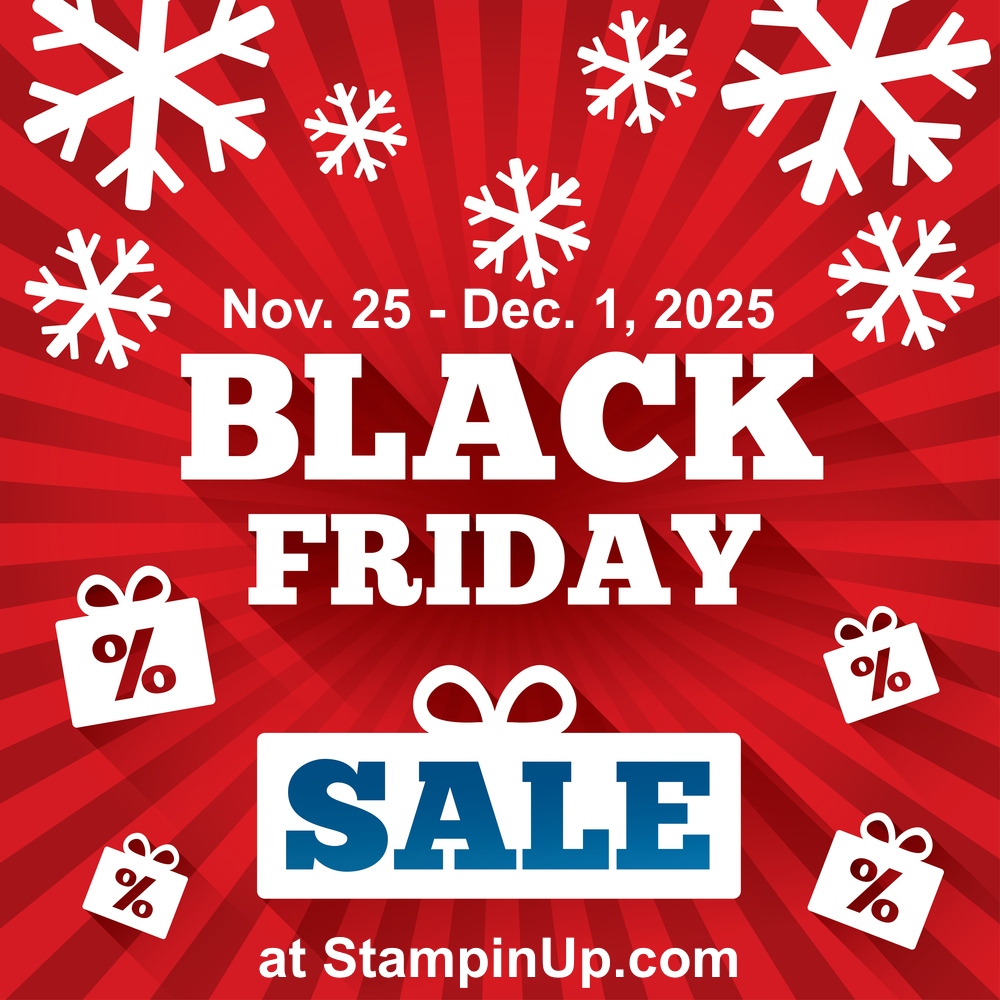
Category Archives: Cards

Paper Pumpkin Cozy Christmas Cards Oct 2025 Kit

Paper Pumpkin Cozy Christmas Cards Oct 2025

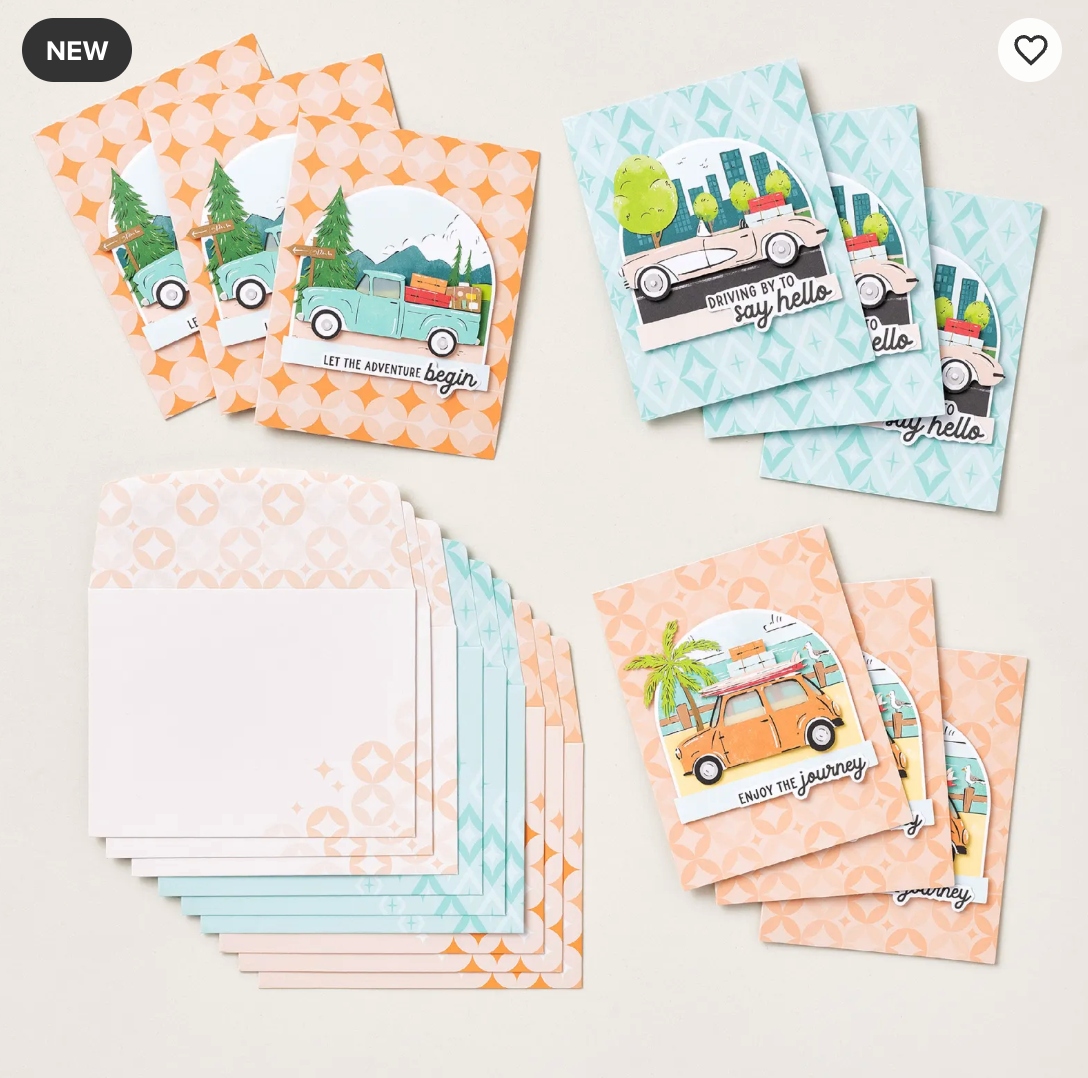
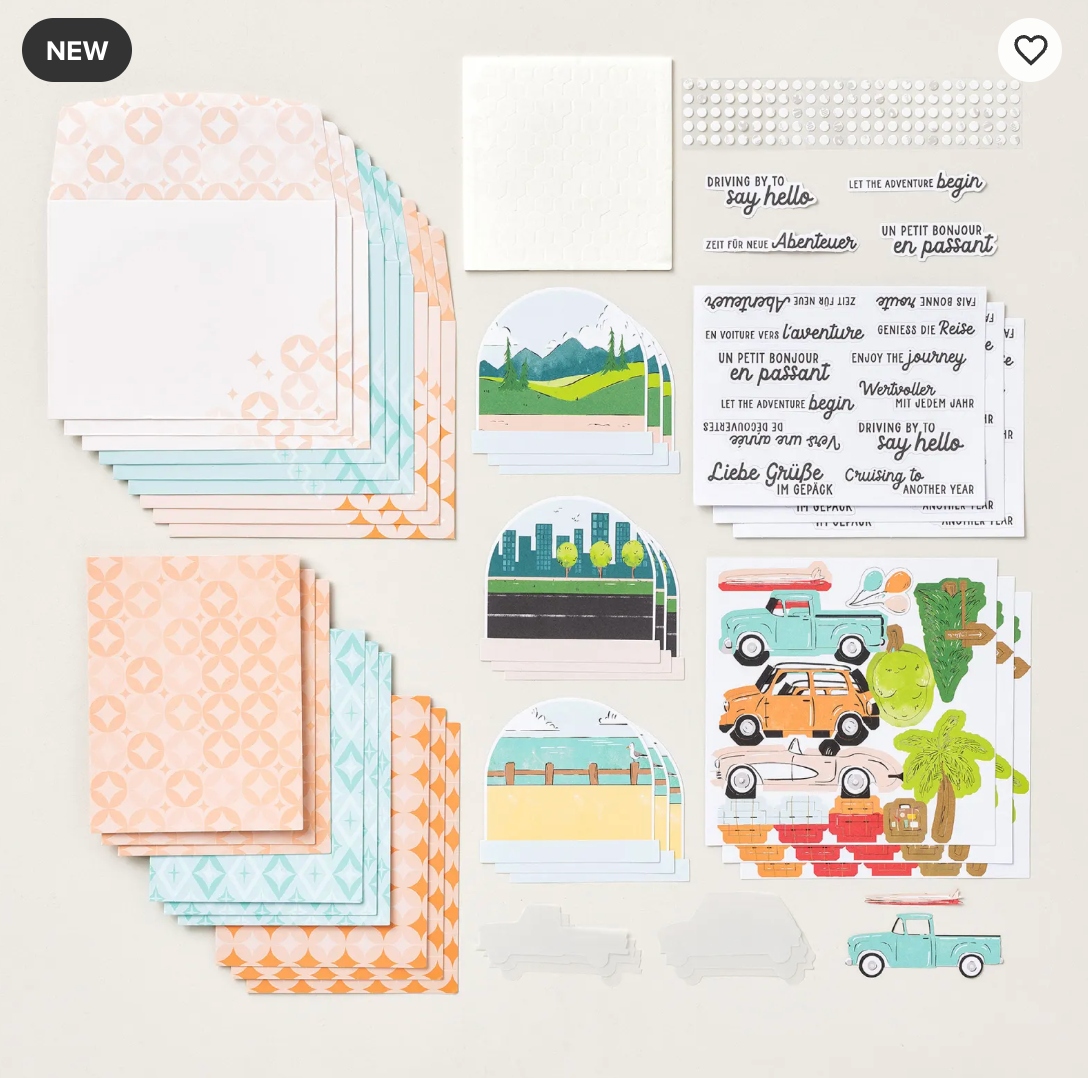
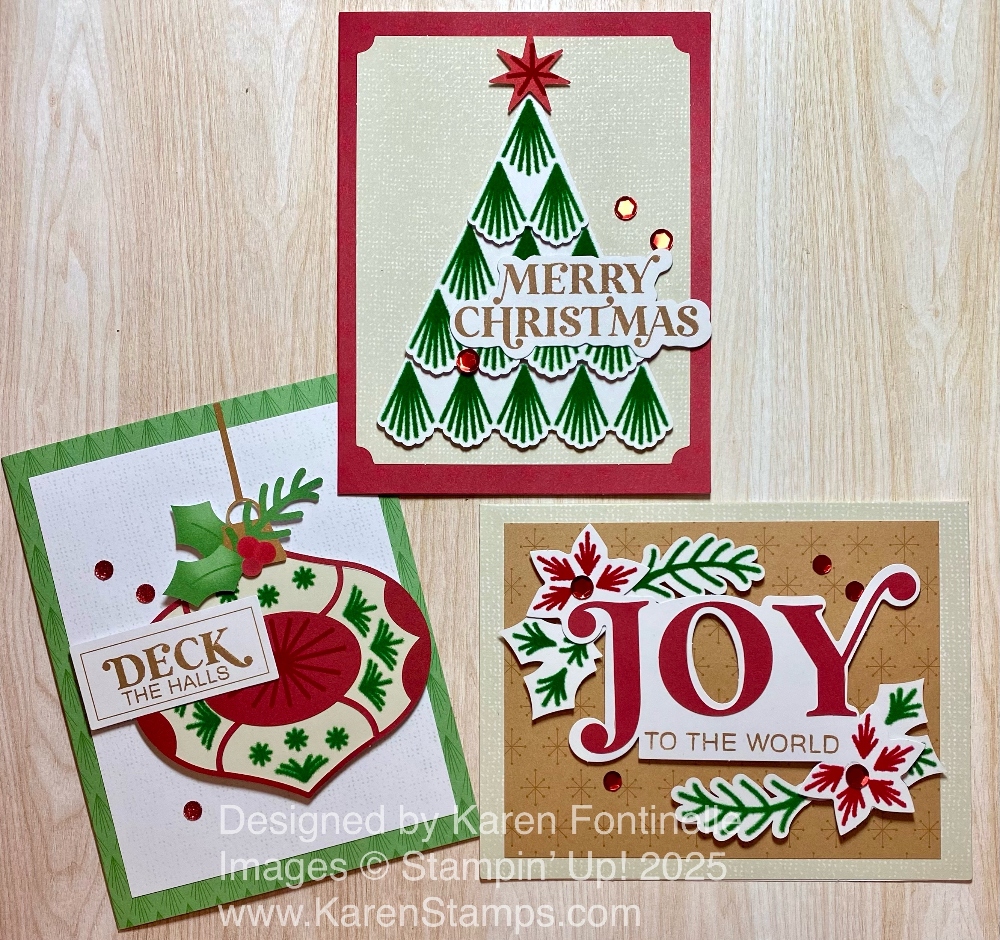
These are the cards you would have made had you been a Paper Pumpkin subscriber back in October! (And once you become a subscriber, you can order any past Kits or Refill (like this one!) (no stamp set or ink spot) that are available, while supplies last.) Every month is a new papercrafting kit that comes to you in your mailbox! I say it’s a gift you give yourself if you like stamping, papercrafting, cardmaking, crafting, but honestly, it looks like a gift! Sometimes you get a special designer Paper Pumpkin box and sometimes it’s the regular Paper Pumpkin box. But inside, you will find all the supplies you need (except maybe a scissors) shrink-wrapped and then enclosed in colored tissue paper! So it really looks like a gift!

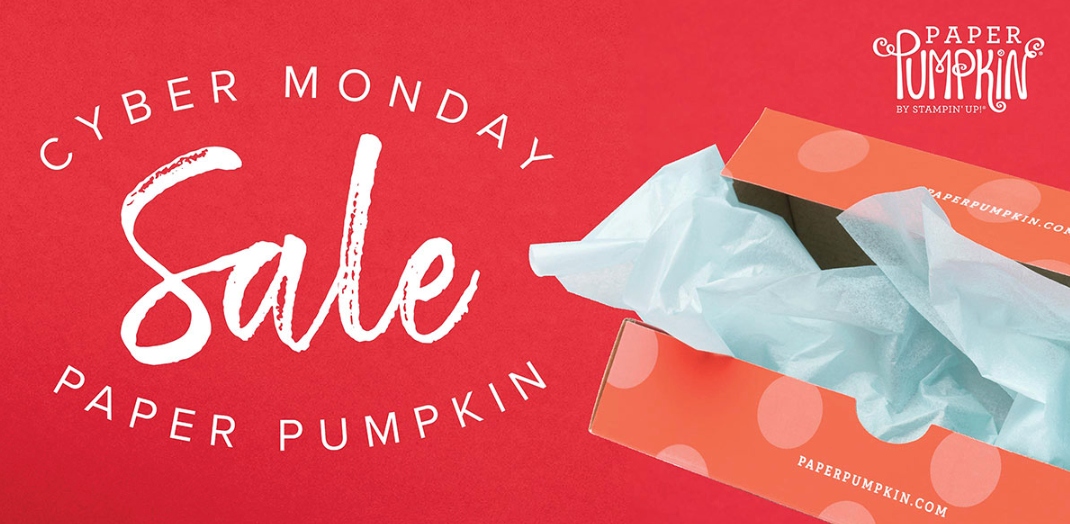
From December 1-9, the Prepaid Subscription Sale for Paper Pumpkin is going on. If you like, you can sign up for Paper Pumpkin and pay by the month when your kit ships right after the 10th of the month. Shipping is included and you do earn Rewards on your purchase. But right now, you can purchase a 3-, 6-, or 12-month subscription at a discount and save money when you get your Paper Pumpkin! Even if you are paying by the month, you can purchase a Prepaid subscription, enter the special code Stampin’ Up! will email to you, then you account automatically knows you have a Prepaid subscription and won’t charge you by the month. You can still skip a month and your account will keep track. Once your subscription runs out, it will revert back to a month-by-month subscription if that’s what you had before. if not, your subscription will just end and you can choose to continue or not.

Paper Pumpkin Dec 2025 Watercolor in Bloom Banner

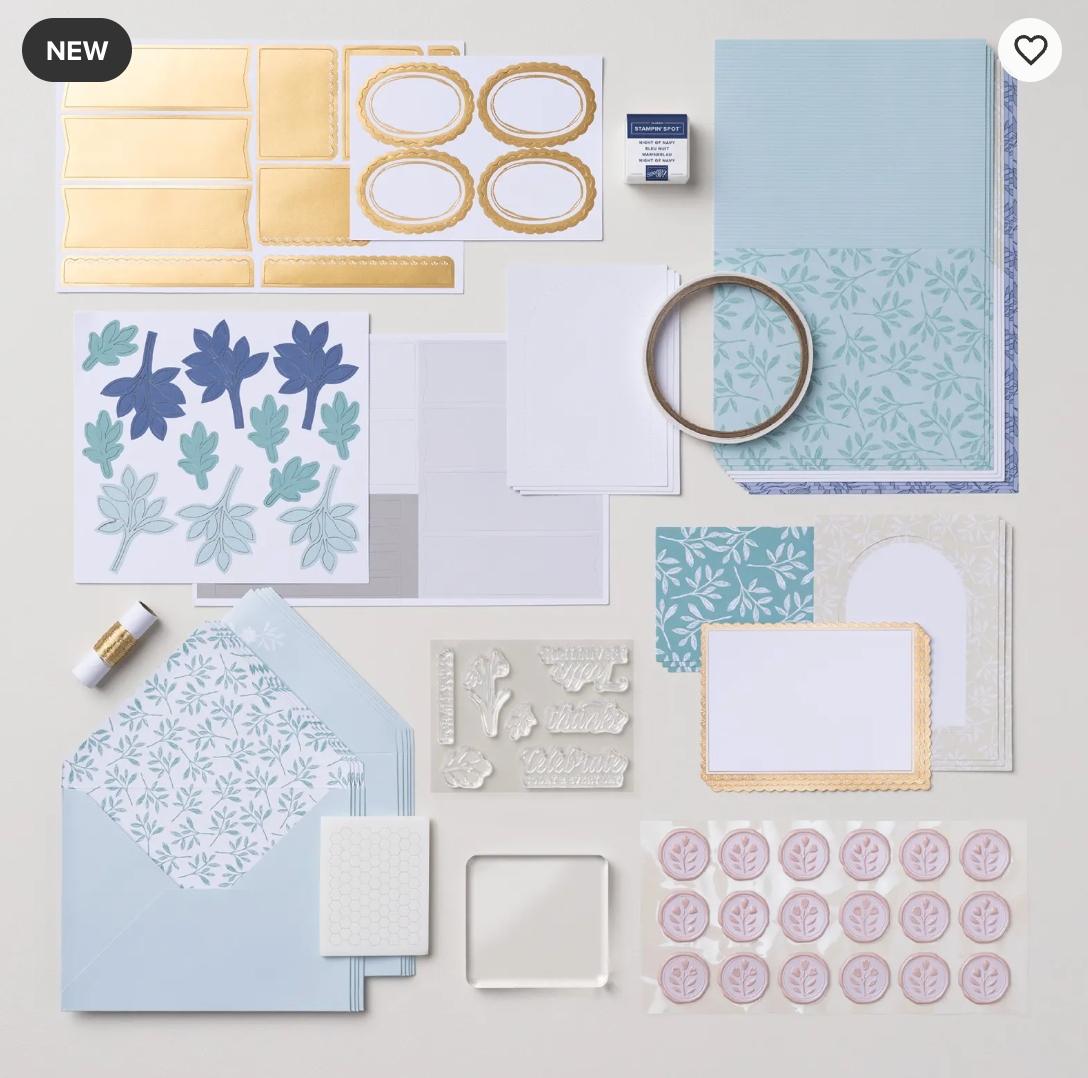
If you subscribe during this sale, or even the month-by-month, the first kit you will receive right after December 10th will be the Watercolor In Bloom Kit. With this kit, you can show your love and appreciation with rich watercolor hues and elegant botanical flourishes.
• Makes 9 cards: 3 each of 3 designs with 9 coordinating envelopes
• Copper foil and copper sequins
• Precut paper and vellum pieces
• Coordinating colors: Copper, Garden Green, Night of Navy (Classic Stampin’ Spot),
Pretty Peacock, Secret Sea, Shaded Spruce

Anyone can make these kits! You don’t have to be an experienced stamper! There are pictorial directions and a video you can watch. Or use the supplies to make your own creations!

Take advantage of this Cyber Monday offer for fantastic deals on 3-, 6-, and 12-month prepaid subscriptions.  

From December 1–9, prepaid Paper Pumpkin subscriptions will be discounted as follows:

3-month prepaid: $61.00 (regular price $81.00)
6-month prepaid: $122.00 (regular price $162.00)
12-month prepaid: $244.00 (regular price $324.00)

This offer ends on December 9 at 11:59 p.m. (MT) 

Purchase a Prepaid Subscription today in the Stampin’ Up! Onine Store Here!

Cyber Monday Prepaid Paper Pumpkin Sale Today!

Paper Pumpkin Prepaid Cyber Monday Sale 2025

Starting today, December 1, at 8 a.m. (MT), Stampin’ Up! is offering big savings on prepaid Paper Pumpkin subscriptions! There’s never been a better time to subscribe to get a new all-inclusive crafting kit delivered to your door each month. I consider it a gift I give myself! Once a month you get some actual HAPPY MAIL right in your mailbox!

You can read about Paper Pumpkin HERE!

Whether you’re looking for a last-minute Christmas present that sparks creativity or resolving to make time to craft in the new year, a Paper Pumpkin subscription is the gift that keeps on giving. Read on for more information about this special offer and some key details you should know.

Take advantage of this Cyber Monday offer for fantastic deals on 3-, 6-, and 12-month prepaid subscriptions.  

From December 1–9, prepaid Paper Pumpkin subscriptions will be discounted as follows:

3-month prepaid: $61.00 (regular price $81.00)
6-month prepaid: $122.00 (regular price $162.00)
12-month prepaid: $244.00 (regular price $324.00)

This offer ends on December 9 at 11:59 p.m. (MT) 

And now, here’s the fine print:

  • Subscriptions purchased during this promotion start immediately with the December Watercolor in Bloom Kit. This kit cannot be skipped.
  • Do not purchase multiple subscriptions for the same recipient. The subscriptions will all start with the Watercolor in Bloom Kit, so the recipient will end up receiving duplicates of the same kit each month.
  • Shipping cost is built into the price of the kit and is not reduced. The promotional discount applies only to the product value of the kit itself.
  • Subscriptions purchased during the promotion will earn reduced rewards compared to full-priced subscriptions due to the discounted price, but they will still qualify for rewards once the threshold is met.
  • Don’t miss your chance to enjoy months of exciting kits at an incredible value!

Don’t miss your chance to enjoy months of exciting kits at an incredible value!

SHOP for your PREPAID PAPER PUMPKIN SUBSCRIPTION HERE!

Click the link above and then scroll down a little bit to the Prepaid Plans.

The Stampin’ Up! Black Friday Sale Starts Today!

Black Friday Sale SU Ad Info

Beginning TODAY, Nov. 25th, you can get up to 40% off select Stampin’ Up! products. This is the first Stampin’ Up! Black Friday sale ever, so you are a part of Stampin’ Up! history!

Save up to 40% off the most useful, needed, irresistible Stampin’ Up! products at deeper discounts than ever before. Shop between November 25 to December 1 so you can create more by spending less during this limited-time-only sale!

*** (I have to say, there is not a lot on this sale, unless a lot sold out during the night before I was up! Lots of Stampin’ Blends, Thick Basic White Cardstock, adhesives, the Paper Trimmer and Cutting Blades, Basic Black Cardstock, Very Vanilla Cardstock, and Bundles of Reinkers. There are just two pages as I see it now. But if you need any of these things, it’s great to get them on sale!! You can also get regular price products, such as the new Online Exclusives released this month. And if you need envelopes for your Christmas cards, they are not on sale but you can order them! I suspiciously see, sometimes, pages 3 & 4 at the bottom of the Sale page so I’m guessing either they had more for sale and it was bought up by the Early Birds OR maybe they are going to add more. I will update you if that happens.)

Stampin’ Up! has listed these products below.

40% off: Stampin’ Blends, Paper Trimmer and blades, Ink Bundles

25% off: Select adhesive

15% off: Select cardstock

This is a great sale for new crafters and new Demonstrators who would like to stock up on the basics.

Refresh Your Stash. Take some time to shop the sale and replenish all your stamping necessities. This way you can restock on all the essentials that you want to have on hand all the time!

Stock Up on Essential Products. This is a great chance for Demonstrators and customers alike to stock up and save on everyday tools and consumable items that every crafter needs.

Great Opportunity for New Stampers. New customers who have just started stamping will need essential products to help build their crafting stash. This sale presents a great chance for them to build their base so they’re ready to craft whenever inspiration strikes.

Perfect for Christmastime. All of the products that will be on sale make great gifts for crafters, whether they’re just starting to craft or if “Crafting” is their middle name. And with delivery set to arrive before Christmas, this sale is the perfect way to get in the festive spirit!

This is more than just a sale—it’s everyone’s chance to grab everyday crafting must-haves at prices too good to pass up.

Shop the full selection of discounted products online. Products are available while supplies last. Orders will likely arrive in time for the holidays.

Visit the online store to view all the products that will be on sale. 

The last day for the Black Friday sale will be Monday, December 1st!

SHOP NOV. 25:  Stampin’ Up! Online Store

Traditions of Christmas Ornaments Card

Traditions of Christmas Ornaments Card

This Traditions of Christmas Ornaments Card is made with beautiful holiday designer paper cut in circles to look like Christmas ornaments. As long as you are diecutting, go ahead and cut out various size circles out of whatever paper you are using and you will have extras to play with and make additional cards.

This card base is Pool Party with a layer of Basic White for the background. I used the beautiful Traditions of Christmas Specialty Designer Series Paper. It was easy enough to take scraps of paper and cut it into as many circles as I could fit different size dies on it. Then you have both sides of the designer paper to use as far as patterns you like so it’s easy to make some beautiful ornament shapes. I used the Stylish Shapes Dies for this. After I had a lot of circles cut out, I just played around with pattern and size to design the card.

For the ornament hanger at the top, I simply cut little pieces of Gold Foil to make that gold cap on top of each ornament. Then I dug around in my bins of retired ribbon and found just a short piece of this gold cord that was just enough for me to tie a gold bow on each ornament. I adhered each bow with a Mini Glue Dot.

The blank white space around the ornaments looked too bare, but at first I wasn’t sure what I would like, maybe just some sparkly gems. But then I thought of the Metallic Textures Rub-Ons which just seem like magic to me! I love cutting out pieces of the designs and just rubbing it with my finger, after removing the backing paper, to transfer to the cardstock. I thought these designs filled in the space nicely.

For the greeting, I chose the word “joy” out of the Greetings For All Ephemera Pack. I love and have used this ephemera pack a lot. It has beautiful greetings of all sizes for your holiday cards and projects as well as scrapbook pages. This gold foil “joy” seemed to fit perfectly on this ornament and it looks good in that position on the card.

Sometimes you don’t know what you are going to come up with when you start designing a card. Even when you have an idea, by the time you try out different colors, papers, and greetings you might end up with a card completely different than your original idea. Or maybe you didn’t have an idea but just working with the elements your creativity comes alive!

Remember, the Stampin’ Up! Black Friday Sale begins tomorrow, Tuesday, November 25 and lasts through December 1. Be sure to shop early to get your choices before anything runs out!

Christmas Tags & More Ornaments Card

Christmas Tags & More Ornaments Card

This Christmas Tags & More Ornaments Card is easy to make with the versatile pack of 6″ x 6″ designer series paper called Christmas Tags & More! Besides the pretty holiday designs and tags in the paper, there are some sheets of diecut ephemera images you can use any way you like on cards or scrapbook pages and other projects for the holidays.

This card starts with a card base of Real Red cardstock, although you could use another color that matches the ornaments. There is a layer of Basic White cardstock for the background because I felt like I wanted the card to be very simple.

For the string holding the ornaments, I used a recently retired green baker’s twine. You could use whatever you have. A gold trim would be pretty, too. The ends are adhered under the sides of the white cardstock. Make it fairly tight going across but you want a little dip in the string. I chose three ornaments from the ephemera pages in the designer series paper, plus two pieces of mistletoe. To adhere the ornaments I put a Stampin’ Dimensional on the back of each one at the center to bottom and then a Mini Glue Dot to adhere to the string. The mistletoe is adhered flat on the card. Then I tied three small bows to adhere with a Mini Glue Dot to the top of each ornament.

Before I added the greeting, I had to play around with papers and layers trying to find the right thing for the bottom of the card. All of a sudden, the right combination came about! I added a strip of the red and green plaid pattern with a layer of Real Red under the greeting to highlight the gold foil wording. But I didn’t want it covering up very much of the plaid design.

The greeting is found in the Greetings For You Ephemera Pack. I have loved this pack with all kinds of gold foil greetings for the holidays that are ready to go and even are backed with adhesive. Just peel off the backing and adhere to the paper. Or if you’d rather use some other adhesive or pop up the greeting with Dimensionals, just leave on the backing paper and do it your way.

For just a tiny bit of embellishment, I added two gold Traditional Sparkling Sequins at each end of the greeting. I think they highlight the greeting a little bit and even a little on a card is nice!

Just get out all the papers and the diecut images and play around with all the possibilities!

Amber Autumn Thanksgiving Card

Amber Autumn Thanksgiving Card

You may want to send a few cards to your loved ones or friends for Thanksgiving like this Amber Autumn Thanksgiving Card. It’s time! I can’t believe how fast Thanksgiving has snuck up on us! Anything “fallish” will do, but I have loved this Amber Autumn Stamp Set since it came out!

For something different, I decided to make this a “book fold” card. I also chose some “fallish” colors of cardstock scraps to decorate the background of the card. To make the book fold card base, cut the cardstock at 11″ x 4 1/4″. With the paper placed horizontally, score at 4 1/4″ and 5 1/2″. Of course, normally you would score that card in half at 5 1/2″, but for the book fold you add in that extra inch and a quarter and adhere that to the inside of the card. If you think you want to add ribbon or twine around this “binding” part, do it before you adhere that section or just place the ribbon around the cardstock or designer series paper you adhere to that section on the front. If you forget, there are ways around it!

I chose different color scraps of cardstock in fall colors to make the background of this card. On the left book binding section, I adhered a piece of Timid Tiger cardstock. The other colors are Cherry Cobbler, Lost Lagoon, Crushed Curry and Old Olive.

Once these pieces were adhered, I stamped the acorns and leaves image from the Amber Autumn Stamp Set with Versamark ink. I tried to stamp them randomly on that area. Since they were already adhered to the card, I didn’t want to get the stamping on the Crumb Cake card base, so I placed other scrap pieces of cardstock along whatever edge I would be stamping on as a mark to protect the card base from the ink. I probably could have done it a better way, but this worked. Same with the Timid Tiger piece being stamped with just the leaf images.

For the focal point, I stamped the pumpkins, squash and corn image from the Amber Autumn Set in Memento ink in black on Very Vanilla. I colored in the images with Stampin’ Blends. Some of the colors I used were Pumpkin Pie, Timid Tiger, Daffodil Delight, Granny Apple Green, and Old Olive. Then I scribbled in some Pool Party around the background just to add some color to the background. This image was diecut with a Stylish Shapes circle die and layered on a larger circle of Garden Green.

The greeting is stamped in Garden Green ink from the Amber Autumn Stamp Set on Very Vanilla and made little banner ends. It is glued down flat across the pumpkins.

The pumpkins image is popped up on a lot of Stampin’ Dimensionals since I held down the Gold Striped Ribbon with the Dimensionals. I just wound it back and forth on the back of the circle die. Since I didn’t think to add ribbon around the binding section before adhering it, instead I added three of the large Timid Tiger 2025-27 In Color Flat Pearls to the side for something different!

I think these Book Fold cards are fun to make, hence the name “fun fold” cards for anything folded differently than the norm. Many can get very complicated and take some extra work, but this book fold card only had one extra score line and a little glue in a different place!

Thanksgiving, surprisingly, is only one week from Thursday on November 27th! Remember, Stampin’ Up! is celebrating Black Friday this year for the first time a couple of days early, November 25 – December 1 for discounted prices on select products. That’s all I know! Maybe we’ll all be surprised on the 25th! And that is one month until Christmas!! Oh my goodness!

SHOP STAMPIN’ UP! ONLINE HERE!

Heads Up! Black Friday Sale at Stampin’ Up!

Black Friday Sale SU Info

Nutcracker Tags Made From the Kit

Nutcracker Tags

I knew I wanted this Nutcracker Tags Kit the minute I saw it in the Stampin’ Up! Online Store! I could tell the tags would be so cute for Christmas gifts and maybe even to make into a card. Each nutcracker image is printed and diecut in bright festive colors. To embellish them, just adhere pieces of their costume with Dimensionals to the tag. Tie them onto a background striped tag and all you have to do is write your “To: From:” on the back when you add them to a gift. No stamping is required. Just add the pieces, the sentiments, and tie the tags together with the black baker’s twine. The tags and sentiments even have gold glitter to make it look extra festive and high-quality.

The Stampin’ Up! Kits Collection is great for anyone to make! I had the opportunity to stamp with my great-niece and worked along with her as we made cards from three different kits and she could easily do it. In fact, after a little while she didn’t even want to follow the directions, she just wanted to make her own creation with the contents in the kit! And that’s fine! The Kit is yours! If you want to change anything or add any of your own products, like extra cardstock, just go ahead and have fun!

At this time, the Nutcracker Tags Kit is sold out. It says “Currently Unavailable” and you can add your email address for Stampin’ Up! to send you an email if and when they get more in stock. I hope they do get more in stock because I really do like this kit. You would still have time to order and make the kit if they are restocked in the next few weeks. I hope so!!

But if you did already purchase the Kit, this is your reminder to get it out and make the cute nutcrackers! Your gifts will look more luxurious and festive with these tags!

SHOP STAMPIN’ UP! ONLINE HERE!

Brushed With Beauty Birthday Card

Brushed With Beauty Birthday Card

Last week Stampin’ Up! released some new products for stamping and scrapbooking and my order came the other day! We often say the Stampin’ Up! paper is prettier in person than you see in photos or online. I’d say that is true about this new Brushed With Beauty Designer Series Paper that I used on this Brushed With Beauty Birthday Card. Floral papers can be used for almost any occasion so it is good to have several on hand for your cardmaking needs.

This Brushed With Beauty Designer Series Paper is part of the Brushed With Beauty Suite in the new Online Exclusives for November 2025. If you want it ALL, just order the Suite with one product number (167100). If you want to pick and choose, then order by item. Also, there will be a virtual Stampin’ Up! class in a private Facebook group using this Suite! You can purchase the class HERE by November 17th to craft along and/or watch the class on November 20th. You can still purchase it later to watch the replay.

For this card I used Mossy Meadow cardstock for the card base. When I went to choose a designer paper pattern, I knew I was going to use a different pattern along the side. But when I saw the pattern on the back side of this floral bouquet patterned paper, I decided to just fold over the edge to reveal “the other side” of the paper. The floral bouquet paper was cut at 4″ x 5 1/4″ and then the right side was folded back 1/2″ to make that interesting side edge. I adhered the designer paper then to a 4″ x 5 1/4″ piece of Petal Pink card stock which. matches the paper, allowing the Petal Pink to only show on the left side of the card.

The greeting is stamped from the Simply Said Stamp Set in Mossy Meadow ink on Very Vanilla card stock. It was diecut with a small oval die in the Traditional Labels Dies. Then I chose a larger oval die of Petal Pink cardstock for a layer behind the greeting. I chose the Petal Pink 5/16″ Braided Trim to place underneath the greeting. It is just kind of folded in half with a little loop at the top peeking over the top of the greeting and then trimmed the ends. The whole greeting is popped up on Stampin’ Dimensionals.

For a finishing touch, I added three Pearls of Beauty in Crumb Cake. There are also White and Calypso Coral pearls in the package. They are pretty and fairly flat, which is good for mailing.

Be sure to check out the new Stampin’ Up! Online Exclusives!!

SHOP STAMPIN’ UP! ONLINE HERE!

Christmas Tags & More Plaid Christmas Card

Christmas Tags & More Plaid Christmas Card

Here’s a fun Christmas card to make, the Christmas Tags & More Plaid Christmas Card. Between the cute designer series paper, the new dies to make the focal point, and the ephemera pieces and embellishments, this card will be easy enough for you to make and be proud of.

The card base is Garden Green, and I used the Christmas Tags & More 6″ x 6″ Designer Series Paper. As you can see, this pack of paper is not only about Christmas tags! You can make tags out of some of the sheets just by cutting the images apart, as I did in THIS blog post. But you can certainly use the pack of paper for lots of Christmas cards, Christmas projects, and making scrapbook pages. I love this plaid design that I used for the background.

On the front of the card, I used the Branching Out Dies which are in the Holiday Mini Catalog and part of the Branching Out Bundle. I love using these dies for their shape and for their layering sizes. The top layer is a piece of Basic White cardstock layered on top of Garden Green cardstock. The small print piece at the bottom is a piece of the Tags & More 6″ x 6″ Designer Series Paper, but only using a portion. This whole piece is popped up on Stampin’ Dimensionals.

In the center is a wreath from the Time For Celebration Ephemera Pack. This wreath fit perfectly on this diecut with the greeting one of the pieces in the Greetings For You Ephemera Pack. I have used elements in this pack so much! They are pretty in gold foil and saves you the trouble of doing embossing. The red bow is from the Time For Celebration Ephemera Pack also, right by the wreath. For a little sparkle and embellishment, I used the Traditional Sparkling Sequins, which I love, love, love! I just placed three red sequins around on the wreath and one silver one on the center of the bow.

If you didn’t have the Branching Out Dies, you could layer any rectangle dies or just cut rectangle shapes of cardstock with a paper trimmer and it would all still be fine.

It appears that many or all of the products I used on this card are “currently unavailable” at this moment. This is why it is a good idea to order products you like as soon as you can when they come out. However, not all is lost! These products should be back in stock in about a week or two. You can go to the product page and fill in your email to be notified when they are back in stock. Sometimes they are even available earlier than expected so this is a good tool to use. Or just check back.

The Christmas Tags & More DSP is due back the week of Nov. 17th, as well as the Greetings For You Ephemera Pack. The Branching Out Dies are due back in stock the week of Nov. 24th as well as the Traditional Sparkling Sequins. The Time For Celebration Ephemera Pack is delayed until the week of Dec. 1st. You will still have time to order these items as they come back and still have time to make your projects. You can also use the same card design with other paper, other rectangular shapes for layers and another greeting and embellishments.

Keep checking the Stampin’ Up! Online Store and perhaps you will be the first one of these products being available again!

SHOP STAMPIN’ UP! ONLINE HERE!

Two New Kits in the Stampin’ Up! Kits Collection

Everyday Beauty Kit

It’s November and two new Kits in the Stampin’ Up! Kits Collection were added! It’s always fun to see what new Kits will arrive each month! The first one is the Everyday Beauty Kit, which does look like a beautiful kit for making some all-occasion cards with very pretty botanical images, even on the envelopes.

Stampin’ Up! says:

“Create the perfect card for any occasion using the all-inclusive Everyday Beauty Kit. This kit comes with everything you need to make three unique card designs: printed card bases and coordinating envelopes with lovely botanical patterns, precut paper pieces, timeless faux wax seals, shimmering metallic thread, and a versatile stamp set that you can use on countless other projects.”

DETAILS
– Makes 9 cards: 3 each of 3 designs
– Folded card size: 5-1/2″ x 4-1/4″ (14 x 10.8 cm)
– Colors: Basic Beige, gold, Gray Granite, Lost Lagoon, Night of Navy, Petal Pink
– Also available in French

Kit includes one of each item listed below.
– Everyday Beauty Photopolymer Stamp Set
– Clear stamp block
– Night of Navy Classic Stampin’ Spot
– Step-by-step instructions
– 9 printed envelopes
– Faux wax seal stickers
– Metallic thread
– Adhesive

Here are all the pieces you get in the Kit to make the nine cards. And if you choose, you can make your own creations with the supplies if you want to make different designs. It’s all right there for you to play with! Just open the box!

Everyday Beauty Kit Contents

The second new Kit for November, is the Adventure Awaits Kit. This looks like a fun set of cards to send to just the right person!

Adventure Awaits Kit

Stampin’ Up! says”

“Let your creativity take the driver’s seat with the Adventure Awaits Kit. Coast in the retro colours and hand-drawn artwork that can be either feminine or masculine. With printed sentiments, precut paper, and vellum details, this kit comes with everything you need to make nine cute cards.”

DETAILS
– Makes 9 cards: 3 each of 3 designs
– Folded card size: 5-1/2″ x 4-1/4″ (14 x 10.8 cm)
– Colors: Basic Black, Coastal Cabana, Crushed Curry, Garden Green, Granny Apple Green, Pecan Pie, Petal Pink, Poppy Parade, Pretty Peacock, Timid Tiger
– Sentiments printed in English, French, and German

Kit includes one of each item listed below.
– Step-by-step instructions
– 9 printed envelopes
– Vellum
– Adhesive

Here are all the components of this Adventure Awaits Kit! Each Kit includes an exclusive stamp set that you won’t see anywhere else.

Adventure Awaits Kit Contents

If you are new to papercrafting, be assured you can make these Kits! Just follow the directions and/or watch the video specific for each Kit! Experienced stampers/papercrafters will find enjoyment in just opening the box and finding a cute project ready to make without having to design anything or hunt for all the needed supplies! They are all in the box except for possibly a scissors!

Check out these two new Kits and previous ones in the Stampin’ Up! Online Store!

Stampin’ Up! New Stamp Set and Die Packaging

Stampin' Up! New Packaging

Tomorrow, November 4, will be new Kits in the Kits Collection at Stampin’ Up! and new Online Exclusives available to everyone! I think it is so much fun to frequently be getting new products even if it keeps our heads spinning trying to keep up! Here are three examples of the new packaging Stampin’ Up! is beginning to use! These are new Online Exclusives you will be able to order tomorrow, and if you do, you will get the New Stampin’ Up! Stamp Set & Die Packaging!

If you recall, back in August Stampin’ Up! announced several big changes. The red rubber cling stamps would be discontinued and all stamps would be photopolymer (the clear stamps) eventually. The reason for this is that the red rubber raw materials were getting harder to source. Since the photopolymer stamps are thinner, the packaging would change from the hard plastic stamp cases to a similar kind of packaging dies have been coming in, the sturdy, durable clear plastic. This saves space and you can, if you want, put the stamp set and dies together in one envelope. A big plus is that artwork of the stamps AND dies will be included with the package. One odd thing is that while dies and stamps now have the same name, the stamp set packaging shows the name of the stamp set boldly at the top. The dies say “Stampin’ Cut & Emboss” at the top with the name of the dies in small print just above the artwork! So some of us may still need our reading glasses!

Those of you with fantastic organizing skills may find this new packaging either an exciting challenge or a new problem! I don’t think I plan to change over any of my old things into new packaging, but some people will want to. Stampin’ Up! is selling plain envelopes if you want extras for other sets you have. These are called Stamp & Die Organizers (167772) and will be available starting tomorrow in the Online Exclusives. You get 10 organizers, 5-5/8″ x 9″, with a self-tuck closure. These will help you organize your products to be all the same if you like. You can also purchase empty Standard Stamp Cases in the Online Store if you have any need to those for your organizing.

We’ll hear lots more about these changes in the coming days and as you get some new products in the new packaging you will decide how you want to store your stamps and dies or if you even want to change the way you do it now. These envelopes are taller than the die packaging we have now. You’ll just have to see how everything works for you! But don’t be surprised if you get new packaging in your next order, depending on what you order.

SHOP STAMPIN’ UP! ONLINE HERE!

Amber Autumn Card For November

Amber Autumn Card For November

It’s November already so here is an Amber Autumn Card For November. You could easily use this card for Thanksgiving although a Happy Thanksgiving greeting is hard to come by! Now that Halloween is over we can turn our attention to Thanksgiving and Christmas coming up.

The card base is Early Espresso with a layer of one of the plaids in the Timeless Plaid 6″ x 6″ Designer Series Paper. This paper is so versatile with it’s different plaid patterns and pretty colors. The pumpkins are stamped from the Amber Autumn Stamp Set. I used Memento ink and colored in with various colors of Stampin’ Blends markers. I used Very Vanilla cardstock and then diecut with one of the Branching Out Dies. I think these dies are on their way to being favorites! I love how they can be layered with lots of different sizes. I chose Pecan Pie cardstock for the layer.

Although that was all I planned to do with this piece, it seemed to be missing something. I got the idea to use the Metallic Textures Rub Ons for a little extra something. You can cut out the exact area you want to use so I cut out three different small groupings of gold dots and applied them around the top of the pumpkins. The card needed a little gold!

At first I tried a greeting in one of the ephemera packs, even sponging it with some Pecan Pie ink but finally decided the white background clashed with the Very Vanilla cardstock on the card. I was hoping there was a Happy Thanksgiving in the ephemera pack but I didn’t find one. So I stamped my own greeting from the Amber Autumn Stamp Set on a strip of Very Vanilla in Pecan Pie ink and popped it up on MIni Dimensionals.

These months are really flying by, but even in Houston TX the temperatures have dropped a little so that it feels like fall. I’m going to put away my Halloween decorations now and get out my Thanksgiving decorations! And maybe make a few Thanksgiving cards to send!

SHOP STAMPIN’ UP! HERE!

Elegant Pine Snowflakes Scrap Cards

Elegant Pine Snowflakes Scraps Cards

Do you know what today is? Today is October 25, TWO MONTHS until Christmas Day! Wow! That puts things into perspective for us crafters, right?! I wanted to post a Christmas card today to remind all of us that even though it isn’t Halloween yet, it is almost Christmastime! Here are two cards, Elegant Pine Snowflakes Scrap Cards, that you can easily make with brand new paper or the scraps that you have left after making other cards. And you can use any paper you have! In fact, you can make this same kind of card for a birthday or any occasion, just change the theme and greeting of course!

Elegant Pine Snowflakes Merry & Bright Card

This card is made with a Real Red card base. As you may have guessed, I used the Elegant Pine Snowflakes Designer Series Paper in the Online Exclusives since September. You could use Cherry Cobbler cardstock or one of the greens. The paper strips are cut at 1 3/4″ x 4″. I adhered mine directly on to the card base. However, sometimes it is easier to cut a piece of cardstock the same size as the three strips together and adhere the strips onto that layer, then the whole piece on to the card base. Or you can make a layer that is larger (if you cut your strips smaller) and have that layer show around the margins of the strips. Very versatile design. These strips are all touching, but you can also make them smaller and narrower and leave a space in between.

The greeting is one of the gold foil sentiments in the Greetings For You Ephemera Pack. It is layered on a Gold Foil diecut circle from the Stylish Shapes Dies. This eventually is layered on a larger Real Red diecut circle. First, however, I used the Real Red 1/2″ Shiny Ribbon back and forth behind the gold foil layer and held in place with Stampin’ Dimensionals. I often put some Stampin’ Seal on the paper to hold the ribbon in place until I get it just right and then add the Dimensionals.

For some pizzazz, I added five gold Traditional Sparkling Sequins for sparkle. With this design you can make hundreds of other kinds of cards. It’s a great way to use more than one pattern of our beautiful paper!

Elegant Pine Snowflakes Joy Card

Here is a second card, made with the same Elegant Pine Snowflakes Designer Series Paper, but with the strips switched around and a different greeting and ribbon. This card base is our old favorite, Old Olive. The greeting is also in the Greetings For You Ephemera Pack, but the whole word punches out. It is layered on an Old Olive Stylish Shapes circle with Gold Striped 3/8″ Mesh Ribbon, which is so pretty. Just like the first card, the greeting is popped up on Dimensionals. This time I used the Real Red Traditional Sparkling Sequins for some sparkle on the card. Just add a greeting or write a message inside the card and you are set to go!

Since today is only two months until Christmas (and that’s Christmas Day when ALL the work and preparation is over with!) let’s all try to make at least three Christmas cards today, maybe more, just to get in the mood and into gear!

SHOP STAMPIN’ UP! ONLINE HERE!