Category Archives: Cards

Stampin’ Up! Designer Series Paper Sale Tuesday!

Designer Series Paper Sale August 2024
Designer Series Paper Sale August 2024 page 2

Designer Series Paper Sale at Stampin’ Up!

Exciting news!! Select designer series papers in the Stampin’ Up! Annual Catalog will be on sale from Tuesday, August 6 through Saturday, August 31! Nothing like one of our favorite things to buy at Stampin’ Up! and one of our most-used products for our cardmaking and scrapbooking being on sale! Every little bit helps!

From August 6–31, you can shop select Designer Series Paper from the 2024–2025 Annual Catalog at 15% off! This is the perfect time to stock up and save on some of your favorite paper.

Click on the photos above to see the flyer listing all the papers at full size!

Our Designer Series Paper is hand-created in-house. The Stampin’ Up! artists design, sketch, paint, etc. the patterns you see on the paper. Its durability and utility are perfect for all types of paper crafts.

The following paper is part of the sale. Click on the links to see the paper in the Online Store. 

Additional Details

  • Specialty paper, cardstock assortments, Designer Series Paper stacks, and paper not yet live is not included in the sale. 
  • You must open and close the order during the allotted dates to receive the discount. (Don’t start your Cart early!)
  • There are NO limits on ordering. However, the products are only available while supplies last. 

Make your choices today and then be ready to order tomorrow, Tuesday, August 6, for best selection!

SHOP STAMPIN’ UP! ONLINE TOMORROW!

Don’t forget to redeem your Bonus Codes from July if you have them!

Making the Paper Pumpkin July 2024 Kit

Paper Pumpkin July 2024 Box

Here it is! The July Paper Pumpkin Kit, Painted Petals, arrived recently in this gorgeous box! Who cares what is in the kit when you get a beautifully decorated box like this? However, the cards you get to make in this kit are lovely and match the flowers on the box!

Paper Pumpkin is the monthly subscription that Stampin’ Up! offers. Sign up to receive a monthly craft kit right in your mailbox with a fully designed project inside and all the supplies you need! I say it is a treat you give yourself! Wouldn’t you like to find a Paper Pumpkin Kit box in your mailbox every month?

The project inside is usually cards, but sometimes it is something different. It used to be that the kit was a total surprise but now there is usually a sneak peek to give you an idea and you can decide whether to receive that kit or skip a month. You might want to skip a month now and then if you are extra-busy or on vacation so you are never obligated. If you try Paper Pumpkin and it is not for you, you can cancel your subscription easily. You will have your own online account that you can go into if you need to make a change to your subscription. The important thing is to make any changes before the 10th of the month.

The project supplies come neatly wrapped in tissue paper! You get an exclusive stamp set and ink spot. With your very first kit you will receive an acrylic block on which to mount your stamps. The instructions are easy to follow plus you can watch a video.

Paper Pumpkin July 2024 Kit Inside

Paper Pumpkin Kit July 2024 Opening

It’s so much fun to open the package of supplies and see what is inside! You even get adhesive! The only thing you “might” need would be scissors.

Paper Pumpkin Kit July 2024 Contents

You can work at your own pace and do the assembling in your own style. You might like to check out all the pieces, stamp all the greetings, line up everything for each card, and then make your cards! Or you might like to do one full card at a time. You can even change up the design if you want, cut things up differently, add some of your own supplies, whatever you like!

These Calypso Coral floral cards were all made exactly according to the directions.

Paper Pumpkin Kit July 2024 Coral Flowers

After making one card as designed, for the second card I made an alternate design. The back of the card bases all have colors, not plain white, so I cut the front and back of the card apart so I could use the back of the card as a layer on the front. For the card base I used my own Basic White cardstock. it gives a little different look. You can see the middle card in the photo has that Melon Mambo border, which originally was the back of a card in the kit.

Paper Pumpkin Kit July 2024 Melon Mambo Flowers

For one of these cards, I did the same as above, using the back of a card, as a layer on the front of the card and then adhered it to a Pretty in Pink card base.

Paper Pumpkin July 2024 Kit White Flowers

Sadly, you can no longer subscribe and get this kit, but if you sign up now or before August 10th, you can get the August Kit! Once you are a Paper Pumpkin subscriber, you can check back in the Online Store to see if “eventually” a Past Kit that you missed will become available. Sometimes there are Refills rather than full kits. Refills do not have the ink spot and stamp set.

JOIN PAPER PUMPKIN!

(This is my personal link to make it easy for you and not have to look up my name. But if you want to sign up under another Demonstrator, just go to www.paperpumpkin.com.)

Redeem Your Bonus Coupon Codes This Month!

Redeem Bonus Coupons

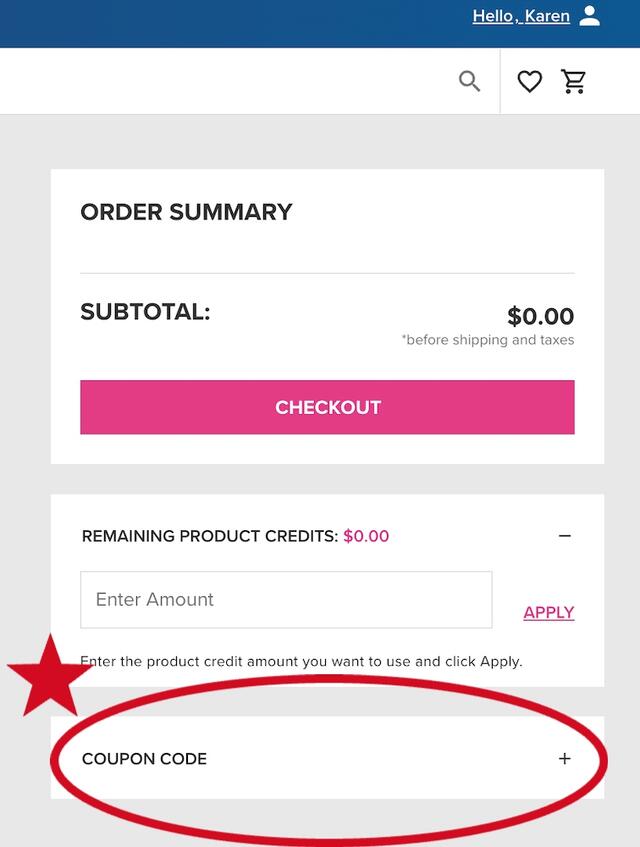
It’s time to redeem all of the Bonus Coupons you earned with your order or orders during July! Find the email(s) you received from Stampin’ Up! and copy the code in your email, then Paste in the Coupon Code box.

During the month of August, you can redeem your coupon codes when you order!

Redemption Period: August 1–31, 2024

  • Bonus Days coupon codes can be applied to new prepaid Paper Pumpkin subscriptions.
  • There is no limit to the number of coupon codes you can redeem on an order during the redemption period. If using multiple codes, they must be separated by a space. 
  • Coupon codes may be redeemed one time only. They cannot be redeemed after August 31. 
  • Coupon codes may be redeemed for any product (excluding Starter Kits).

When you place your order in August, you will find the Coupon Code box in the Checkout area, below that pink Checkout bar. In the photo, I added a red star and oval circling the Coupon Code area. Click on the + sign and the box will open for you to type or paste your coupon code(s). You can use all of them on one order or spread them out as long as you know you will order again during August. Whatever you like!

Coupon Code Box Circled

Have fun shopping! (But wait until Tuesday, August 6! Select designer papers will be discounted!)

Unbounded Beauty Split Birthday Card

Unbounded Beauty Split Birthday Card

This is one of the quickest cards I have made lately! I had the card idea in my head from one I saw online so all I had to do was choose paper and make it! I didn’t even stop to find another card like it to see how to make it. I just had to get it done and out came this Unbounded Beauty Split Birthday Card! I don’t even know what this card design would be called, but that’s what I am calling it.

The card base is Petunia Pop, one of the new In Colors. It coordinates with the pretty Unbounded Beauty Designer Series Paper. The patterns you see on this card are the two colors on one sheet of paper. I guess my geometry skills were lacking because I thought I would just cut this 5 1/4″ x 4″ piece of designer in half diagonally and flip one piece over to show the other side. But that didn’t work! so I cut another piece from the same designer paper at 4″ x 5 1/4″, cut it on my Paper Trimmer diagonally, but this time I cut it from the opposite top corner of the paper than I did the first time. Here is a photo of how to lay your paper on the Paper Trimmer:

Unbounded Beauty Cutting

When I swapped out one of the halves from each piece of paper, then they lined up properly! You could even have another layer on the card base and adhere the designer paper to that, but I put mine right on the card. Also, you can have the space in between the two pieces or you can push them together. I liked having that diagonal line going through the middle.

For the greeting, I diecut two circles with the Deckled Circles Dies in the Online Exclusives. One is Basic White cardstock and the larger one is Summer Splash cardstock. At first, I was going to use Petunia Pop cardstock, but I liked using the Summer Splash better for a little more color. I stamped the greeting on the Basic White circle in Summer Splash ink. The stamp is in the Unbounded Love Stamp Set. The birthday greeting seemed like just the right size for the look of this card. After stamping, I adhered the white circle layered on the Summer Splash circle.

I had even forgotten I had the ribbon in the new In Colors, so when I saw I had those, I used the Summer Splash 3/8″ Bordered Ribbon. The texture and feel of this ribbon is really nice! I applied Stampin’ Seal adhesive on the back of the Summer Splash circle and applied the ribbon back and forth behind that piece. When I popped up that greeting with Stampin’ Dimensionals, those Dimensionals helped hold the ribbon in place even more.

And why not apply a few embellishments to this card for a little more pizzazz? I used the 2024-2025 In Color Resin Dots for a little bling on the greeting in Pretty in Pink, Petunia Pop and Summer Splash to represent all the colors on this designer paper.

I just realized this is the first day of August and I made a birthday card….and it’s my birthday month! I didn’t even have that in my head! I was probably thinking of a friend whose birthday is the day after mine so I could send her this card. And there probably are other August birthdays I will need cards for!

Remember, now you can redeem your Bonus Days coupon codes!

SHOP STAMPIN’ UP! ONLINE HERE!

Last Two Days For Stampin’ Up! Bonus Days!

Bonus Days 2024 Last Days

The month has flown by, but tomorrow will be the last day of July and that means Bonus Days end! If you want to get in on the deal, spend $50 or more at Stampin’ Up! and receive a $5 bonus coupon code to redeem on more products in August!

  • Earn a $5 coupon for every $50 spent (before shipping and tax). 
  • All coupon codes will be emailed directly from Stampin’ Up! right after a qualifying purchase has been made. Make sure your email in your account is current.
  • If you earn multiple codes from a single order, you will receive one email with multiple codes. If you earn multiple codes from multiple orders, you will receive separate emails for each code earned.
  • There is no limit to the number of coupon codes customers can earn per order or throughout the earning period. 
  • Starter Kit orders are excluded from this offer. All other order types qualify.

Bonus Days end on July 31 at 11:59 PM MT.

Then, beginning August 1, you can redeem your coupon codes when you order!

Redemption Period: 1–31 August 2024

  • There is no limit to the number of coupon codes you can redeem on an order during the redemption period. If using multiple codes, they must be separated by a space. 
  • Coupon codes may be redeemed one time only. They cannot be redeemed after August 31. 
  • Coupon codes may be redeemed for any product (excluding Starter Kits).
  • Bonus Days coupon codes can be applied to new prepaid Paper Pumpkin subscriptions.

Choose Happy Pink Bunny Card

Choose Happy Pink Bunny Card

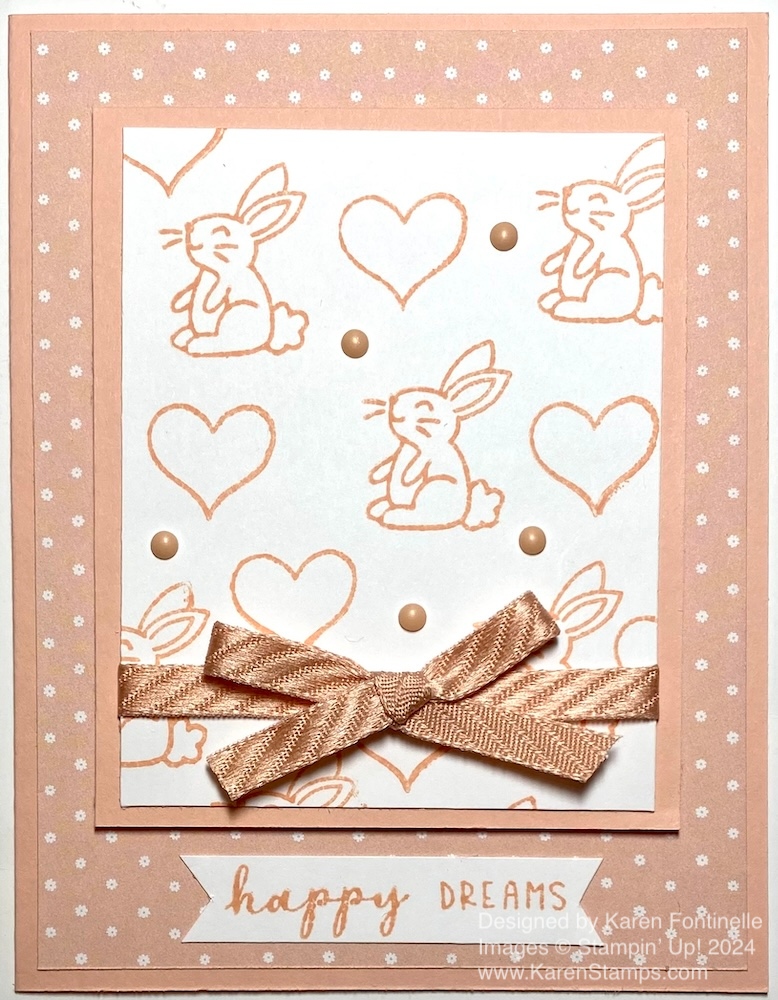
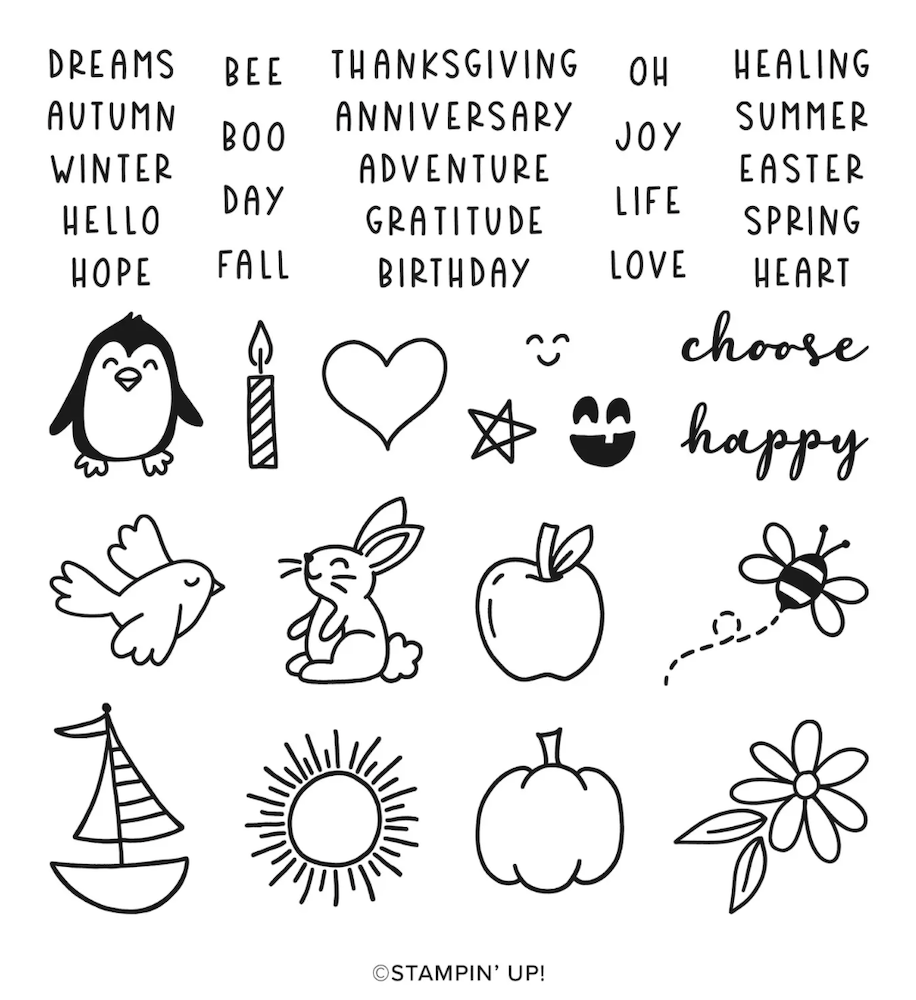
This Choose Happy Pink Bunny Card was fun to make, especially because I hadn’t even used this stamp set yet! Do you buy stamp sets and then forget to use them? That’s what happened with this stamp set. It’s a cute one, however, with lots of fun and happy possibilities, hence the stamp set name, Choose Happy!

This stamp set is full of simple little images to use in all kinds of ways plus numerous useful sentiments that you can pair up however you like. Stamp the images as I did randomly for a background in one color to make a monochromatic card or color them in.

This card begins with a Petal Pink cardstock card base with a layer of Petal Pink polka dot paper in the Flowering Zinnias Designer Series Paper. The focal point of the card is Basic White, cut at 3″ x 3 3/4″. I stamped the little bunny and the heart randomly on that paper. I originally planned to just stamp the bunny, but why not stamp the heart, too?! I think the bunny could be used on a baby card or maybe a birthday card for a child. Change the color of the bunny for a boy or to a girl’s favorite color. I layered this stamped piece on a 3 1/4″ x 4″ piece of Petal Pink cardstock. Before I adhered it, though, I added a piece of the Petal Pink 1/4″ Diagonal Trim Ribbon in the Combo Pack. I also tied a separate bow and adhered it with a couple of Mini Glue Dots. Then I popped up the whole piece with Stampin’ Dimensionals.

The greeting is stamped in Petal Pink ink on a strip of Basic White. The two separate words fit perfectly and I could have chosen something else for the sentiment. This card could be sent to new parents of a baby girl! For some extra embellishment, I added some Rainbow Adhesive Dots in Petal Pink. I think it turned out to be a nice, simple soft card!

Remember, Bonus Days comes to an end on Wednesday, July 31! Spend $50 and receive by email a coupon code worth $5 to spend in August! Don’t miss out!

SHOP STAMPIN UP! ONLINE HERE!

Garden of Thanks Kit in the Kits Collection

Garden of Thanks Kit Contents

Have you seen this beautiful kit in the Stampin’ Up! Kits Collection called Garden of Thanks? The Stampin’ Up! Kits Collection is a selection of online-only kits that are pre-cut, all supplies included, and geared to the beginning crafter. The kit can be for anyone though, new or very experienced! Even if you are very creative on your own, sometimes it is nice to just open something ready to go with everything already designed to make. And you can always change it up however you like!

Make your gratitude gorgeous with the Garden of Thanks Kit! This DIY card-making kit is centered around saying thanks in the most beautiful way. You can create three thank you cards each in three purple watercolor floral designs. Whether you want to convey your sincere thanks or love purple and blue flower gardens, this card kit is for you! Available in French.

Kit includes:
* Garden of Thanks Photopolymer Stamp Set
* Clear Stamp Block
* Misty Moonlight Classic Stampin’ Spot
* Predesigned projects
* Step-by-step instructions
* Precut pieces (No prep work! Get right to crafting)
* Makes 9 cards: 3 each of 3 designs
* Folded card size: 5-1/2″ x 4-1/4″
* 9 preprinted envelopes
* Enough adhesive to complete projects
* Misty Moonlight Baker’s Twine
* Specialty gold foil
* Gold sequins
* A 9-7/8″ x 6-1/2″ x 2-3/4″ printed designer box for storage or crafting on the go

Product colors: Berry Burst, Boho Blue, Bubble Bath, Lemon Lime Twist, Misty Moonlight, Old Olive, Petunia Pop

Garden of Thanks Kit Contents

These kits are not the same as Paper Pumpkin, which is a monthly subscription. These kits are sold in the Stampin’ Up! Online Store as long as supplies last. You can get extras to stamp with friends or give as gifts.

Remember Bonus Days going on for just five more days, until July 31. Spend $50 and receive an online coupon code of $5 to spend in August! Pick up several kits or a kit and some other Stampin’ Up! products!

Kits by Stampin’ Up! are perfect for new crafters, busy crafters, or crafters who want quick and easy projects. All-inclusive project kits have everything you need in one box! Give as a gift or try them yourself. Kits are while supplies last. Order today!

Shop the Kits Collection at Stampin’ Up!

Perennial Lavender Thanks Card

Perennial Lavender Thanks Card

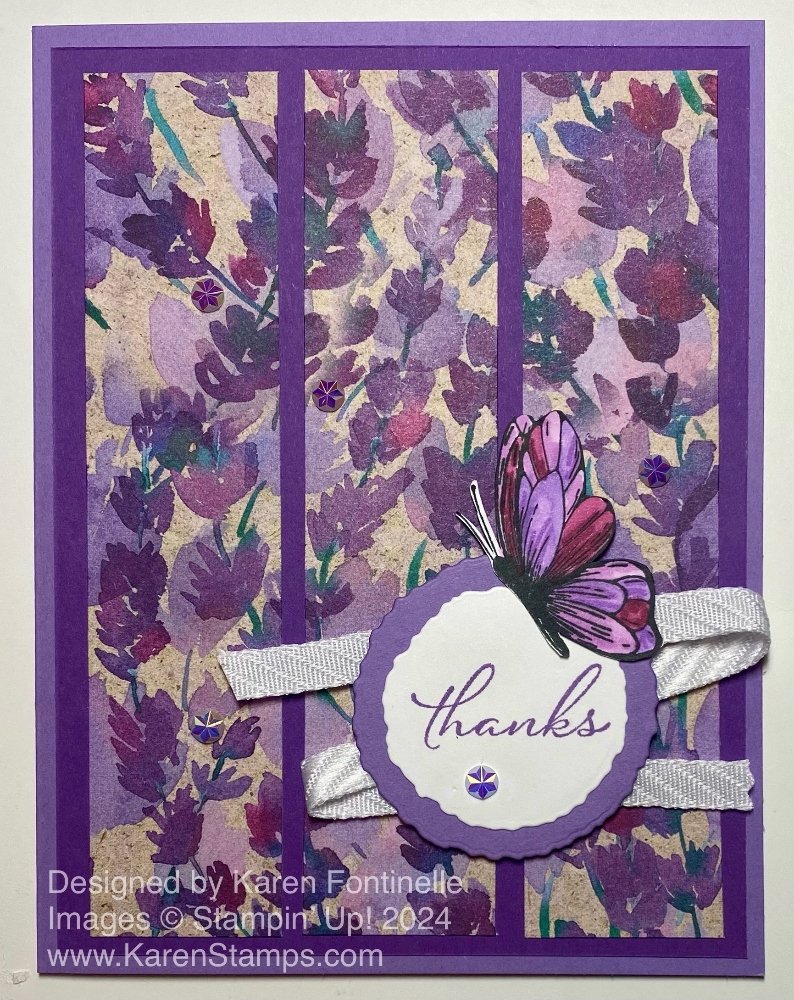
I always forget to check the card sketches on page 22 in the Stampin’ Up! Annual Catalog, but a lot of people like to use sketches to get ideas for making a card. This Perennial Lavender Thanks Card is like the third sketch on page 22. It’s really an easy card to make! I decided to choose a designer paper I hadn’t used in a while.

The card base is Highland Heather cardstock. The Perennial Lavender Designer Series Paper is cut in strips 1 1/8″ x 5″. They are adhered to a 5 1/4″ x 4″ piece of Gorgeous Grape cardstock. It’s probably a good idea to glue down the center strip, centered on that cardstock, and then do the side strips. It’s not too difficult to space them apart by just eyeballing.

I used a stamp in the Spotlight On Nature Stamp Set in Highland Heather ink on Basic White cardstock for the greeting. It is cut out with the second to smallest Deckled Circles Die and then the next largest one to cut out the Highland Heather layer. You could use any shape for your greeting. I forgot to tie some ribbon around the layer with the designer paper strips so I just adhered the white ribbon back and forth behind the greeting. This is the white ribbon in the Petal Pink and White 1/4″ Diagonal Trim Combo Pack. It’s very pretty! When I do ribbon like this, I usually add some Stampin’ Seal on the back to hold the ribbon while I get it attached the way I like it. Then if I use Stampin’ Dimensionals to pop up the whole thing, they help hold the ribbon on as well.

When I saw the butterfly in the stamp set, I decided to stamp and color that in also! I stamped it in Memento Ink and cut it out by hand. It is colored with Berry Burst, Fresh Freesia, and Highland Heather, all Stampin’ Blends Markers. For a little sparkle to brighten up this slightly dark paper, I added some Iridescent Faceted Gems randomly around on the card.

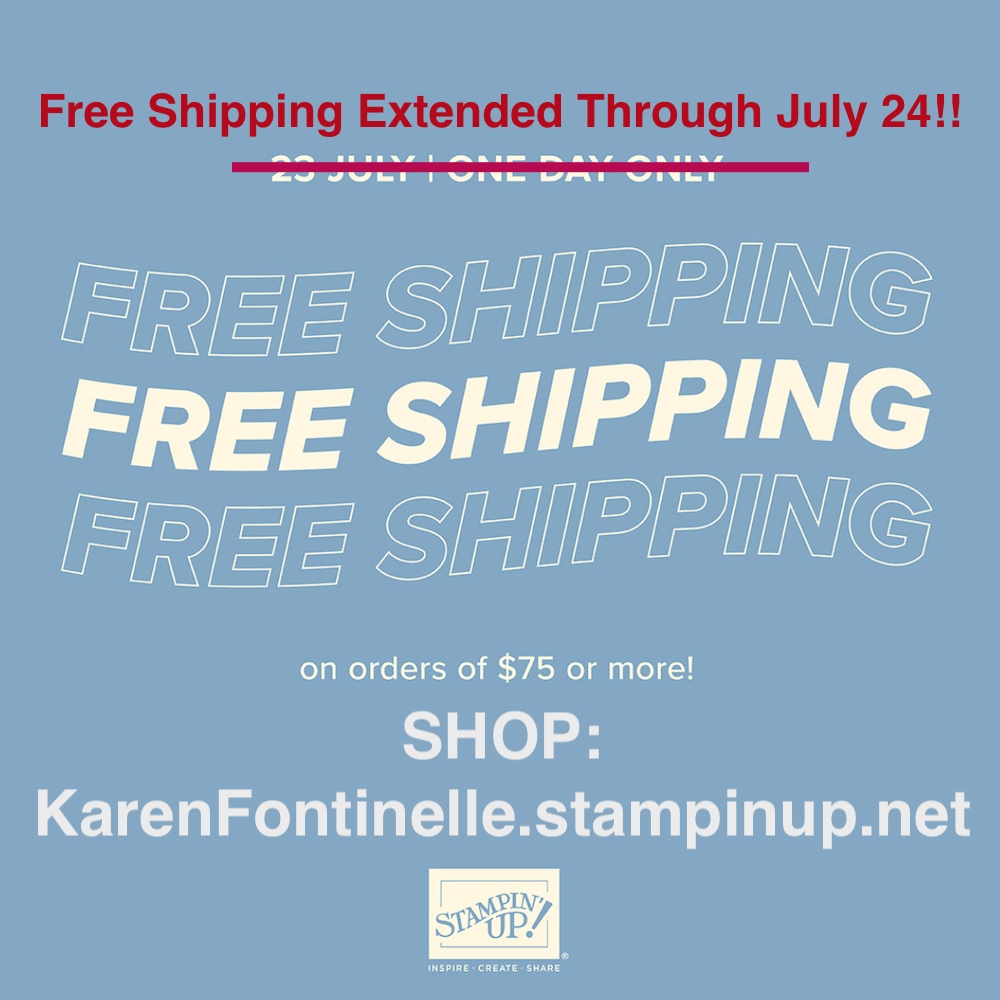
Free Shipping July 23 Sq Ad Info Extended

Deals & Steals At Stampin’ Up!

Hot Deals Image

Several Deals & Steals are going on at Stampin’ Up! right now! Especially today! Check them out and make sure you don’t miss out! You will likely even “double dip”! If you order $75 in products you get free shipping plus earn a Bonus Days $5 coupon code for August! Remember, Hostess Rewards begin at $150! That’s free shipping plus 3 Bonus Days coupon codes!

Numeral 1

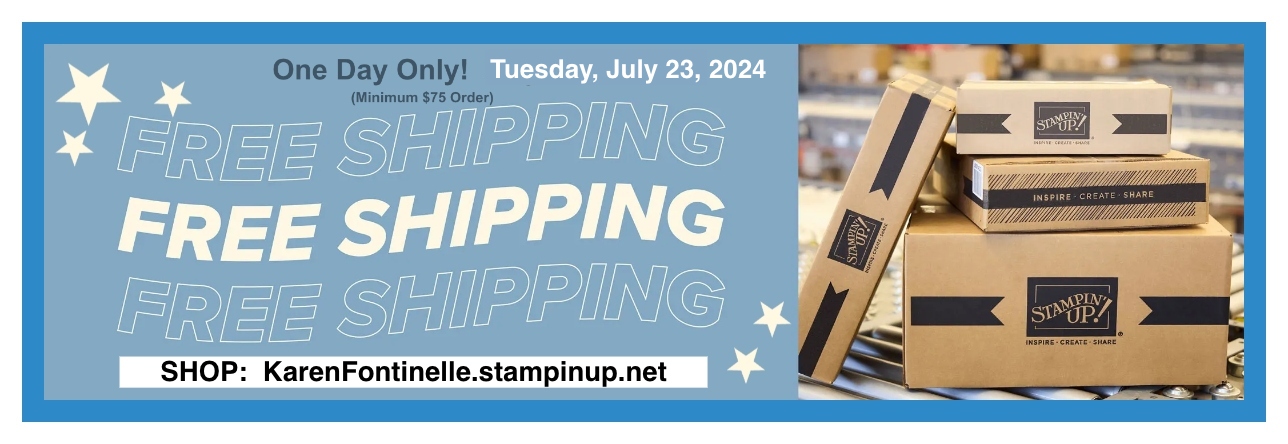
FREE SHIPPING TODAY ONLY! $75 Minimum Order

Free Shipping Details:

  • All order types qualify for this promotion.
  • Free shipping is for 24 hours only. Orders must be opened and closed on July 23, 2024.
  • Free shipping automatically applies to your cart after the qualifying amount has been met, which is $75 USD (before tax).
  • Coupon codes and product credits are non-commissionable and will lower your order’s retail amount. Orders must meet the qualifying amount to be eligible for free shipping.
  • This promotion does not cover the additional cost of expedited shipping.
  • Prepaid 3-, 6-, or 12-month Paper Pumpkin subscriptions can contribute to the qualifying amount for free shipping (Month-to-month subscriptions do not qualify). Subscriptions billed and shipped this month will be charged for the normal amount ($25.00 USD shipping included) + tax.
  • Free shipping ends at 11:59 pm MT on July 23.
SU Free Shipping Banner July 23 2024 BorderInfo

Numeral 2

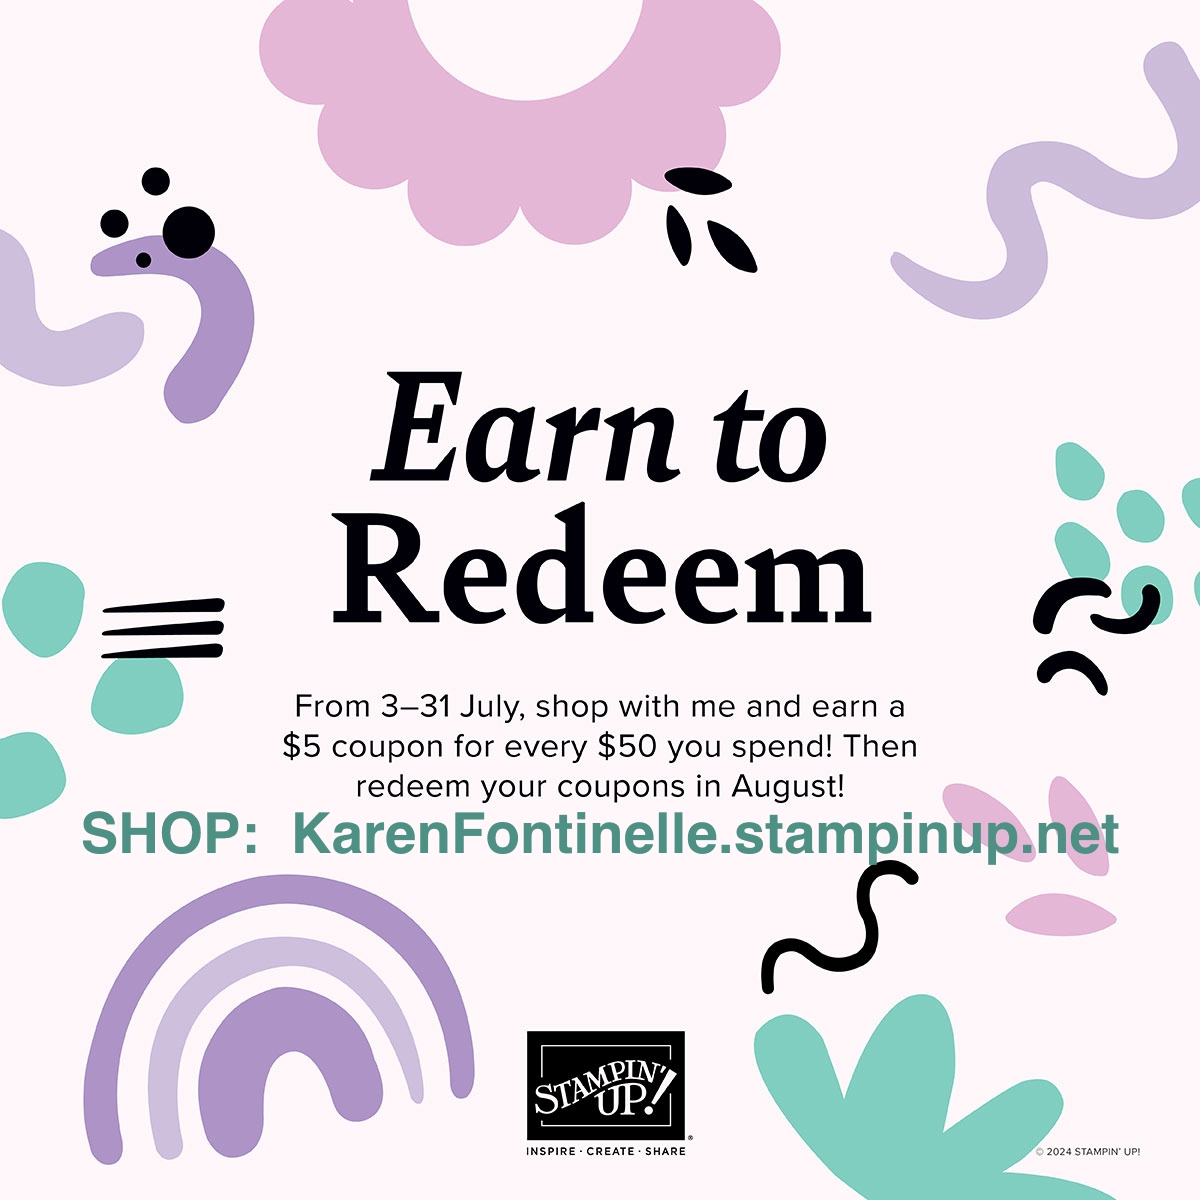
BONUS DAYS! Earn a Coupon for August!

If you shop in $50 increments today, you will get Free Shipping plus a $5 coupon code for each $50 you spend. Kind of like double-dipping!

  • Earn a $5 coupon for every $50 spent (before shipping and tax). 
  • All coupon codes will be emailed directly from Stampin’ Up! right after a qualifying purchase has been made. Make sure your email in your account is current.
  • If you earn multiple codes from a single order, you will receive one email with multiple codes. If you earn multiple codes from multiple orders, you will receive separate emails for each code earned.
  • There is no limit to the number of coupon codes customers can earn per order or throughout the earning period. 
  • Starter Kit orders are excluded from this offer. All other order types qualify.

Bonus Days end on July 31 at 11:59 PM MT.

Redeem your coupon codes when you order from August 1-31 2024!

Bonus Days July 2024 Sq Ad
Numeral 3

Special For Paper Pumpkin Subscribers!

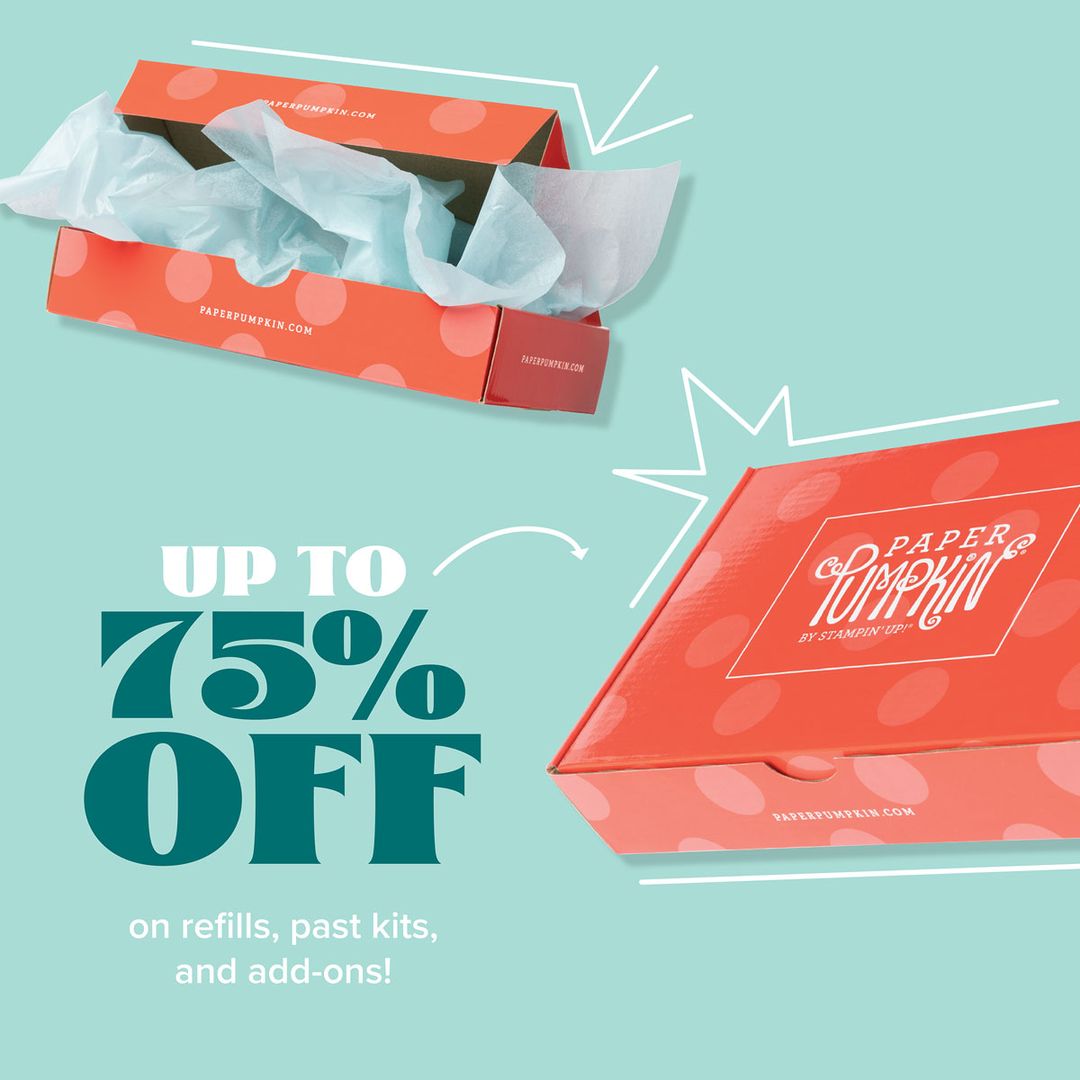
Surprise! From July 23-25, all active Paper Pumpkin subscribers can save up to 75% off on refills, past kits, and add-ons! Product is only available while supplies last.

What’s even sweeter? July 23rd is free shipping! Shop your favorite Paper Pumpkin products at a discounted price and don’t worry about any shipping fees (with a $75 min. order).

As if you didn’t need any further reason to start shopping…any Paper Pumpkin purchase WILL count toward the Bonus Days earning period.

Discounts do not apply to monthly or prepaid subscriptions. This deal is for North America only.

Numeral 4

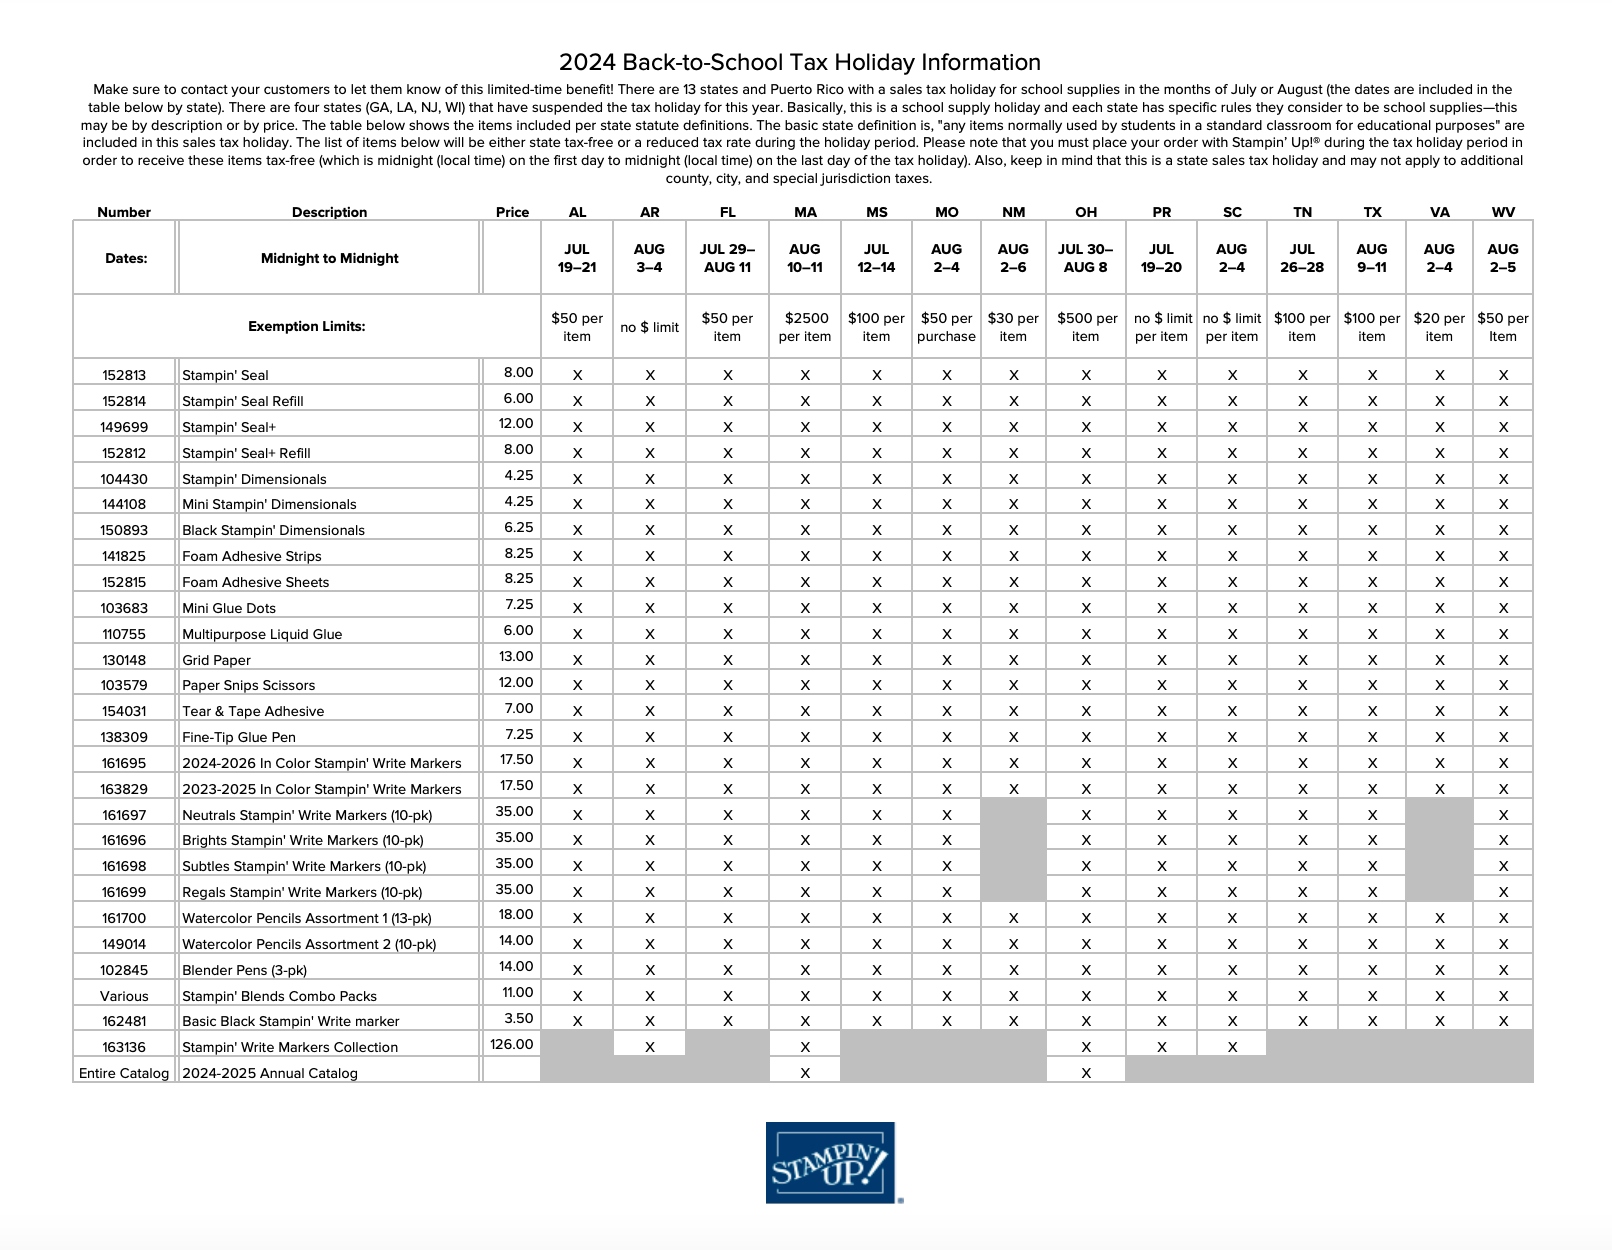
Back-To-School State Sales Tax Holidays

The 2024 Back-to-School Sales Tax Holiday season has begun! There are thirteen states and Puerto Rico offering a sales tax holiday for school supplies during July and August. Products that are eligible according to the statute include “items normally used by students in a standard classroom for educational purposes.” Not every state participates, but if yours does, why not take advantage?! Click HERE or on the chart below to read it!

Back to School 2024 Sales Tax Holiday

Check out all these “Deals & Steals” and see what really good deals you can find for yourself!

Happy Deals Shopping!!

Stampin’ Up! Surprise! FREE SHIPPING!

SU Free Shipping Banner July 23 2024 BorderInfo

Stampin’ Up! has announced FREE SHIPPING

on orders of $75 or more,

ONE DAY ONLY, July 23, 2024. That’s TOMORROW!

That’s the kind of surprise we like!


Free Shipping Details:

  • All order types qualify for this promotion.
  • Free shipping is for 24 hours only. Orders must be opened and closed on July 23, 2024.
  • Free shipping automatically applies to your cart after the qualifying amount has been met, which is $75 USD (before tax).
  • Coupon codes and product credits are non-commissionable and will lower your order’s retail amount. Orders must meet the qualifying amount to be eligible for free shipping.
  • This promotion does not cover the additional cost of expedited shipping.
  • Prepaid 3-, 6-, or 12-month Paper Pumpkin subscriptions can contribute to the qualifying amount for free shipping (Month-to-month subscriptions do not qualify). Subscriptions billed and shipped this month will be charged for the normal amount ($25.00 USD shipping included) + tax.
  • Free shipping ends at 11:59 pm MT on July 23.

Remember, make your list today on paper, but do not start entering it in your cart until tomorrow or free shipping may not come up. Start your order tomorrow, July 23.

This is a great opportunity to shop and save on all qualifying orders of $75 or more. What a great way to stock up on all your favorite products from the catalog, Online Exclusives, kits, and more!

Don’t forget about Bonus Days!! With every $50 purchase through July 31, you will earn a $5 Bonus Coupon to spend on an order(s) in August! Your coupon code(s) will be emailed from Stampin’ Up! immediately after ordering. If you spend $75 you will get one $5 coupon code plus free shipping on your order. If you spend $100, you will get two $5 coupon codes plus free shipping, for example.

Have fun shopping at Stampin’ Up!

The Season of Green & Gold Paper Is a Must Have!

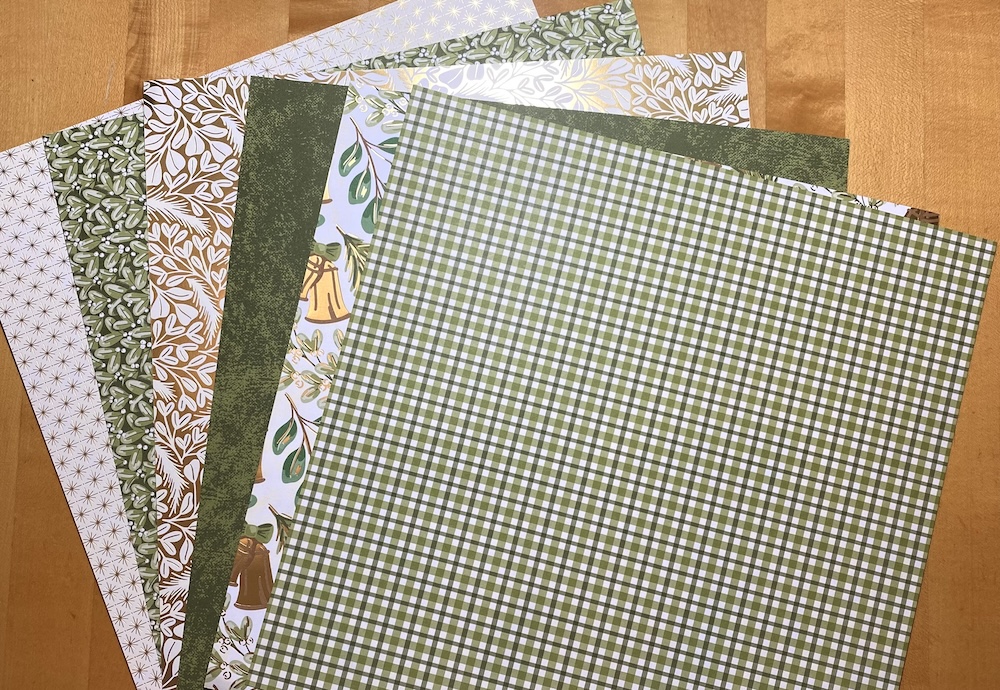
Season of Green & Gold Paper

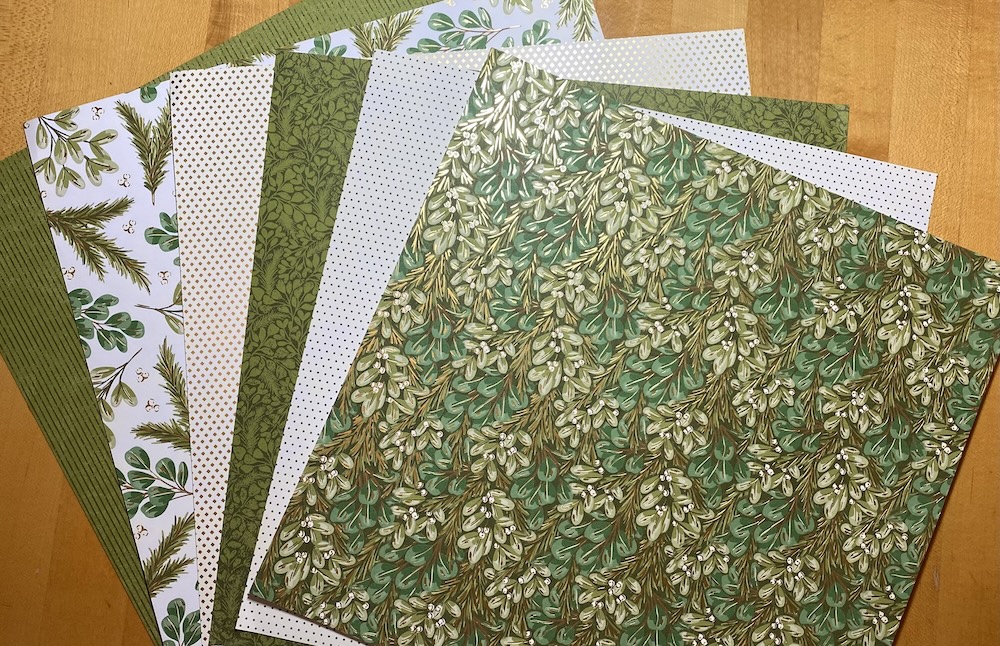
I FINALLY received my last Stampin’ Up! order yesterday! For days I was getting a notice saying it was “On Its Way!” When I checked the detailed tracking, I saw that it had gone from Salt Lake City to Albuquerque to San Antonio and then back and forth from Houston to Austin TX three times!! But I guess it was worth the wait because this Season of Green & Gold Specialty Designer Series Paper, one of the new Online Exclusives, is gorgeous! You can’t tell from my photos or even online but I can tell you it is really nice.

Season of Green & Gold Specialty Paper

The greenery on these papers is just beautiful especially when accented with gold foil. And of course, on “the other side” of the paper, the patterns are more generic so you can use them any time of year or use for tags or other projects. This paper is in the Season of Green & Gold Suite Collection.

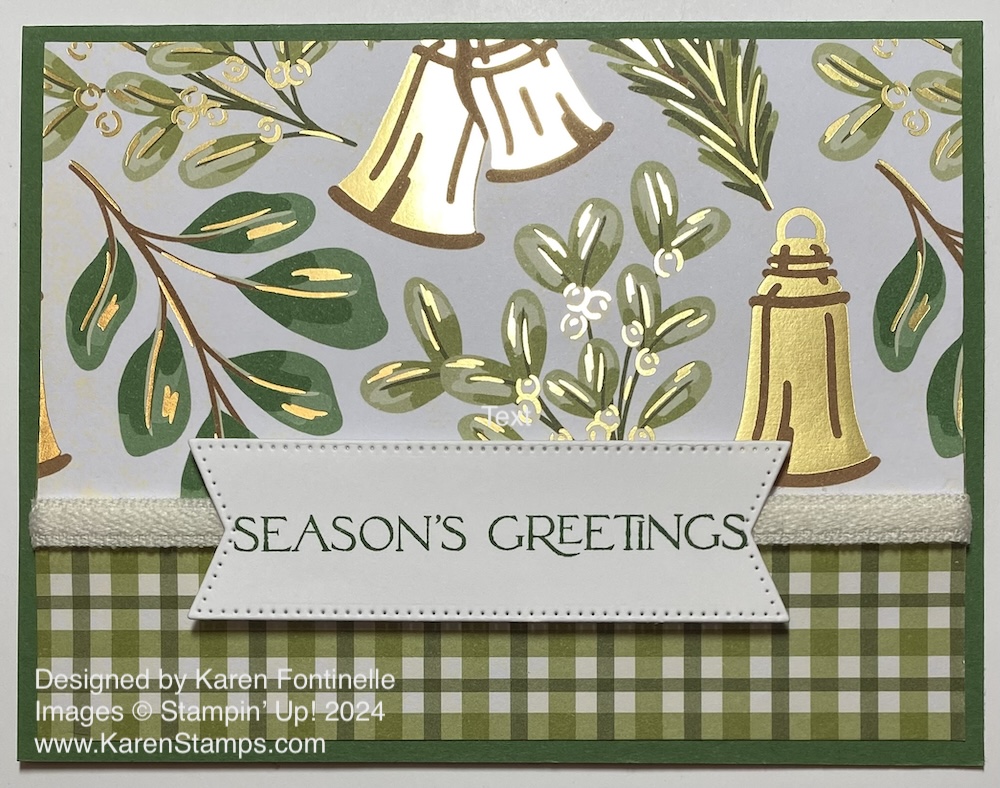
Season of Green & Gold Christmas Card

I couldn’t wait to make something with this pretty paper, so I just went with a simple card design. This Season of Green & Gold Christmas Card is what I came up with. You will love this pattern with the gold bells on it along with the foliage. Besides Christmas, you can use the bells for wedding or anniversary cards!

The card base is Garden Green cardstock. The two patterns of paper you see on this card are the two sides of the same sheet. As you can see, you could use that green plaid for almost anything! I cut the two patterns so they would overlap so I could wrap ribbon around the seam. The ribbon is the Cream 1/4″ Woven Ribbon in the Online Exclusives. It’s very pretty.

The greeting is stamped in Garden Green ink on Basic White from the Brightest Glow Stamp Set (retired). The Season of Green & Gold Suite has a new stamp set in it called Greetings of the Season. I couldn’t make up my mind on all the things when I ordered so I only got the paper in this Suite and the Cherry Cobbler and Pearl Adhesive-Backed Berries. Of course, I had to have the bling!

The next time you order, don’t pass up the Season of Green & Gold Specialty Designer Series Paper, even if you don’t get anything else!

SHOP STAMPIN’ UP! ONLINE HERE!

Unbounded Love Scraps Card

Unbounded Love Scraps Card

It was time to look through the little pile on my table of an assortment of die cuts and stamped images. They are just extra pieces that I made or didn’t use and sometimes these scrap piles can really grow! From those scraps, I designed this Unbounded Love Scraps Card! If you have a pile of scraps of various kinds, stop and look through them and see what you can design.

This card base is one of the new In Colors, Summer Splash. I realized I have barely used the new In Colors so I thought I should get busy with one of them! I didn’t add a layer to the card base, just started placing my scrap pieces to see what I could do.

I began with these white oval die cuts from the Unbounded Love Dies. I could have made some sort of shaker card with these pieces, but for now, I was looking for an easy card. I simply placed these ovals on the card and then planned out what flowers or pieces I could fit inside them and make a nice-looking card.

I won’t list all the stamp sets that are represented but some are Sentimental Park, Poised Peony, and Painted Lavender. Besides the ovals, some of the dies used were Painted Lavender and Sentimental Park. I stamped, colored, and die-cut a few flowers and foliage to fill in the ovals with the right size of images, but mostly I used my scraps. The cross-hatch stamped designs on the card are from the Spotlight on Nature Stamp Set. They are stamped in the same color as the card, Summer Splash ink. I just needed a little something for the background. It’s usually best to stamp first and then glue things, but I lucked out and didn’t ruin anything!

The greeting is in the Heartfelt Hexagon Stamp Set. I stamped it on Basic White in Summer Splash ink. Since I was rather limited in space on the card, I just cut around the stamped greeting. That takes up less room and still looks good!

For a final touch, I added a few 2024-2026 In Color Shimmer Gems in Summer Splash and Peach Pie on the card. What is a card without the bling?!

You could use this card for lots of occasions or even omit a greeting and just send it! It’s a good way to use up scraps and extra pieces that you have!

SHOP STAMPIN’ UP! HERE!

Join the Stamping With Karen Mailing List

Email Yellow envelope

Have you signed up for my Stamping With Karen Mailing List yet? Whether you sometimes visit my blog or if this is your first time here, please join us by signing up in the Mailing List Sign Up Box!

Each Tuesday, you will receive an email newsletter with the latest Stampin’ Up! news and any special offers, plus at least one tutorial for a card or another project or papercrafting tip. Stampin’ Up! updates us on Tuesdays so that is a good day to get in touch with you!

If you like getting new stamping ideas, this is for you! These projects are exclusive to my newsletter. 

As a special gift for signing up, you will receive a PDF called “A  Dozen Creative Gift Wrap Ideas”. You can update the ideas with current products.

Dare I say — the holidays will soon be upon us! The Holiday Mini Catalog will come out before we know it and I like to send out special 12 Weeks of Christmas emails with one holiday project each week. These projects ONLY go to my Mailing List subscribers! You won’t want to miss those for some holiday inspiration early on!

Keep on top of all things Stampin’ Up! and learn how to use those great products in papercrafting!  Sign up in the Mailing List sign-up box in the upper right corner of my blog or the pop-up box! If you are on your phone, the red signup box may be at the bottom of this post.

Here is a link to sign up!

The August 2024 Paper Pumpkin Kit

Paper Pumpkin Aug 2024 Kit

Here is a peek at the Paper Pumpkin Kit for August 2024. If you want to treat yourself, which we all should do now and then, just subscribe to Paper Pumpkin and enjoy the surprise in your mailbox once a month when the newest kit arrives!

Bring on a birthday bash with these elegant birthday cards made with rose gold details! You will get all the supplies you need in this kit! You’ll have materials to make not just ordinary birthday cards with this kit, but one extra-special design! Plus get a FREE extra stamp set!

Here are the details about the Time For Cake Paper Pumpkin Kit which will mail out right after August 10th:
• Makes 9 cards, 3 each of 3 designs
• Project includes printed card bases, coordinating envelopes, and labels
• Embellishments and rose gold cord
• Coordinating colors: Moody Mauve, Night of Navy (Classic Stampin’ Spot), Petal Pink,
Pecan Pie, Pretty in Pink, Wild Wheat

Subscribe to Paper Pumpkin by August 10th! No risk, no obligation! Try it out and if it’s not for you just cancel. If you love Paper Pumpkin but you will be on vacation or busy one month, just skip a month. Easy peasy!

JOIN PAPER PUMPKIN!

Click this link above to see what these special birthday cards will look like!

Mediterranean Blooms Hello Card

Mediterranean Blooms Hello Card

This Mediterranean Blooms Hello Card came about from just getting out a package of designer paper and looking over all the patterns. This is a good way to start when you want to make a card but have no particular design in mind. When a certain paper strikes you, start with that and see where it takes you!

For this card, I liked the large “tile” design of the designer paper, and I thought maybe it would pair well with the smallest blue and white design. The card base is Night of Navy. The designer paper is the Mediterranean Blooms Designer Series Paper. I love this paper with the look of hand-painted tiles, greenery, and citrus. I used two different patterns on this card plus some Balmy Blue cardstock to help the large tile design stand out a little from the background paper.

The designer series paper used for the background layer on the card base (the small design) is cut at 4 1/8″ x 5 3/8″. If you want a wider margin of the Night of Navy around the edge of the card, just do the normal size of 4″ x 5 1/4″. The large tile design is cut at 5 3/8″ x 2 3/4″. Now to get the floral tile in the center of this panel, I had to use a ruler and figure out where to cut the paper on the sides to center that design. So you may have to “waste” a little designer paper to do this, but save the scraps! You can always use them another way! The Balmy Blue cardstock is just strips to adhere along the sides of the large tile design. Mine were cut at 5 3/8″ x 1/2″ but they can be wider if that is what you already have. Just adhere them to the back of the panel so that there is just a thin amount showing. The Liquid Glue works best for this because you have that “wiggle” time to get those strips adhered straight and even.

The greeting is stamped in Night of Navy ink on a Basic White scrap of cardstock and diecut with a small rectangular die in the Country Side Corners Dies. The greeting is in the Simply Said Stamp Set. I wanted a bolder greeting to stand out better than the ones in the Citrus Blooms Stamp Set that goes with the paper.

For the little blue bow, I used white Baker’s Twine in the Baker’s Twine Essentials Pack. But I colored it with the Light Balmy Blue Stampin’ Blend Marker. Just lay the twine on a scrap piece of paper, like computer paper, and gently rub the marker along the twine. Turn it and make sure the twine is colored all the way around. I adhered the bow to the greeting with a Mini Glue Dot. I also added two Rainbow Adhesive-Backed Dots in Balmy Blue.

I made another card using the smaller size tile design in the background behind the oranges!

When I started, I didn’t know what I was going to make, but I’m really pleased with how this card turned out! Use your package of designer paper for inspiration when you are stuck!

SHOP STAMPIN’ UP! ONLINE HERE!