Category Archives: Cards

Oh So Eclectic Die Cut Design Card

oh so eclectic die cut design card

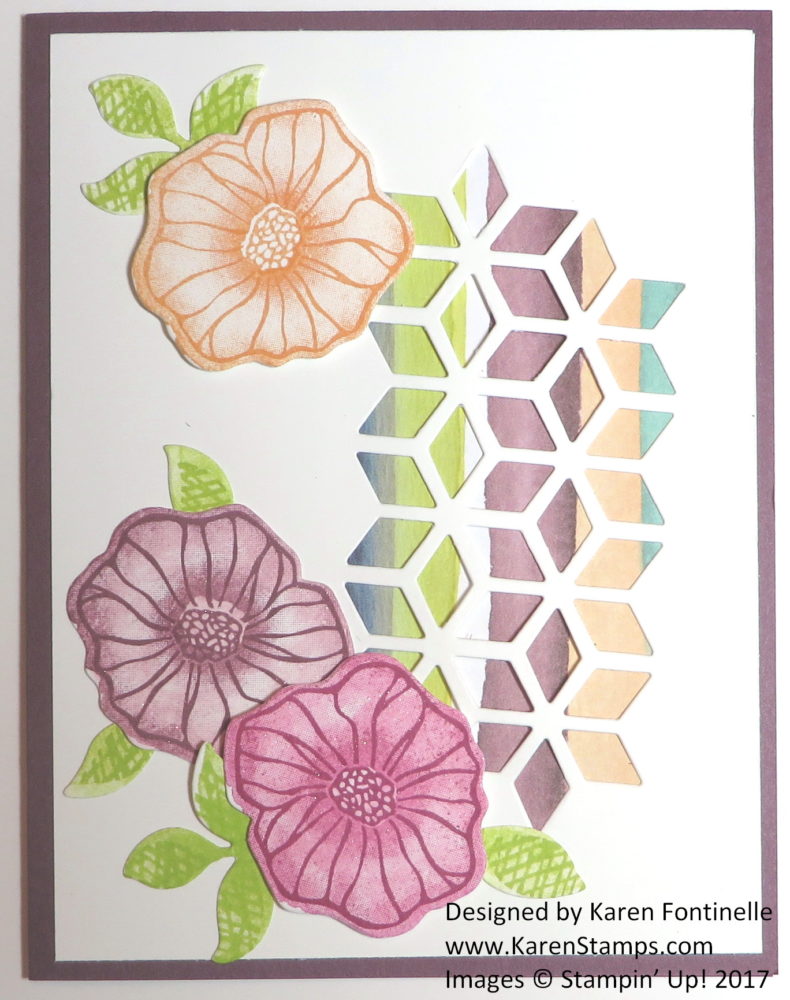
Sometimes it is fun to just get out one stamp set or suite of products and just play with those instead of combining several stamp sets, colors, dies, etc.  Here is one of the cards I made, the Oh So Eclectic Die Cut Design Card, using the some of the products in the Naturally Eclectic Suite.

I was quite interested to play with the oblong image in the Eclectic Layers Thinlits DiesI started with the card base of Fresh Fig and added a layer of the stripe pattern in the Naturally Eclectic Designer Series Paper  to go behind the die cut. This paper has the look of watercolored imperfect stripes. You can also leave the area plain behind that die cut (I don’t know what shape to call it!) if you have some other colored paper behind it or just the card base.  Then I stamped and die cut the three flowers and leaves and added a bit of Clear Wink of Stella, which gives a very subtle shimmer to the flowers, not picked up in the photo.

Since the stamps are clear-mount (or you can choose wood-mount), you can’t see through them to do the 2-step stamping BUT since it all has that watercolored look, nothing has to be perfect. And really, if you are die-cutting you will not notice at all that you didn’t overstamp perfectly. And not everything has to be perfect, remember, when you are making a handmade card!  It’s handmade, not machine-made!

I think you will be able to make lovely creations with the Naturally Eclectic Suite of products! If you would like to order some or all of them, you will find them in the Stampin’ Up! Catalog on pages 132-33. Just click the picture of the catalog on the right side of my blog to go to the Catalog PDF.  Or email me with your contact information and I would be happy to mail you a catalog and be your personal Stampin’ Up! Demonstrator!

Shop Stampin’ Up! Online 24/7 HERE!
 

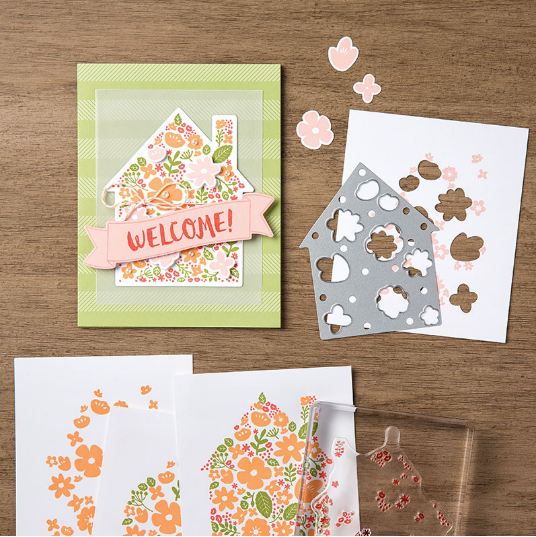
Stamp a Beautiful Home With the Home Life Bundle!

Hopefully you and your family had a fun and happy 4th of July, whether it started last weekend or was just today or maybe you are on vacation or celebrating the rest of this week! We had a quiet day at home until we went to a very nearby fireworks display with our friends that we always watch fireworks with. Amazingly, after a blistering hot day, the evening, at least by 8 pm was perfectly lovely out and with a nice breeze, so it was perfect weather to watch fireworks! I’d love to see the fireworks downtown, but I love being back home in a few minutes instead of in all that traffic!

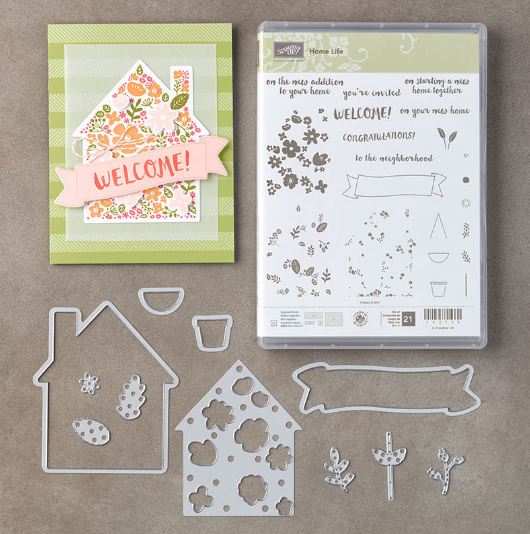
Here’s a Stampin’ Up! video you will enjoy about the Home Life Stamp Set and Welcome Home Framelits Dies with Donna Griffith from the Stampin’ Up! Home Office. Not only does she talk about the stamp set and dies, but she gives lots of good tips for using this set.

Home Life Bundle  Home Life Bundle

Check it out in the new Stampin’ Up! Annual Catalog!  Lots of good things in there!  Let me know if you would be interested in a copy!  Email me with your contact information.

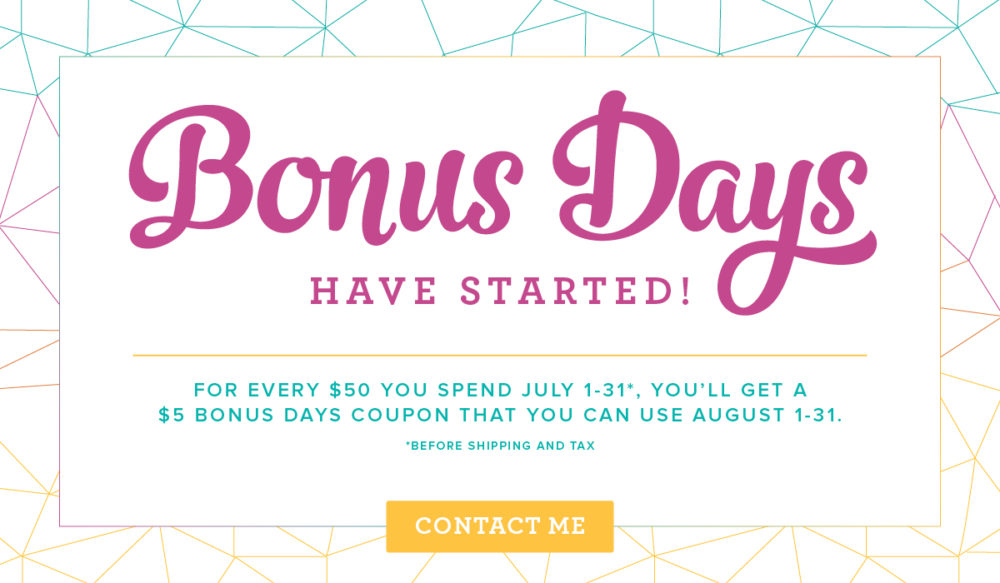
And remember, July is Stampin’ Up! Bonus Coupons to spend in August!  For more information, read this blog post HERE. With every $50 you spend on Stampin’ Up! products, you will be emailed a $5 coupon to spend in August! Be sure to keep track of the emails and codes! Purchase the Home Life Bundle and you will get a Bonus Coupon!

Shop Stampin’ Up! Online 24/7!

4th of July Stampin’ Up! Card Ideas

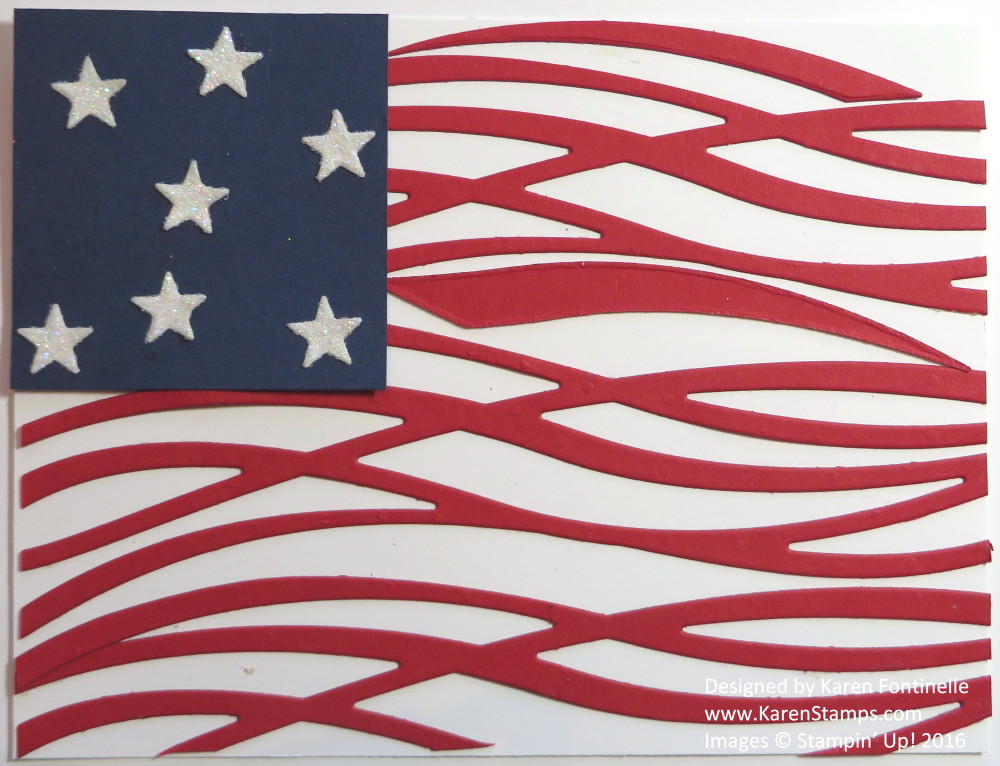
4th of July Flag Card with Swirly Scribbles Thinlits

HAPPY 4th of JULY!!

If you are still looking for some last minute 4th of July card ideas, here are some from past years, plus you can check the last two days on my blog!

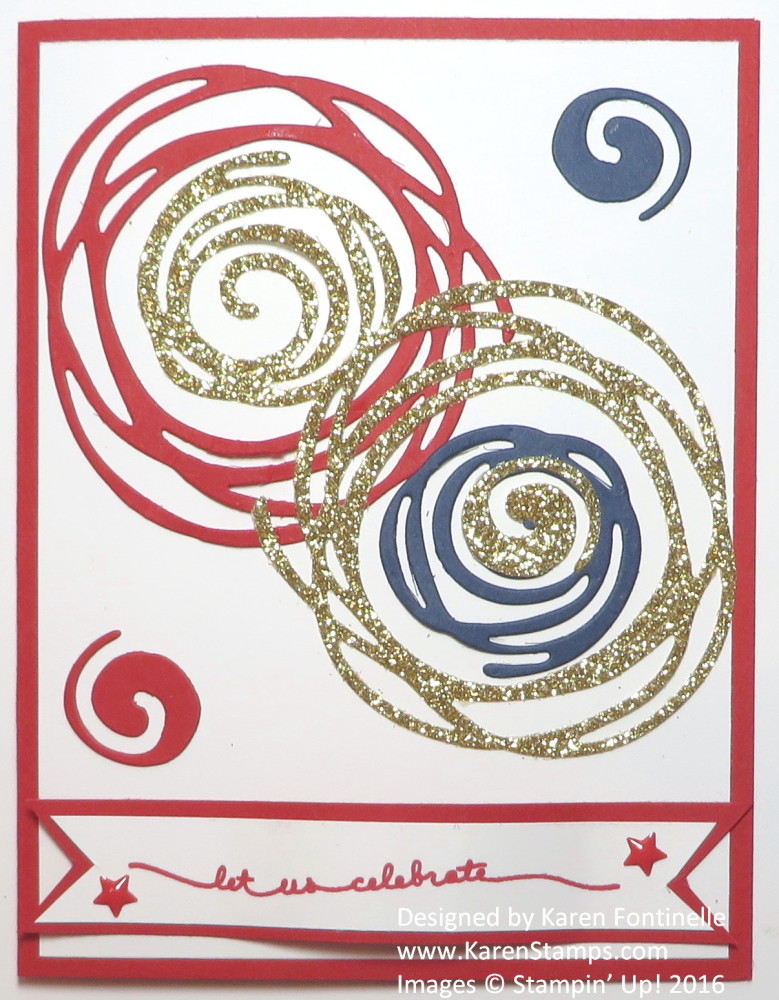
4th of July Fireworks with Swirly Scribbles Thinlits

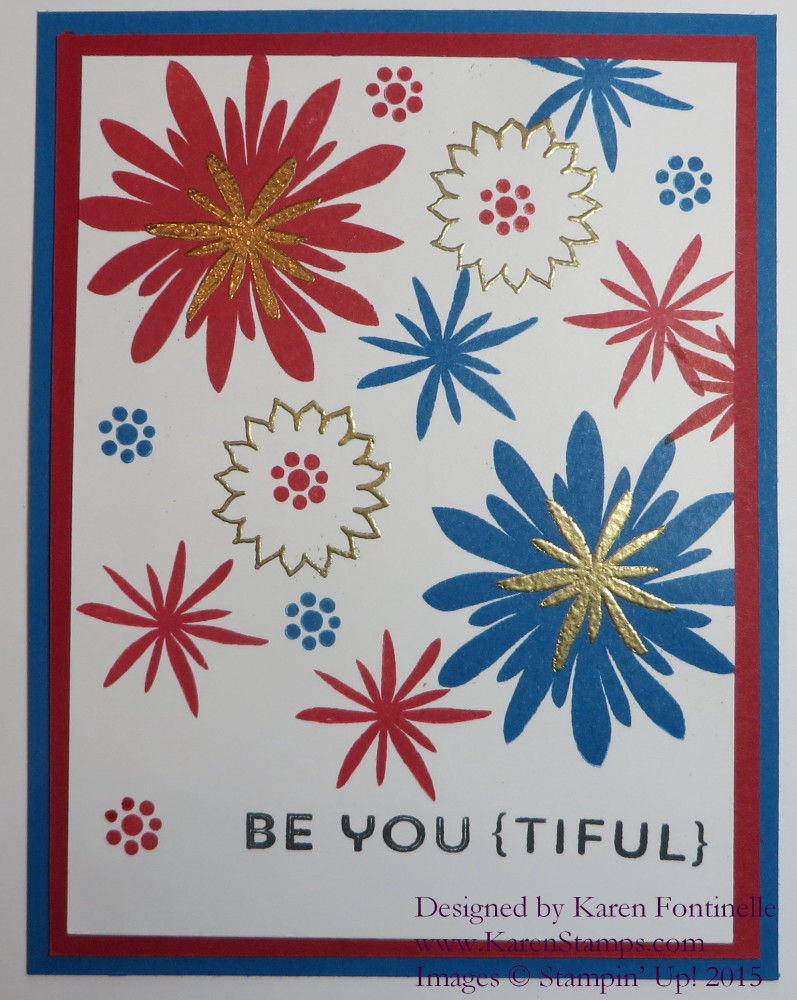
Flower Patch 4th of July Fireworks Card

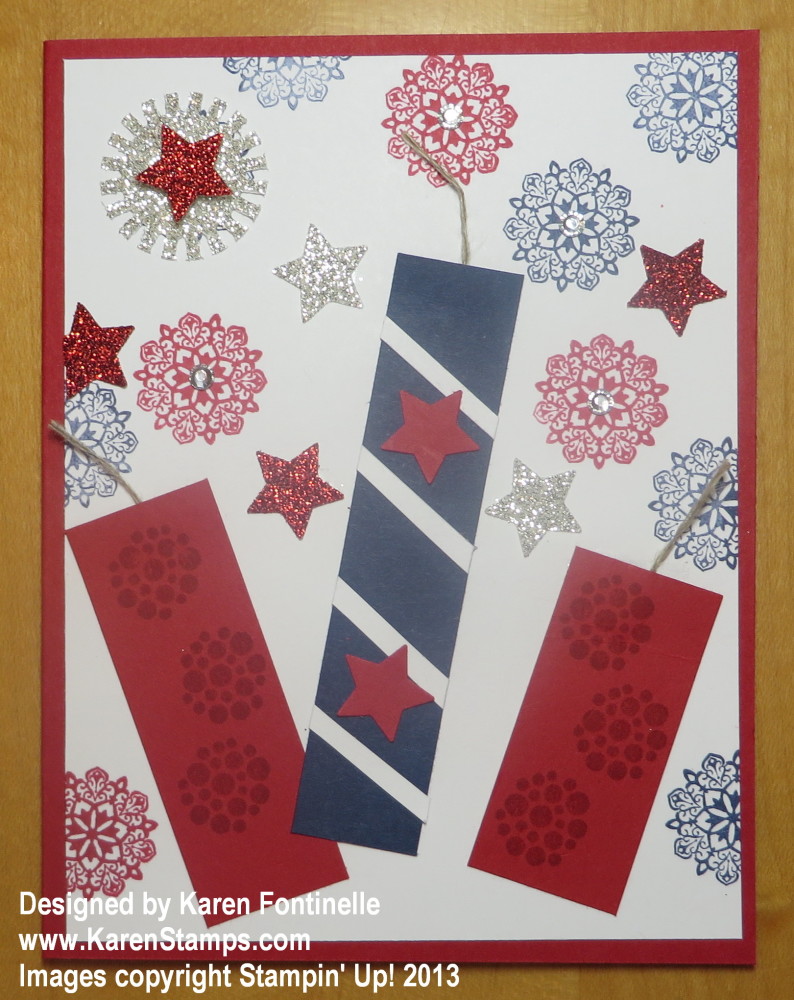
4th of July Fireworks Card

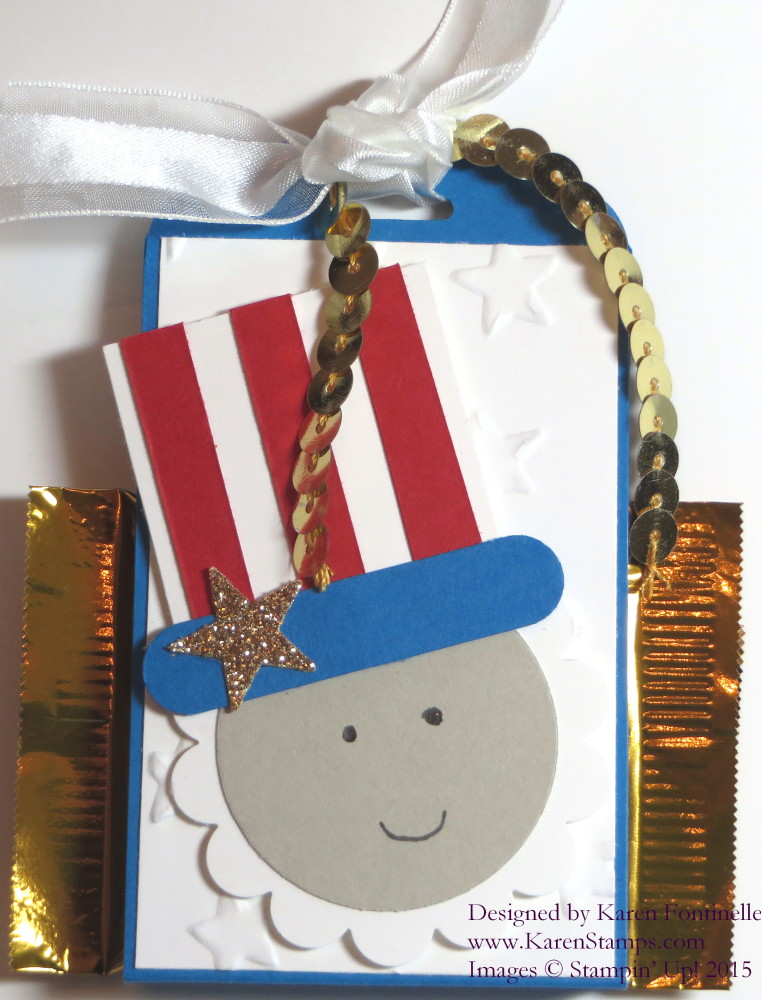
4th of July Uncle Sam Scalloped Tag Topper Treat Holder

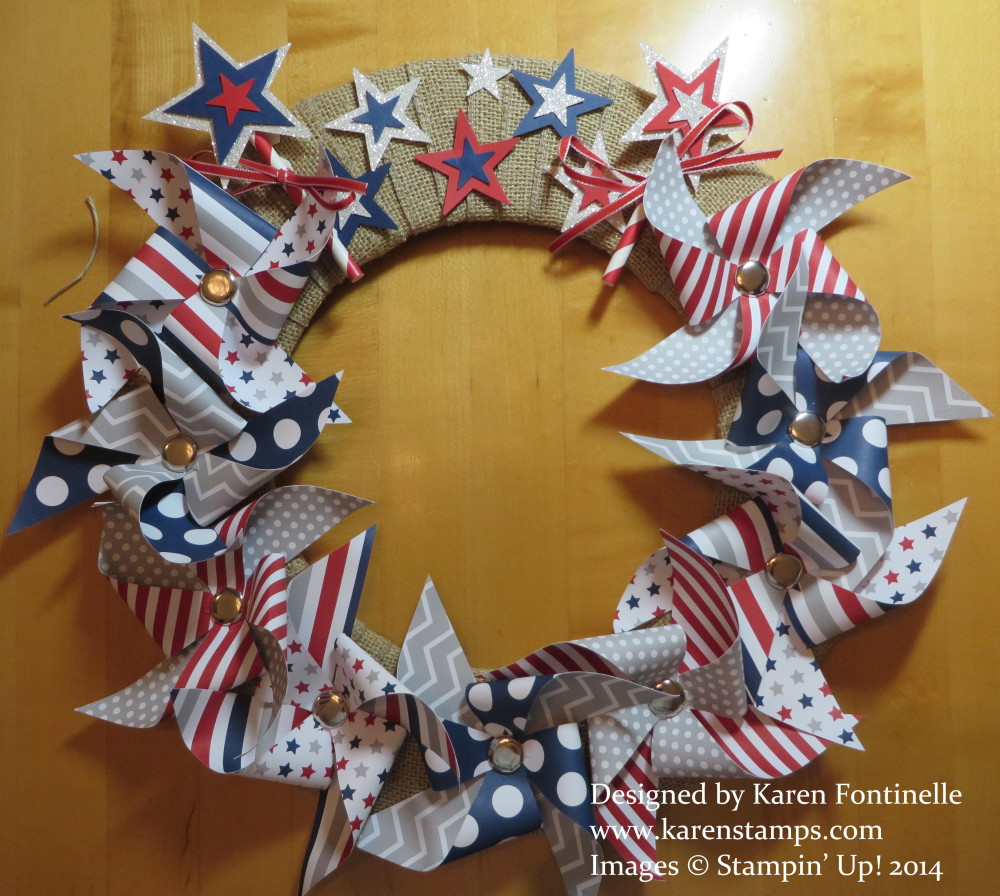
Paper Pumpkin Patriotic Pinwheel Wreath

I hope you and your family are having a wonderful holiday!  If you need a last minute 4th of July card or project idea, I hope you found some inspiration right here!

HAPPY INDEPENDENCE DAY!

Stampin’ Up! Bonus Days, Christmas in July, and a Bundle in August!

Stampin' Up! Bonus Days 2017 Stampin’ Up! is starting July off with a big old firecracker BANG!  There are two fantastic offers for you, Stampin’ Up! Bonus Days and Christmas in July!

BONUS DAYS!

For every $50 you spend during the whole month of July (before shipping and tax), you will receive a $5 Bonus Days Coupon that you can use during the month of August!

*There is no limit to the number of coupons you can receive per order or throughout the duration of the promotion.
*When you receive your coupon code via email, write down the codes in case anything happens to your email.  Codes cannot be resent.
*An email address is required to participate; Bonus Days coupon codes can only be delivered via email. (If you don’t have an email address, we can work around that.)

Deadline:
July 31, 2017 by 11:50 PM (MT)

REDEEM IN AUGUST!
*There is no limit to the number of coupons you can redeem on any order in August.
*Bonus Days coupon codes can be redeemed for any product, excluding Starter Kits and Paper Pumpkin subscriptions. New prepaid Paper Pumpkin codes (the 1-, 3-, 6-, and 12-month prepaid subscriptions in the Stampin’ Up! Online Store) can be discounted with Bonus Days coupons.

SO…..Shop during July in $50 increments and earn a $5 Bonus Coupon for each $50 to apply to your order(s) in August! Don’t lose the emails with the coupon codes!

And I have just the thing for you to spend your Bonus Coupons on in August!

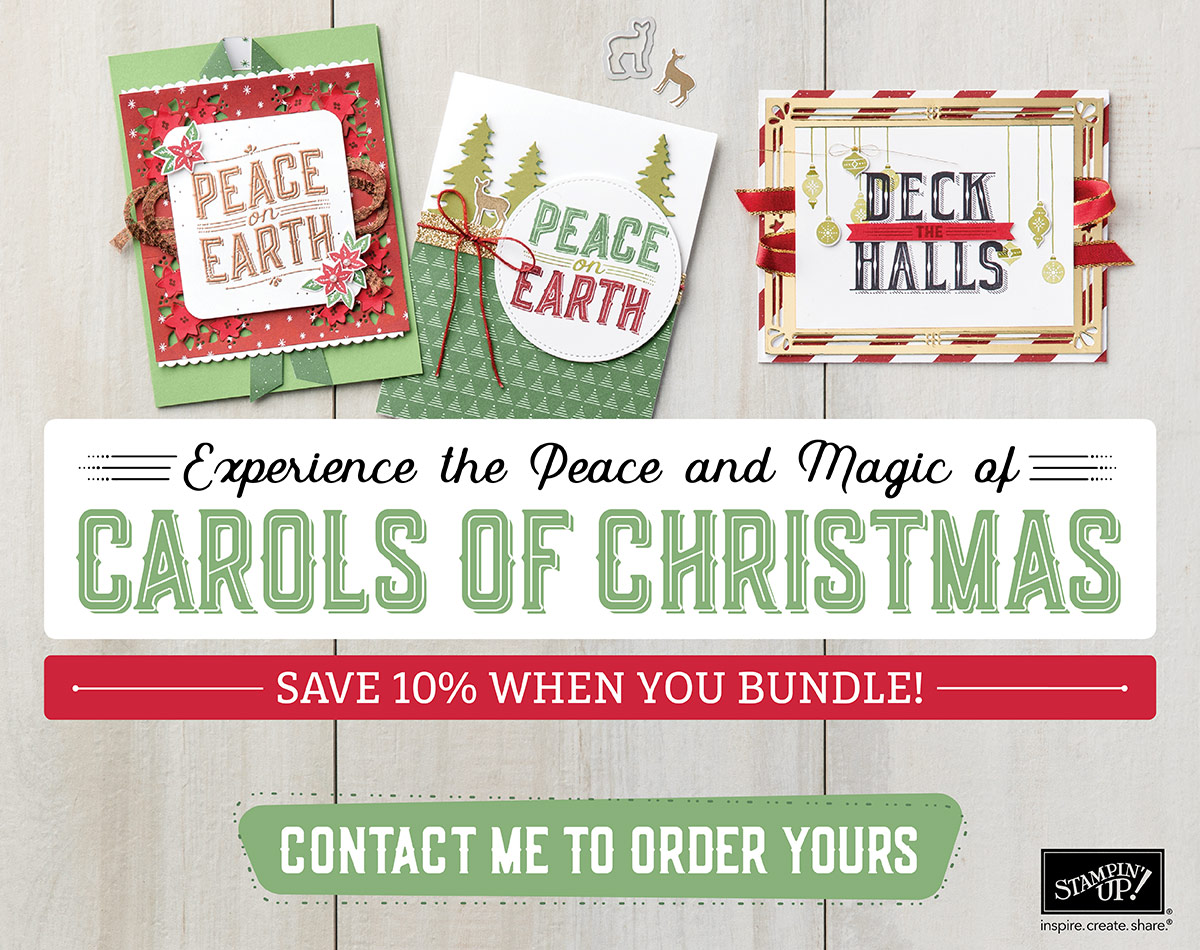
Carols of Christmas 2017

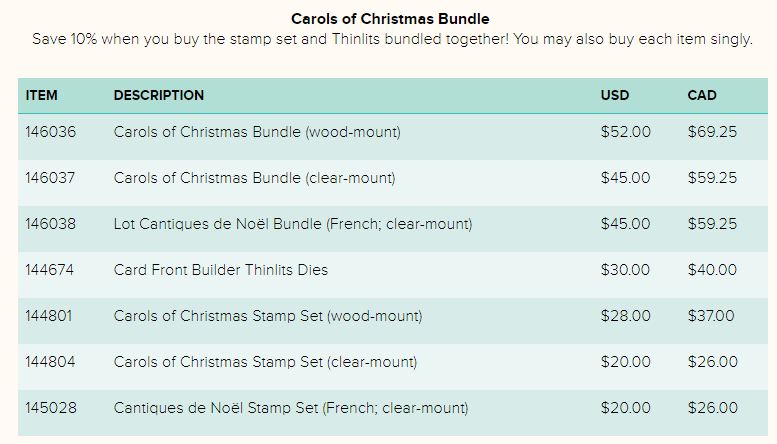
Stampin’ Up! will be releasing one of the top-trending bundles from the upcoming Holiday Catalog in August, the Carols of Christmas Bundle!  Save 10% on the Bundle and use your July Bonus Coupons to help pay for it!  You will be able to order this Bundle from August 1-31.

This bundle will be available in the 2017 Holiday Catalog. This is just an opportunity to get your hands on this bundle early.  You may order the bundle or the individual products.

Click here to read and download the Carols of Christmas flyer!

Carols of Christmas Product Listing

And if that all wasn’t enough……!

Christmas In July Recruiting Banner

This is quite the deal!! If you have ever thought of starting your own business, earning a little extra income for yourself or your family, try out Stampin’ Up! and become a Demonstrator! Run your business as small or as big as you like! I am here to help as well as Stampin’ Up!, of course!

When you sign up to be a Stampin’ Up! Demonstrator, you will purchase the Starter Kit for $99 and choose the contents of your kit yourself! Plus, Stampin’ Up! gives you business supplies to help get you started. All this valued at $125, but you pay only $99.

During Christmas in July, though, you will receive ALL these extras!!

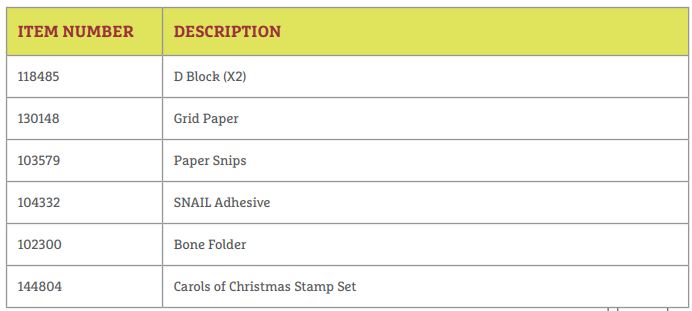
Christmas in July Recruiting Essentials

That’s a $72 value, and yes, the Carols of Christmas Stamp Set is included! Once you are a Demonstrator (in minutes after you sign up!) you can go ahead and preorder the rest of that Carols of Christmas collection during July if you like.

For more information about becoming a Stampin’ Up! Demonstrator, click HERE.

Let me know if you have any questions!

Remember, Stampin’ Up! Bonus Days have started! With every $50 you spend, you will be emailed with your $5 Bonus Coupon Codes to spend in August!

Click Here to Shop Stampin’ Up! Online 24/7!


Quick and Easy Thank You Card

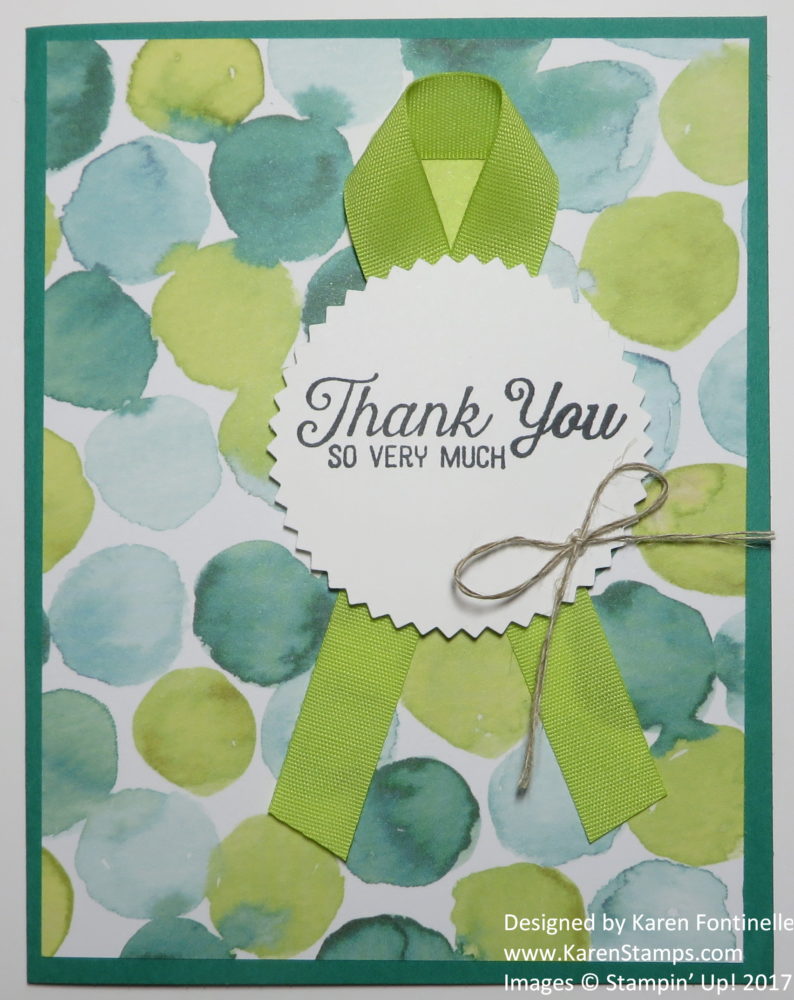
Quick and Easy Thank You Card

Need a quick and easy thank you card?  This one is certainly easy enough for anyone to make and has a little pizzazz besides! For some inspiration, I opened the new Stampin’ Up! Catalog, barely turned a few pages, and found a card of this design on page 129. It’s even labeled “Quick & Easy” on the catalog page!  I wanted to try out my new Starburst Punch so this card was perfect.

I started with a sheet of paper from the Naturally Eclectic Designer Series PaperI love the watercolor look of this pattern!  Probably something we could make ourselves as a background with reinkers and an Aqua Painter! I looked on the back of the package to see what colors coordinated and Emerald Envy was one.  Since I haven’t used this color very much, I thought this would be the perfect time so I made the card base with Emerald Envy Cardstock.

I stamped the greeting from the Flourishing Phrases Stamp Set and the punched with the new Starburst Punch. This is a beautiful and useful stamp set.  One of my favorites! It’s usually best to stamp first and then punch so you can see the placement of the words or image in the underside of the punch, but the Starburst Punch is pretty large so you can punch and then stamp if you prefer. Behind the punched out greeting, popped up with Stampin’ Dimensionals,  is a strip of ribbon folded over and criss-crossed for a decoration with the greeting. In this case I used the Lemon Lime Twist 1/2″ Finely Woven Ribbon.  And then for just a finishing touch, I tied a small bow with the Linen Thread.  The Linen Thread is a great product to have on hand, very useful in many ways.

I see the Starburst Punch being a great punch to have on hand. It is large enough to stamp many different greetings or add some embellishment on the stamped piece, Practically all you need is some designer paper on the card and this punch for the greeting! You will have a quick and easy thank you card in minutes!

Shop Stampin’ Up! For All the Supplies You Need!

For Summer Notecards and Gift Bags From Paper Pumpkin by Stampin’ Up!


What says summer more than a cute melon theme for some gift bags and notecards?! This is the June 2017 Paper Pumpkin Kit from Stampin’ Up!, all designed for you and ready to create in a cute box with everything you need for the project!  Going to a friend’s house for a swim party or barbecue?  Just stick a little treat in one of these gift bags or wrap up some of the notecards for a little hostess gift.

Paper Pumpkin is by subscription only, so get signed up now so you will be on the list for the July Kit to be shipped to you mid-July.  Once you are a subscriber, you can also look at any past kits or refills that Stampin’ Up! is offering if you want to pick up something you missed.

You can subscribe by the month or if you are ordering regular products from Stampin’ Up!, choose a prepaid option in the Online Store and perhaps boost your order total to earn Stampin’ Rewards! You will receive an email detailing how to set up your Paper Pumpkin account and a code to put in the Promo Code box so it will identify you as a prepaid customer.

JOIN PAPER PUMPKIN HERE TODAY!

or

BUY A PREPAID PAPER PUMPKIN SUBSCRIPTION HERE!

Either way, the fun will arrive in your mailbox around mid-month. No risk, no obligation. Skip a month now and then if you need to. Get an extra kit for a friend or loved one. The Paper Pumpkin fun never ends!


Make an Easy All-Occasion Card

Make an Easy All-Occasion Card

We can always use a stash of “all-occasion” cards, or maybe they should be called “any-occasion cards” and this easy to make all-occasion card fits the bill! And sometimes you just want to make a quick and easy card and not spend a lot of time designing something super-special. Last night that was the case with me, as my niece had just come for a visit for several days, so I just wanted to try out some of my new paper but not take a lot of time right then making a card.

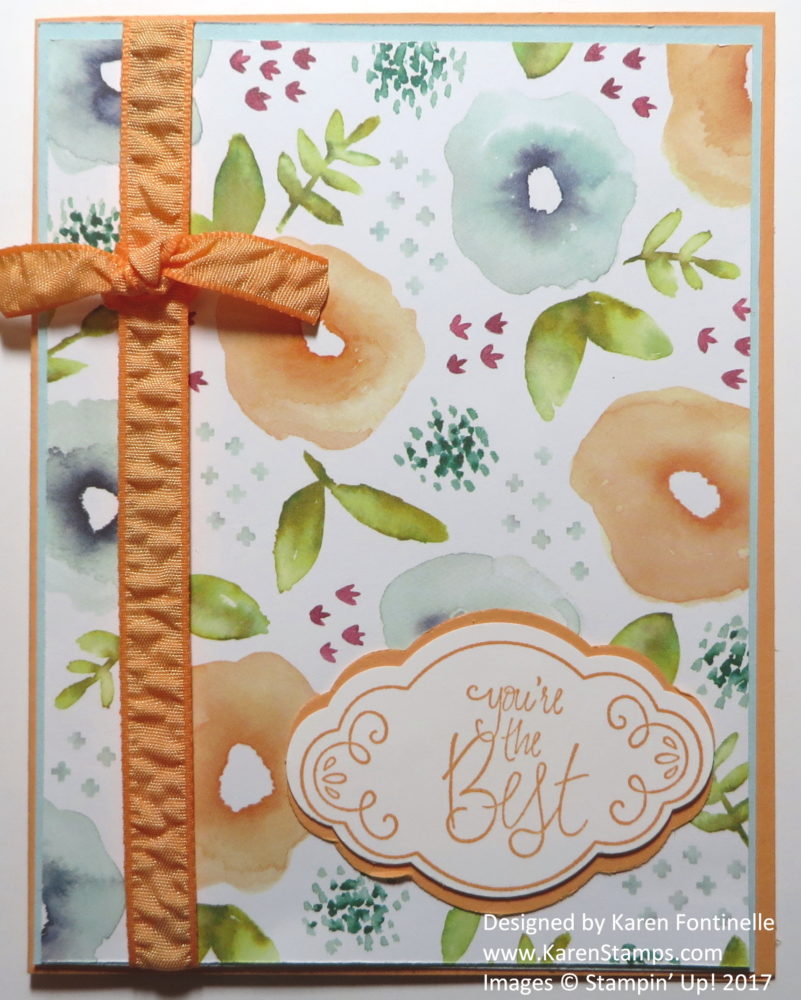
I decided to use the new Naturally Eclectic Designer Series Paper on this card. I chose a color for the card base from the list of coordinating colors with the paper on the back of the cardboard in the package (or you will find the colors in the catalog). I went with Peekaboo Peach, one of the continuing In Colors that we will have for another year. When I first laid this piece of designer paper on the top of the card, I loved it. Then I played around with other half and half combinations, etc. and nothing was striking me.  So I went back to the original paper and added a narrow margin of Soft Sky behind it. The Peekaboo Peach Ribbon is retired, but I had it so I used it!  You can substitute some other new ribbon.

For the greeting, I used the new stamp set Label Me Pretty and the coordinating punch, the Pretty Label Punch.  I stamped the greeting with Peekaboo Peach ink and then punched out. I thought I probably wanted to layer the greeting on something so I first thought I would cut off the margin of the punched greeting so I could layer that on the piece of cardstock punched with the Pretty Label Punch. But before I did that, I punched two pieces of Peekaboo Peach and layered them under the greeting and it seemed to be just fine!  What do you think? You can’t really tell it’s two separate punched pieces! There are other ways to make a punched layer look larger, like we used to do with the Decorative Label Punch but cutting two pieces in half, one horizontally and one vertically.  If you like the Label Me Pretty Stamp Set and the Pretty Label Punch (who wouldn’t?!), then buy them together in the Label Me Pretty Bundle, either clear-mount or wood-mount.

I think this is a very nice, simple stamp set and punch that you can use together or separately and get a lot of use out of. And of course the Naturally Eclectic Designer Series Paper is pretty on it’s own and help you be very creative!

Shop Stampin’ Up! For All Your Papercrafting Needs!

Make a Bold Bright Card For Any Occasion

Make a Bold Bright Card For Any Occasion

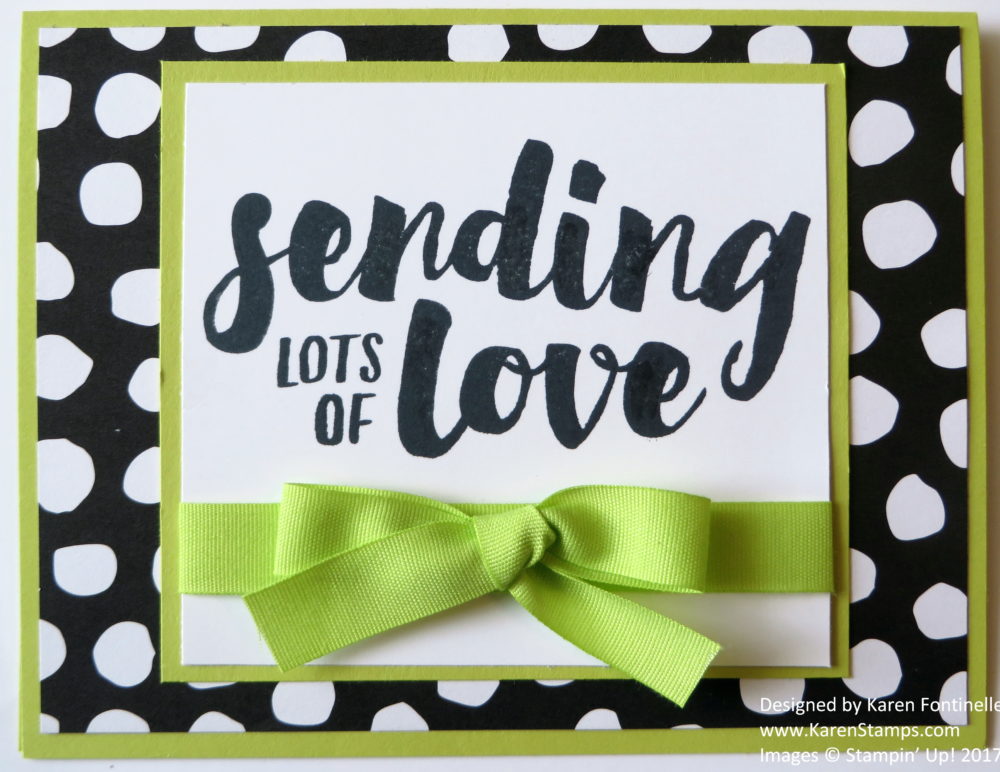
Make a bold bright card for any occasion with this beautiful designer paper, stamp set and trendy colors!  I just love this Whole Lot of Lovely Designer Series Paper in the new Stampin’ Up! Catalog.  I made a project the other day with the pattern on the other side of this black and white polka dot paper, so today I used this dramatic pattern. I decided to pair it with the Lemon Lime Twist new In Color for the card base and ribbon.  The bold greeting is from the Lots of Love Stamp Set.  I wasn’t quite sure how the size of the greeting would work on the card, but stamping it on a larger piece of paper gave me the idea to tie the ribbon around the bottom of the greeting.

You really never know exactly what you are going to come up with when you start stamping! You may think you have a specific idea, but then as you work, often some other idea pops into your head! These pretty designer papers this year in the new catalog as just scrumptious to work with! Be sure to check them out and however much you think you might like them, just multiply that by 200% by how you will like them in person!

I think this Lemon Lime Twist color (am I finally learning the proper name of it??) was one that maybe a lot of people didn’t like at first, but I think it is going to turn out to be a favorite.  I also love the Powder Pink.  And the Berry Burst isn’t bad either!

The ribbon I used on the card is the Lemon Lime Twist 1/2″ Finely Woven Ribbon.  I think you will like it.  It’s very soft and easy to tie.  I think it makes beautiful bows.  You can get it in any of the In Colors. So many pretty Stampin’ Up! ribbons this year too!

Go check out Lemon Lime Twist and see if that color appeals to you or grows on you!  You can get an assortment package of the In Color paper, that way, you can try them all and pick your favorites. Then go make a bold bright card for yourself!

Shop Stampin’ Up! Online 24/7!


How To Make an Easy Watercolored Birthday Card

How to Make an Easy Watercolored Birthday Card

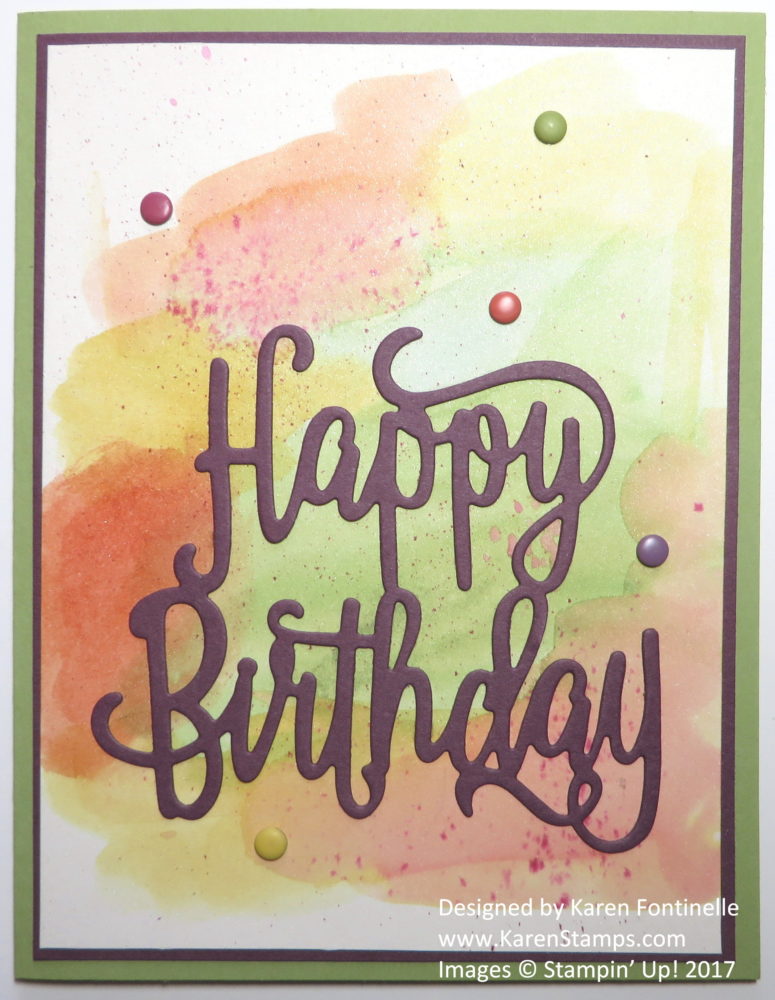
Online I saw several examples of a watercolored background and then the Happy Birthday Thinlits Die adhered over the watercoloring, and I really liked that look. It just takes some random watercoloring to make this so easy watercolored birthday card.  Just imagine all the different backgrounds you could make like this in so many colors!

The card base is Pear Pizzazz, layered with Fresh Fig, one of the new In Colors. The Happy Birthday Thinlits Die is also made with Fresh Fig. You have two choices for the top layer of the card. Whisper White is not very good for watercoloring although you can do a very minimal amount. A better choice is the Shimmery White Cardstock (I love that paper because it has the most subtle shimmer under the light!). This is what I used on this card. The best choice for watercoloring is, amazingly, Watercolor Paper!

To make the watercolored background, I just picked up various colors of ink in the lids of the ink pads with my Aqua Painter, one of my favorite tools, and randomly watercolored some blobs of color on the Shimmery White.  If you squeeze the ink pad top to bottom before you open it, you likely will cause a puddle of ink to appear in the lid of the ink pad.  If you do not, then put a tiny drop or two of reinker in that lid. You can also just touch the Aqua Painter to the actual ink pad to pick up ink but try to just do this on the corners of the ink pad so as not to get a lot of water in the ink pad. Also, if the puddle you make in the lid is real watery when you are finished, just take a paper towel and wipe it out before closing the ink pad so as not to get water in the ink pad. Depending on dry your ink pad seems to be, you might consider reinking it while you have it out!

The greeting on the card is just the Happy Birthday Thinlit Die so that serves as both an embellishment on the card and the greeting!  I love this die! Here is another card I made recently with the Happy Birthday die.  

I don’t own them yet, but I think Stampin’ Up! carried them in the past, the new Multipurpose Adhesive SheetsYou can adhere a piece of the adhesive sheet to the paper you are die-cutting, then the die cut will automatically have adhesive on the back.  No putting tiny dots of glue on the back of a finely die-cut image. So that is a product to consider if you are having trouble with adhering these intricate die cuts.

For some extra embellishment, I used a few of the retired Candy Dots scattered around, but now we have new versions you can purchase in the new catalog on pages 196-197.

I highly recommend the Happy Birthday Thinlit Die because it is bold enough to adhere over a lot of different backgrounds yet very delicate and pretty. Try the watercoloring technique for a background for your card as a different way of making an easy watercolored birthday card.

Shop Stampin’ Up! for all your cardmaking supplies!


View the Whole Lot of Lovely Designer Series Paper

Whole Lot of Lovely Designer Series Paper

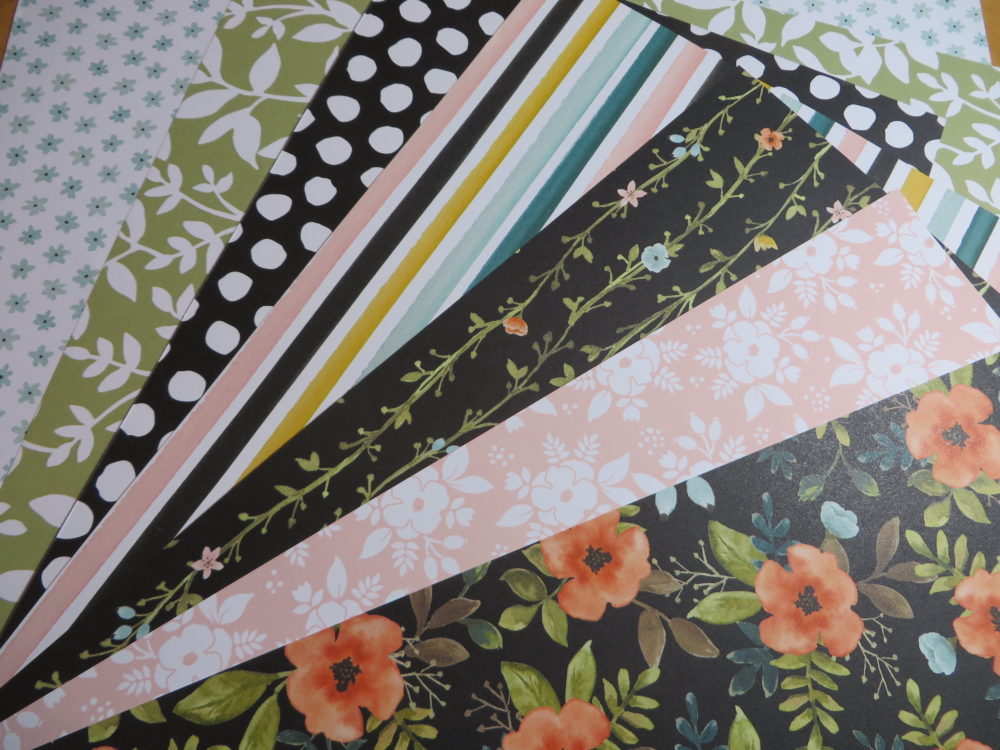
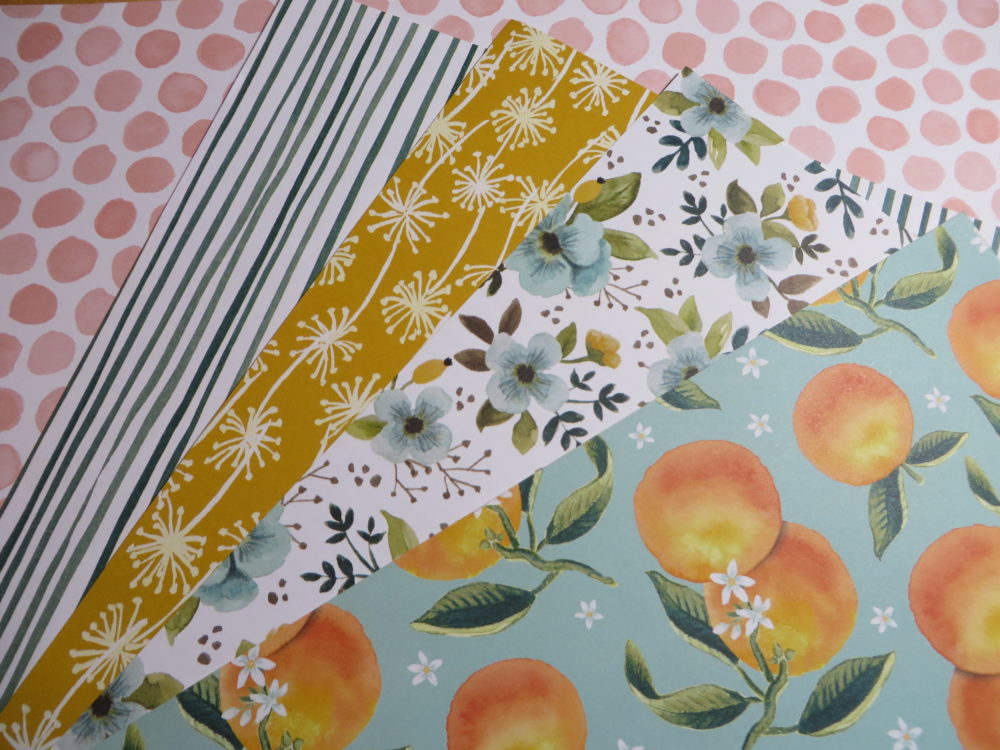
One of my favorite new designer papers from Stampin’ Up! in the new catalog is called Whole Lot of Lovely. Now I say one of my favorites but, so far, I think every pack of paper I have ordered is my favorite!  I think Stampin’ Up! did a bang up job this year on the designer paper. And you know that in person, every paper looks even a million times better than just the picture in the catalog.

Here is the rest of the paper.  I guess I didn’t count evenly!  There are 12 sheets of paper in the package, double-sided.

Whole Lot of Lovely Designer Series Paper

There’s no way any photo can really show how pretty this paper is.  I see lots of potential projects with each different pattern.

If you look in the catalog or on the back of every package, you will see the colors listed that coordinate with these designer paper.  I find it most handy to look on the back of the package for the coordinating colors, but since they are written in pretty small print, I usually just take a Sharpie marker and write out the colors, larger, on that white chipboard that backs the package.  That way I can see at a glance what colors I might us rather than having to grab my reading glasses!

These are the coordinating colors:  Basic Black, Crushed Curry, Pear Pizzazz, Pool Party, Powder Pink, Soft Suede, Tangerine Tango, Tranquil Tide, Whisper White.

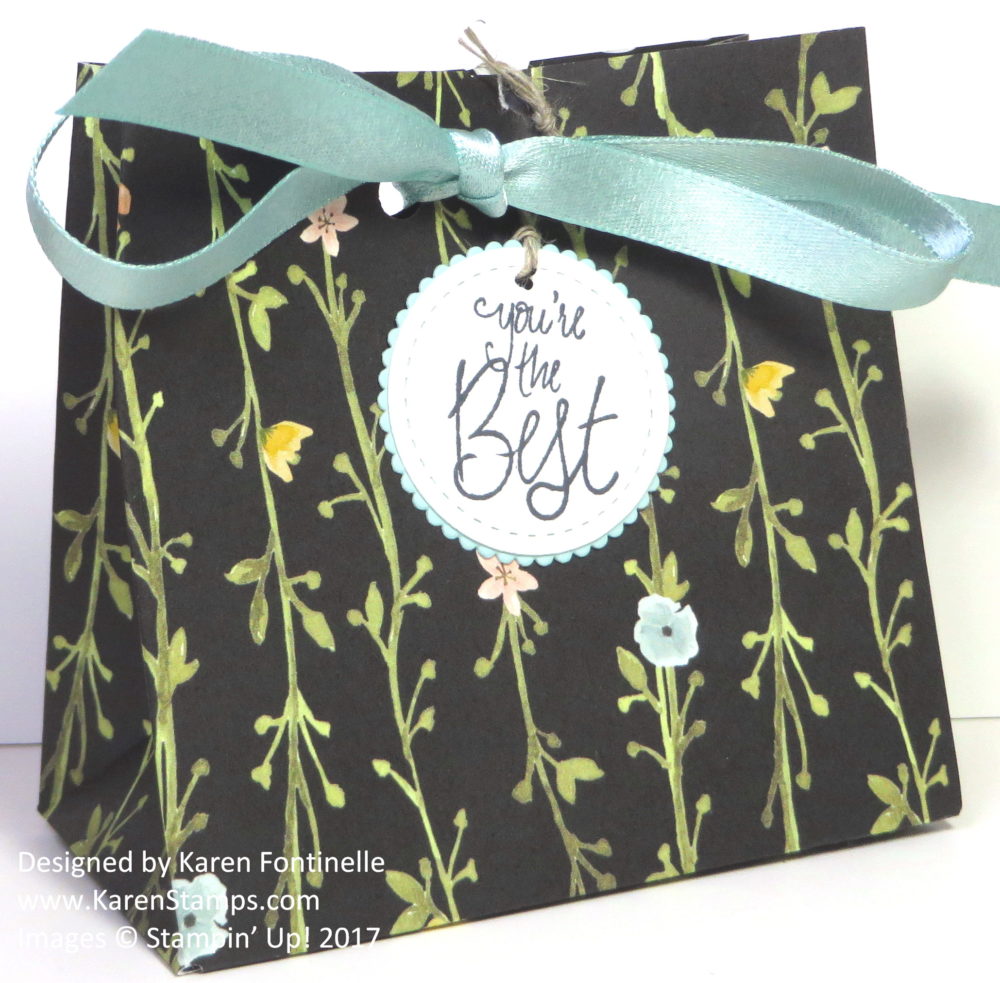
If you missed the easy little gift bag I made yesterday using the Whole Lot of Lovely Designer Series Paper and the Gift Bag Punch Boardclick HERE to see my post or click on the photo below.

Make Your Own Gift Bag With the Gift Bag Punch Board

Check out all the beautiful designer series papers in the new Stampin’ Up! Catalog!


Easy Tulip Card With Tranquil Tulips

Easy Tulip Card With Tranquil Tulips

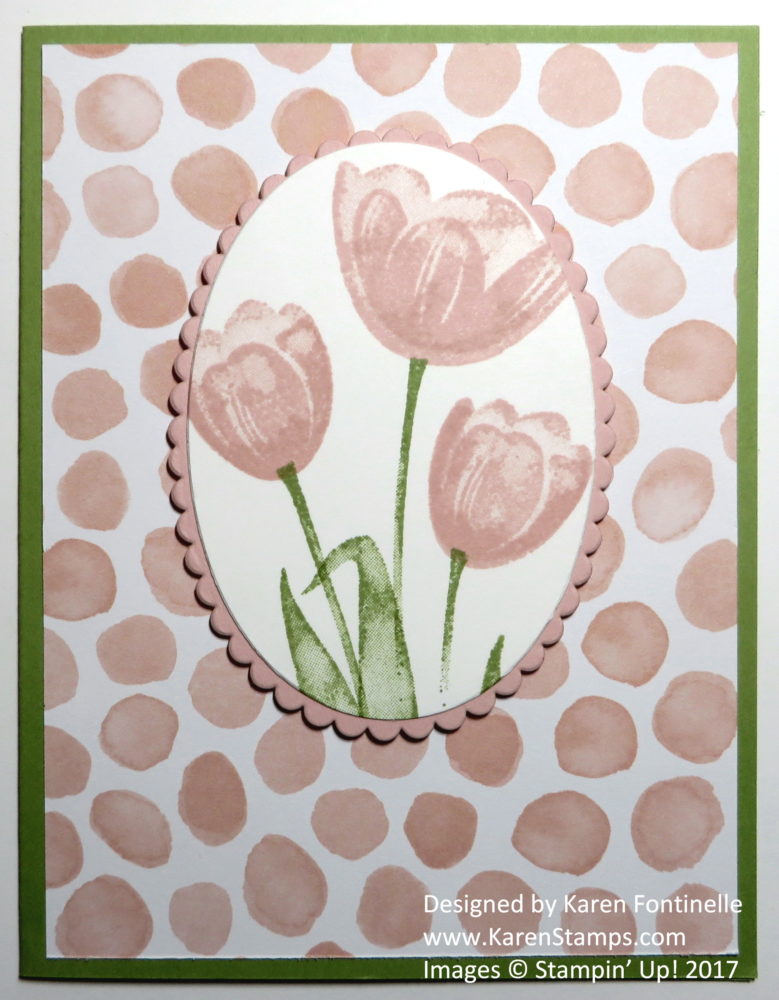
My Stampin’ Up! order of new products came late last night (yes, we live close to the UPS place so I think they save our neighborhood until last and then go back to UPS when they are done! Ugh!) so now I have all kinds of good things to play with, like the Tranquil Tulips Stamp Set to make this easy tulip card. Normally I don’t get the Host Sets that you can purchase at a discounted price with your Stampin’ Rewards with an order of $150 or more, but I’d already seem so many pretty cards with these tulip stamps!

I used a card base of Pear Pizzazz to match the color on the stems and leaves that I stamped. The designer paper is one I just got last night in the Whole Lot of Lovely Designer Series Paper package. Oh my goodness, the patterns in that package are so gorgeous!  I think they hit the jackpot this year with designer paper!  Really pretty!  And you can bet that the paper you look at in the catalog or online is going to be 200% prettier in person when you get it!

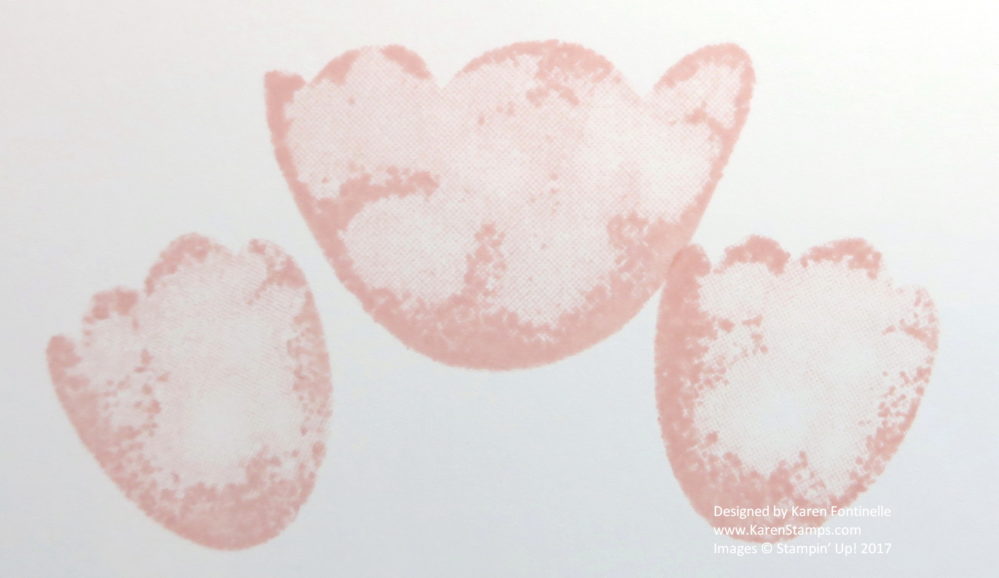
I stamped the tulips in Powder Pink and the stems and leaves in Pear Pizzazz. Now the tulips are “two-step stamping” which means you stamp one layer and then you stamp over that same image with another stamp that adds more depth and detail. You could even use two different colors. Just so you are aware, the first stamp stamps like this in my photo.  It looks like something is wrong with the stamp but there isn’t. It’s that textured, watercolored kind of look. Then when you stamp over it with the second stamp, you see the details of the tulip.

Tulips Stamping

After I had my tulips and stems stamped, I die cut them with the next to largest oval in the Layering Ovals Framelits Dies and then die cut another Powder Pink oval with the scalloped oval in the same package. After adhering those two pieces together I adhered them to the card front with the designer paper using Stampin’ Dimensionals. (Do you know there are Mini Stampin’ Dimensionals in the new catalog??)

That’s it!  Easy card and so pretty!  I didn’t add a greeting yet, I’ll see what I need and then put one on.

If you put in a large order of $150 or more or gather some friends’ orders in order to reach that amount, you might consider choosing the Tranquil Tulip Stamp Set in the Host section of the catalog. It’s an easy tulip card to make for the summer and next spring and can be used for so many different kinds of cards.

SHOP STAMPIN’ UP! TODAY!

Quick and Easy Happy Birthday Card to Make

Quick and Easy Happy Birthday Card to Make

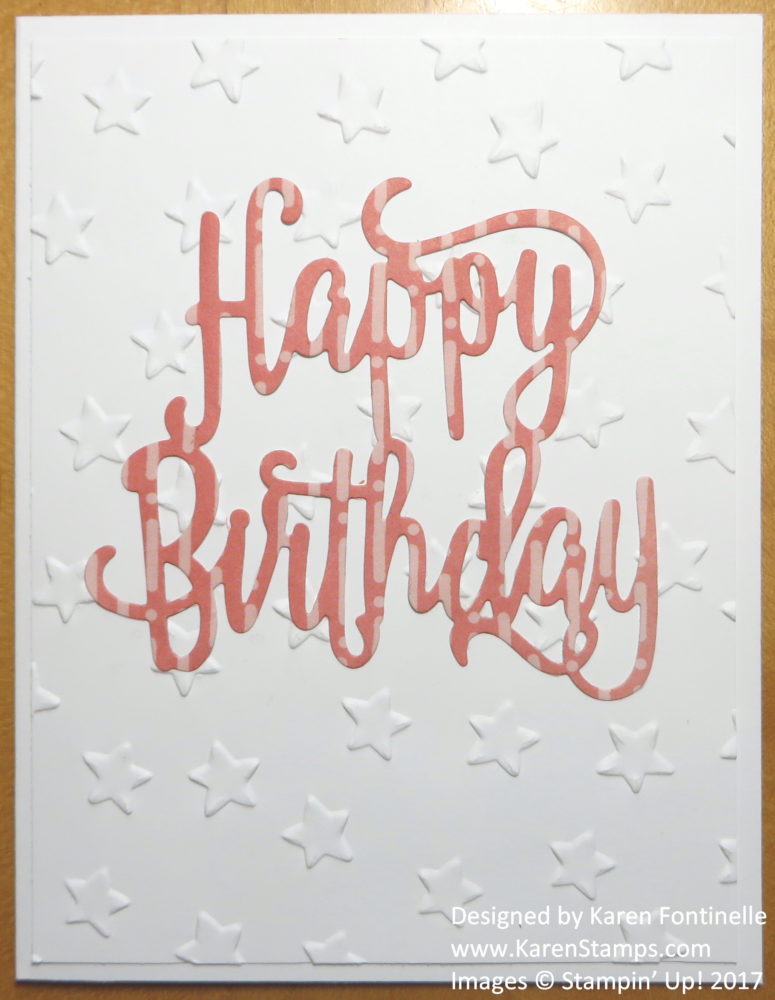
If you need a quick and easy happy birthday card to make, this is it!  You do need a Big Shot Die-Cutting Machine.  If you don’t own one, I’d highly recommend treating yourself to one. I’ve had mine since Stampin’ Up! started carrying them and use it practically everyday. It can do so much work and all you have to do is crank the handle!

For this card, I just used a Whisper White Cardstock base and a Whisper White layer. I think it gives a nice, elegant look!  I embossed the white layer with the Oh My Stars Embossing Folder, a new folder in the new Stampin’ Up! Catalog. The “Happy Birthday” is die cut with the Happy Birthday Thinlits Die.  It’s so simple to just have one die cut on the card but has such a fun impact!  I used a piece of the Delightful Daisy Designer Series Paper. You could also just used a piece of cardstock.

Now if you don’t own a Big Shot, the next best thing would be the Stylized Birthday StampIt’s  a single wood-mount stamp and quite cute for stamping a birthday greeting.

There are so many quick and easy way to make a birthday card, whether you own a Big Shot and accessories or just stamps, ink, and paper. Make those cards and mail them out! Real mail, real birthday cards, real cards to say I’m thinking of you can make a bigger impact on a person than you might imagine!

Shop Stampin’ Up! for the best selection of birthday stamps and accessories!

Father’s Day Card Oval Window Using Lovely As a Tree

Father's Day Card Oval Window Lovely As a Tree

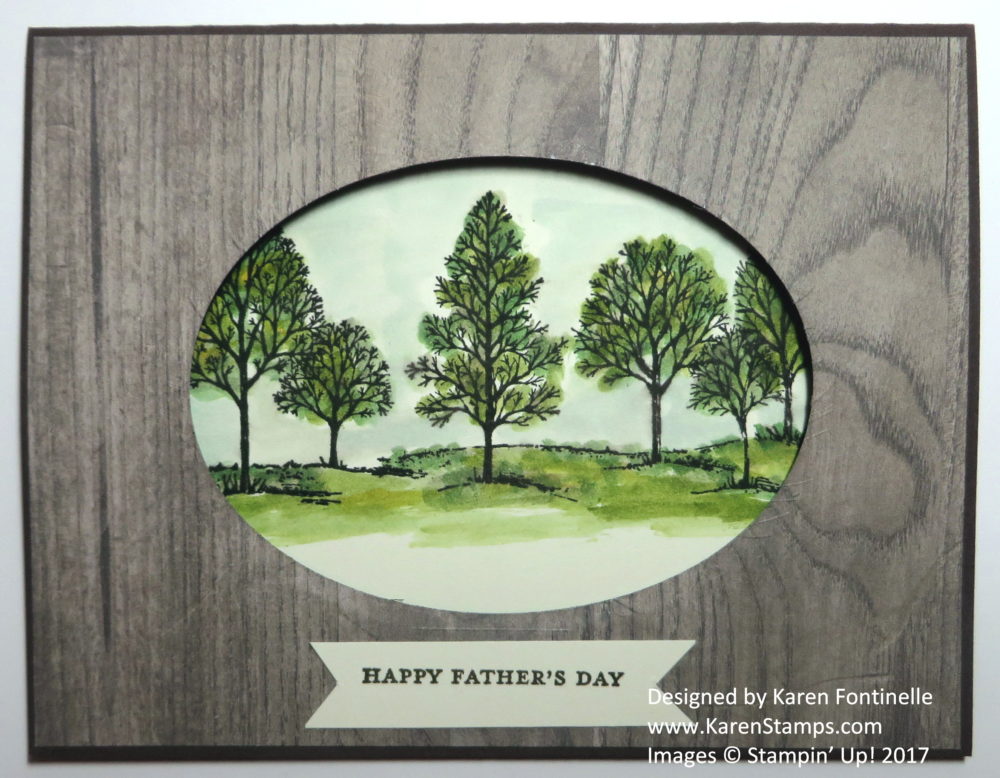
Here’s my idea for a Father’s Day card using stamps that you may already have, a Father’s Day Card with an oval window using Lovely As a Tree.  Since Lovely As a Tree has been around “forever” in Stampin’ Up! and I hope it never retires, I thought it could be one stamp set lots of you have and could use to make a Father’s Day card since Father’s Day is sneaking up so fast! Father’s Day is next Sunday, June 18th! I thought we just started June!

On this card, one new product I used was the Wood Textures Designer Series Paper Stack. It is layered on the front on top of Chocolate Chip Cardstock.  If you don’t have this paper, you can leave it plain or use an embossing folder or whatever you like.

Before I die cut the oval with the largest oval in the Layering Ovals Framelits DiesI stamped the inside and watercolored the trees with my Aqua Painter and ink inside the lids of my ink pads (several greens and a touch of yellow).  I adhered this piece inside my card, then die cut an oval out of scrap paper, laid it over the trees on the inside, put a small piece of Snail Adhesive on the top of the scrap and closed the card so that the scrap oval would be attached to the inside front of the card.  In this way, I could place the oval die exactly where I wanted the window to be on the front of the card to showcase the trees on the inside of the card, and then I die cut that oval.

The greeting is from one of my favorite sets, Teeny Tiny Wishes. It’s just stamped on a scrap strip of Very Vanilla and I cut the little banner ends with my Paper Snips.

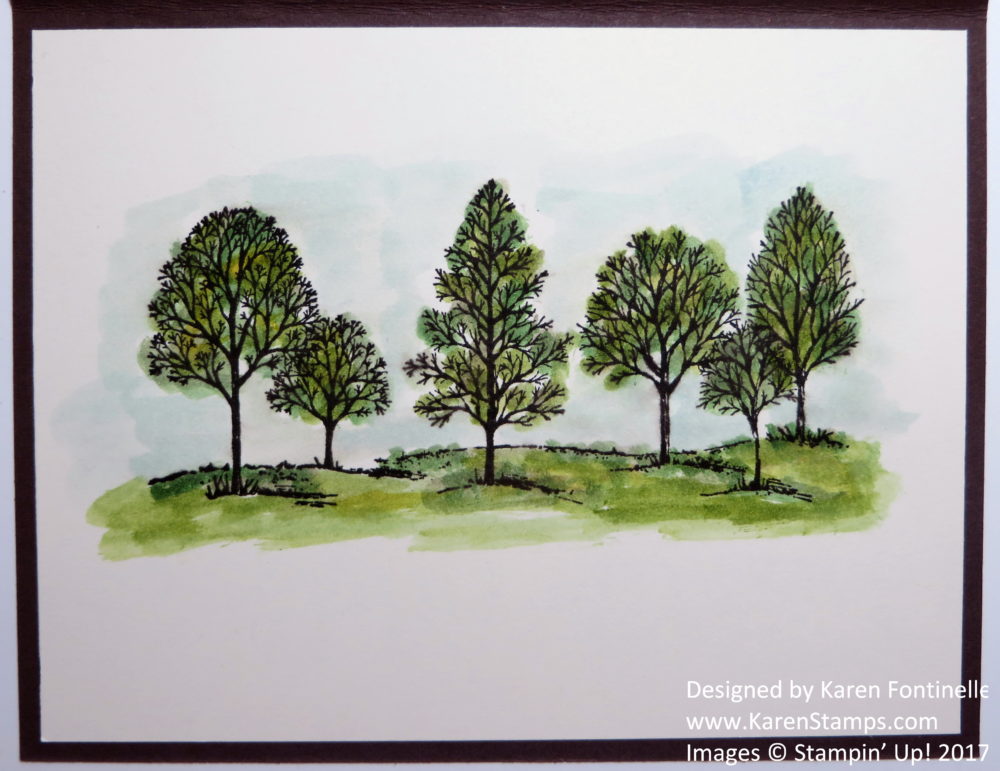
Here is the inside of the card.  Don’t worry about perfect watercoloring and don’t fuss too much or the paper will pill or the brown ink on the trees might smear.  Just apply some color as if you were an artist!  Just blob some down here and there, not totally solid, not too much.  And I used some Soft Sky for a bit of sky color.

Father's Day Card Inside With Lovely As a Tree

Now as I was uploading my photos for this blog post, I realized I had already made a very similar card!  Check it out in THIS BLOG POST!  They say “Great minds think alike.”  Maybe the same mind thinks alike!  The cards are basically the same but have some differences, so choose whichever one you like!

Don’t delay in making a Father’s Day card for the father (or husband) or special man in your life! Lovely As a Tree has always been a classic stamp set to use for masculine cards or really any kind of card!  If you don’t already own it, you might want to add it to your order of brand new products!

SHOP STAMPIN’ UP! ONLINE!

Using Scraps to Make a Card with the Eastern Palace Suite

Using Scraps to Make a Card with the Eastern Palace Suite

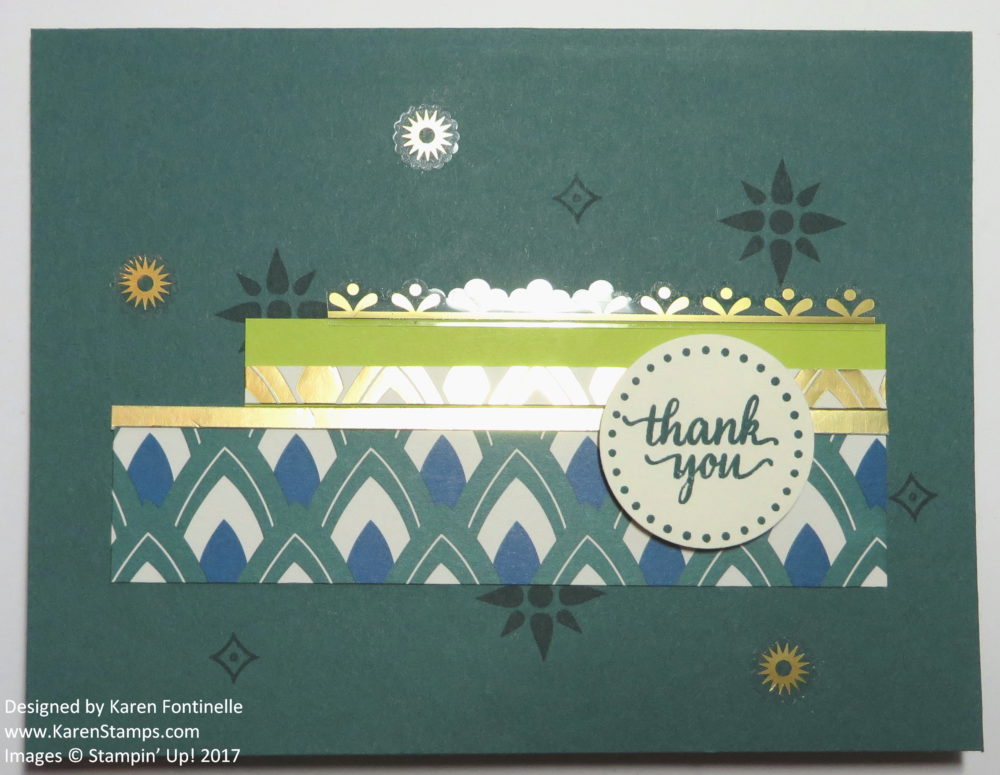
In looking for inspiration for making a card, I wanted to use the Eastern Palace Specialty Designer Series Paperso I looked in the new catalog and decided to “copy” one of the samples displayed. As it turned out, making this card shows a way of using scraps to make a card with the Eastern Palace Suite.  I made my card slightly different than the catalog sample, but this shows that the catalog is a great place to look for ideas. What you end up with might be entirely different than what you started copying.  I might add this card was difficult to photograph because of the glare of the gold foil on several different pieces.

The card base is one of the new In Colors, Tranquil Tide. I randomly stamped a few of the small images in the Eastern Beauty Photopolymer Stamp Set on. the card with Tranquil Tide ink. Then I began placing some of my Eastern Palace Paper onto the card, somewhat like the sample I was copying from the catalog.  One of the pieces of scrap paper has the gold foil design, plus I added a thin Gold Foil Sheet strip on the top edge of another Eastern Palace piece. Since I had a scrap of Lemon Lime Twist CardstockI used that piece on the card whereas the Stampin’ Up! sample used a piece of designer paper in the pack. The greeting is stamped with images from the Eastern Beauty Stamp Set.

Different from the Stampin’ Up! catalog sample, I found the urge to use the fun Eastern Gold Vinyl Stickers too strong to resist! The sample card used a piece of the new Gold Mini Sequin Trimbut since I don’t have that yet, I felt the card needed a little more pizzazz, which I had already tried to add with the gold foil pieces of paper. Since we have the gold stickers, I looked in there and chose some to use on the card. The stickers are high quality, easy to use, and fun to use!

This card was made with one half sheet of cardstock plus scraps I found mixed in with my designer paper pack, so don’t under estimate what you can do with small pieces of your precious designer paper, since I know we are all paper hoarders! Use your scraps, even as small pieces, to decorate a card or project. We can all get a lot of mileage out of our large sheets of designer paper.

Be sure to use the Stampin’ Up! catalog as a source for ideas for your projects.  It’s a gold mine!

Shop Stampin’ Up! Online HERE!

Find Out About the New Memory-Keeping System From Stampin’ Up!

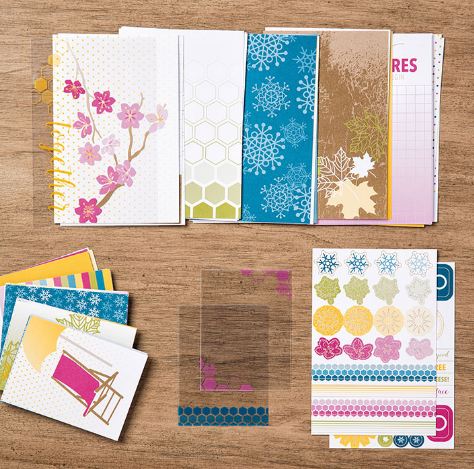
Get acquainted with the new memory-keeping system by Stampin’ Up! Doesn’t that video just make you want to get your photos together and start designing your album? However, this system isn’t just for memory-keeping, as evidenced by the name, Memories & More! This system is comprised of Card Packs that you can buy to keep handy to use on regular greeting cards, to write quick notes on, or to slip in a Pocket Page along with photos and journaling for memory-keeping. These Card Packs come with extra accessories as well, plus coordinate with other Stampin’ Up! products, so you will have plenty of supplies available to you!

Besides the Card Packs, there are also Albums, two in a 6″ x 8″ size and one in a 12″ x 12″ size. There are Variety Packs of the Photo Pocket pages plus one kind that holds a full 12″ x 12″ sheet of paper or enlarged photo.

Watch Bonnie from the Stampin’ Up! Home Office share about the Memories & More products and system.

I think these Card Packs are so fun to have on hand! If you still have little children in school (or even BIG ones!) you can use these cards to hide in their lunch box or backpack for just a sweet or encouraging note from you! Keep them within reach if you want to dash off a short note to a friend. Once you get started you probably will think of other uses as well!

Just having these Card Packs, pocket pages and albums on hand will get your creative juices flowing. Keep it as simple as you want!  Simply slide photos and cards into the pockets and maybe add a bit of journaling on one card (believe me, future generations who see your albums will appreciate this!). Now if you WANT to, get really creative and have fun adding extra embellishments to some of the cards or photos, jazz it up however you like.  But at least start with the simple version so you can make some progress.  Then you have that done, at least, and can go back later to embellish more if you like.

If you received my Stamping With Karen Newsletter yesterday, you saw a traditional-looking scrapbook page I made with several of the cards in the Color Theory Card Pack, plus I added some stamping from the Colorful Seasons Stamp Set. (And if you aren’t on my mailing list, sign up today in the red box on the top right of my blog page so you won’t miss these new projects!)

Color Theory Card Pack

Images (c) Stampin’ Up! 2017

You’ll find Memories & More products in the new Stampin’ Up! Catalog on pages 190-193.

Check out the Memories & More Page in the Stampin’ Up! Online Store HERE!