

If you would like a Paper Pumpkin Sneak Peek for February, read below!!
Every Paper Pumpkin kit is specially designed at Stampin’ Up! by our designers and concept artists. These talented individuals develop original patterns, artwork, designs, photography, and more to create kits that you love.
This video gives you an inside look at this creative process through the eyes of the designer and concept artist themselves; plus, it gives you a taste of the themes, colors, and elements you can expect to see when kits arrive in February. The video won’t spoil any surprise, really.
If you want to be surprised in February, don’t read any further!
*
*
The February 2019 Paper Pumpkin Kit will be:
- An all-card kit
- Makes 9 full-sized cards in 3 unique designs (3 of each design)
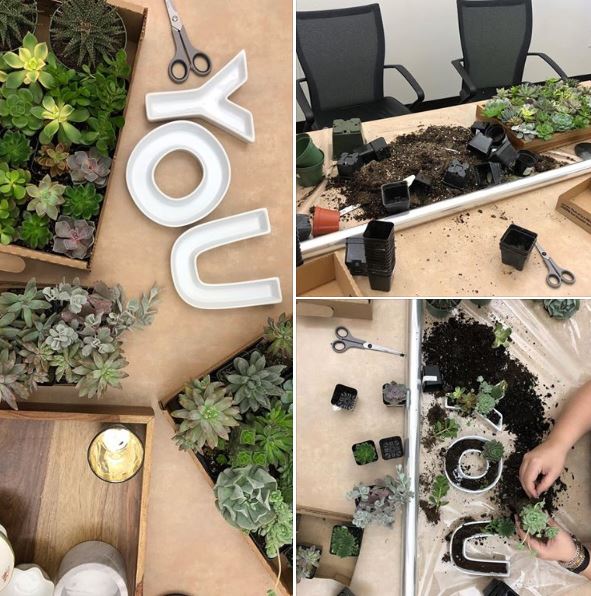
Here are some photos on the Paper Pumpkin Facebook Page of the design process! Who would think to design cards you would be working with dirt and succulents?!
Here’s how to get YOUR Paper Pumpkin Kit mid-February when they ship out:
SUBSCRIBE HERE ON THE PAPER PUMPKIN PAGE AND CHOOSE MY NAME AS YOUR DEMONSTRATOR: KAREN FONTINELLE
OR
SUBSCRIBE HERE AT MY PERSONAL LINK AND YOU DON’T HAVE TO CHOOSE A NAME!
JOIN Paper Pumpkin by February 10th in order to get the February Kit! But better to do it early just in case they would sell out! You will not be charged until the kit ships in February.
Each kit contains all the supplies you need for the project right there in the box! With your first kit, if you are a new subscriber, you will receive a special acrylic block on which to mount the stamps, so you will have everything you need even if you are not a big stamper or crafter. The kit comes to you in the mail once a month, but you can skip a month any time or cancel if you must. Each kit is guaranteed by Stampin’ Up!
Let me know if you have any questions! If not, go ahead and JOIN Paper Pumpkin NOW!!


