Tag Archives: Tea Boutique Suite

Tea Boutique Sending Smiles Card

ea-Boutique-Sending-Smiles-Card

It’s so funny that the Tea Boutique Suite of products did not appeal to me when the newest Stampin’ Up! Annual Catalog came out. Once I saw some samples made with the stamp set and designer paper, I couldn’t resist! I love a lot of the patterns in the Tea Boutique 6″ x 6″ Designer Series Paper and they go with all the new In Colors so it is a lot of fun to make cards with this Suite. I actually forgot this designer series paper was the 6″ x 6″ size! I kept looking and looking through my 12″ x 12″ designer paper trying to find it until I remembered it was in a different spot with the other 6″ x 6″ paper!

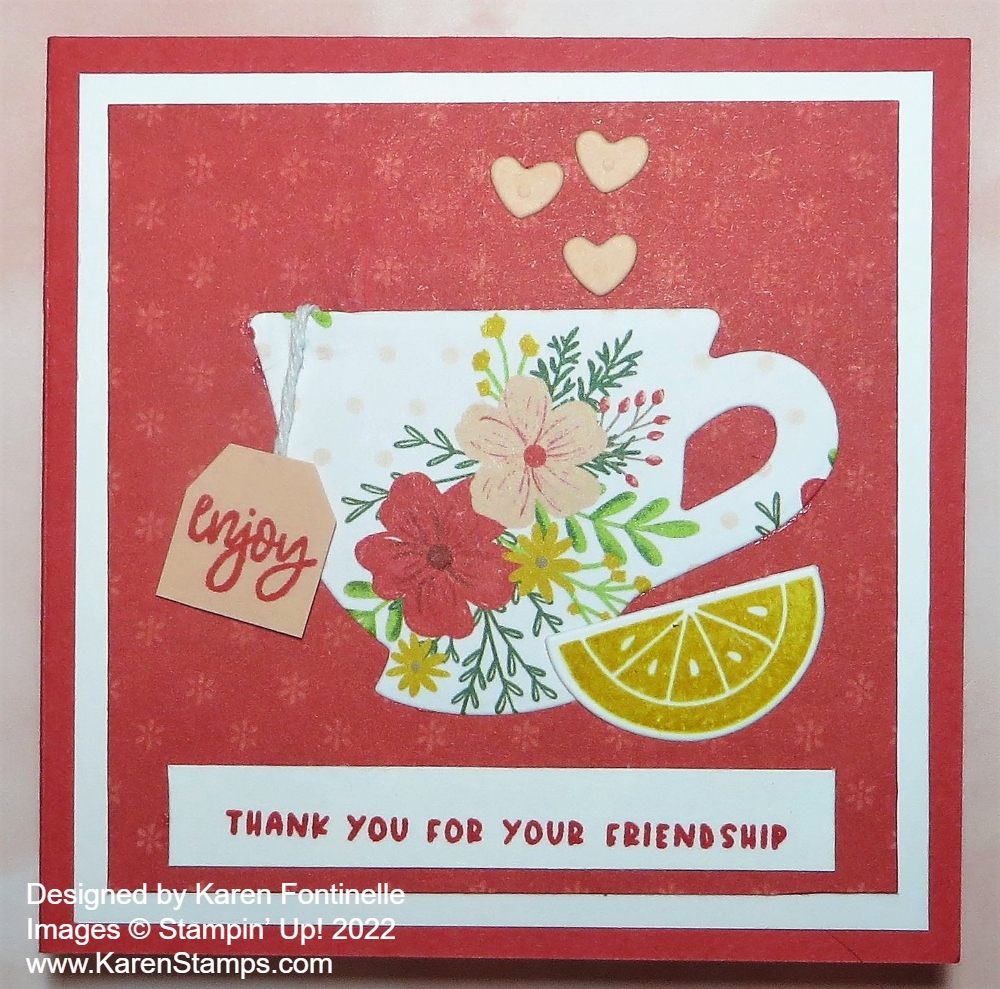
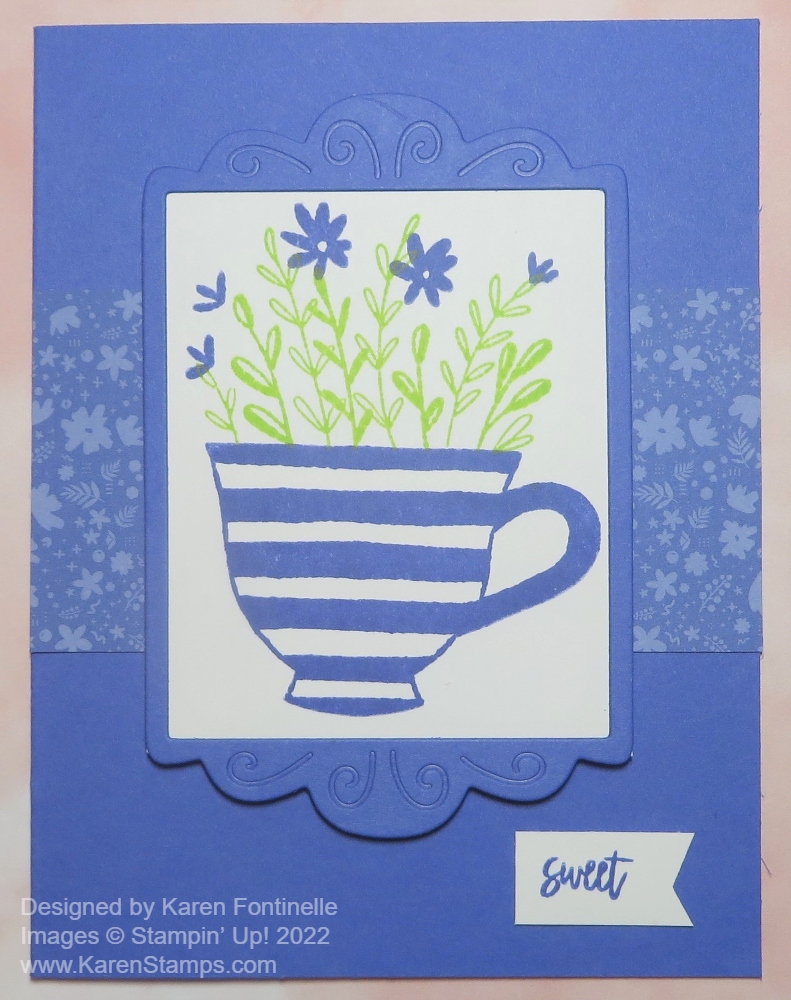
This is really a simple card. The card base is Sweet Sorbet, but I could have used any other new In Colors. I cut a 3″ x 3″ piece of the Tea Boutique DSP and layered it on another piece of the designer paper. This pattern worked out well because of the four teapots that display so well. It fits perfectly on this card.

For the greeting, I used the Sending Dies to cut out the word “Sending” from Crushed Curry Cardstock. Then I stamped one of the many sentiments in the Sending Smiles Stamp Set in Sweet Sorbet ink on a thin strip of Basic White Cardstock. I could have planned a little better to not cover up part of the sentiment with the tail of the die-cut word! Or I could have chosen a different, shorter sentiment.

And when will I ever remember to use Adhesive Sheets before die-cutting something very thin and delicate like the word “Sending”! These are sheets that you adhere the piece of cardstock to that you are going to cut out. Then, after you cut out the cardstock, you simply peel off the backing and you don’t have to apply any bit of glue or adhesive. It’s as if you made your own sticker with the Adhesive Sheets. Put them on your next order and then try them out! But if you forget to use them, use teeny tiny dots of Multipurpose Liquid Glue on the back of tiny, thin pieces and that will work if you are careful and have a steady hand!

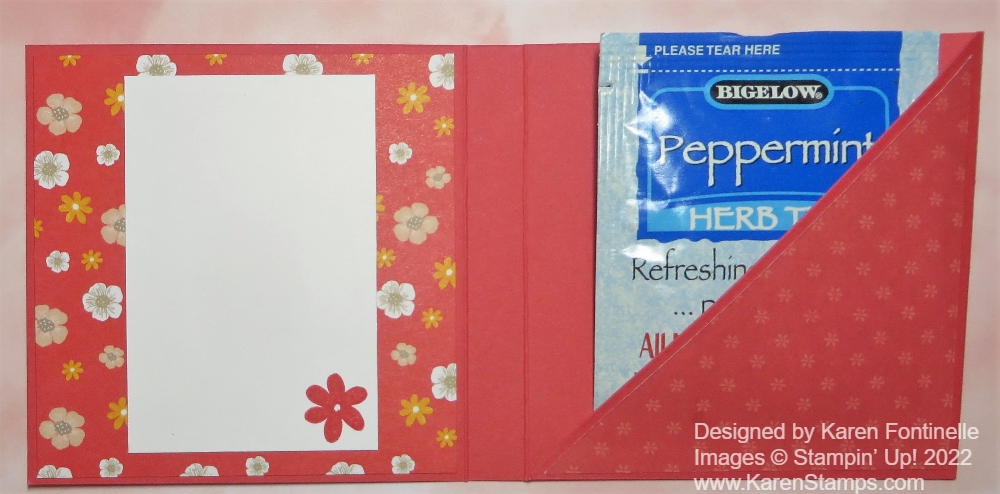
On the inside of the card, I added a layer of Basic White cardstock for additional stamping or a written personal message. On one of my scraps of the same designer paper, I cut out one of the teapots and adhered that in the lower right corner on the Basic White cardstock for an extra little touch inside the card.

The Tea Boutique Suite contains the Cup of Tea Stamp Set and the Teacup Dies, which you can buy together in the Cup of Tea Bundle and save 10% if you do not want the entire Suite. Also in the Suite is the Tea Boutique 6″ x 6″ Designer Series Paper which I have told you has lots of really cute patterns in it, especially if you are a tea lover! Even the generic designs that don’t have tea cups or teapots are cute and very usable. You might miss the Tea Boutique Cards & Envelopes in the Suite which are super cute and give you a head start with a card base that you can decorate with stamps, dies, and paper. The envelopes are also printed with flowers and In Colors. You will enjoy decorating these cards and then sending them off in the printed colorful envelopes!

If you are a tea lover, a teacup collector, or a teapot collector like my sister-in-law (and me to a certain extent!) you will enjoy any and all parts of this Tea Boutique Suite!

SHOP STAMPIN’ UP! ONLINE! Earn FREE Sale-A-Bration Products!

Cup of Tea Teabag Holder

This Cup of Tea Teabag Holder is really an old project I have made many times through the years, but the Tea Boutique Suite Collection is perfect for it! As you will see, this little card opens up to be more than a card! It is a card but holds a teabag inside in a side pocket.

When you open the card, there is a decorated panel on the left on which you can write a message and on the right is space for a teabag or if you wanted, a piece of chocolate or another treat!

It’s really very easy to make one of these holders. Start with a piece of cardstock 11″ x 3 1/2″. I used one of the new In Colors, Sweet Sorbet. Score this strip of cardstock at 3 1/2″, 7″, and 7 1/2″. Crease all the folds. On the third section on the right, cut that piece on a diagonal as you see in the photo below. When you fold that diagonal over, that will make the pocket to hold the teabag.

Tea Bag Holder scoring

Now all you have to do is decorate the teabag holder however you like for the occasion.

For the cover of the teabag holder, I added a layer of Basic White, cut at 3 1/4″ x 3 1/4″ with a layer of the Tea Boutique 6″ x 6″ Designer Series Paper, cut at 3″ x 3″. The white helps the designer paper and the teacup stand out better.

The teacup is diecut from a floral pattern of the Tea Boutique Paper with the Teacup Dies. It reminds me of many old teacups I have from my grandmother. She used to have a tier table full of teacups and saucers that oddly enough, she said my grandpa brought home from birthday parties as favors! Then there is also a collection of handpainted teacups that my grandpa’s sister painted when my grandparents got married.

But back to making the teabag holder – the greeting is in the Cup of Tea Stamp Set. I wanted to use it because it was small enough to fit in the space. With the stamp set and dies, you can stamp and cut out the lemon slice, the little hearts, and even the tag on the teabag. There are two teabag dies so you could layer them, but the word “enjoy” only fits on the larger tag but I didn’t want that large of a tag on this project, so I just cut it down smaller by hand. I added a small piece of white baker’s twine to look like it is attached to the teabag inside the cup brewing tea.

On the inside panel, I just used another pattern in the Tea Boutique Designer paper, and added a small piece of Basic White on which to write a message or sign your name. I didn’t want to cover up much of that cute paper so I made it smaller than a regular layer.

To make the diagonal pouch on the right side, I used a piece of Tear & Tape just on the bottom of the diagonal. I also cut a piece of the designer paper in a 3 1/4″ square and then diagonally cut it to layer on the pouch.

This is really a fun project to make. The extra scoring in the center leaves space for the thickness of the teabag of candy, whatever you put in there. The only thing I forgot to do was put ribbon around the whole thing to tie it closed. You would likely adhere it underneath the layers so that it would tie on the side to hold it closed. But it’s okay as is, really. If it is presented in an envelope, it’s not going to fall open anyway until the person opens it themselves! There are no mistakes in stamping!

Orchid Oasis Cup of Tea Card

Orchid Oasis Cup of Tea Card

This Orchid Oasis Cup of Tea Card was fun and pretty easy to make! I’m loving playing with the new 2022-2024 In Colors, the new Cup of Tea Stamp Set, and the Fabulous Frames Dies.

The card base is the new In Color, Orchid Oasis, cardstock. This card is a little smaller than usual, 4″ wide by 5 1 /4″ long. I cut a piece of the In Color Designer Paper Assortment to put across the middle of the card. This one is 2″ x 4″. You could make it wider or even use a layer to cover the front of the card except for the margins.

The Fabulous Frames Dies has this one die that I used that I really like. It’s also cut out in Orchid Oasis cardstock. The center piece of that frame even is cut out so you will need to glue it somewhere on the inside of that frame. Actually, I kind of wish it would all stay in one piece, too! Then it would be easier to layer something in the center. As it is, the center piece comes out so on this card, after stamping the center piece, I had to glue it to the backside of the frame. My Multipurpose Liquid Glue was really cooperating and I was able to squeeze out just tiny lines or dots of glue along that very narrow frame edge and then place my stamped piece on it. I didn’t need to put glue on the top or bottom fancy frame areas because I was going to adhere the whole thing to the card front with Stampin’ Dimensionals.

The stamped piece on Basic White is stamped with Orchid Oasis ink for the cup, Parakeet Party for the leafy stems, and Orchid Oasis for the little flowers. I’m not sure I have completely figured out how to stamp those flowers to line up exactly with the stems. I got close, though. Maybe they aren’t supposed to line up! I don’t think it matters so just play!

For a little greeting, I just chose one of the small words in the Cup of Tea Stamp Set and stamped it on a narrow scrap strip of Basic White and then made a banner end with Paper Snips. (Or if you have the retired Tailored Tag Punch you can use the pointy end of that!)

There are lots of ways you could step up this card with “more” if you wanted to. You could add gems of some kind. You could die cut the cup and stems or flowers. Of course you could change out the colors and make it less monochromatic or tie on a tag with the little tag diecut and piece of twine. I was keeping this card rather simple although diecutting the frame and adhering the stamped piece took a bit of time.

Here is the first card I made from this Tea Boutique Suite.

I think you will really like these new In Colors. I recommend buying the assorted packs of cardstock so you get all the colors and then you can go back and order the individual colors you know you like. You can also buy an assortment of 12″ x 12″ cardstock!

Check out all the new products now that the new Stampin’ Up! Catalog has been released! If you are new and interested in Stampin’ Up! products and would like a catalog, just email me your name and address so I can send you a catalog. Or if you prefer, you can view it online HERE.

SHOP THE NEW STAMPIN’ UP! ANNUAL CATALOG HERE!

Sweet Sorbet Cup of Tea Card

Sweet Sorbet Cup of Tea Card

After waiting ALL day Saturday for UPS to deliver my Stampin’ Up! preorder, it finally arrived after 9:00 PM but at least it got here! I present to you my first card out of all the things! I couldn’t wait to see and use the new In Colors so I chose this stamp set and designer paper to make my Sweet Sorbet Cup of Tea Card. There are dies in the Tea Boutique Suite but for this first card, I kept it rather simple.

The card base is the very pretty color I love already, Sweet Sorbet. I also really wanted to use the new Tea Boutique 6″ x 6″ Designer Series Paper, so I simply picked the pretty teacup print on the top of the package! I decided to simply cut a strip about 2″ wide by 5 1/4″ to put on the left side of the card.

The striped teacup is stamped in Sweet Sorbet ink on a scalloped rectangle in Basic White in the Scalloped Contours Dies. After the cup was stamped, I stamped the leafy stems with the new Parakeet Party ink. I dared to stamp the row of little flowers without much thought in Petal Pink ink but didn’t get it lined up right. If I didn’t mention it, you probably wouldn’t notice it or think that it was “wrong”. There are several greetings in the Cup of Tea Stamp Set, some larger and some really small to fit on the little tag stamp and die! I just stamped the greeting next to the cup. Now that I see the sizes of things, I would probably stamp the cup a little lower on the diecut. The diecut piece is layered on the new Starry Sky dark blue In Color. The whole piece is then popped up on Stampin’ Dimensionals®.

On the inside of the card, I added a layer of Basic White with a 1″ strip of the “other side” of this same designer paper on the left side of the white layer. That way it is easier to write a message or stamp on the inside of the card.

This Tea Boutique Suite is going to offer lots of great cardmaking opportunities! There is even a matching set of Tea Boutique Cards and Envelopes to which you can add stamping, paper, and/or die cuts.

Who doesn’t enjoy a cup of tea now and then so they will certainly enjoy a Cup of Tea card!

New Catalog Goes Live May 3rd!