
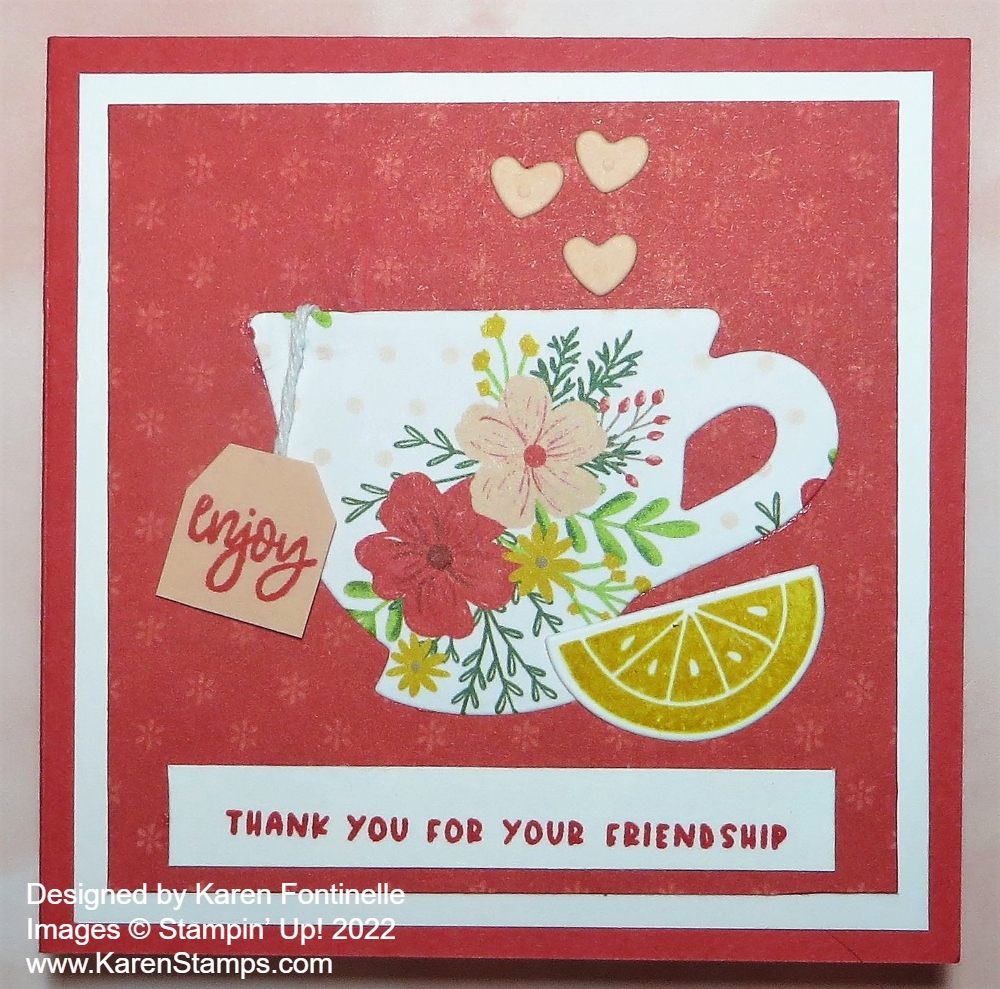
This Cup of Tea Teabag Holder is really an old project I have made many times through the years, but the Tea Boutique Suite Collection is perfect for it! As you will see, this little card opens up to be more than a card! It is a card but holds a teabag inside in a side pocket.
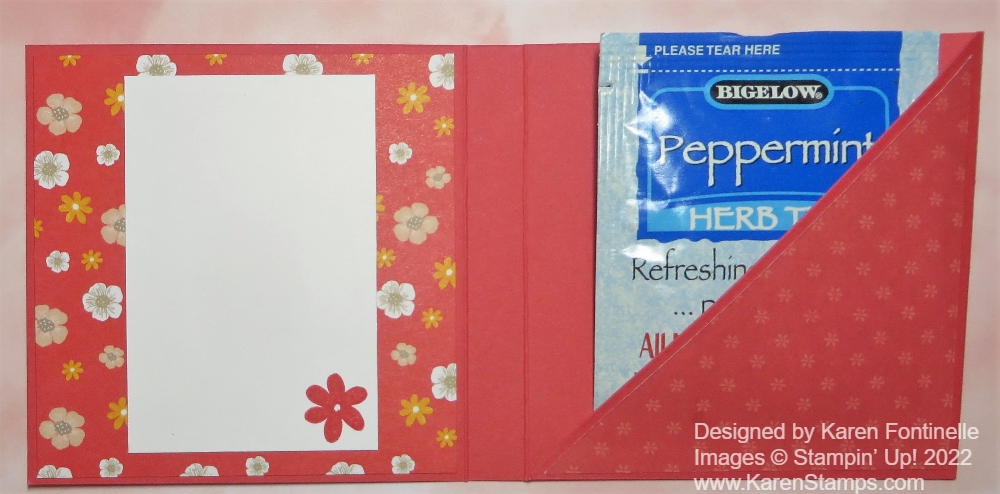
When you open the card, there is a decorated panel on the left on which you can write a message and on the right is space for a teabag or if you wanted, a piece of chocolate or another treat!
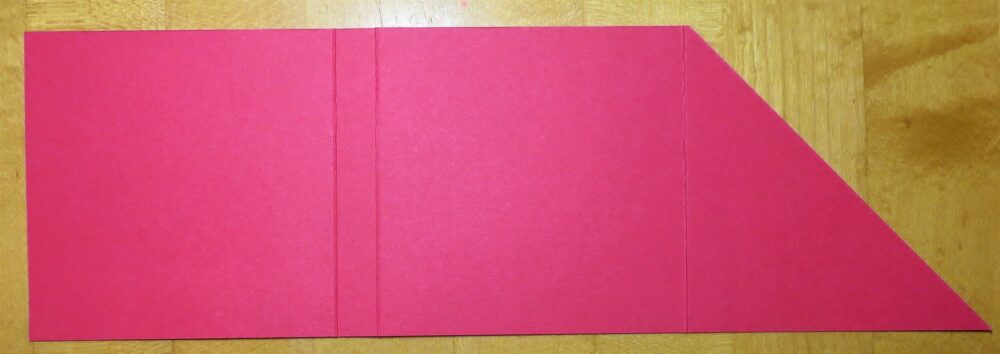
It’s really very easy to make one of these holders. Start with a piece of cardstock 11″ x 3 1/2″. I used one of the new In Colors, Sweet Sorbet. Score this strip of cardstock at 3 1/2″, 7″, and 7 1/2″. Crease all the folds. On the third section on the right, cut that piece on a diagonal as you see in the photo below. When you fold that diagonal over, that will make the pocket to hold the teabag.
Now all you have to do is decorate the teabag holder however you like for the occasion.
For the cover of the teabag holder, I added a layer of Basic White, cut at 3 1/4″ x 3 1/4″ with a layer of the Tea Boutique 6″ x 6″ Designer Series Paper, cut at 3″ x 3″. The white helps the designer paper and the teacup stand out better.
The teacup is diecut from a floral pattern of the Tea Boutique Paper with the Teacup Dies. It reminds me of many old teacups I have from my grandmother. She used to have a tier table full of teacups and saucers that oddly enough, she said my grandpa brought home from birthday parties as favors! Then there is also a collection of handpainted teacups that my grandpa’s sister painted when my grandparents got married.
But back to making the teabag holder – the greeting is in the Cup of Tea Stamp Set. I wanted to use it because it was small enough to fit in the space. With the stamp set and dies, you can stamp and cut out the lemon slice, the little hearts, and even the tag on the teabag. There are two teabag dies so you could layer them, but the word “enjoy” only fits on the larger tag but I didn’t want that large of a tag on this project, so I just cut it down smaller by hand. I added a small piece of white baker’s twine to look like it is attached to the teabag inside the cup brewing tea.
On the inside panel, I just used another pattern in the Tea Boutique Designer paper, and added a small piece of Basic White on which to write a message or sign your name. I didn’t want to cover up much of that cute paper so I made it smaller than a regular layer.
To make the diagonal pouch on the right side, I used a piece of Tear & Tape just on the bottom of the diagonal. I also cut a piece of the designer paper in a 3 1/4″ square and then diagonally cut it to layer on the pouch.
This is really a fun project to make. The extra scoring in the center leaves space for the thickness of the teabag of candy, whatever you put in there. The only thing I forgot to do was put ribbon around the whole thing to tie it closed. You would likely adhere it underneath the layers so that it would tie on the side to hold it closed. But it’s okay as is, really. If it is presented in an envelope, it’s not going to fall open anyway until the person opens it themselves! There are no mistakes in stamping!