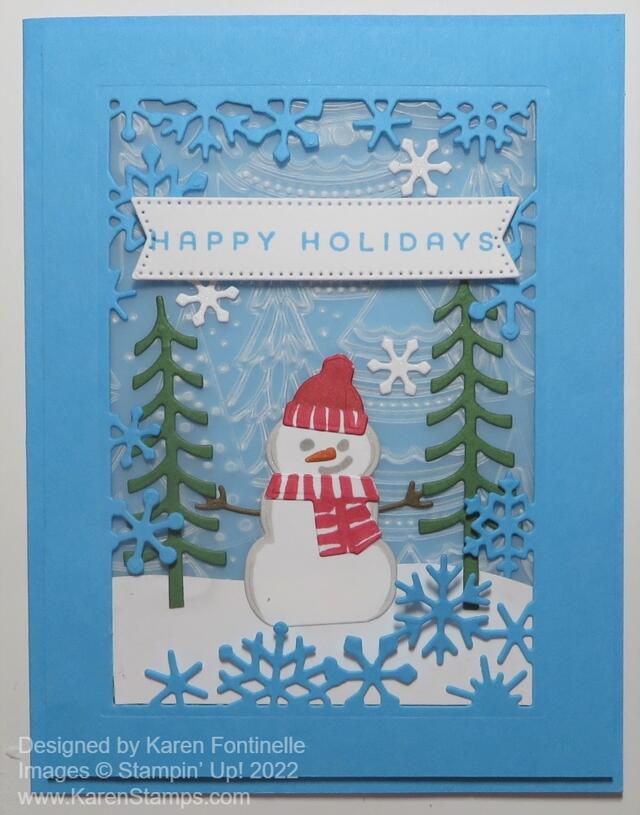
Back in July, I saw a card on the Stampin’ Pretty blog by Mary Fish using the Snowman Magic Bundle and I just loved it! I didn’t even own this Bundle so after a while I order just the Snowman Dies. At any moment, I was going to copy Mary’s card, but it didn’t happen until now! I guess it’s now or never now that it is just a week until Christmas.
My card isn’t “exactly” like hers because I didn’t buy the stamp set and I used a different background. But it is pretty close! I used Tahitian Tide for this card. It’s one of the “new” In Colors that came out in the Annual Catalog. Such a pretty blue to use with a snow scene!
It has turned cold here in Houston and will get even colder for Christmas so I’m hoping for snow, but I don’t think my wish will come true! It did snow many years ago here on Christmas Eve and we went out and played in the snow a bit on Christmas morning! I even made a tiny snowman that I kept in the freezer for months! It probably wasn’t much bigger than the snowman on this card!
Even without the Snowman Magic Stamp Set, I knew I could use the diecut snowman and make him look okay! I added a bit of the Light Gray Granite Stampin’ Blend on the edges of the snowman plus diecut the scarf and hat and added my own stripes and color with the Dark Real Red Stampin’ Blend. The snowman carrot nose is the smallest thing I have ever seen as a diecut! I just colored it with the Pumpkin Pie Stampin’ Blend and somehow managed to glue it down on the snowman’s face. Then I drew in the eyes and mouth with the Gray Granite marker. The arms are the next smallest things I’ve ever die cut! I had a brown scrap of cardstock handy.
The frame of snowflakes is a diecut that does all that work for you! Before adhering to the card base, I embossed a piece of vellum using the Whimsical Woodland 3D Embossing Folder. You can see the trees in the background. I also diecut the two green trees on each side of the snowman and three white snowflakes that I added.
I adhered the vellum to the back of this frame piece and since the snowflakes aren’t adhered except to the edges, I just cut a piece of snow for the base by hand and slipped it down into the frame. The snowman and trees are adhered flat to the vellum. Just slip them in where you want them. Then adhere the whole thing with Stampin’ Dimensionals to the card base.
The greeting is stamped in Tahitian Tide ink and die cut with a narrow banner shape in the Stylish Shapes Dies. It is popped up on Dimensionals also.
This was a fun card to make, maybe a little too much for multiples, but there are many things you can do creatively with this set of dies!

