Tag Archives: Excellent Eggs Stamp Set

Excellent Eggs Easter Treat Card

Excellent Eggs Easter Treat Card

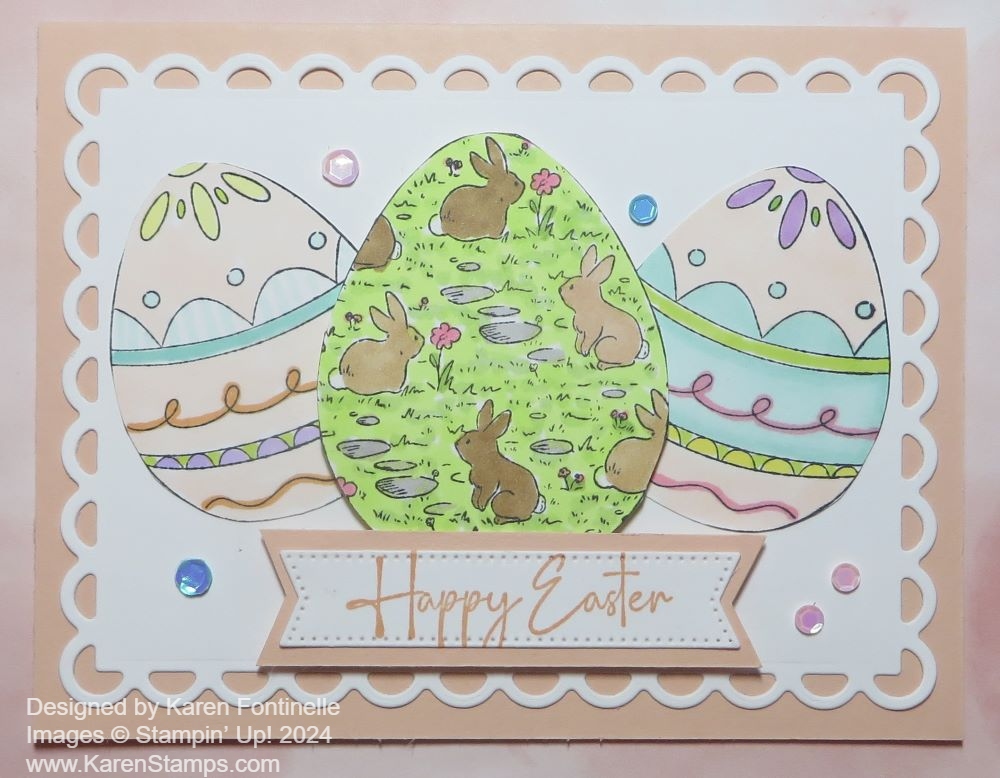
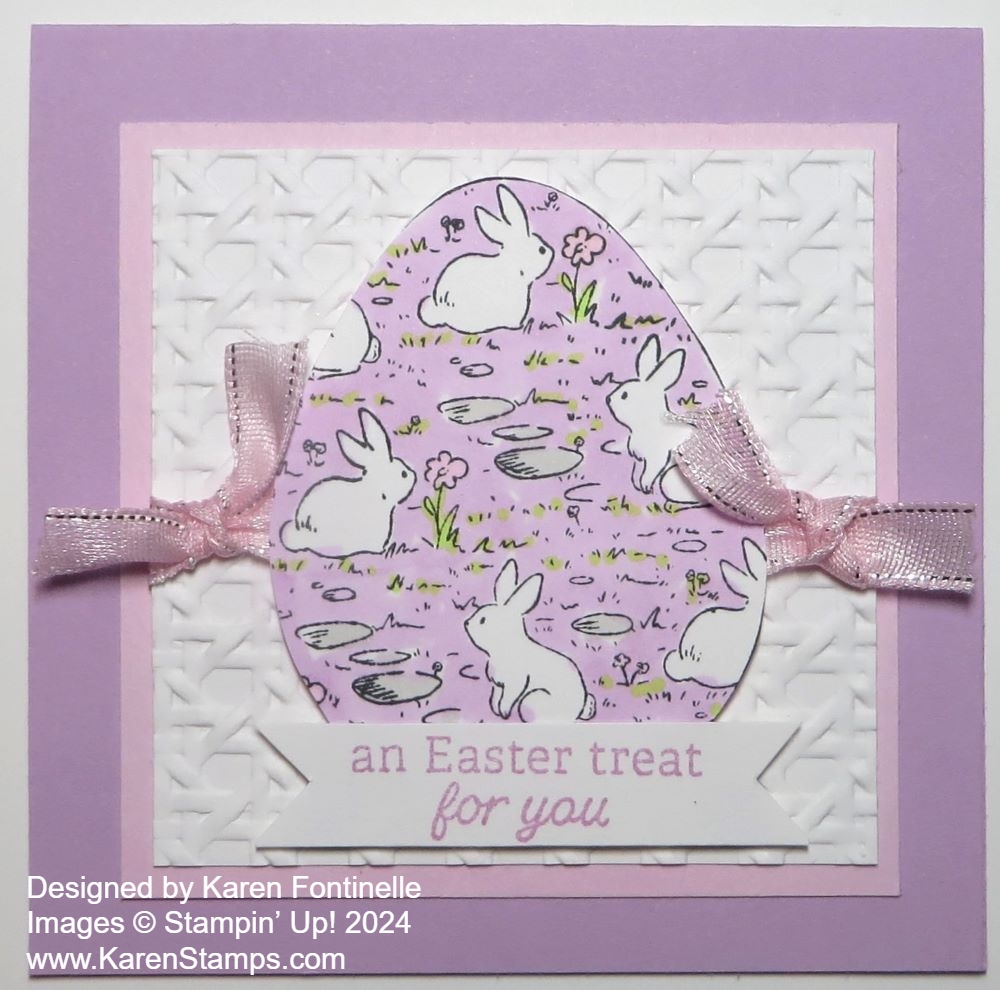
This Excellent Eggs Easter Treat Card is one of those cards that I came up with so easily and I like it! The egg was already colored in and cut out from another stamping session where I must have made extras to use another time. Since it would be by itself, I thought it needed a smaller card. First I thought of 3″ x 3″ but if I were to mail it, 4″ x 4″ would fit in a regular-size envelope.

The card base is a 4″ x 8″ piece of Fresh Freesia cardstock to match the egg folded in half to make a 4″ x 4″ card. You can have the fold at the top or the side, as with any card. Mine is at the top. After I decided on Basic White for the background behind the Easter egg, it looked too blah so I embossed it! I used the Cane Weave 3D Embossing Folder for this 3″ x 3″ square of Basic White. After some deliberation, I layered a Bubble Bath piece of cardstock, cut at 3 1/4″ x 3 1/4″ underneath the embossed cardstock. That color of pink goes well with the Fresh Freesia since the Bubble Bath had purple tones in it.

After seeing where the egg would go, and finding that I did have some Bubble Bath ribbon in the 3/8″ Sheer Ribbon Combo Pack (which is retiring in April and will be 30% off!), I wrapped and adhered the ribbon around the white embossed layer to go behind the egg. After that I could adhere the white piece to the Bubble Bath layer and then onto the Fresh Freesia card base.

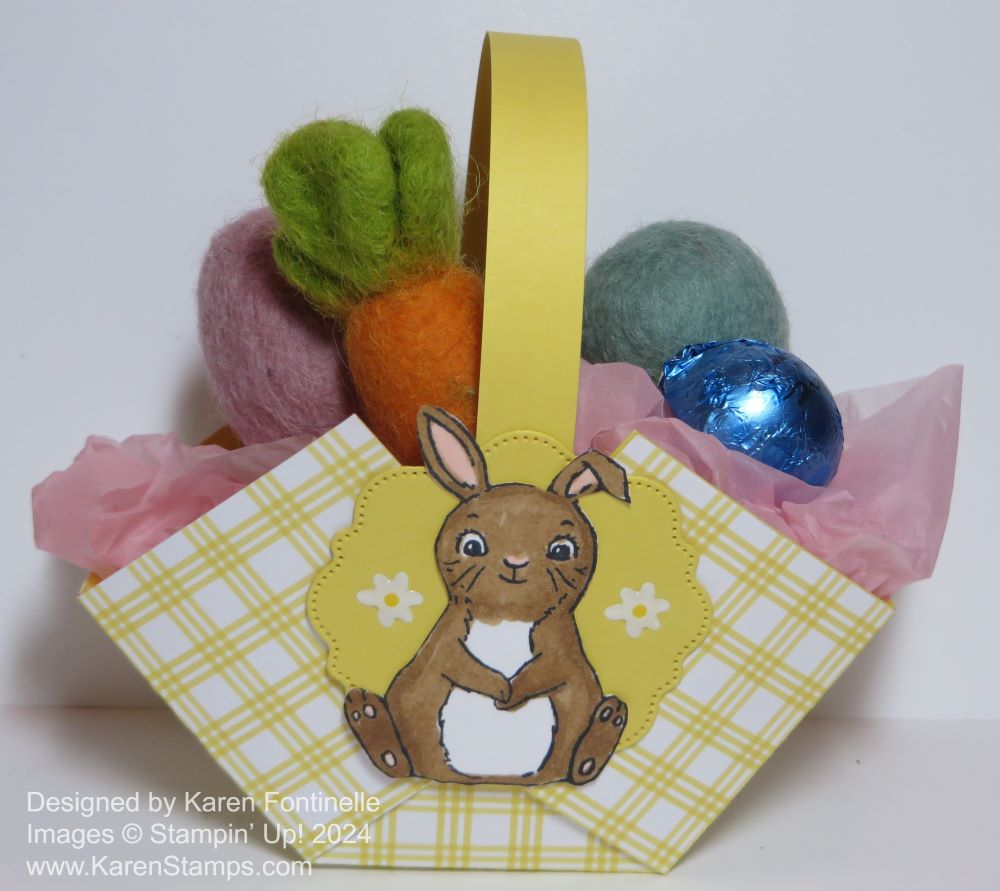
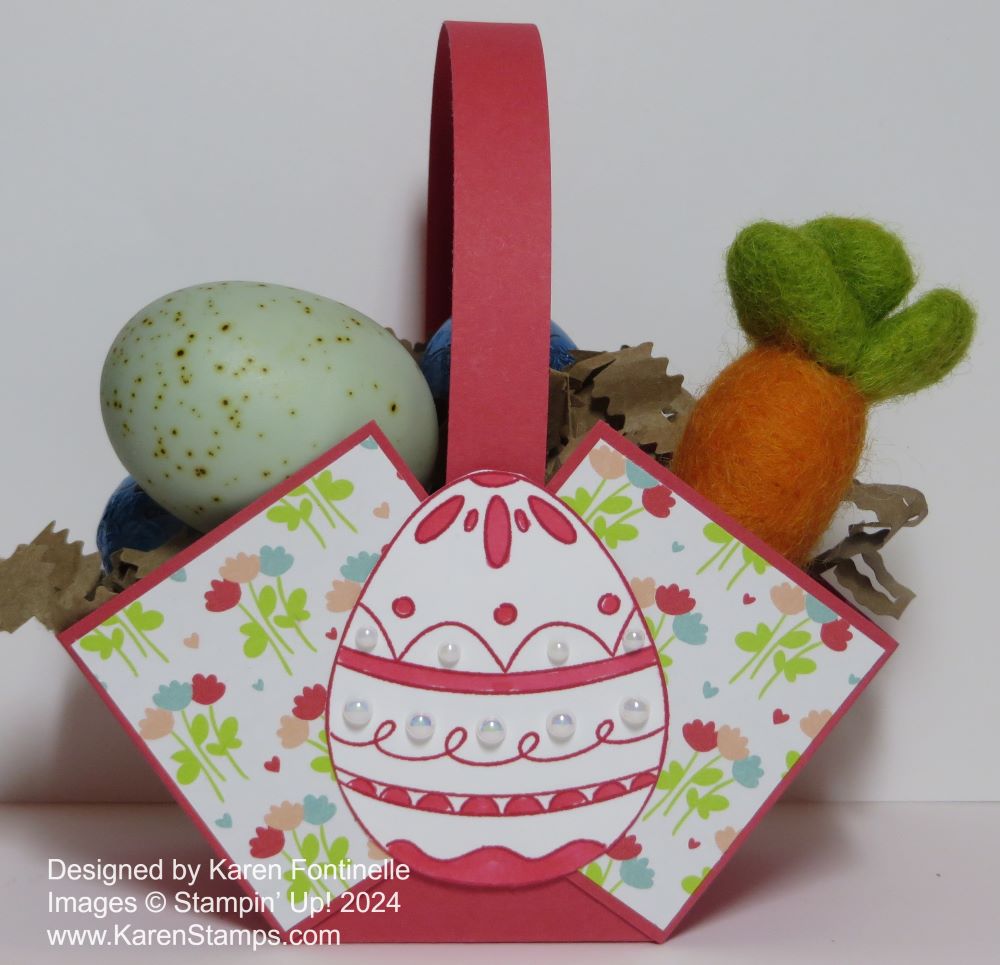
The Easter egg is stamped with Memento Ink from the Excellent Eggs Stamp Set in the Spring Mini. This stamp set will be retiring in April. I colored in the background of the egg with Fresh Freesia Stampin’ Blends, left the bunnies white, colored in the stones gray, and colored in a few pink flowers with green leaves. Use whatever color of Blends or markers to color your egg. The egg is popped up with Stampin’ Dimensionals over the ribbon. I also added two knots on each side of the egg with the ribbon. The little silver thread along the sides of the ribbon really adds a little sparkle to the card!

For the greeting, I stamped this one in Fresh Freesia ink from the Easter Bunny Stamp Set in the Annual Catalog. This stamp set is going to retire at 50% off in April which is a fantastic deal if you need some bunnies in your collection! Three different bunnies, a carrot, a butterfly, Easter eggs, flowers…everything you could need for cards even other than Easter. Bunnies always make cute baby cards! I stamped the greeting on a narrow scrap of Basic White, then flagged the ends and it fit perfectly on this small card!

You still have a little time to make a few Easter cards, especially if you aren’t going to mail them or if the recipient doesn’t live too far away! Who knows with the post office these days?

Two Little Easter Baskets For You

Easter Bunny Plaid Easter Basket

Next weekend is Easter, believe it or not! If you need some little Easter baskets for a little treat for someone, a dinner table favor, or just a little home decor, try this basic easy basket patterns! Decorate however you like once you know the way to make the basket!

I used the same pattern for both baskets. Just start with a 6″ x 6″ square piece of paper and score like a tic tac toe. Score at 2″ and 4″, then turn and score at 2″ and 4″. Cut on the two vertical score lines up to the horizontal score line. Do the same on the opposite side. See the diagram below. Cut a handle of about 8 1/2″ x 1/2″.

Easter Basket Pattern

Crease and fold all score lines. If you like, round all four corners. Or you can leave them as is. Form the paper into a basket and use brads or glue to hold the sides and handle together. The handle goes in between the two side flaps and the center flap. That hides it a little bit on the inside. (If you think of it ahead of time! Or it can just be glued to the inside of the basket.)

Decorate the basket with designer series paper or stamping or whatever you like.

For the basket in the photo at the top I cut a 6″ x 6″ piece of Daffodil Delight cardstock and the plaid pattern in the Bee Mine Designer Series Paper. I glued them together so the whole front of the basket would have the yellow plaid design.

After assembling the basket, I stamped a bunny in the Easter Bunny Stamp Set (retiring soon!) and colored in with Stampin’ Blends. For the bunny, I used Light Pecan Pie and Petal Pink for the ears. I cut out the bunny and layered him on a diecut from the Thoughtful Expressions Dies. It’s cute-shaped label with a stitched look around the edge. It will retire soon also. I also added two of the Adhesive-Backed Hearts & Flowers Embellishments.

Excellent Eggs Sweet Sorbet Easter Basket

For this basket I used Sweet Sorbet cardstock, but added the cute little flowered paper in the Bee Mine Designer Series Paper cut in squares to decorate each side, front and back. Since each square is 2″ x 2″, I cut the DSP at 1 7/8″ x 1 7/8″ .

The Easter egg is in the Excellent Eggs Stamp Set (retiring) and to keep it all simple, I stamped it with Sweet Sorbet ink, then colored in just parts of the egg with the Light Sweet Sorbet Stampin’ Blend marker. I cut out the egg by hand, although there are dies if you like. After adhering it to the basket, I added some Iridescent Pearl Basic Jewels in two different sizes. Very easy!

If you want to check out some other baskets I have made, look HERE and HERE.

You will be surprised at how easy these little baskets are to make. You can make them for other occasions, not just Easter or spring!

SHOP STAMPIN’ UP!

Excellent Eggs Happy Easter Card

Excellent Eggs Happy Easter Card

This Excellent Eggs Happy Easter Card is the first Easter card of the season for me! Believe it or not, Easter is less than a month away! Time to get out your bunnies and eggs and make some cards to send, too!

For this card, I used the Excellent Eggs Stamp Set in the Spring Mini Catalog. You’ll find it on page 27. You can also get the Dies that go with the stamp set to step up your egg-making! Get both together in the Excellent Eggs Bundle and save 10%.

I started just stamping both egg designs on Basic White in Memento ink so I’d have lots of eggs to choose from as I designed my card. Then I colored in with various Stampin’ Blends Markers. I didn’t so much use the Dark and Light to blend but just chose whatever colors I wanted to use. The two eggs that are the same design I colored a little differently.

The center egg looks as if it would be tough to color, but truthfully, it is easier than it looks! I colored in the bunnies with a couple of different browns, including the skin tones of Stampin’ Blends. Just choose whatever you like! After coloring the stones and the little flowers, it was easy to color the background grass! Don’t color super-carefully, just scritch-scratch around with that marker and before you know it you will have it all colored!

The card base is Petal Pink with the largest Scalloped Contours Die for the layer behind the Easter eggs. I glued the two outer eggs down flat on the card, but the center egg is popped up on Stampin’ Dimensionals.

The greeting is also in the Excellent Eggs Stamp Set. I stamped that in Petal Pink in on Basic White and die cut with a banner die in the Stylish Shapes Dies. It needed a layer so I adhered it to a strip of Petal Pink and flagged the ends to make a layer that fit right. This is adhered with a Dimensional on each end and a strip from the outer edge of the sheet of the Dimensionals placed at the bottom of the greeting so that it would go underneath the popped-up greeting and everything would fit.

For some bling, I added a few colored sequins in the Pastel Adhesive-Backed Sequins. It’s always fun to add some embellishments if you can. At the same time, sometimes you have to know when to stop!

SHOP STAMPIN’ UP! ONLINE HERE!