
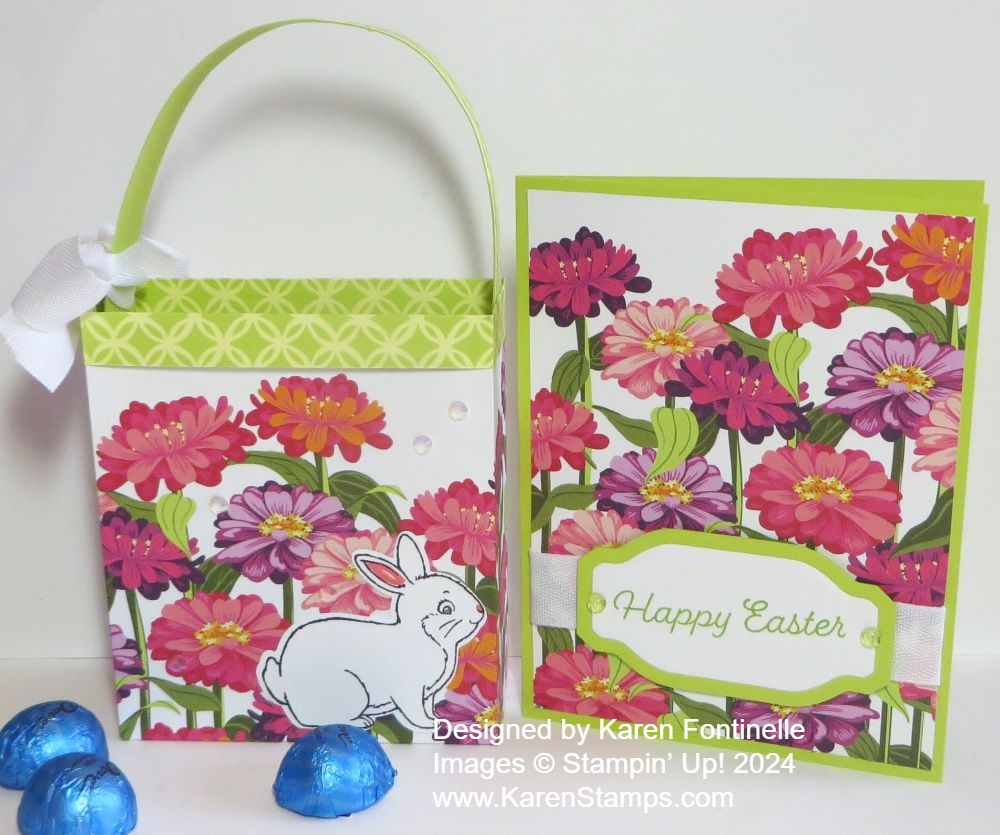
Here’s one last Easter project for you if you need something last minute, maybe to put some candy or a small gift inside! Or make it and keep it for your own Easter decor! You can even leave it out for Spring and really, summer. Leave off the Easter Bunny! To make this Easy Easter and Spring Treat Bag, I used the Flowering Zinnias Designer Series Paper. I used the sheet that has flowers at the top and bottom with a white space in between. You can vary the height of this project if you want to make it a little shorter or cut the paper in half at 6″, right in the middle of the white portion.
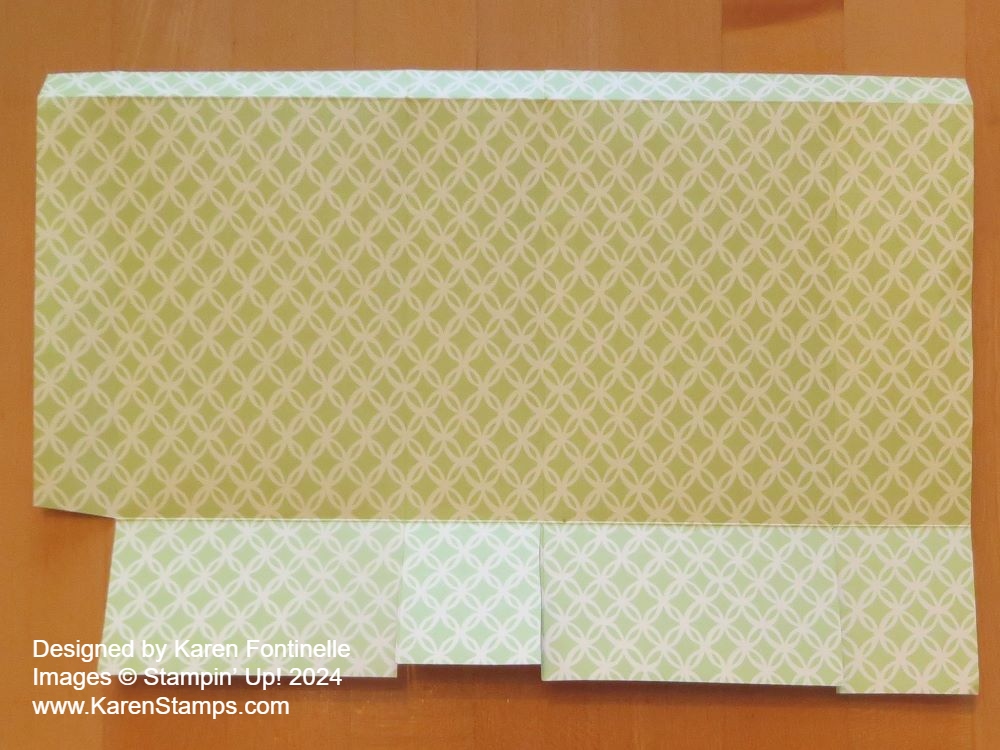
I cut the designer paper at 12″ x 6 3/4″. Of course, you can use any kind of designer paper or even cardstock. I like the idea of the beautiful flowers right there on all sides of the bag. The piece of designer series paper is scored at 1 3/4″, 5 1/2″, 7 1/4″ and 11″. Make sure your pattern is going the correct direction, then score the bottom flaps at 1 3/4″. Optional: If you like the pattern on the other side of the bag, score at the top of the paper about 1/2″ so you can fold that down for a nice pattern on the front of the bag at the top. Or, you can glue an extra strip around the outside of the top of the bag if you prefer.
Cut the score lines for the flaps, up to the horizontal score line. Cut off that little corner piece as you see in the photo. Then crease and fold on all the score lines and see how your bag will go together.
Here’s what the other side of the paper looks like which will be the front of the bag.
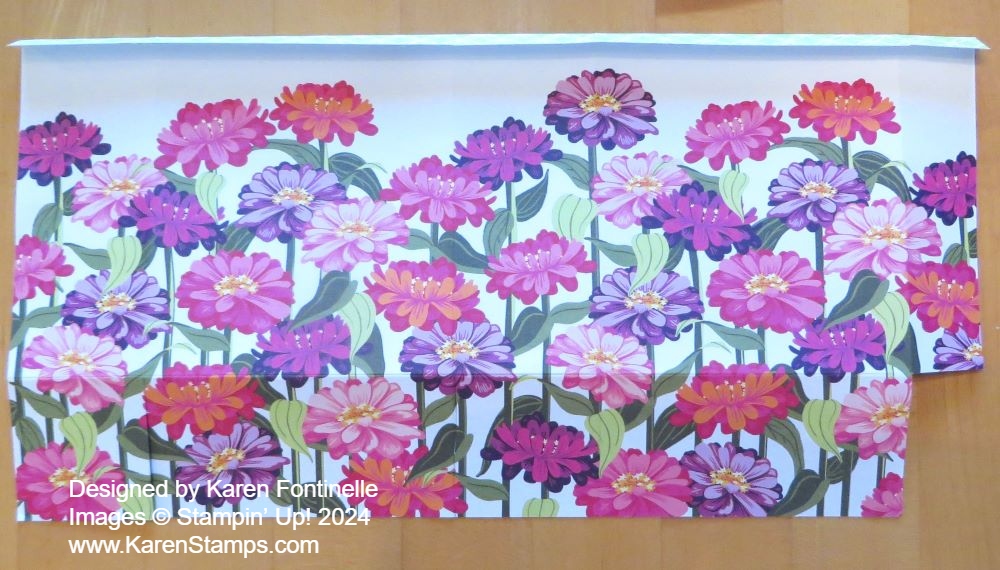
Pay attention to what will be the front of the bag. If possible, keep the side seam that you glue together to form the bag in the back and also fold in the flaps so the last flap you fold and adhere will have the fold line on the front of the bag and not the edge of the back flap. That doesn’t sound very clear, but if you look as you make your bag you will see what I mean. You want the front to look as smooth and professional as possible.
If you want to, cut a strip of cardstock or designer paper for a handle. You don’t need to do this. I used a strip of Lemon Lime Twist cardstock that was about 3/4″ wide and I covered it with a narrower strip of the “other side” of the paper I used for the bag. That way it matches the front lip that I folded over on the bag. I just adhered it to the inside sides of the bag with Stampin’ Seal but you could use brads or staples if you wanted to.
I wanted my treat bag to have an Easter look so I stamped a bunny in the Easter Bunny Stamp Set and cut him out with the Easter Bunny Punch. I colored in his ear and his nose with a Flirty Flamingo Stampin’ Write Marker just for a little color. For a little sparkle, I added some Iridescent Rhinestones Basic Jewels. These will be retiring so make sure you stock up because I use them all the time!
Just in case you would also need one last Easter card to go with this treat bag if you were giving it as a gift, I used another piece of the Flowering Zinnias DSP for a card front, layered on Lemon Lime Twist Cardstock to match the bag. I wanted to keep it simple so I just added a ribbon about the Zinnia paper and adhered it to the card base. This is the 3/4″ Herringbone Ribbon, retiring soon! I also tied a bow with it around the handle of the gift bag!
For a greeting, I stamped “Happy Easter” in Lemon Lime Twist ink on Basic White and cut out with a label die in the Something Fancy Dies. These were a good choice for the size and opportunity to cut out a layering die in Lemon Lime Twist. I popped up the greeting with Stampin’ Dimensionals. I added two Lemon Lime Twist gems on each side of the greeting in the Tinsel Gems Four Pack.
Now all you have left to do is maybe put a little tissue paper or shred in the bottom of the bag and add some Easter candy or a small gift! You are all set with a card and gift! Or put some candy in the bag and set it out for your own Easter decoration or maybe at your Easter place setting!
Happy Easter! Happy Spring!