Tag Archives: Blackberry Beauty Specialty Designer Series Paper

Thanksgiving Wine Bottle Label

Thanksgiving Wine Bottle Label w Flowers

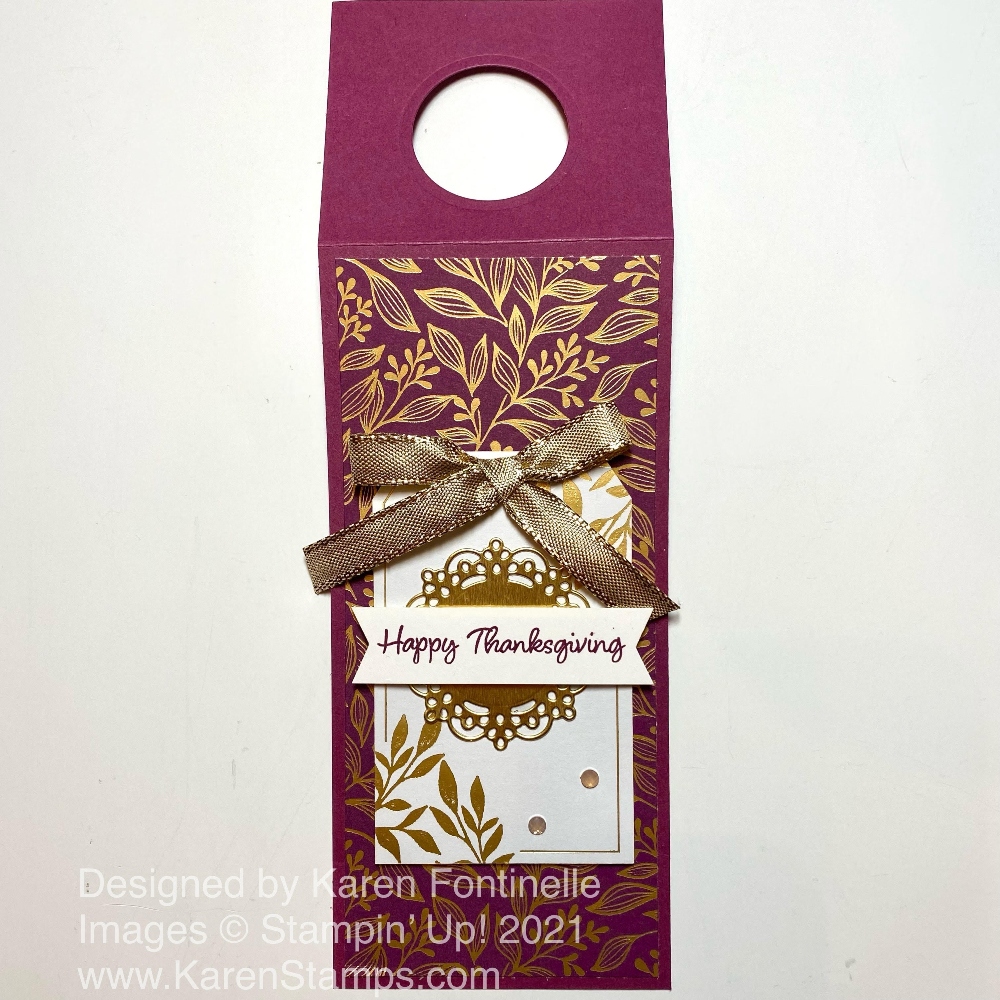
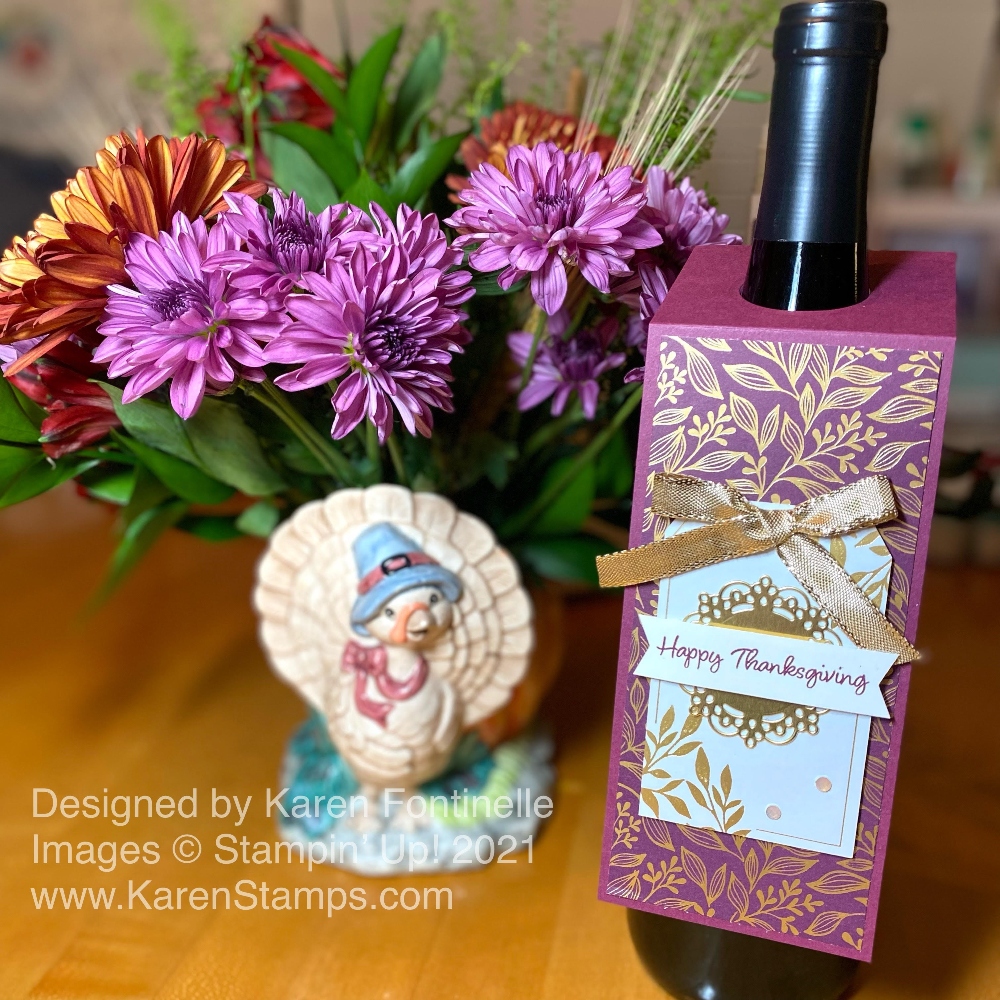
If you need a little something to make for Thanksgiving, make a Thanksgiving Wine Bottle Label like this one to decorate your own bottle of wine or to take to your hostess! This label that you just hang on a wine bottle is pretty easy to make and of course, you can make one in a thousand different ways!

This label starts with a piece of Rich Razzleberry cardstock that is 3″ x 9″. Score it at 2 1/2″ to make the top fold and die cut or punch a hole in the center to go over the bottle. I used a small circle die in the Layering Circles Dies or you could use your old retired 1 3/8″ Circle Punch. This makes the hanger label go over the wine bottle. You can adjust the length or the top hole or fold. Decorate however you like!

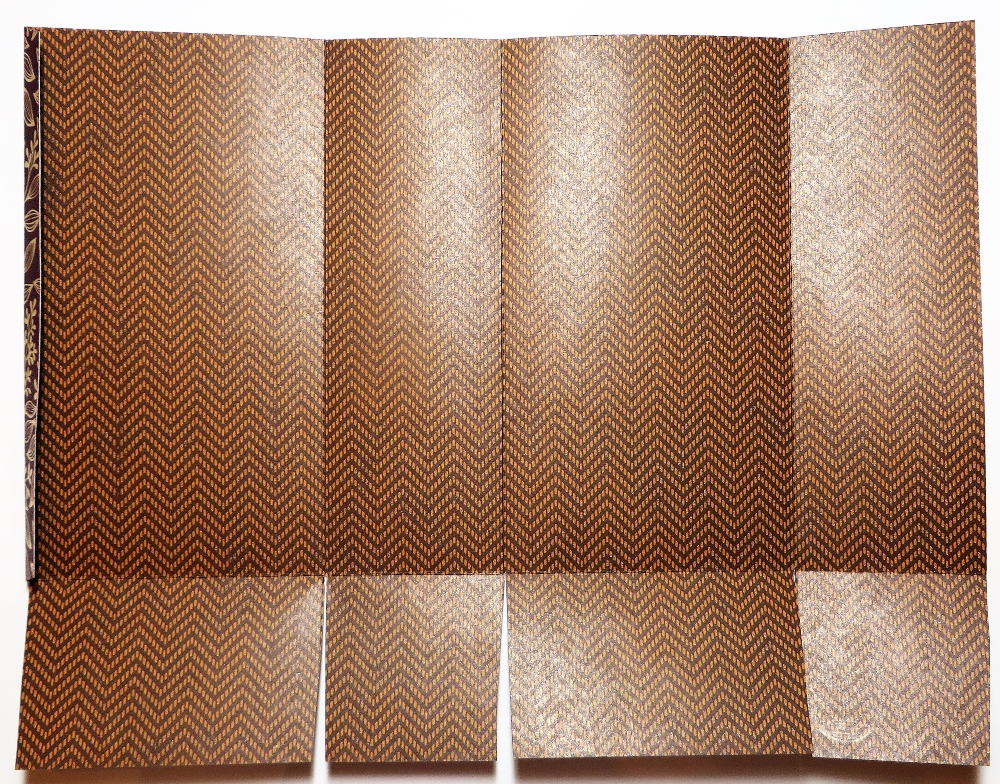
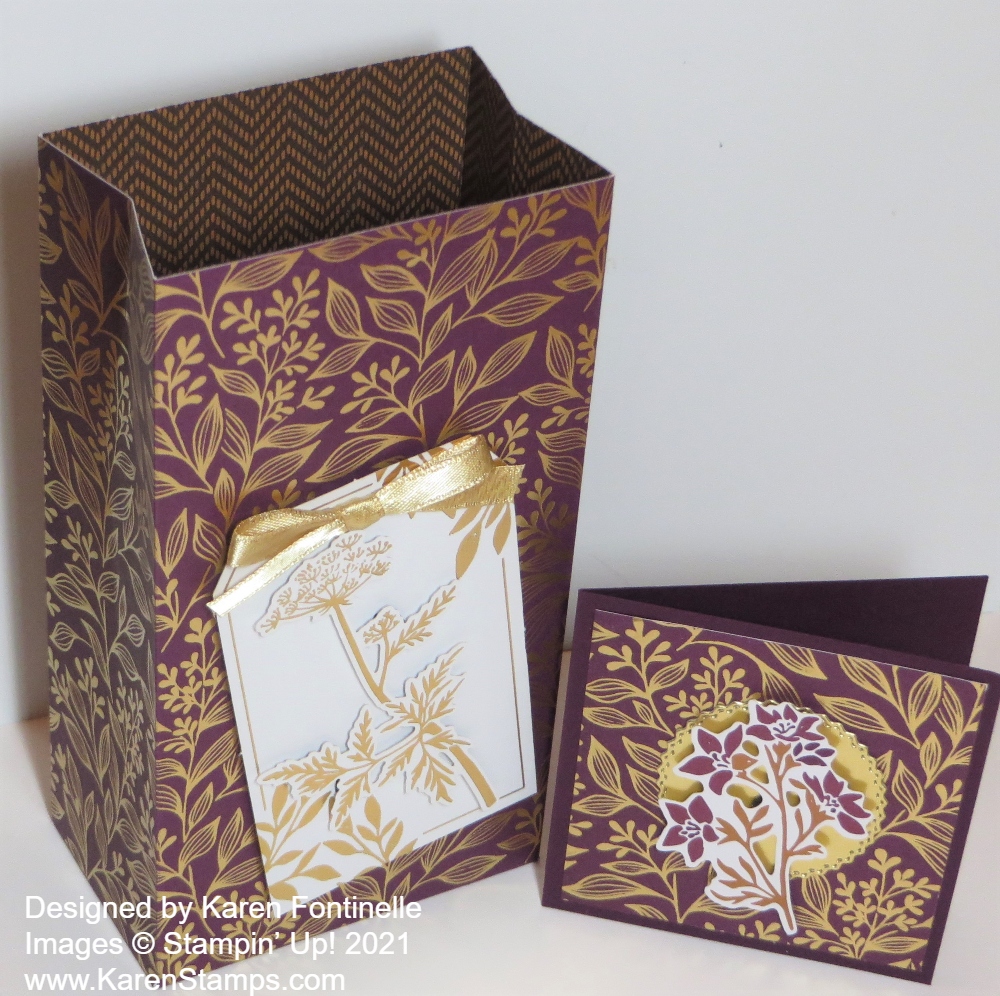
To decorate I used the Blackberry Beauty Specialty Designer Series Paper in the Holiday Mini Catalog. It’s been difficult to keep in stop and not available as I write this, but perhaps you have it already. The gold foil accents are beautiful and make the paper. I cut it at 2 3/4″ x 6 1/4″ to layer on the front.

The tag is in the Blackberry Beauty Ephemera Pack and I added a small, die cut fancy doily from the Encircled in Beauty Dies in Gold Foil. I stamped the greeting from the Banner Year Stamp Set in Rich Razzleberry ink and adhered it over the gold doily after punching the banner ends with the Tailored Tag Punch. The gold doily is adhered to the tag which I popped up on Stampin’ Dimensionals.

For a little embellishment, I tied a bow with the Gold 3/8″ Shimmer Ribbon and adhered it with Mini Glue Dots. And for just a little more, of course, I had to add a couple of Elegant Faceted Gems at the bottom of the tag.

It might sound like this wine bottle hanger took a while to make but it really was quite easy! Here’s another one I made five years ago! Whether you are going somewhere for dinner and taking a gift or just want to make something special for your own wine bottle, make a quick and easy wine bottle label like this one for Thanksgiving!

Thanksgiving Wine Bottle Label

Blackberry Beauty Happy Fall Card

Blackberry Beauty Happy Fall Card

This is another card, the Blackberry Beauty Happy Fall Card you could use to send to someone for Thanksgiving! Normally I don’t like cattywampus card designs like this one, with the papers at an angle, but somehow I liked it on this card! I never make cards like this! But the colors with the gold foil look rich and elegant and perfect for fall and Thanksgiving.

The card base is Cinnamon Cider, one of the In Colors for 2020-22. The designer paper is the Blackberry Beauty Specialty Designer Series Paper. I didn’t use one of the papers with gold foil, I used a “plainer” one with a foliage/floral design.

Next, I turned to the Blackberry Beauty Ephemera Pack for other design elements. I loved this pack (and so did a lot of other people because it has been hard to get and is back-ordered as I write this! Usually packs like this are all gold foil pieces but this one of laser cut pieces are paper with color and gold foil accents. I loved the flower (looks like Queen Anne’s Lace) but I wanted it to stand out more. I cut out a piece of Cinnamon Cider that would fit behind the frame you see. To make it more interesting, I embossed it with the Tasteful Texture Embossing Folder. It just gives it a little something extra.

The frame and the piece the greeting is stamped on are also in the Ephemera Pack. After playing around with all the pieces for a while, I settled on this “askew” design! As I said, I usually don’t care for that look but that is what pleased me in making this card! I stamped the little label piece using Cinnamon Cider ink and just used part of the greeting in the Banner Year Stamp Set. The frame is popped up with some foam strips, like Dimensionals. The flower is also popped up inside the frame.

While I can’t believe we are already into November, my Halloween decorations are put away and my Thanksgiving ones are out! If you want to mail cards or make little treats for Thanksgiving, now is the time to do it before we are full-blast into Christmas! Enjoy this fall season! Remember to change your clocks tonight/tomorrow back to Standard Time!

Blackberry Beauty Happy Fall Card Closeup

SHOP STAMPIN’ UP! ONLINE HERE!

Blackberry Beauty Thanksgiving Card

Blackberry Beauty Thanksgiving Card

Can anyone believe it is November already? It’s time to put away the Halloween decorations, eat all the candy, and start thinking about Thanksgiving, so here is a Blackberry Beauty Thanksgiving Card to get you inspired!

This Blackberry Beauty Specialty Designer Series Paper is so beautiful that it has been hard to keep in stock. Every time Stampin’ Up! gets more in, it sells out again. Right now as I write this, this paper is not orderable but hopefully, they will get more in stock in about two weeks. I hope you already own this paper in the Holiday Mini Catalog so you can use it for fall and Thanksgiving projects!

It is very difficult to photograph this paper on a card. It has beautiful gold foil accents and the background is rather dark so the reflection for any lighting is terrible! The card base is actually Blackberry Bliss although in the photo it looks like black! The card layer is a full 4″ x 5 1/4″ piece of that leafy pattern.

Next, I cut a strip of a different pattern of the paper, a smaller foliage pattern in gold. It measures 4″ x 1 1/4″ and it is layered on a strip of Blackberry Bliss that measures 4″ x 1 1/2″. That is just adhered across the card, although from the photo it almost looks like the designer paper layers are separated with some Blackberry Bliss showing in between! That would also be a good way to make this card!!

The greeting, in the Banner Year Stamp Set, is embossed in Gold in the Metallics Embossing Powders on a strip of Blackberry Bliss. After deciding to use a Gold Foil layer from the Tasteful Labels Dies underneath the greeting, I ran the narrow embossed strip through the die just to make the ends match the Gold Foil. This greeting is popped up on Stampin’ Dimensionals®. I also added two of my new Brushed Metallic Adhesive Backed Dots to each end of that strip of designer paper.

For a final touch, I adhered some gold foil foliage from the Blackberry Beauty Ephemera Pack. This pack has really pretty pieces of all kinds in it, not just gold foil pieces. I hope you already have this, too, because I see it is back-ordered until mid-December. I wonder which ship lined up at the port it is on! Don’t you think about Stampin’ Up! products being delayed every time you see one of those news reports about the container ships at sea?!

I hope this Thanksgiving card, which could be used for other occasions as well, even something like a fall wedding, inspires you to make and send some more cards! Wouldn’t this designer paper be pretty and different for a wedding in the fall? Here is another small gift card and gift bag I made earlier using this pretty paper.

It’s early yet, but time to start thinking about your Thanksgiving plans and any cards you want to make to send to friends and loved ones. The holidays are upon us!

SHOP STAMPIN’ UP! ONLINE!

Make an Easy Gift Bag and Card With Blackberry Beauty Designer Paper

Blackberry Beauty Gift Bag and Gift Card

The season for gifts will soon be upon us, actually, it is always the season for gifts, so here is how to Make an Easy Gift Bag and Card With Blackberry Beauty Designer Paper. These gift bags, no matter the size, are really so easy to make either out of designer paper or cardstock. You can stamp the cardstock or add a layer of pretty designer paper to dress it up. You can learn to make these small gift bags and it will be faster for you to do it yourself than to drive to the store for wrapping paper or gift bags!

I made this gift bag out of the Blackberry Beauty Specialty Designer Series Paper. As I mentioned above, I thought about making the bag out of Blackberry Bliss Cardstock and then adding a layer of designer paper. It would make the bag sturdier to use cardstock. But using designer paper also makes the inside very pretty!

The paper, whether cardstock or designer paper, is 8″ x 11″. Look at the pattern of the paper before cutting and scoring and make sure your pattern will go in the correct direction. On the side that will be bottom, where the flaps will be, score the paper lengthwise at 2″. Then turn the paper so the long side is at the top, using your Paper Trimmer or Simply Scored Scoring Tool. If using the Paper Trimmer, just make sure you don’t use the cutting blade by accident! You might even want to remove it temporarily! Score at 2″, 5 1/4″, 7 1/4″, and 10 1/2″. This will make the score lines where you will fold to form the bag.

Blackberry Beauty Gift Bag Cutting

Above you see the image of the inside of the paper scored and the flaps at the bottom cut. On the left side of the photo, you can see the 1/2″ flap that I folded inward a bit. Just below that, I cut off that 1/2″ x 2″ section. That 1/2″ flap is where the adhesive will go to form the bag with the opposite side. I like to angle my cuts just a bit as you can see by the spaces between the flaps, which will form the bottom of the bag. If you cut straight on the scored lines, sometimes they don’t overlap perfectly so cutting on an angle takes away that tiny bit of extra paper and makes it all look a little more professional when you assemble the bag. Try it! Plus you don’t have to worry about cutting EXACTLY on the score lines because sometimes they are difficult to see on printed paper!

Apply adhesive to that 1/2″ flap and then just fold over the opposite edge, making sure it is lined up evenly with the flap. I used Stampin’ Seal +. You could use Multipurpose Liquid Glue or Tear & Tape as well.

After connecting the two sides, fold in those bottom flaps, applying adhesive, and then reaching inside the bag on a table with a Bone Folder or something to rub down the flaps to make sure they are adhered well. Decorate the outside of the bag.

You can do the top however you like. For now, I left mine open like a gift bag. Or you can squish in the sides a bit to bring the top edges together and either tie a ribbon around, add a clip to the top, or punch holes and tie ribbon through to close. Make sure you put the gift inside first!

For the front, I used pieces from the Blackberry Beauty Ephemera Pack. As I write this, it is back ordered but should be back in stock in another week. Its been very popular! But you don’t have to have it. Use some gold pieces, tags, ribbon, whatever you have in your stash to decorate the bag. And as long as I had everything out, I made a little gift card to go along with it, folding a 3″ x 6″ piece of cardstock in half and then decorating. You can order 3″ x 3″ envelopes.

This bag is really easy. If you want it shorter, then cut it at maybe 6″ instead of 8″ or make it taller. This Blackberry Beauty Specialty Designer Series Paper is really pretty too with its gold accents and deep colors. This will be so pretty for fall and Thanksgiving cards and projects. Try making something like this Blackberry Beauty Gift Bag today!

Blackberry Beauty Gift Bag top view

SHOP STAMPIN’ UP! ONLINE HERE! LAST WEEK OF SALE-A-BRATION!

Be Dazzling Pretty Pumpkins Halloween Card

Be Dazzling Pretty Pumpkins Halloween Card

Here’s a fun Halloween card, the Be Dazzling Pretty Pumpkins Halloween Card, that came about simply because I found a square Pumpkin Pie card base already in my Pumpkin Pie cardstock. I immediately got the idea that I would make a quick card out of it right away. I don’t know if this one was quick in my fiddling with the words in the greeting, but it would be an easy one for you to copy since I already did the design!

Beyond the 4 1/4″ x 4 1/4″ Pumpkin Pie card base and putting a pumpkin on the front, I didn’t know exactly how it would all come together. Just to start, I looked through the Blackberry Beauty Specialty Designer Series Paper simply because it was laying out on my desk. Right away I saw the backside of one of the gold foil accented papers, probably one of the prettiest papers. We often don’t use the “other side” of the fancy or themed paper but sometimes we have to sacrifice the pretty side in order to use the “other” side! I immediately liked the herringbone design of this paper for a background. It is cut at 4″ x 4″.

The pumpkin is die-cut from the Sale-A-Bration Be Dazzling Paper using the Detailed Pumpkins Dies. As I write this, this paper is not coming up in the Online Store so it may not be available any longer. However, if you can’t get it, you can use a Gold Foil Sheet or any other metallic papers which will look just as pretty! This particular die is SO pretty and detailed! If you think ahead, it would be best to use an Adhesive Sheet on the back of the paper before you die cut it so that you don’t have to put teeny tiny drops of glue on the back to adhere it.

The greeting is in the Cutest Halloween Stamp Set and is quite lengthy in size. Just for fun, I decided to cut up the individual words and see if I liked that on the card. With the pumpkin taking up a lot of room on the card, front and center, it was a little difficult to arrange the words to my liking. Finally, I decided to go with a placement I liked and stamped and cut out a ghost as well from the same stamp set.

Sometimes, even when you are not totally pleased with a card, it is the addition of some little embellishment that just makes the card satisfactory! In this case, since I had struggled with the word placement and the ghost, it wasn’t like this was my favorite card of all time, but when I added the Cute Stars Adhesive-Backed Sequins, that was the final touch! I think the stars added so much and I loved the card then!

Sale-A-Bration ends on September 30, a Thursday, two weeks from yesterday! That’s all the time you have to get your free products with every $50 or more purchase! It always seems like we have lots of time in the beginning but now the end is coming up fast! Don’t disappoint yourself by forgetting or not getting free products during this favorite promotion!

Be sure to shop soon and hopefully get something FREE during Sale-A-Bration!

SHOP STAMPIN ‘ UP! ONLINE!

Be Dazzling Pretty Pumpkins Halloween Card Closeup

Blackberry Beauty Slimline Floral Card

Blackberry Beauty Slimline Floral Card

This Blackberry Beauty Slimline Floral Card is what happens when you open a package of designer paper you just received and you didn’t realize this pattern was in the package and you just say to yourself, “Wow! That would make a beautiful, simple card!” Sometimes just seeing a sheet of paper inspires you to make a certain card design.

This designer series paper, Blackberry Beauty Specialty Paper, is so popular it has been back-ordered multiple times! It is beautiful paper for fall with its gold foil accents! This particular pattern is one of those with an empty space down the middle of the 12″ x 12″ paper so you can just cut it in half and then possibly make six cards out of that paper. When I saw these tall flowers (are they Queen Anne’s Lace?), I knew I was going to make a slimline card and that this pretty pattern wouldn’t really need much else!

The card base is Early Espresso. To make a slimline card, just start with a piece of cardstock 6″ x 6″ and fold it in half so the card is 3″ x 6″. This will fit in a regular envelope you might have in your desk at home. I cut the designer paper at 5 7/8″ x 2 7/8″ to just leave a narrow margin around the edge. You can cut the designer paper to take the best advantage of the placement of the flower or flowers on your card front. For example, you wouldn’t want half of this big flower cut off if somehow the way you cut the paper made that happen.

For the greeting, I stamped one from the Pansy Patch Stamp Set on a die-cut piece of Basic White. This is a small rectangle die from the Stitched So Sweetly Dies. I needed something very small for this card since there isn’t much space! This greeting is part of a longer sentiment so I colored only the part I wanted with the Early Espresso Stampin’ Write Marker. You’ll find this marker in the Neutrals Stampin’ Write Markers.

To add a little bling to the card I just added a strip of the Gold 3/8″ Shimmer Ribbon under the greeting. It just adds a little more sparkle of gold to go with the gold foil sparkles on the paper. You could use another gold ribbon if you like. Since the Early Espresso card base is pretty dark, I added a layer of Basic White for a stamped or written message on the inside of the card.

Certain designer papers are just made to be used all by themselves, I think, like this one! It would even be very pretty without the greeting on the front. We don’t always need to make a very fancy, fussy card when just a simple one that shows off the paper or some other element is all that we need for an elegant card.

SHOP STAMPIN’ UP! ONLINE HERE!