Make a Card with Flower Shop

Flower Shop Flowers

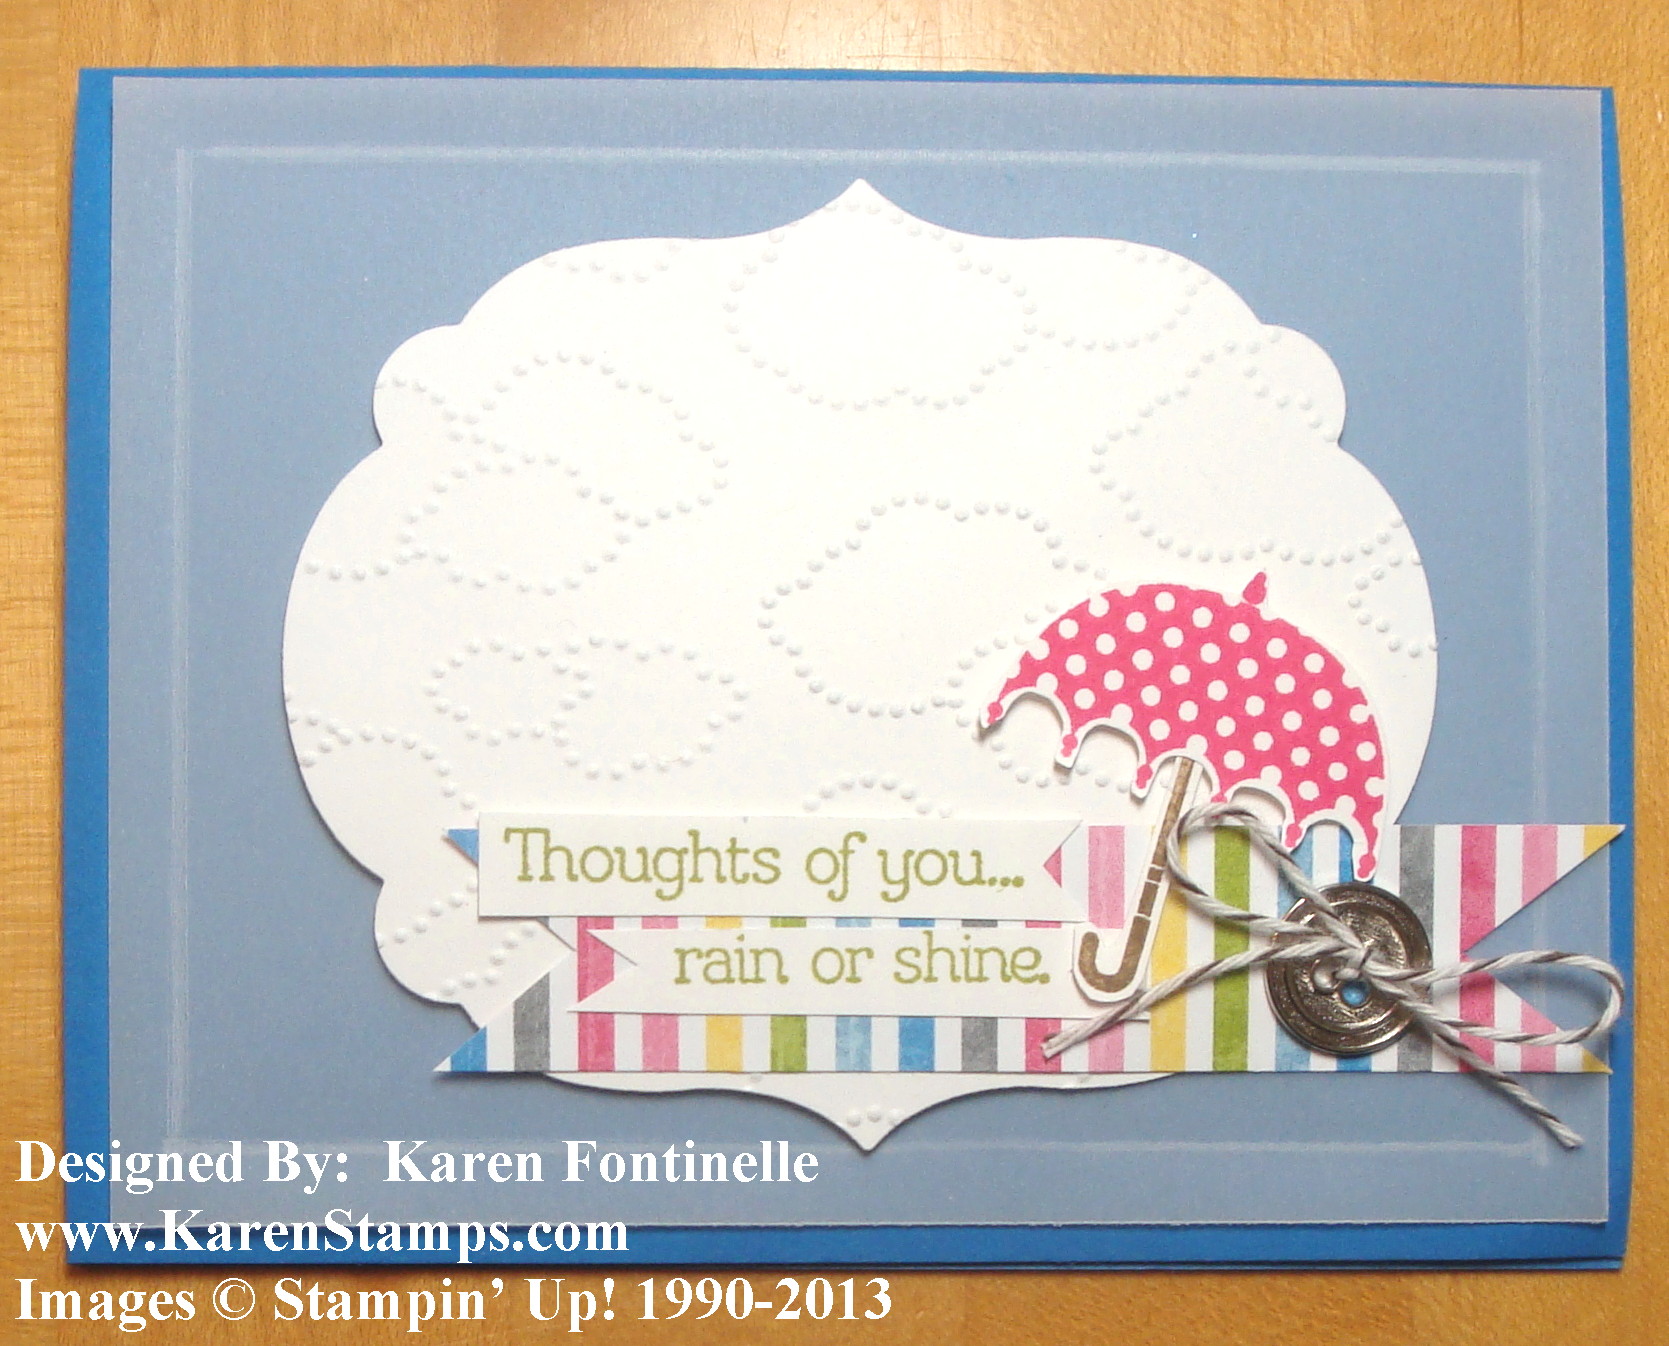
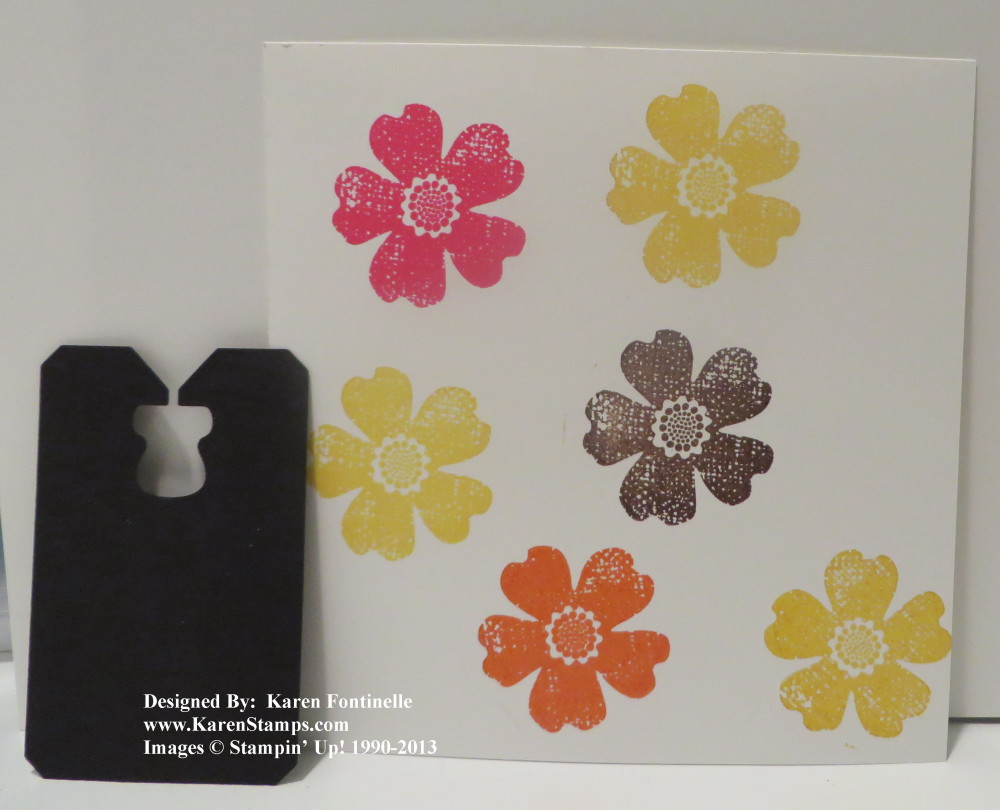
This is how I started making an unknown card, just stamping some flowers from the new stamp set Flower Shop, and with a die cut tag using the Chalk Talk Framelits Dies from Basic Black card stock.

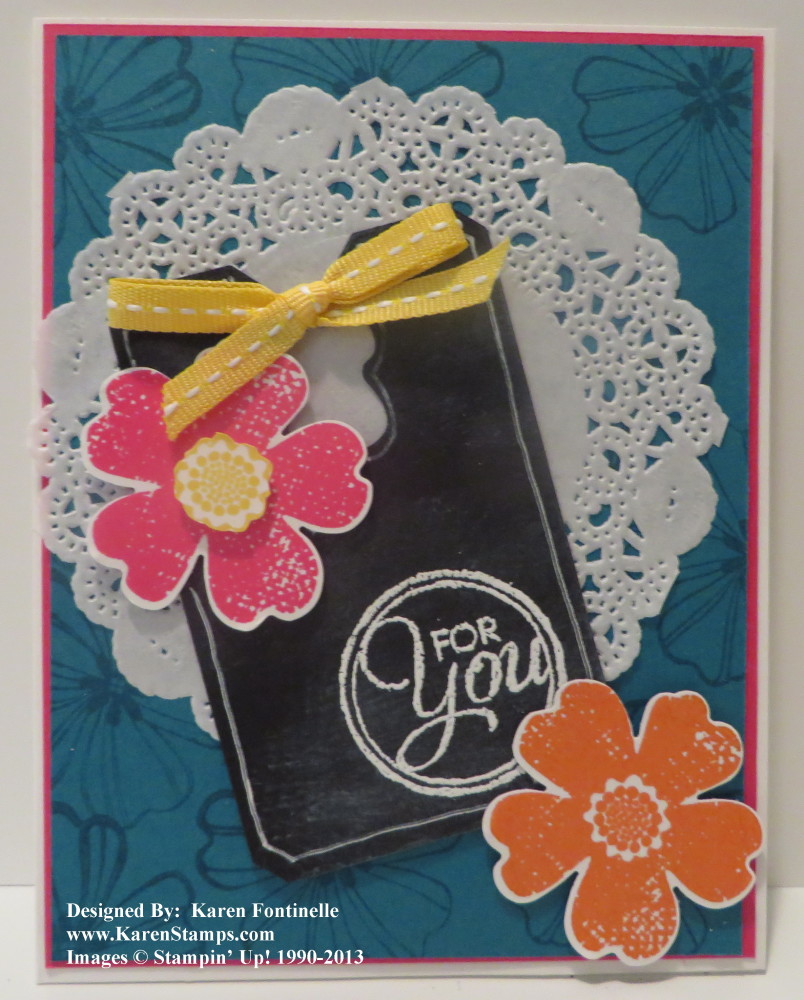
I wanted that “chalk” look on this card so I stamped a greeting from the stamp set  Chalk Talk on the black tag using Versamark Ink and then embossing with White Stampin’ Emboss Powder and the Heat Tool.

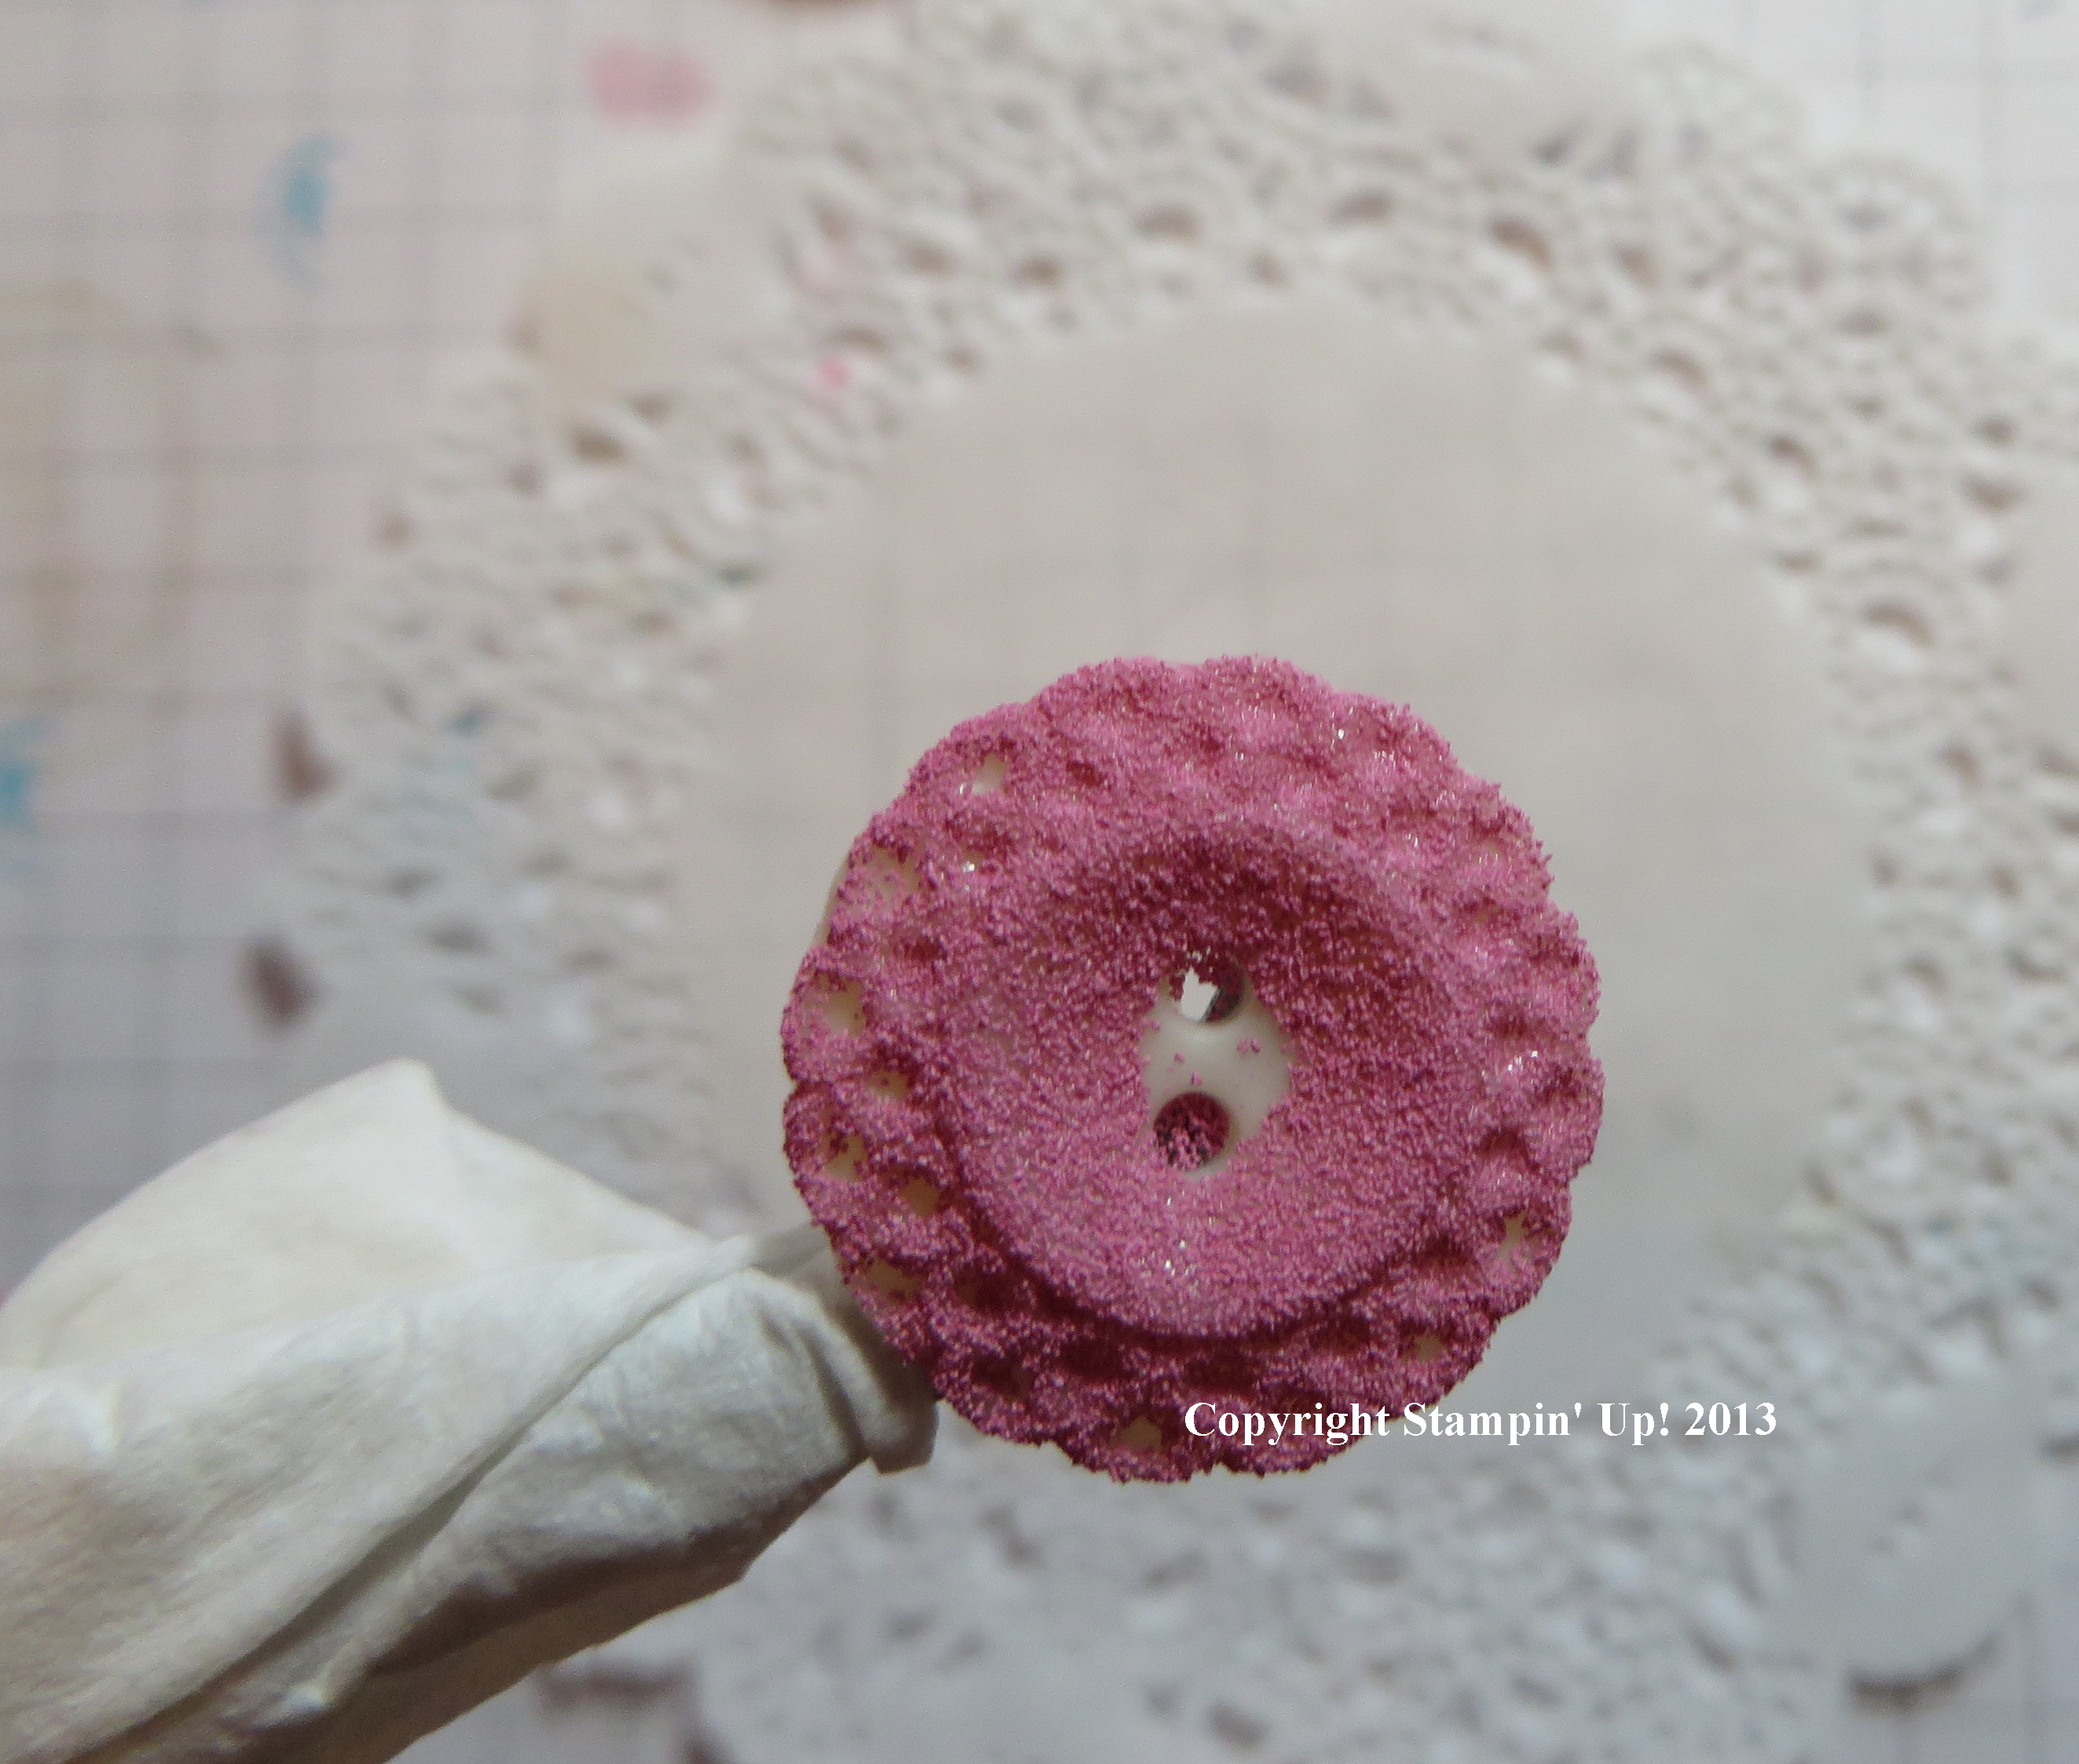
I LOVE the new Pansy Punch that fits the Flower Shop flowers! You can purchase the stamp set and punch in a Flower Shop Clear Bundle (or wood-mount).

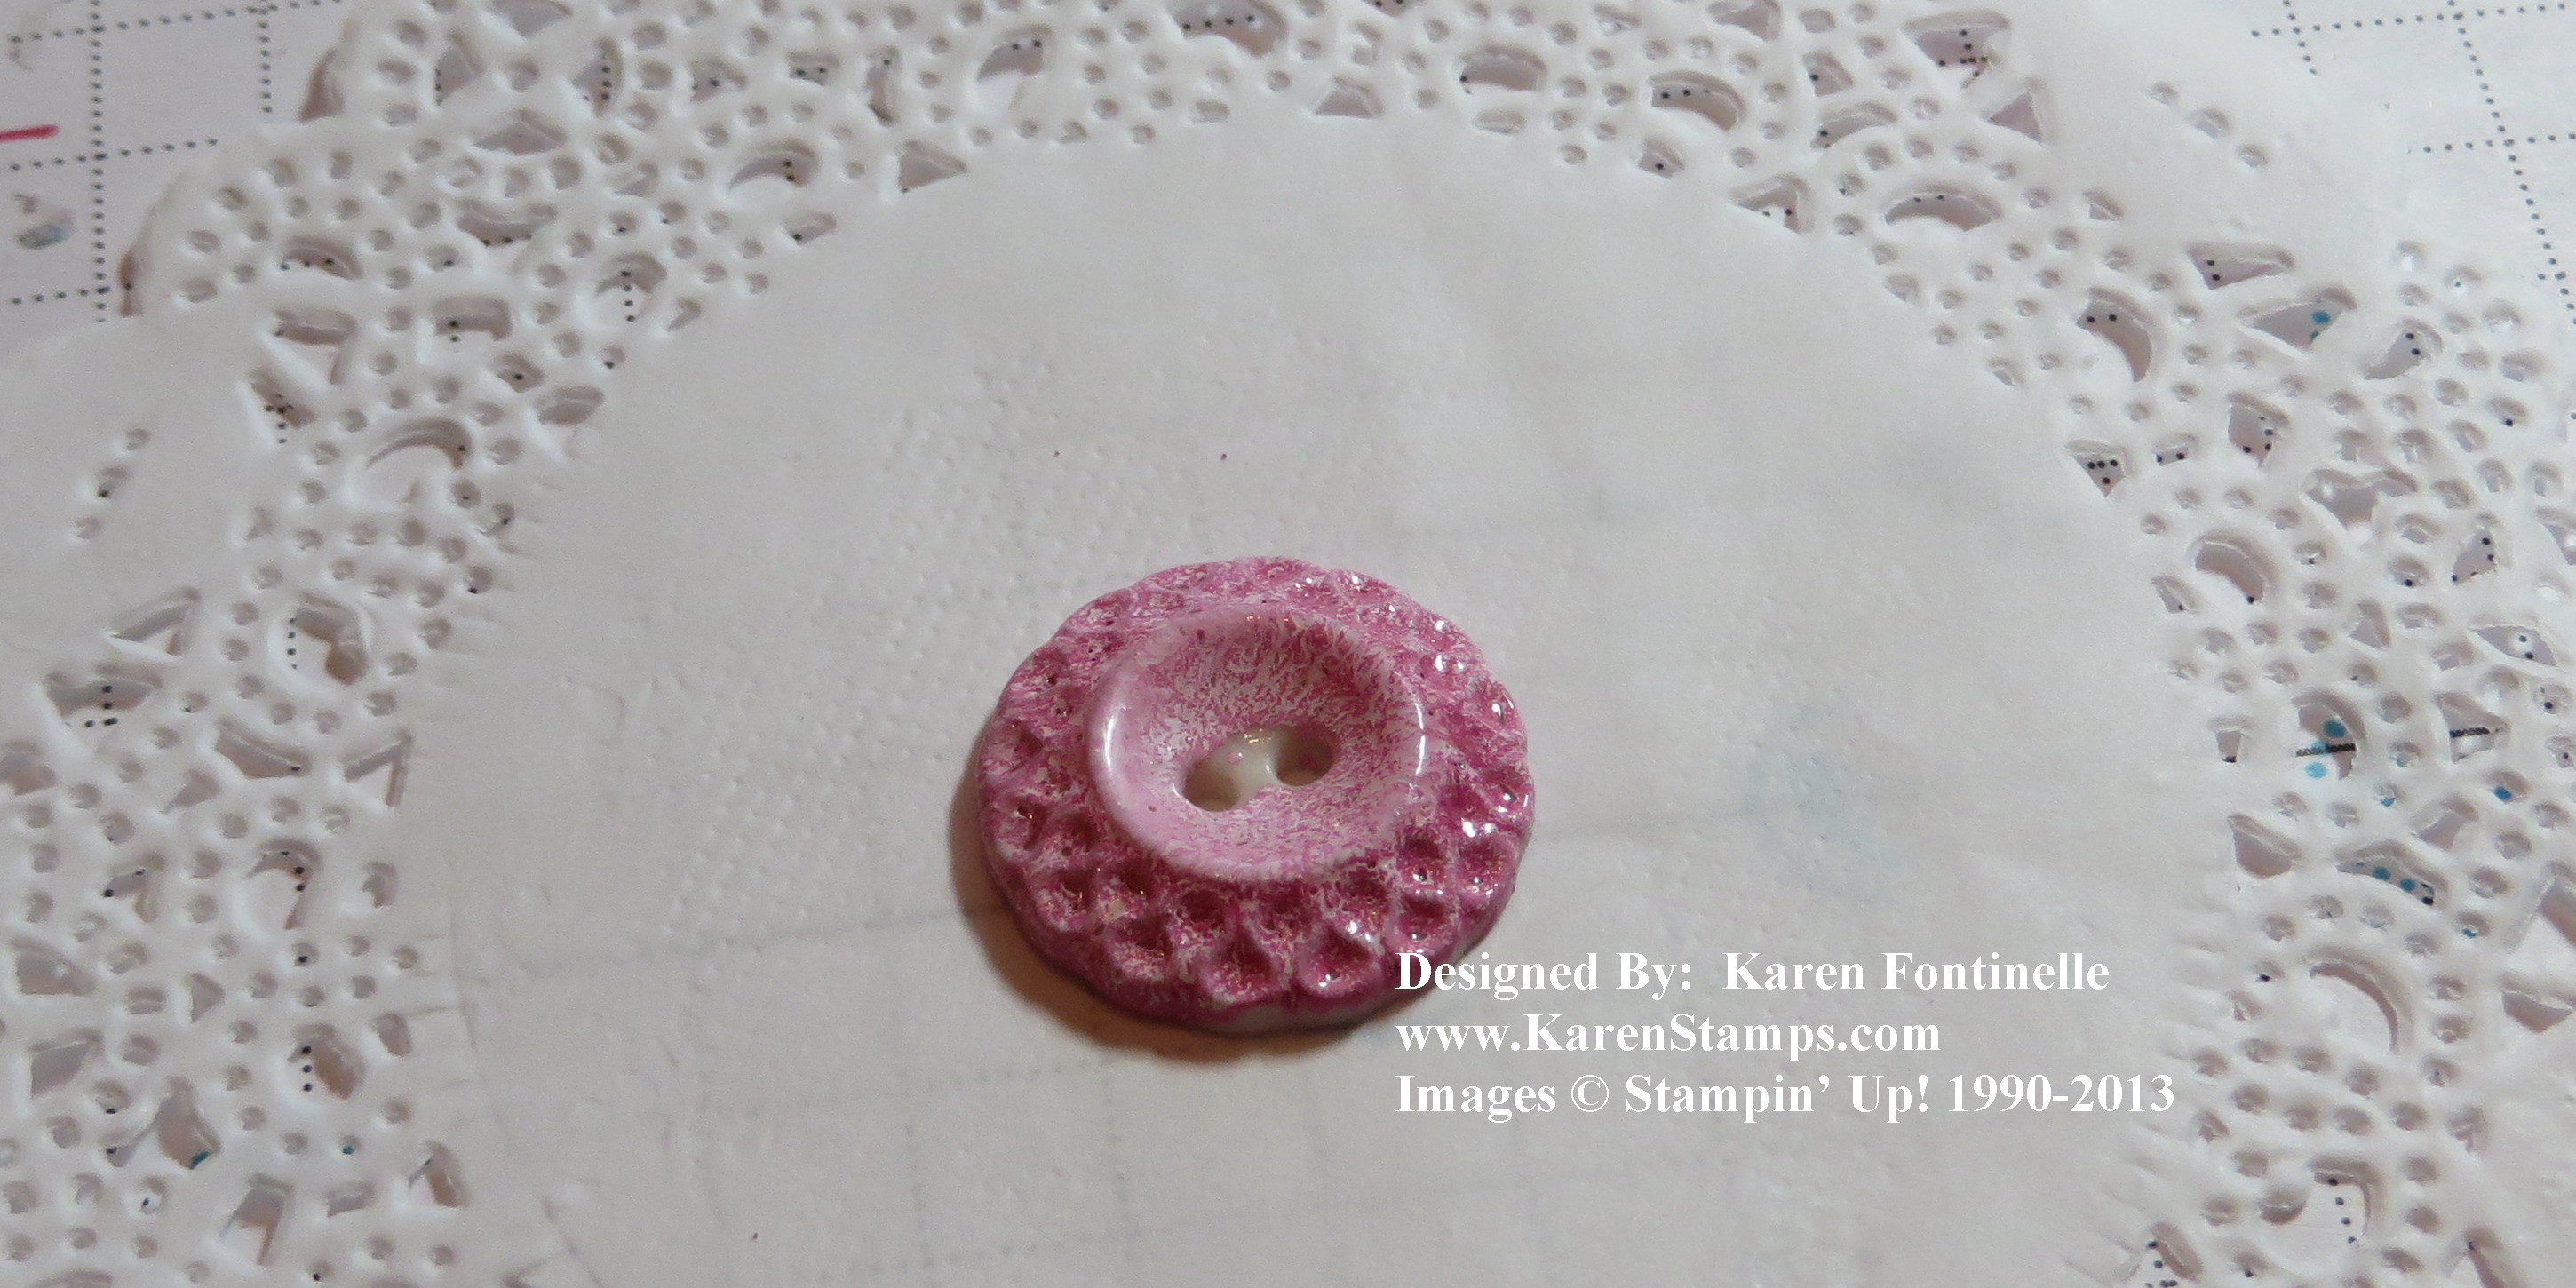
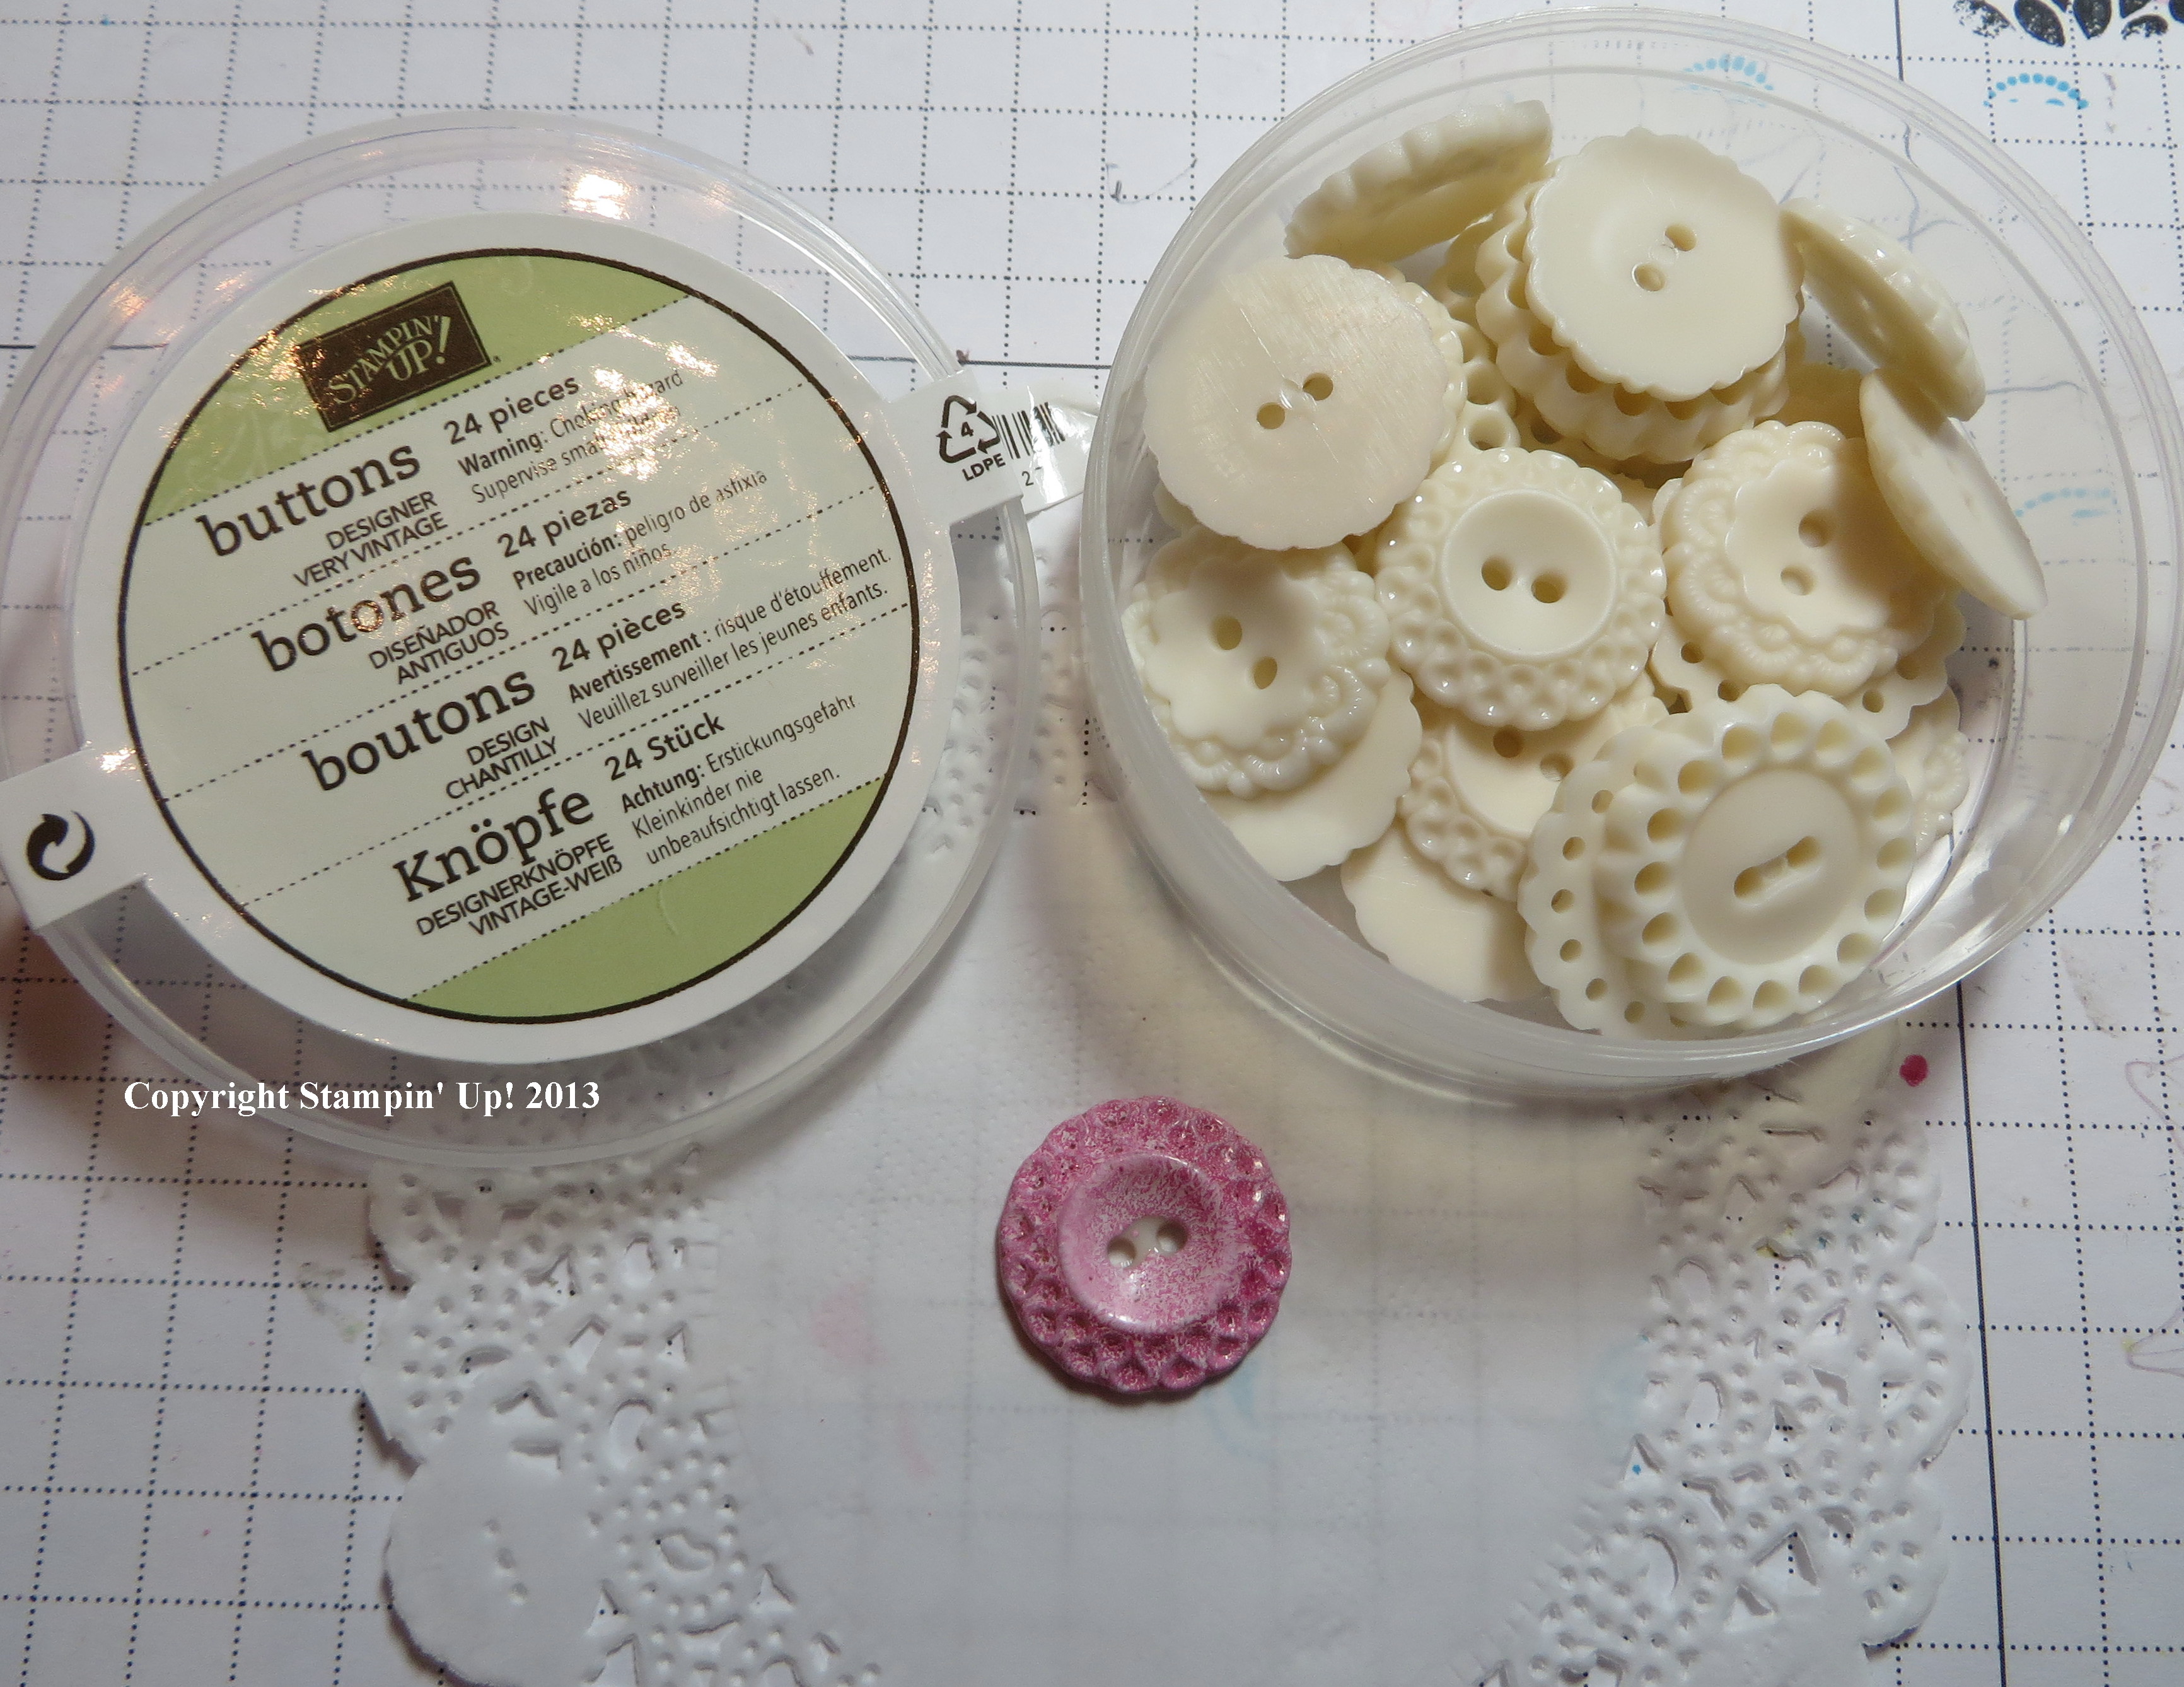
After punching out some flowers, stamping the background of the card with Versamark flowers and adding a Paper Doily, this was my final creatiion. If you just PLAY with your stamps, ink and paper a design and creation will come to you!

Flower Shop Chalk Talk Tag Card

Today get out some stamps, ink and paper that you haven’t used yet and see what you can create on your own! Send me a photo!

If you need any Stampin’ Up! stamps, ink and paper, you are welcome to visit my Stampin’ Up! Online Store  any time or contact me if you have any questions!

A Five-Way Flower Notecard from Scraps

Five-Way Flower 3x3 Notecard

Sometimes you don’t have to look far for creative inspiration! Sometimes it is as close as the scraps on your table!

I had stamped the Five-Way Flower several times with my new stamp set and also had some Real Red card stock scraps laying out. The card stock scrap looked pretty close to a 3″ x 6″ strip to trim, fold, and make into a notecard, and the Real Red stamped flower looked good on it since the Very Vanilla edges provided a contrast. Voila!  A little notecard just that easy!

The Five-Way Flower is a single stamp in the new catalog. When you look at it closely, you realize it is made for several scallop circle punches, probably already in your collection! Stamp the flower several times and then punch different size scallops to layer to build up the flower.  Separate the layers with a Stampin’ Dimensional. Or just stamp the flower and leave it as is!  I added a Rhinestone Basic Jewel to the center. You could also punch a different colored center or use a pearl or whatever you like.

I only had room for a small greeting (you wouldn’t have to have one) so I chose one from Itty Bitty Banners and just cut it out by hand (although there are matching framelits you can use!) (and the new Magnetic Platform would be super-duper for these!)

Such a simple little thing to make and yet it was so easy and most importantly, made me happy to make it!

Please visit my Stampin’ Up! Online Store to purchase any stamping, scrapbooking, and papercrafting supplies you may need!

Summertime Sunburst Card

Gingham Garden Summer Sunburst Card

On the one hand, I can’t believe it is officially summer already; on the other hand, here in Houston it has been summer for weeks! Heat and humidity, the standard summer weather forecast:  95 for a high, 75 for a low and 10% chance of rain!  So in honor of summer, I decided to try my hand at what I guess most people would call a “sunburst” card.  It’s a great way to use scraps of paper, and I’ve seen so many variations of this idea that you can do almost anything with it.  There is no right and wrong.

Since it is officially summer, I wanted my sunburst to be mostly yellow. I used the Gingham Garden Designer Series Paper to cut angled strips.  You can do this lots of different ways I’m sure and make lots of different sizes.  It probably doesn’t matter at all what you do,  I started with strips of the Gingham Garden paper about 4 1/2″ x 1 1/2″ and used my Stampin’ Trimmer to cut from one corner to the other diagonal corner.  Basically you want one straight edge and one angled side. Then just lay them out in the design you want, with the excess hanging off the card layer.  Be sure not to put adhesive ALL over the back of the strip because part will be trimmed off the card later. You can just lay out the strips in one area of the card or all over the top half as I did or over the whole card, whatever you like. Trim off the excess paper hanging off the edge of the card with your Paper Snips and you can also trim the place where all the points meet if you need to.  I placed a strip of designer paper across the middle of the card to cover that area but just the punched flower would have done so as well.  The flower is punched with the Blossom Punch – one piece of Delightful Daffodil card stock and two pieces of Gingham Garden paper. The center is a piece of Pear Pizzazz that was in my scraps already embossed! I just punched it out with the 7/8″ Scallop Circle Punch.

This was a fun and easy card to make and I’m anxious to try some other versions! Dig out some of your scrap paper and try it!

Visit my Stampin’ Up! Online Store here 24/7!

You’re Amazing Birthday Card

You're Amazing Birthday Card

Do you ever wonder where people get these creative ideas for making cards or any papercrafting projects?  There are lots of places, but perhaps the best one is right at your fingertips…..the new Stampin’ Up! Annual Catalog! I just barely started paging through the catalog when I saw both a tag and a birthday card at the top of page 15. The birthday card was simple enough although it had some sewing on it……but the tag was also cute.

I made the tag using the stamp set You’re Amazing and embossed with Pool Party Stampin’ Emboss Powder and Versamark Ink. I added two of the new Candy Dots on there (probably my main reason for making the whole card!). One of my favorite framelits dies is the one I used from the Apothecary Accents Framelits collection. I even punched a little hole in each side of the Happy Birthday piece and tied on some Pool Party Baker’s Twine (that color retired).

The card base is Crumb Cake, a great neutral to start with! For this card, I did cut it smaller than usual, 4 1/4″ x 8 1/2″ so when it is folded I have a 4 1/4″ square card. I meant to round the bottom corners of the card but I guess I forgot! After putting a little border on the bottom of the greeting using the  Dotted Scallop Ribbon Border Punch  I used strips of the This And That Epic Designer Series Paper for the layers underneath.  Very simple, good use of scraps, and makes a fun card I think!

In the photo below I think you can see the Pool Party embossing a little better!

You're Amazing Birthday Card with Embossing


If you want to purchase any Stampin’ Up! supplies, please visit my Stampin’ Up! Online Store now! Check the categories in the left sidebar when you get there and make sure you see ALL that is available!

Tag a Box Kraft Gift Box with Acetate Sleeve

Tag a Box Gift Wrap

This is a fun new product in the new Stampin’ Up! Annual Catalog!  You can buy just the box, the Tag a Box, which is a sturdy kraft box with an acetate sleeve. Before I opened the package, I thought the acetate was going to be a lid that I would have to assemble.  But it is a sleeve that just needs to be made 3D from being folded and then slid right over the box.  Love it! The box comes flat and then you easily assemble. Then the fun begins, filling it with whatever treat or gift you want to put in there! Since I was giving this to a stamper, I added three small cello bags of new and old ribbon, buttons and other embellishments….plus a few chocolates! I tied the Summer Starfruit ribbon around and added a tag. You can buy JUST the Tag a Box Gift Boxes, but I recommend purchasing the Tag a Box Bundle, which comes with the boxes and the Tag a Bag Accessory Kit.

Tag a Box Bundle

 * 10 large base tags
* 10 medium builder tags
* Baker’s Twine, 20′ each of 3 colors: Crushed Curry, Tangerine Tango, Bermuda Bay
* 10 mini clothespins
* 5 Smoky Slate self-adhesive
strips, each 12″
* 40 Stampin’ Dimensionals

Here’s a close-up of the tag. As you can see, I used a base tag and builder tag plus punched or cut out two images from stamps to put on the tag.  The “K is for Kindness” is from A Round Array, punched out with the new 7/8″ Scallop Circle Punch (I cut out the center by hand).  The “Thank You” is stamped with Itty Bitty Banners and just cut out by hand with my Paper Snips, although there are Itty Bitty Framelits you could use.

Tag a Box Bundle Gift TagTo purchase these or any other Stampin’ Up! products, please order online at my Stampin’ Up! Online Store or contact me at Karen@KarenStamps.com and I’ll be happy to put your order in for you. These gift boxes would be great to have on hand for those unexpected occasions when you need a cute little gift for someone!

A Father’s Day Paper Napkin Necktie

Paper Napkin Necktie

I received an email from Chinet, a company who makes paper table goods, that had a cute idea for folding one of their square paper napkins into a necktie shape for Father’s Day. To finish theirs off, they wrote on a paper tag the menu for Father’s Day. I thought it was a cute idea but used some Stampin’ Up! stamps, ink and paper to make a cute tag and attached it with a paper clip (like a tie clip!) The paper napkin necktie is pretty easy to make (only took me three tries!). You might call it simple origami! It would make a cute table decoration for Father’s Day. You can watch the video below.

For my tag, I stamped the images in Early Espresso, one on Crumb Cake and one on Whisper White with the Chalk Talk stamp set.  There are matching Chalk Talk framelits, but I don’t have them yet, so I just cut them out by hand. (There’s also a Chalk Talk Bundle to save you 15%!)  I also used the Curly Label Punch to add that extra colorful layer. I used the new In Color, Coastal Cabana.

Chalk Talk Tag on Paper Napkin Necktie

Shop the Stampin’ Up! Online Store Here!

Quotes and Sayings About Fathers for Father’s Day

A Saying about a DadFather’s Day is this weekend and I thought you might enjoy or be inspired by some sayings and quotes I found about fathers. I hope you will take some time to make a card for your father, grandfather, or husband and/or help your children make something special for their dad.  Make a scrapbook page or a mini album.  Decorate a picture frame. Make a gift bag for Dad. This is why we all have our stamps, ink and paper!  Let’s take the time to use them.  It’s faster than going to the card shop!

**************************

Any man can be a Father, but it takes someone special to be a dad. — Anne Geddes

The most important thing a father can do for his children is to love their mother.” — Rev. Theodore Hesburgh

The greatest gift I ever had came from God; I call him Dad! — Author Unknown

A truly rich man is one whose children run into his arms when his hands are empty. — Unknown

A father carries pictures where his money used to be. — Author Unknown

When I was a boy of fourteen, my father was so ignorant I could hardly stand to have the old man around. But when I got to be twenty-one, I was astonished at how much he had learned in seven years. ~ Mark Twain

A good father is one of the most unsung, upraised, unnoticed, and yet one of the most valuable assets in our society. ~ Billy Graham

Fatherhood is pretending the present you love most is soap-on-a-rope. – Bill Cosby

“We never know the love of a parent till we become parents ourselves.” – Henry Ward Beecher

“It is a wise father that knows his own child.” – William Shakespeare

Lovely As a Tree Father’s Day Card

Lovely As a Tree Father's Day Card

Father’s Day is Sunday so time is running out to make that special man in your life a handmade Father’s Day card. As I looked over my current stamp sets, I remembered that Lovely As A Tree is ALWAYS a good set to use for a masculine card. I decided to keep this card extremely simple, and you probably have this stamp set in your collection (and if you don’t, you need to order Lovely As a Tree right away!).  The card base is Soft Suede and the Whisper White strip is layered over a piece of Pear Pizzazz.  I had planned on the ribbon being lower on the card, but when I accidentally place it right at the base of the Whisper White, I liked it very well right there. This is the 7/16″ Natural Trim Ribbon and it has a burlap look to it. I really like it and thought it was perfect on this card. The greeting is from Teeny Tiny Wishes (another big favorite of mine!), punched out with the Word Window Punch and layered on the Modern Label Punch (should I say again, all favorites of mine?!)

Thumping Technique

To color in the trees, I decided to use the Thumping Technique. I selected three green Stampin’ Write Markers and colored in the leafy part of the trees and the grass on the stamp with the lightest color green. Then I picked up the next darker marker and held it so I could just “thump” the markers in spots on the trees…here, there and everywhere.  Do the same with the darkest green.  Then I took the Soft Suede marker and colored in the trunks of the trees and some of the branches.  It doesn’t matter that you are going over the green because the brown is darker. When I thought I had the stamp covered enough in the marker, I breathed on it real well or re-moisten the ink and stamped.  That’s how you get that variegated look to the leaves!

Have fun making a nice Father’s Day card for your father, your husband, your uncle, maybe your son….whoever in your life deserves a handmade card from you!


A Father’s Day Card Idea

Chalk Talk Father's Day Card

Father’s Day is Sunday, June 16th so we should all be thinking about making a Father’s Day card. Here is a Father’s Day card idea I came up with using a greeting from the new Chalk Talk Stamp Set.  And you won’t believe the designer paper I used for the background! It’s a pattern from Gingham Garden Designer Series Paper!!  Who would think you would find a suitable male pattern in a pack of Gingham Garden paper?! But the backs of the flowery papers have patterns like this one to use for a variety of projects!

The card base is Crumb Cake.  The darker brown is Soft Suede. The banner is cut out with the Apothecary Accents Framelits Die.  If you don’t own that die, you could use a rectangle and two small circles adhered to the sides. The cute little buttons, which I think just “make” this card are from the Naturals Designer Buttons and tied with a little bit of Linen Thread.

The greeting is from the new stamp set Chalk Talk. It’s a generic greeting that can be used in so many ways so I think it can be used for a Father’s Day card from a child, a step-child, a wife to her husband, maybe even a niece or nephew to a favorite uncle; anyone special in your life.

If you are interested in the Chalk Talk stamp set, be sure to notice you can purchase the stamp set (wood or clear) and the matching Chalk Talk Framelits DIes as a Bundle and save 15%!! You use the Framelits with the Big Shot Die-Cutting Machine to cut out those shapes.

And for the inside of the card, I added a Whisper White layer and a little designer paper. The Father’s Day greeting is from Teeny Tiny Wishes (a must-have set, if you ask me!) By the way, a stamp set like this, with small stamps, I prefer to own in the wood-mount. Just a little easier to handle and clean.

Chalk Talk Father's Day Card Idea

For all of your stamping needs, please visit my Stampin’ Up! Online Store here.


Gift-Wrapping with Stampin’ Up! Washi Tape

Gingham Garden Designer Washi Tape Birthday Tag and Gift

Now that Stampin’ Up! sells washi tape, we will find lots of ways to use it. You can easily decorate a Kraft Gift Box with strips of our new Gingham Garden Designer Washi Tape. It’s even repositionable, so I was able to lift one part up and put one strip underneath on the top of the box. You could also wrap the tape around the sides of the box or add matching designer paper.

The birthday tag is made by just snipping off the top corners of a scrap of Whisper White card stock.  I added some strips of Gingham Garden Washi Tape to the bottom of the tag.  Since you usually just tear washi tape, I let the lengths be longer than the tag by just a bit and then trimmed off the excess with my Paper Snips on each side.  Washi tape is translucent so keep that in mind when you are deciding on what colors of paper to use.  The surface you stick the tape to will show through somewhat.

To decorate the hole of the tag, I just punched a small scallop with the 7/8″ Scallop Circle Punch, adhered it to the tag, and then used a regular hole punch to punch the hole for the tag. To tie on the tag, I used the Daffodil Delight 1/4″ Stitched Grosgrain RibbonYou could hand write your greeting or your “To” and “From” on the tag or stamp something, or both!  I stamped a birthday greeting from Bring on the Cake in Island Indigo, one of the coordinating colors of the Gingham Garden Washi Tape.

If you want to try out some of the new Stamping’ Up! Washi Tape, just go to my Stampin’ Up! Online Store here.

Mixed Bunch Flower Birthday Card

Mixed Bunch Flower Birthday Card

There are many places to get inspiration for our stamping, and for Stampin’ Up! Demonstrators, one of them is our Stampin’ Up! publication called Stampin’ Success. This card I made is pretty much like one in my magazine. I changed the center of the flower because I didn’t have the same stamp set they used, and I used a different color of Baker’s Twine to wrap around the card layer.

The base of the card is made with one of our new In Colors, Coastal Cabana, and the front layer is Whisper White. The sizes are different than our usual cards. The card base starts at 6 1/2″ x 6 1/4″ and folded in half to become 6 1/4″ long by 3 1/4″ wide. (If you want to make it a little easier for yourself without remembering all those numbers, cut a 6″ x 6″ square of card stock for the card base and fold in half!) Before adhering the Whisper White layer, I adhered three separate strings of Baker’s Twine (I used retired Pool Party) to the card stock on the back to save those extra inches I would have used wrapping around.  You can do it either way.  Then I just tied the bow to the center string.

The flowers are stamped with the Mixed Bunch stamp set and Coastal Cabana ink and punched out with the Blossom Punch.  I punched out two flowers so I could layer them and slightly curled the top flower with my Bone Folder to give it some dimension. For the flower center, I stamped the “For You” image from A Round Array twice–once in Coastal Cabana and once in Crisp Cantaloupe.  I used the 1/2″ Circle Punch to punch out the words in Crisp Cantaloupe and used the new 7/8″ Scallop Circle Punch to punch out the whole image in Coastal Cabana. Then I just layered the words on top of the scallop with a tiny Stampin’ Dimensional (part of one). You can layer whichever parts you want with dimensionals or just adhere them together in a flat fashion. The scallop is layered on top of a 1″ Delightful Daffodil circle. I made two little strips of Crisp Cantaloupe card stock and cut the ends like flags and stuck them underneath the flower for a little contrast.  The greeting is from Bring On the Cake but of course, you could use any number of greetings.  For the center of the flower you could place a button or other embellishment instead of the words.

This is a good basic card that you can modify for any number of occasions!

Here are some other ideas you could do:

  • Use ribbon instead of the Baker’s Twine.
  • Turn the card sideways, putting the flower on one side and stamp a greeting on the other side.
  • Stamp a flower or other image and wrap the Baker’s Twine or ribbon around the base of the layer.

If you need any stamping supplies to make cards like this one, please shop at my Stampin’ Up! Online Store here.

Dress Up Birthday Card

Dress Up Birthday Card

Now that my daughter has received her birthday card, I can post it here.  The paper is retired now, but most things are current for you to make your own card like this. The Dress Up Framelits are so fun to use! Just cut out a dress in whatever paper you like, maybe cut two and then have a different top and bottom to your dress, or even a jacket! Almost like playing with paper dolls!

Use the Oval Collection Framelits to die cut a background.  I used the birthday stamp from Petite Pairs for the greeting.  This stamp set is on sale now in the Grab Your Greetings offer for 25% off.  Be sure to check it out because it is a good sentiment stamp set to own.  The other two choices are good ones, also.

The Real Red border at the top and bottom of the retired designer paper is punched with the Dotted Scallop Ribbon Border Punch.  What I love about this punch is you can show just the tiny scallops on the edge or you can show the dotted part, so versatile!

If you would like to own the Dress Up Framelits and make oh so many cute projects with them, please visit my Stampin’ Up! Online Store here to place your order.

Gingham Garden All-Occasion Card

Out of the selection of designer series paper I was allowed to purchase during my demonstrator preorder from the new Stampin’ Up! Catalog, the Gingham Garden Designer Series Paper was my favorite! I’m so glad to be finished with the retirement lists and just start working on new stuff! Plus I have a new camera for taking pictures of my cards and projects for my blog so I am having to learn how to use it and get the photos off!  Always a learning curve!

Here is my new card made with Melon Mambo card stock and two patterns from Gingham Garden Designer Series Paper.

Gingham Garden All-Occasions Card

I did a lot of fun things on this card!  The button (Very Vintage Buttons) in the middle of the flower started out plain.  Since I already had some Melon Mambo Embossing Powder, I decided to try embossing the button!  I put some Glue Dots on the back of the button so I could hold it from the back with my long tweezers.  You could use anything you had.  I dipped it onto a Versamark Ink Pad and then embossed with the embossing powder and Heat Tool!  I like the way it turned out!The very center didn’t pick up any Versamark but that is covered with the Baker’s Twine bow.

Embossing Button

Melon Mambo Embossed Button

Melon Mambo Embossed Button

To make the flower (since I couldn’t find my Paper Daisies!), I punched three Whisper White flowers with the Blossom Punch and snipped the petals with my Paper Snips. The layers are glued together and the flower adhere with Stampin’ Dimensionals.  There is half of a Tea Lace Paper Doily stuck in behind the flower.

The greeting is stamped on Whisper White and also on Melon Mambo card stock and punched out with the new Artisan Punch. Then I used my Paper Snips again to cut out just the greeting portion and adhered that to the Melon Mambo piece with Stampin’ Dimensionals.

If you need any of these or other stamping supplies,please shop at my Stampin’ Up! Online Store HERE.

New Stampin’ Up! Catalog Day is Here!

The NEW STAMPIN’ UP! ANNUAL CATALOG BEGINS TODAY AT NOON MT!!

Stampin' Up! Annual Catalog 2013-14

View the Catalog online (Flash)

View the Catalog PDF

View the Stampin’ Supplies

This is the day we’ve all been looking forward to!  Stampin’ Up! will be transitioning the website over to the new catalog until noon MT today You can also order any retiring items, as well as from the Spring Catalog, while supplies last!  People are calling it the “trifecta of ordering” because you can order from all three catalogs at once…the old, the new, and the Spring Catalog!  Have patience because there will be a LOT of people ordering and sometimes there are glitches when everything is new!

Stampin’ Up! New Catalog goes live at:

  • 11:00 am Pacific Time
  • Noon Mountain Time (Stampin’ Up! Home Office Time)
  • 1:00 pm Central Time
  • 2:00 pm Eastern TIme

I always like the see the time written in my own time zone so I don’t have to keep figuring it out!

And that’s not all!!!!

Grab-Your-Greetings sale

Three greeting stamp sets are on sale for 25% off starting today and going through June 30!  We always need another greeting set!  This is an easy add-on to your order!

Grab Your Greetings Chart

____________________________________________________________________

The Bracket Stamp personalized name stamp with 5 lines (item 131138) will not be available in time for the May 31 catalog launch, but we anticipate that it will be available soon. However, the other versions of Bracket Stamp, with 1-4 lines, will be available to order once the catalog is live.

________________________________

Remember……Ordering begins today at Noon MT (Stampin’ Up! Time!)

Current Catalog          NEW CATALOG           Spring Catalog

The Spring Catalog will END tonight at 11:50 pm MT!!!!!!!!!!!

Just go to my Online Store after Noon MT today and you can start placing your order!  If you have any questions, please contact me at Karen@KarenStamps.com or call at 713-981-7662.

If you plan to shop for your Stampin’ Up! supplies with me and want a brand new catalog to hold in your hands (even though it is online!) please email me or call with your contact information and phone number.

Close to the End for the Stampin’ Up! Spring Catalog

Sunshine & Sprinkles Rainy Day Card

I’m really sad to see the end of the Stampin’ Up! Spring Catalog, even with the excitement of the upcoming new catalog! You have today and tomorrow, May 31st, to order from the Spring Catalog.

This card I pretty much CASED (copied) right from the sample in the Spring Catalog.  I think all the rain and storms around the country inspired me to do a cloud and umbrella card.  The card base is Pacific Point with a layer of Vellum Card Stock which is scored just around the edges at about 1/4″. I used the Labels Collection Framelits to cut the shape out of Whisper White and embossed it with the Cloudy Day Embossing Folder. The umbrella and greeting is stamped with the Rain or Shine stamp set.  The little strip of striped paper is from Sunshine & Sprinkles Designer Series Paper.  I love that colorful stripe!

Shop Stampin’ Up! Online all day today until midnight Mountain Time tonight!

At midnight Mountain Time tonight Stampin’ Up! will shut down ordering until Noon tomorrow May 31 Mountain Time when the NEW STAMPIN’ UP! CATALOG will go live!!!

When you have your order ready, just go to my Online Store HERE or contact me with your order and I’ll be happy to put it in for you!