Magnificent Maple Fall Thinking of You Card

Magnificent Maple Fall Thinking of You Card

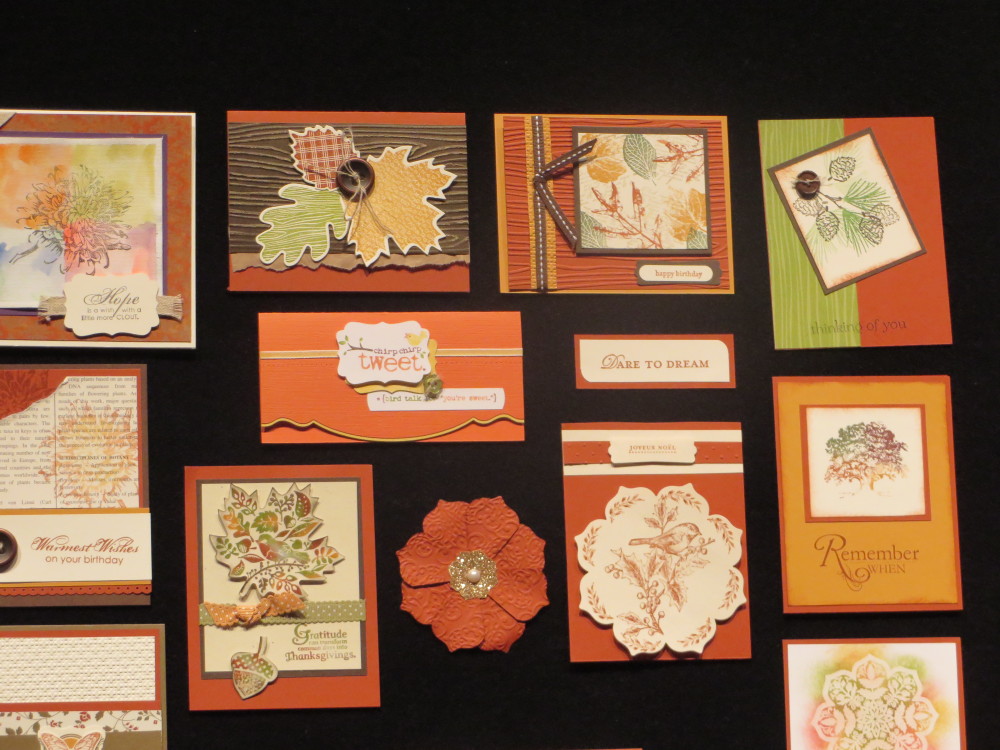
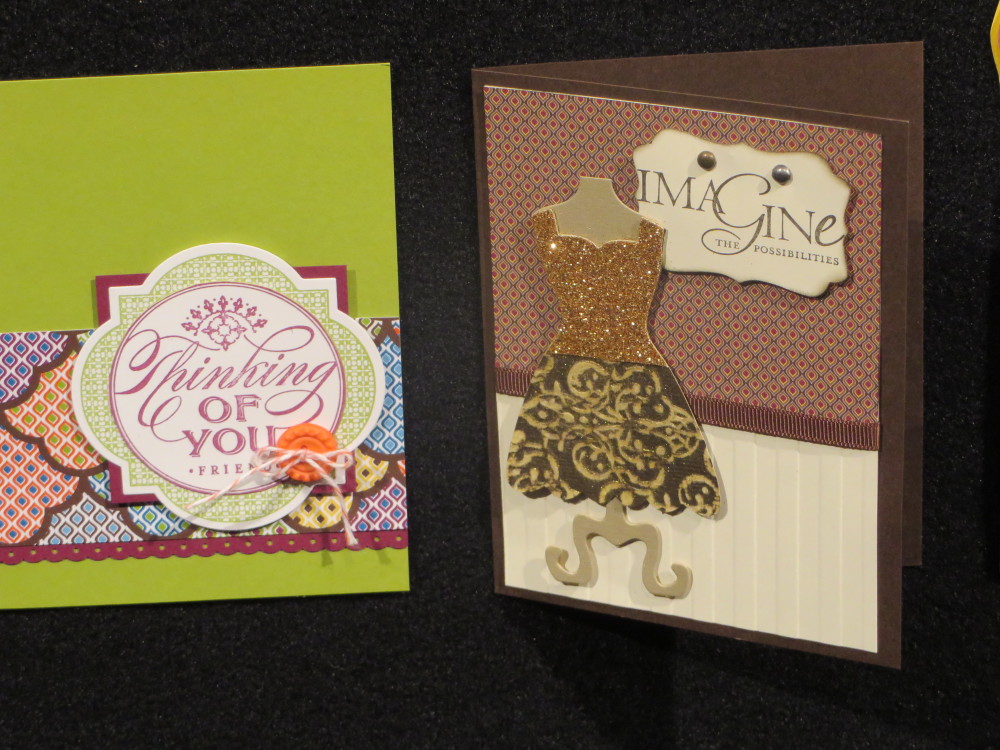
This leaf stamp on this Thinking of You card comes as a single stamp called Magnificent Maple in the Stampin’ Up! Holiday Catalog. I thought it was a beautiful leaf stamp, even though I have other leaf stamps.

I thought about calling this my Backache Card because I have done something terrible to my back, maybe putting it into perpetual spasm. I’m beginning to think that it is actually slowly getting better.  I couldn’t exist without ice packs right now! But Saturday night, after a miserable day, I was feeling mostly better, like magic! The first thing I wanted to do for my mental health was play with something from my new Holiday Catalog order.

This Magnificent Maple stamp seemed like the perfect stamp to make a simple card. Since the right colors of ink pads weren’t already on my kitchen table, rather than reach down to where the ink pad caddy is on the floor because of my back pain, I decided to just ink up the stamp with Stampin’ Write Markers. If you start with the lightest color and progress to the darkest you won’t mess up your markers. I believe I used Crushed Curry (or Daffodil Delight) for the yellow, Gumball Green, Pumpkin Pie, and a bit of Cherry Cobbler, just coloring in various areas of the stamp. When you use markers, you should “huff” or breathe on the stamp to remoisten the ink before stamping.  Obviously I stamped the center leaf full strength, inked up the stamp again but stamped off VERY lightly on scrap paper before stamping on my card for that lighter image. Maybe I stamped the lightest leaf on the left with what was left of the ink on the stamp.  It’s very light.

The card still needed something so I decided to sponge some color around the leaves. See those big sponged areas of Baked Brown Sugar? I wasn’t happy that I was sloppy and got the first big brown area when all I was trying to do was sponge a little soft subtle color around.  But since “there are no mistakes in stamping”, I decided to just add another big blob!  Make it look like I intended it to be that way! There’s almost always some way to fix a stamping boo-boo.

The greeting is from A Dozen Thoughts.  I put it at the top since I happened to stamp the leaves a little too low. And for a little extra interest I tied some Linen Thread around the panel and added a Natural Designer Button. I also stamped a few leaves in green on the Gumball Green card stock to add a little something around the edges.

So if you have back pain and it stops for awhile, go celebrate by stamping something!

New Thinlits Card Dies from Stampin’ Up! Make Some Easy Flip Cards!

New Thinlits Card DiesOne of the exciting new Stampin’ Up! products introduced at the Stampin’ Up! Convention was the new Thinlits Card Die. There are two card dies available to create a card that flips! Instead of having to cut the design of this card by hand, now you can just use the new thinlit and your Big Shot Die-Cutting Machine.  Each die comes with extra die pieces that you can use to embellish and design your cards.

These Thinlits Card Dies were one of the Prize Patrols at Convention but they had not yet arrived at Stampin’ Up! so the prize winners had to wait until the next day to pick them up!  That’s how NEW these card dies are!!

Please enjoy this video and get the full idea of how to use them here:

http://youtu.be/CwdGSYeIn44

Click on the image below to read the flyer or print it off!

Thinlits Card Dies Flyer 2013

Click image to read flyer.

To order these new Thinlits Dies and other products you like from the Stampin’ Up! Holiday Catalog, please shop at my Stampin’ Up! Online Store here.  Or you are always welcome to email your order to me!

It’s Stampin’ Up! Holiday Time!

It may be August, but it is none too early to start thinking about the upcoming holidays!  And just in time is the Stampin’ Up! Holiday Catalog, chock full of creative ideas and new products! Now is the time for us crafty stampers to start working on all these projects we intend to do before each holiday and season and often run out of time to do!  Get an early start now with the Stampin’ Up!  Holiday Catalog!

Stampin' Up! Holiday Catalog 2013

Click catalog image to shop!

Holiday Catalog Flipbook

Holiday Catalog PDF

Holiday Catalog Stampin’ Supplies

Holiday Catalog Spanish Flyer

If you have a copy of the catalog, don’t forget to try out the new feature with your smartphone: little videos!

If you don’t have a Stampin’ Up! Demonstrator and would like a copy of the Holiday Catalog mailed to you, please contact me at Karen@KarenStamps.com.

Yes, you can place an order today, August 1st from the new Stampin’ Up! Holiday Catalog!

And there are even more goodies available starting today!  Check back later!


More Stampin’ Up! Convention Display Board Samples

Just a few more I chose from my photos!  Enjoy!

Stampin' Up! Apron Dress Up Framelit Die

Stampin’ Up! Apron Dress Up Framelit Die

Paper Doily Die Card

Paper Doily Die Card

Beautiful Embossed Pumpkin Card

Beautiful Embossed Pumpkin Card

Sample Cards

Sample Cards

Fall Inspiration Cards

Fall Inspiration Cards

Doggie in the Dog House Punch Art Card

Doggie in the Dog House Punch Art Card

Summer Smooches Cards

Summer Smooches Cards

Cute Red Bird Card

Cute Red Bird Card

Oh Hello Scallop Tasteful Trim Card

Oh Hello Scallop Tasteful Trim Card

Make an easy hot air balloon card!

Make an easy hot air balloon card!

Epic Day Designer Paper Triangles

Epic Day Designer Paper Triangles

Hello Card with Epic Day This and That Designer Paper

Hello Card with Epic Day This and That Designer Paper

Cupcake Punch Birthday Card

Cupcake Punch Birthday Card

Apothecary Accents Framelit and Epic Day DSP

Apothecary Accents Framelit and Epic Day DSP

Epic Day This and That Designer Paper

Epic Day This and That Designer Paper

Cute Little Embellishments to Make

Cute Little Embellishments to Make

Yellowstone Natl Park Scrapbook Page

Yellowstone Natl Park Scrapbook Page

Patio Party Designer Paper

Patio Party Designer Paper (Retired)

Cork board

Cute little cork board

Label Love

Label Love Stamp Set and Artisan Punch

3D Box


Stampin’ Up! Convention Make & Takes

This year at the Stampin’ Up! Convention Make & Takes were just ONE of the many activities we could choose from to do.  Since I usually get frazzled at Make & Takes, I chose to do mine at home and partake of the other demonstrations and things going on, as well as taking pictures of the display boards.

We always get stamp sets at Convention with which to do the Make & Takes.  This year we received the “Hello, Lovely” Stamp Set, Gorgeous Grungeand the Ronald McDonald set, Tag It. With each purchase of the Tag It stamp set, Stampin’ Up! donates $3 to the Ronald McDonald House Charities.

Here are the packets we received with all the materials to make the projects!

Stampin' Up! Make & Takes

And here are the projects completed!

Tag a Bag Gift Bag

You can trim and score the Tag a Bag Gift Bags in order to make them stand up rather than just be flat. This one has a tag made from the Tag It stamp set and the Tag a Bag Accessory Kit plus some of the new Coastal Cabana Ruffle Stretch TrimYou can make lots of cute little gift bags with these tags and bags and buy them as a bundle.

Hello Lovely Card

This was a fun card made with the Hello Lovely Stamp Set plus the Gorgeous Grunge Stamp Set.  The Gorgeous Grunge stamp set reminds me of the stamp set we had long ago, I think it was called “Itty Bitty” – something.  It was very handy for just adding a bit of texture or interest when you needed it.  This card and envelope also has a bit of Epic Day Washi Tape on them. And the little Baker’s Twine thread in the Vintage Button was dyed by holding the twine down on the ink pad with a piece of sponge and then pulling the twine through. Not sure I would want to bother doing this very often, but if you need a certain color, you can do that.

And here are several note cards and envelopes that go in the cute gift bag.

You Make Me Happy Notecards and Envelopes


You Make Me Happy Notecards


You Make Me Happy Notecard Gift Bag

And here’s an easy box to make with the Tag a Bag Gift Box.

Tag a Bag Box

These boxes are going to be so good to keep on hand for those little gifts and things when you need something special.

For these or any other great Stampin’ Up! stamping supplies, please shop with me at my Stampin’ Up! Online Store!

Display Boards at the Stampin’ Up! Convention

One of my favorite parts of any Stampin’ Up! Convention is looking at all the display boards with projects galore! Here are just a FEW photos of where I started photographing cards and projects on the display boards.  Yes, the paper and some embellishments might be retired but they are still fun to look at and perhaps you already have those materials and can duplicate some of these or get ideas for using new papers and products! Click on the pictures to enlarge.

All images copyright Stampin’ Up! 2013

Stampin' Up! Convention Cards on Display

Stampin' Up! Convention Cards on Display

Swallowtail Stamp Set Butterfly Card

Beautiful Swallowtail

Beautiful Dress with Champagne Glimmer Paper and Core'dinations Card Stock and Dress Up Framelits

Beautiful Dress with Champagne Glimmer Paper and Core’dinations Card Stock and Dress Up FramelitsPunch Art OwlCute punch art owl!Stampin' Up! Display Boards at Convention

All Cute Projects!
Stampin' Up! Display Boards at Convention

Close-up of hanging wordsDecorate your flip flops

Cute Flip Flops!
Dress Up Framelits art in a frame

Cute framed paper art

Use Stampin' Up! Buttons to decorate box

Cute way to decorate top of a box!

If this is getting you in a stamping mood, you can order more stamping and scrapping supplies at my Stampin’ Up! Online Store HERE.


A Fun Visit to the Stampin’ Up! Home Office

The first day of Convention, Stampin’ Up! provided buses for us to ride out to Riverton, Utah to tour the home office.  It was about a 25-minute ride and oh so beautiful out there! I could turn in a circle and see mountains everywhere! No wonder they picked that spot for the home office! This is where the offices are and the Distribution Center where our orders are packed.  However, the stamps are manufactured a few hours away at Kanab, Utah.

After being greeted by some Stampin’ Up! employees when we got off the bus, we went inside!

Stampin' Up! Home Office Tour

 the history of Stampin' Up!

In the Legacy Room, the History of Stampin’ Up!

Covering walls with designer paperUsing (retired) First Edition Designer Paper to cover the walls

Decorate your wall with die cut flowers

Decorate your wall with die cut flowers

Books covered with designer paper

Books covered with designer paper

Getting the Stampin' Up! boxes ready to pack

Getting the Stampin’ Up! boxes ready to pack

Stampin' Up! Distribution Center

Stampin’ Up! Distribution Center

Stampin' Up! Distribution Center

Where our orders get packed!

The Stampin' Up! Rock

The Stampin’ Up! Rock

And I still have plenty of photos I would love to show you that I took at this place! I have to figure out how to make a gallery of photos! But at least this gives you an idea of the home base of Stampin’ Up! and what a lovely work enviroment they have. I also have photos of “The Idea Room”, a large room with bean bag chairs, a piano, games, stamping supplies, and one room where all the walls are those dry erase boards, I suppose for brainstorming.  Of course demonstrators had fun writing all kinds of messages all over the walls!

Writing messages in the Idea Room

Writing messages in the Idea Room

Writing on the Board in the Idea Room

Writing on the Board in the Idea Room

Even if you’re not a demonstrator, if you’re on vacation in the Salt Lake City area, you might call Stampin’ Up! and see if you could pay a visit to see the beautiful home office in Riverton, UT.


Stampin’ Up! 2013 Convention Highlights Video

Stampin’ Up! has posted the 2013 Convention highlight reel!  I hope you enjoy while I continue getting my feet back down on the ground after such a fun time at Convention!

And I’m editing this post to add that the theme song singer, who Shelli introduced as “Ryan from The Voice” is Ryan Innes, a contestant on “The Voice” TV show! http://www.youtube.com/watch?v=AIKGHEZzuC0


Stampin’ Up! Home Office Tour

Not enough time to tell you every last detail right now!

Took a bus ride out to Riverton, UT to the Stampin’ Up! Home Office!

Stampin' Up! Home Office


So fun!  Some employees were there to greet us as we got off the bus!

Stampin' Up! Home Office


In the Atrium

IMG_0516


Just one photo of one of the beautiful displays!  Got more!

IMG_0524


Do you know Stampin’ Up! Demonstrators will stand in line for half an hour to get their picture taken by a rock??  Well, it is the Stampin’ Up! rock!  Can’t find the photos now but I’ll catch up later!

First General Session at 5:00 was fabulous!  Guess who even won the second Prize Patrol??  Get yourself some of the Modern Medley Designer Series Paper and gold embossing powder!  Pam Morgan of SU says it will be the hot thing!  She used the “Grunge” stamp set….can’t think of the correct name.  Got beautiful backpacks too!  Broke the world record for most greeting cards mailed from one location!  I stood in line for an hour to mail my card but now I’m part of a world record! Special offer coming on My Paper Pumpkin.  Stay tuned! So much going on, so fun, so fun!!!


First Day of the 2013 Stampin’ Up! Convention

The schedule for the Stampin’ Up! Convention this year is rather different.  I’m not sure I have it all straight in my head yet.  But I do know first thing today is a bus tour out to Riverton to see the Stampin’ Up! Home Office!  I have been there before several years ago and it is a wonderful place (would Stampin’ Up! have an office that wasn’t wonderful??!) so I’m anxious to see it again.  As I remember, there were several rooms to walk through and see stamping ideas and even some Stampin’ Up! history.  The first General Session will begin about 5:30 pm tonight.  The excitement will be palpable!  Just flying in yesterday we were getting more excited the closer we got and when I got to my hotel I thought, “OH, it’s just across the street over there!  So close!”  So much excitement that will happen and so many memories we will all make!  My trip here was fun because I met one demo I already knew a little bit and enjoyed her company, plus we met two other ladies who were fun to be with as we ate lunch together in the Denver airport and rode the shuttle together over to the hotel.

For Convention I always like to take my own notebook, even though they give us a workbook of sorts, but I like to decorate the cover and have plenty of writing and drawing space.  So this is what I came up with close to the last minute!

Convention 2013 Notebook

And since all 5800 of us will get the same bag, it’s a good idea to make some kind of tag that hopefully helps you keep track of your own bag.  Here’s the one I made, not knowing what the bag will look like!

Convention Bag Tag

That’s all I know so far!  Follow me on Twitter at www.twitter.com/karenstamps and especially my Facebook business page www.facebook.com/stampingwithkaren.  I’ll try to remember to post there now and then.

Secret Garden Flower Card

We have some kind of flowers back along the fence with long stems and lots of small flowers in pinks and whites. This morning they looked especially beautiful blooming in all their glory! And those flowers inspired this card.

Secret Garden Flower Card

Since I couldn’t stamp white flowers on Whisper White card stock, I stamped flowers from the Secret Garden stamp set in Pink Pirouette and Strawberry Slush (with some flowers stamped off once to give a lighter shade) with three flowers cut out with Paper Snips (cuz I forgot we had matching framelits, oh well!!) and popped up on Stampin’ Dimensionals. The greeting is from the stamp set Label Love and punched out with the Artisan Label Punch.  Actually the greeting is trimmed a bit so I could layer over the punched piece of Baked Brown Sugar card stock.  I stamped it twice and cut out the strip with “just for you” so I could pop it up with dimensionals. Three new In Colors were used on this card:  Strawberry Slush, Baked Brown Sugar, and Pistachio Pudding.

With so many flowers stamped on my card stock, it’s almost like I made my own designer paper! You can do the same thing!

For any Stampin’ Up! supplies, please visit my Online Store here!

Modern Medley Houndstooth Petite Purse

Modern Medley Black Houndstooth Petite Purse

Use the new Stampin’ Up! Modern Medley Designer Series Paper to make a stylish purse with the Big Shot and Petite Purse Die! This is one of the new designer papers in the current Stampin’ Up! Annual Catalog. I added an edging of the new Stampin’ Up! Strawberry Slush Ruffle Stretch Ribbon. This is really pretty ribbon in one of the new Stampin’ Up! In Colors and SO easy to work with because of the stretch.  You will love it! Before I added the ribbon, I snipped off the little tab that would insert into the slit in the front of the purse in order to fit the ribbon. I also added an embellishment from the In Color Boutique Details package. These look like buttons without the holes! This one is a Strawberry Slush color.  I adhered it with a couple of Mini Glue Dots. In order to hold the purse flap closed, I adhered a small piece of velcro on the flap and on the purse so that it can be opened and closed.

This purse is very small but can be used decoratively or to hold a few little favors, perhaps a couple of chocolate nuggets or candies or some other little gift.  The die is easy to use. The paper is scored and easy to fold into the purse shape.  The little handle is a separate piece on the same die that cuts out at the same time.  I have attached it to the purse on the sides with Silver Mini BradsWhen designer paper is used, it may be difficult to see the score lines but using the die as a guide as to where the score lines are, you can easily feel them and then fold them.  It all works quite nicely.

If you are looking for a way to make cute little gift containers or party favors, this Petite Purse Die will make your job easy and fun!

You can find the Big Shot and all the dies, etc. to use with it as well as beautiful designer series paper at my Stampin’ Up! Online Store.  Don’t forget to take advantage of the special offer on Designer Series Paper this month!

Frame the Card You Make!

Five-Way Flower Framed

Yesterday when I made this card to put on my Facebook Page here I thought it didn’t HAVE to be just for the 4th of July, it could be for anything. Then I decided it would be cute just in a little frame! I found this plain gold one, made a larger Real Red mat to adhere the card to and slid it in the frame. There was room to leave the glass on the front, hence the glare, but I could have framed it without the glass.

The card is made with the single stamp, Five-Way Flower.  If you stamp the flower several times, you can use all your scallop circle punches to punch out different size scallops of the flower and then layer them one on top of the other, popping each layer up with a Stampin’ Dimensional.

The greeting is from the Perfectly Penned stamp set.

Think about whether the card you make could also be a piece of art to be framed!


Happy 4th of July! Happy Independence Day!

4th of July Fireworks Card

I hope you are having a wonderful 4th of July, celebrating the United States’ independence from Great Britain. Independence Day is filled with great traditions!  Picnics, barbeques, family get-togethers, parades, concerts, with everything culminating in a fireworks display!!  Back when I was growing up, it was not illegal to shoot off fireworks in our driveway, so all the neighbors could take turns shooting off their fireworks and we could all watch. Shopping centers would often have displays and we could walk to the top of our hill and watch one display. Somehow that is still a great childhood memory with my friend who lived across the street and me and others in our neighborhood, according to their Facebook postings!

This card may be a bit overdone!  I obviously ignored the rule of crafting which is “know when to stop!” But that’s okay, I think it represents the “grand finale” of the fireworks display!  My favorite part!

Here are some of my other 4th of July decorations!

4th of July Table Decorations


4th of July Cross-Stitch


4th of July Firecrackers outdoor decorations


4th of July Uncle Sam

Make an Easy 4th of July Card with Simply Stars

4th of July Simply Stars Card

It’s time for the red, white, and blue and what says 4th of July more than stars and sparkle?! When I got out my red, white, and blue paper I had a completely different idea of a card I was going to make. Then I thought of my new stamp set Simply Stars and this card came together quite nicely. It was just fine with just the Real Red and Night of Navy stamped stars, but who can leave off some bling with Red and Silver Glimmer Paper when you have the opportunity?!

The greeting on the card is stamped with Real Red ink on Whisper White card stock from the stamp set Chalk Talk.  It needed a layer, though, and that’s where I was starting with the Glimmer Paper.  In order to layer on the Silver Glimmer Paper, I had to hand cut the greeting following the lines around the design.  It’s not perfect but it’s fine! Then I cut out the Glimmer Paper using the Chalk Talk Framelits Dies. It still seemed to need something. I adhered the Silver Glimmer Paper to a piece of Night of Navy and hand cut with my Paper Snips (an indispensable tool for cutting like this, in my opinion!), just leaving a small border around the design. The “Happy Big Day” greeting from Chalk Talk is popped up with Stampin’ Dimensionals.  They stick well on the Glimmer Paper. I thought “Happy Big Day” can easily cover the 4th of July holiday!

As I said, not to ignore an opportunity for more sparkle and shine, I punched out stars from the Silver and Red Glimmer Paper with my small Star Punch in the Merry Minis Punch Pack #126882. This punch pack was in the Holiday 2012 Catalog.  It doesn’t appear in the new Stampin’ Up! Catalog but it is carried over and can be ordered. Just copy that item number into your order. That little star fits perfectly in the center of the Simply Stars stars!

I had fun making this card and I know you will too!  I almost wished the card was bigger because it was fun stamping and embellishing with glimmer paper!

Make something, anything, today with red, white, and blue for whatever your 4th of July celebration is. Make a card for a neighbor.  Make a party favor for your guests. Make some table decorations for your picnic.  Make a scrapbook page for your 4th of July photos. Check out my posts from last year with some 4th of July ideas! Fly your flag, even if it is one of those little ones you can buy at the store on a stick.

Have a Happy 4th of July!