Monthly Archives: June 2012

Make a Digital Scrapbook Page for July 4th in My Digital Studio

4th July-001

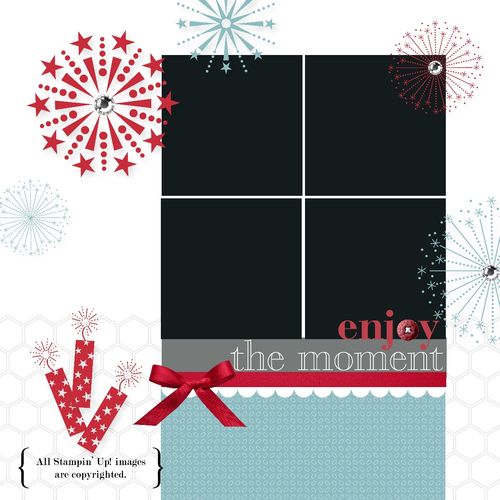
Plan ahead! Make a digital scrapbook page for the 4th of July using My Digital Studio!  Then just insert your photos of your family, neighborhood gathering or fireworks later and you are all set! Add some journaling in the lower area in a text box.

In My Digital Studio you can start with a template….almost any one will do…and then change whatever you want on it.  Even a pre-designed template is completely changeable to your design and needs.  But it does give you a starting point for your page.

Give My Digital Studio Express a try with the 30-Day Free Trial!  It is no risk and no obligation!  Just order it HERE in my Online Store…you'll see the box to click….download it to your computer…and you are ready to play! You can order more downloads as you need them if you want. Print any of your projects.  And if you purchase My Digital Studio now, when Version 2 comes out, you will get to upgrade for free!!

Want to Be a New Stampin’ Up! Demonstrator?

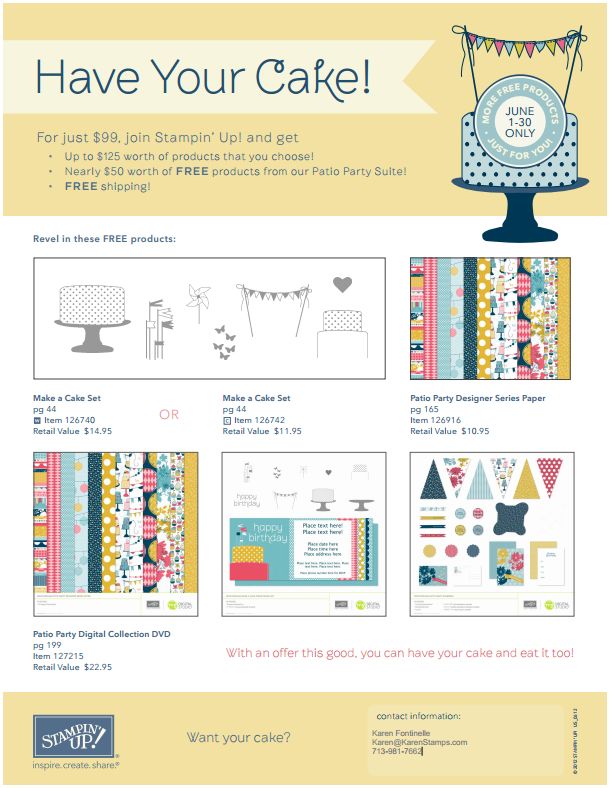
Have Your Cake Recruiting Promotion

Click on image above to enlarge.

If you have been thinking that maybe it would be fun to be a new Stampin' Up! Demonstrator, now is your time! This offer has been going on this month of June, but now the deadline is approaching! The last day is Saturday, June 30, 2012.

Sign up online to be a Stampin' Up! Demonstrator to start your own business and be a part of Stampin' Up! I don't think you will regret it!

  • For only $99, get a customized Starter Kit with $125 worth of great Stampin' Up! products.
  • A pack of business supplies valued at $65.
  • BONUS

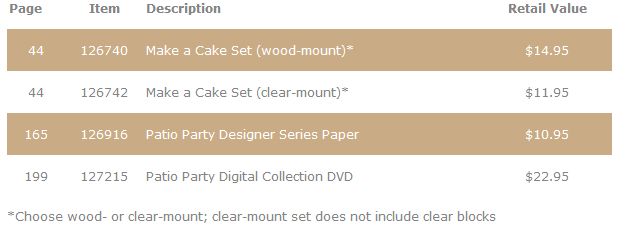
Have Your Cake Free Products

Becoming a Stampin' Up! Demonstrator is easy, only takes a few minutes online! You will receive your Demonstrator number right away in an email.  Then just wait for your Starter Kit to arrive. You can start planning how you would like to run your business and spread the word to your friends and family!

I'm happy to answer any questions you may have. Please look HERE for information on becoming a Stampin' Up! Demonstrator.
 

4th of July Red, White, and Blue!

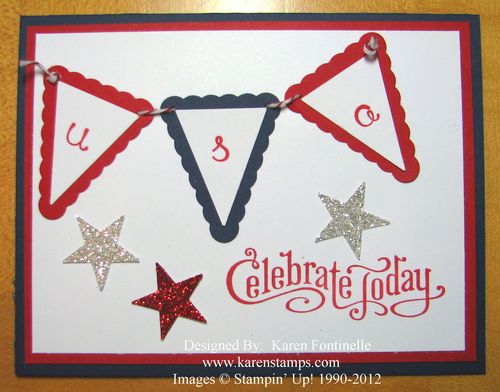
Patriotic 4th of July Card

Time to get out your red, white and blue colors for the 4th of July! If you want to make something patriotic, it's easy with the Petite Pennants Builder Punch #122361. And I'm telling you, once you start using the Glimmer Paper in Red or Silver, you just can't stop yourself! The greeting is Perfectly Penned. For the USA letters, I had to pull out my retired Sweet Shoppe Lower Alphabet, but you could use another alphabet or just print the letters yourself with a Stampin' Write Marker. Just a fun card to celebrate the 4th of July!

Go to my Stampin' Up! Online Store HERE to get your supplies!

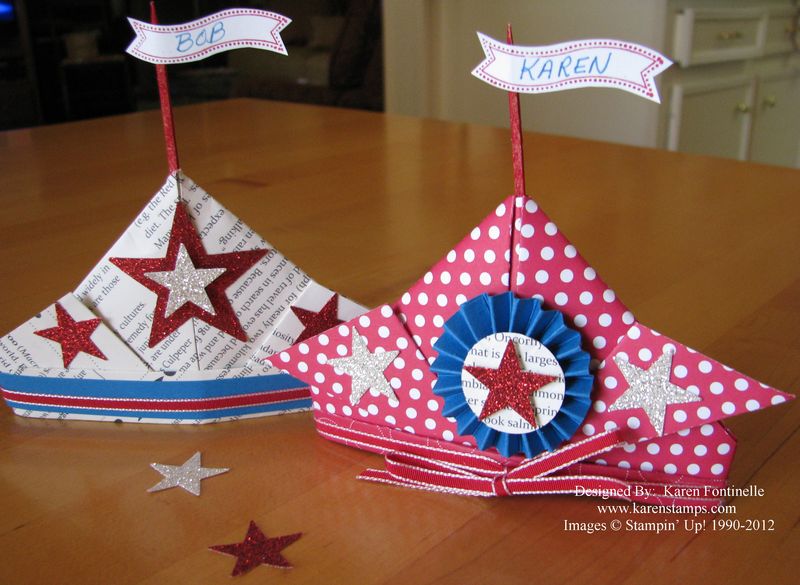
Patriotic 4th of July Place Card Holder Hats

Patriotic 4th of July Place Card Holder Hats

Wouldn't these patriotic 4th of July place card holder hats make a cute table decoration for your 4th of July party or picnic?! I saw the examples and instructions on the Country Living website and thought I would give them a try!  It's almost like making paper hats when you were a kid, just a little fancier.

I used a piece of designer paper 8 1/2" square.  You could make it larger or smaller. Mine turned out about 4 1/2" wide at the base and 3" high.  One is made with the First Edition Specialty Designer Series Paper #121878 and the other with the new Polka Dot Parade Designer Series Paper #126902. I loved using the Red (#121790) and Silver Glimmer Paper (#124005) for the stars.  Unless you already have the Stampin' Up! retired star punches you'll have to cut out your own stars, but that is fine, too. Just decorate these little hats however you like.  For a place card, just attach a name to a toothpick or skewer or pipe cleaner and insert in the top of the hat.

Try it!  The instructions are pretty clear.  Use some scrap paper the first time. When you get to Steps 5, 6, 7 and 8 just keep folding that bottom portion up until you form the folded over brim of the hat…which forms the base.  That's the only part I found a little tricky following the directions.

Find the directions HERE.

And for all your stamping and papercrafting needs, please shop at my online store HERE. Stampin' Up! paper, ink and stamps plus accessories are the best!

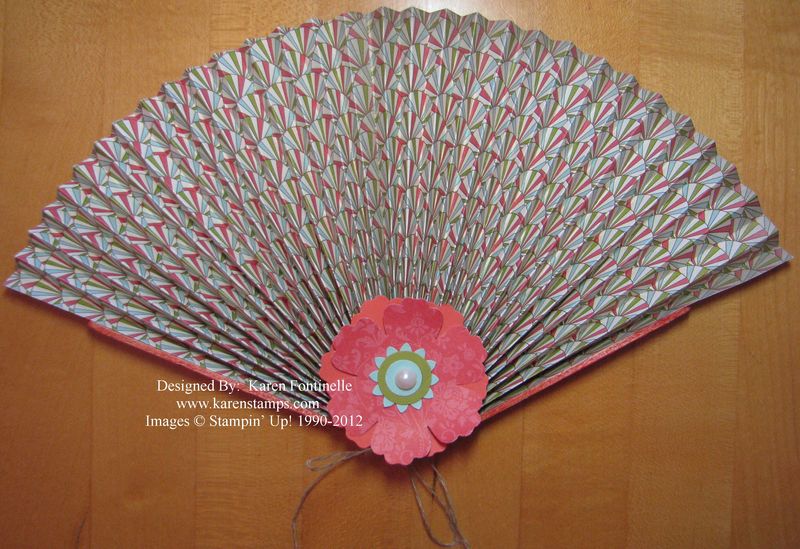
Beat the Summer Heat in Houston with a Paper Fan!

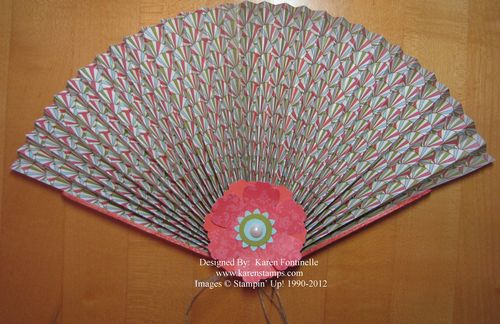
Summer Paper Fan

It's always hot, humid and miserable in the summer time in Houston, TX…and summer here goes from about May until….who knows….maybe October or November! But this is the third day of record-breaking heat here!  The temperature rarely gets to 100 degrees (although you might argue how much better is it at 95??).  But even Galveston, right on the coast, broke a long time record the other day at 100. Of course it all depends on where you live and where they read the temperature, but yesterday it was 102 here.  And the temperature didn't drop much late in the evening either.  The night before when I checked it was still 99 into the evening.

So with this awful, record-breaking summer heat in Houston, I thought I would make a paper fan! Even in a comfortable, air-conditioned house with the shades partially drawn to keep the heat out, one can still use a little breeze now and then….and heaven forbid if the power went off for whatever reason!  Yikes!

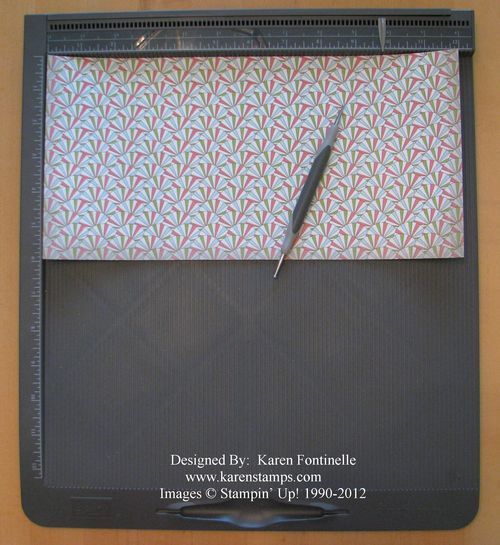
Simply Scored Scoring Tool

I started with a 12"x12" piece of designer paper (in this case I used a piece of the Sale-A-Bration paper Everyday Enchantment) which I cut in half (check your pattern to see which way it goes on both sides before you cut!). I found two popsicle sticks in my craft closet which were 3/8" wide so I scored every 3/8" inch across the paper using the Stampin' Up! Simply Scored Scoring Tool. Score both halves of the paper so you have two pieces.

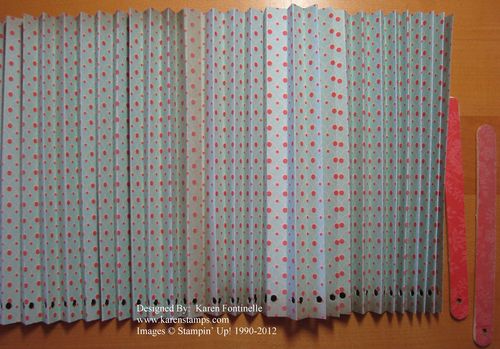
Folded Paper Fan

There's a lot of folding to do, back and forth!  I glued the two halves of designer paper together using Tombow Multipurpose Glue. Sad to say the Crop-A-Dile is retired, but I got mine out and punched the holes in small groups across the bottom of the fan.  You could use a small hole punch. I also covered the front of my popsicle sticks with matching paper and even colored the edges with a Stampin' Write Marker and glued one to each end of the paper. This just adds a little sturdiness.

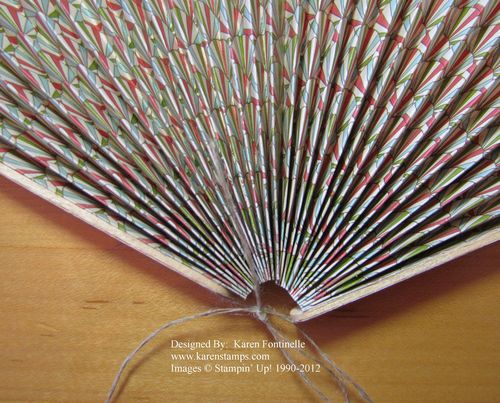
Tied Fan

I used Stampin' Up! Linen Thread to run through the holes and tie tightly underneath.  You could use ribbon or string or even dental floss!

And just to jazz it up I added a pretty paper flower with my Blossom Punch to the front!

I hope I can just LOOK at my pretty fan and NOT have to use it!!!

Designer Paper Fan

For any designer paper, card stock, stamps, punches or any other great Stampin' Up! products, please just click HERE to order online!

Circle Circus International Bazaar Card

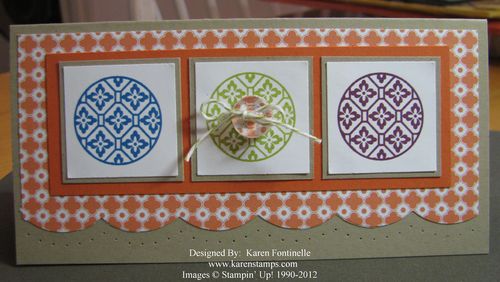
Circle Circus International Bazaar Card

Here's my card I made using the Circle Circus stamp set and the new International Bazaar Designer Series Paper.  I showed you the paper-piercing yesterday and all the new paper-piercing tools in the new Stampin' Up! Catalog.

There are lots of colors that coordinate with the International Bazaar Designer Series Paper, which is probably why the colors on this paper are so beautiful!  To stamp my design with Circle Circus, I used Pacific Point, Lucky Limeade, and Rich Razzleberry. And all of those are matted on Tangerine Tango on top of the Crumb Cake.

And for a little pizzazz (besides the paper piercing!) I added one of the new Vintage Faceted Designer Buttons with a 1/2" circle of the designer paper just underneath the button.

Have you looked through the new Stampin' Up! Catalog yet?  You can find it online right HERE.

Stampin’ Up! Essentials Paper-Piercing Pack

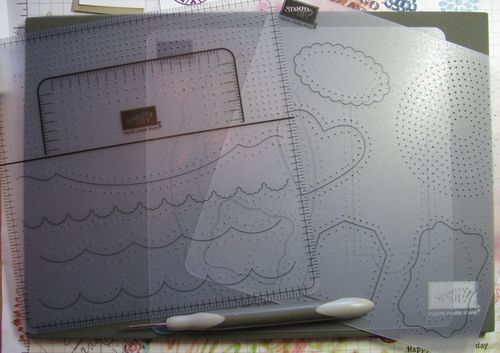
If you thought you liked the old Paper-Piercing Tool and Mat Pack with the one paper-piercing template, you will LOVE the new bigger and better Essentials Paper-Piercing Pack #126187. This pack has 3 templates, each 6"x6". There is also the new Paper-Piercing Tool #126189 and the Stampin' Pierce Mat #126199 You can find all these great new stamping tools on page 181 of the new Stampin' Up! Catalog.

Essentials Paper-Piercing Pack

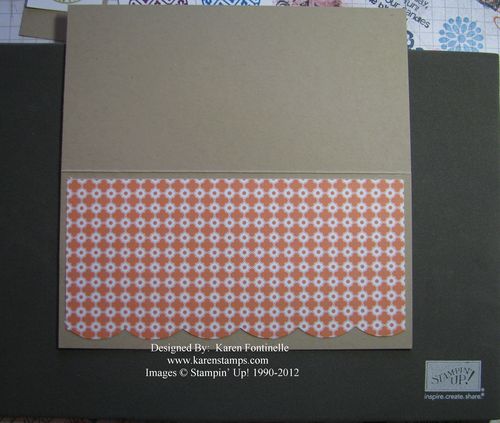
In making this card, first I cut the edge with the new Large Scallop Edgelits Die #127019.

Large Scallop Edgelit

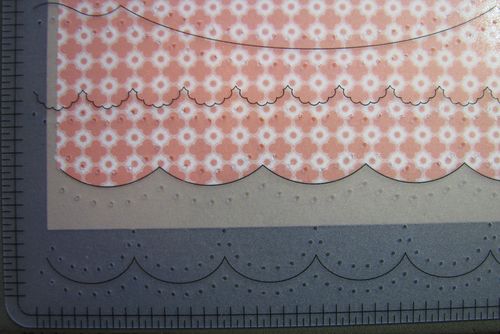
Next I matched up my scallop edge with the proper scallop template.

Paper-Piercing Design Template

Then I used the new Paper-Piercing Tool, which is much more comfortable to hold and use due to the ergonomic design of the handle. It even comes with a protective tip and storage tube.

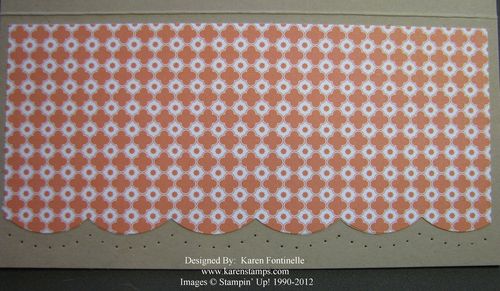
Paper-Pierced Card

Isn't that lovely?!!  And so easy to do now with the larger template. With this finished card being 3"x6" I did have to move the template over to finish off the scallop but that wasn't difficult.

Put these accessories on your order today!  You will love them! To order any Stampin' Up! products, please click HERE to go directly to my Online Store! And anytime you would rather I put your order in for you, please just contact me at Karen@KarenStamps.com. I'm happy to help in whatever way makes it easy for you!


Use Your Eensy Weensy Paper Scraps to Decorate Wooden Clothespins!

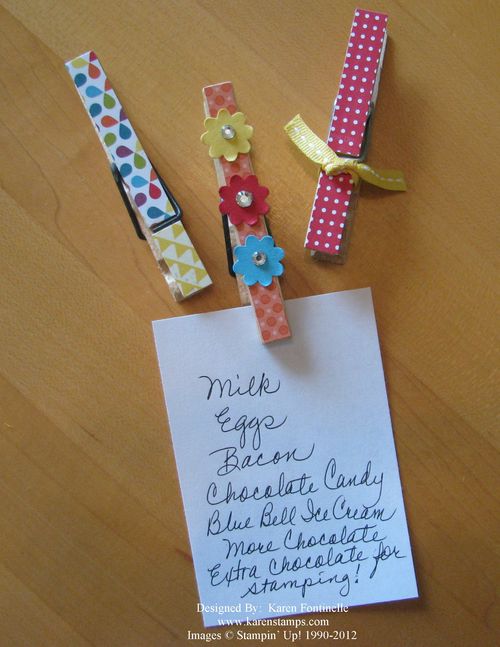
Decorated Clothespins

If you happen to be a scrap hoarder, even down to the smallest ones…because you never know when you might need that small piece….then get out your paper scraps along with some old-fashioned wooden clothespins (or maybe some craft clothespins) and play!  I don't really know if these are clothespins I bought at the craft store a long time ago or if they are real clothespins that my mom or grandmothers used way back in the day….but either way, instead of BUYING decorated clothespins like these, you can make them in three seconds. You can also purchase round magnets to stick on the back and then you can stick the clothespin to your refrigerator door to hold your shopping list.

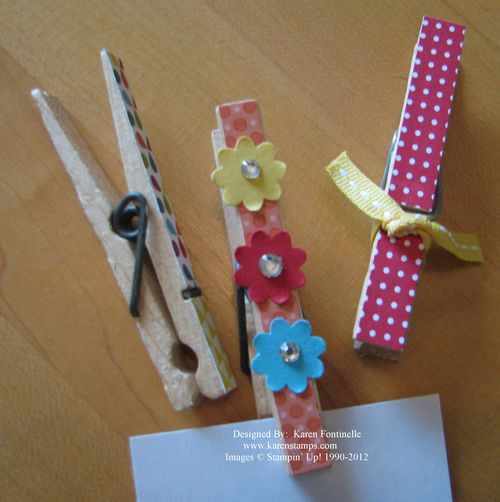
Just measure the width of your clothespin (probably pretty small!) and cut a strip of designer paper.  You can also measure the length and cut, but after the first one I realized I could just glue on the paper and cut off the end with my Paper Snips.  I just used my Tombow Multipurpose Liquid Glue to adhere the paper.  Then tie some bows, use two kinds of paper, bling them out with Basic Rhinestones….or whatever you want to do!

Check your craft closet for those wooden clothespins….or should I say "vintage wooden clothespins"?

Decorated Clothespins Side

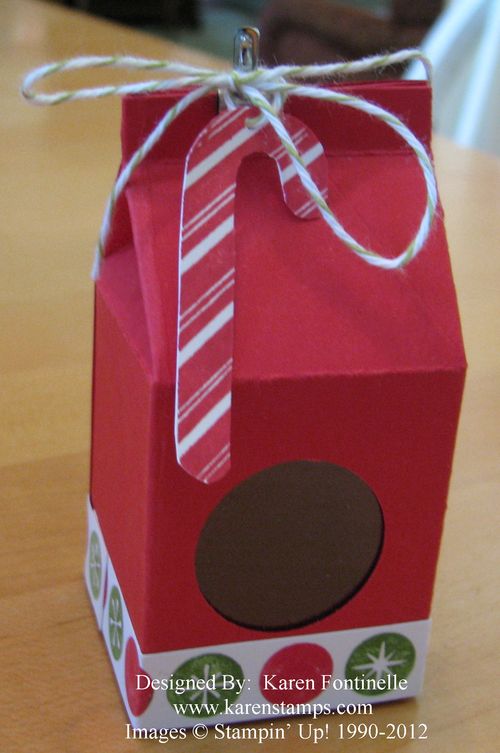
Christmas Milk Carton Gift Box

Milk Carton Gift Box

Summer may be here but the other day I made this cute Christmas milk carton with the Big Shot and wanted to show you.  And it never hurts to start thinking about Christmas crafts way ahead of time!  Of course you can make this for any occasion, just change the colors and papers.

While you can make just the usual milk carton box, I punched a hole in the center of one side (figure it out before you glue!) and added a piece of window sheet behind the hole.  Now you can put some colorful candies or a sneak peek of the gift and it will show through!

For this project some of the supplies you will need:

Mini Milk Carton Bigz L Die #117310

Big Shot Die-Cutting Machine #113439

Chock-Full of Cheer Stamp Set (p. 10)

I used a mini Library Clip on the top, but you could perhaps use a Vintage Trinket #118764, just to add a little interest and then hang the candy cane with some Baker's Twine or even Linen Thread.

I'm sure you can imagine lots more ways to embellish this project!

For any stamping supplies, please visit my online store HERE. (Especially if you have a large order…$150 or more….be SURE to go to my direct link to my store…not through Stampin' Up! first…to be able to get your Hostess Rewards!) If you have any questions, just ask me first!


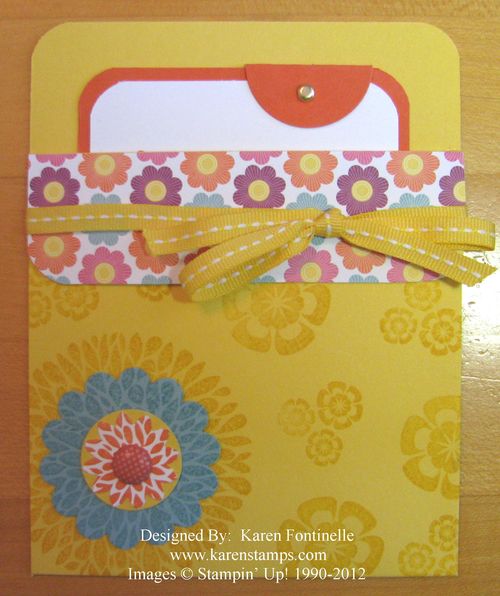
Betsy’s Blossoms Pocket Card

Betsy's Blossoms Pocket Card

For the second day of summer, I thought a bright and cheery pocket card might be fun! Pocket cards are really easy to make and I think often take your card-making up a notch.

Supplies

Stamps: Betsy's Blossoms (p. 72), Perfectly Penned (p. 132)

Ink: Daffodil Delight #126944, Tangerine Tango #126946, Baja Breeze #126960

Paper:  Daffodil Delight #119683, Tangerine Tango #111349, Baja Breeze #111352, Whisper White #100730, Floral District Designer Series Paper #126919

Accessories: 1/4" Stitched Grosgrain Ribbon #126872, 1 1/4" Circle Punch #119861 (for tab), 1 3/4" Scallop Circle Punch #119854, Boho Blossoms Punch #119858, 1" Circle Punch #119868, 3/16" Corner Punch #119871, 3/16" Metallic Brads #119741, 3/8" Designer Printed Brads #122940

Directions

1. Cut pocket card 4 1/4" x 11".  Score at 5 1/2" and 1 1/4". Cut the insert 3 1/4" x 5" (if you want a layer cut 3" x 4 3/4").

2. Fold the card stock into a pocket, using adhesive along the sides.

3. Round the corners of top, flap, and insert with punch.

4. Stamp the front of the pocket card.

5. Adhere the designer paper to the flap, trimming if necessary. Tie ribbon around flap and adhere flap down.

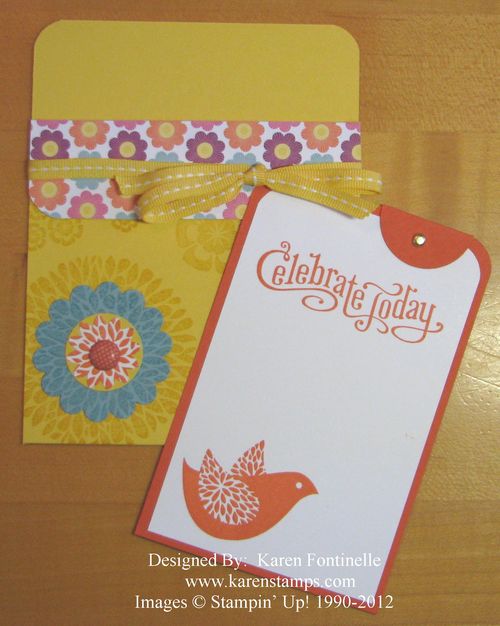
6. Stamp the insert. Punch the 1 1/4" circle, fold in half and push brad through front of circle and insert. Apply adhesive to back of half circle and adhere to back covering back of brad.

7. Stamp and punch out layers for flower on front, inserting Designer Printed Brad in center.  Adhere flower to front of pocket.

Betsy's Blossoms Pocket Card and Insert


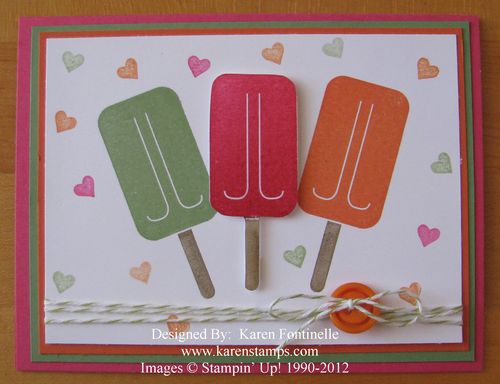
Mouthwatering Popsicle First Day of Summer Card

Today, June 20th, is the first day of summer….at least it will be by 7:09 PM (EDT). What better way to celebrate the first day of summer than with mouthwatering popsicles!  In this case, the popsicles are stamped with the cute Mouthwatering stamp set!

Mouthwatering Popsicle First Day of Summer Card

If we had "smell-o-vision", maybe you could smell the Cherry Scented Stampin' Emboss Powder #127035 embossed into the center popsicle! Yum! Stampin' Up! says the scent should last up to 2 weeks.

After tying on the Lucky Limeade Baker's Twine #125572 with a Pumpkin Pie Brights Designer Button #119747, the card still needed something.  I chose the little heart stamp in the new Make a Cake stamp set, using the same ink colors I used for the popsicles, but "stamping off" first for a lighter shade. I think it made the card look fun and cute! The popsicle colors are Wild Wasabi, Melon Mambo, and Tangerine Tango.

Why not make a bright and fun card today to celebrate the first day of summer?!

It's a rainy, cooler day in Houston, TX today so not our typical hot, hot, hot summer day….but I'll take it….because tomorrow the summertime heat could return!

Latest My Digital Studio Downloads

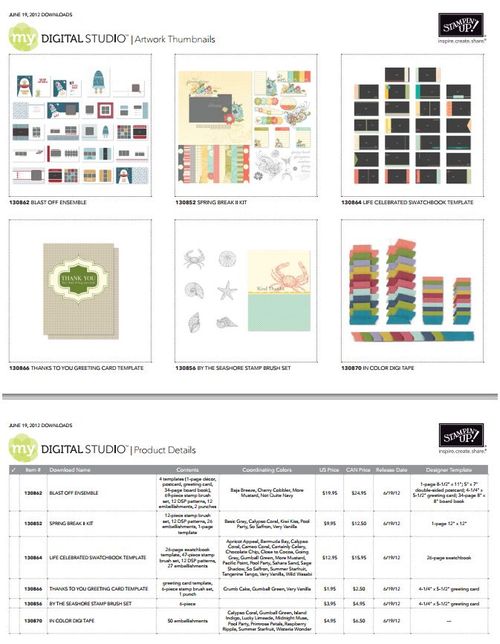
MDS Downloads_June 19 2012
(Click to Enlarge)

The latest My Digital Studio Downloads are out today! Did you know that after you purchase the My Digital Studio software you can purchase more downloads of stamps (brushes), accessories, templates, colors, designer papers…all sorts of things….to add to your collection and to use on your projects?! Stampin' Up! puts out new downloads for purchase every Tuesday (officially not EVERY Tuesday, but that's usually how it goes!).  If you click on the image above, it will take you to the .pdf file where you can see the downloads better and read the descriptions and prices.

Or you can go HERE to the Online Store and click on the box that says "Newest Downloads".  Then you can choose the most recent date or any of the other dates. Click on the image you are interested in and you will see the download and a description of what is included and the price. To purchase, you would just click "Add to Bag". Click on the image once more for more of a close-up.  You still will not get a perfect large image because, of course, Stampin' Up! has to protect their images. But you will get a real good idea.

You can also use these downloads with other design programs.

Interested, but don't own My Digital Studio?? Try the FREE 30-Day Trial of My Digital Studio Express!  You have nothing to lose!

Contact me if you have any questions at Karen@KarenStamps.com.

Join My “Stamping With Karen” Newsletter!

Mailbox


If you are reading my blog and enjoy what you see, please sign up for my "Stamping With Karen" email newsletter mailing list! You will see the box in the upper left corner of my blog!  I send out a monthly newsletter full of the latest Stampin' Up! news and many stamping projects, plus another short note around mid-month of reminders or newest updates.

Sign up today so you won't miss another thing!

Make an Easy Father’s Day Card!

Easy Father's Day Card 2012

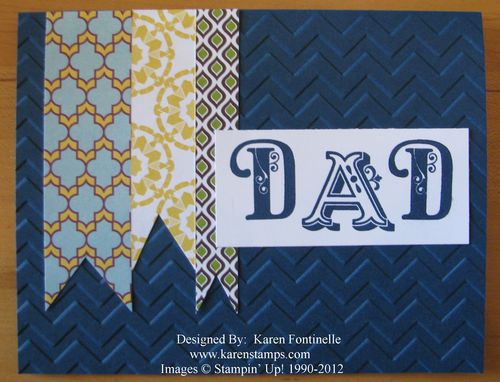
This easy Father's Day card will take just minutes to make! To add some texture to the background, I used the new Chevron Embossing Folder #127749…of course you could use most any folder you have…or none at all. Then I just cut strips of designer paper into little banners to decorate the front.  This paper is the beautiful new International Bazaar Designer Series Paper #126920, but you could use any that you have on hand. The "DAD" is stamped with the Broadsheet Alphabet (p. 144). I kept it super simple and didn't even use layers!  The card base and ink color is one of the new In Colors, Midnight Muse.

Stampin' Up! products make coordination easy and simple. Now get busy and make an easy card for the father in your life today! 

Happy Father's Day to all the dads!

Handmade Father’s Day Gift Idea: Stamped Picture Frame

Father's Day Picture Frame

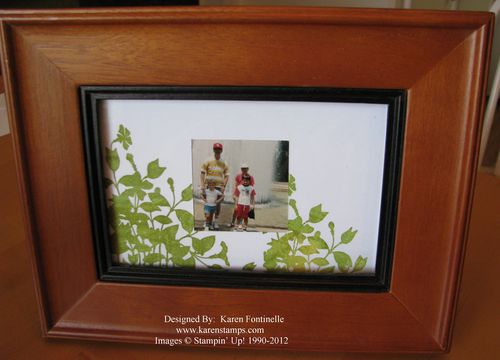
It's getting down to the wire!  Do you have a Father's Day gift yet? Here's a very easy handmade Father's Day gift idea….just make a stamped picture frame! I bet you have a picture frame of some sort around the house or they are inexpensive to buy.  Either using the mat that comes with it or cutting your own from Whisper White card stock, so some stamping on the mat and insert your photo! On this one I used the My Friend stamp set.  The leafy image was easy to stamp and good for a Father's Day gift.

Just to fancy it up a bit, I first inked up the stamp a bit with the new In Color Summer Starfruit, then the Gumball Green and finally some tapping with Old Olive.  As long as you start with the lightest color first it won't affect your ink pads.  It just gave a little bit of a varigated look to the leaves.  If you had some leaf stamps, you could stamp those randomly around the mat.

Make a matching little gift card by stamping the leaves on a small card.

An easy gift for the kids to help with, and you probably have the supplies around the house!  And Dad will treasure it!