Is Today Your Leap Year Birthday?

Playful Pals Frog Leap Year Birthday Card

Is today your Leap Year birthday? If it is, then here is a Playful Pal Frog Leap Year Birthday Card for you! The rest of us can just celebrate having an extra day to do all those things we always want more time to do! It’s hard for me to believe it is the end of February already, even with the extra day.

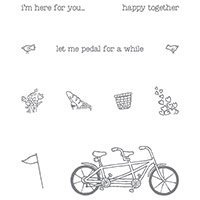
I made this Playful Pal frog sitting on a lily pad using the Playful Pals Photopolymer Stamp SetYou can purchase the stamp set and the matching Pyramid Pals Thinlits Dies in a Bundle and save 15%. If you like either one, you will want both!

The card base is the same card stock as the lily pad, Mossy Meadow. The lily pad is punched with the 2 3/8″ Scallop Circle Punch. The frog is made by stamping pieces with the stamp set and then die-cutting some of the pieces with the Big Shot using the bright Cucumber Crush card stock. The background layer of the card is stamped with Soft Sky Ink on Whisper White with the Watercolor Wash Background Stamp.

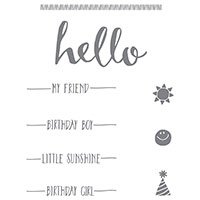
Now to make the greeting, I happened to think of my Alphabet Rotary Stamp! Admittedly, I haven’t used it much, but it’s one of those things that comes in handy in the right circumstances. I just stamped each word on scrap paper and cut out each word. I think it’s a fun way to add a greeting to something, to just paste the single words.

I hope you will consider the Playful Pals Bundle which can be used for cards and projects such as my Playful Pal Frog Leap Year Birthday Card and of course the actual 3D pyramids for favors, gifts and treats.

Shop Stampin’ Up! Online! Earn FREE products during Sale-A-Bration!

Birthday Bouquet Thank You Card

Birthday Bouquet Thank You Card

An easy way to find ideas for cards to make is to look in the Stampin’ Up! catalogs and copy, or copy some things and change others! I saw a sample card in the Occasions Catalog on page 8 that inspired this Birthday Bouquet Thank You Card. This photo looks like it is layered on a Whisper White base with the usual margin, but that is just the background, the designer paper actually covers the front of the card with no margins. This is a great way to use up some scraps of designer series paper.  Just cut strips of various widths, play around and see what order looks good to you, and adhere! On this card I used the Birthday Bouquet Designer Series Paper and a strip of Gold Foil. The greeting is from the Fabulous Four Stamp Set.

To embellish the card I used a small gold foil doily in the Metallic Foil Doilies cut in half and just stuck underneath the greeting strip.  I also added a Bow Paper Clip Embellishment. Since it is a paper clip and has that extra piece on the back, I cut that part off with my old Stampin’ Up! Rubber and Craft Scissors, if you have those. I used the tiniest dabs of the Tombow Multipurpose Liquid Glue on the back of the Bow Paper Clip to hold it on the card.

Just look through your designer paper or scraps and see what you could to make a card like this one!

Order your Stampin’ Up! supplies HERE at my Stampin’ Up! Online Store!  Every $50 purchases earns you a FREE Sale-A-Bration product!

Birthday Bouquet Ice Cream Cone Card

Birthday Bouquet Ice Cream Cone Card

If you want to make a very easy card, this Birthday Bouquet Ice Cream Cone Card might be one you could make! It’s as simple as a card base, a layer of card stock, and a diagonally cut piece of designer paper! Stamp a greeting and you’ve got a card.  I added the ice cream cone but you wouldn’t have to if you want to keep it super simple!

The card base is the new Thick Whisper White Card Stock. It is just a little thicker than regular Whisper White so it makes a sturdier card base like other colored card stock.  Regular Whisper White is fine, but the thick is just a little bit nicer. The layer is Pool Party, one of the coordinating colors with the Birthday Bouquet Designer Series Paper. I diagonally cut the designer paper.  Not a difficult job when you have the Stampin’ Up! Paper Trimmer! Just line up the opposite corners in the channel where the cutting blade will slide and you have your diagonal!  See the photo below.

Diagonal Paper Cutting

I stamped the ice cream cone from the Sale-A-Bration Stamp Set Honeycomb Happiness, in the Sale-A-Bration Brochure on page 15 on Whisper White, colored it in with markers and cut out with Paper Snips.  Then I added a Honeycomb Embellishment in the Occasions Catalog. These are self-adhesive, just peel off the backing. Not that I realized that at first, but you can also add Glue Dots instead if you want or for extra stickiness.

Shop Stampin’ Up! During Sale-A-Bration and Earn Free Product with Every $50 Purchase!

Stampin’ Up! Weekly Deals February 23 2016 & Paper Pumpkin

Stampin' Up! Weekly Deal Feb 23 2016

Here are the new Stampin’ Up! Weekly Deals for you!  These are good today through Monday, February 29. Wow!  February is almost gone, and it is a Leap Year so we get an extra day in February!

This week we have a flower punch, the Flower Medallion Punch, that coordinates with the flower in Crazy About You. You can also use it to punch cardstock or designer paper to make a multitude of flowers!  The Happy Heart Embossing Folder just got a workout for Valentine’s Day, but of course hearts aren’t just for Valentine’s Day!  You can use it for any sweet card, birthdays, anniversaries, all occasions really.  The Stars Framelits Dies are great to have on hand!  I’m a big believer in having “stars” to use on all kinds of cards such as congratulations, graduation, kids’ cards, 4th of July, birthdays – you name it!

We also have the 2015-17 In Color Stampin’ Write Markers on sale!  I use my markers a lot in various projects.  And if you don’t own all the ink colors, you can get by with the markers.  Just color directly on the stamp with the marker. And if you like buttons, we have the Classy Designer Buttons which are a vanilla color. Great neutral to use for many projects, but if you prefer, color them with Sharpies for a custom color.

Stampin' Up! Star Framelits 4th of July Card

Paper Pumpkin Sale for Sale-A-Bration

If you are a Paper Pumpkin subscriber, you can purchase refills of the February kit. This is a really pretty kit so you might want to add a refill to your regular order. Stampin’ Up! is also starting to send out a special Paper Pumpkin newsletter by email to Paper Pumpkin subscribers so watch for that!  Not a subscriber yet??  Add a 3-month Prepaid Subscription to your Stampin’ Up! order if you are ordering anyway and since it is over $50 you qualify for a free Sale-A-Bration choice. If you just want to try month to month, you can find more information and join HERE.  You can cancel or just pause your subscription at any time.  Join now so you will receive the March Kit!

Sale-A-Bration continues!!  Get a FREE product with every $50 Stampin’ Up! purchase! 

Easter Lamb Easter Card

Easter Lamb Easter Card

I thought one of the cutest stamps in the Occasions Catalog was the Easter Lamb stamp I used to make this Easter Lamb Easter card. It actually comes with the Happy Easter greeting attached, but I cut it off to place it elsewhere on the card. It is just this one wood-mount stamp, and I think just the stamp itself would be cute set out for an Easter decoration when you aren’t stamping with it!

For a background I used my Watercolor Wash Wood-Mount Background StampI mostly buy the clear-mount stamps because, well they are cheaper and they take up less storage space. But some stamps I do like the wood-mount, like these large background stamps so they are mounted and ready to go and just sturdier to use on the wood-block.  I also like wood-mount for very tiny stamps. I inked this stamp with Soft Sky ink, stamped off a bit and still had plenty of color on my Whisper White paper. It is easiest to lay the paper onto the stamp which is face up on your desk, and then lay scrap paper, like computer paper or your Grid Paper over it so you can rub the paper on the stamp without getting inky fingers.

The lamb is stamped with Stazon Jet Black ink and I colored in a bit with a Pink Pirouette Stampin’ Write Marker and Smoky Slate. I also colored the grass green with a marker.  I punched out the lamb with the 2″ Circle Punch and layered it on the 2 3/8″ Scallop Circle PunchFor a little glitz, I also punched a piece of Gold Glimmer Paper to layer behind.  I love that touch!  Then for a little more interest, I added a strip of Jute Ribbon and Venetian Crochet Trim.

It’s time to start making Easter cards, so use this Easter Lamb Easter Card as an inspiration to get started!

Shop Stampin’ Up! Online HERE!

Botanical Gardens Gift Bag

Botanical Gardens Gift Bag

If there was one thing that made me purchase the products in the Botanical Gardens suite in the Occasions Catalog on page 26, it was the gift bag sample using this paper!  I guess it was the black background that really stood out to me. Actually, all the samples at the top of page 26 are so darn cute!  Did you realize the “plant” in the flowerpot is really stamped paper leaves??

Although this gift bag is not exactly the same as the one in the catalog, I used my Gift Bag Punch Board to make it with the paper from the Botanical Gardens Designer Series Paper. The Gift Bag Punch Board makes it easy to make a small gift bag, especially if you want one with the creases in the side. The instructions are written right on the Punch Board and a diagram, but rest assured there is also a Stampin’ Up! video if you need a more visual reminder of how to make your gift bag!  I’ve posted it below.

To make the tag, I just cut a 2″ wide piece of Whisper White cardstock and stamped the greeting from the set Enjoy the Little Things. This is the stamp set that coordinates with the Enjoy the Little Things Project Kit, but it’s also a good stamp set to have on its own! Then I punched the corners with the Curvy Corner Trio Punch. I sponged the edges of the tag with Pool Party Ink just for fun.  The greeting is stamped with Mossy Meadow Ink. Since I had some spare die cut flowers, it was easy to add a little flower to my tag. The leaves to embellish the tag were stamped with the veins in the Botanical Blooms Stamp Set and die cut with the Big Shot and the Botanical Builder Framelits Dies. The ribbon is the soft and pretty Pool Party Glitter Ribbon.

The Stampin’ Up! Annual Catalog and the Occasions Catalog are certainly good places to start when you are looking for inspiration or need ideas for a project you want to make. If you don’t want to copy it exactly, just change out the paper, or the colors, or the stamp set to make it your own.

It’s always handy to have some gift bags made up and ready to go, such as this Botanical Gardens Gift Bag which is perfect for spring and summer coming up!

Get your favorite stamping and papercrafting supplies at my

Stampin’ Up! Online Store!

(Spend $50 or more and choose a FREE Sale-A-Bration product now through March 31, 2016!)

Easy Masculine Birthday All-Occasion Card For a Man

Easy Masculine Birthday All-Occasion Card For a Man

Yesterday I made a card very similar to this one HERE in this post, and then I thought about changing it up in color and texture to make an easy masculine birthday all-occasion card for a man.  I just used Chocolate Chip cardstock for the card base, making it open at the top instead of the side.  Just cut the full piece of card stock lengthwise at 4 1/4″ and then score in the middle at 5 1/2″ for the fold. I used a piece of the Kraft Corrugated Paper (you also get white sheets as well in the pack!) for the layer. The Whisper White banner is stamped with several different inks in the Neutrals family. I adhered a piece of cardstock at the top of the banner and stapled it (for that “masculine” texture!) with the Stampin’ Up! Handheld Stapler. Be sure to order a box of the Silver Mini Staples so you will have some on hand. And it all counts toward your $50 order for Sale-A-Bration!

Don’t forget to check out the Weekly Deals this weekend if you are ordering!

Weekly Deal Feb 16 2016

If you are new and need catalogs (and a Demonstrator!), please email me at Karen@KarenStamps.com.  I have a few left on hand I can mail to you.

If you are reading this and are NOT on my mailing list, be sure to sign up in the box in the upper right of my blog or in the pop-up. I hope to have my mid-month newsletter going out today, but the gremlins may have run off with it overnight!  Yikes!  I may have to start over! Gotta love computers!!

Red Mailbox for Mailing List Sign Up

Order online at my Stampin’ Up! Store for all the supplies to make cards like the ones I have on my blog!

Fabulous Four It’s Your Day Card Idea

Fabulous Four It's Your Day Card Idea

One of the many things I love about stamping is that it is okay to copy an idea, as I did with this Fabulous Four It’s Your Day Card. While a birthday card might come to mind, I think this card with this greeting could be for lots of occasions. I saw this idea in the magazine we receive as Stampin’ Up! Demonstrators and I changed it just a little bit.

The card base is Pool Party card stock stamped with an outline flower from the Garden In Bloom Photopolymer Stamp Set in Pool Party ink for a watermark effect.  The center banner is stamped with the same greeting from Fabulous Four multiple times in multiple colors. I chose Calypso Coral, So Saffron, Wisteria Wonder, Wild Wasabi, and Pool Party. At the top of the banner, instead of card stock, I put a strip of Cherry on Top Designer Washi Tape around the top and tied on a piece of Whisper White Baker’s Twine. For some extra pizzazz, I used my Botanical Builder Framelits Dies to cut out a little flower and its center to put on the banner. I also added one of the It’s My Party Enamel Dots to the center.

This is an easy card to make and can be copied and changed up a bit in colors or texture to make a card for anyone and any occasion. The Fabulous Four stamp set is one I have used a lot, especially the It’s Your Day greeting.

Shop Stampin’ Up! Online HERE for the best in cardmaking supplies!

Birthday Blooms For You Card

Birthday Blooms For You CardMake an easy all-occasions card with the Birthday Blooms Stamp Set and some pretty paper and card base. This stamp set just is “pretty” to me! I love the font style and the pretty flower designs. The single flower is just stamped on Whisper White card stock with Black Stazon Ink and punched with the 2″ Circle Punch. This circle then layers on the 2 3/8″ Scallop Circle Punch  on a piece of Calypso Coral card stock.  The flower is colored with my Aqua Painter and some “ink” from the Calypso Coral Stampin’ Write Marker.  I just scribble the marker on my plastic stamp case and pick it up with my Aqua Painter or a Blender Pen. When I am finished, I just wipe off the stamp case with a paper napkin or towel, which I am probably already using with the Aqua Painter. The leaves and stem are colored with Old Olive in the same manner but you could also use Pear Pizzazz or another green of your choosing. If you don’t have the right markers, you can use a drop of ink refill or pick up some ink off your ink pad.  So many choices and ways to do things in stamping!

The card base is Crumb Cake. The designer paper is the Wildflower Fields Paper, FREE in the Sale-A-Bration Brochure on page 12 with a $50 Stampin’ Up! purchase.  I hadn’t looked closely at all the patterns in the package, but wow, when I did, I fell in love with this pattern of stems and a little bit of color on white! I love the simplicity and easy look of it!  I thought it would go perfectly with this simple, pretty single flower from Birthday Blooms.  I added a piece of Pear Pizzazz 1/4″ Cotton Ribbon across the top of the designer paper and tied on a small knot.  The greeting is also from the Birthday Blooms Stamp Set and stamped on Calypso Coral.  I thought I would just keep it simple by not layering or anything else.

At the last minute, I decided to stamp some flowers in Versamark Ink on the top part of the card base, which is not a good idea when you have the bottom paper already adhered.  I couldn’t space the flowers out very well and a few overlap as you can see – but, oh well, handmade doesn’t mean perfection! And probably no one else will notice but me! So don’t let your mistakes stop you. There ARE no mistakes in stamping!

Remember, there are 3 new Sale-A-Bration products to choose from as of yesterday! See them HERE.

Shop Stampin’ Up! Online HERE and get a Birthday Blooms Stamp Set for making cards or any other wonderful Stampin’ Up! products – and with a $50 purchase, get a FREE Sale-A-Bration item!


New Sale-A-Bration Products at Stampin’ Up! For You!

Today, February 16, Stampin’ Up! is making Sale-A-Bration even more interesting and fun by adding three new items!  Choose one of these new products or the others in the Sale-A-Bration Brochure when you spend $50 or more, no limit!

Sale-A-Bration New Products 1

Sale-A-Bration New Products 2

Any current Stampin’ Up! products count toward your $50 purchase as do the Weekly Deals and Clearance Rack!  If you need a Stampin’ Up! Annual Catalog and/or Occasions Catalog, please email me.  I have a few on hand and can mail them to you.

Here are some new Stampin’ Up! videos to help you learn about the new Sale-A-Bration products!  Enjoy!
See what you can do with the Glitter Tape!

Want to get a FREE Sale-A-Bration product?  Just place a $50 Stampin’ Up! order at my Online Stampin’ Up! Store HERE!

Don’t Miss Out on Stampin’ Up! Sale-A-Bration! New Products Coming!

Sale-A-Bration 2016 Catalog

Can you believe we are about half way through Stampin’ Up! Sale-A-Bration?! In case you are new, Sale-A-Bration is Stampin’ Up!’s biggest promotion.  With every $50 you spend on Stampin’ Up! products, you get to choose a FREE Sale-A-Bration product from the brochure pictured above!  No limit! So if you spend $100, you get to choose 2 FREE Sale-A-Bration products!  If you spend $150 you get 3 Sale-A-Bration products PLUS Hostess Rewards! If you, or you and some friends, spend $250, you get 5 FREE Sale-A-Bration products plus Hostess Rewards (10%) PLUS during Sale-A-Bration $25 in Hostess Rewards!

SaleABration Hostess Rewards 2016

Today, February 15th, however, is the last day for these three Sale-A-Bration products! So if you have been putting off ordering and you want these items, be sure to place your order today!

To replace these outgoing Sale-A-Bration products, you can see the NEW PRODUCTS HERE!

 New Products available tomorrow, February 16th!

Shop Stampin’ Up! Online HERE or contact me to place your order!

Paper Strip Quilt Valentine Card For Valentine’s Day

Paper Strip Quilt Valentine Card

It’s Valentine’s Day, and if you need to make a last minute Valentine card, this paper strip quilt valentine idea is very easy to make. It may look involved, but it is a good way to use up your designer paper scraps.  I happened to have a bunch of paper strips from a project with the Love Blossoms Designer Paper Stack. They are about 1/2″ wide, you can use whatever measurement you like. The basic idea is to lay down some strips of paper side by side on the cardstock and then trim off the overhanging strips.

I suggest starting with a piece of cardstock such as Whisper White, larger than what you ultimately want (to allow room for trimming). I adhered one paper strip at an angle that didn’t go all the way across. Then start adhering strips side by side (or leaving a margin in between if you want) going in different directions and varying the paper patterns. Where you end up with the eensiest empty space along an edge, you could color in with a marker, but if you make your base cardstock larger, you will be trimming the edges off anyway.

This is what your strip piecing will look like:

Paper Strip Quilt Valentine Card BackPaper Strip Quilt Valentine Card Front

Paper Strip Quilt Valentine Card Trimming

And then you end up with this paper strip layer that looks like a quilt perhaps!

Paper Strip Quilt Valentine Card pieced

It’s best to make this layer larger than the size you need so that you can trim it down and get rid of any little empty spaces along the edge.

If you wanted to make this look like a quilt or to add extra texture, you could now run this layer through the Big Shot with an embossing folder of your choice.

To finish the card for Valentine’s Day, I punched three Whisper White and three Rose Red hearts with the Sweetheart Punch. You can’t really layer the hearts properly but you can make it look a little bit layered by just staggering the punched hearts one on top of the other. The hearts are stamped with images from the Bloomin’ Love Photopolymer Stamp Set.

Of course this card is not just for Valentine’s Day.  You can do this paper strip technique for any occasion with any papers. It’s a great way to use up scraps with an impressive result! If you need a last minute Valentine card, try this paper strip quilt technique.

Happy Valentine’s Day!


Making a Valentine Birthday Card With Paper Pumpkin

Making a Valentine Birthday Card

Although the January 2016 Paper Pumpkin Kit had an obvious Valentine theme to it, you can also use hearts for a birthday, especially a birthday for Valentine’s Day. When you receive your Paper Pumpkin papercrafting kit in the mail, you can follow the enclosed directions and/or you can make your own alternative Paper Pumpkin ideas. There often are enough materials to do some of both! And some people subscribe to two kits so they can make the project as designed and then play around with the second kit to make other creative ideas!

There are always alternative ideas out there and I saw other ideas of making cards with the hearts. Since I didn’t really need another Valentine, I decided to make a birthday card with the big Paper Pumpkin heart.  If you aren’t getting the Paper Pumpkin Kit, just cut out your own heart out of cardstock or designer paper.  Perhaps you have the retired Hearts Framelits. (How could they retire those?!!) It’s okay for the heart to be too big for the card, just cut off the overhanging part and it still looks fine. I stamped this heart with a greeting from the Big News Stamp Set.  The background paper is from the Birthday Bouquet Designer Series Paper If you are using two patterns on your card, have one be big and bolder and one smaller to make them work. My little banner also comes from the Paper Pumpkin Kit. The smaller hearts are punched with the Sweetheart Punch.  I just punched three so I could get sort of a layered look even though they don’t really “layer”. The beautiful sequin trim also comes in the kit and I made it look like a bow, adhered with Glue Dots. I pulled off a few sequins to adhere randomly on the heart. Easy with the tiniest drop of glue on the paper and then place the sequin on the paper, don’t try to put glue on the sequin.

I hope this gives you an idea for a Valentine card, alternative ideas for your Paper Pumpkin Kit or an idea for using hearts for other occasions like a birthday, rather than just Valentine’s Day.

Shop Stampin’ Up! Online!

Stampin’ Up! Weekly Deals

Stampin’ Up! Sale-A-Bration

(Last weekend to get the three limited edition products pages 16-19!)

January 2016 Paper Pumpkin Valentine Treats

January 2016 Paper Pumpkin Valentine Treats

I’m getting some Valentine treats ready made from my January 2016 Paper Pumpkin Kit. This kit makes a banner for Valentine’s Day and  these heart-shaped treat bags. All you need is some chocolate candy to put inside. (Candy purchased for professional purposes only, of course!!!)  All supplies came in the kit including the strips of adhesive used to glue the sides of the hearts together. You can use the included stamp set to personalize your hearts and you can even write a messsage of love on the back!

Today is the day!  If you would like to get the next Paper Pumpkin Kit in your mailbox in February, subscribe today or add a prepaid subscription to your Stampin’ Up! order.  The 10th of any month is the date by which you need to subscribe or pause or cancel your subscription because in a few days the next kits will go out!  I can picture the red boxes all stacked up in the Stampin’ Up! warehouse right now!

No worries!  If you miss the 10th today and join Paper Pumpkin later on, you will just get the next kit! It’s all good! Paper Pumpkin is for experienced and unexperienced crafters and stampers, old and young, girls and boys, grandmas and grandchildren, nieces and nephews, friends and college students – whoever is looking for a little break in our busy lives to just sit down and play with a surprise project once a month without having to design something or go out and buy supplies, etc.  It all comes in the red box! Maybe you need some glue and scissors, but maybe you won’t.

If you have any questions, just ask!  Email me at Karen@KarenStamps.com. If you are ordering from Stampin’ Up! anyway, then add on the 3-month Prepaid Subscription and earn a free Sale-A-Bration product for your subscription because you are spending over $50. It may even boost your order up to Hostess Rewards. And if you just want to try it for a month or two and see how you like it, join HERE or click to get more information.

I hope you will treat yourself for Valentine’s Day by joining Paper Pumpkin so you will start receiving your happy red box in the mail!

Stampin’ Up! Weekly Deals

Stampin' Up! Weekly Deal Feb 9 2016

Here are the new Stampin’ Up! Weekly Deals for today through Monday, February 15, 2016. The Blossom Bunch Punch is currently in the Occasions Catalog on page 22 and coordinates with the Grateful Bunch Stamp Set. I’ve loved all the Sequin Trim that has been offered!  It often just adds that extra little bling and texture to a card or project that puts it over the top! The Baker’s Box Thinlits Dies make small box-making easier.  You can see some samples in the Stampin’ Up! Annual Catalog on page 59. Just check out the Weekly Deals and see if you want to add any to your order. Always nice to get Stampin’ Up! products at a discount!

Don’t forget to check the Clearance Rack, too!

Paper Pumpkin Sale for Sale-A-Bration

If you would like to receive the Paper Pumpkin papercrafting kit in YOUR mailbox in a week or so, sign up today or tomorrow.  You can sign up for just a month HERE for only $19.95 which includes shipping OR you can order a 3-Month Prepaid Subscription on your regular Stampin’ Up! order and save $5. This will also qualify you for a free Sale-A-Bration product that you choose from the Sale-A-Bration Brochure. Just join Paper Pumpkin by Feb. 10th in order to receive February’s kit!

Sale-A-Bration is ongoing! Time is flying! Be sure to place your $50 order or multiples of $50 to choose a free Sale-A-Bration product for each $50 spent! Remember, if your order reaches $150 you also get Hostess Rewards! And during Sale-A-Bration, if your order reaches $250 you get an EXTRA $25 in Hostess Dollars with which to choose MORE products!  Get some friends together and take their orders to reach those benefits. Prepaid Paper Pumpkin subscriptions count toward all of this, too!

Speaking of Sale-A-Bration! Some new product choices are coming! Here is a flyer with the upcoming new products available February 16. Click HERE. If you want any of these current limited products, be sure to get your order in by then:

  • Sky Is the Limit Stamp Set
  • Perfectly Artistic Designer Series Paper
  • Hello Stamp Set

I hope you are stamping and mailing some Valentines today!  Valentine’s Day is Sunday, February 14th!

Shop Stampin’ Up! Online for the best in papercrafting products!