Watercolored Butterfly Birthday Card

Watercolored Butterfly Birthday Card

I got the idea for this Watercolored Butterfly Birthday Card from the new Stampin’ Up! Catalog that will be out June 1st!  It was so easy to make and I love how it turned out!

I watercolored the Shimmery White Cardstock background using some reinkers and my Aqua Painter. This is such an easy technique!  The Aqua Painter is one of my favorite tools! The barrel is filled with water so it is like a paint brush without having to dip it in a separate container of water. You can pick up some ink from the lid of an ink pad or you can put just a tiny drop of reinker on the outside of a plastic stamp case or any piece of plastic and water it down with the Aqua Painter first or just pick up as is, depending on what shade you want. Just to help the reinkers along, I spritzed the Shimmery White Cardstock a little bit with water in a spritzer bottle. Shimmery White isn’t as good for watercoloring as Watercolor Paper but it is better than Whisper White.  And you will love the shimmer!  You can probably see it a bit in my photo. I used Delightful Dijon, Bermuda Bay, and Rich Razzleberry reinkers. I just scribbled on some color onto the slightly wet Shimmery White and kind of blended the edges together. If you are in a hurry (of course you are!) use your Heat Tool to gently dry the paper.

The reason I chose those colors was because I was going to use the Elegant Butterfly Punch  to punch out butterflies from the Bohemian Designer Series Paper. Honestly this was never my favorite paper, yet there have been many cute projects made with it. Just look on the back of any pack of designer paper and you will see the coordinating colors listed, in tiny print! I always write them on the back cardboard with a Sharpie so I can read it easily!!  I added some Candy Dots to the butterflies and popped them up on Stampin’ Dimensionals. The greeting is from the Remembering Your Birthday Stamp Set.

You can make this card with just Shimmery White, but mine is actually on a card base of Delightful Dijon Cardstock, which doesn’t show up well in my photo. You can jazz up this card even more if you like with more embellishments but I liked it just the way it turned out. Try something like the Watercolored Butterfly Birthday Card for any occasion or changing the colors or embellishments, etc.

Shop Stampin’ Up! Online for Current and Retiring Stamping Products!

Mini Treat Bag Thinlits Candy Treat Bags

Mini Treat Bag Thinlits Candy Treat Bags

I spent most of the day making a bunch of Mini Treat Bag Thinlits Candy Treat Bags for some people. Yesterday I posted one I made to get myself going and think about how I was going to decorate the treat bag. It’s best to have a simple design when you are making a quantity of anything, of course.  I used quite an assortment of papers for these! I used the Cherry on Top Paper Stack, the Love Blossoms Paper Stack, Birthday Bouquet, English Garden (retired), and the Botanical Gardens Designer PaperMost of these I had big enough scraps for at least one treat bag so I ended up with lots of different papers just to use up some of my current papers.

I scored the bag at 3 1/2″ from the bottom to make the foldover flap. Then I adhered a belly band around the treat bag (be sure to put the treat in first!) and stamped “Thank You” for the Tin of Cards Photopolymer Stamp Set. The word “Celebrate” is from the Any Many More Stamp Set that has all kinds of greetings in it.

It’s fun to make these mini treat bags!  You don’t only have to use them for candy or treats. You can use them for envelopes and slip in a simple card or a monetary gift.

Of course the main thing you need to make these Mini Treat Bag Thinlits Candy Treat Bags is the Mini Treat Bag Thinlits Dies and the Big Shot.

Shop Stampin’ Up! Online 24/7

Make a Birthday Bouquet Treat Bag with the Mini Treat Bag Thinlits

Birthday Bouquet Mini Treat Bag

I’m back to one of my favorite projects, using the Mini Treat Bag Thinlits Dies to make a special treat bag with the Birthday Bouquet Designer Series Paper. I love using the Mini Treat Bag Thinlits Dies for lots of projects! The basic way to use the dies is to make a treat bag with an opening in the top like any little sack and then embellish it. But this one I folded the top over and added a belly band to hold it closed.  It is filled with two chocolates and a tea bag. The die cut heart also comes in the die collection. I embossed the heart with the Decorative Dots Embossing Folder just to add a little texture. The small hearts are punched with the heart punch in the Itty Bitty Accents Punch PackThe word “Enjoy” is also one of the die cuts.  You really get a lot in the Mini Treat Bag Thinlits Dies!  The belly band is 8 1/2″ x 1 1/2″ and just folded around the bag.  The bag is scored at 3 1/2″ from the bottom if you want a score line to help fold the top over.

There are so many variations to making these treat bags and embellishing them! Check out my post HERE to see the other similar one I made,

We’re moving along in May so be sure you check out the Retiring Stampin’ Up! products list to see what is still available and what you want before they are gone May 31. Stamps are guaranteed though May 22 since Stampin’ Up! manufactures their own stamps in Kanab, Utah. Other products are only available while supplies last.  If you see it in the Online Store, then it is still for sale!

Stampin’ Up! Retiring List

Shop Stampin’ Up! Retiring Products

A Quick and Easy Mother’s Day Card

Quick and Easy Mother's Day Card

If you are running behind, here is a quick and easy Mother’s Day card that is simple for anyone to make at the last minute! You can copy this exact idea or just use it for a starting point and give it your own twist.

After playing around with a couple of other ideas that honestly weren’t working out very well, I decided to just stamp three stems, stamp three flowers and use a die cut word I found in my stash of unused pieces I’d already made at one time or another.  You could just as easily stamp a greeting at the bottom instead of using a die cut.

The flowers are from the stamp set Flower Patch. Lots of flower designs to choose from in that stamp set. But if you don’t have that stamp set, just use another one. The die cut “enjoy” is from the Mini Treat Bag Thinlits Dies.  The card base is Blushing Bride with a layer of Whisper White.  The card is square at 4 1/4″ x 4 1/4″ but it fits in a regular size Whisper White Medium Envelope so no need for a square envelope. And for a little embellishment, I added Pearls to the center of each flower!  You could do rhinestones or candy dots or whatever you like.

This card is actually perfect for many other occasions, not just Mother’s Day, but if you are looking for a quick and easy Mother’s Day card today, something like this one will be much appreciated!


Birthday Bouquet Gift Bag for Mother’s Day

Birthday Bouquet Gift Bag for Mother's Day

If you need a quick gift bag for Mother’s Day or any occasion, it’s easy to make one with the Stampin’ Up! Gift Bag Punch Board or you can follow some directions online to make a bag. This gift bag is made with the pretty Birthday Bouquet Designer Series Paper.  I actually intended to use the side that is on the inside of the bag, but I didn’t think about which way the pattern was going when I used the Punch Board, so the hearts would have been upside down! When you are using the Gift Bag Punch Board, remember that what you are punching and scoring at the top of the board is actually going to be the bottom of your bag.  Make sure you check your paper pattern and make sure it is going in the correct direction! However, the pattern on the other side of almost any Stampin’ Up! paper is also going to be pretty and coordinating with what you are making so it worked out just fine to use this polka dot pattern for my gift bag!

I found a scrap of designer paper that was from a boo-boo awhile back, and really all that I could use it for would be cutting out the flowers by hand.  Depending on how much you like or hate to cut things out, you might prefer to stamp a flower rather than cut one out! But this worked for me.  I love these flowers on this paper so I just cut out around the flower and all its parts and didn’t worry about perfection.  If you leave a little border then perfection in cutting doesn’t matter! Having Paper Snips really does make the job of cutting things out a lot easier.

To make the snipped flower stand out on the bag, I punched a 2 1/2″ circle of Blushing Bride cardstock, then thought of putting a Tea Lace Paper Doily behind it. I had some doilies already cut in half so I decided that would be better. Then I added some White Jute Ribbon and a scrap of Venetian Crochet TrimSince I had a scrap of Watermelon Wonder 1″ Stitched Ribbon that was already tied in a knot, I just put the ends through to the back and had that little pop of color in the front holding the bag shut.

Birthday Bouquet Gift Bag Embellishment

I like the Gift Bag Punch Board for making small to medium size gift bags. It comes in handy sometimes!  If you take an afternoon and make a bunch at one time, you can have a supply of gift bags of all kinds on hand ready for when you need them! Almost any of the designer paper by Stampin’ Up! is pretty enough for gift bags, but I really like this Birthday Bouquet Paper for this Mother’s Day Gift Bag!

Circle of Spring Embossed Wreath Watercolor Thank You Card

Circle of Spring Embossed Wreath Watercolor Thank You Card

This Circle of Spring Embossed Wreath Watercolor Thank You Card seems perfect for spring! Doesn’t the watercolor look just feel like spring? I found this watercolored and embossed piece laying in a pile of odds and ends because there was a little imperfection in the embossing. Do you have a little pile of pieces that maybe you punched out but didn’t use or scraps of cardstock or something you stamped and then didn’t need?

The focal point of this card is a layer of Watercolor Paper watercolored with several colors, perhaps with the acetate sheet method I think in my last newsletter. Then I used Versamark Ink to stamp the wreath from the Circle of Spring Stamp Set and embossed with the Heat Tool and Gold Stampin’ Emboss Powder. I recommend when you stamp or stamp to emboss on Watercolor Paper that you make sure your ink pad is juicy and make sure you give your stamp a good press on the paper since the paper is a little bit textured compared to regular card stock. To color the flowers and leaves of the wreath use either light-colored Stampin’ Write Markers or use the Aqua Painter and pick up small amounts of ink either from the ink pad or from a drop of ink refill.

The bow is stamped and diecut and actually trimmed a little bit with scissors to get off the excess white border. The small butterfly is punched with the Bitty Butterfly Punch out of a scrap of watercolored paper that was lying around on my table.  The little turquoise rhinestones are actually some “contraband” I had in the drawer, but you can use your Stampin’ Up! Rhinestones and color them with Sharpie Markers to color them, or use the Blendabilities if you happen to have those that Stampin’ Up! used to carry.

The card base is Melon Mambo and the layer is Tempting Turquoise. There are several different greetings that come in the Circle of Spring Stamp Set so you can have your choice. You can use the Wonderful Wreath Framelit Dies to cut out the wreath, bow, and hanger.

The wreath in the Circle of Spring Stamp Set will make a beautiful card for you whether you just stamp or emboss, watercolor or not. Make it look like spring or another season by the colors you use on the wreath and the rest of your card or project.

Shop Stampin’ Up! Online HERE!

Check the Retiring Products that are available this month while supplies last!

Stamping Off Easy Petite Petals Congratulations Card

Petite Petals Congratulations Card

I’m getting a little more use out of my 2014-16 In Colors before they retire in this Stamping Off Easy Petite Petals Congratulations Card. I have to admit, I stole the idea from a sample in the new upcoming Stampin’ Up! Catalog! Mine is even simpler, just stamped on a folded piece of Whisper White Thick Cardstock and stamped the greeting right on the center of the card.  I could have stamped and punched a few extra Petite Petals to adhere in a popped-up fashion, but I just kept it simple.

I chose to use three of the retiring In Colors:  Hello Honey, Tangelo Twist, and Blackberry Bliss (ink pad not available). I did LOTS of stamping off to get the lighter colors of the flowers and less stamping off to keep getting darker colors. What is it about having a stamp in your hand and doing repetitive stamping that is so satisfying?! The flower is from the Petite Petals Stamp Set, which is not retiring and you will see in the new catalog. And for the small price difference, only $4, I would recommend getting the wood-mount stamp set.

For the greeting, I chose the Bravo Photopolymer Stamp Set with it’s great bold greetings for many occasions. Sadly, this is a retiring stamp set, so if you are interested, be sure to put it on your order!

This Stamping Off Easy Petite Petals Congratulations Card is fun to stamp and would work for graduations, weddings, thinking of you, birthday, hello, birthday, Mother’s Day – many occasions!

Shop Stampin’ Up! Online

Adult Coloring Flower Shop Card

Adult Coloring Flower Shop CardYesterday I made my own adult coloring page and today I have made it into this Adult Coloring Flower Shop Card! If you are into the adult coloring craze, don’t forget, you can make your own coloring pages!  Just stamp randomly with Stazon Ink or Archival Black Ink and then color in with Stampin’ Write Markers, watercolor with ink, color with colored pencils, whatever you would like to do!  It’s fun, easy and therapeutic! Just take a little while to stamp and relax, and color like when you were a child! I recommend using lighter colored markers or else pick up the ink with an Aqua Painter so it doesn’t get too dark for your images. I used the Flower Shop stamp set to stamp these outline flowers.

After “adult coloring” this page yesterday, I decided to make it into a card today!  It is layered on a piece of Basic Black cardstock with a very thin margin and then layered on a card base of So Saffron. The greeting is from the Tin of Cards Stamp Set (one of my favorites!). I stamped it and then punched out with the popular Decorative Label Punch. I couldn’t resist adding a couple of Rhinestone Jewels.  The ribbon is the Basic Black 3/8″ Stitched Satin Ribbon (retired).

If you want a layer behind your Decorative Label Punch, punch out two pieces of the contrasting color.  Then cut each piece in half, one horizontally and one vertically and layer behind the top label.

If you want to see my adult coloring Flower Shop page before I made it into a card, visit my Facebook page HERE.

Take a few minutes and stamp some Whisper White card stock with an outline image of your choice.  Just holding a block and stamp in your hand will feel wonderful! Stamp and then color in with whatever art supplies you have. Stamping and coloring is good for the soul!

Shop Stampin’ Up! Online for all your papercrafting needs!

Flower Shop Mother’s Day Card

Flower Shop Mother's Day Card

Mother’s Day is coming next Sunday so here is a Flower Shop Mother’s Day card! Sometimes I totally surprise myself with what I end up making compared to what I thought I was going to make when I get out my supplies and start stamping. This card was inspired by one I saw in the Stampin’ Up! Catalog on page 126, made with the Flower Shop Stamp Set.  I don’t even know how they made it so I just came up with something similar.

The card base is made with the Whisper White Thick Cardstock with a layer of Whisper White (regular) Cardstock. The flowers are stamped with Crumb Cake ink, but stamped off first before stamping again on the Whisper White layer. A couple of the flowers are stamped and punched out with the Pansy Punch.

Now the unusual part of the card is the fiber heart.  Can you guess what that is made from?  I used the White Jute Ribbon!  I’m not sure at all how they made the heart on the sample I was copying, but I made mine with the Jute Ribbon. It wasn’t wide enough, so I just took 3 pieces of the ribbon, laid them side by side to make one heart. I actually folded the center piece in half lengthwise, then put the side pieces on each side of that folded center piece and cut out a heart shape like you would out of folded paper. Then I used Fast Fuse to adhere the three pieces down on the card in the heart shape.

I added a few embellishments: two of the Neutral Designer Buttons (retiring and discounted) and one of the 2015-17 In Color Blossom Accents (retiring and discounted).  The greeting is from the retiring stamp set And Many More. This stamp set, in the wood-mount, is discounted almost $10! Change the greeting to anything you like for a card for another occasion!

If you need inspiration, just look through the Stampin’ Up! Catalog and look at the samples.  I’m sure you will find something that jumps out at you that you want to make.  You can copy exactly or change the paper or the embellishments or the colors or the stamp set! It’s fun and easy! That’s how I came to making this Flower Shop Mother’s Day Card.

Shop Stampin’ Up! Online!


Botanical Gardens Big News Birthday Card

Botanical Gardens Big News Birthday Card

Yesterday I showed you a baby card made with the retiring Big News Stamp Set and today I have used one of the birthday stamps in the set to make this Botanical Gardens Big News Birthday Card. Today is May Day, the 1st day of May, so I thought a few flowers would be appropriate!

Normally I don’t care for the off-kelter, look of cards that seems to be popular recently, like I have done with the designer paper on the background of this card. However, I was looking at a sample that I was copying except for changing the designer paper, so I decided to give it a try. The card base is Hello Honey Card Stock and I used the Botanical Gardens Designer Series Paper for the background layers. This paper is retiring, so get it while you can!  I angled them slightly, which normally I don’t like.  The greeting from Big News is stamped on Whisper White Card Stock with Old Olive Ink.

The flowers are cut out from another pattern of the Botanical Gardens Designer Series Paper. The flowers are pretty as is, but if you like, you can use the stamps in the Botanical Bloom Photopolymer Stamp Set to stamp the flower centers, as I did. I simply cut out the flowers myself, but you can use the Botanical Builder Framelit Dies to die cut them. If you want it all, get the Botanical Blooms Photopolymer Bundle while you can and get the stamp set, the framelits, and the designer series paper.  You will save 15% with the Bundle and get everything you need!  You could also add some other embellishments if you wanted – ribbon, rhinestones, Candy Dots.

Now that it is May, this is the last month for the Stampin’ Up! Retiring Products! See all that is still available in my Stampin’ Up! Online Store HERE. Accessories are only available while supplies last and some are sold out already. Stamps, since Stampin’ Up! manufactures them, will be available through May 22 even if they sell out.  Stampin’ Up! will make more until that date.

See if you like the angled look of my Botanical Gardens Big News Birthday Card today, and if so, try it yourself for something different!

Big News Baby Card

Big News Baby Card

Make a Big News baby card for that new arrival with the Big News Stamp Set! It’s on the Stampin’ Up! retiring list so you only have a few weeks to order it. But this stamp set is not just for babies, it has greetings for several life events, such as birthdays and weddings, as well as good old “awesomeness”!

Big News Stamp Set

I hate to see this stamp set retire. It made me happy just to see it!

I used the Birthday Bouquet Designer Series Paper on this card so I used the colors that coordinate with the paper.  The card base is Mint Macaron layered with Whisper White Card Stock. The words are stamped in Soft Suede ink.

I stamped the outlined words “Big News” right on a scrap of the Birthday Bouquet Paper with Stazon Black Ink so it wouldn’t bleed when I colored in the letters.  You can stamp the whole stamp on a larger piece of designer paper and then cut it accordingly rather than trying to stamp it precisely. I  cut the banner ends and then layered it on a piece of Watermelon Wonder card stock. You might not be able to tell from the photo, but I colored in the outline letters with the Mossy Meadow Marker from the 2014-16 In Color Stampin’ Write Markers. This set of markers is one of the retiring In Colors and the pack of markers is discounted, so be sure to check that out!

The baby booties are from the stamp set Something For BabyI colored the stamp with two markers, Watermelon Wonder and Mint Macaron, and stamped and then cut out. I tied a small bow with Whisper White Baker’s Twine and adhered the booties to the ends of the twine. You can also get coordinating framelits for this baby stamp set in a bundle with the stamp set, the Something for Baby BundleSave 15% with the Bundle!

We always need more words and greetings for our stamping projects so check out the Big News Stamp Set (both the clear- and wood-mount stamp sets are discounted!) and see if you should add it to your Stampin’ Up! order, and make sure you get all the retiring accessories you want while they are still available.

Shop the Stampin’ Up! Retiring List Online!

See the products that are still available right here in the Online Store!


Blended Bloom Shimmery Thank You Card

Blended Bloom Shimmery Thank You Card

We are in the midst of the Stampin’ Up! transition to the new catalog with the Retiring Products List and two of the retiring products on the list are on this Blended Bloom Shimmery Thank You Card. The Retiring List is a list of products going away by May 31st (if not sooner) in order to make room for the exciting new products and stamp sets in the new Stampin’ Up! 2016-17 catalog coming out June 1, 2016.

This beautiful stamp, Blended Bloom Wood-Mount Stamp Set, is a single wood-mount stamp. If you are in to the adult coloring craze, this is a good stamp for coloring! You can stamp it as many times as you like without having to buy an expensive coloring book! This stamp is discounted by a few dollars on the Retiring List, so check it out!

I stamped this beautiful flower on Shimmery White Card Stock with Stazon Ink. Shimmery White paper holds up to watercoloring pretty well, better than Whisper White, although Watercolor Paper still is the best.  But I love the shimmer on the Shimmery White Paper. I think you can see it a little bit in the photo above. I used my Aqua Painter and ink refills to color in the flower, then cut it out with Paper Snips.

The card base is Rich Razzleberry Card Stock (as is the main color of ink on the flower) with a Shimmery White layer. I wrapped a piece of White 1 1/4″ Jute Ribbon around the left side of the card using Fast Fuse to adhere the end and also to adhere it along the front of the card, but not all the way over to the right. Then I tied on some Linen Thread around the Jute and trimmed the end with my Craft Scissors (they are sold out!). Then I adhered the Blended Bloom flower using Stampin’ Dimensionals.

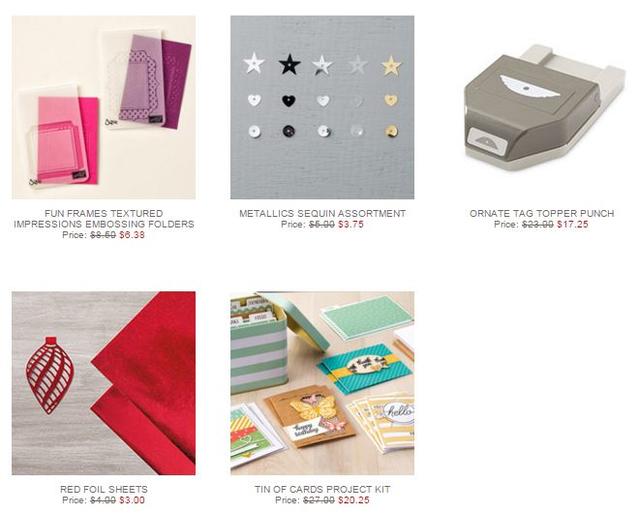
The greeting is from the Tin of Cards Photopolymer Stamp Set This stamp set is a great one to have, lots of great greetings plus a few little cutesy stamps that I have often used for just an extra little something on a project. I would also recommend you take a look at the Tin of Cards Project Kit because it is discounted right now and on the Retiring List! A great price and lots of crafting fun to make 16 cards!

Grab the Blended Bloom Stamp while you can and check out the other products used on the Blended Bloom Shimmery Thank You Card. Just change the greeting, of course, to make it a card for any occasion.

Stampin’ Up! Retiring Products in the Online Store

Join Paper Pumpkin! Get the May Kit!

Paper Pumpkin Box

The Stampin’ Up! Paper Pumpkin Kits for April 2016 have been delivered to subscribers!  If you don’t want to miss out on the next kit in May, be sure to get yourself subscribed!

It’s easy to join!

  • Sign up on my Paper Pumpkin page HERE! (or just get more information)
  • Add a Prepaid Paper Pumpkin Subscription to your Stampin’ Up! order!  You’ll receive a code via email right after you order. It will tell you to set up your account on the Paper Pumpkin page and you will be set to go!
  • Sign up either way by May 10th to receive the May kit.
  • Watch for your Paper Pumpkin kit in your mailbox around mid-May!

Everything you need comes in your kit! A stamp set, an ink spot, a clear block with your first kit, and all the paper and supplies you need to make the project.  Sometimes it is cards, sometimes it is something else.  It’s always a surprise.

No risk! If it doesn’t suit you, just cancel. If you are busy and want to skip a month, just go in to your account and pause your subscription. Resume when you are ready.

Give Paper Pumpkin as a gift! I send one to my daughter as a gift and if she is too busy, she just pauses her subscription for a month or two.

Who do you need a gift for and want something different?  Who do you know could use  a little “me” time to just sit down and relax while they have some crafting time? Who do you know would enjoy a little surprise gift who doesn’t even craft?  Paper Pumpkin is for everyone and anyone!

Take a look at April’s Paper Pumpkin Kit!  Sometimes there are plenty of extra pieces left over that you can make even MORE projects with! If you don’t like the project or you don’t want to make all the cards or whatever, just go with your own design and creativity.  Nothing says you can’t change it up!  Just have fun with it! That is what Paper Pumpkin is for!

Join Paper Pumpkin Today!

Make An All-Occasion Card with Everything Eleanor

Everything Eleanor All-Occasion Card

One of the Stampin’ Up! retiring stamp sets is Everything Eleanor , which is a set that has been around a long time, it seems, and is good for all-occasion and any occasion cards! It’s an elegant set of stamps that you can make as simple or formal as you like. I’ve always loved the flourishes and the special shaped images to use as a background.

This card has Lost Lagoon, one of the retiring In Colors, as the card base with a Whisper White layer. I stamped the flourishes in Mossy Meadow  and the cute background shape in Lost Lagoon (stamped off once first). The flowers were all stamped in Stazon Ink on a scrap and colored in and cut out.  I used my Aqua Painter and the ink in the lid of the ink pads ( Calypso Coral, So Saffron, Melon Mambo).  The bird is also stamped and cut out.

The greeting is from the stamp set A Dozen Thoughts. It is also on the retiring list.  I noticed that the wood-mount version is discounted so it is only $1.25 more than the clear-mount! For that little price difference, I would rather have the wood-mount! Once you mount the stamps on the wood blocks, the stamps are ready to go all the time! If you don’t mind the extra storage space that the wider case takes up!

Stampin’ Up! Retiring List

Check it out soon because some items have already sold out!  Don’t miss out on what YOU want!

*Due to high demand for retiring stamps, Stampin’ Up! will keep producing retiring stamps until May 22 (not accessories, which are only while supplies last).

Cherry on Top Easy Amazing Birthday Card

Cherry on Top Easy Amazing Birthday Card

Here is a Cherry on Top easy Amazing Birthday card!  If you are looking for a simple birthday (or most any occasion) card to make, this is one you should try. All it takes is a change of paper and/or greeting to fit any reason to send a card!

One of the retiring stamp sets I am going to miss is the Amazing Birthday Stamp Set! It is even discounted on the Retiring Stamps List. It has birthday-specific stamps but some of the other stamps you can use for other occasions, too!

The card base is Bermuda Bay, with a layer of Crushed Curry, both of which coordinate with the Cherry on Top Designer Series Paper Stack. My Cherry on Top Paper Stack had gotten lost in the shuffle somehow so I was glad to think about it again, find it, and use it because it has some fun, colorful papers in it. It’s “Happy” paper to use!

I used my Banner Framelits Dies to die cut the layered banner on the front of the card. If you like, you can save 15% by purchasing the Amazing Birthday Stamp Set and the Banner Framelit Dies together in the Amazing Birthday Bundle.  I had forgotten these two products came together in a Bundle!

All Bundles are being retired right now, but that doesn’t mean all the products individually are being retiring.  They are just taking apart the Bundles to make room for NEW Bundles in the new catalog and perhaps one of the items in the Bundle is retiring, such as the stamp set or the designer paper.

For a final embellishment, I wrapped some Gold Metallic Thread around the top of the banner. This is not retiring but you may as well put it on your order to have on hand because it is an inexpensive, fun bit of pizzazz to add to any of your cards or projects.

Try making this Cherry on Top Easy Amazing Birthday Card or change it up with your own design!

Stampin’ Up! Retiring Products:  Stamps and Everything Else!