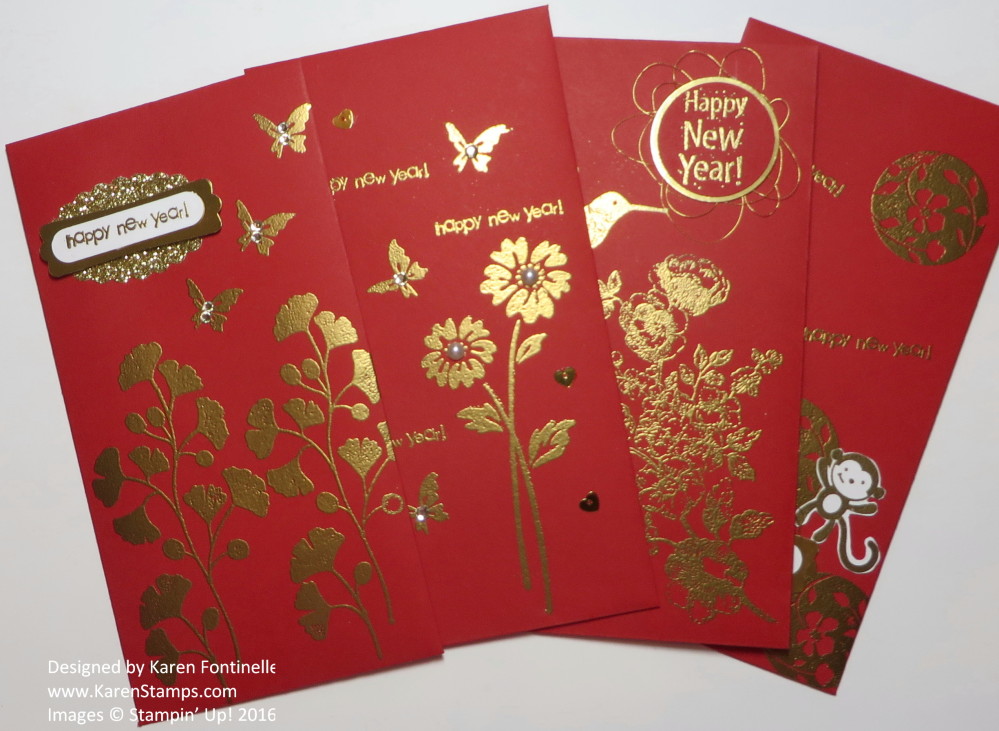
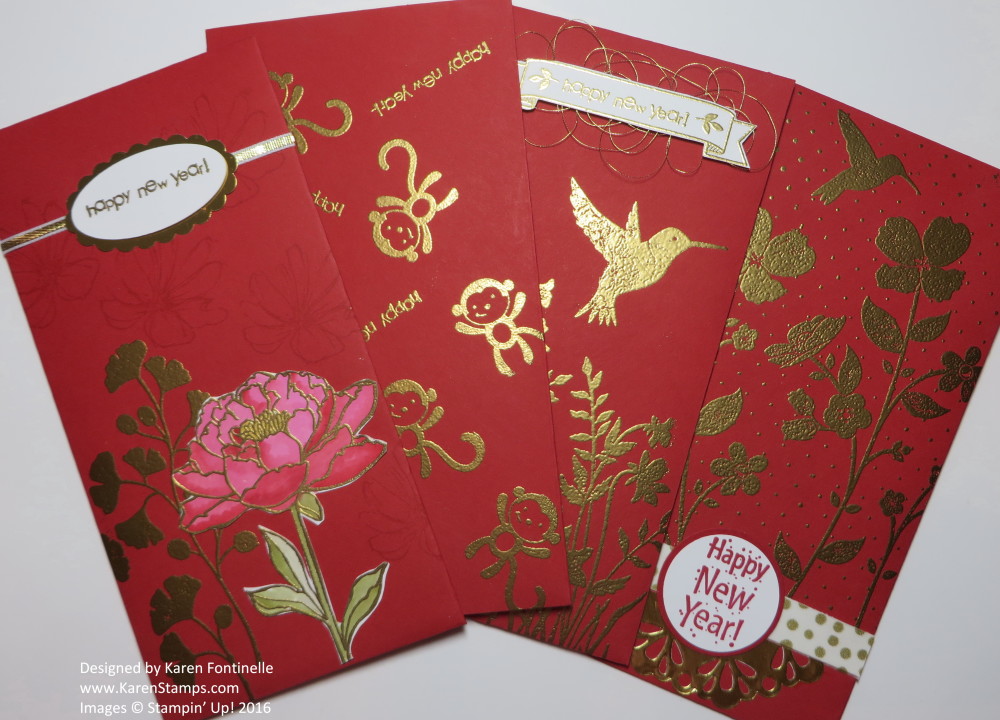
Happy Chinese New Year! This Chinese New Year is the Year of the Monkey. There are twelve animals in the Chinese Zodiac and the monkey is the ninth animal in the cycle. To celebrate, red envelopes are given with money inside. Someone asked me if I could make some for her, so here are some of the envelopes I came up with. I didn’t have any Chinese stamps, but I started off choosing flower stamps that I thought would work. I did find a monkey stamp, and although I thought it might not be the right thing, the lady I was making them for liked having a monkey on some of the envelopes.
I used the Stampin’ Up! Red Envelope Paper that is no longer available and really gave the Envelope Punch Board a workout! I also gave the Heat Tooland Gold Embossing Powder a workout as well! Some of the stamp sets I used are retired. Even though they take up too much space, sometimes it is nice to have a huge selection of stamps to choose from when you have a custom project to make for someone!
These envelopes went all the way to China which is pretty exciting! I hope everyone who receives one enjoys their gift!
Check out the Google image today of the monkeys to celebrate the Lunar New Year!
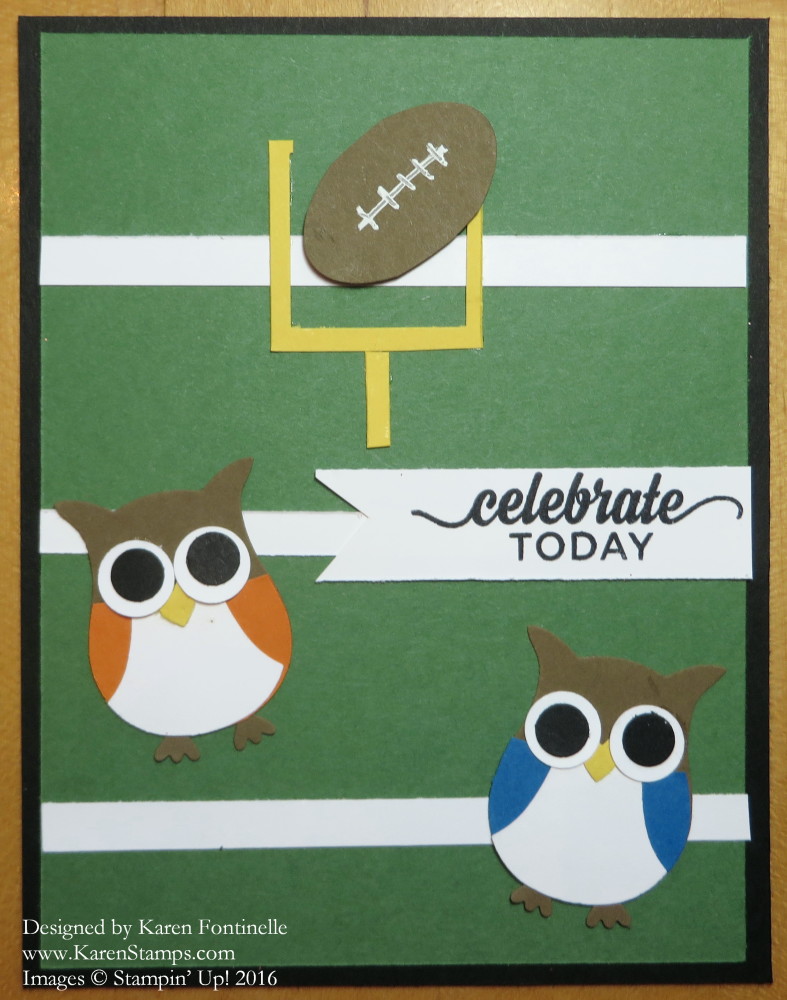
Today is Super Bowl Sunday 2016, so before the game or during the game, why not celebrate with a little stamping?! Gotta love the Owl Builder Punch for making just about anything you need, including football players! I don’t know of any punch more interesting and versatile than the Owl Punch!
The football is made with the Oval Punch, but I stuck one end back in the punch from the top (not the side as usual) to make the oval shorter. Then I had to trim the sides just a teeny bit and I added the stitching with the White Gel Pen. The greeting is from the stamp set in the Occasions Catalog, Enjoy the Little Things . The goal post I made with the Square Punchand some hand trimming.
Whatever you are doing today, whether it revolves around football or not, have a fun Super Bowl Sunday!
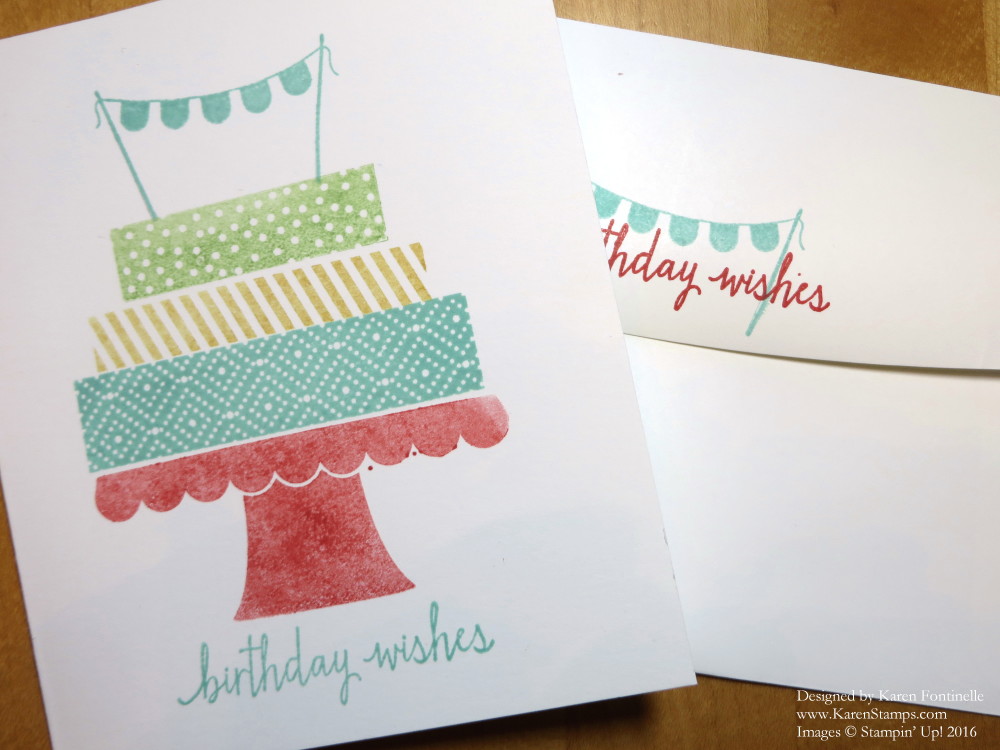
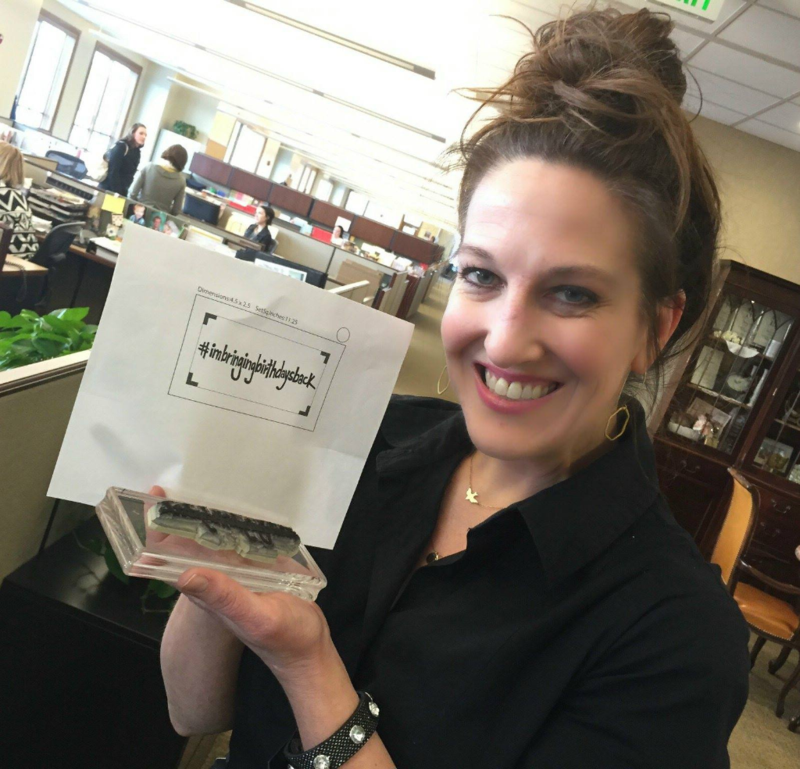
Yesterday Shannon West, from the Stampin’ Up! Corporate Office, was on a local Utah morning show with some stamped birthday cards with the Build a BirthdayStamp Settalking about her idea called #ImBringingBirthdaysBack. Shannon West is one of our favorite presenters at Stampin’ Up! events and on videos, etc.
Shannon was feeling that social media, with its quick and easy way to just type a birthday greeting online to friends, was ruining birthday cards, so she decided she wanted to send a birthday card to anyone who wanted one! She even made her own hashtag stamp #imbringingbirthdaysback. If you aren’t familiar with hashtags, they really are kind of like search terms that group those certain terms together. Sometimes they are specific and sometimes they are just funny or silly. Of course Shannon was deluged with requests.
Stampin’ Up! got behind her movement since making and sending cards is what we do! At least we intend to!! So maybe this will spur more of us on to not just type a birthday greeting on social media but to send a card, especially a handmade card! Let’s make the post office busy again! Stampin’ Up! is going to manufacture Shannon’s hashtag stamp! I can’t wait!
I made a card similar to the ones she showed, as you can see in the photo above. I also loved the idea of how she stamped the back flap of the envelope! Remember, we should not be sending out “naked envelopes”! Stamp something on them!
Let’s all get those birthday date books out and start making cards, or pull out the ones you have made but not mailed, and start sending real birthday cards, IN THE MAIL, to your friends and loved ones! Bring back the good old days when postmen delivered cards and letters in the mail!
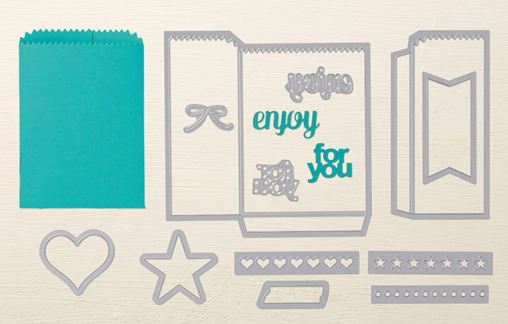
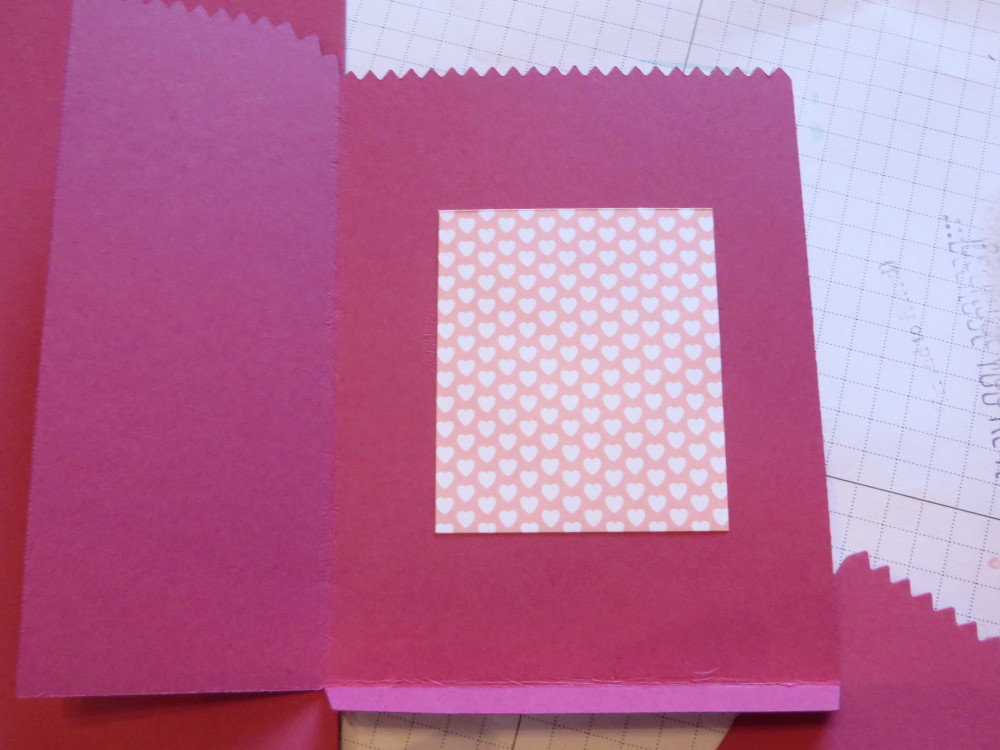
If you have ever considered getting the Mini Treat Bag Thinlits Dies from Stampin’ Up! now is the time because they are discounted on the Weekly Deals! Quickly and easily make cute little treat bags for candy, gift cards, small gifts, or even as an envelope to hold a card. They can be for any occasion and thanks to creative people who figure these things out, you can even make them into different sizes! You just need to die cut with the Big Shot the one main front piece that has one of the back sides attached, plus the other back side. Score, fold, and glue and you have a cute treat bag!
As a bonus, you get all kinds of extra pieces to die cut to make embellishments for your treat bag or to use on other projects.
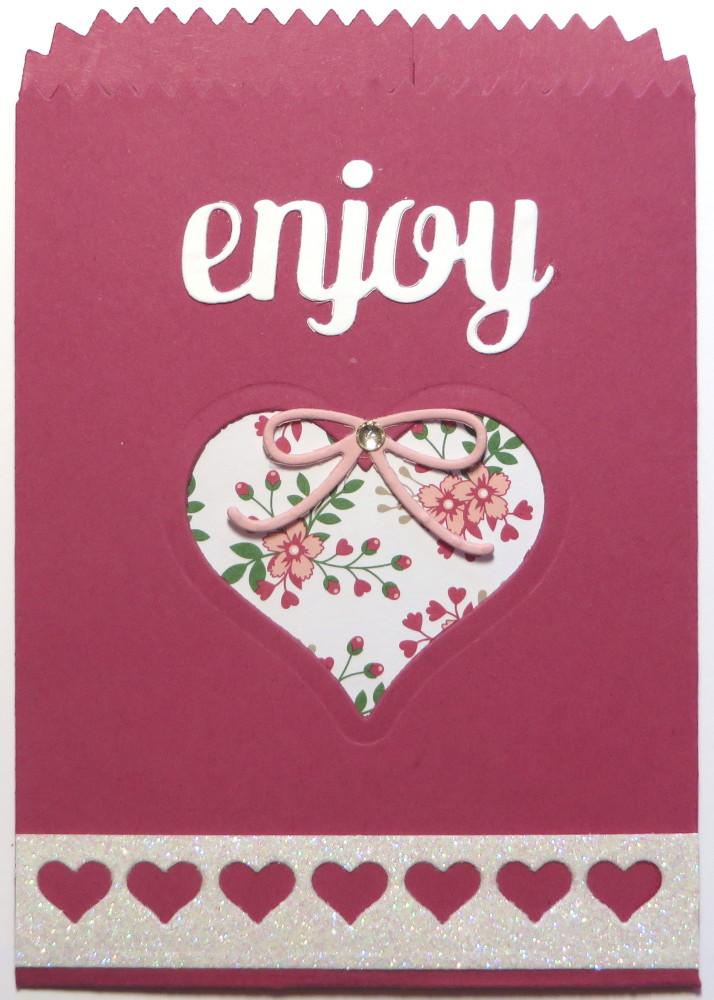
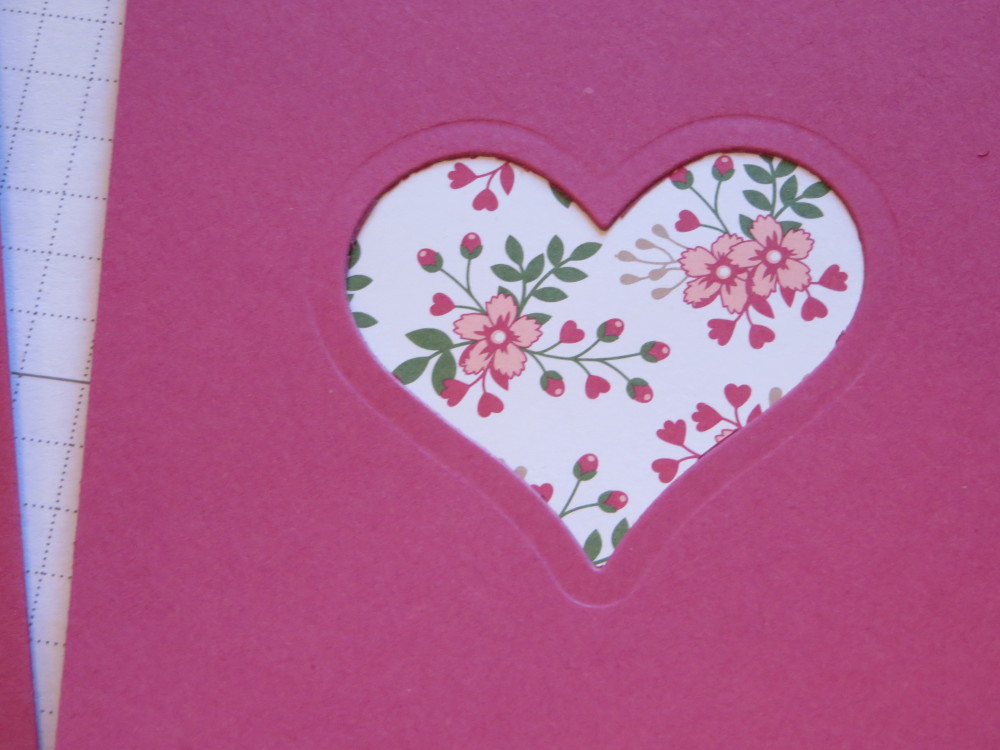
My Mini Treat Bag I made with Rose Red card stock because it coordinates with the Love Blossoms Designer Paper Stack that I used inside the heart window. I used the heart die to cut that window and then just adhered a piece of the Love Blossoms paper on the inside before I glued the bag.
Next just decorate your treat bag with any embellishments or die cut some of the pieces that came in your set for whatever occasion you are making this for! This bag I made could be for Valentine’s Day but doesn’t have to be. Make a separate card to slip inside and have the whole thing be a card rather than a bag. Fold over the top and make a bellyband to make it an enclosure. Just have fun with it and you will!!
Check out the Stampin’ Up! Weekly Deals and all the good products of Stampin’ Up! HERE in my Online Store!
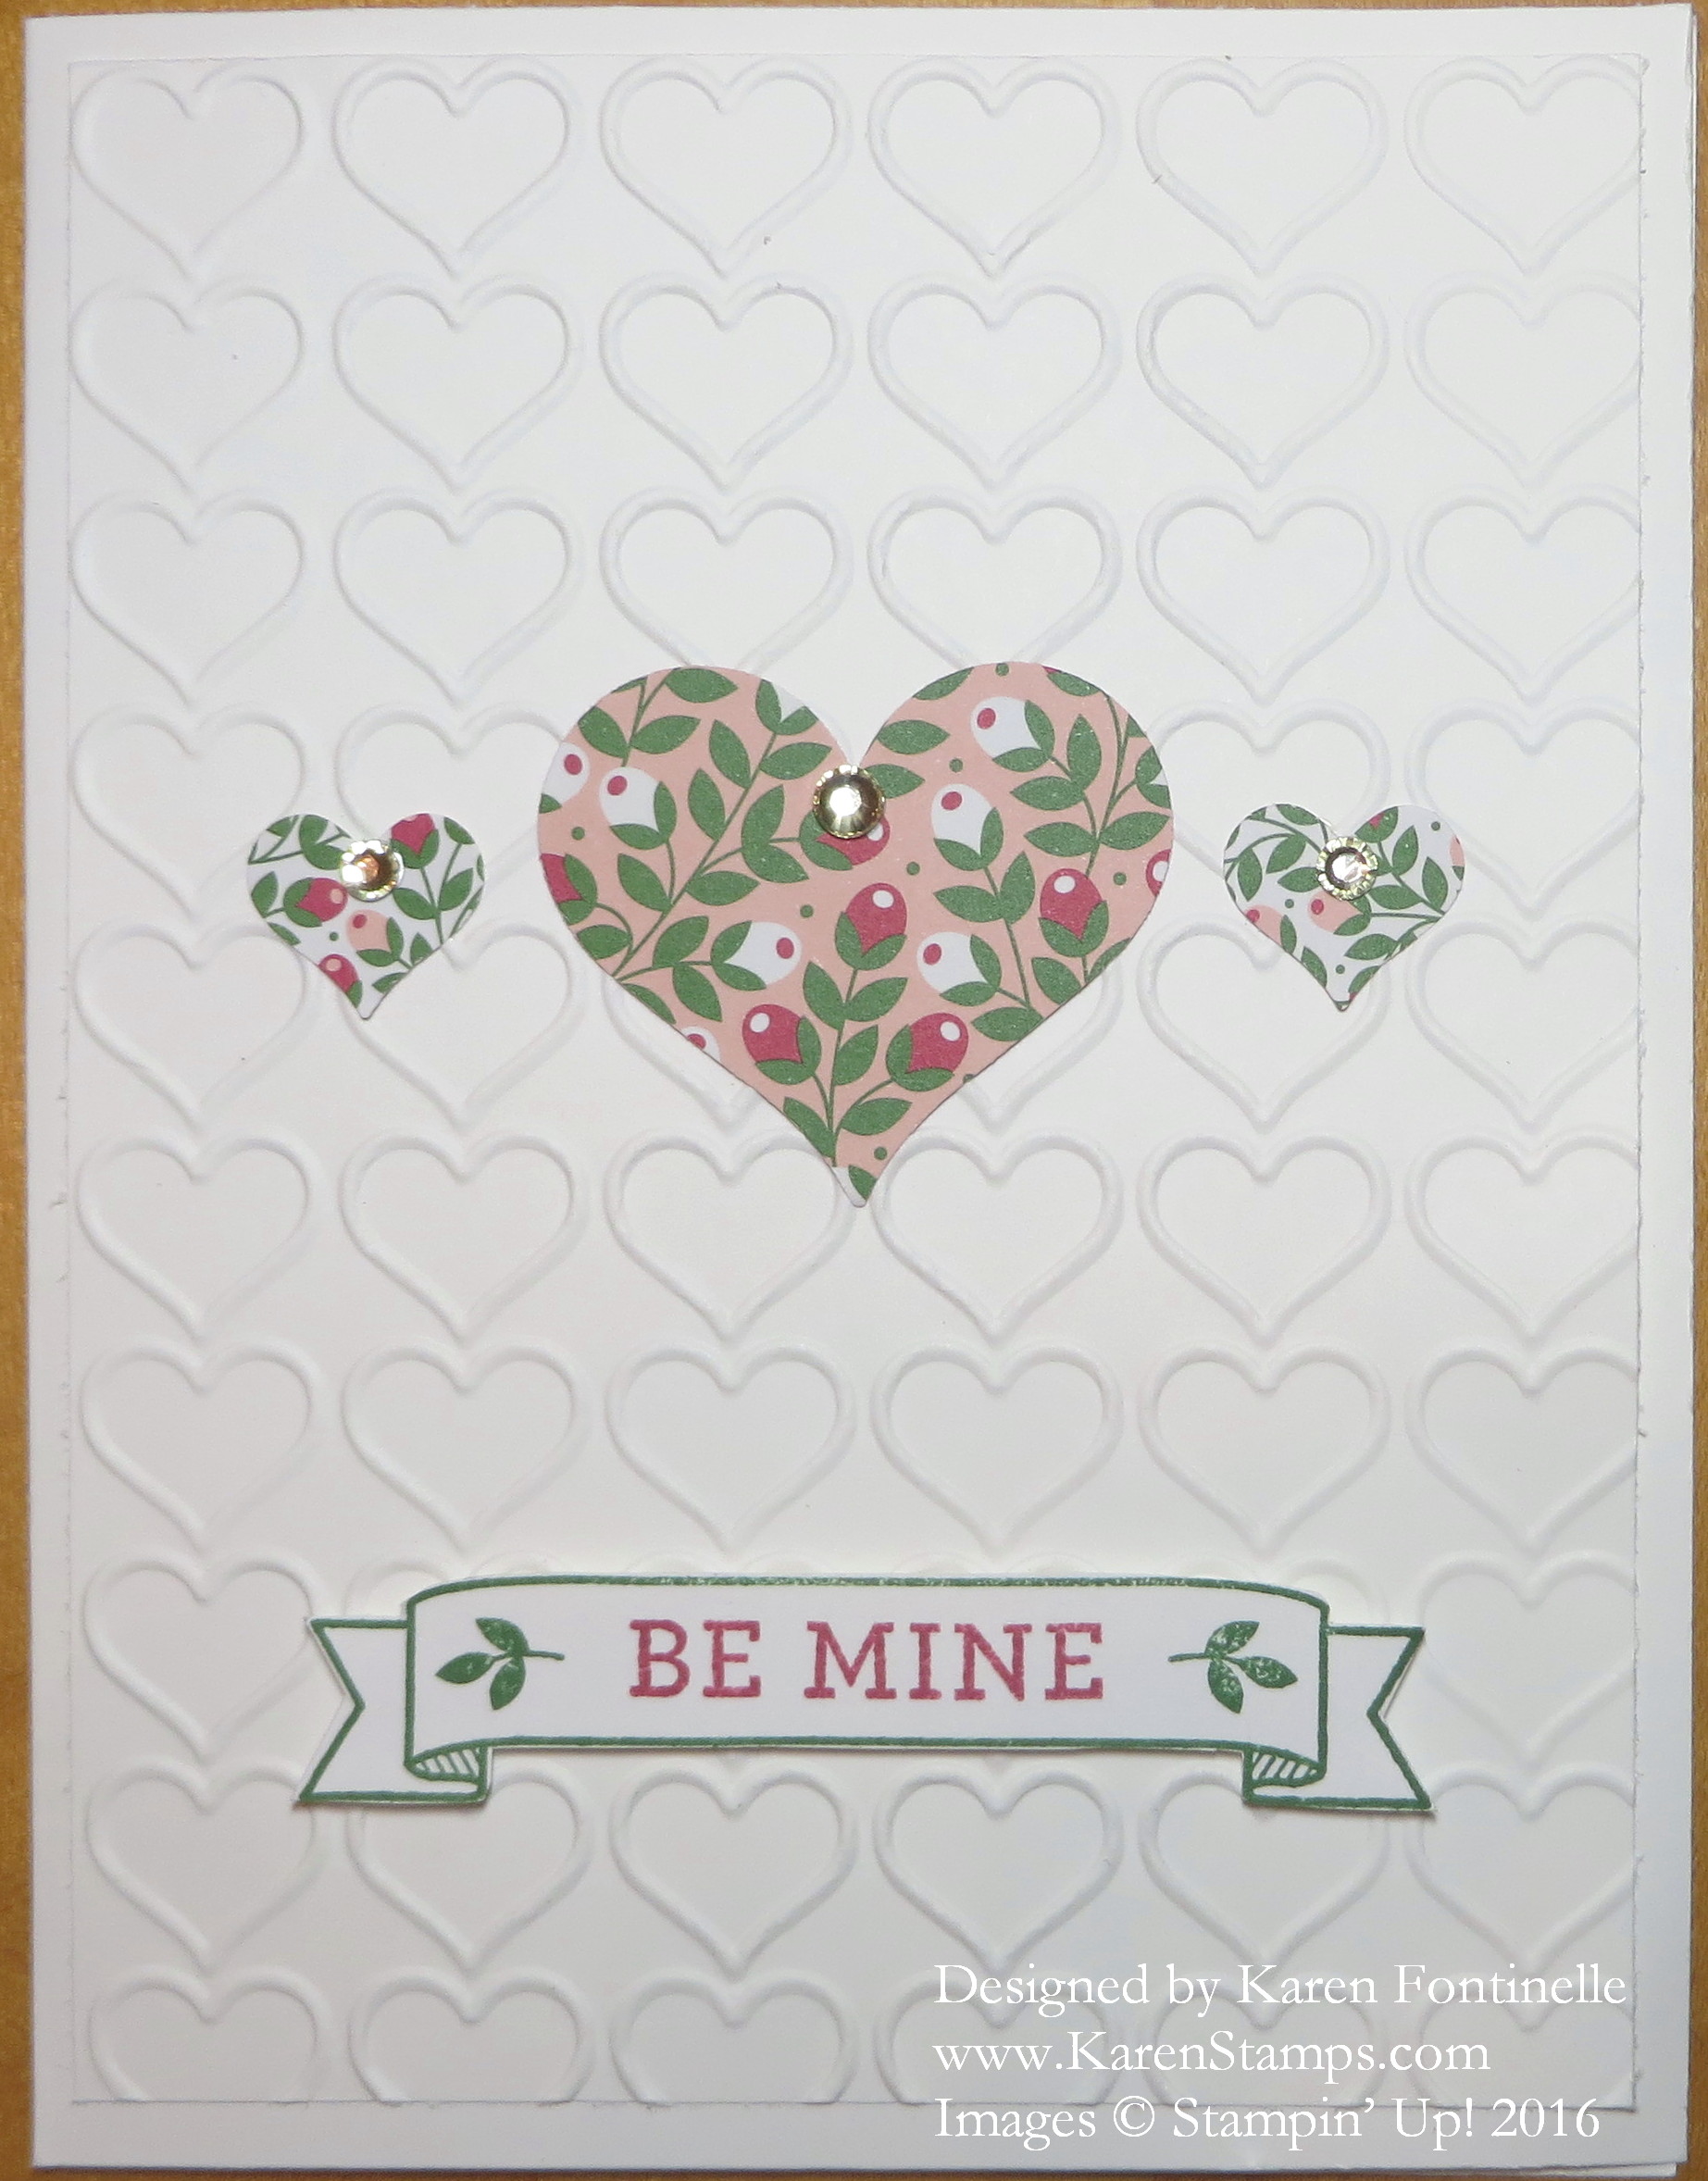
Since it is Valentine’s Day, why not have even more hearts on this card by using the Happy Heart Embossing Folder for the background?! First I made a card base with Whisper White and then embossed a layer piece of Whisper White with the Happy Hearts Folder, so we have white on white.
The banner is stamped from the Bloomin’ Love Photopolymer Stamp Set. I used Garden Green ink since that matches the Love Blossoms Paper. You could also use Black or any other coordinating color. The coordinating colors are listed on the front of the Paper Stack pad! How handy! There are several greetings to choose from in the stamp set, so pick what you like. Then I just cut it out with my Paper Snips. Paper Snips, rather than regular scissors, make really easy work of small trimming like this, so if you don’t have Paper Snips, I would put those on my next order. Sometimes you don’t realize how much of a difference a certain tool can make until you use it.
Rhinestone Jewels always come in a handy for just a little bit of bling on the hearts!
Get out some paper and stamps and have fun playing to make some valentines!
If you need any supplies, check out my Stampin’ Up! Online Store HERE! Let me know if you need a copy of the Occasions Catalog or Sale-A-Bration Brochure. Remember, with every $50 you spend, you choose one free product from the Sale-A-Bration Brochure!
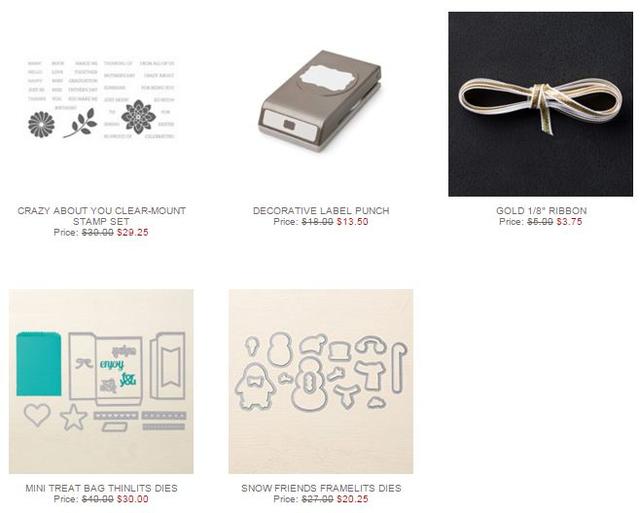
How exciting to see one of my favorite products on these Weekly Deals! Can you guess what it is?? It’s the Mini Treat Bag Thinlits Dies! I love making the mini treat bags, but they’re not just “treat bags”! You can use them as cards or gift card holders or vary the size and shape, whatever your creative mind comes up with! Plus you get all kinds of extra dies to use not just with these bags but any time (I need to remember that!!). Save $10 this week if you want to purchase these fun dies!
The Decorative Label Punch has always been a favorite so if it’s not in your collection already, you might want to put it on your order. The Gold 1/8″ Ribbon is one I have used a LOT! Being so thin you can add it as a smaller accent and of course the metallic gold color really adds an oomph to your project!
Stampin’ Up! Weekly Deals and Clearance Rack items all count toward Sale-A-Bration, the popular Stampin’ Up! promotion where you choose a free product from the Sale-A-Bration Brochurefor every $50 you spend with Stampin’ Up! Remember, products on pages 16 – 19 are available only through February 15! After that there will be some NEW items available through the rest of Sale-A-Bration, while supplies last!
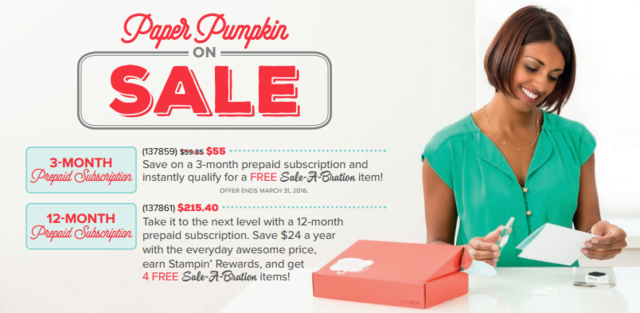
And one more DEAL to think about!! If you love crafting, but want to keep it simple or don’t have many supplies, or like a surprise, or even if you have an overflowing craft room, don’t forget about the Prepaid 3-Month Paper Pumpkin Subscription. Save $5 during Sale-A-Bration and you will qualify for a free Sale-A-Bration product! Put the subscription on your regular Stampin’ Up! order and choose your free Sale-A-Bration product from the brochure. (I suggest ordering other things along with the subscription because you will pay minimum shipping for the SAB item even though the item is free.) Once you are a subscriber, you can order any past kits or refills that are still available. If you order by February 10th, you will receive the February Kit that goes out mid-February! This is also good to add to your order and perhaps reach Hostess Benefits! Stampin’ Up! will email me you a code and tell you how to activate your account! Let me know if you have any questions!
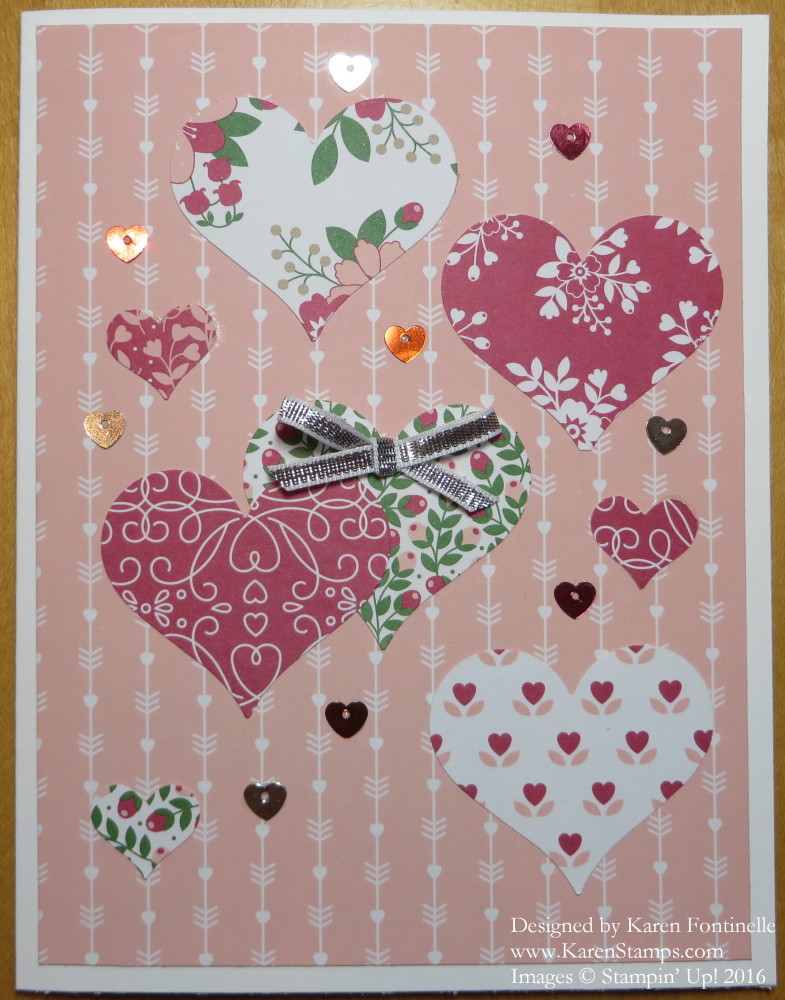
I found an old card in my stash that I really like with a bunch of hearts punched from designer paper, so I decided to just copy my own creation and make this Love Blossoms Punched Hearts Valentine Card. It could be a valentine card or it could just be any card! I even chose not to put a greeting at the bottom or somewhere on the card because I kind of liked it the way it way. And then I stamped a valentine greeting on the inside from the stamp set Bloomin’ Love.
It’s time to start making a few Valentines now that it is February 1st! Can you believe it?! One of the greatest benefits of Stampin’ Up! products is the color coordination. The designer papers match the card stock, and now Stampin’ Up! even prints the list of coordinating colors on the designer paper package. And they’ve made it even easier for customers by selling a cardstock pack that comes with the main colors you need for each suite of products in the Occasions Catalog, such as the Love Blossoms Cardstock Pack that contains the colors Blushing Bride, Crumb Cake and Rose Red.
Shop Stampin’ Up! Online for all your Valentine’s Day cardmaking supplies! There’s time!
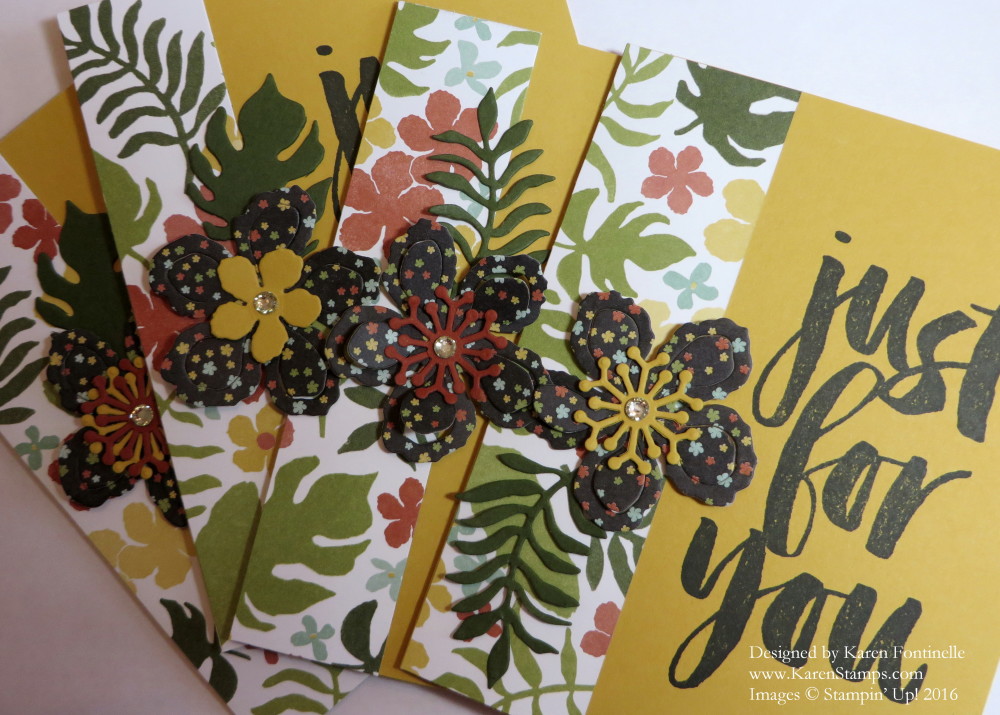
I had so much fun making these Botanicals For You cards! Once you start playing with any of the products in the Botanical Gardens Suite in the Stampin’ Up! Occasions Catalog, it’s pretty hard to stop. So many possibilities! And along with this Suite, the Botanicals For You Stamp Set in the Stampin’ Up! Sale-A-Bration Brochure goes well with it. I love the big “just for you” image and the sayings that come with it that you can put on the inside of the card!
I kept it relatively simple making these cards, just using Hello Honeyfor the card base, stamping the greeting with Stazon Ink and adhering a strip of the Botanical Gardens Designer Series Paper along the side. You could choose any of the patterns, I was really drawn to this paper with the dramatic black on some of the designs. I could have stopped there but I wanted a little more, so I die cut several flowers and centers from the designer paper and cardstock using the Botanical Builder Framelits Dies. I love the flower that has petals that pop out just a little bit! If you aren’t mailing the card you can pull them out to stand up a bit and also shape the centers to look more 3D. I also love the very delicate leafy leaf die in here! Oh my!
I do highly recommend the new Big Shot Die Brush to use with some of these intricate dies. It only costs $11 and comes with the foam pad that you use. If you are going to use any of these new intricate dies you might as well buy the Die Brush! Put it on your next order!
You can purchase THREE of these products in this Suite: The Botanical Blooms Stamp Set, the Botanical Gardens Designer Series Paper, and the Botanical Builder Framelits Dies in a BUNDLE and save 15%! Might as well do it and then choose a free Sale-A-Bration product!
If you like flowers and foliage, you will love this whole set!
The Pyramid Pals Thinlits Dies weren’t something I initially thought I would purchase, but the cute animal samples in the Occasions Catalog were a little hard to resist! And I knew that after Demonstrators and other stamps started making things with these dies that I would see all kinds of cute ideas.
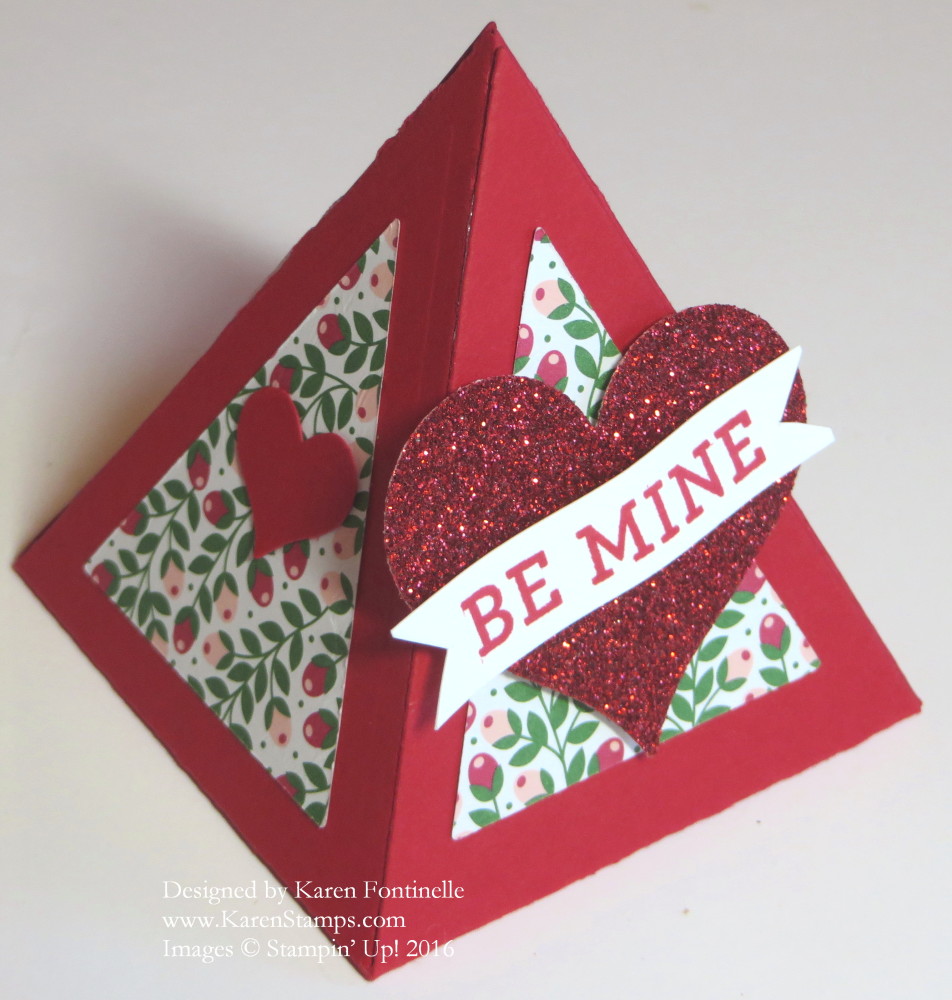
So for my first try with these dies, I just made a little Valentine box! You need to cut two pieces to form the box. There is an extra triangle piece in there that I used to cut the pieces of patterned paper from the Love Blossoms Designer Series Paper Stack (really cute papers, by the way!) to glue onto each side. You can use Tear & Tape Adhesiveto adhere the sides of the pyramid together, but don’t forget to leave one side open so you can put your treats or gift inside! To make mine easy and for a Valentine treat, I just used the Sweetheart Punchto punch out a Red Glimmer Paper heart for the front. The greeting is from the stamp set Bloomin’ Love. For each side I used the heart punch in the Itty Bitty Accents Punch Packto punch a red cardstock heart for just the two sides.
I could do even more to this Pyramid Pal Valentine Treat Box but sometimes you have to know when to stop! So I stopped. Lots of potential with these Pyramid Pals Thinlits Dies and the coordinating Playful Pals Stamp Set. But if you would like to save 15%, buy the Bundle!
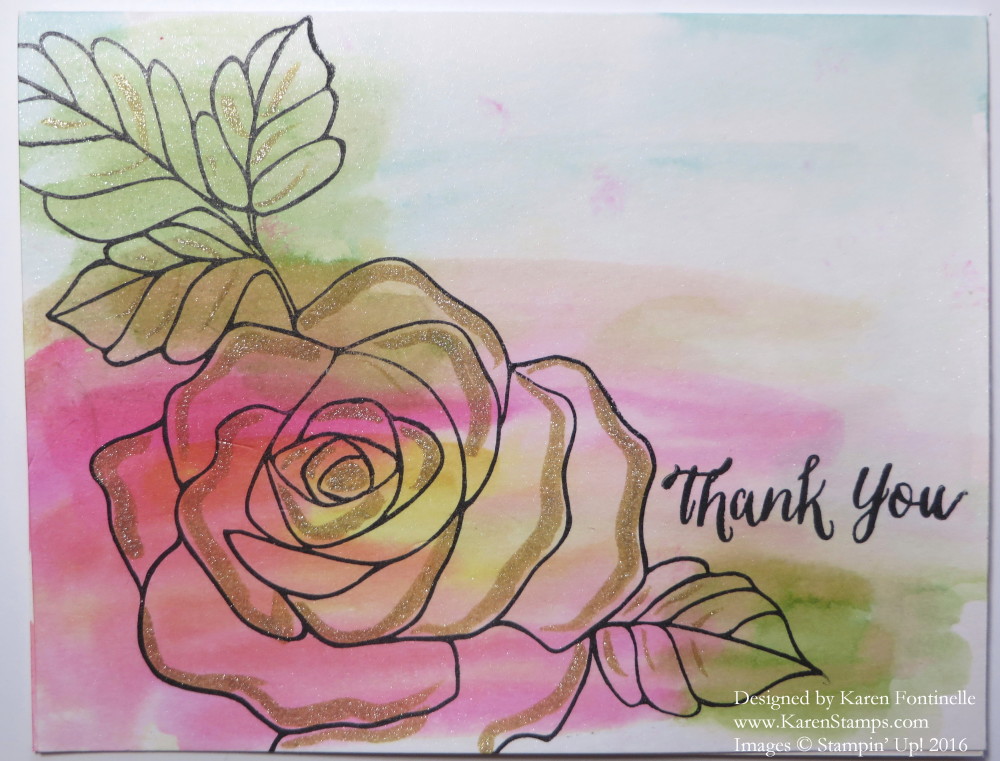
I got a big box of Stampin’ Up! goodies yesterday and barely knew which stamp set or product to start playing with, but this Rose Wonder Photopolymer Stamp Setwon out! I decided to make a very easy card with the pretty Shimmery White Cardstock. Shimmery White holds up to watercoloring better than regular cardstock, and I had this idea to just watercolor on the paper first and stamp second. I used my Aqua Painter and several ink refills: Old Olive, Pear Pizzazz, Melon Mambo, Daffodil Delight and Pool Party. I did kind of see where the stamp was going to go on the card front and approximately watercolored in those area, but not with any exact placement.
An easy way to watercolor with ink refills is to place a DROP of ink on a clear block or on top of a stamp case, then use the Aqua Painter to dilute and swirl and pick up the ink. Then just wipe it off with a paper towel or napkin when you are finished with that color. A stamp case or block is usually right there so easy to use! Of course you can also use the inside of the ink pad lid. Lots of ways to do it!
After watercoloring the Shimmery White (or you could certainly use watercolor paper), I used the Heat Tool to dry it completely. I stamped the flower and greeting in Jet Black Stazon Ink. And then for a little pizzazz (and of course for the fun of playing with my new product!) I had to add some highlights with my new Gold Wink of Stella Glitter Brush. Once you start playing with the Wink of Stella Glitter Brushes it’s pretty hard to stop!
I may play around with this card some more and take it from simple to a little “more”. We’ll see!
Shop Stampin’ Up! Online for the Rose Wonder Stamp Set so you can make beautiful cards!
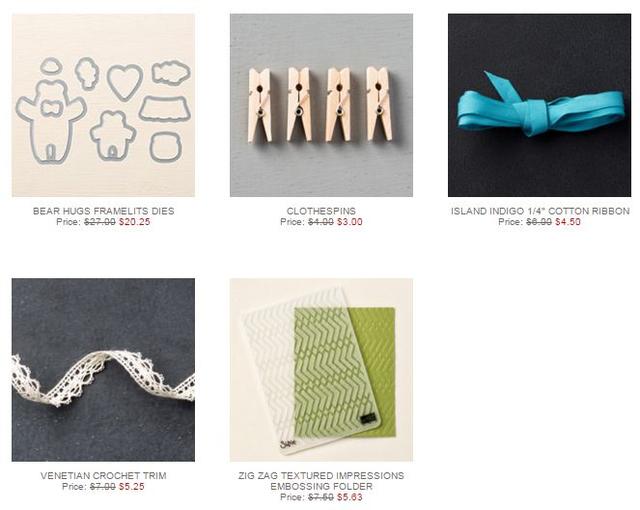
Here are the new Stampin’ Up! Weekly Deals for January 26 through February 1, 2016. There’s one brand new item, the Bear Hugs Framelits Dies, in the new Occasions Catalog on page 40. If I did the math correctly, you will still save a few cents to buy the Bundle of stamp set and framelits, but if you wanted to buy one at a time, you’re not out too much with the Weekly Deal discount. And then you have ribbons, clothespins, and an embossing folder for embelllishing your projects!
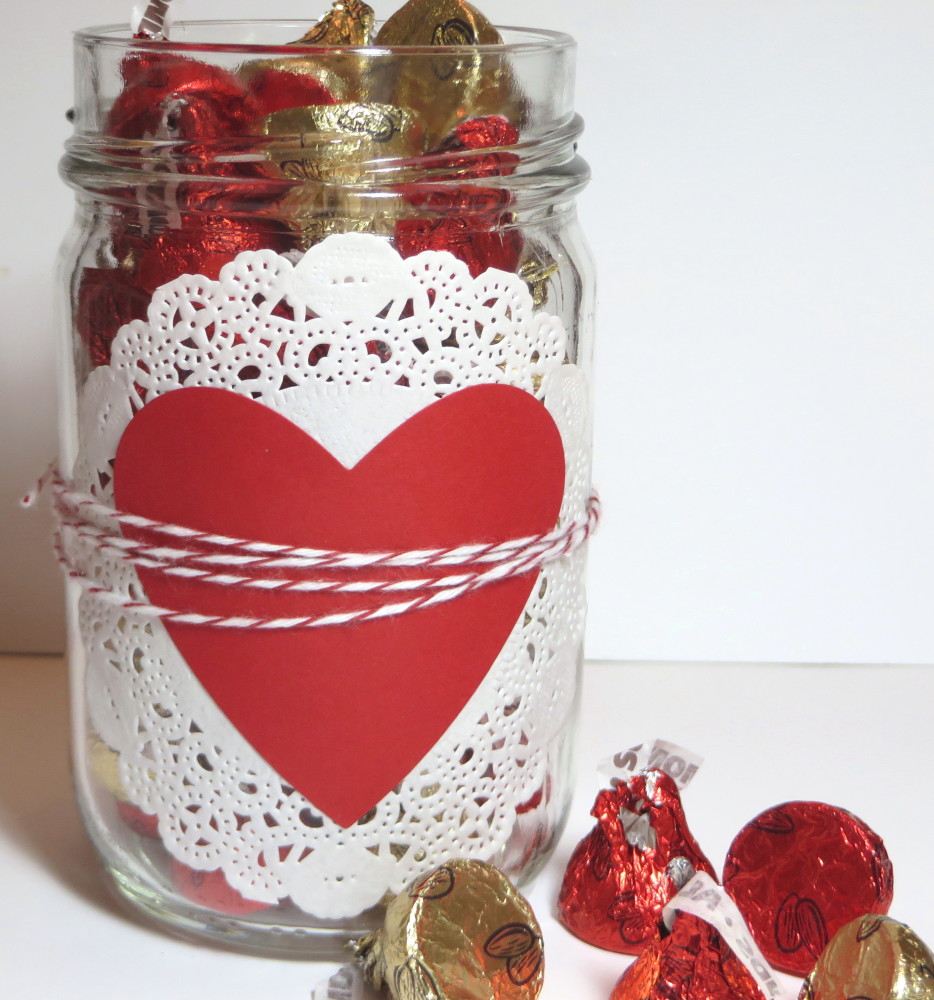
I saw this idea for an easy Valentine candy jar in an online feature from Country Living and I had to try it since it looked so easy! All you need is a doily of some kind, a heart, and some Baker’s Twine or similar! I used just a dab of SNAIL Adhesive to hold the doily in place and the heart while I wrapped the Cherry Cobbler Baker’s Twine around and around the jar. And then the best part – filling the jar with Valentine candy!! Give it fora Valentine gift or keep it for yourself!
Don’t look if you haven’t received or opened your Stampin’ Up! Paper Pumpkin Kit yet!
Mine is still unopened in the box, but it was a busy week and I think this weekend might be a good time for some Paper Pumpkin time! Don’t delay too long with your kit as there is a time factor involved! And I have to remind myself of this, too — you can use the stamp set that comes in the kit for other stamping projects! I often use it for the kit project and then put it away! I missed out on using the greetings in one kit on other cards for a holiday because I just didn’t think about it! Some people store their photopolymer Paper Pumpkin stamps in the Project Life by Stampin’ Up! Photo Pocket Pages and then in an album for easy access. I think I need to get organized and do that!
OK, so if you are still reading then you probably want to see what the Stampin’ Up! January 2016 Paper Pumpkin Kit is all about! Here is the Stampin’ Up! video that shows how to put the kit together. Keep in mind, with each kit you can follow the directions….or not! Sometimes you can make part of the kit as they describe and then make alternate projects with the remainder of the pieces. It just depends. Each month’s kit is different! And I love that Stampin’ Up! provides a video to watch, if you want, for each kit. So besides reading the directions, you can also watch how to make the kit.
If you would like to receive a Paper Pumpkin Kit in your mailbox once a month (or whenever you choose), the best deal right now during Stampin’ Up!’s Sale-A-Bration promotion is to order the 3-Month Prepaid Subscriptionand save $5. This will qualify you for a free Sale-A-Bration item from the Sale-A-Bration Brochure! I recommend adding some other products to your order because you will be paying the normal $6.95 minimum Stampin’ Up! shipping for your free SAB item. Might as well get some adhesive and Paper Snips or ribbon or cardstock along with it to make the shipping worthwhile! That’s my opinion anyway!
When you order before the 10th of any month, you will receive that month’s kit! So order before February 10th and get the February kit. Order later in February and you will receive the March kit. Whatever you prefer. Once you have subscribed, if you want to pause (or, heaven forbid, cancel!) your subscription, just do it before the 10th of the month because Paper Pumpkin starts shipping out around the middle of the month.
You can order extras for gifts! On the prepaid kits, you will receive an email from Stampin’ Up! telling you have to set up and activate your account with a special code.
Either way, I think you will really enjoy the thrill of getting that Paper Pumpkin box in your mail every month! And who doesn’t need some “happy mail” once a month!
Click for more information!
Don’t forget the Stampin’ Up! Weekly Deals for this week and always check the Clearance Rack! And for every $50 you spend with Stampin’ Up! through March 31, 2016 you will get to choose a FREE Sale-A-Bration product! (Some products are only available until February 15th and then a few new products will be introduced!)
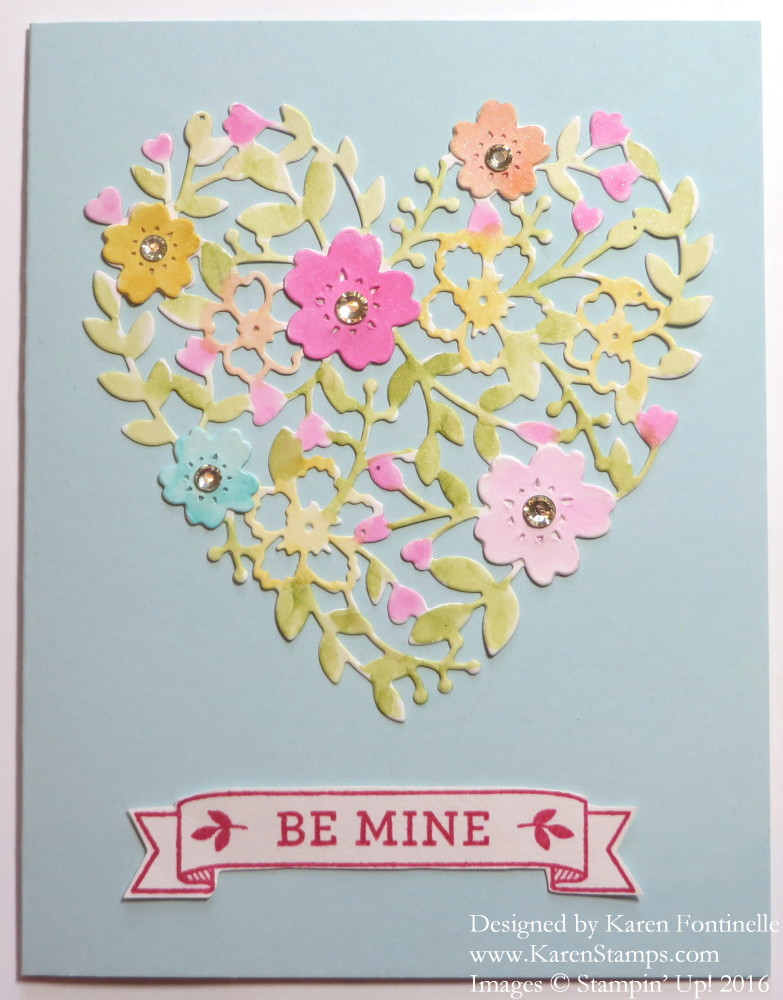
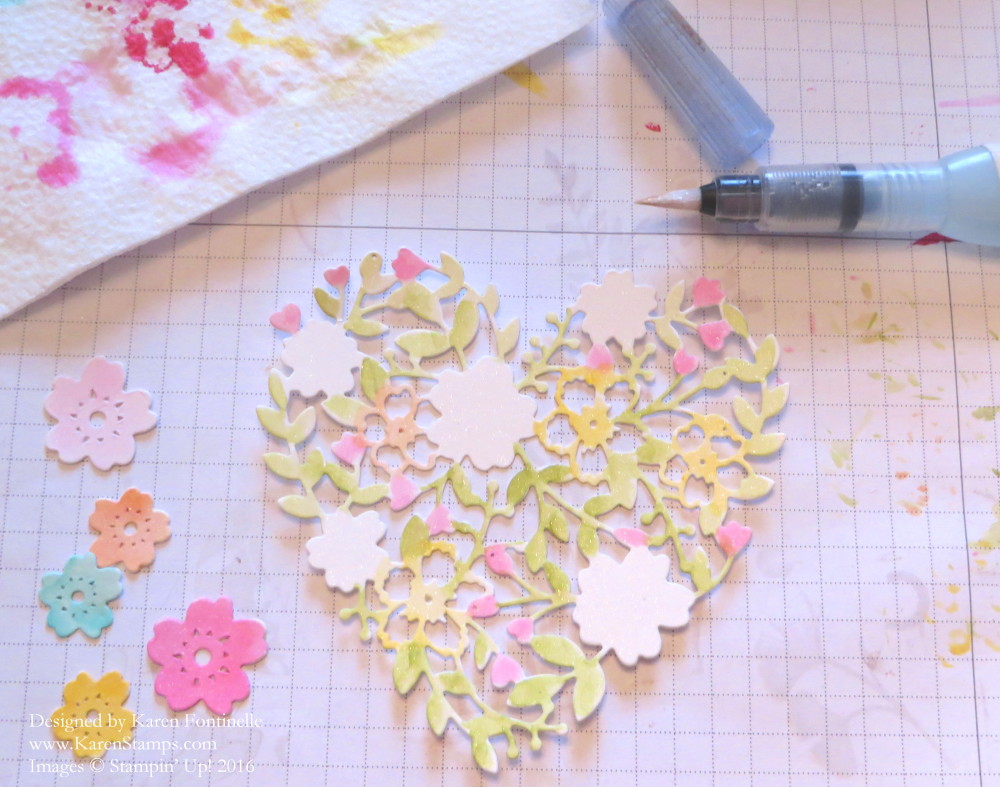
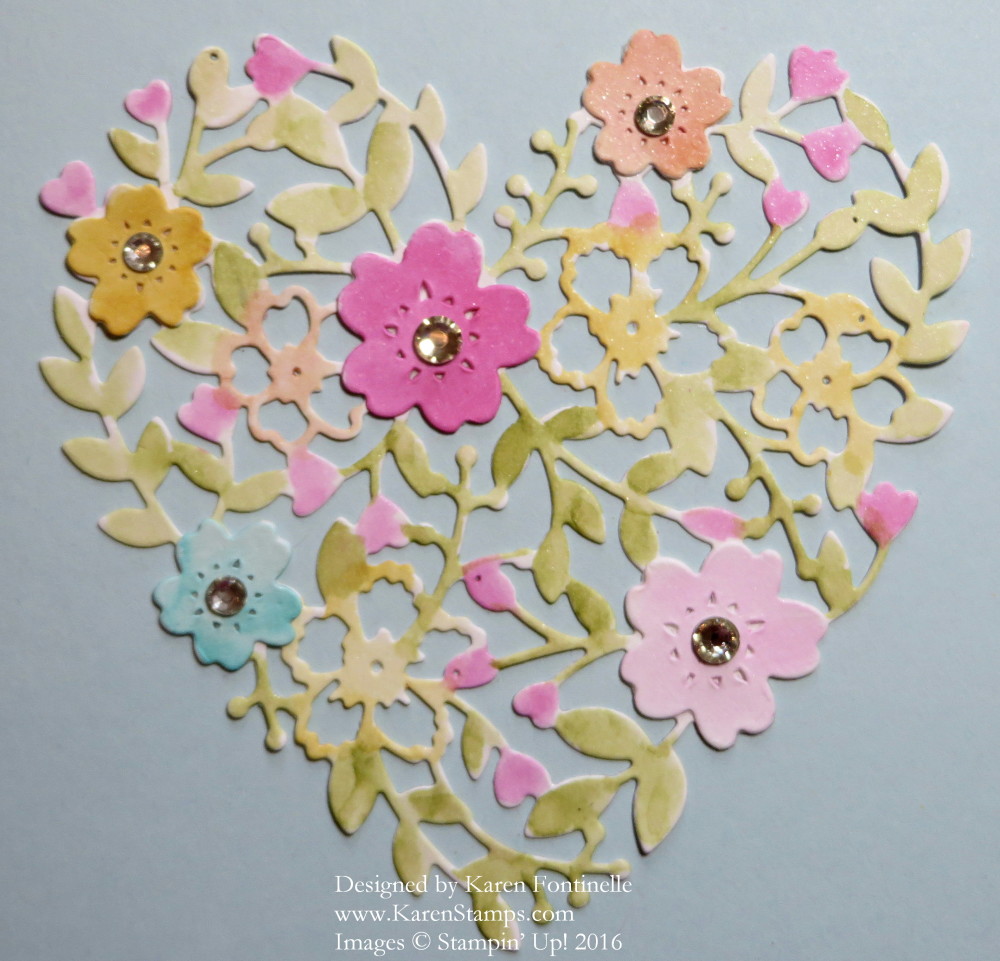
The Shimmery White Cardstock is wonderful to use on a card like this Bloomin’ Heart Thinlit Valentine Card. Not only is it beautiful in and of itself with its subtle shimmer, but it works well for watercoloring. Not that I started this card thinking of watercoloring! I just wanted to make the beautiful Bloomin’ Heartdie cut with the Shimmery White cardstock. Then I decided to color in the little die cut flowers that come with the heart, and after that thought I would color the leaves on the heart die cut. That led to coloring the flowers too, doing it all very loosely, not trying to get every single shape colored exactly correctly and perfectly. I used my Aqua Painterand ink in the lids of my ink pads: Melon Mambo, Daffodil Delight, Bermuda Bay, Old Olive, Tangerine Tango. The Shimmery White cardstock holds up well to watercoloring like this, better than just Whisper White.
After coloring the heart and making sure it was dry (you can use the Heat Tool to quickly dry the watercoloring), I used the new Fine-Tip Glue Pen to apply glue to many of the tiny spaces on the back of this heart. If you don’t have this Fine-Tip Glue Pen in your arsenal, I really suggest you add it to your next order! I adhered it to a card base of Soft Sky cardstock. Next I adhered the die cut flowers to the heart and added Rhinestone Jewels for some bling!
This Bloomin’ Heart Thinlit Die is just beautiful and can be used for more than Valentine’s Day. It cut out well with the Precision Base Plate by Stampin’ Up! I rolled it forward and back so that it went through the Big Shot three times. Then if you take the die with the paper inside and lay it on the foam and roll with the Big Shot Die Brush, almost all the little pieces some out and the die cut shape pops out easily. You still probably have to poke out a few pieces with the Paper Piercing Tool or something similar.
If you would like to save 15%, purchase the Bloomin’ Love Photopolymer Bundleand get both the Bloomin’ Heart Thinlit Dies and the Bloomin’ Love Photopolymer Stamp Set.
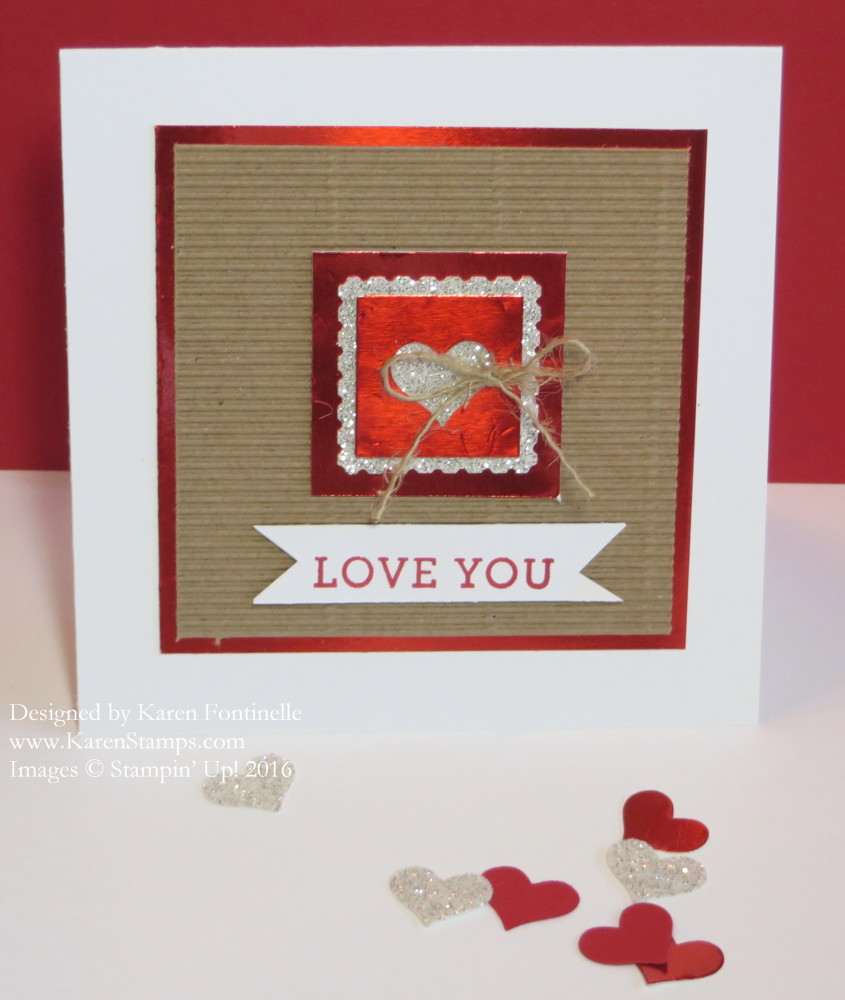
I didn’t really know what to title this valentine, so I titled it with everything: Kraft Corrugated Red Foil Glimmer Valentine! I sort of copied my own valentine creation from last week when I was making some sample valentines for the valentines two moms and I made for their kids’ classes. But today, as I was looking for some current designer paper to use, I spied this Kraft Corrugated Paperon my table. Sometimes no matter what you THINK you are going to make, you might get inspiration and a different idea from something else you see. So I just decided to mix textures and looks with kraft textured paper, sparkly glimmer paper, and shiny red foil paper!
If you are interested in Stampin’ Up! products and you don’t already have a Demonstrator, contact me and I can send you the new Occasions Catalog and Sale-A-Bration Brochure! Just email me at Karen@KarenStamps.com.
Try using different textures and materials to make your valentines and see what you come up with! It’s time to be thinking about Valentines!
Shop Stampin’ Up! Online for all your Valentine needs!