Category Archives: Cards

Playing with Buttons!

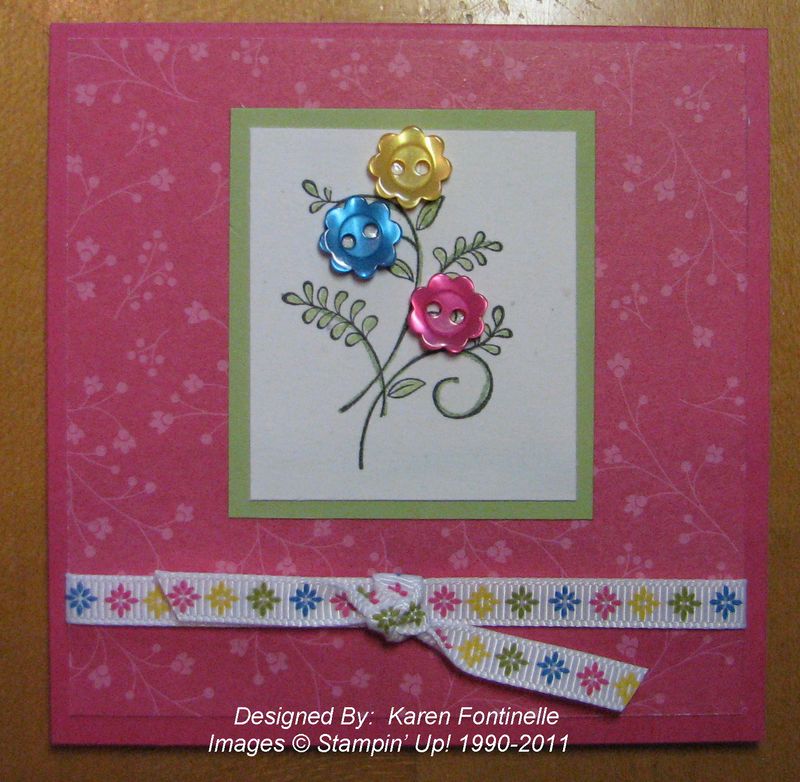
One day as I was looking through the Occasions Mini Catalog I noticed on page 22 this little bitty card in the samples with a big button on it!  I thought it was the CUTEST little thing!!

So I made one!

Tiny Big Button Card


I cut Pink Pirouette to 1 1/2" x 3" and folded in half.  The button is from the Sweet Stitches Designer Big Buttons #122302 on page 35 of the Occasions Mini.  The button is threaded with Linen Thread #104199. Now you could leave it this plain, or you could stamp a little word in the corner before attaching the button.

If you knew a seamstress, wouldn't this be the cutest little tag for a gift? Anyone would love it!

******************

This is a great day to stamp in most parts of the country! While you are snowed in or staying in because of the freezing cold, do something fun….which, of course, would be stamping or scrapbooking! The weather forecast even for Houston, TX is SNOW tonight!!!!  I'm keeping my fingers crossed!  You know I love snow!!

Here's another small card I made for Valentine's Day using the Bitty Buttons #118761 and the Heart Small Punch #117193.  I cut the Crumb Cake card stock 3" x 6" and folded in half and used the Love Patterns Paper Pack Designer Paper # 124156 for a layer and for the small hearts.  I punched a little strip of Red Glimmer Paper #121790 with the Pinking Hearts Border Punch #117649.  The heart-shaped buttons in the Bitty Buttons are attached with a mini glue dot after being threaded with Linen Thread.  You could stamp a little greeting on the front instead of the glimmer paper strip if you wanted.

Bitty Button Heart Card


Here's tip on working with these little buttons….. thread the linen thread through the button holes, but then stick them down with a Mini Glue Dot.  This will anchor them so they will be easy to tie!  No more fighting a flipping-around button while you try to tie your knot!

Tying Knots on Buttons

Don't forget to put some buttons on your next order for Sale-A-Bration! Click HERE to shop and place your order!


It’s February! Valentine’s Day is Coming!

Here's a Valentine inspired by a card in our Stampin' Success Magazine for demonstrators.  The sample card was a dark brown background with 3/4" circles punched and then decorated.  I decided to try making something similar with hearts!

Heart to Heart Punch Valentine

I just used the Heart to Heart Punch #119881 to punch the same heart nine times out of the current designer series paper.  Then each heart is decorated with one of the Itty Bitty Punches, Red Glimmer Paper, brads, rhinestones, bitty buttons, or pearls!  Just do what looks good to you!  For a tiny sentiment, I used one of the Love Impressions Rub-Ons #121886. The Red Glimmer Paper #121790 is so fun to use I punched a strip with the Scallop Trim Border Punch #118402 and stuck on a little bow with the 1/8" Taffeta Ribbon.  A really fun valentine to make and lots of room for creativity!!

If you need any paper and punches to make your valentines, it's time to order today!  Just click HERE!
 

Love Impressions Rub-Ons

Stampin' Up! was kind enough to send us demonstrators a sheet of the Love Impressions Rub-Ons #121886 as seen on page 8 of the Occasions Mini Catalog.  These are a little different than previous rub-ons in that they are on a plastic material which is a little sturdier.  Here are two cards I made with them!  Order a package of Love Impressions Rub-Ons and you're ready to make some valentines!

Love Impressions Rub-Ons


This card is stamped with the tree from Valentine Defined in the Occasions Mini.  I inked it up with Pink Pirouette and then colored certain hearts with a Stampin' Write Real Red Marker and the trunk with Early Espresso.  The "Love You" is the rub-on!

Love Impressions Valentine

This card uses lots of the Love Impressions Rub-Ons!  The hot air balloon and clouds on the Whisper White piece are rub-ons as are the white clouds and the tiny red hearts on the pink area of the card.  I used some Love Impressions Specialty Designer Series Paper #121780 on the card plus a strip of the BEAUTIFUL Red Glimmer Paper #121790.  The Love You is rubbed on a piece of scrap Whisper White and punched out with the new Medium Oval Punch #120908….from the Holiday Mini, but still available for order!

A Valentine

Valentine Defined Hearts


This is a card I made while making projects and samples for my most recent stamp camp.  I used the stamp set in the Occasions Mini, "Valentine Defined" on page 9.  If you don't already own this stamp set, you should put it on your next order (especially with Sale-A-Bration!)!  We used it on several cards at my stamp camp and everyone loved it.  The Framed Tulips Textured Impressions Embossing Folder #121809 is used on the border of this card, and I can tell you all my stampers really loved this embossing folder, too.  I liked the simple, soft elegance of this card and didn't even want to add a layer under the greeting, which I had punched with the Decorative Label Punch #120907.  

Here is how I made the card.  The card base is Pink Pirouette with a layer of Basic Gray on top.  The quarter piece of Whisper White card stock was embossed in the Framed Tulips Folder; however, to make it fit on top of the Basic Gray layer, it had to be made smaller so it is actually trimmed inside one of the embossed lines around the outer edge.  Then I very lightly sponged the embossed edge with Pink Pirouette ink.  The stems and hearts are stamped with the Valentine Defined set, inked with Certainly Celery marker on the stems and Pink Pirouette marker on the hearts.  You have room to stamp 2 1/2 times going across the card.  The greeting is from Grateful Greetings #116511 and punched with the Decorative Label Punch.  You could sponge some Pink Pirouette ink around the edge of the label if you wanted.  Change the greeting and you can have a card for any occasion!

If you need any of these stamping supplies, you can place your order at my Online Store here or by clicking on the red Online Ordering button in the upper-right of my blog.

Occasions Mini Catalog 2011 Is Here!!!

New Year, new Mini Catalog from Stampin' Up!!  Yes, the new Occasions Mini Catalog begins today, January 4 and runs through April 30.  As Stampin' Up! always does, they have provided a fantastic selection of new products you won't want to miss!!  New stamp sets, beautiful new paper (Red Glimmer Paper!!), new punches, buttons, trinkets, fabric. Sewing is a big theme!  (not that you have to sew…you can stamp about sewing themes!)  It's all beautiful and if you haven't already received your Occasions Mini Catalog in the mail, you will want to click the cover below and look at it online!

Stampin' Up! Occasions Mini Catalog

Once you have browsed, just click HERE to go to my Online Store and start your order!  Or contact me with any questions or if you need help!

ENJOY!!!

Rejoicing in Christmas

Here is a card I made with this beautiful stamp set, Rejoicing in Christmas (#120829w/121139c).  You can watercolor very lightly with a Blender Pen #102845 or Aqua Painter #103954.  Then for a little extra on this card I used my Aqua Painter to apply some Shimmer Paint (colors on page 195 IB&C) to Mary’s garment and to the three halos.  After sponging the edges of the card with Soft Suede, I also spritzed with some Gold Glow Smooch Spritz #118770.  Instead of Whisper White card stock, I used Confetti White.  The background layer was embossed with the Finial Press Embossing Folder #115963.

HolyFamilyCard

If you need any products to make your own Christmas cards this year, there is still time to place an order.  Check out my Stampin’ Up! Online Store HERE.

Jolly Old Saint Nick

JollySt.Nick

I loved the old-fashioned look this stamp set, Jolly Old Saint Nick in the Holiday Mini, has from the moment I saw it…..and finally I got around to using it!  I also thought the new Glass Glitter #120997 (Champagne) would look perfect with this set.  To make this card I cut a Top Note die #113463 from some Deck the Halls Designer Series Paper #120810, but instead of using the "Top Note" piece, I used the negative….just trimmed the edges to make it fairly even and adhered it to the card base.  I colored in Jolly Old Saint Nick with my Aqua Painter #103954 and ink and cut out.  Little snowflakes come in the set so I stamped those in the background just for a little texture.  The greeting is stamped in Cherry Cobbler and punched out with the Extra-Large Oval #119859.  It's basically a simple card, but I liked the end result!  This is a great set to use for your Christmas cards and tags!

Last Day for Stampin’ Up! Deals!

This is the last day, last few hours for all the great deals from Stampin' Up! Don't have buyer's remorse tomorrow that you didn't order what you wanted today!

Last Day!  Nov. 30….Online Spectacular :  Products on sale from 20-50% off!  Don't miss it!  Fabric, Big Shot Dies, Brads, Ribbon, Stamps, Decor Elements, Craft & Rubber Scissors, Hodgepodge Hardware, and MORE!

50% off!  My Digital Studio software for digital papercrafting! Unheard of! Make your own calendars, scrapbook pages, journals, cards, photo cards, multimedia, you name it!

50% off Stampin' Up! Starter Kit!!!  Start your own business for only $87.50 TODAY.  Sign up online and be in business by tonight! Contact me!

A Movie-Lover Birthday Card

Our new son-in-law's birthday came upon us pretty quickly, along with the realization that he is now a member of the family and should get a card and gift!  Since he is a big movie-lover, I came up with this card, even though I had to dig around in some retired sets to find "Treat Yourself".  

Move-Lover Birthday Card

For the "filmstrip technique" I just took a strip of black card stock and punched along the edges with the Spiral Border Punch #119872.  Then you stamp on some squares that fit on the strip to make it look like a movie!  I have always loved that idea!

Sometimes it is harder to come up with a "male birthday card" but with a little thought it's really not that difficult.  Stampin' Up! provides so many kinds of stamp sets that you can find something appropriate for everyone!

Updating an Older Card

While cleaning up some of my samples and cards, I found three packets of card stock, with a sample card, obviously left over from a stamp camp, maybe from last year or the year before.  I decidcd I would make something with it!

Here's the "old" card.  The stamp set is still current, "Season of Joy" #110384, page 33 of the IB&C, so really just the designer paper is retired.

TreeCardold

Here's the new card.  I flipped the designer paper to the other side, substituted the tree from Paisley Prints, in the Holiday Mini, clipped the corners, and instead of ribbon I punched a strip with the Dotted Scallop Ribbon Border Punch #119275.  I used a greeting from Jolly Old Saint Nick in the Holiday Mini, as well as a little Basic Rhinestone #119246 to top the tree!

TreeCardnew

If you need any supplies to make your Christmas cards, you can contact me or just go straight to my Online Store HERE.

Scenic Season Card

This is a beautiful stamp set, Scenic Season #115354, from the Stampin' Up! 2010-2011 Idea Book & Catalog, page 36, that allows you to make an easy and elegant Christmas card.  Just stamp the trees and a greeting, add a little Dazzling Diamonds Glitter and maybe a snowflake from the die cut Northern Frost #120901 in the corner.  Layer on whatever cardstock colors you select.  I used Night of Navy and Cherry Cobbler.

Scenic Season

November 2nd – Election Day!

Just a quick little 3" x 3" card in honor of Election Day today. Stampin' Up! makes it so easy to make a cute little card for any occasion.  You can express yourself with just colors or punches and generic stamps sometimes….you don't always have to have exactly the right occasion stamp.

Vote on Election Day!

Here I used Whisper White, Real Red, and Marina Mist card stock, plus the Decorative Label Punch #120907 and the Sizzix Naturally Serif Alphabet #113453 die cut with the Big Shot #113439.  For a little pizzazz, I put down a strip of Sticky Strip #104294 and sprinkled with Chunky Essentials Glitter #108797

If you need any stamping supplies, visit my Online Store!

She’s Married!!

The bride was beautiful, the groom handsome, the wedding a whirlwind!  It is an amazing experience to see your child get married and to welcome the new spouse as a real part of the family.  And to see all the months of planning actually come together in the decor, the flowers, the food, the music….everything!  It was all wonderful!

Of course stamping played a part in all of this!  I was honored that my daughter asked me to make her wedding invitations.  We were able to partially design the invitation while I was visiting in June, although it was right at catalog change-over time so would we use retiring paper and could we get enough or would we prefer a new color and accessories from the demonstrator preorder?  Concord Crush seemed to be the right color, and she loved the new "Vintage Wallpaper" embossing folder and Scallop Trim Border Punch so I had to incorporate all of those.  She liked the inside of the Vintage Wallpaper embossing showing so that really dictated the size and design of the whole invitation.  It was a paper-engineering and computer feat, but with tips from my cyber-stamping friends with more computer skills than I had I eventually got it ready to go!

Invitation Cover


Vintage Wallpaper embossing inside

Wedding Invitation Inside

One of the insert cards…..my favorite!  The bride is from the Spanish set in Celebrando Creatividad, Para la novia.  A lot of guests were coming from out of town.

RestaurantInsert

The fan was purchased, of course, but I made the menu, the table number/name, the favor tin and the escort cards.  As you can see, it had a bit of a Spanish (as in Spain) theme!  It was all fun!

Wedding Table Decor


And now back to real life!  I don't know where to begin to catch up!  But I know Stampin' Up! has some specials going on and new My Digital Studio downloads, and the holidays are upon us!  Whew!  I better get busy!