Category Archives: Cards

Something Besides Purple!

More wedding preparations and finally I got to use a color besides Concord Crush!  Certainly Celery is a welcome change!  And what a great opportunity to use the fabulous Medallion stamp #115223, the best-selling stamp last year, I believe.  This stamp is so versatile, whether you want a background, something elegant, something large….stamp it with ink, emboss it, do Poppin' Pastels on it (really pretty!)….so many choices!  And it is so much fun to play with the new bling in this year's catalog…..rhinestones and pearls!

Certainly Celery

Scallop Baby Carriage Card

After seeing these cards around, I finally tried making one!  Just use your Big Shot and Scallop Circle Die #113468!  Use a piece of card stock or designer paper (I used a retired paper). Actually I used Whisper White for the card base and also the designer paper so I would have a white inside.  Cut your paper twice as large as the scallop on the die and fold in half.  Place the fold just inside the scallop edge, omitting about 4 scallops. When you do it, you'll see.  After the scallop is cut, you will need to make your own template, but basically you are just going to cut into the middle of the scallop from the open edge and cut out a section to make it look like a baby carriage.  Then decorate away!

Scallop Baby Carriage Card

Shopping for Shoes

I've been absent from posting for a few days because I have been busy shopping for shoes for the wedding…mainly so that I can go get my dress hemmed, if necessary.  It's not an easy task and one I have always hated. Even though I might like new shoes just fine, my foot is a lousy fit.  It's rare that I try on a pair of shoes and think, "Wow! These feel great!"  And now, to be shopping for dress shoes, especially FANCY dress shoes, well, it has just been miserable!!

So in honor of the endless shoe shopping, here is  a card with shoes on it!

Things I Love Shoe Card

This stamp set, Things I Love, was one we received a year ago at the Stampin' Up! Convention.  There is also a stamp of a piece of chocolate in the set, but I didn't think a black piece of chocolate would look that good…even though I probably love chocolate more than I love shoes!  

The lighting isn't very good, but there is some bling on this card!  I added some black glitter to the shopping bag with Tombow Multipurpose Glue (just push the teeny sprinkles back in to the image with your fingernail to make sharper edges) and the shoes each have a Rhinestone on them as well as the heart.  And it is so fun to punch out a little heart with the Small Heart Punch!

Here are some of the supplies I used:

Stamps:  Things I Love #115229

Paper:  Daffodil Delight, Whisper White, Basic Black, Regal Rose

Ink:  Black Stazon

Accessories:  Small Heart Punch #117193, Backgrounds 1 Texturz Plates #114512, Scallop Trim Border Punch #118402, Black Chunky Essentials Glitter #108797, 1/8" Black Taffeta Ribbon #119261, Basic Rhinestones #119246

Yes, I did buy a pair of silver shoes that look lovely and hopefully I can wear them long enough to get through the ceremony and get photos taken….now if I can just convince my feet of that!

Stampin’ Up! Convention 2010 Swaps

Finally got photos of some of my swaps I got at the Stampin' Up! Convention!  You can click on any of the photos to enlarge them and get a closer view.  If you have a question about something you like, just contact me and I'll try to answer it.  Enjoy!

Button tote bag

This tote looks even prettier in person!  The buttons really pop out!  So pretty!

Convention swaps

Stampin' Up! Convention Swaps

Convention Swap Cards

Stampin' Up! Swaps

Stampin' Up! Convention Swaps

If these great swaps stir your creativity and you need some stamps and supplies, you can order online anytime at my Online Store!


Finally! Stampin’ Up! Convention Make & Takes

Believe it or not, I finally made my Make & Takes from the Stampin' Up! Convention just last night!  The day at Convention that I was scheduled to do them I was EXHAUSTED for one thing, plus it was my last opportunity to take pictures of all the displays….AND I really turn into a mess when I stamp in a big group like that!  Fortunately, I'm not the only demonstrator that I have heard of that suffers from that same condition!  When I sit down, I feel like everyone else knows what to do but me and they are all doing it faster!  So I have come to the conclusion that, if I know I have the materials at home, I should just wait and then enjoy solitary stamping!  Brings back the memories of fun times at Convention, too!

Thanks So Much Card Pocket

Thanks So Much Card Pocket

This is a Small Open-End Envelope #107286 with the long side slit open so that small cards and envelopes can be inserted.  I would show you the inside but I made a "slight" boo-boo with the circle punch (not reading the directions!).  I can fix that later, but haven't yet!  You can always fix things in papercrafting!  The stamp is the single stamp, "So Many Thanks" #120173.

Thanks So Much Cards

Some Things Have to Be Believed Card

Some Things Have to Be Believed Card

They gave us a mask to use…the negative paper from cutting Circles #2 with the Big Shot….so we could sponge three colors of ink for the background and then stamp with the beautiful new set "Just Believe", page 109 in the catalog. This is a 3×3 card and Mini Square Whisper White envelope.

Thank You Watercolor Card

Just Believe Watercolor Thank You Card

I loved making this card, the watercolor effect is so pretty, especially on the Watercolor Paper #105019.  I think we don't use this watercolor paper often enough.  I inked up the stamp from "Just Believe" using Stampin' Write Markers, spritzed it with water in a spray bottle (very lightly), then stamped it on the watercolor paper.  Of course the Small Open-End Envelope got stamped, too!

Paisley Prints Heart Card

Putting the little Basic Pearl #119247 on the tiny flower punched with the flower in the Itty Bitty Shapes Punch Pack #118309 just makes this card, I think!  Love the new pearls and rhinestones in the catalog!!  The stamp set is Paisley Prints, which you will find in the upcoming Holiday Mini Catalog and the Paisley Party Stampin' Around wheel #120875 on the envelope.

Paisley Prints Heart Card

Paisley Prints Pumpkin Card

Paisley Prints Pumpkin Card

I really loved making this pumpkin with the new set coming in the Holiday Mini Sept. 1st, Paisley Prints.  The ribbon is just folded over with Mini Glue Dots to hold it and the wheel Paisley Party is used on the card and the bottom of the envelope.

Just for You Pouch

This pouch was real easy and so cute!  Just punch a slot with the Word Window Punch and cut the flap to fit.  Stamp the images from the Just Believe set and make the tiny cute cards to fit inside!

Just For You Pouch

Just For You Pouch and Cards


Invitations (Almost) Complete!

I know I have been MIA for a few days, but I have been a busy bee working on these wedding invitations.  Even though it was a lot of work, I enjoyed just taking the time instead of worrying about how many I had to do.  My printing came out fine in the end.

Wedding Invitations 

And here's a handy use for the Aqua Painter #103954!  I love this tool anyway for coloring in stamped images with either ink from the pad, ink from the refill bottle, pastels, etc.  It's almost like a watercolor brush with the water right in the barrel.  Stampin' Up! has a quality Aqua Painter…..I just leave the water in mine and it doesn't leak or anything.  But when faced with licking stacks of envelopes, I happened to think of my Aqua Painter!  Just swish the brush along the gummed seal of the envelope (not getting it too wet, of course!) and seal!  I couldn't help but think of the old Seinfeld episode where George's fiance dies from licking poisoned envelopes for her wedding invitations!

Stampin' Up! Aqua Painter
 

If you need an Aqua Painter for coloring or sealing envelopes, just check out my Online Store!


Making Wedding Invitations

This has been a long process and it has barely started.  Of course the invitations should be going out soon, which just adds to the pressure.  I didn't realize how long it would take to write everything up to fit my idea and get agreement from the bride (long distance).  It has been an engineering and computing feat for sure.  Apparently I did not really know how to compose wedding invitations on a computer, or at least our printer wanted me to think I didn't.  Thanks to my online group of Stampin' Up! demonstrator friends on SUDSOL, who are always standing by to help with any question, I was able to (hopefully) get my computer skills up to par and everything (hopefully) sized correctly…..but we shall see in a little while when I go to the printer.  If you are a Stampin' Up! demonstrator and not a member of SUDSOL, you should really consider membership.  You can get a trial offer to see how it works and if it suits you.

Paper, Plans, and Hopefully Invitations!

Will I come home in tears because I did everything wrong or it won't print out right, or will I be jumping for joy??  Will there be a wedding if no one gets an invitation?  Stay tuned! 


Another Swap Card for Convention!

This one I actually copied from the anniversary card my husband gave me!  I made a smaller version, but a similar idea.  This card is 4" x 4", with the front flap cut a little shorter so that I could add a strip of green designer series paper on the inside layer that would look like grass from the front.  And then it adds a little design on the inside of the card as well.

SwapCardFlowers

The flowers are stamped with Petal Pizzazz. I drew in the stem and the little leaves are Pocket Silhouettes.  Hard to see in the photo but there is a little bling on the flowers from Dazzling Diamonds Glitter

This was a fun, simple card to make!  If you'd like to make one, you can look at the stamping supplies HERE.

A Convention Swap Card

One of the best parts of going to any Stampin' Up! event is to swap card fronts with other demos.  It's a great way to talk to other demos and maybe recognize a name you've see online somewhere.  And of course swapping provides many ideas for our customers to see!  Here is one of my swap cards!

SwapCardGingerbreadMen

This card used two stamp sets……one is brand new, called "Got Treats" and when you see it in the catalog, you will see that it is great to use with the Milk Carton Die!  I actually cut off the words from below the gingerbread man so that I could stamp just the gingerbread man.  But especially with the clear mount stamps, I can add on the word any time.  The sentiment comes from the set we got free last year at Convention, Sweet Season.  And the heart is punched with the new little heart punch

Just check out these items at my Online Store!

Prettier Than The Corpse Flower!

Have you ever heard of a Corpse Flower?  It is the big news here in Houston right now while we wait to see if the Corpse Flower blooms at the Houston  Museum of Natural Science.  The museum has had a live web feed on the plant 24/7 and the museum has been open late and sometimes all night to give visitors a chance to see this unusual plant.  The plant even has a name….Lois!  Only 28 other bloomings have been observed in the US of this kind of plant….that's partly why it is so unusual.  The other attraction is that when the plant blooms it will have a powerful stench of rotting flesh. Apparently the smell is for the plant to attract certain kinds of flies and beetles.  You can see a picture and read more about it here.

So I thought I would make a prettier flower, only similar to what the Corpse Flower might look like in colors.  I chose Rich Razzleberry and Pear Pizzazz. Right now the real Corpse Flower looks like a stalk of some sort.

Corpse Flower 


If you would like to keep an eye on the Corpse Flower at the Houston Museum of Natural Science, you can watch the live web feed HERE.

And if you want to stamp your own pretty flowers with the Petal Pizzazz stamp set #113417, you can go shop right now at my Online Stampin' Up! Store!  Don't forget the 1 3/4 Inch Scallop Circle Punch #119854 which will make it easy to punch out one of the flowers.


Getting Ready for Convention!

The time is getting really close now for the fantastic Stampin' Up! Convention in Salt Lake City, and as usual, I am rushing to get some swaps made.  It seems like this year they are giving us hints of what new, extra things might be going on at Convention so it is getting very exciting!  You can't imagine how much fun it is to be there until you actually get to attend a Stampin' Up! Convention….so if you want to be in on the fun, you should sign up to be a Stampin' Up! Demonstrator so you can attend next year!

Here are some pieces for one of my swaps!  I decided to CASE (copy) myself for this one although I am making it a little plainer for swapping…and to save myself time!  But you can always take a simple card and jazz it up a little if you want, especially now that Stampin' Up! has some BLING!  Be sure to check out the half-back rhinestones and pearls with adhesive on the back.  They are on page 188 of the Stampin' Up! 2010-2011 Idea Book & Catalog.

Swappieces 

If you need some cool stamping supplies, be sure to check out the Stampin' Up! Store!


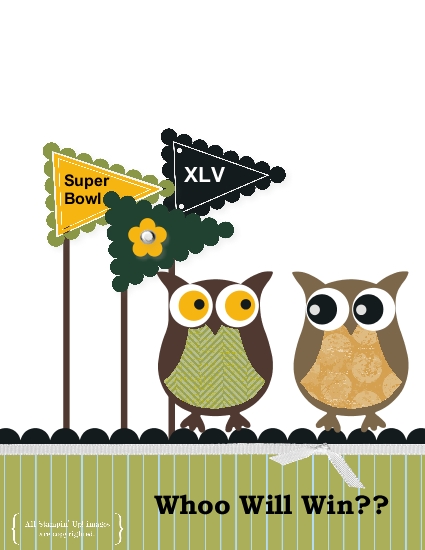
My Digital Studio Owl Card

Naturally I wanted to play with my new My Digital Studio downloads, especially the new Two Step Owl Punch:

Two Step Owl Punch My Digital Studio Download 

copyright Stampin' Up! 2010

Isn't it cute, even as a digital download, and it's only $.95!

I started in My Digital Studio with a template already designed for me and then changed a couple of elements or colors.  It was easy and fun to do!

Owl Card-001 

I could also design the inside of my card as well, even the inside left-hand page, which normally is blank in most cards.  But with My Digital Studio I could place whatever paper or stamp or accessory on it and have it look like a very fancy card!

The more you use My Digital Studio, the more you learn and the more you like it!


The Circus Is In Town

The Ringling Bros. Barnum & Bailey Circus is in Houston, TX this week! I saw a story on the local news the other day about the elephants, and that plus this new Designer Series Paper Sunny Garden #119831 inspired me to make this card.  I used the Bigz Scallop Circle Die #113468 and cut a portion out to make the "bigtop" roof and then just a small square for the sides, cut a slit and turned back the "tent flaps" with a piece of Basic Black card stock #121045 behind it.  The elephants from Animal Stories #116716 are stamped with Basic Gray #109120 and one is cut out and adhered with Stampin' Dimensionals #104430 to pop up.  The words are from the stamp set Oval All #113790, punched out with the Scallop Oval Extra-Large Punch #119856 and mounted on the 2" x 1-3/8" Oval Extra-Large Punch #119859.

Circus Card 


On the bottom I sponged a little bit of Soft Suede ink #115657 and for the sky I used Pacific Point ink #111837.  I just grabbed a scrap of the Scallop Circle, put that down on my Whisper White background and sponged the edges, moving it around to make it look like clouds.  Nothing scientific about it, I just did it!  You can too!  

Card stock I used:  

Whisper White #100730

Crumb Cake #120953

Poppy Parade #119793


You can get all your stamping supplies for this project and more at my Online Store!  Shop anytime!


Dotted Scallop Ribbon Border Punch

Dotted Scallop Ribbon Border Punch 

In my box of new goodies from Stampin' Up! last night was this new Designer Series Paper, Sunny Garden #119831 and the new Dotted Scallop Ribbon Border Punch #119275.  I wasn't quite sure how I would use that punch, but after playing around today, this is what I came up with and decided to do the three strips layered.  I really like it!  The flowers are stamped with Watercolor Trio (Summer Mini p. 16), colored with the Stampin' Write Markers.  The colors I used were Pear Pizzazz, Daffodil Delight, Peach Parfait, Poppy Parade, and Concord Crush.

Do you have your new colors yet??  You can email or call me with your order or you can shop at my Online Store.


Fun with Tote-ally Tess on Another Rainy, Flooding Day in Houston!

Thank goodness stamping does not require electricity!  It has been raining and raining and raining all day here in Houston.  The power went off before 10:30 am, and threatened to even before that, so what is a girl supposed to do with no computer or TV all day??  I got out stamps, ink and paper since I could see pretty well at my kitchen table by the window and made this card!

ToteAllyTess 

So Tote-Ally Tess and I had a pretty good time this morning.  I just kept stamping away until I was satisfied with how the card turned out.  To begin I consulted my new Color Coach #121620 to find a color combination I wanted to use and Sahara Sand, Regal Rose and Tempting Turquoise is what came up!  You'll love the new style Color Coach!

I also got to work on switching out some of my retired stamp sets and markers and cleaned up a few things.  Good day for that, even though I needed a flashlight now and then!  The power finally came back on at 4:00 pm although they say on the news (now that I can watch it) that thousands are without power.  Naturally ours came on just in time to cook dinner, but probably better than being out driving because there are so many spots that flood.  Now if I can just drive to the Park & Ride to pick up my husband!  They even had to set off some of the fireworks downtown today that were being set up for the 4th of July display because the bayou was getting high, just to be safe.  Wish I could have seen that!