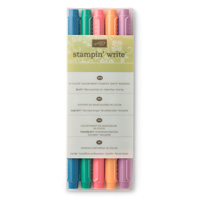
This weekend, starting today is aState Sales Tax Holiday in Texas and several other states (AL, AR, FL, LA, MO, NM, OH, SC, and VA). While most people will be shopping for school clothes and supplies during the Tax Holiday, we stampers can also shop at Stampin’ Up! for certain items! Please click the chart above to see a readable version and check your state.
Here are the products available in Texas (and most of the states) during the Tax Free Weekend August 5-7! Check the chart above to see exactly what is available in your state!
Stampin’ Up! helps support the Ronald McDonald House Charities (R) by making a contribution for every special RMHC stamp set sold, and this My Hero Stamp Set is the stamp set for 2016-17. For every stamp set sold, Stampin’ Up! will donate $3 to the RMHC. You can purchase this stamp set in wood- or clear-mount and know that your stamping is fun for you but also helping a good cause! The Ronald McDonald House Charities helps support families whose children are undergoing medical treatment away from home. You can read more about it HERE.
To make this easy card, I used Real Red for a card base with the fold at the top. Just cut the cardstock in half lengthwise at 4 1/4″ and then fold in half at 5 1/2″. I have a layer of Whisper White and then Soft Sky for – the sky! I darkened the sky a bit with a little sponging of Smoky Slate ink. I actually used the coordinating punch for last years RMHC stamp set, the Tree Builder Punch, to punch out some clouds (on another card they might be cupcake tops!) and sponged those as well.
Next I actually used the My Hero Stamp Set. I stamped the umbrella on Whisper White cardstock with Real Red ink and cut it out with myPaper Snips. The umbrella handle is stamped with Basic Gray and cut out. I adhered the clouds to the top of the card and next the umbrella, popping up the umbrella with Stampin’ Dimensionals. The little greeting at the bottom is from the stamp set and punched out (just the ends) with the new Classic Label Punch. You could also put this greeting on the inside of the card.
For a little fun and pizzazz, I used my Clear Wink of Stella Glitter Brushto make tiny raindrops! I think you can see them on the photo if you look closely! It’s always hard to photograph shiny and glimmery things.
I hope you will consider adding the My Hero Stamp Set to your next order and help Stampin’ Up! support a worthy charity that helps children and families, the Ronald McDonald House Charities.
TheThoughtful Branches Bundle from Stampin’ Up! is available to customers starting today, August 2! Get yours right away because these will only be available during August while supplies last! I’ve seen so many pretty sneak peek samples that I imagine this limited time product will be very popular.
If you ordered in July and received those Bonus Days Coupon Codes, you can use them starting today! Apply them to this Bundle or Stamp Set or any other products you would like! Use your Bonus Coupons before August 31!
Stampin’ Up! Trimmer Blades will be available TOMORROW (Limit of 3) if you need some! They are unavailable today, but will be available tomorrow! Be sure to put them on your order because when these are gone, we will have to wait until the next shipment arrives.
Order Thoughtful Branches or anything else that you need HERE at Stampin’ Up! Online!
I’m still copying cards, like this Watercolor Words You’re the Best Card from the new Stampin’ Up! Catalogor at least getting some inspiration! The catalog is a great resource when you are looking for any kind of idea. Even if you see an idea for a card, you might be able to use it on a scrapbook page. If you see an idea for a tag, you might be able to use that on a card. You will find ideas for boxes and gift-wrapping and home decor items, and the samples in the catalog are there for you to take inspiration from!
This is another sample I have made from page 135 in the Stampin’ Up! Catalog. It didn’t turn out exactly like the catalog sample, but it doesn’t have to. Change it up according to what products and stamps you have. You could have used different flowers on this card, a different greeting or different paper.
Flip through the catalog next time you need an idea for a card or other project! If you need a catalog, please send me your contact information and I can mail one to you.
Stampin’ Up! Bonus Days are coming to an end! Did you place your $50 order so you could get $5 back to use in August on another order? Last day July 31!! Redeem your coupons beginning August 2.
Are you a Harry Potter fan? On July 31, 2016 the new Harry Potter book, “Harry Potter and the Cursed Child,” by J.K. Rowling will be released. To commemorate that and to celebrate Harry Potter’s birthday I made this Harry Potter card.
Not that I came up with the design myself, but I found several samples online and came up with this card for Harry Potter fans. The card base is made with Whisper White Thick Cardstock and the scarf is made with a strip of Crushed Curry with pieces of Cherry Cobbler adhered to it. The hair is just cut by hand (reminded me of cutting Frankenstein’s hair at Halloween!). The glasses are made with black punched circles with smaller white circles inside and then small circles from the Owl Punch for the eyeballs. Always put a little dab of white on the eyeballs with a white gel pen or the White Stampin’ Chalk Markerfor that reflection of light.
Easy card to make really and fun for the occasion of a new Harry Potter book and Harry Potter birthday!
If you are a Harry Potter Fan, I hope you enjoy the new book being released, “Harry Potter and the Cursed Child.”
Need any supplies to make a card like this? Just check out the Stampin’ Up! Online Store HERE! Stampin’ Up! has the best stamps, ink, paper and accessories for all your creative needs!
I opened the Stampin’ Up! Catalog for inspiration and BOOM! This easy Watercolor Words Just For You Card was on the first page I opened! It even says “Quick & Easy” on the sample! I did change it a bit from the card I saw on page 135 but that’s fine! Lots of times I think I am going to copy and I end up doing something either slightly or a lot different! I think we should all remember more often the wealth of inspiration and ideas in the Stampin’ Up! Catalog! What a resource!
I have always loved the Watercolor Words Stamp Setthat came out last year I believe. It’s just so versatile and easy to use. This card is photographed on a piece of Melon Mambo card stock but the card itself is just aWhisper White Thick Cardstock card base. The regular Whisper White is okay for a card base but the Thick Cardstock is better. You should have a package in your stash! Then I just stamped the flower and leaves and greeting, added a strip of washi tape down the side and tied on some White Baker’s Twine. So fun and easy! And for a little pizzazz I added three Rhinestone Jewels.
Since the sample in the catalog had the greeting stamped OVER the flower, I inked up the flower and leaves and stamped them “off” on a piece of scrap paper, THEN stamped onto the card. This gives a lighter image without using lighter colors of ink. I used Melon Mambo ink for the flower and Pear Pizzazz for the leaves. I liked the flower and leaves as they were and decided to stamp the greeting below the flower since I had plenty of room. I wanted to use my Pop of Pink Designer Washi Tape, that determined the color ink I would use on the flower.?!
If you have this stamp set (or really any flower stamp set and greeting) I suggest you make a few simple cards like this right away and have them on hand! Once you start you will probably change up your design a little bit or perhaps add a little more embellishment to your card or who knows?! At any moment in time you might feel a different creative mood!
With every $50 you spend in July, you will receive by email a $5 coupon to use in August on your next order!
(You must have an email address and you must not lose your coupon code because Stampin’ Up! will not be able to resend to you.)
I don’t know about where you live, but here in Houston it is too hot to do anything outside, or do much of anything at all, so you might as well turn on the a/c and sit and stamp this weekend!!
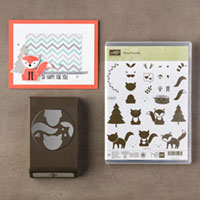
Since I have been playing with the Foxy Friends Stamp Set and Fox Builder Punch, I thought you would like to see how to use them and some really cute samples from Stampin’ Up! You get a LOT of pieces in the Foxy Friends Stamp Set, but it’s good to just get in there and play with them and then the creativity will come. The little animals you make will be so cute!
******************
Yesterday Stampin’ Up! released a list of states with Tax Holidays coming up right away! Be sure to check this PDF and if you need any of these Stampin’ Up! products, you can get them on the specified dates without paying tax!! The states they have listed are Alabama, Arkansas, Florida, Georgia, Louisiana, Missouri, New Mexico, Ohio, Puerto Rico, South Carolina, Tennessee, Texas, and Virginia. Be sure to check the dates! Georgia is July 30-31 and Tennessee is tomorrow July 29-31. And WOW, if you live in Louisiana, you can get the entire catalog tax free! Let’s all move!! Be sure to check the dollar limit for your state at the top of the column.
You must place your order with Stampin’ Up! during the tax holiday period in order to receive these items tax-free (midnight on the first day to 11:59 PM on the last day of the tax holiday).
Keep in mind that this is a state sales tax holiday and may not apply to additional county, city, and special jurisdiction taxes. Lastly, Massachusetts normally participates in this holiday but they are not participating this year.
Last few days for Stampin’ Up! Bonus Days! Spend $50 and get a $5 off coupon to spend in August! It’s like Kohl’s Cash! This promotion ends July 31! Be sure to check for the follow-up email after putting in your order which contains your coupon codes and guard those with your life!! Print out the sheet, write them down, whatever you have to do because Stampin’ Up! cannot resend them if you lose them. If you don’t see them within a little while of placing your order, check your Spam Folder in your email and whatever other folders you have. If you don’t receive them in a little while be sure to contact Stampin’ Up! right away.
Today I played with the Fox Builder Punch to make this Foxy Friends Fox Punch card. On the Stampin’ Up! video, they show a tip of punching a piece of paper and then stamping through the spaces to have everything lined up so that you can punch all the pieces at one time. I thought that worked pretty well. The punch leaves a bit of a margin around the punched pieces but you can always trim those if you like. Easier than cutting out all the pieces!
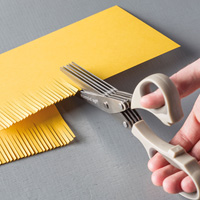
The card base is Old Olive cardstock as well as the grass cut with theFringe Scissors. The trees are stamped from the Foxy Friends Stamp Setand I just cut those out by hand, although there are coordinating framelits, Perfect Pines, if you already have those. After assembling the pieces from the Fox Punch to make my fox, I popped him up on Stampin’ Dimensionals as well as one tree. The sky in the background is just sponged in Soft Sky ink using a punched cloud from the Tree Builder Punch that coordinates with theSprinkles of Life Stamp Set (last year’s Ronald McDonald House Charities Stamp Set, and so popular it is still available THIS year!). Just put down the cloud and sponge around the edges of it. So easy!
As cute as many of the cards and projects I was seeing using the Foxy Friends Stamp Set, I have to admit, looking at the many stamps in the set and the Fox Builder Punch, I felt a little intimidated and wondered how to use the punch and all these stamps! Finally I had to stop and watch the Stampin’ Up! video and look at some samples online, and now I have taken the leap! I can’t wait to make some more cards and projects with all these cute critters!
To make this card, I started out kind of copying a sample in the Stampin’ Up! Catalog. As usual, it didn’t come out to be an exact duplicate. The A Little Foxy Designer Series Paper Stack is going on my next order, so I made my own designer paper for this card! I found two different sized hearts in other stamp sets to stamp for background paper on Whisper White for this card. The card base is made of Smoky Slate Cardstock. The fox is stamped in Tangerine Tango Ink. Then I stamped his eyes and nose and also his front legs. These are some little details that you add with this stamp set. I didn’t use the Fox Builder Punch today on this card!
Check out the A Little Foxy Suite on pages 56-57 in the new Stampin’ Up! catalog! So many cute samples and see all the stamps you get in the Foxy Friends Photopolymer Stamp Set.If you are also interested in the Fox Builder Punch, be sure to get the Bundleand save 10%!
Shop Stampin’ Up! for all your cardmaking supplies!
Once you start playing with the Sweet Cupcake Stamp Setyou will find so many possibilities with this stamp set and even more with the coordinating Cupcake Cutouts Framelits Dies. Buy these two products together in the Sweet Cupcake Photopolymer Bundle and save 10%, but most importantly, you will have all these tools to make great cards and other projects!
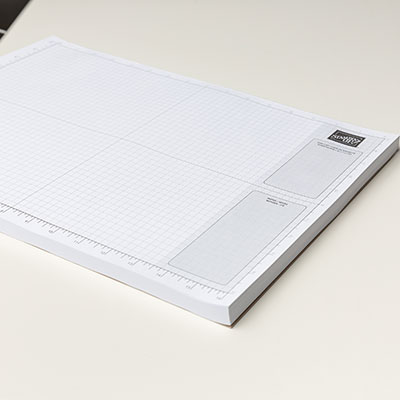
For this card, like yesterday’s card, I used Watermelon Wonder Cardstock for the card base. Then I die cut five squiggles with the Big Shotfrom the Cupcake Cutouts dies, also out of Watermelon Wonder, just to add a little texture to the background. I love those squiggles! They are probably the reason I bought the framelits! To adhere them, I just used tiny dots of Multipurpose Liquid Glue. I like to use the Silicone Craft Sheet underneath any narrow pieces like the squiggles so that I don’t get glue on my Grid Paper where I am working on the whole card, and the glue can be wiped off the Silicone Craft Sheet.
I stamped the cupcake the same way I did in yesterday’s postusing Pink Pirouette and Watermelon Wonder ink for the frosting and So Saffron and Crumb Cake for the cupcake bottom (or wrapper). I die cut this cupcake and popped it up with Stampin’ Dimensionals. For some extra pizzazz on the cupcake, I used a few of the Brights Enamel Shapes. This is a product that you might overlook in the catalog, but once you have them you know that they are SO CUTE! Really a fun embellishment!
If you have them, use the Layering Squares Framelits Dies for the background for the cupcake and the little scalloped edge. The Sweet Cupcake Stamp Set comes with lots of great greetings for both the front of the card and the inside so you will get lots of use from this set!
If you are new to my blog or Stampin’ Up! and would like a copy of the new Stampin’ Up! catalog, please contact me at Karen@KarenStamps.com I would be happy to send you the fantastic new catalog if you are interested in Stampin’ Up! products or would like to get started in the fun hobby (or even BUSINESS!) of stamping, memory-keeping, and papercrafting! Or if you prefer, check out the catalog online HERE.
It was finally time to play around with the Sweet Cupcake stamp setand make this Sweet Cupcake Birthday Card! I think you can even see the glimmer on the frosting from the Clear Wink of Stella Glitter Brush. (Once you start painting on that glitter, you don’t want to stop!) I didn’t realize that these cupcake stamps are actually 3-step stamping. You can experiment with them with ink choices and whether to stamp them 1-2-3 or 3-2-1. The stamps are numbered inside on the plastic so you can use that for a guide. That may sound crazy but the choice will be yours. You can stamp this cupcake and cut it out with the Cupcake Cutouts Framelits Dies and the Big Shot and pop it up with Stampin’ Dimensionalsto give it a 3D look. Get the Sweet Cupcake Photopolymer Bundle with both the stamp set and framelits and save 10% plus be all set to make some cute cards and projects!!
To stamp the cupcake frosting, I used Pink PIrouette Ink and Watermelon Wonder. I meant to use the new Watermelon Wonder 5/8″ Mini Striped Ribbonon the card but I completely forgot! Maybe the next one! The cupcake itself (or the cupcake wrapper) is stamped with So Saffron Ink and Crumb Cake. There are lots of combinations or single inks that you can experiment with.
And I love the sayings in this stamp set. I even took a picture of the inside of the card because we seldom show that. Since the Watermelon Wonder card stock base is rather dark for writing a greeting, I added a Whisper White layer and stamped my greeting. Also, if you noticed on the front, since the stamps are photopolymer, you can actually bend them a little as I did for the greeting above the cupcake. I also love all the die cuts you can make with the framelits, like the word “Sweet”. At the bottom I added a piece of doily, it’s not one of the new Delicate White Doilies, but I wanted to use up the ones that I already had. If you don’t own any doilies, they are great to have on hand for just a little bit of texture or embellishment sometimes.
Don’t forget Stampin’ Up! Bonus Days are going on! When you spend $50 or more, or any number of increments of $50, you will receive (by email) a $5 coupon to spend in August! Spend $100 in July, get 2 $5 coupons to spend in August, etc. You must have an email address and keep track of your coupons yourself to take advantage of this offer. Bonus Days end July 31. You can redeem coupons August 2-31.
Can’t you just imagine all the birthday cards you can make with this cute stamp set?! Remember how important it is to send real birthday cards in the mail to our friends, not just take one second to write a greeting on social media! If you want to join the movement started by Shannon West of the Stampin’ Up! Home Office, you might like to invest in this #IMBRINGINGBIRTHDAYSBACK stamp to use maybe on the back of envelopes!
Here’s how to make this Easy Definitely Dahlia All Occasion Card. The Definitely Dahlia Stamp is one large stamp! Personally, I recommend the wood-mount version for such a large stamp. I just think it is easier than trying to mount the clear-mount on a block each time. The wood-mount is only $5 more than the clear-mount.
To make this card, I just used Peekaboo Peach Card Stockfor the card base. You could use most any color. Then a layer of Whisper White Card Stock. My intention was to just stamp the large dahlia, but when I did, I wondered if the color was too bright and bold. So I stamped again in the upper portion of the Whisper White without reinking and I loved the look of the light version of the dahlia! You never know what you might come up with in the end when you start stamping! The greeting is from the Birthday Blooms Stamp Set. That’s really all you need for this card. It is dramatic as it is, so you don’t have to do any more.
Try your hand at an easy card with big impact like this Easy Definitely Dahlia All Occasion Card, and change the greeting for any occasion you need. Pure stamping at its best on this card!
I played around some more with the Marquee Messages Stamp Set in the new Stampin’ Up! Catalog and made this Marquee Messages Birthday Card! This is a fun stamp set to play with. It comes with smaller messages that you can add to the front of the card or use for the inside greeting, plus extra little stars and sparkles you can stamp inside or outside to jazz up the card. Use your markers or whatever coloring method you prefer to color in the marquee. I also used the Gold Wink of Stella Glitter Brushto a little sparkle on the marquee lights and the stars.
On this card I used Basic Black for the card base and added a layer of Pop of Pink Specialty Designer Series Paper. After stamping the marquee and message, I cut that out and fit on top of a Daffodil Delight card stock layer for the front of the card. If the card base is black, then you need to add a layer of Whisper White to the inside so you can write your message or note and sign your name. This is the perfect opportunity to stamp a little something in the corners or edges of the white layer. And it is always a good idea to do a little stamping on the envelope if you think of it!
If you don’t like coloring, you could stamp the marquee on a piece of colored card stock or several different colors and cut out various parts. This is called paper piecing. Lots of opportunities for creativity with this stamp set!
Shop Stampin’ Up! and get your Bonus Days coupons with every $50 you spend in July to use in August!
Here is a sneak peek of a new stamp set called Thoughtful Branches that will be available during the month of August only, while supplies last! There is also a coordinating set of thinlits to die cut the images, called Beautiful Branches. And you can buy the stamps and thinlits in a Bundle and save 10%! If you receive coupons from your July orders of $50 or more, you can use those to help purchase the Thoughtful Branches products in August!
This promotion runs August 2-31. Here is the ordering information:
Here is what you get!
Remember, these products are not available YET, but they will be beginning August 2, 2016 from Stampin’ Up! Stay tuned!!
Order $50 or more (kind of like Sale-A-Bration) during July and get a $5 coupon with every $50 multiple of your order to spend during August! Stampin’ Up! Bonus Days are here!
Today is National Ice Cream Day so why not celebrate by making a card about ice cream! Last year’s Ronald McDonald House Charities stamp set by Stampin’ Up! was carried over to the new catalog this year (which I think is a first, that I can remember) and is perfect to use to celebrate National Ice Cream Day! The Sprinkles of Life Stamp Set,with which you can make ice cream cones, also comes with a coordinating punch, the Tree Builder Punch by Stampin’ Up!,
I made the card with a card base of Crumb Cake card stock and a layer of the new In Color Flirty Flamingo. The background layer of the card is Very Vanilla embossed with the Polka Dot Embossing Folder. The ice cream cone is stamped with Delightful Dijon Ink on Delightful Dijon Card Stockand just cut out with Paper Snips. The ice cream scoops are punched with the Tree Builder Punch. I made the flavors out of Pink Pirouette, Very Vanilla, Mint Macaron, Flirty Flamingo and Soft Suede. The punch even has a little cherry (or in some cases it could be an apple!) to put on top of the ice cream! I added a little glimmer with the Clear Wink of Stella Glitter Brush to the cherry. So fun to play with the Wink of Stella Glitter Brush!
The greeting comes in the stamp set and I layered it on the new Layering Squares Framelits Dies. Since I had a little space at the top, I added a little knot tied with the Gold 1/8″ Ribbon. This ribbon has been around for awhile and it is so useful. It also comes in silver so be sure you have both!
What is your favorite ice cream flavor? Be sure to celebrate National Ice Cream Day by eating a big bowl of ice cream with all your favorite toppings! And if you must save calories, then make an ice cream card instead!