Category Archives: Cards

A Couple of Things About Paper Pumpkin by Stampin’ Up!

Paper Pumpkin December 2016 Kit

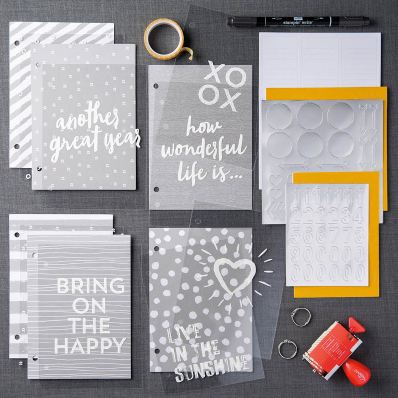
In case you haven’t heard, Paper Pumpkin is the papercrafting kit that comes to you in the mail once a month! Each month is a surprise, and as you can see by the December 2016 kit it is not always cards!  This December kit is designed to be made into a mini scrapbook of sorts, or whatever you would like, but you could make cards with the pieces as well. Usually you receive an ink spot and an exclusive stamp set, but for the first time, they are instead including in the kit this rotary stamp and a black marker with which to ink up the words on the rotary stamp.

Now, it is too late to subscribe for the December Kit, but if you subscribe for the January 2017 Kit, you can go back and purchase any of the past kits or refills that are available. And right now Stampin’ Up! is offering the full December kit, #143596, so you don’t have to wait, but you do have to subscribe!  Past kits are only available to current subscribers. So join Paper Pumpkin HERE and then put the December 2016 Kit on your order! You’ll also find more information at that link. Please choose me as your Demonstrator.
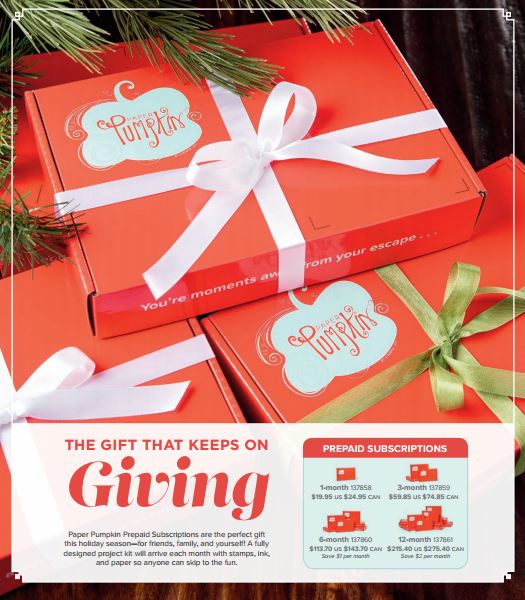
Paper Pumpkin Subscription Flyer

If you need a last minute gift for someone, consider the Prepaid Subscription to Paper Pumpkin. Add your choice to your order and you will receive an email from Stampin’ Up! telling you how to activate your account, plus a printable Gift Certificate! You can forward this to your gift recipient if you like.

Or maybe it is for YOU! Just show your husband or mother or daughter or son or whomever the link, either for joining month by month or for the Prepaid Subscription. Let them purchase it for you and print out the gift certificate!

Here’s a video showing how to assemble the December Kit!

Here is Carrie from the Home Office telling more about the kit and showing alternative ideas for the kit if you don’t want to make the album.
JOIN PAPER PUMPKIN TODAY!

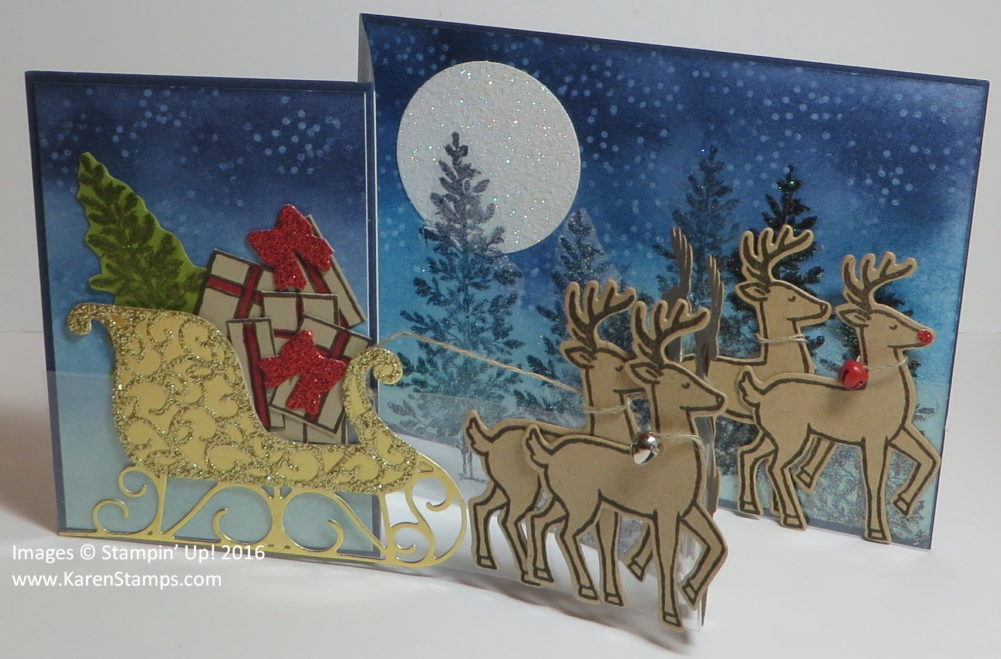
Santa’s Sleigh Double Z Fold Christmas Card

Santa's Sleigh Double Z Fold Christmas Card

Wow!  This Santa’s Sleigh Double Z Fold Christmas Card is a masterpiece!  I’m not bragging on myself, though, because I copied nearly exactly another Stampin’ Up! Demonstrator’s card!  I had been seeing a lot of Demonstrators, in a group I’m in, making some really pretty double z fold Christmas cards of various styles. Somehow I picked this particular one to copy and decided to make 4 cards all at the same time! So it was a little time consuming, but so much fun to see how pretty it would all turn out! Actually, I think I chose this one to copy because she used a window sheet rather than cardstock for that z fold strip that makes this type of card so interesting.

The card I copied was made by a Demonstrator in Australia, I believe, named Chloe.  I am going to give you the link to her YouTube video because she did such a good job explaining how she made this card.  The video is long, but you’ll really learn how she made the card.  You might choose to do your card in a slightly different way, but at least you’ll know all the steps she took to make this beautiful card.  I did use the evergreen tree in Lovely As a Tree rather than the one she used, and I used Dazzling Diamonds Glimmer Paper for the moon rather than Silver Foil.  I put a tree in my sleigh!  The next time I might not bother adding the trees on the acetate that she adds in the center. And I only gave a red Jingle Bell to Rudolph and a silver bell to the reindeer on the front.  She put bells on each reindeer.

Santa’s Sleigh Double Z Fold Card Link

I’m keeping one of the four cards I made for my own Christmas decoration!  So if you have all your Christmas preparations done, or if you want to wait until a quiet day after Christmas, make a Santa’s Sleigh Double Z Fold Christmas Card for yourself for next Christmas!


How About a Quick and Easy Christmas Card Anyone Can Make?

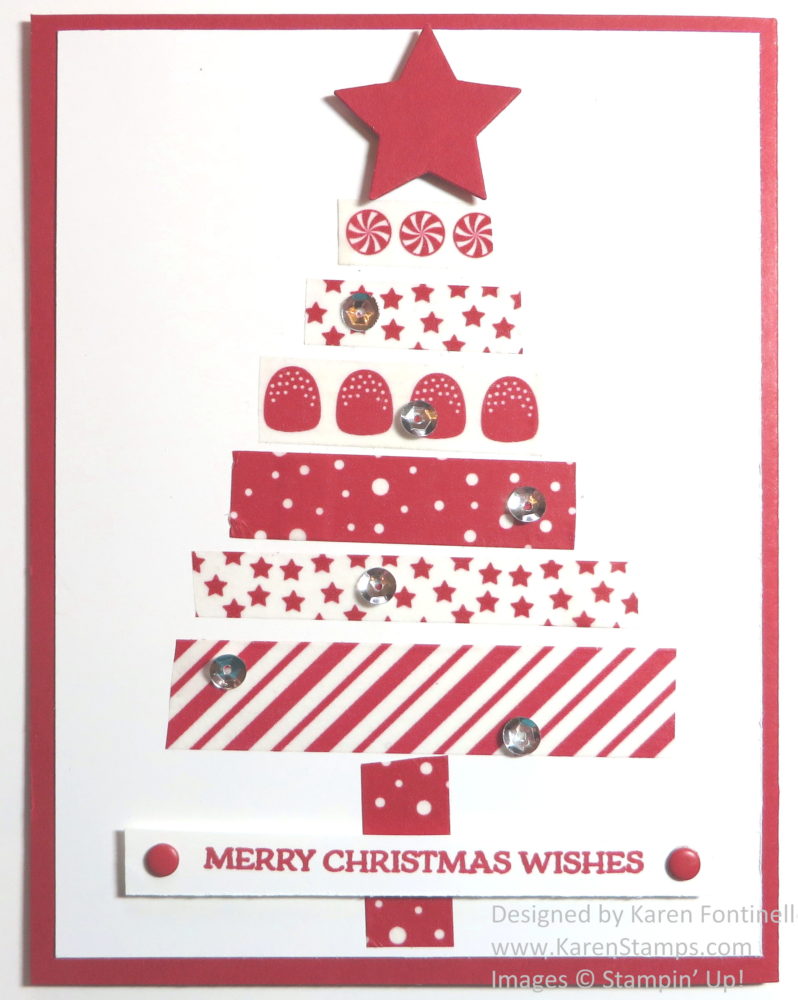
Washi Tape Christmas Tree Card

How about a quick and easy Christmas card anyone can make? I know you have a stash of washi tape, and if you don’t, just substitute strips of designer paper or cardstock for the washi tape. Just cut or tear strips of washi tape and place them on the card front, straight or crooked, it doesn’t matter! Make a little tree trunk, add a greeting, maybe put a star on top and you’re done!

For this card I used the Candy Cane Lane Washi Tape, now on sale in the Stampin’ Up! Year-End Closeout Sale.  I cut the ends with scissors to make them straight, but you could just as well just tear the tape off and have irregular edges. For the star on top I used the smallest die in the Stars Framelits Dies. For a little extra pizzazz I added a few of the Metallics SequinsOn the greeting strip (greeting from Santa’s Sleigh Stamp Set) I added a couple Brights Enamel Dots.

Doesn’t that sound like a quick and easy Christmas card to make now that we are getting down to the wire?!  And a good way to use up excess washi tape!  You know you have it!

Floral Thinlits Dies 40th Anniversary Card

Floral Thinlits Dies 40th Anniversary Card

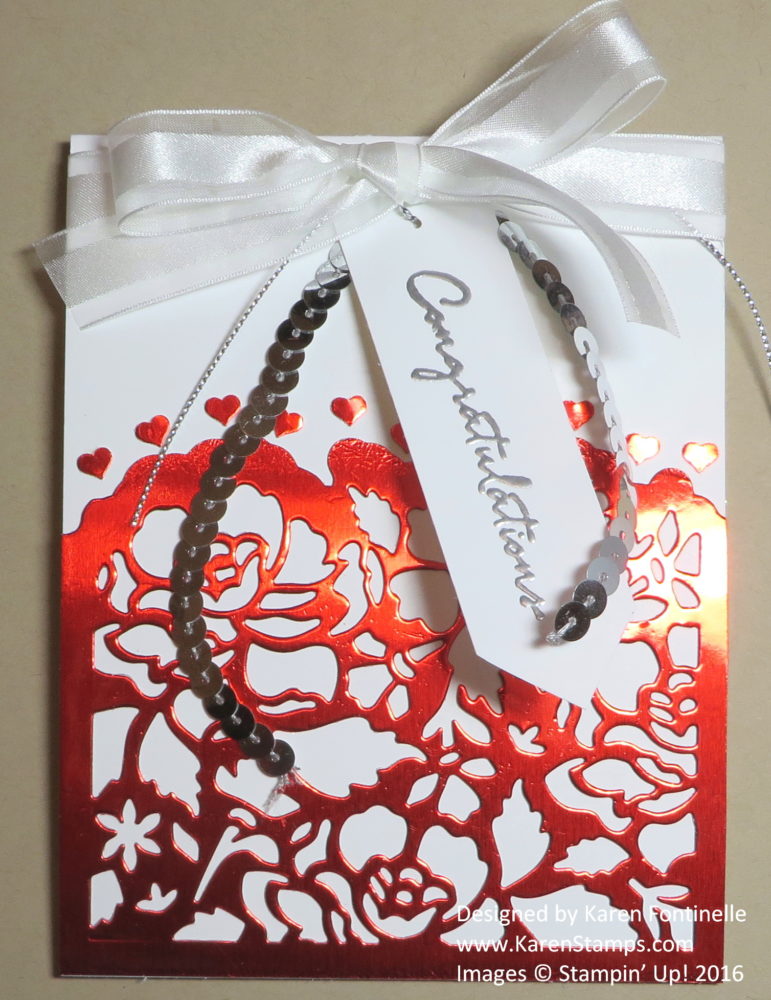
When you’re kids and growing up, you probably can’t imagine that someday it will be years, and years, and years since you used to play together and be part of each other’s everyday lives. I recently made this Floral Thinlits 40th Anniversary card for the “boy” who lived next door to us and was best friends with my brother. When he met his future wife, she would sit in a lawn chair on the carport while my brother and his friend would fix a car or a lawn mower or go cut a neighbor’s grass or whatever they were up to. They eventually got married, 40 years ago, and my husband and I got engaged the following weekend if I remember correctly. How can we “kids” be celebrating forty years of marriage??!

Apparently 40 years is “Ruby”, if anyone still goes by things like that for anniversary gifts and cards. I decided to make the card pretty fancy since it was for such a special occasion. I found a sample online that I liked and fashioned my card mostly after that one. The Floral Thinlits Dies are perfect for when you want to make a fancy card!  I used a Whisper White card base and die cut the Red Foil (retired). I only used the bottom piece, not the top piece. The card opens at the top so I could wrap the Whisper White 5/8″ Organza Ribbon around the card. To jazz up the ribbon, I also used a piece of Silver Sequin Trim and a piece of Silver trim that I just tied into the white ribbon.  The greeting is from the Floral Phrases Stamp Set and is embossed with Silver Emboss Powder  and the Heat Tool.  The little hearts are punched or die cut (I forget how I got those!) and just glued individually above the Floral die cut piece.

There are other ways you could make this same card.  You could use Gold or Silver Glimmer Paper for the die cut piece or a piece of cardstock and put some glimmer paper behind it.  You could stamp the greeting above the die cut piece rather than tie on the greeting on a tag. You could turn the card sideways, putting the die cut piece on the other side. For sure, the Floral Thinlits Dies can make any project look spectacular!

Notice the Floral Thinlits Dies are on SALE in the Stampin’ Up! Year-End Closeouts, so don’t miss it!

Shop Stampin’ Up! Online HERE!

A Couple New Occasions Catalog Products…Coming!

Stampin' Up! Occasions Preorder Items

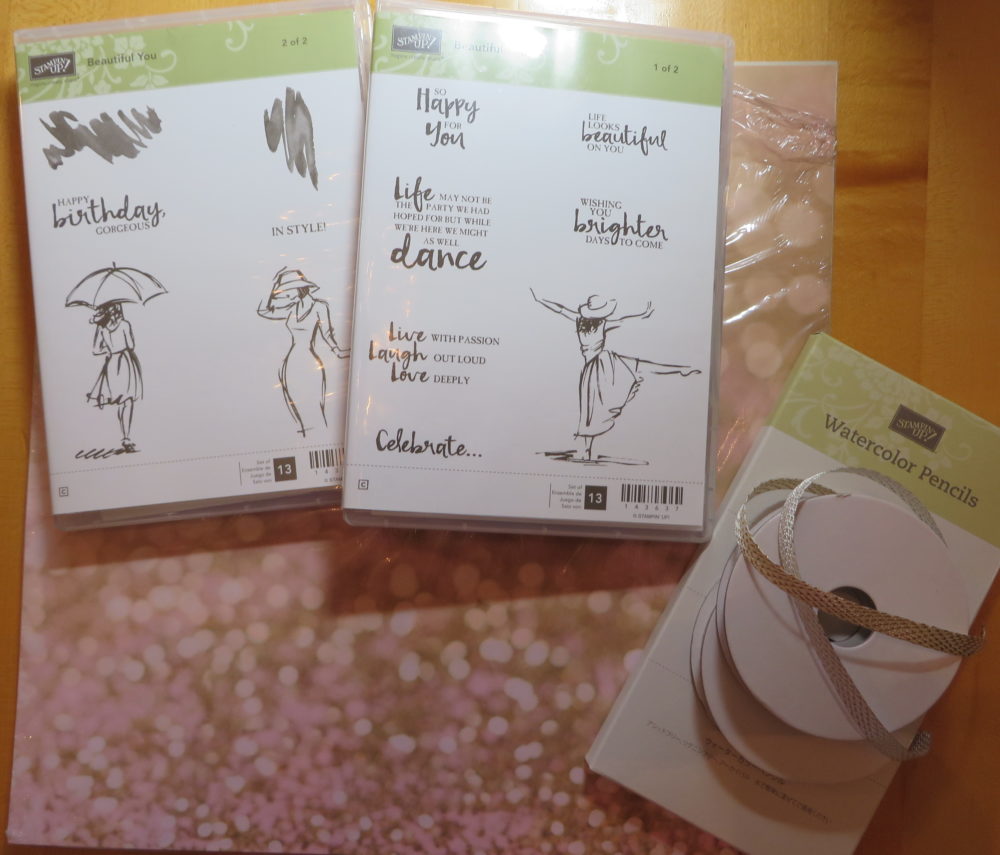
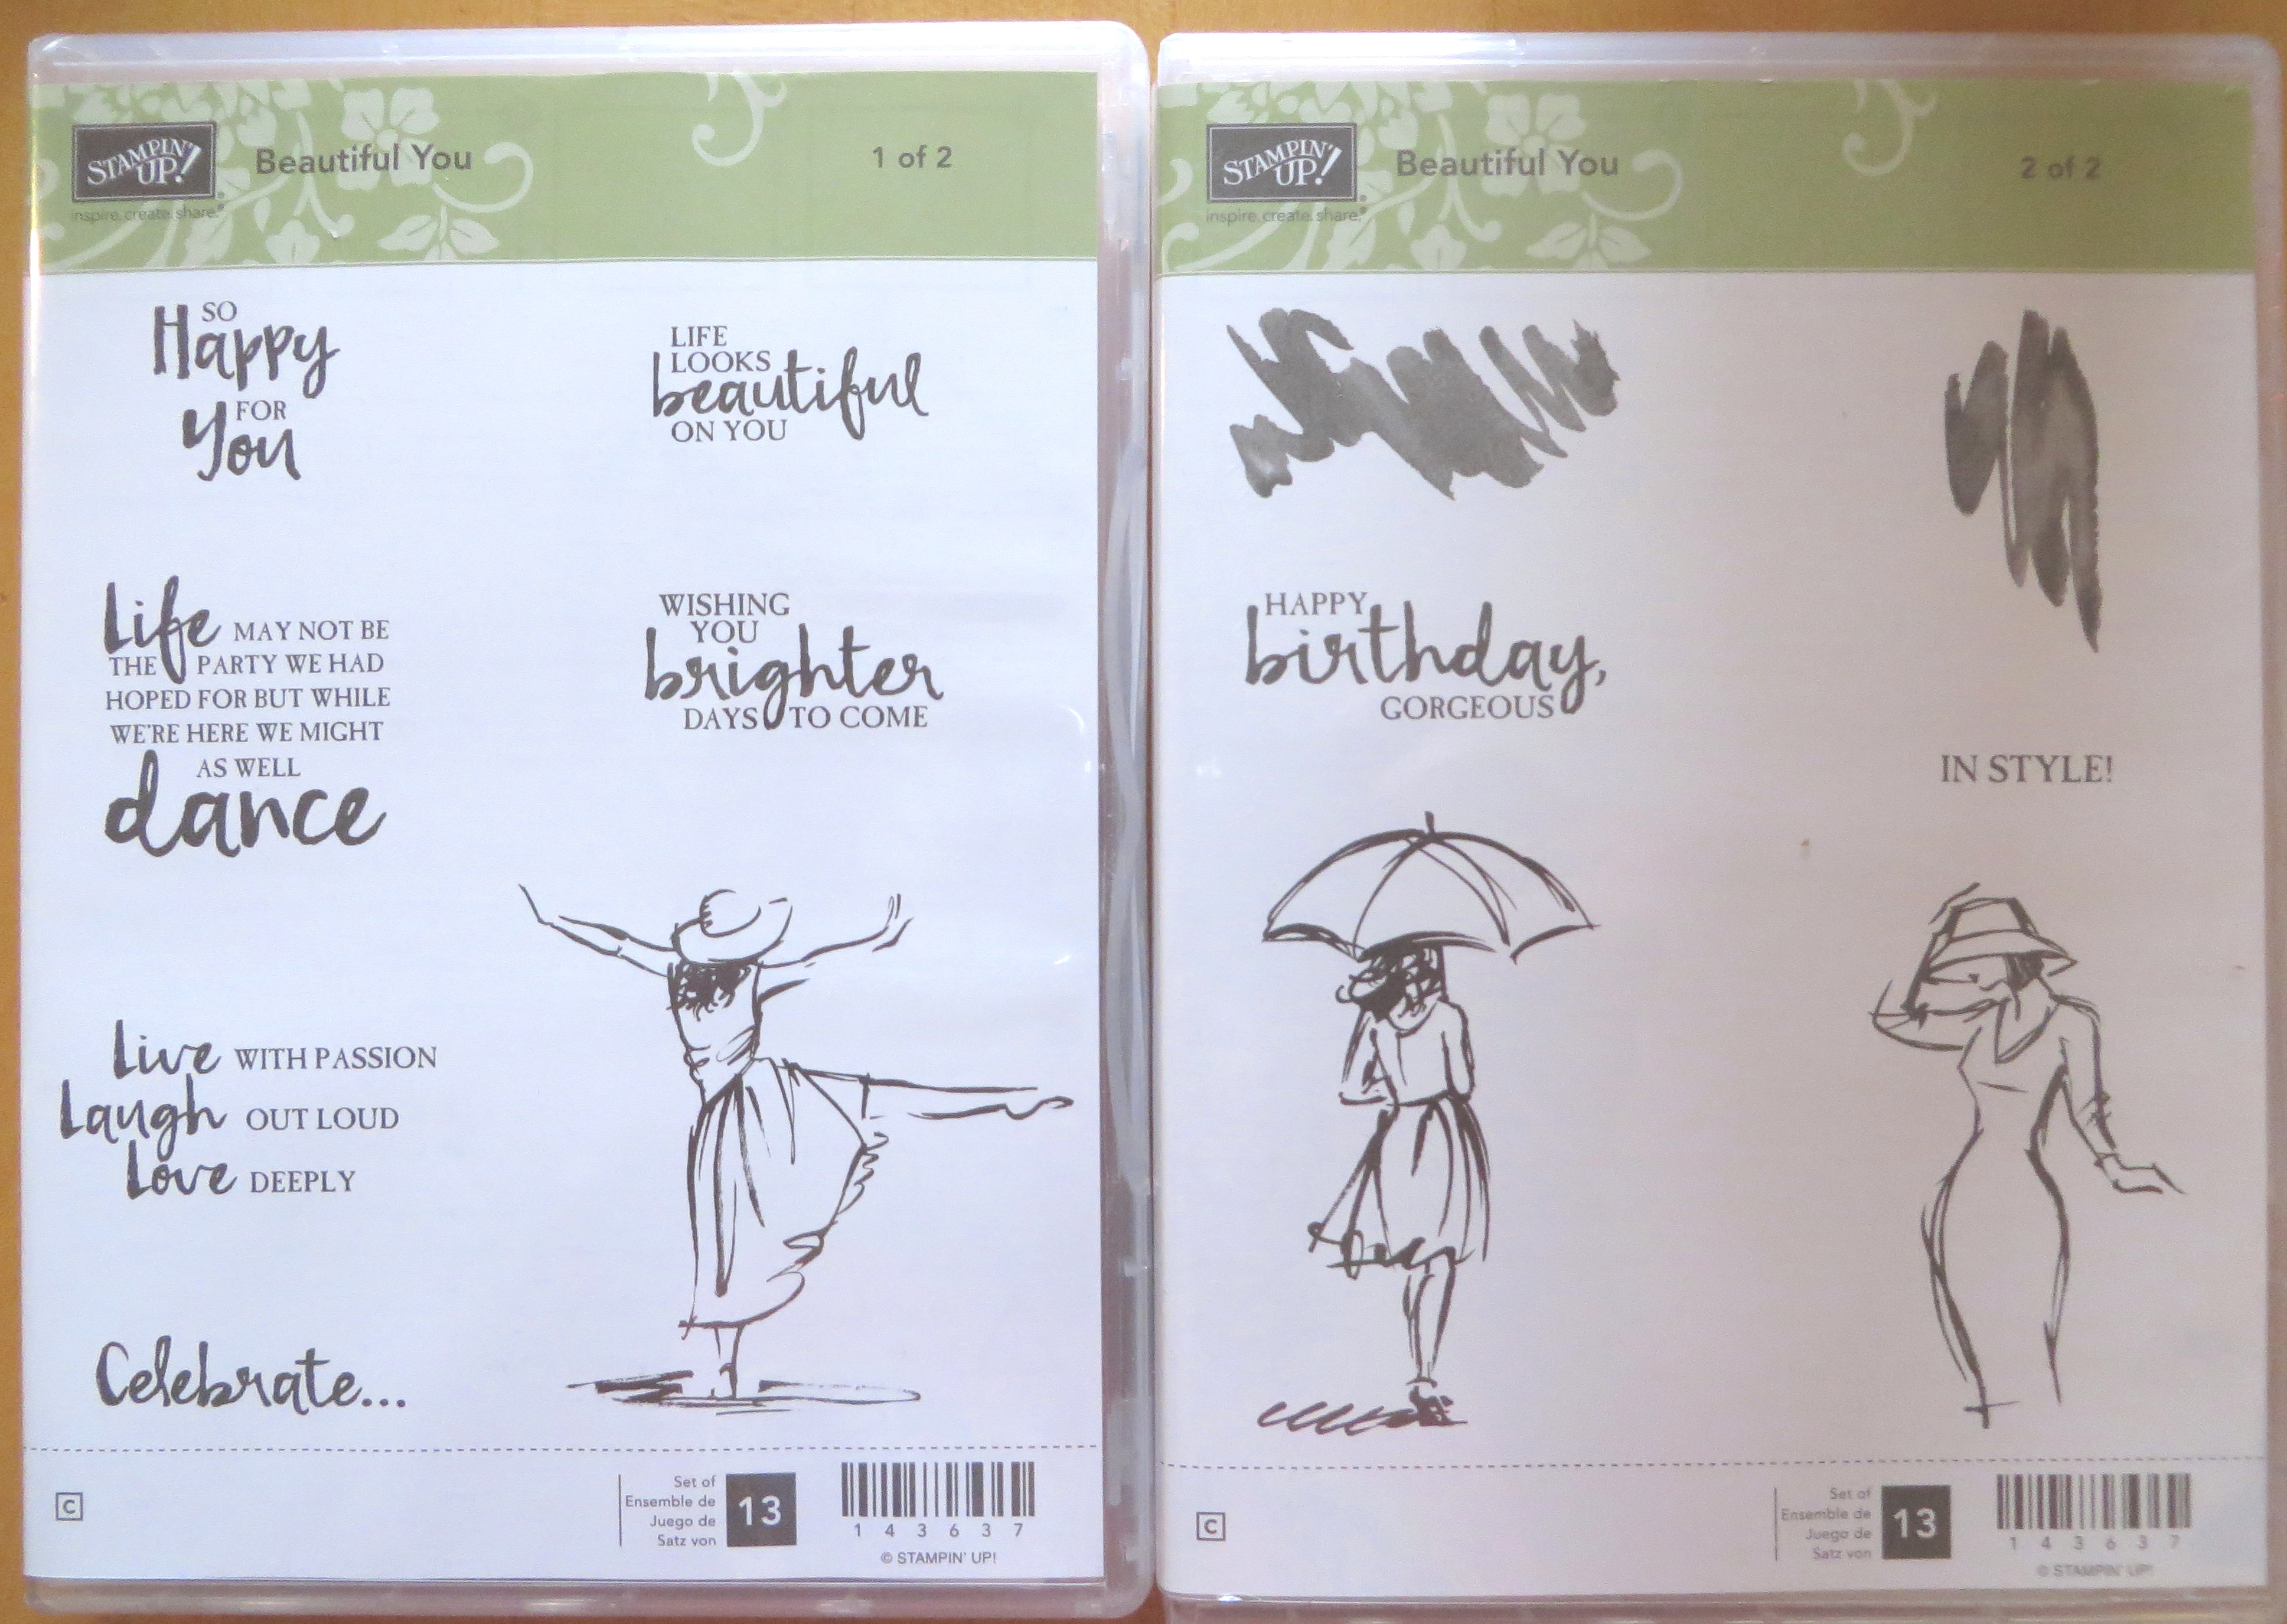
As Stampin’ Up! Demonstrators, we get to preorder from upcoming catalogs, one of the many perks of being a Demonstrator. I only ordered a very few things in my Stampin’ Up! Occasions Catalog Preorder and received it last night. I will wait until January 4th (most likely!) when the Occasions Catalog goes live and when Sale-A-Bration begins to order MORE!Beautiful You Stamp Set

From samples I have seen online that other Demonstrators have made, I would guess that this stamp set, Beautiful You, is already very popular. I love the sketched images and the greetings. The images will be great for coloring in in kind of a watercolored look or even left plain.

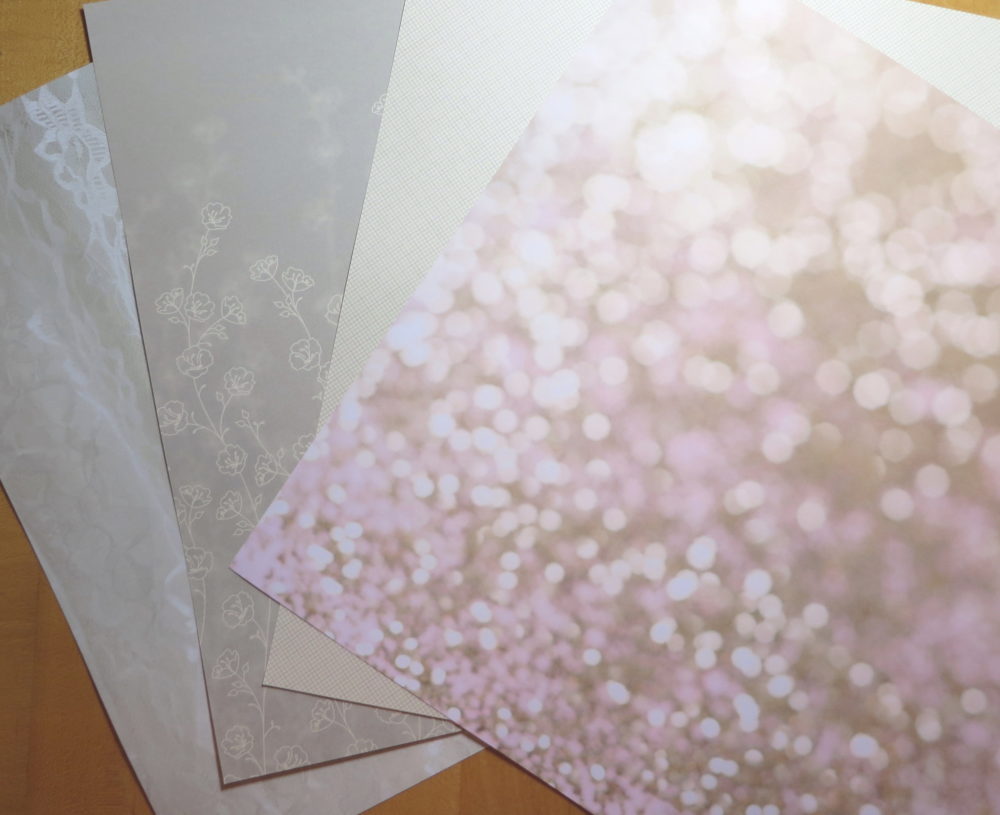
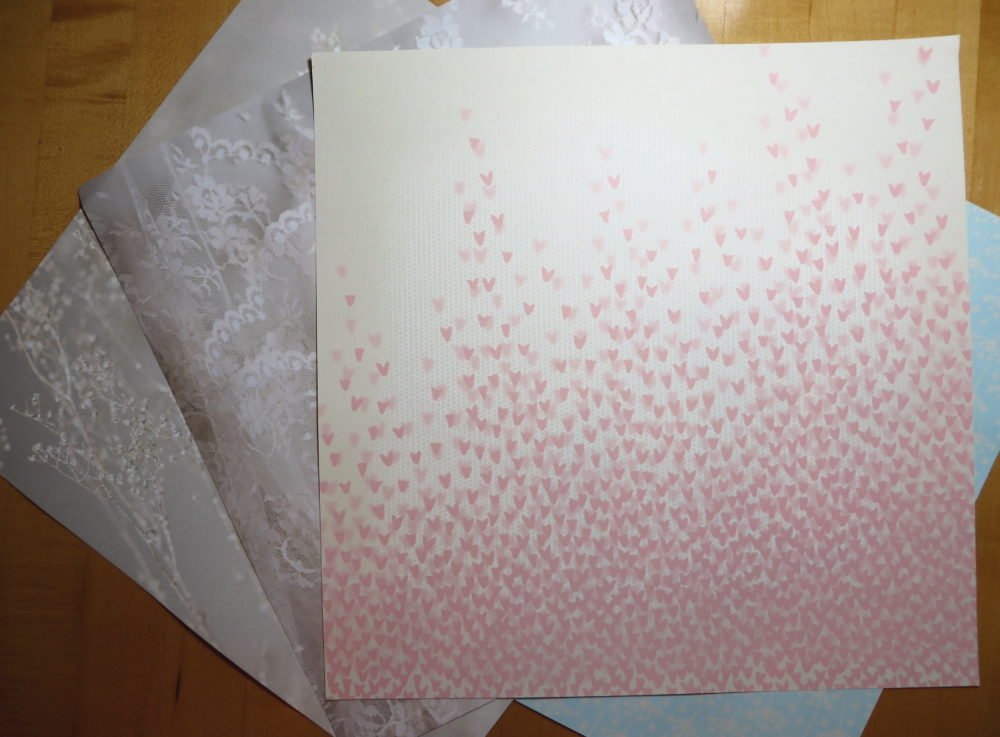
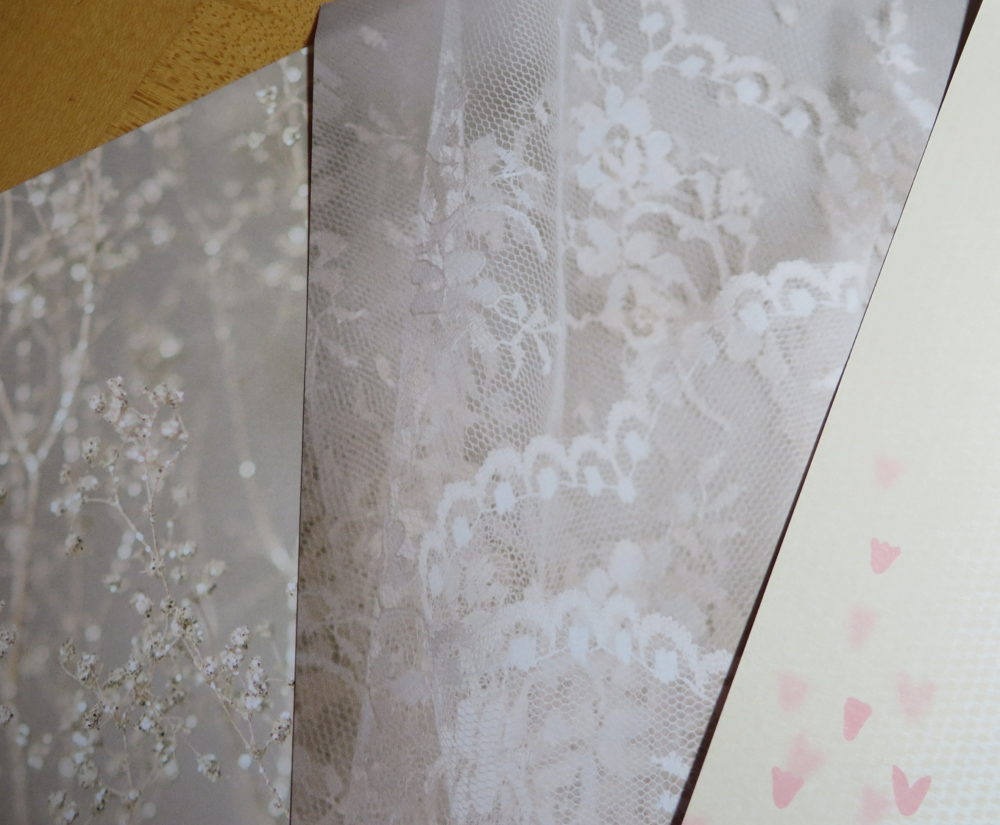
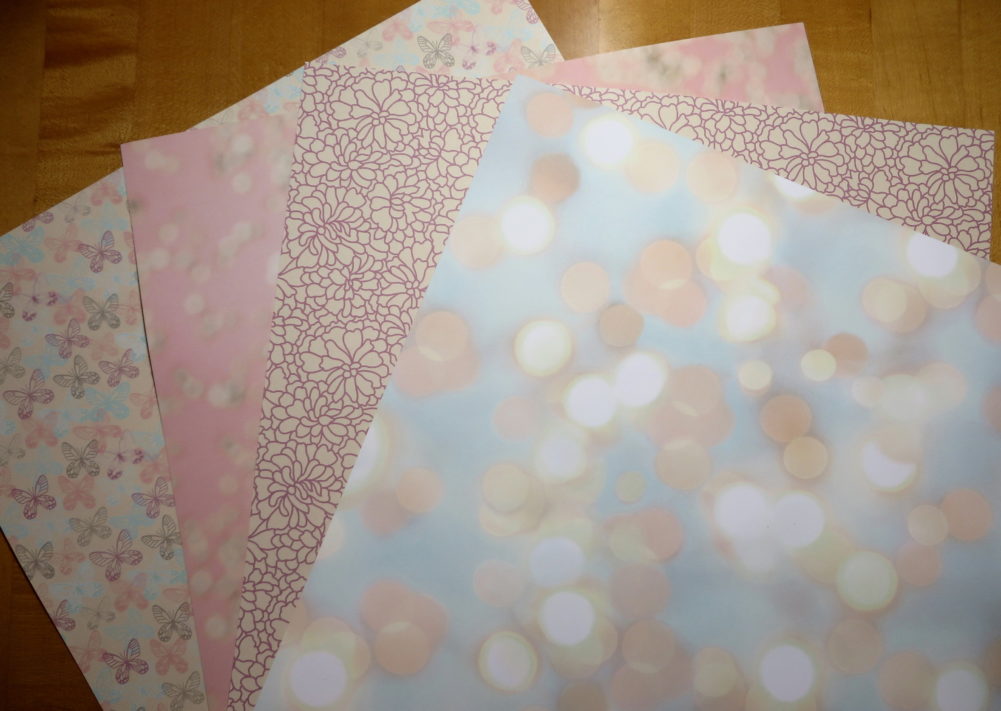
I ordered the Falling in Love Designer Series Paper.  It is so soft and beautiful!  Lots of the “bokeh” look (the kind of blurry circles background), plus other really pretty patterns. It’s difficult to tell what the paper REALLY looks like until you see it in person, but I took some closer shots to give you a better idea.

Falling in Love Designer Series Paper 1

Falling in Love Designer Series Paper 2

Falling in Love Designer Series Paper 2closeupFalling in Love Designer Series Paper 1closeup

This photo above is a close up so you can see the page with the beautiful lace pattern!  Love it!!

Falling in Love Designer Series Paper 3

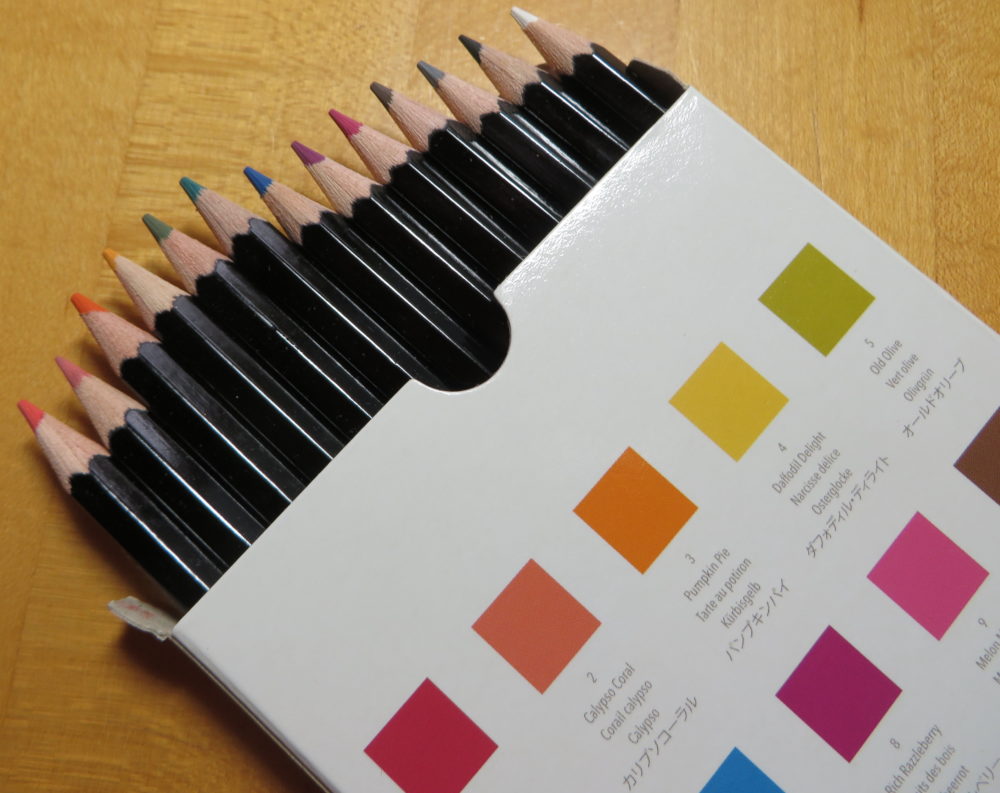
Watercolor Pencils Open

I haven’t had a chance to play with these Watercolor Pencils yet, but if you are newer to Stampin’ Up! you might not know that years ago (when I started!) we had watercolor pencils, but they were not in official Stampin’ Up! colors.  These are! I think most people liked the watercolor pencils, I know I did.  Very easy to color with in different techniques using a little water one way or another to blend the color. Really fun!  You should put these on your first order! Especially with the adult coloring craze right now, these will fit right in!

Metallic Ribbon Combo Pack Sample

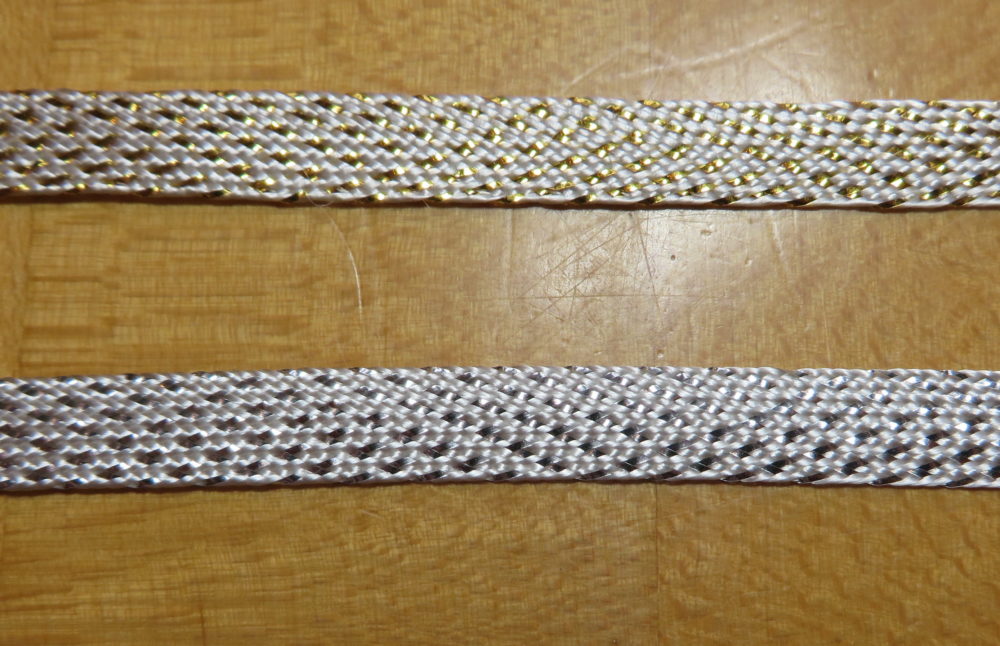
Even during our preorder, we were allowed to choose a free Sale-A-Bration item and I chose the Metallic Ribbon Combo Pack. You get two rolls of this beautiful ribbon, one with silver threads and one with gold.  They are both soft and pliable. You will love using them!

So there is a sneak peek of some new things that are coming!  Sale-A-Bration (beginning January 4th) is always a fun time because who doesn’t like to get FREE stamping things with our orders!

If you already have a Demonstrator you are working with, I’m sure you can ask her (or him!) for the new Occasions Catalog and Sale-A-Bration brochure.  If you do not have a Demonstrator you are working with and are interested in Stampin’ Up! products, I would love to be YOUR Demonstrator! I have a few extra catalogs handy for new customers, so just email me at Karen@KarenStamps.com with your contact information and I can send them out to you.  Let me know if you also want the Stampin’ Up! Annual Catalog.

My regular customers should be getting your catalogs in the mail that I ordered for you from Stampin’ Up! probably pretty soon.  Watch your mailbox and don’t lose them in the Christmas hustle and bustle!

And if you would like to be in on all the fun of being a Stampin’ Up! Demonstrator, check out some information HERE at this link. Then contact me with any questions or concerns or excitement! you have and I can tell you how to get signed up!  Great Christmas present for yourself!!

In the meantime, check out the Stampin’ Up! Year End Closeout Sale going on!

Shop Stampin’ Up! Online HERE!


Santa’s Sleigh Warmth & Cheer Christmas Tree Card

Santa's Sleigh Warmth & Cheer Christmas Tree Card

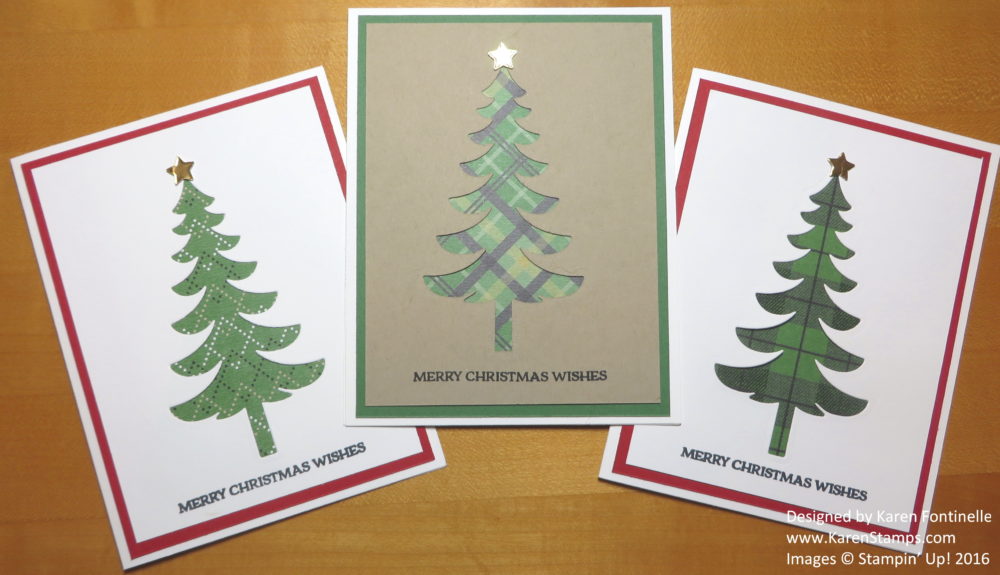
I saw an idea on Pinterest similar to this Santa’s Sleigh Warmth & Cheer Christmas Tree Card, but the person used washi tape behind the tree. I thought it looked like a nice simple design, but I got the idea to use the Warmth & Cheer Designer Series Paper Stack (It’s on sale right now for half-price on the Year End Closeout Sale!) behind the die-cut tree.

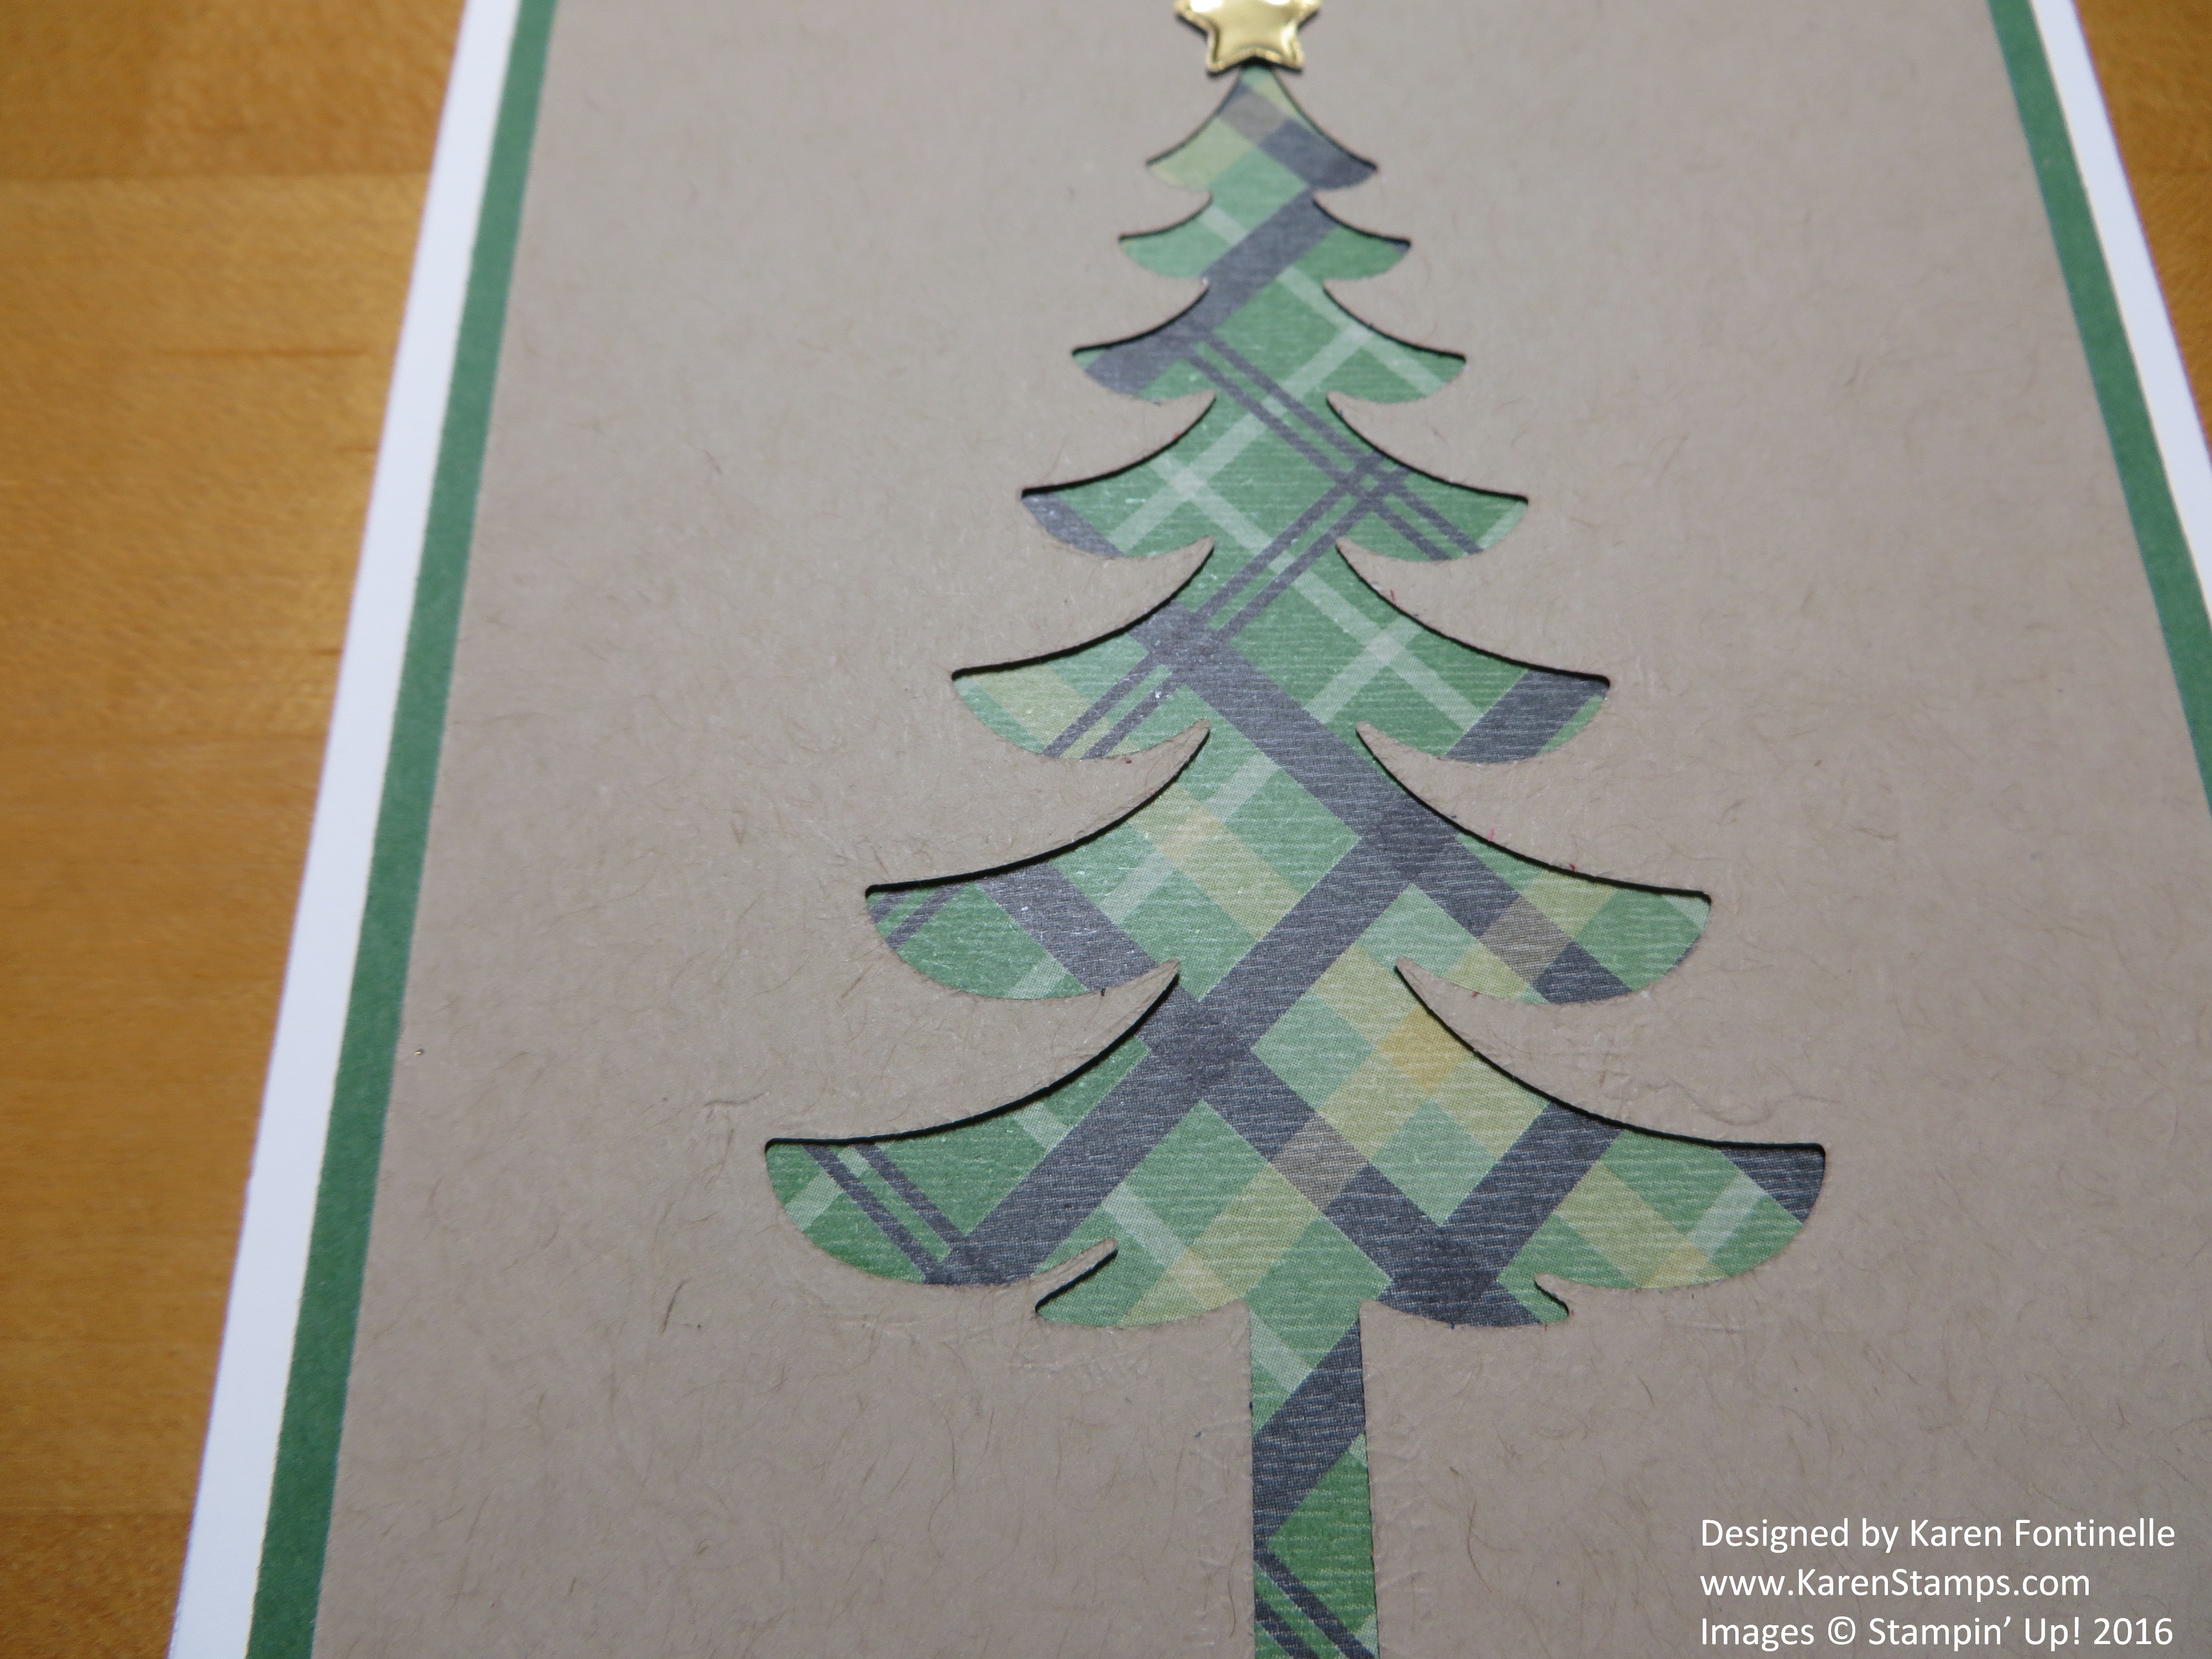
Just start with a card base of Whisper White and add a layer of colored cardstock. I decided to use three of the different green patterns in the pattern stack, so on two cards I used Real Red cardstock for a layer and on one I used Garden Green. Just to make another change, I used Crumb Cake for the top layer. I used my Big Shot and the tree framelit in the Santa’s Sleigh set of dies. Then just adhere a piece of the patterned paper behind the cut out, making sure the whole open area is covered!  Save the trees you cut out, maybe you can use them on another project! If you wanted to, you could adhere a piece of brown cardstock for the tree trunk. There is a small star die in the Santa’s Sleigh Thinlits Dies so I cut a gold foil star for each card. The greeting is in the Santa’s Sleigh Photopolymer Stamp Set, but you could use any greeting you liked.

Here is a close up so you can see the die cut and the patterned paper underneath.

Santa's Sleigh Warmth & Cheer Christmas Tree Card

You could probably even add some bling to this card if you wanted to like some sequins or Enamel Dots or some die cut bows, but I think it looks perfectly fine simple as it is! Sometimes you have to know when to stop!  Try this Santa’s Sleigh Warmth & Cheer Christmas Tree Card for a simple design and easy assembly.

Shop Stampin’ Up! Online 24/7 HERE!

Did You See Sara Douglass on the Today Show?!

Sara Douglass on Today

Image Stampin’ Up! 2016

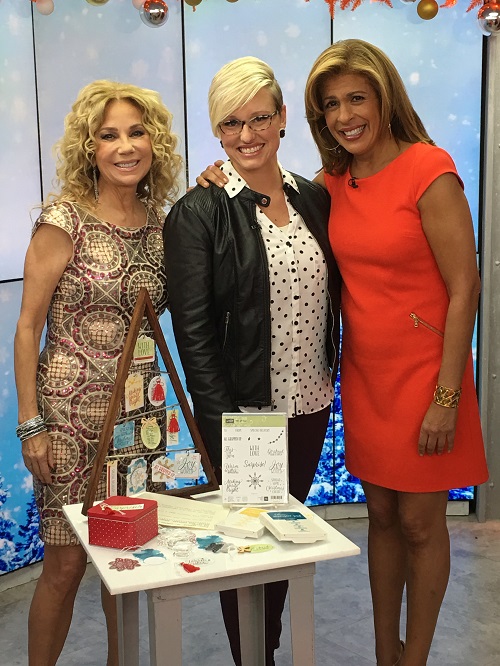
Did you see Sara Douglass, CEO of Stampin’ Up! on the Today Show yesterday??  She was there to donate $2.5 million dollars in Stampin’ Up! papercrafting products to the annual Today Show 2016 Toy Drive.  In fact, the donation was so generous that the Today Show electronic screen didn’t even go above $2 million!

On display was the Tin of Tags Project Kit, and Sara mentioned part of the donation would be kits, that make it easy for anyone to create!

To read more about Sara’s appearance on the Today Show, check out the Stampin’ Up! Blog HERE!  We’re all so proud to be associated with Stampin’ Up! and their generosity!

Shop Stampin’ Up! Online HERE!

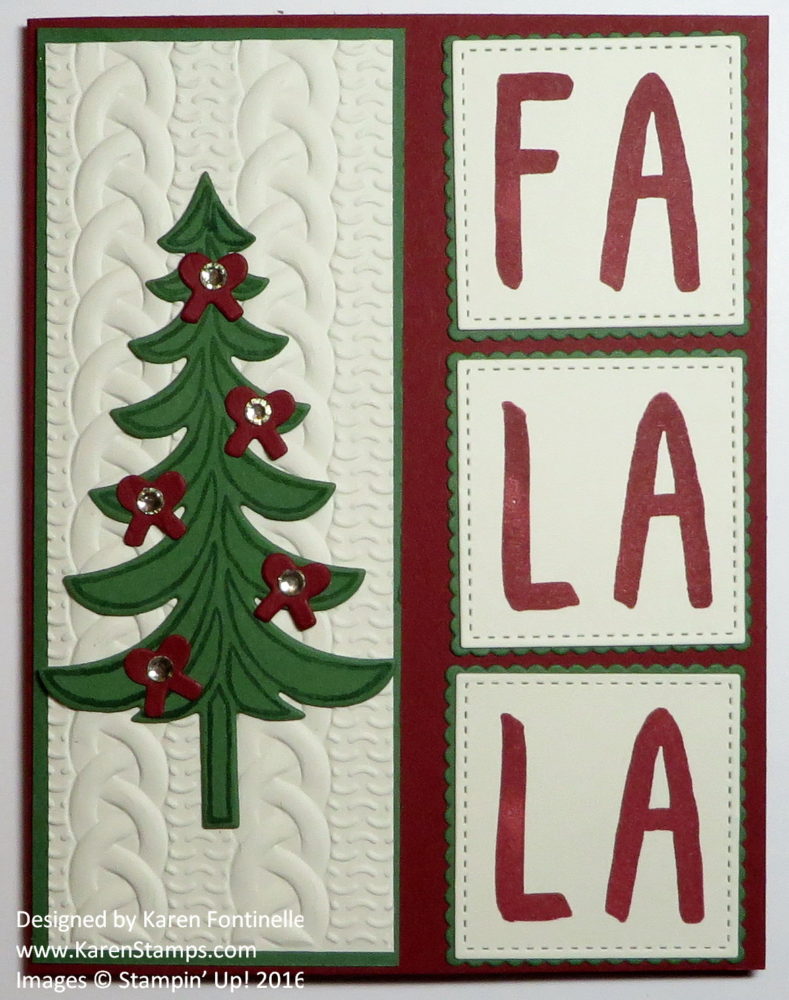
Layered Letters Fa La La Christmas Card

Layered Letters Fa La La Christmas Card

Usually I don’t know what I will end up when I start to make a card or project even when I “think” I know what I am going to make, as is the case with this Layered Letters Fa La La Christmas Card.  And you never know where your inspiration will come from – and how much your final project will change from that inspiration!

On a store website, I saw a pillow with “Fa La La” printed on it, and I immediately thought of the Layered Letters Alphabet Stamp Set.  I thought their colors looked a lot like Cherry Cobbler so that is how I started. I decided to stamp the letters and then die cut with the new  Stitched Shapes Framelits Dies.  These dies are unavailable right now but will be back! The Garden Green background layer is cut with the Layering Squares Framelits Dies.

I couldn’t fit just the three words on the card very well so I tried to see what else I could do.  I thought the Christmas tree from Santa’s Sleigh would be nice. You can get the stamp set and framelits in a Bundle and save 10%! And in the Bundle you also get little bows, which I used to decorate the tree!  I added a Rhinestone Jewel to each bow since I hadn’t stamped the bows first, and I like the way they look!  I thought the background needed a little something, so as I looked for the Sparkle Embossing FolderI came across the Cable Knit Dynamic Folderwhich is probably good for almost anything!  It’s so beautiful!

And that’s how my card turned out that started with just “Fa La La” in Cherry Cobbler on Very Vanilla turned out!

Shop Stampin’ Up!  It’s not too late for Christmas!

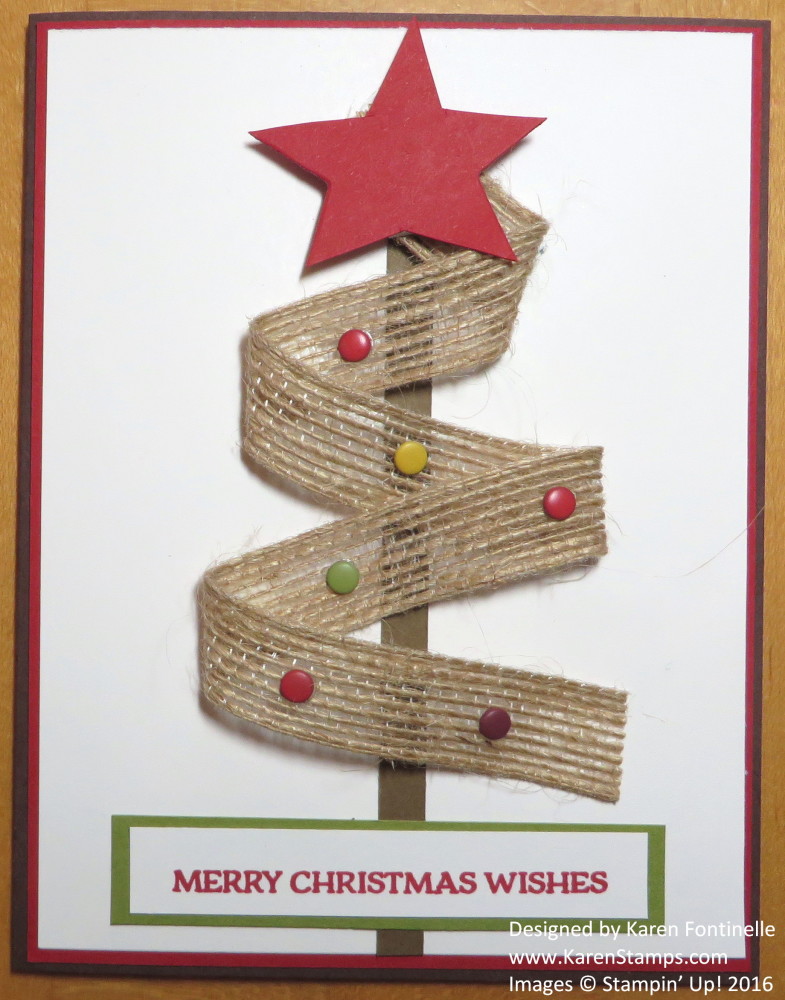
Burlap Ribbon Christmas Tree Card

Burlap Ribbon Christmas Tree Card

Did you know you could use our 5/8″ Burlap Ribbon to make a Burlap Ribbon Christmas Tree Card?  I saw a similar idea on Pinterest that I thought was pretty cute, so I looked over my current Stampin’ Up! ribbons. I first thought I would use the Delightful Dijon ribbon in the Trio Pack, but then I spotted the Burlap Ribbon and I wondered if that would work! I suddenly liked the thought of a “rustic” look to the card! If you really wanted to be rustic, you might use a real twig for the tree trunk, but I just used a strip of Soft Suede cardstock. To adhere the ribbon to make the tree, I just used Stampin’ Dimensionals but kind of hid them under where the ribbon folded over. The top one is hidden underneath the star.  At the very end of the ribbon, I used a couple of Glue Dots.

The star was a problem as I didn’t have a punch or framelit that seemed like quite the right size so I did die cut a star with one of the Mini Treat Bag dies, but then cut it down a little in size. It’s not perfect, but since it’s “rustic” it could be a little wonky!  I could have stopped them, but oh no, I thought maybe those Enamel Dots might be fun to look like ornaments.  The greeting comes from the Santa’s Sleigh Photopolymer Stamp Set.  The card base is Early Espresso, the layer Real Red, and then the top layer Whisper White.

Check your ribbon selection and see what you can use to make a ribbon Christmas tree card like this one!

Shop Stampin’ Up! Online for all the best supplies!  In fact, if you need some ribbon to make ribbon Christmas trees, check the Year-End Closeout Sale by Stampin’ Up! There are several you could pick from!

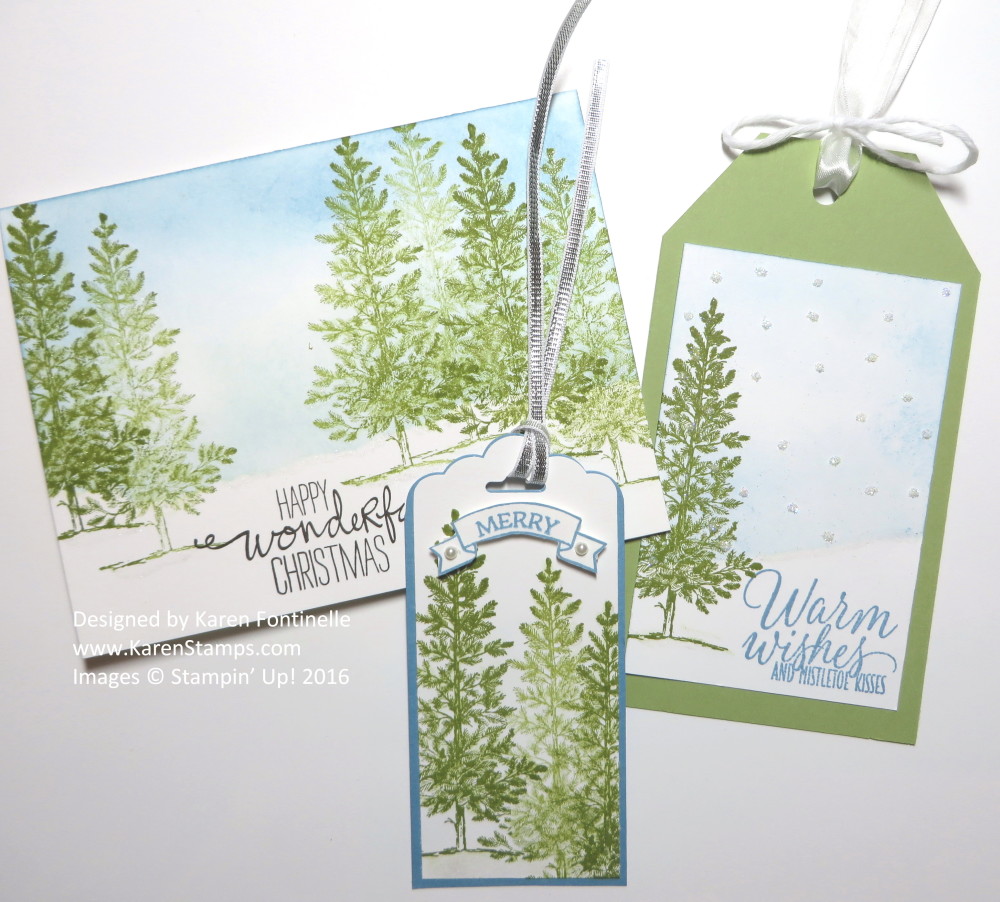
Stampin’ Up! Lovely As a Tree Christmas Card and Christmas Tags

Lovely As a Tree Christmas Card and Christmas Tags

What would Christmas be without a Lovely As a Tree Christmas Card and matching Christmas Tags?!  Lovely As a Tree is a classic stamp set, maybe the oldest stamp set that Stampin’ Up! carries. It’s been around as long as I’ve been a Stampin’ Up! Demonstrator. There was a funny moment at one Stampin’ Up! Convention when Shelli Gardner was on stage stamping and she couldn’t believe Lovely As a Tree was still a current stamp set! I’m not sure, but I think most all of us prefer to keep Lovely As a Tree around for a lot longer because it just works so well for many cards and projects. If you google this stamp set, you will find the most gorgeous, creative cards!  I think it was one of the first stamp sets I ever bought as a customer!

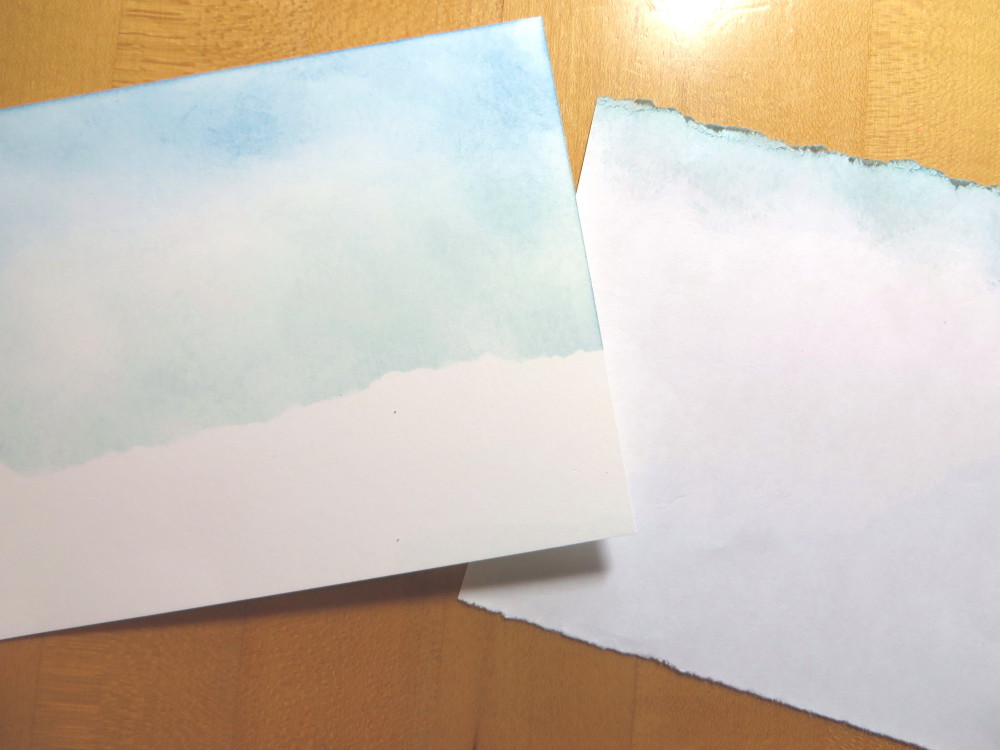
To make the card, I tore a piece of computer paper to make a rough edge and laid it down along the bottom of the Thick Whisper White card base. Then I just sponged on some ink – Soft Sky at the bottom and Marina Mist farther up. Use a light touch because you can always go back and apply more ink.Torn Edge Sponging

For the fun part of stamping the evergreen tree, I used Pear Pizzazz, stamping once and then stamping again without reinking to get that lighter look.  The stamped greeting is from the Wondrous Wreath Stamp Set. For a finishing touch, although you cannot see it in the photo, I used the Clear Wink of Stella Glitter Brush for some shimmer and shine on the trees and here and there on the snow at the base of the card.

As long as I had my materials and stamps out, I thought I would make a couple Christmas tags. The smaller one is punched with the Scalloped Tag Topper PunchIf you prefer a different look, you can use the Ornate Tag Topper Punch which happens to be on sale in the Year-End Closeout.  The little banner is from the Sweet Home Photopolymer Stamp Set as is the word “Merry”. It’s easy to cut out by hand with Paper Snips. The second tag I just cut by hand to make it wider. Again I sponged the snowy ground and sky with a scrap piece of cardstock that just happened to be curved. To make the snowflakes, I put down dots of glue with the Fine Tip Glue Pen and sprinkled on Dazzling Diamonds Stampin’ GlitterAgain, the Dazzling Diamonds Glitter is a long-time product of Stampin’ Up!, we have used it forever, and I personally hope they keep it around for a long time.  So easy to use, although I have to say I miss the retired Glue Pen we used to use on the trees. Using the Fine Tip Glue Pen gives a bit of a 3-D look, which worked well with the tiny snowflakes.

If you don’t already own the Lovely As a Tree Stamp Set, please put it on your next order!  You won’t be disappointed and will get lots of use out of it.  I have the original wood-mount stamp set, but now you can also buy it in Clear-Mount. It’s great for masculine cards, Christmas cards, all-occasion cards, birthday cards, you name it!

Don’t forget to check out the ongoing Year-End Closeouts Sale!

Shop Stampin’ Up! 24/7 in my Online Store!

Stampin’ Up! Retiring List and Year-End Closeout Sale

Stampin' Up! Closeout Sale Banner 2016

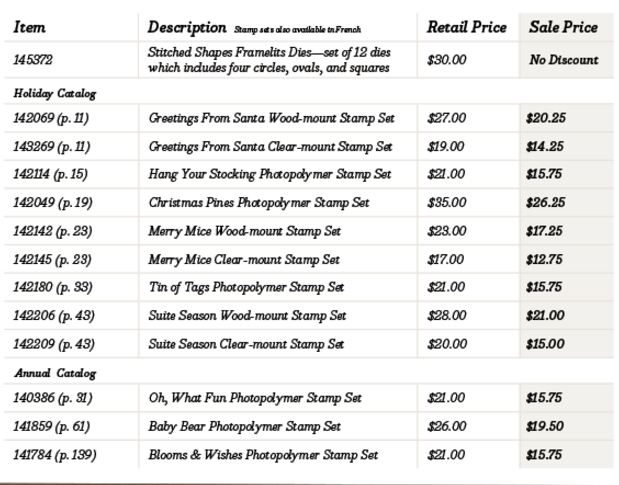
Today begins the Stampin’ Up! year-end closeout!  Year-End Closeouts will include holiday retiring products, clearance rack items, and current high-inventory catalog products.

SHOP HERE FOR YEAR-END CLOSEOUTS!

Click HERE for the Retiring List

The Retiring List will be updated daily with what is no longer available. You will see an “X” in the “Available” column.

  • Clearance Rack items are only available while supplies last.
  • Following the Year-End Closeouts promotion, some products may remain on the Clearance Rack; other items may be removed from the Clearance Rack to be added at another undetermined time.
  • High-inventory items will only be discounted through January 3; beginning
    January 4, they will still be available, but at regular price.
  • Retiring stamp sets are guaranteed available until December 21, after which they will be only available while supplies last.
  • Retiring accessories will only be available while supplies last. Retiring items will only be available while supplies last.
  • All retiring items will be discontinued after January 3.

JUST GO SHOP!  See what you can pick up at a discount from the Stampin’ Up! Closeout Sale!  CLICK HERE!

Rudolph the Red-Nosed Reindeer Mini Treat Bag

Rudolph the Red-Nosed Reindeer Mini Treat Bag

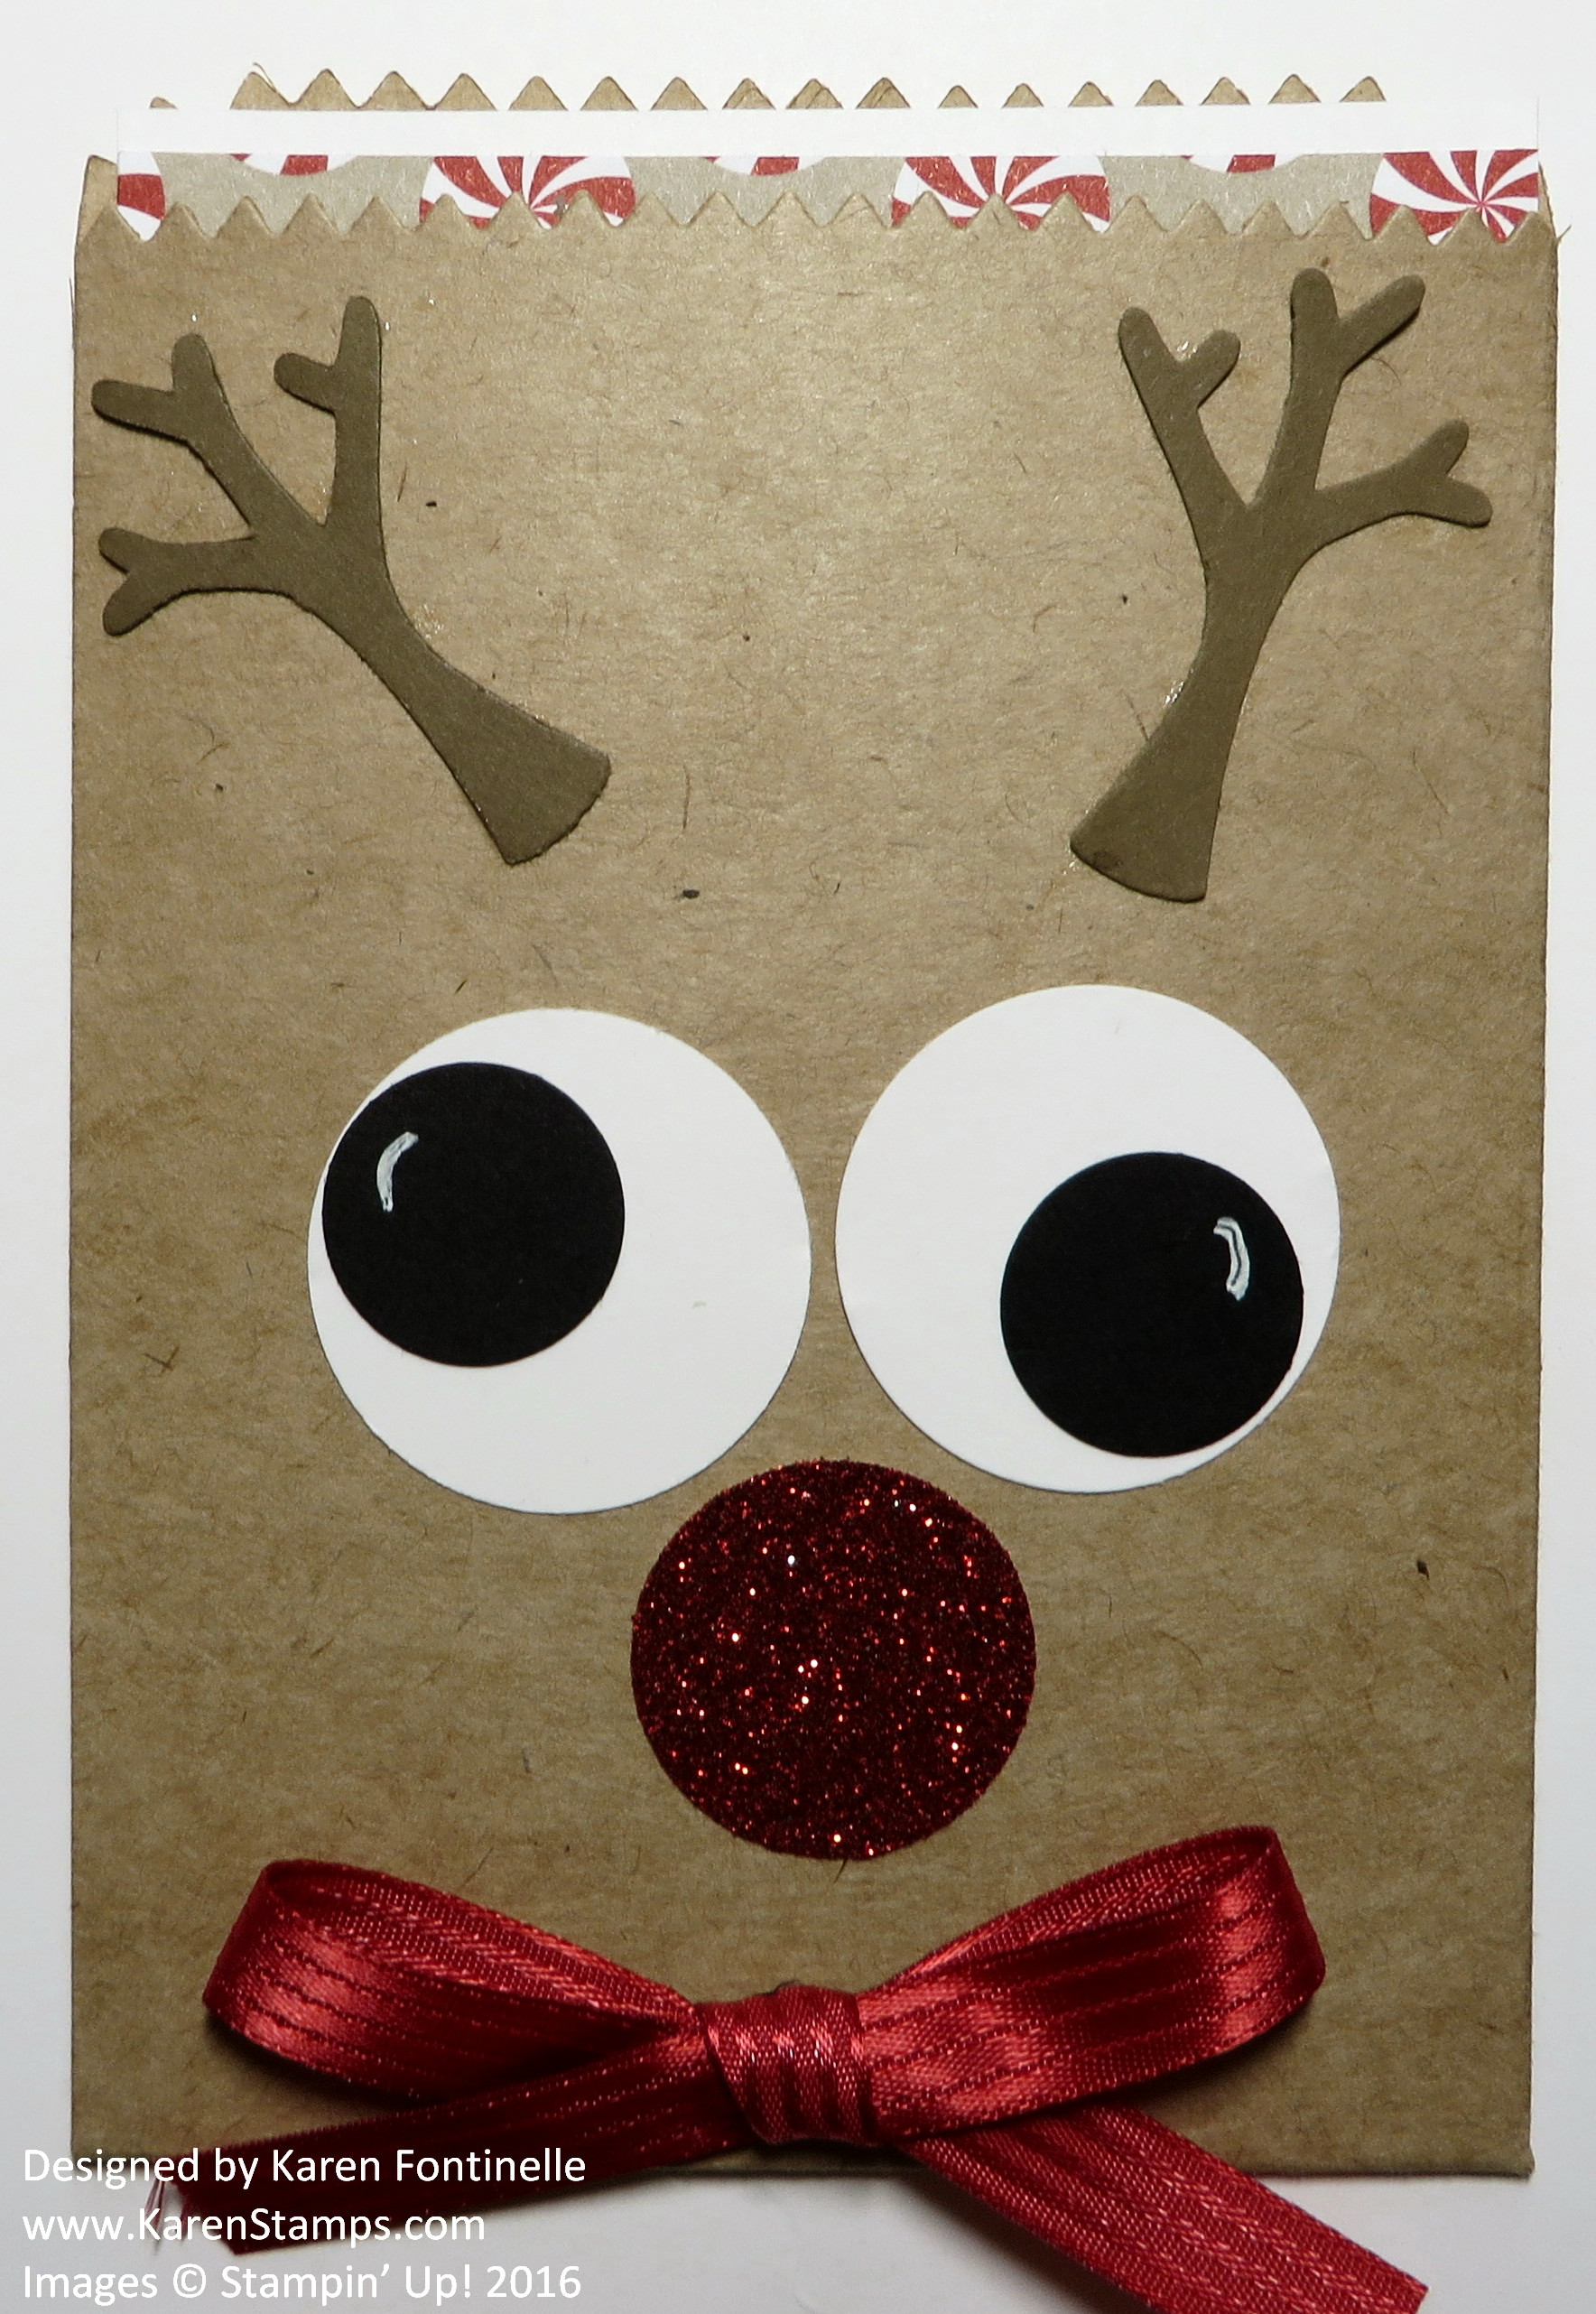
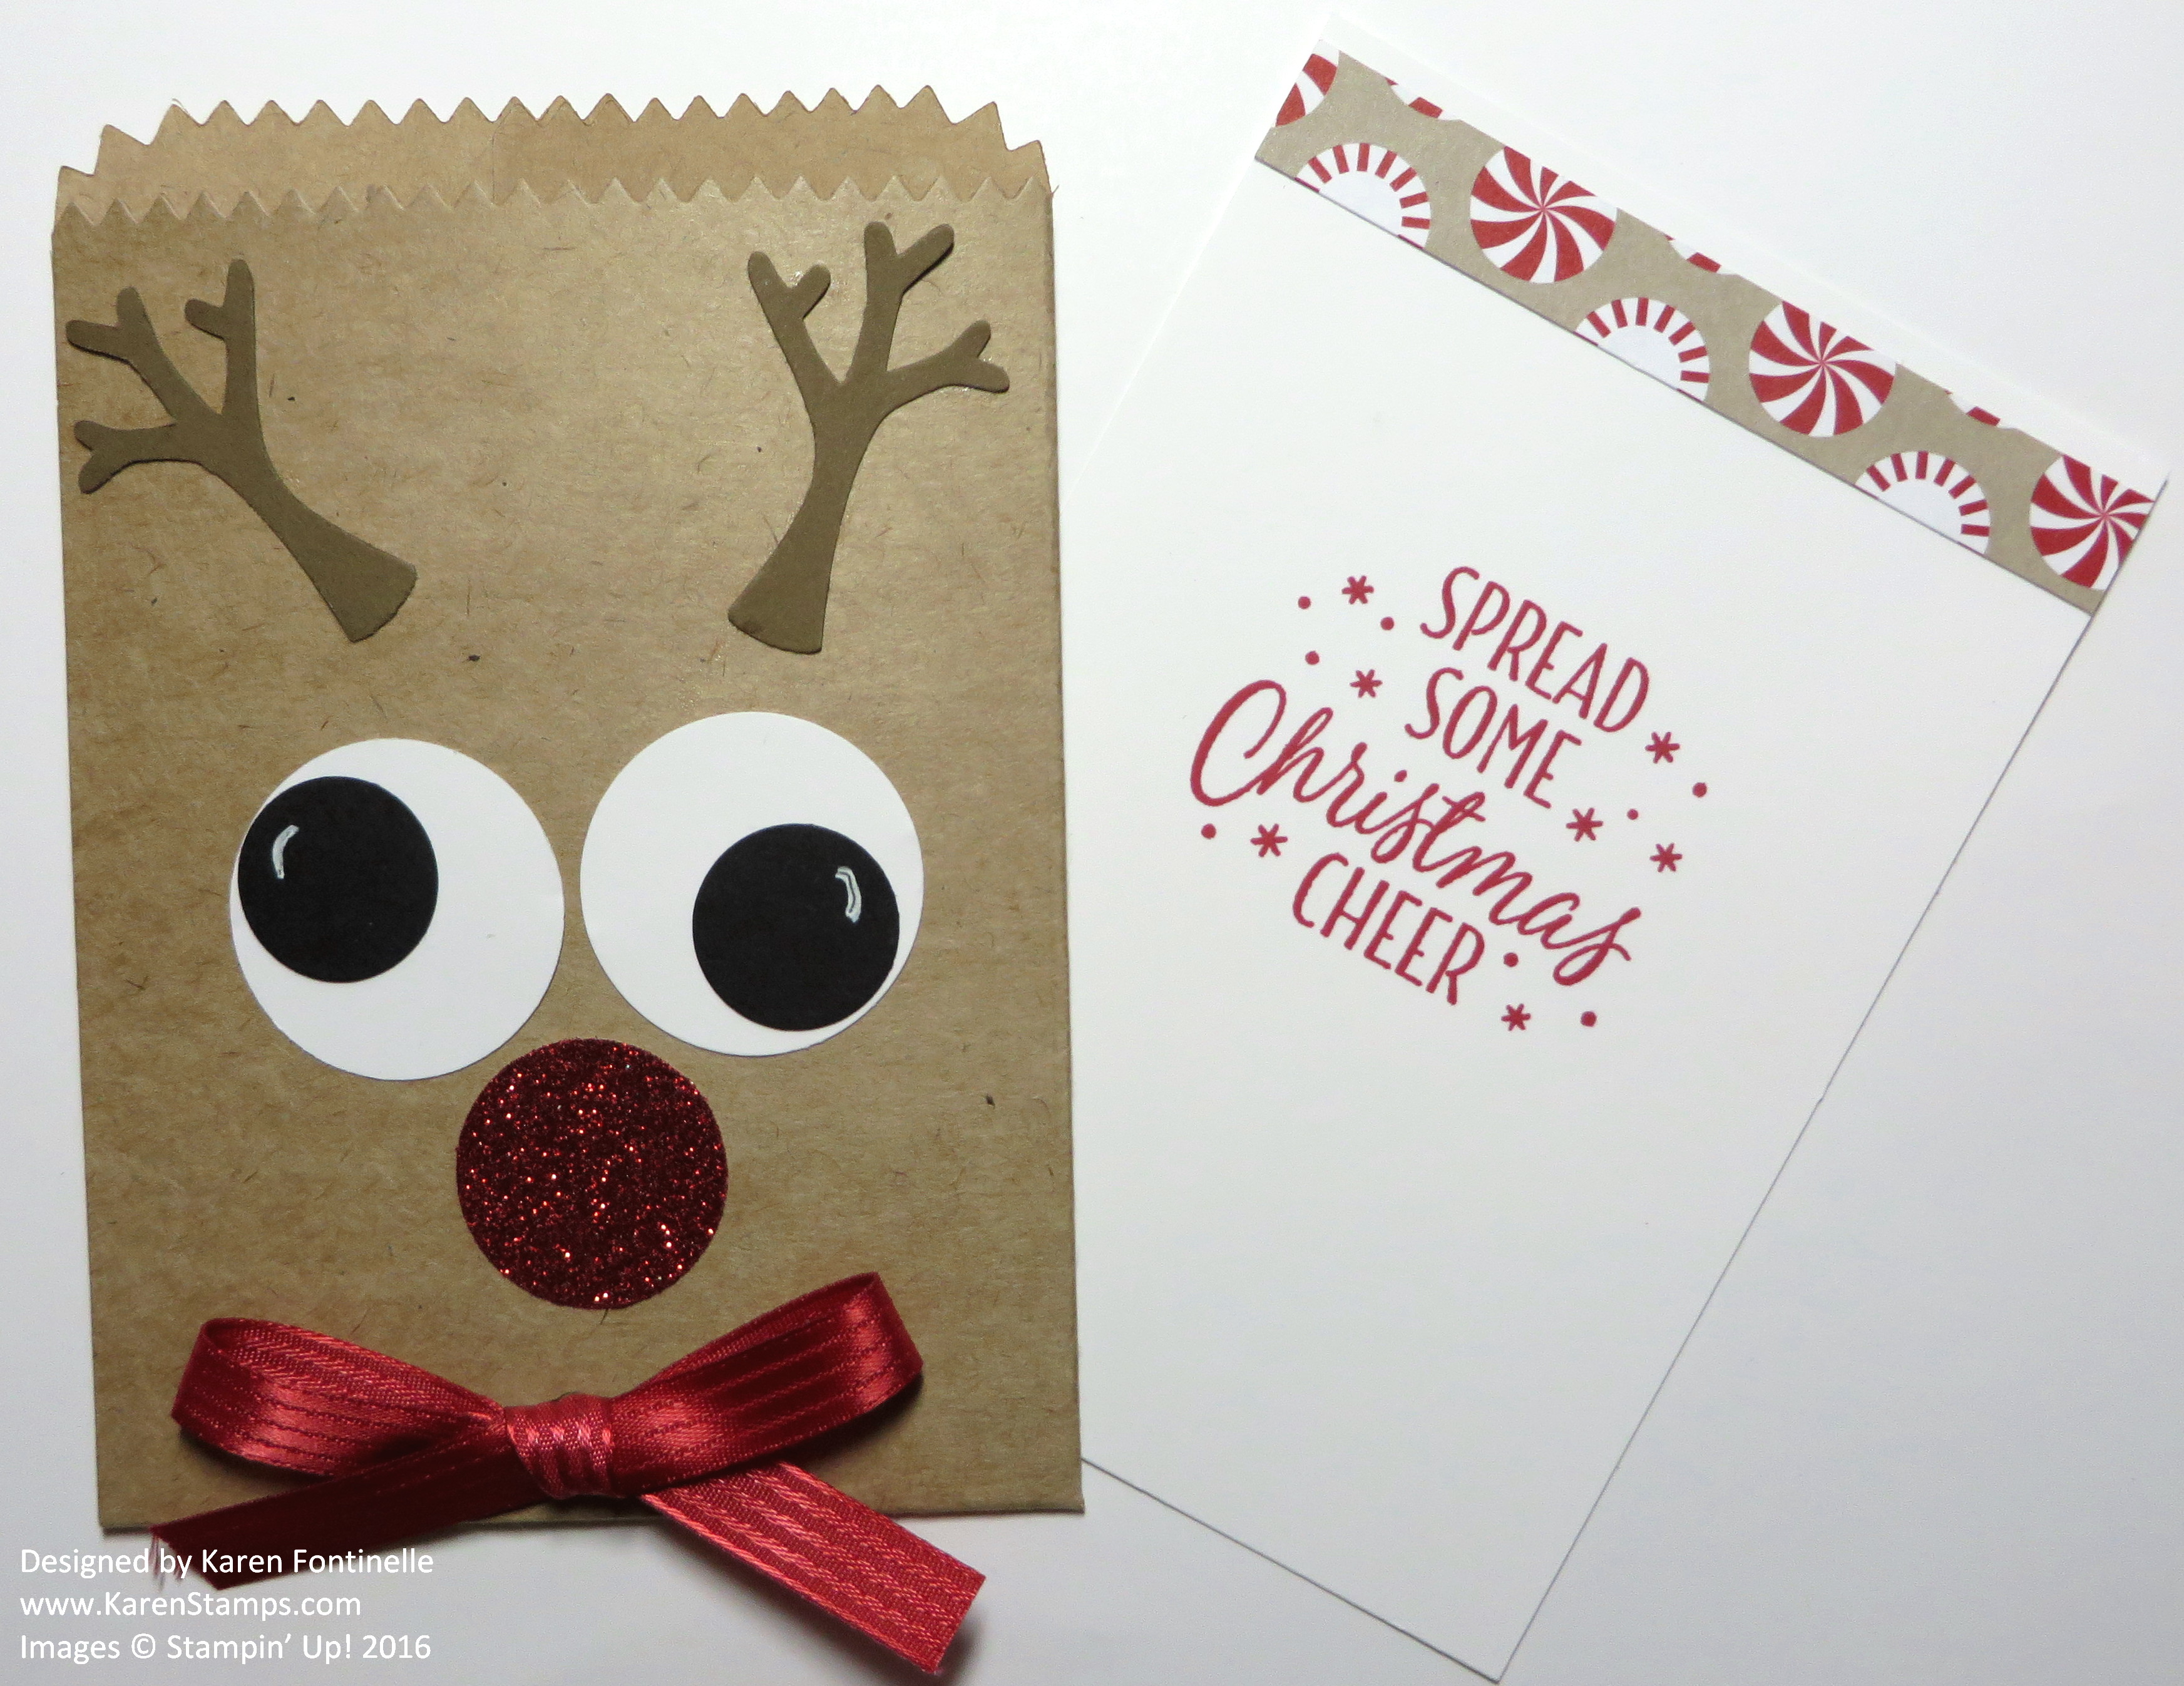
Last year I decorated a kraft gift bag much like this Rudolph the Red-Nosed Reindeer Mini Treat Bag and it was quite popular. This year I thought I would try something similar with one of my favorite products, the Mini Treat Bag Thinlits Dies!  I loved this project because you can use the treat bag as a treat holder, a small gift holder, or as a Christmas card! If you look closely you can see the top of the card I inserted in the treat bag with a strip of the Candy Cane Lane Specialty Designer Series Paper.

Rudolph the Red-Nosed Reindeer Mini Treat Bag Card

To make the mini treat bag, of course I used the Big Shot and the Mini Treat Bag Thinlits Dies. I made this bag out of our Kraft 12″ x 12″ Cardstock. Rudolph’s antlers are punched with the Tree Builder Punch.  The eyes are punched with the 1 1/4″ Circle Punch out of Whisper White and the black pupils with the 3/4″ Circle PunchI marked a little “highlight” on the eyes with my White Stampin’ Chalk MarkerThe Red Glimmer Paper nose is punched with the 1″ Circle Punch.  And I had to tie a bow on the reindeer with the Real Red 3/8″ Stitched Ribbon.

The card is cut from Whisper White Cardstock to fit inside the treat bag. I adhered a strip of designer paper to the top and stamped a greeting from the Tin of Tags Stamp Set. You don’t have to have the Tin of Tags in order to make good use out of this stamp set. It stands on its own!

LAST DAY For STITCHED FROM THE HEART STAMP SALE!!

Stamp Set Sale Nov 2016

Today, November 30, is the last day for the Stitched From the Heart Stamp Sale! Check out the list one more time (click HERE) and see if you can pass up any of these great stamp sets at 25% off!

Year End Closeout 2016 Banner

New Announcement!

Check back tomorrow, December 1st (if you can believe that December will be here tomorrow!!!) to see the list of all items from the 2016 Holiday Catalog that are retiring and will no longer be available for purchase after January 3, 2017.

I don’t know yet what is on the list!  We will all find out tomorrow! Check back here on my blog or at my Online Store HERE.  I’m sure you will be able to click on the banner you see there to see all the products!

I hope you got a kick out of the Rudolph the Red-Nosed Reindeer Mini Treat Bag and can use this inspiration for one of your own projects!

SHOP STAMPIN’ UP! ONLINE HERE!

Paper Pumpkin November 2016 Kit Wonderful Winterland

Paper Pumpkin November 2016 Kit Wonderful Winterland

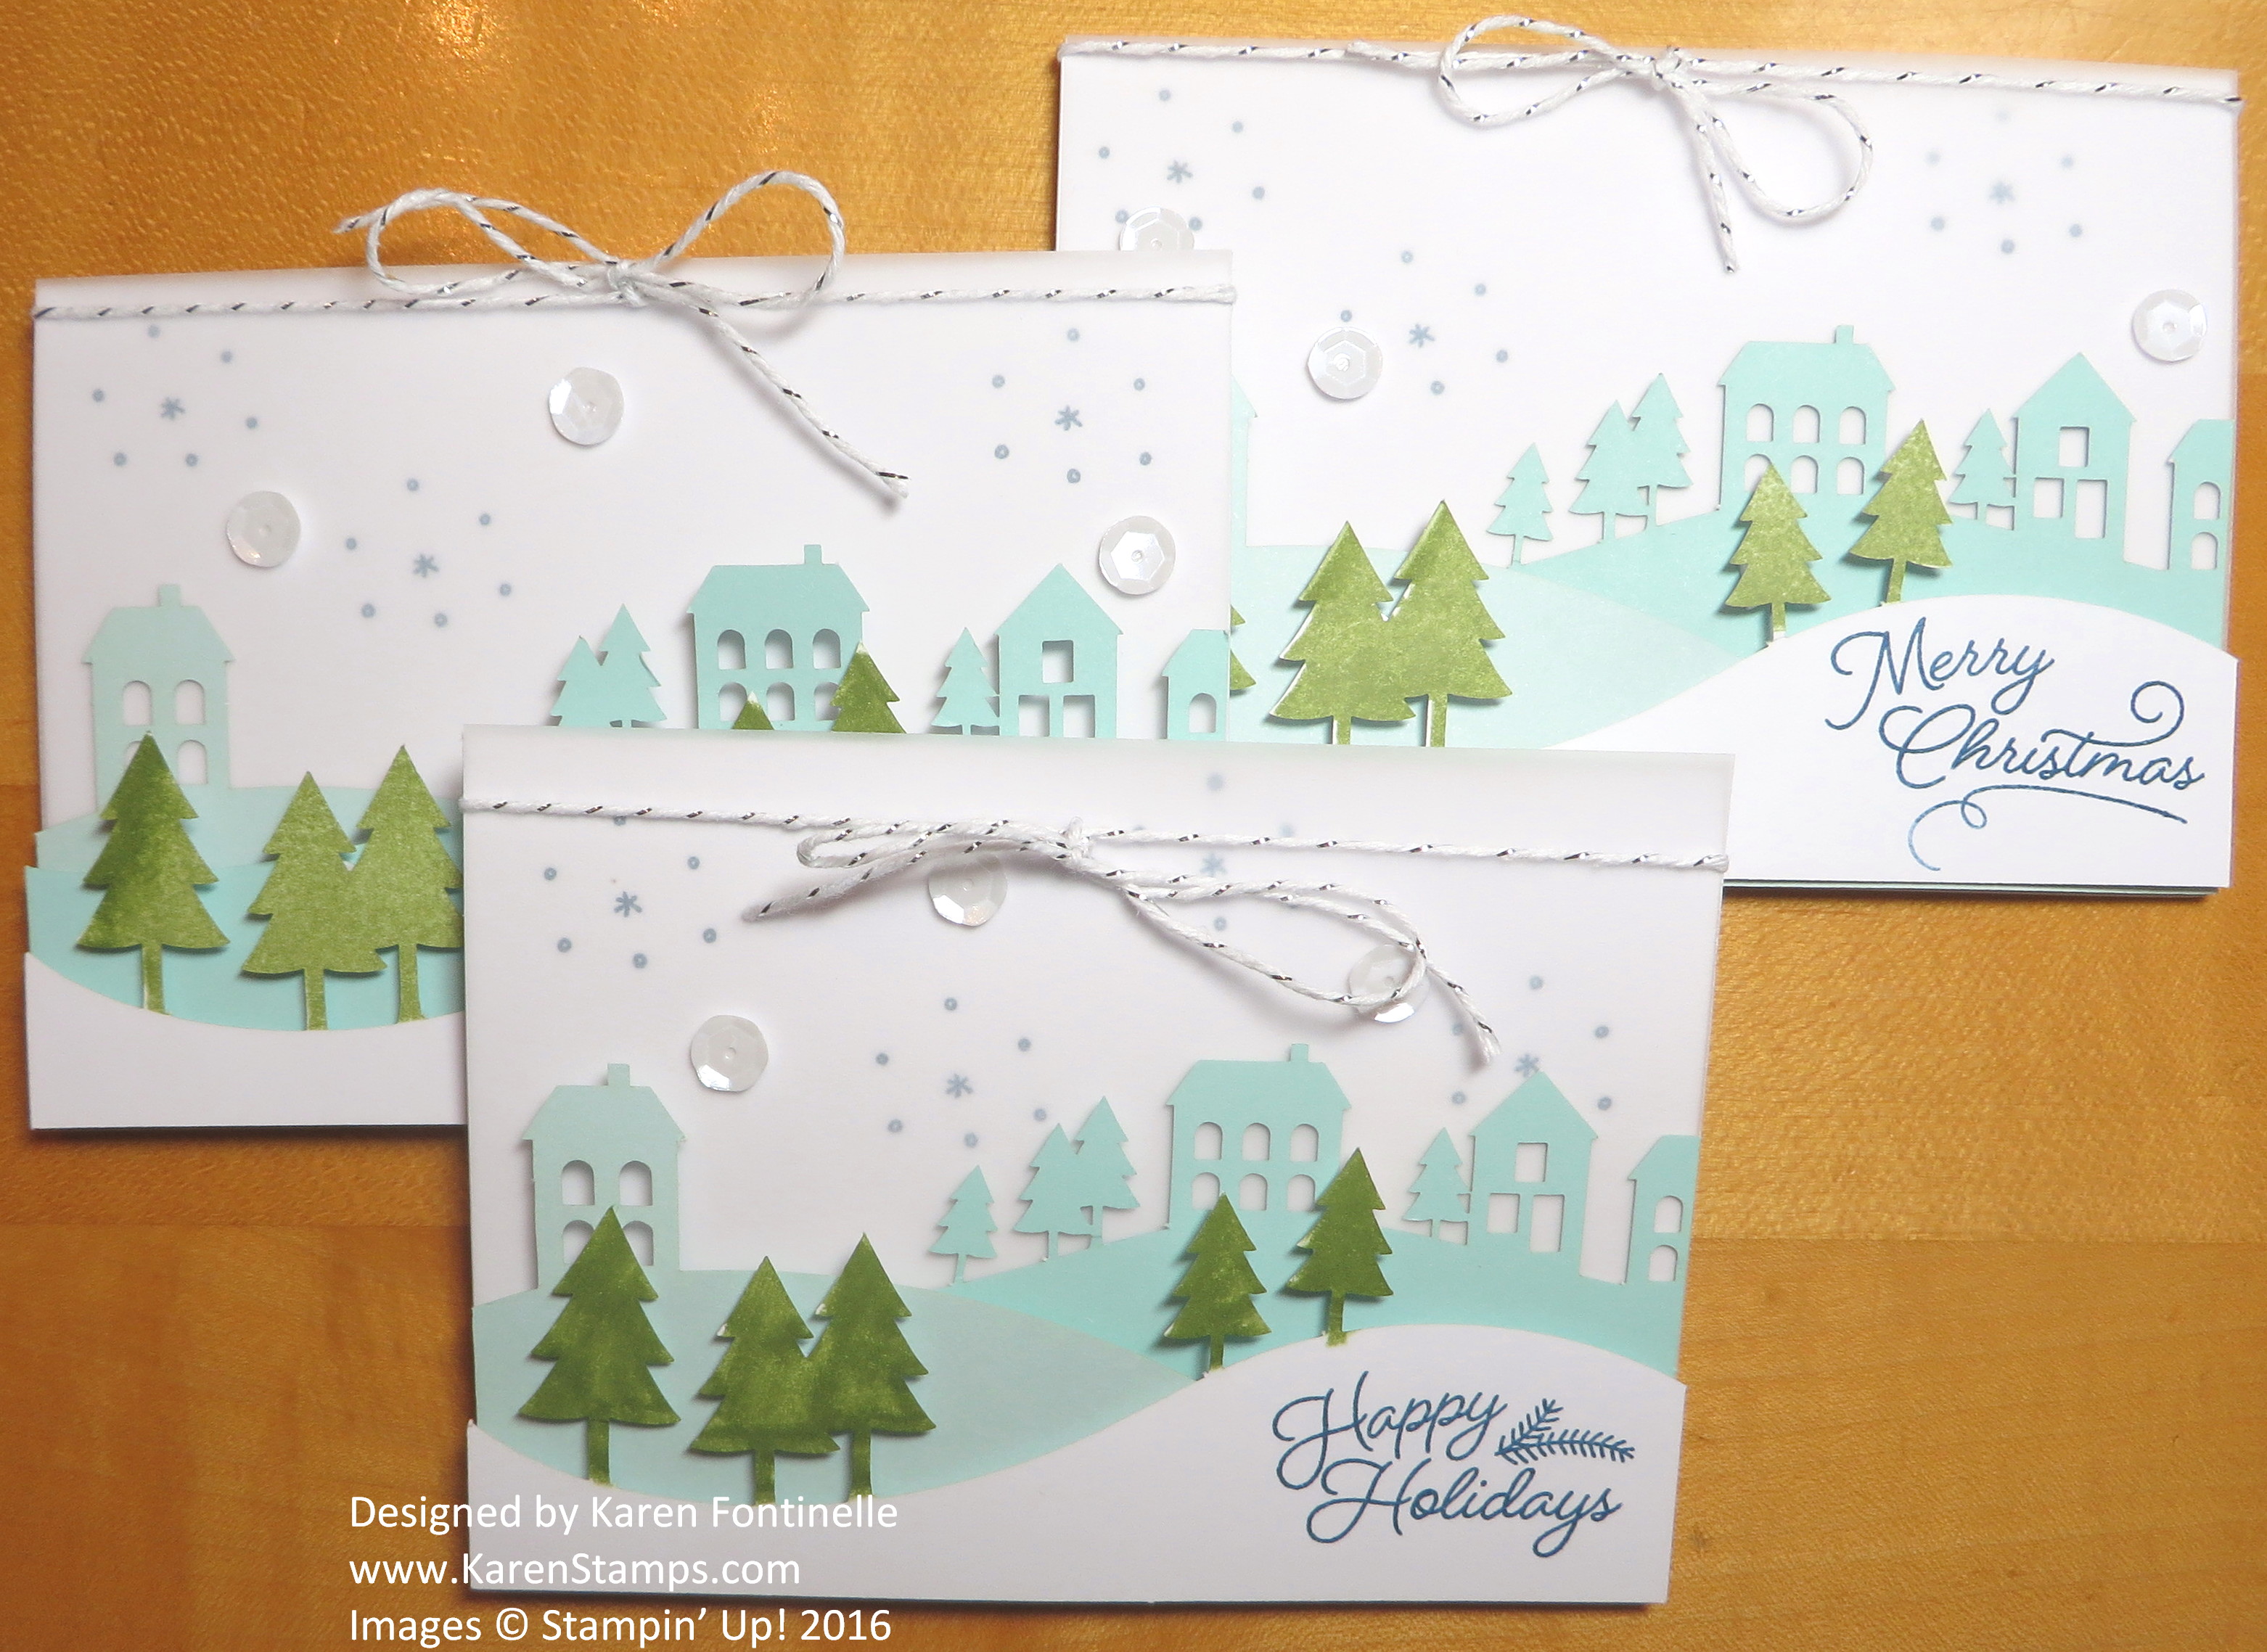
On the day after Thanksgiving, it seemed like a good idea to start working on my Paper Pumpkin November 2016 Kit Wonderful Winterland. This is a beautiful kit with these die cut scenes that are layered one on top of another but popped up with dimensionals with a vellum layer in the background and then adhered to the little note card. The snowflakes, trees and greeting are all stamped. The sequins and metallic baker’s twine add the finishing touches to the cards (as well as the twine holding the vellum in place so no adhesive will show!).

If you haven’t heard of Paper Pumpkin, it’s a monthly subscription kit from Stampin’ Up! that comes to you in the mail. Whether you are an advanced crafter or a beginner or not a crafter at all, it’s a kit that entices you to spend some time for yourself, relaxing, and enjoying making the project inside the box! With your first kit, you receive a clear acrylic block on which to mount the stamps. Each kit includes an exclusive stamp set and an ink spot (a 1″ square ink pad!) plus directions and all the materials you need for the project. Each month is a surprise! There is even a Stampin’ Up! video each month showing you how to assemble the kit if you like to watch rather than just read the directions.

Of course it’s your box, so you can change the project and make alternate creations or make it exactly as it is designed! Whatever you want, it’s your craft time! (Some would call it therapy time!!).

Join Paper Pumpkin by December 10th to receive the December kit! Once you are a subscriber, you can purchase any past kits or refills that are available. (There are some available now on the Online Extravaganza.)

Maybe you would like to gift someone with Paper Pumpkin for Christmas as well as getting a subscription for yourself!  You can also order extra kits any month that you choose as long as you change the quantity by the 10th of any month. Skip a month when you need to or cancel your subscription if you must.  No risk, no obligation!  Worth a try!

Check out the video for the November 2016 Kit!

You can get more information  at www.PaperPumpkin.com or go to my direct link HERE.

Do it for yourself!  You deserve it!

Sprinkles Punch Easy Holiday Card

Sprinkles Punch Easy Holiday Card

In the midst of your Black Friday shopping, don’t forget the Stampin’ Up! version, the Stampin’ Up! Online Extravaganza with items on sale such as a couple of things on my Sprinkles Punch Easy Holiday Card.

This is a super easy card to make!  Just change the greeting and you can have a holiday card, a birthday card, a congratulations card, a new baby card, etc. I used a Whisper White card base with a Watermelon Wonder layer for color. On top of that, I added another Whisper White layer and then punched lots of In Color confetti with the Sprinkles PunchThe Sprinkles Punch is on sale through Monday, November 28, for 30% off!  All it takes are some tiny drops of the Multipurpose Liquid Glue either on the confetti piece or for the tiniest ones, just a tiny drop on the spot where you want to adhere the confetti. Then use a paper piercer to lightly stab the confetti to pick up and place over the glue!

Stamp the greeting first, of course!  Mine is from the Suite Seasons Stamp Set, another sale item on the Stitched From the Heart November Stamp Sale 25% off! I stamped it in Watermelon Wonder Ink to match the Watermelon Wonder 5/8″ Mini Striped Ribbon, also on sale 30% off!

You could even jazz up this card a little more with some Rhinestone Jewels or Enamel Dots or maybe some Wink of Stella!

Stamping With Karen’s Black Friday Special!

Place a $25 Stampin’ Up! order or more today through Monday, November 28 and get at least 5 random cards from me! Plus my usual Thank You card and surprise goodie inside!

Be sure to shop the Stampin’ Up! Online Extravaganza this weekend!

Star Wars Inspiration BB8 Punch Art Handmade Birthday Card

Star Wars Inspiration BB8 Punch Art Handmade Birthday Card

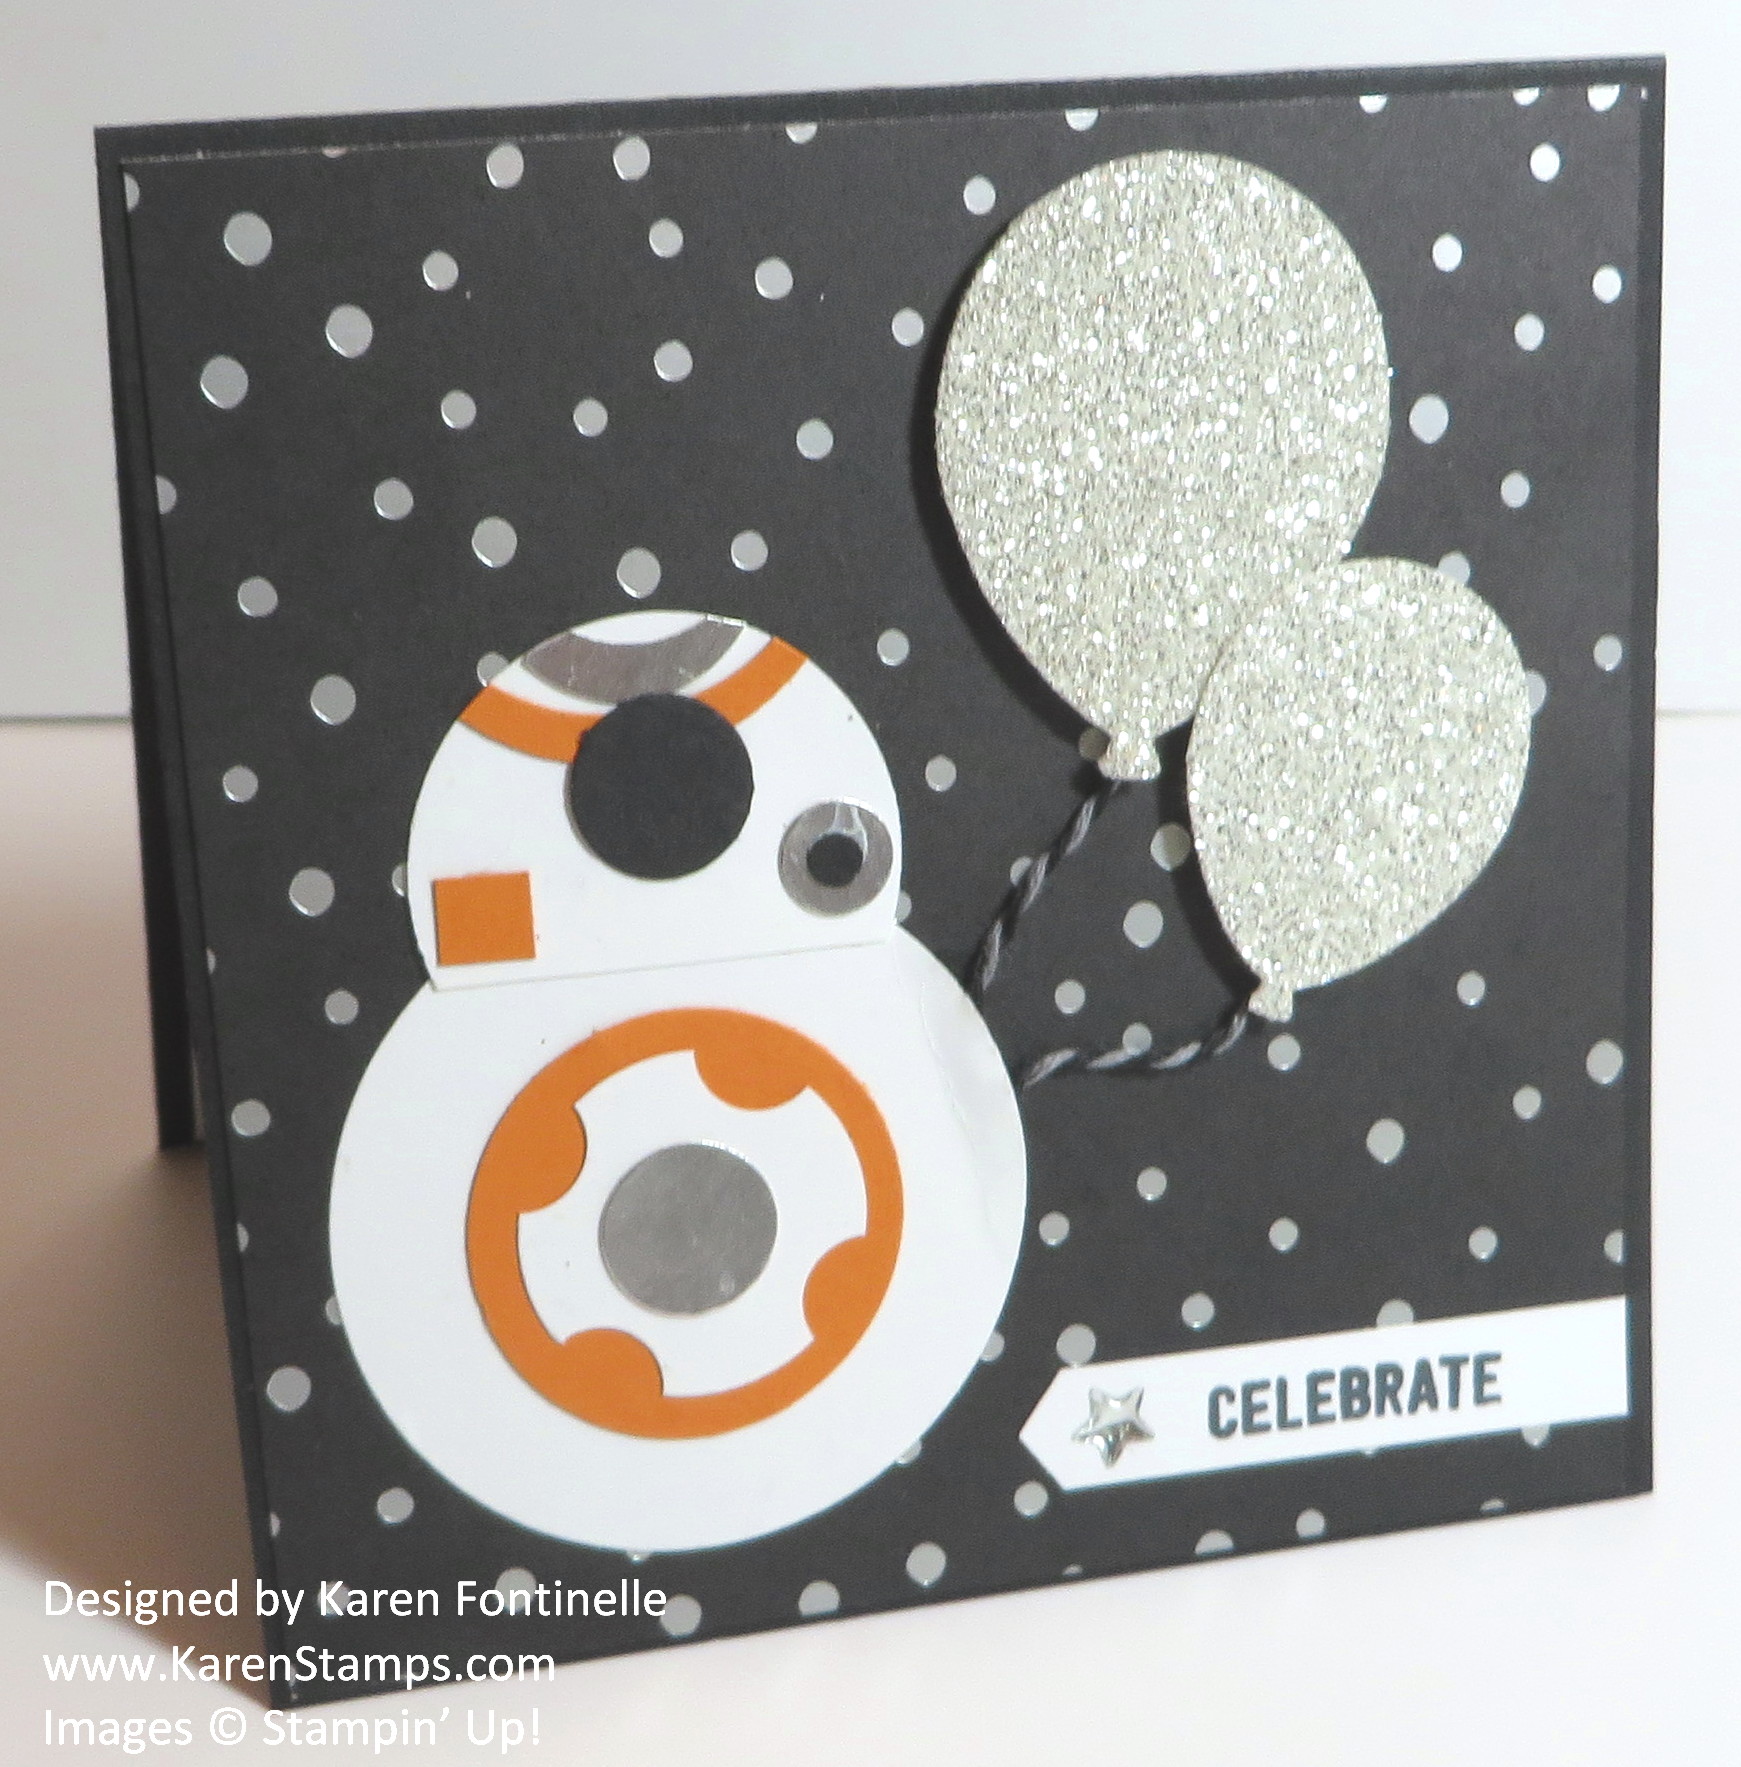
A few weeks ago I came up with this Star Wars Inspiration BB8 Punch Art Handmade Birthday Card  for my son-in-law’s birthday and I liked it so much I made another one for my son’s birthday a few days later. By now they both have received their cards in the mail so it’s safe to show it on my blog!

When you have a Star Wars fan in the family (who even appreciates your handmade cards), you just have to come up with a new idea for each birthday or occasion. After searching the internet of course, I came up with this card of BB8, one of the characters in the Star Wars movie that came out last year. The background paper is the foil embossed paper in the Halloween Night Specialty Designer Series Paper.  I think it is perfect for this card. To make BB8 I used several circle punches. I probably used the 1 3/4″ Circle Punch for the lower body, maybe the 1 3/8″ Circle Punch for the upper body, and then smaller punches for all the details.  I’m sure you can try the punches you have and see what fits on your card the way you want it!  Of course the birthday balloons are punched with the Balloon Bouquet Punch and punched out of Silver Glimmer Paper. The greeting piece is punched with the Classic Label Punch and I added a silver star from the Metallic Enamel Shapes.  

I love these Enamel Shapes and ordered the Bundle of all of them yesterday on the 24-Hour Flash Sale on the Online Extravaganza.  You missed that but you can still add them (not discounted) to your Online Extravaganza order any day this week until November 28! Don’t miss out on anything else!  And be ready for the Flash Sale on the last day, Monday November 28!

Shop Stampin’ Up! and the Online Extravaganza!