Category Archives: Cards

Painted With Love All-Occasion Card

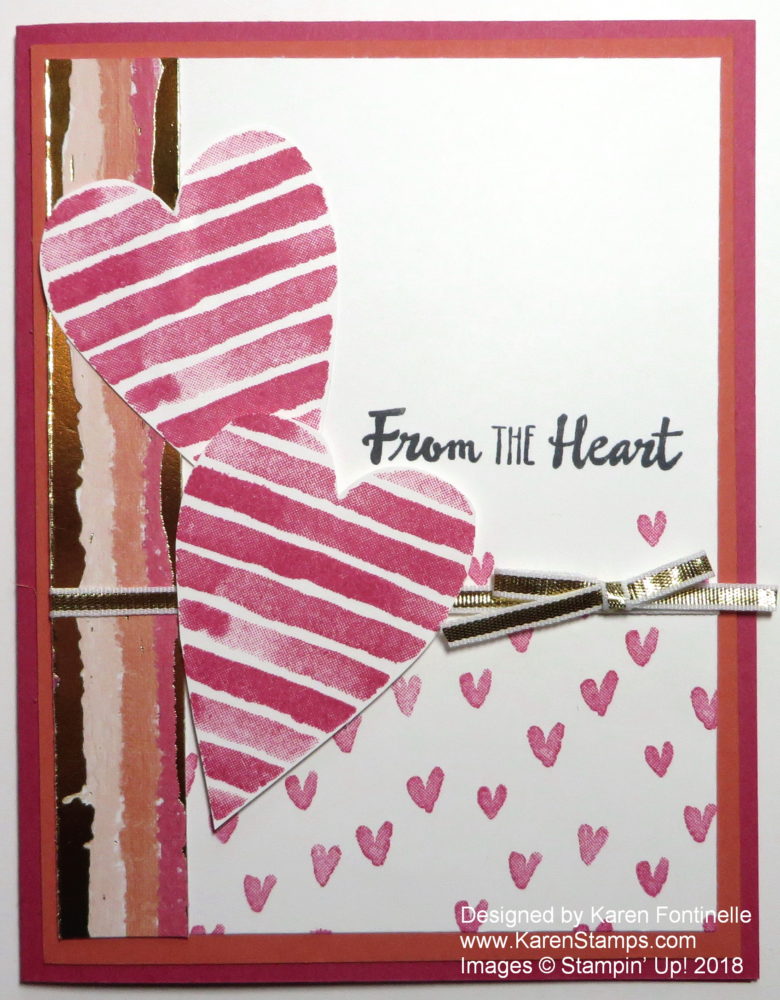
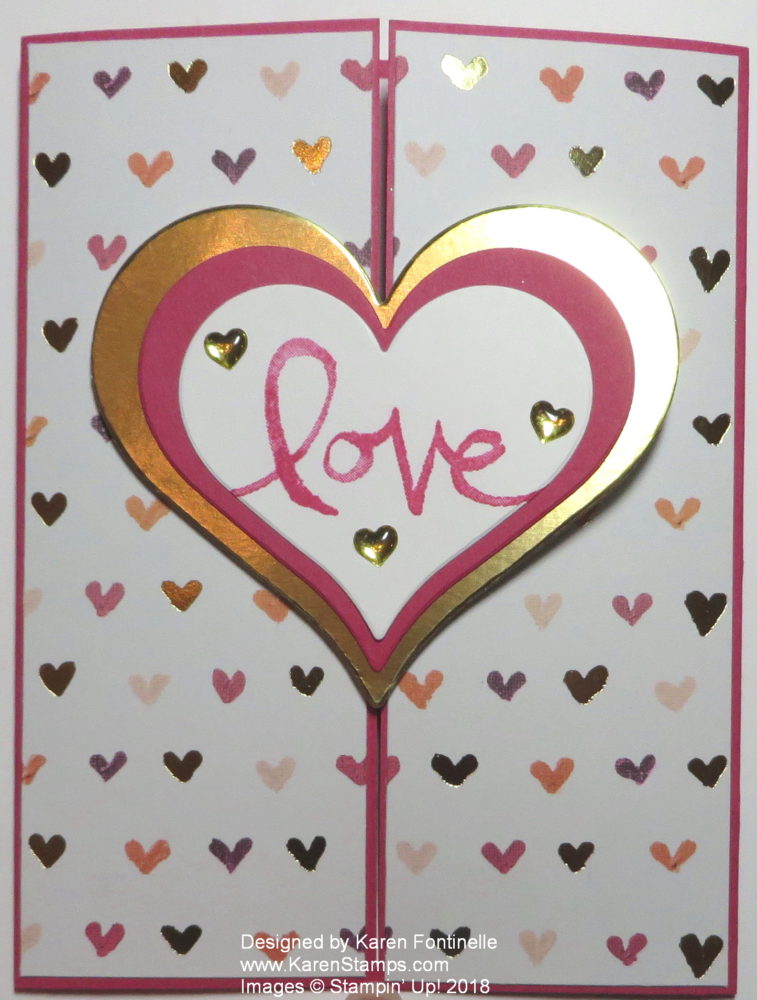
Painted With Love All-Occasion CardMy big order from the new Occasions Catalog came late last night so I finally have a multitude of new Stampin’ Up! products to play with!  This new Painted With Love Specialty Designer Series Paper is so beautiful in person and will make all kinds of fantastic cards and other projects. This Painted With Love All-Occasion Card can serve as a card for almost any occasion or a Valentine or birthday or anniversary or whatever you like.

The Heart Happiness Photopolymer Stamp Set is one that we will be able to use in many ways with all the hearts! I decided to stamp this flowery heart in Melon Mambo, one of the coordinating colors with the designer paper.  I die cut the flowery heart with one of the sizes in the Sweet & Sassy Framelits Dies and then cut a larger heart out of Gold Foil.

The card base is Melon Mambo and then the striped pattern is layered on the other pattern with a thin Gold Foil strip in between.  The heart is popped up on Stampin’ Dimensionals.

I could have added a greeting or more embellishment, but I just kind of liked it “plain and simple” like this. Now I can use the card for whatever I choose when I need it or still leave it plain and write my own message on the inside. It’s a good idea when you make a card similar to this Painted With Love All-Occasion Card to just leave it plain without a greeting, and then when you need a card, just stamp a greeting and add to the card.

Painted With Love DSP

SHOP STAMPIN’ UP! ONLINE!

Join My Stamping With Karen Mailing List Today

Red Mailbox for Mailing List Sign Up

DON’T MISS OUT!  JOIN MY STAMPIN’ UP! MAILING LIST

Why would you want more email?? Because this is FUN email about STAMPING! And who doesn’t want more ideas for stamping projects?  I know I always like to see new ideas for things to stamp…..even when I’ve seen hundreds of them! There always might be one more that will really inspire me!

Every Tuesday I send out an email.  The first Tuesday of the month is my longer email newsletter with several stamping and papercrafting ideas and complete directions, plus the latest Stampin’ Up! news. This gets you started for the new month!

The other three weeks I send out a shorter email with any updates or recent news or specials, but always another project or two! I even include my favorite or most popular projects on my blog in one of the emails called “The Best of the Blog”. They’re all there in one place for you!

When you sign up for my Mailing List, you will receive an email with a link to a FREE GIFT just for signing up with gift wrap ideas. These are easy things to do with whatever materials you have on hand.  Just change the paper or the stamp and you have an idea for perhaps a last minute gift wrap instead of racing to the store for a gift bag or wrapping paper! Much quicker to make your own!

Just put your name and email in the red box on the right of my blog or click HERE. Then watch for your Welcome Email in your Inbox and free gift!  We’d love to have you!

JOIN MY MAILING LIST FOR STAMPING IDEAS AND STAMPIN’ UP! NEWS!

New Stampin’ Up! Narrow Note Cards For a Birthday

Stampin' Up! Narrow Note Cards For a Birthday

Something new in the Occasions Catalog that you might overlook (I did!) are the Whisper White Narrow Note Cards & Envelopes. These Narrow Note Cards are perfect for enclosure cards in gifts, perhaps for a birthday, as I have decorated these! Use them for a birthday, Valentines, in a wedding gift – whatever the occasion!

These note cards measure  2-1/2″ x 4-1/2″ and the envelopes measure  2-3/4″ x 4-3/4″. Going by the envelope size, I doubt that these are big enough to send in the mail.  You should check with your post office. If you did want to mail one of these Narrow Note Cards, you could just place the note card or even the note card in an envelope into a larger envelope and mail it that way. It looks to me that the post office requires an envelope (doesn’t matter the size of the card inside, it’s the envelope size) that is 3 1/2″ x 5″ at a minimum. Check this information HERE.

Now Stampin’ Up! also has the Whisper White Note Cards & Envelopes that we have always used.  They are also available in Very Vanilla.  These note cards are 3 1/2″ x 5″ and the envelopes are 1/8″ larger on each measurement so they are absolutely okay to mail. Here is a photo of the two kinds of note cards.

Stampin' Up! Note Cards Comparison

You can see some cards I made with the standard Note Cards & Envelopes HERE.

As you can see, the Narrow Note Cards have envelopes that run lengthwise and have a curved flap on the end!  Very cute!  I say have both kinds on hand!  Quick and easy to just stamp or embellish slightly and you are ready to go! They are really so handy! You don’t have to cut cardstock, just pull out a notecard, possible stamp a greeting (or not!), maybe stamp a cute image or pretty flower on the outside or add some designer paper and ribbon.  Who knows?  It’s all cute and easy!

These Narrow Note Cards (#145583) are great for quick and easy embellishing to add your personal touch to a gift or even just a little note you are going to hand someone or stick in a lunch bag, purse, suitcase, or briefcase! Yes, they even would hold a gift card!  I just tried! You will find them on page 19 in the Occasions Catalog. Really the photo is off the bottom of the page so you mostly only see the printed description.  But now you know that they are there! You get 20 for only $8.00 and that includes the cute envelopes!

To fancy up my Narrow Note Cards, I added a layer of the Picture Perfect Party Designer Series Paper and a greeting. The one card has a bow hand cut from another of the patterns with all the photographed bows for a little embellishment.

Today would be a good day to place an order for a 3-month Prepaid Paper Pumpkin subscription because today is the deadline for receiving the January 2018 Kit. Then you can add on the Narrow Note Cards & Envelopes, some designer paper, maybe a new stamp set and whatever else you like and collect a FREE Sale-A-Bration item with every $50 increment! And you would already earn a Free Sale-A-Bration product just with the Prepaid Paper Pumpkin Kits. You would have to pay shipping on the free item you chose, so to get best value, order a few other things as long as you are paying the shipping already!  That’s what I would do!

Shop Stampin’ Up! Online HERE!

Quick and Easy Picture Perfect Party Birthday Cards

Quick and Easy Picture Perfect Party Birthday CardsWhen it comes to quick and easy cards, these Quick and Easy Picture Perfect Party Birthday Cards are about as easy as you can get!  The new Picture Perfect Party Designer Series Paper in the Occasions Catalog is just delightful! I didn’t know if I would really like the “photographic” imagery on the one side of all the sheets in the package, but I do!

Sometimes to get your creativity started when you are making a card, it’s a good idea to start with the catalog!  The Stampin’ Up! catalogs are just full of wonderful samples and you are welcome to copy! I suggest start off copying something you like and then make another card almost the same but change something up a bit.  Chances are, once you start making a card, you will come up with something on your own anyway!

The card on the left is one that I copied from the Occasions Catalog on page 4.  It’s even marked “Quick & Easy”!  Even when you are copying, you will probably find that you won’t copy exactly for whatever reason – maybe you don’t have the exact same supplies or you want to use another color or you want to use a different sentiment. Whatever it is, if you need a boost to your creative mojo, just start off copying something in the catalog! While I was trying to “copy” this card, I don’t have that Paper Ribbon used on the sample because Stampin’ Up! isn’t even selling it right now. There was a problem with the production in the factory so it will not be carried in the Online Store. That’s a shame, I thought that was something different and cute, but it was out of Stampin’ Up!’s control.

The sample card base is Peekaboo Peach layered with the Picture Perfect Party Designer Series Paper. This selection of paper comes in the 6″ x 6″ size. It’s really fun to page through and choose either one of the photographic images or the graphic pattern on the reverse side.  The greeting is stamped in Berry Burst with a greeting from the Picture Perfect Birthday Stamp Set. I substituted a piece of Berry Burst 1/2″ Finely Woven Ribbon.

The card on the right is one that I more or less copied from the first card but changed things up.  I chose the balloon paper in the Picture Picture Party pack and layered it on a piece of Berry Burst on top of the card base of Lemon Lime Twist card stock. I tied a piece of ribbon, the Lemon Lime Twist 1/4″ Ombre Ribbon around the layers before adhering to the card base.  The greeting is stamped with Lemon Lime Twist ink on a piece of cardstock the same color. For a little bling, I added some different colors and sizes of the Glitter Enamel Dots.

Copying or at least looking in the Stampin’ Up! catalogs is a great way to get some inspiration if you need it or you just enjoy looking at other samples. For some quick and easy cards, be sure to try some like these Quick and Easy Picture Perfect Party Birthday Cards.

Shop Stampin’ Up! Online with the new Occasions Catalog &

Sale-A-Bration!

Picture Perfect Party Cookie Card

Picture Perfect Party Cookie Card

I love the new Picture Perfect Party Suite in the Occasions Catalog, and I just made this super quick and easy simple card! It really only took minutes! I was hungry at the time, so I think that is why this cookie patterned paper caught my eye!  I was expecting to put some sort of birthday greeting on the card, but when I saw the “treat yourself” greeting I knew it was perfect!

The card base is Bermuda Bay Cardstock which coordinates with the Picture Perfect Party Designer Series Paper.  This designer paper is 6″ x 6″ and has a graphic image on one side and a photographic image on the other!  Quite trendy!  The photographs are really fun and festive, just like a party!  I chose the cookie plate, which I trimmed down to fit properly on this card base.  The greeting is from the Picture Perfect Birthday Stamp Set, which I really like!  Great greetings and fun stamps to make various images.  This greeting seemed like it would just fit perfectly in the corner of the paper, so I kept it simple and didn’t make it any more complicated than that. I just stamped it in the corner with Memento Ink.

Be sure to check out this Picture Perfect Party Suite in the Occasions Catalog and make a card like this fun cookie card! Does it make you hungry??!

Shop the Occasions Catalog at Stampin’ Up! Online HERE!

Stampin’ Up! New Occasions Catalog Off to a Great Start!

Yesterday was such an exciting day with the premier of the new Stampin’ Up! Occasions Catalog plus the beginning of Sale-A-Bration! I’m still working on my order because of course I want way more than I can get at one time!

A couple of things:

  • The Picture Perfect Paper Ribbon on page 5 of the Occasions Catalog is no longer available. Businesses worldwide have been affected by some kind of factory issues and this cute ribbon is one of the products so delayed that Stampin’ Up! has decided to remove it from their offering.
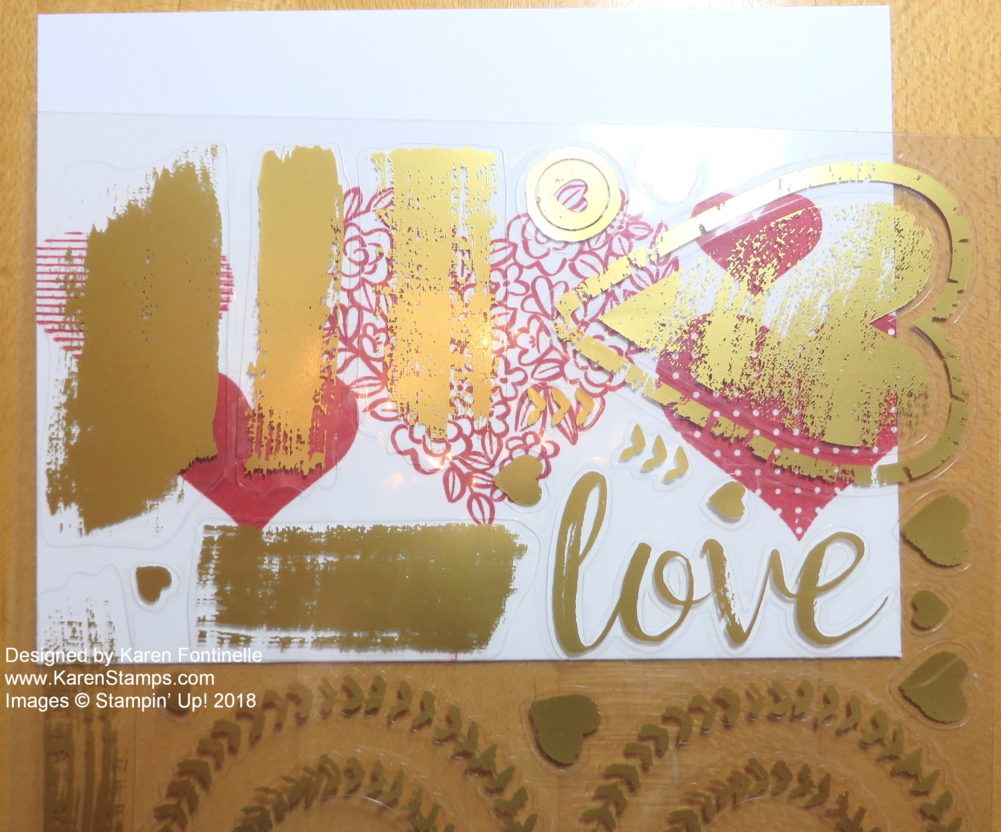
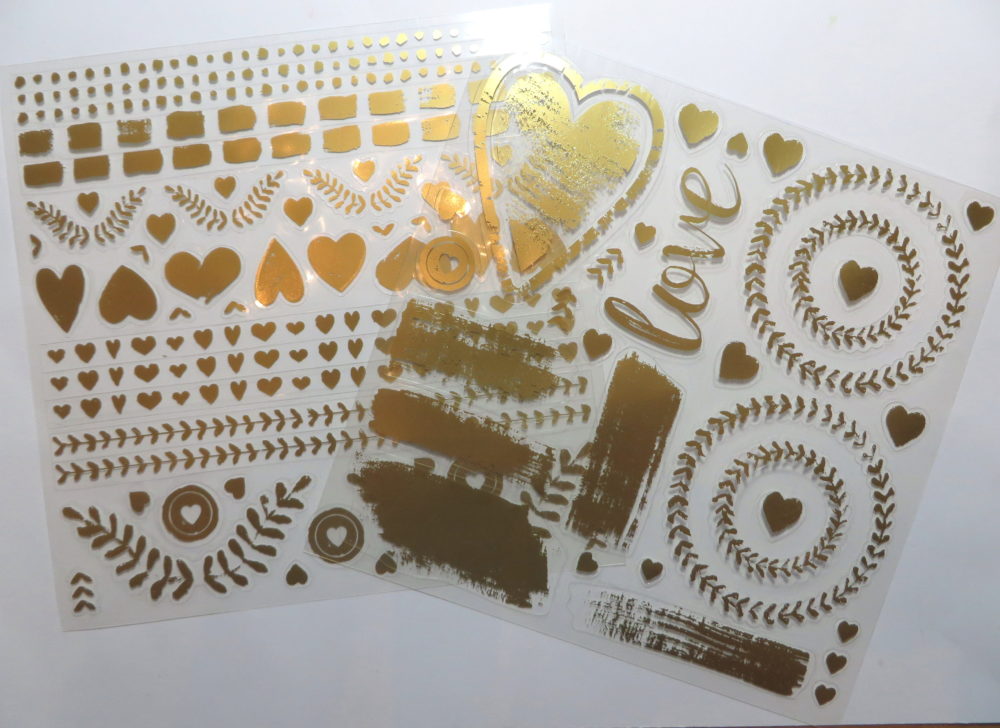
  • In the Occasions Catalog on page 19, the number of sheets in the Painted Love Gold Vinyl Stickers is incorrect. The product includes 4 sheets: 2 each of 2 designs.
  • Something you might miss because it isn’t fully pictured on the page is the Scattered Sequins Dynamic Textured Impressions Embossing Folder #145649, way down in the right hand corner of page 13.
  • The Brusho Crystal Colour is not real obvious in the top corner of page 26. I’m really excited about trying these out! Real watercolor artists use these! If you get them, DO NOT open the lid!  They say the crystals are so fine that just opening the bottle will release them like a powder that will go everywhere! I think there is a warning on the box. It is recommended that you just take a pushpin or Paper Piercer and poke 1-3 holes in the lid without opening anything. Then leave the pushpin in the hole when you are finished using.  Use the bottles like a salt shaker!

Enjoy some more videos about the new products in the Occasions Catalog so you will know what you want to order (well, everything, but most of us can’t!)!

I hope you are loving all these exciting new products in the Occasions Catalog and planning your purchase so you can take best advantage of Sale-A-Bration!  Remember, with every $50 purchase you will earn a FREE Sale-A-Bration item from the special brochure.  Look for the $50 icon scattered through the brochure.  If you have a $100 order, maybe you want to choose one of the two $100 choices, identified with the $100 icon!  This is something new this year.  You could choose one $100 item or 2 $50 items and so on.  Let me know if you have any questions or need help deciding!

If you are new to Stampin’ Up! or haven’t ordered in awhile and would like the new catalogs, please email me at Karen@Karenstamps.com and I will get the catalogs in the mail to you, compliments of me! I would be happy to be your Demonstrator and help you with this wonderful hobby of ours!

SHOP STAMPIN’ UP! ONLINE HERE TODAY!

It’s Time to Sale-A-Brate! Occasions Catalog and Sale-A-Bration Begin Today!

Occasions and SAB Catalog 2018

Today is the BIG DAY! Double-big day, actually!  The Occasions Catalog 2018 by Stampin’ Up! is live and Sale-A-Bration has begun! New products to play with and create beautiful stamping and papercrafting projects plus Stampin’ Up!’s biggest promotion of the year, Sale-A-Bration!

SHOP!!

With every $50 you spend on Stampin’ Up! products (before tax and shipping), you earn a FREE  product in the Sale-A-Bration Brochure!  Just look for the $50 Purchase icon on the product!

JOIN!

Join Stampin’ Up! by purchasing the Starter Kit with $125 worth of products of your choosing for just $99. THEN choose TWO additional FREE stamp sets from the Annual or Occasions Catalog! Start your own business and have fun being a Stampin’ Up! Demonstrator!

HOST!

Host a stamping event or put in your own order (or order with friends!) and earn $25 MORE in Stampin’ Rewards with sales of $250 or more! This is in addition to regular Stampin’ Rewards.

Enjoy these videos about some of the new products in the Occasions Catalog!

Today you can begin ordering from the Occasions Catalog (and of course, always, the Annual Catalog!). Remember, if you want to earn free products from the Sale-A-Bration Brochure, order in increments of $50. No limits, for every $50 you spend, you choose one Sale-A-Bration product!

SHOP TODAY FROM STAMPIN’ UP! ON THE FIRST DAY OF SALE-A-BRATION HERE!

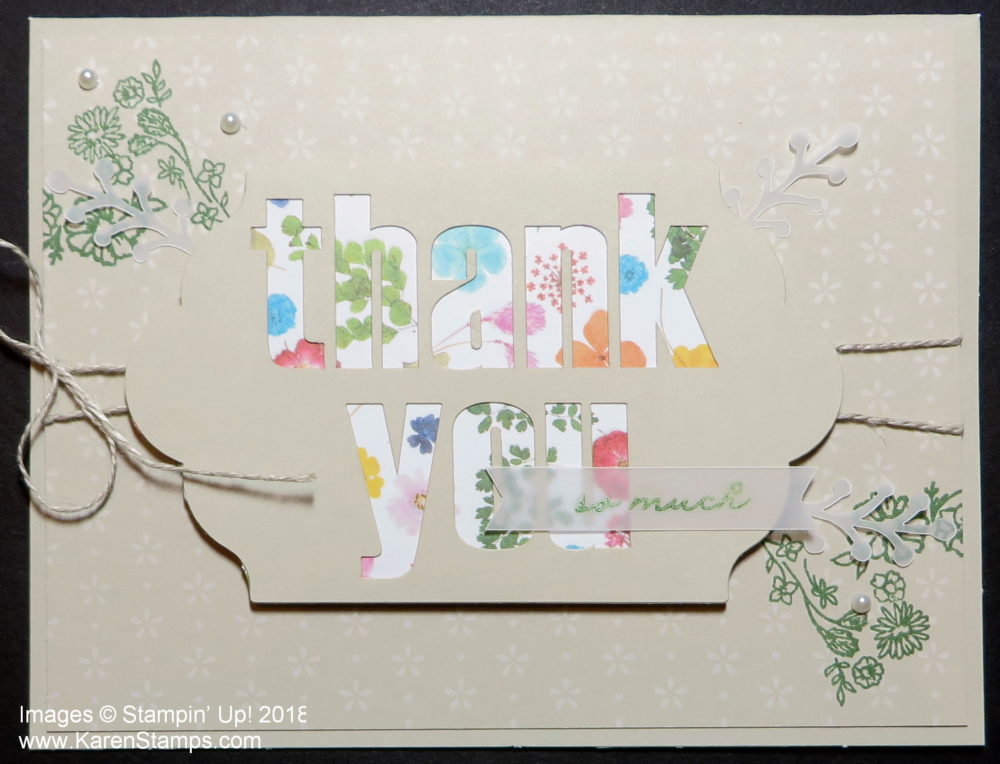
Quick and Easy Thank You Note Card

Quick and Easy Thank You Notecard

Okay, the holidays and New Year are over, so now is the time to write those thank you notes for your gifts, parties, and hospitality like this Quick and Easy Thank You Note Card. Email thank yous are better than nothing but really a handwritten note is the proper way to go. Yes, I am old-fashioned! Stand out in the crowd!  Write a thank you note(s) to the people who deserve one.  They will be surprised and amazed!  After all, we all need more personal mail in our mailboxes!

The easiest way in the world to write a thank you note is to use the Stampin’ Up! Whisper White Note Cards and Envelopes. These note cards are the perfect size for a quick and easy thank you note and they come with envelopes. Find almost ANY “Thank You” stamp you have and stamp on the front of the notecard!  That’s it!  Write your note on the inside.  Now if you want to step it up a bit, tie a ribbon around the front of the card or stamp a little something or add a few sequins or small embellishments. Whatever you like. If you don’t have a thank you stamp in your collection, a “Just For You” would do, “Thinking of You”, or a nice flower stamp or something generic can be used!

Make the cards simple and get them done! The recipient will appreciate it!

Today is the LAST DAY for the Holiday Catalog!  Check the retiring products and be sure your order today if you want any of these products. Also check the items that are discounted on the Year-End Sale.

Tomorrow the new Occasions Catalog and Sale-A-Bration promotion begins!! Get Ready!!

Go stamp some Thank You notes and get them in the mail! Make it simple like my quick and easy note card above. Here’s another example of a quick thank you card! Or make a fancy one, but just make one!

Picture Perfect Party for New Year’s 2018

Picture Perfect Party for New Year's 2018

Happy New Year!! When I wanted to make a card for the New Year, I didn’t have to look any further than the Picture Perfect Party 6″ x 6″ Designer Series Paper, coming SOON in the Occasions Catalog!  In fact, I had so many paper choices that I had to add a few to my card photograph!

My card base is Basic Black because that is elegant for New Year’s Eve, when I was making the card!  The paper appears to have confetti all over it, so how perfect! But look at just a few of the other sheets I also could have used that would be “partyish” for this card! This is a really fun pack of paper!

During the free shipping Stampin’ Up! offered awhile back, I purchased the Large Letters Framelits Dies but I already owned the Large Numbers Framelits Dieswhich certainly are perfect for New Year’s! Very easy way to cut out the numbers for the new year!  Also great for birthdays and anniversaries! I cut the numbers out of Gold Glimmer Paper and adhered them to a piece of Basic Black layered on a piece of Gold Glimmer Paper. It was that easy!

I hope you had a fun and safe New Year’s Eve and now are celebrating the beginning of a New Year!  The time sure seems to fly by!

The Occasions Catalog goes live Wednesday, January 3, and you’ll be able to get your hands on this fun Picture Perfect Party Paper as well as the coordinating Picture Perfect Birthday Stamp Set and all the embellishments! It’s all very cute!  Great for birthdays, anniversaries, all kinds of party themes!

If you need a Stampin’ Up! Demonstrator and would like the new Occasions Catalog plus Sale-A-Bration Brochure, just email me at Karen@Karenstamps.com and let me know.  I’d be happy to mail you the catalogs plus the Annual Stampin’ Up! Catalog if you don’t have one already! It’s going to be so fun to switch over to non-holiday colors and products after the Christmas holidays! In the meantime, be sure to check if you want anything that is retiring from the Holiday Catalog before the last day, January 2, 2018.

HAPPY STAMPING NEW YEAR!!

Coffee Cafe Cards For a Gift

Coffee Cafe Cards

Here are some fun Coffee Cafe Bundle cards I made someone for a Christmas gift! You can purchase the stamp set Coffee Cafe and the Coffee Cups Framelits Dies separately or in a Bundle and save 10%! Since I’m not really a coffee person, even though I could see these were popular products, I didn’t purchase them until right before Christmas when I realized making these cards for someone would be a perfect gift. They were so fun to make, too!

You will also want the Coffee Break Designer Series Paper to match and for fun, the Corrugated Elementslittle corrugated kraft paper designs.

Notice the kind of fun new way to do ribbon on the last card – just kind of squiggle it back and forth underneath a greeting or design element instead of just tying it around the card!

LAST CHANCE TODAY!!

While I was doing my Christmas cards, I sure wished I would have had the new Stamparatus coming out in the next Stampin’ Up! Annual Catalog!  I could have placed my stamp, inserted each card and stamped exactly in the same proper place where I wanted my greeting!

If you want to get your hands on this Stamparatus Stamp Positioning Tool, the window closes TODAY, Dec. 30th!  Go to my Online Store HEREsign in to your account, then scroll down just a little until you see the Stamparatus on the right.  You will see the button to click to reserve yours. Click and then fill out your information and make sure you see at the bottom that you DID reserve a Stamparatus.  You will also receive an email within a few minutes confirming your reservation. When Stampin’ Up! gets yours in stock, they will place it in your Shopping Cart and email you that it is available (probably mid-March or later). At that time, if you complete your order like usual, adding any other products you may want (maybe it will be early enough to take advantage of Sale-A-Bration!) and at that point your credit card will be charged for the Stamparatus and anything else you ordered.  Your credit card will not be charged just for the reservation. It’s like you are reserving the opportunity to pre-order one before the Annual Catalog comes out!

AND…….

Stampin’ Up! Year-End Sales Event thru January 2, 2018

Stampin’ Up! Clearance Rack 

Lovely As a Tree Christmas Card with Merry Little Christmas

Lovely As a Tree Christmas Card with Merry Little Christmas

Lovely As a Tree has to be the best, most universal stamp set ever created, and it makes a great Christmas card such as this Lovely As a Tree Christmas Card with Merry Little Christmas.  I have probably used the Lovely As a Tree Stamp Set every Christmas since I bought it, which has been at least 15 years. I have also used it many other times throughout the year because it is not just for Christmas.  It is not “just” for anything! It is so versatile!

One of the early cards I learned to make was to stamp this tree over and over again across the paper, sometimes without reinking, to give the look of a forest of trees.  The I squiggled glue over the trees and added Dazzling Diamonds Glitter. It always makes a beautiful card and is so easy.

For this card, I updated the Lovely As a Tree look a little bit by using the Merry Little Christmas paper.  The card base is Old Olive Cardstock, layered narrowly with Basic Black and then a layer of the green and black plaid paper.   I wasn’t sure at first how I was going to place the tree on this card because  a regular layer would cover up all the plaid that I wanted to show.  So I cut just a narrow strip and stamped that.  In the end, I cut the strip to basically fit the stamp, about 2″ x 4″ so there would be room for a greeting from Hearts Come Home. I decided to layer the tree on Gold Foil and then I added some strips on the sides of Gold Glimmer Paper.  All that took were some scraps! Then I added the greeting with some Stampin’ Dimensionals on the back to lift it over the tree piece (since I didn’t place it high enough on the card!).

Easy card to make if you need a last minute idea! And who doesn’t need last minute ideas at this point?!  I need a last minute elf, actually, to help!!

If you don’t already own Lovely As a Tree, it should be on your list for the New Year! It is a classic and I hope Stampin’ Up! will keep it around forever.

The upcoming Occasions and Sale-A-Bration catalogs have been mailed from Stampin’ Up!  You probably should have received yours by now if you are a regular customer of mine, or it should be coming soon, so watch for them in your mail.  They come separately.  If you are new and  would like copies, just email me and I’ll send them to you.


Star of Light Christmas Card

Star of Light Christmas Card

One of my downline sent me this Star of Light Christmas Card, and I want to tell you it is an absolutely beautiful card!  Just stunning in real life!  The photograph doesn’t really do it justice because of the glare from the gold foil. The Star of Light Stamp Set is a perfect one for the Christmas season, not only with beautiful artwork but lots of sentiments to use.

The card starts on just a Whisper White base, layered with a piece of Gold Foil. The top layer is Night of Navy embossed with the Sparkle Embossing Folder.  Underneath this Night of Navy layer are strips of Silver Glimmer Paper on each side, very narrow margins. It just looks beautiful along with the Gold Foil and Night of Navy cardstock!  The Star of Wonder is made with the Starlight Thinlits Dies using the Gold Foil and the Silver Glimmer Paper in all the layers.

The greeting is embossed in gold and layered on Gold Foil with a bit of the Gold 1/8″ Ribbon folded behind. There is also a small Rhinestone Jewel on the front.

For texture, shine, and eye-catching beauty, this card really can’t be beat! All the elements are there from the embossing folder, the Gold Foil and Silver Glimmer Paper and the beautiful die-cutting and layering of the star with the Starlight Thinlits Dies. Really pretty!

You will find this Star of Light Photopolymer Stamp Set and Starlight Thinlits Dies in the  Stampin’ Up! Annual Catalog on page 122, so it can be ordered any time.  Perhaps you will want to get a head start on NEXT Christmas by making this card in January! This Star of Light Christmas card is one that will turn out beautifully!

Stampin’ Up! Clearance Rack Updated Today! Get Some Bargains!

Stampin' Up! Clearance Rack Banner 2016

SURPRISE!  The Stampin’ Up! Clearance Rack has been updated!  New items have been added to the Clearance Rack in the online store! Supplies are limited, and with discounts up to 70%, products will go quickly. Shop now and stock up.

You will find cardstock, dies, ribbons, embellishments, designer paper, punches, and more!  Of course it’s all “while supplies last”!  Check it out right now!  The Early Bird gets the worm!

Don’t forget the Year-End Sales Event going on, too!

This sale has surplus inventory at reduced prices and retiring products from the Holiday Catalog!

Don’t forget!  Last day to order from the Holiday Catalog is January 2, 2018.

                         Last day to order from the Year-End Sales Event is January 2, 2018.

AND: You can “reserve” your Stamparatus, the new stamp positioning tool  until December 30, 2017. This is an earlier way to receive your tool before it appears in the next annual Stampin’ Up! catalog!

Stamparatus Ad

  • Just go to my Online Store, sign in to your account, scroll down until you see the Stamparatus.
  • You will see a link to click to go through the reservation process.  Just put in your name and credit card number.
  • Your credit card will NOT be charged until the Stamparatus has been received by Stampin’ Up! and put in your Shopping Cart.
  • At that point, you can go ahead and add to your order, if you choose, or just complete your order as always.
  • You will want to be the first kid on the block to own the Stamparatus!  First reservations in, first Stamparatus out! Reserve yours today before time slips away.  You can always cancel if you change your mind.

Go check out all these Stampin’ Up! bargains and deals!

Have A Friend Into Star Wars – The Last Jedi? Here’s A Card For Them!

Golden Canyon Star Wars MDS

Made in Stampin’ Up! My Digital Studio

Today the new Star Wars movie, The Last Jedi, comes out so maybe you have a friend into Star Wars and want to make them a Star Wars card! My husband, my boys and my son-in-law are all Star Wars fans, and I admit to seeing a few of the movies myself.  If you want to give a Star Wars fan a thrill, either now or maybe their birthday, here are some handmade Star Wars cards from the past. They were mostly ones I’d found on the internet, of course, and copied from people who were more creative than I was. I know my son-in-law has his cards on display, which makes me happy that he enjoys them! Mostly it just takes paper and punches to make all of these!

The picture above I made when Stampin’ Up! had My Digital Studio. Our family went to Death Valley a few years ago (Fantastic trip and scenery!  If you haven’t been there, you need to put it on your list!) and although we didn’t know it at the time I don’t think, there was at least one hike we were on that my guys commented looked like something out of Star Wars. When we got home and researched it, it turned out that some scenes were filmed in this area!  So I had a photo of my son on this hike and with My Digital Studio added a light saber!

But here are some other Star Wars cards I have made that you can keep on file!

Star Wars R2D2 Punch Art Birthday Card

This is a punch art R2D2 card, a little bit involved with all the small pieces! You can see it in my blog post HERE.

Star Wars Birthday Card Yoda and Darth Vader

This might have been my first Star Wars card I made with Darth Vader and Yoda! I know I found some kind of “Yoda Language Generator” site where you could type in your message and they would translate it into how Yoda would say it! Here is the blog post about this card.

Star Wars Inspiration BB8 Handmade Birthday Card

This card was fun with the BB8 character! You can read about the making of this card HERE.

Star Wars Day Yoda Card

I like this Yoda card, maybe because of the colors! You can read about this card on this blog post HERE.  I made this card for Star Wars Day, May 4th (as in…..May the 4th be with you!)

Are you going to see the new Star Wars movie? I don’t know if I will or not. It will be a Christmas holiday activity for the rest of the family home for the holidays.  If you have a friend into Star Wars, you might like to make a special Star Wars card for them to commemorate the new movie, The Last Jedi.


Christmas Card With Foil Frenzy Christmas Trees

Christmas Card with Foil Frenzy Christmas TreesIn keeping with my Christmas trees theme of yesterday, I got the idea to die cut Christmas trees with the Foil Frenzy Specialty Designer Series Paper to make a Christmas card. Using this colorful paper with foil colors and patterns makes for a more whimsical card! The foil patterns are printed on heavyweight kraft paper so besides cards, this paper is good for making boxes and other 3D projects for any occasion, not just Christmas! Check out the Foil Frenzy Paper!

One of the coordinating colors of the foil is Berry Burst, one of the In Colors, so I used that color for my card base.  The card layer is, again, Shimmery White. After I die cut the three Christmas trees with the tree in the Santa’s Sleigh Thinlits Dies, I decided to slide them all over to the right and add a bow to the side. The card is wrapped with the Berry Burst Ribbon, and I also added a piece of the 1/8″ Gold Ribbon for an added accent. The bow is a “cheater bow” – I adhered the strip of ribbon around the card layer but then tied the bow separately and adhered it to the ribbon with several Glue Dots. Makes it a little easier to just attach the bow rather than to tie it actually on the card!

The greeting is one from Oh What Fun and I simply stamped the whole thing with Berry Burst ink.  Another thing you can do with markers is to color right on the stamp, coloring different areas different colors.  After the coloring and before stamping, be sure to “huff” or breathe on the stamp to remoisten the ink, then stamp!  This will give a slightly lighter inked image than if you inked up with an ink pad directly, but it is a good technique to use sometimes.

Even when you start with an idea of what you are going to stamp, often another idea comes to mind while you are creating.  Just go with it and see what happens! If it doesn’t work, just keep working on it and you probably will find just the right combination of what looks good for your project!

Be sure to check out my card from yesterday in THIS POST to see the more typical way to use the Santa’s Sleigh tree die – or is there really a typical way to use any of our products?!  It’s all about the creativity!

SHOP STAMPIN’ UP! ONLINE HERE!