Category Archives: Cards

Petal Passion Just a Note Card

Petal Passion Just a Note Card

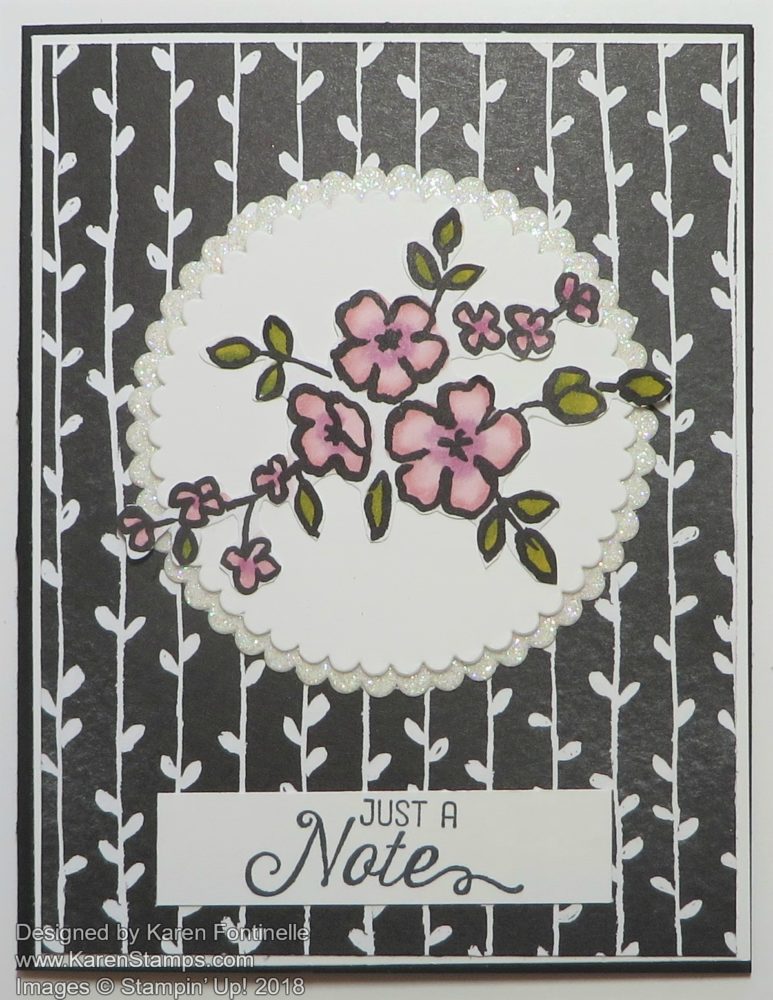
I have to admit, the Petal Passion Designer Series Paper was not at the top of my list when the last catalog came out, but I have loved using it as you see on this Petal Passion Just a Note Card.  You can use it as it comes, in plain black and white, or you can do so coloring in, particularly on certain patterns of the paper.

For this card, I started with a card base of Basic Black and layered a piece of Whisper White underneath the designer paper with just a thin margin to help the DSP stand out a bit.  From another sheet of the paper, I chose this one with the small flowers and colored them in with my Stampin’ Blends markers. And then I just cut out around the design with my Paper Snips.  I didn’t try to cut exactly on the lines but left a tiny margin and made sure I didn’t cut a section off.  Then I layered the colored flowers on die cut circles cut from the Layering Circles Framelits Dies out of Whisper White and the Dazzling Diamonds Glimmer Paper.  The greeting is from the Flourishing Phrases Stamp Set.

This is basically an easy card once you know what you are going to make.  However, the Petal Passion Designer Series Paper is retiring as is the Dazzling Diamonds Glimmer Paper so don’t delay if you want some!  Check out the Last-Chance section in the Stampin’ Up! Online Store! You know the rest of May is going to fly by!

SHOP STAMPIN’ UP! ONLINE TODAY!

Celebrate Cinco de Mayo With a Handmade Margarita Card

Cinco de Mayo Margarita Card

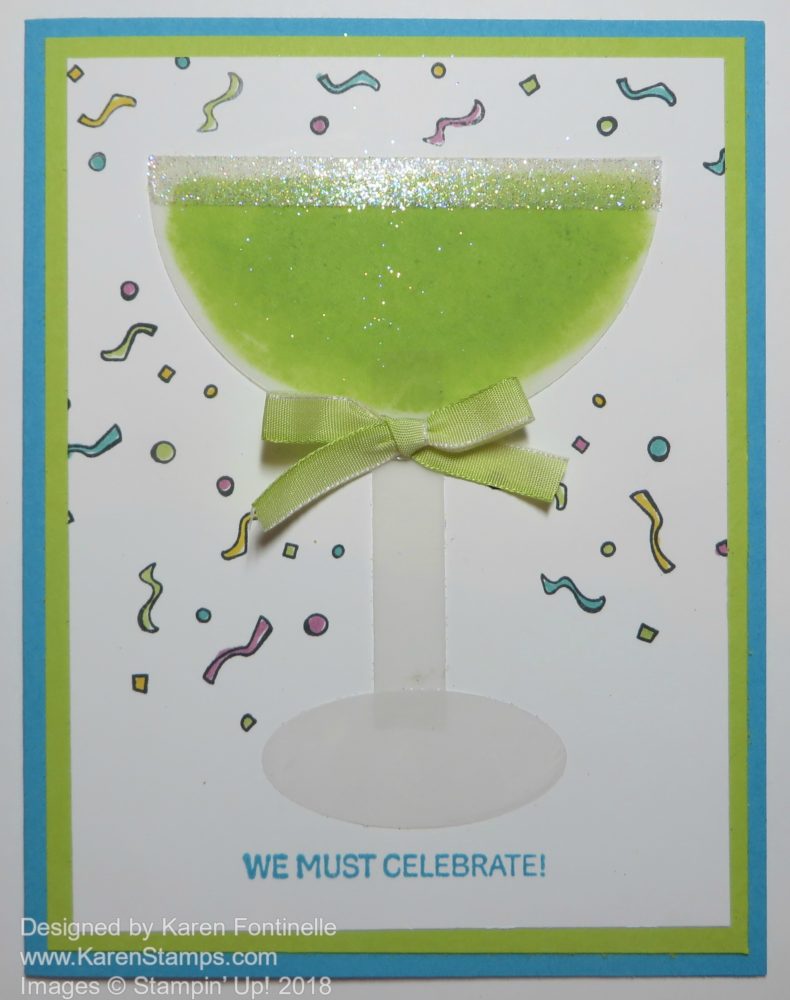
Celebrate Cinco de Mayo with a handmade Margarita card like this one! Cinco de Mayo, the fifth of May, is historically a celebration of the Mexican victory over France in 1862 at the Battle of Puebla. (Who says you don’t learn history while you are stamping?!) In the United States, however, Cinco de Mayo is a celebration of Mexican heritage and culture. And what better way to celebrate Cinco de Mayo than with a Margarita…….at least a card!

It’s very easy to make a Margarita glass!  Vellum Cardstock is great for this because it’s kind of sturdy and yet kind of see through to it will look for glass. For the top of the glass, just die cut or punch a circle, depending on what size you want.  I used the largest circle die in the Layering Circle Framelits Dies.  Then cut the circle in half.  Color on the backside of the half circle with green ink (or whatever color your beverage is) with a Sponge Dauber or whatever you like.  For the stem of the glass, just cut a strip of the Vellum Cardstock.  Then punch or die cut a small oval for the base of the glass.  I used the smallest oval in the Layering Ovals Framelits Dies.  It’s almost impossible to hide adhesive underneath vellum so do the best you can!

The card base is the retiring Tempting Turquoise with a layer of Lemon Lime Twist.  I thought those colors would be bright and festive for this Cinco de Mayo card.

Once I had the vellum glass set on the front of the Whisper White card front, I stamped some confetti from the We Must Celebrate Stamp Set as well as the greeting from the same set.  Who would think this animal stamp set would be perfect for a Cinco de Mayo card?! This cute stamp set is retiring May 31, while supplies last, so if you love little animals, be sure to order it.  I colored in the bits of confetti with my Stampin’ Blends markers.  So fun!  And for just a little fun embellishment, I added a little bow to the glass made of the Lemon Lime Twist 1/4″ Ombre Ribbon.

Here is another Margarita glass card I made last year.

I prefer some salt on the rim of my frozen Margarita, so to make that on this card I just used a strip of Tear & Tape and added some Dazzling Diamonds Glitter to the adhesive.  You could also add Glimmer Paper if you had that.  Or take your Margarita without salt!

Here in Houston, Texas we have a lot of great Mexican restaurants, so my husband and I celebrated early last weekend to beat the crowds this weekend on Cinco de Mayo!  Whether you have a real Margarita or make one on a card, have a fun Cinco de Mayo!

Maybe to celebrate Cinco de Mayo you want to just shop Stampin’ Up! Online HERE!


Make a Card For a Star Wars Friend! It’s Star Wars Day!

Golden Canyon Star Wars MDS

Made in Stampin’ Up! My Digital Studio

Why not make a card for a Star Wars friend since today is Star Wars DayMay 4th!  May the 4th be with you??  Get it??  I didn’t at first, when my husband was wishing it was a work day a few years ago so he could repeat this Star Wars phrase to everyone!  I’ve been to a few Star Wars movies through the years, but not the most recent one. My husband, sons, and son-in-law are fans (but not over-the-top crazy ones!) so I’ve had opportunities to make some Star Wars cards for them, especially my son-in-law! He even has them on display on shelves in a spare bedroom!

These are some of the cards I have made through the years. I wouldn’t be able to think them up myself, but you can find ideas on the internet, of course! You don’t even need stamps mostly paper and punches and maybe a scissors!

The picture above I made when Stampin’ Up! had My Digital Studio. Our family went to Death Valley a few years ago (Fantastic trip and scenery!  If you haven’t been there, you need to put it on your list!) and although we didn’t know it at the time I don’t think, there was at least one hike we were on that my guys commented looked like something out of Star Wars. When we got home and researched it, it turned out that some scenes were filmed in this area!  So I had a photo of my son on this hike and with My Digital Studio added a light saber!

But here are some other Star Wars cards I have made that you can keep on file!

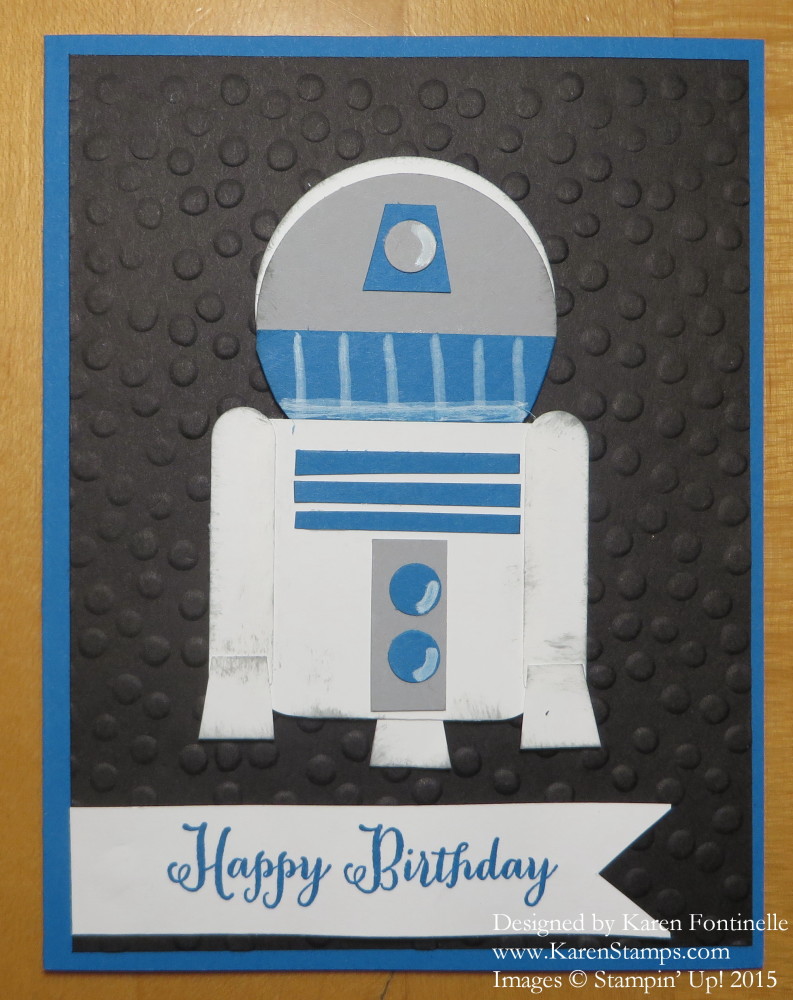
Star Wars R2D2 Punch Art Birthday Card

This is a punch art R2D2 card, a little bit involved with all the small pieces! You can see it in my blog post HERE.

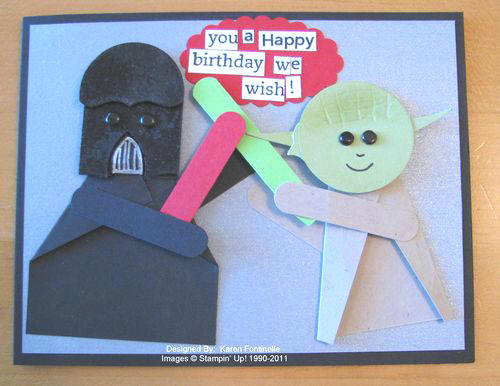
Star Wars Birthday Card Yoda and Darth Vader

This might have been my first Star Wars card I made with Darth Vader and Yoda! I know I found some kind of “Yoda Language Generator” site where you could type in your message and they would translate it into how Yoda would say it! You can Google that term.  Here is the blog post about this card.

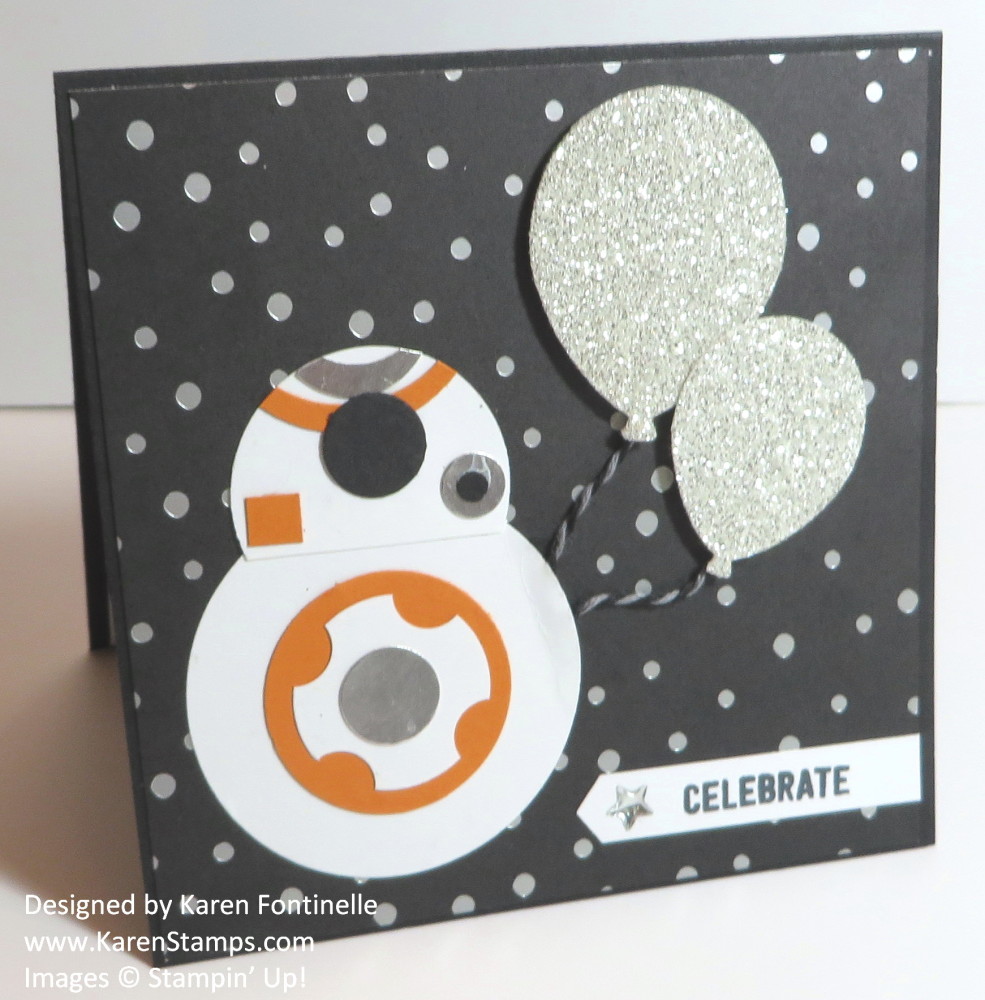
Star Wars Inspiration BB8 Handmade Birthday Card

This card was fun with the BB8 character! You can read about the making of this card HERE.

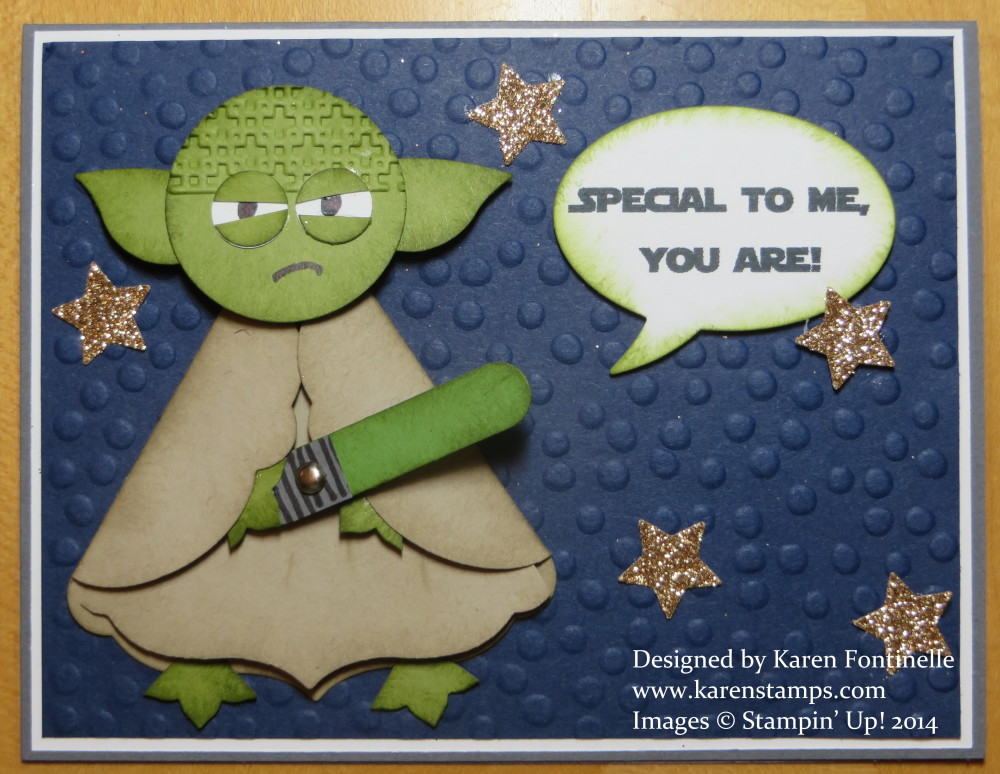
Star Wars Day Yoda Card

I like this Yoda card, maybe because of the colors! You can read about this card on this blog post HERE.  

Even if you don’t send out any Star Wars cards today, it would be a good day to get into the spirit of Star Wars Day 2018 and try your hand at making some Star Wars cards to keep on hand!  You know you must have some Star Wars friends or relatives you’ll be able to send the cards to for birthdays or other occasions! And look up that Yoda Language Generator! It really is fun to play with!

As Yoda would say, “For your Star Wars friends, make cards. Hmmmmmm.”

Happy Star Wars Day! May the 4th Be With You while you make Star Wars cards (or any other cards)!


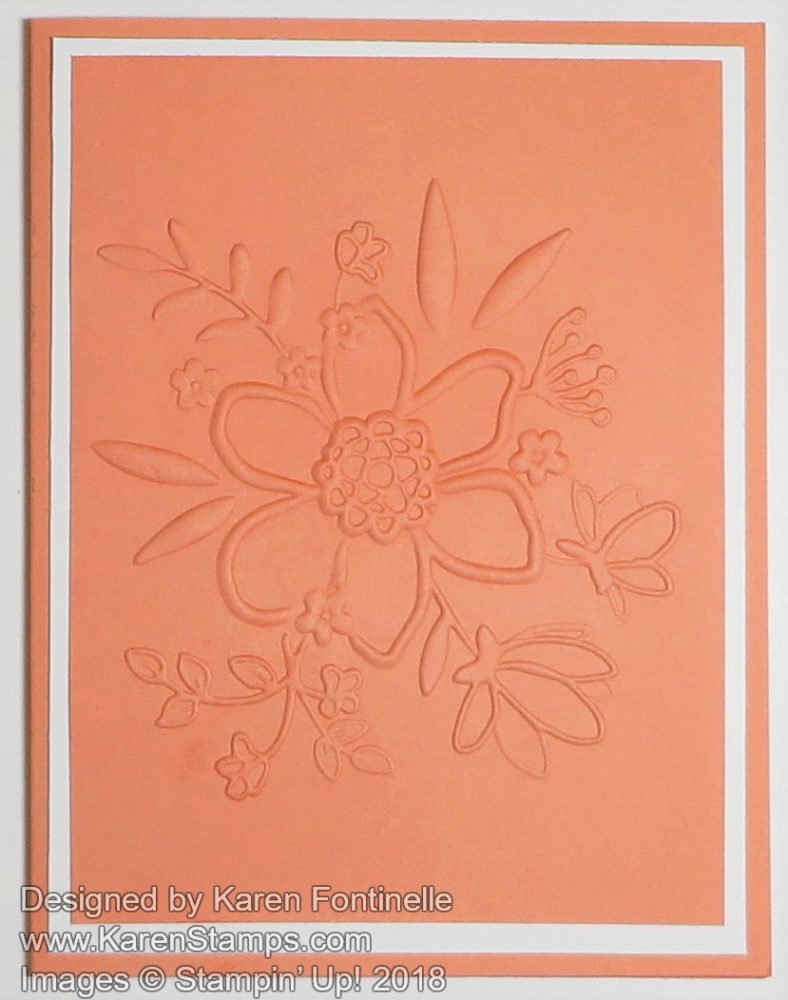
Embossed Floral Monochromatic Card

Embossed Floral Monochromatic Card

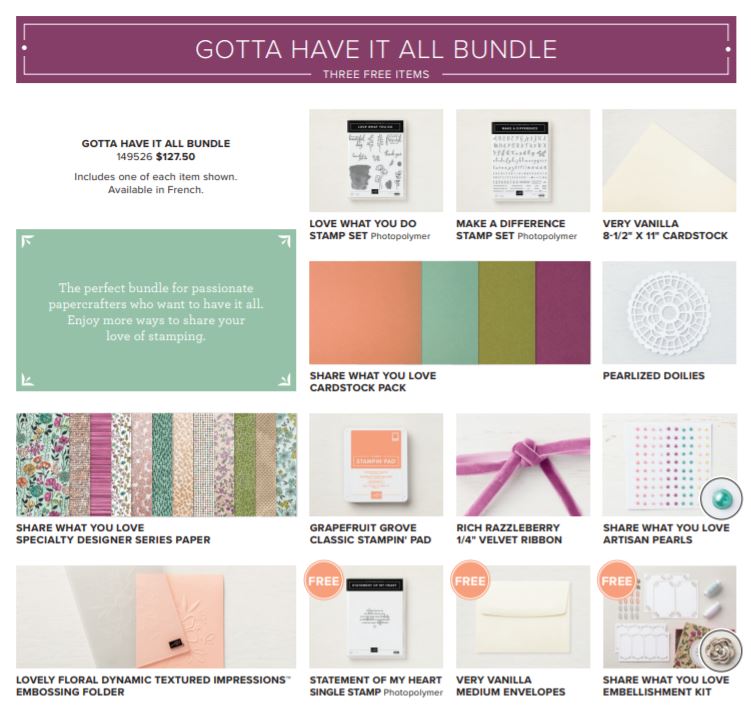
After I received my Share What You Love “Gotta Have It All” Bundle, this Embossed Floral Monochromatic Card was one of the first cards I made because I wanted to try out this new embossing folder.  How easy can it get to make a beautiful card with just an embossing folder and Big Shot?

The embossing folder comes in the largest Bundle, available now to customers as an early release before the new Stampin’ Up! goes live in June. It is called the Lovely Floral Dynamic Textured Impressions Embossing Folder, which means it is one of the heavy, thick embossing folders that really leaves an outstanding impression on your cardstock. It’s a good idea to spritz the cardstock first with water (very fine mist) to loosen the fibers so the embossing folder can do its work.

The paper is the new Grapefruit Grove color, one of the new In Colors for 2018-2020.  After embossing the card layer, all you have to do is add a greeting.  I didn’t add one yet as I was just trying out the embossing folder, but now all I have to do is choose what greeting I want to use when I send the card!

Start looking forward to the new Stampin’ Up! Catalog going live June 1st!  If you are chomping at the bit to buy some Stampin’ Up! products and you do not have a Demonstrator you are working with, please email me and I’d be happy to mail you a complimentary catalog….when I get them!  They are ordered so we just have to wait for them to ship out and get to me!

Check out all the products at Stampin’ Up! including the Share What You Love Bundle, the Last-Chance List, and the bargains on the Clearance Rack!  Soon you will be making cards like my Embossed Floral Monochromatic Card!

SHOP STAMPIN’ UP! ONLINE TODAY!

Elegant Floral Share What You Love Thank You Card

Elegant Floral Share What You Love Thank You Card

Make an Elegant Floral Share What You Love Thank You Card with this BEAUTIFUL Share What You Love Specialty Designer Series Paper.  It is available now in the Share What You Love Suite in the Gotta Have It All Bundle. Even if you do not purchase this largest Bundle during this Early Release offer, you will want to order the paper as soon as possible in June! The paper is double-sided, heavyweight, and on one side has pearlized accents!  You might be able to see the gleam a little bit on these blue flowers.  Really pretty in person!

To make this card, I began with a card base of Mint Macaron.  If you have been a Stampin’ Up! customer for awhile, you might already have this cardstock in your stash! If not, you will receive it in a cardstock pack that comes in the two larger Bundles.  From the beautiful designer paper, I cut a strip and then the piece to fit the front of the card. But I cut this piece into two and just flipped it over to the backside for the bottom half of the card layer. I think it just adds a little interest to have the two different patterns, and they coordinate so beautifully. I used a piece of the 1/4″ Copper Trim ribbon to apply over the seam.  I think it matches pretty well with that bottom piece of designer paper.

For an embellishment I chose one of the Pearlized Doilies that come in the larger Bundles.  These have a pearlized surface on one side and white on the other side that could be colored if you wanted. I had no planned idea of how I was designing this card, but I just played around until I was happy with it…..and that didn’t take long!  I punched a circle of Mint Macaron with the 2 1/4″ Circle Punch to adhere behind the doily.  Then I needed “something” to decorate the front of the doily. I thought about adhering the greeting across it, but after playing around, I just added some cut out flowers from the designer paper on top of the doily, some pieces popped up with Stampin’ Dimensionals (or the Mini Dimensionals).  Even though it’s a bit of effort to cut out these flowers by hand, I bet you can’t cut just one!  This paper is so beautiful you can enjoy the close-up cutting and get a better appreciation for the art that is this paper!

Cut Out Flowers Closeup

The greeting is stamped in Mint Macaron ink on a piece of Whisper White with an image from the Love What You Do Stamp Set in all three bundles.

Check back on THIS POST yesterday on my blog to find out about all the Share What You Love Bundles available for you to order NOW!

I really liked this card when I finished it!  And I enjoyed making it!  That’s a win-win! While you are waiting on your new products, you can try making a design much like this Elegant Floral Share What You Love Thank You Card using whatever designer paper you have and embellishments.

Customer Preorder: Share What You Love Bundle & New Ink Pads!

The Share What You Love Suite is in the new upcoming Stampin’ Up! Catalog, but you don’t have to wait until June to get it!

Beginning today, May 1st, customers can pre-order products from the Suite in a choice of Share What You Love Bundles of your choosing…..and get a free gift besides!

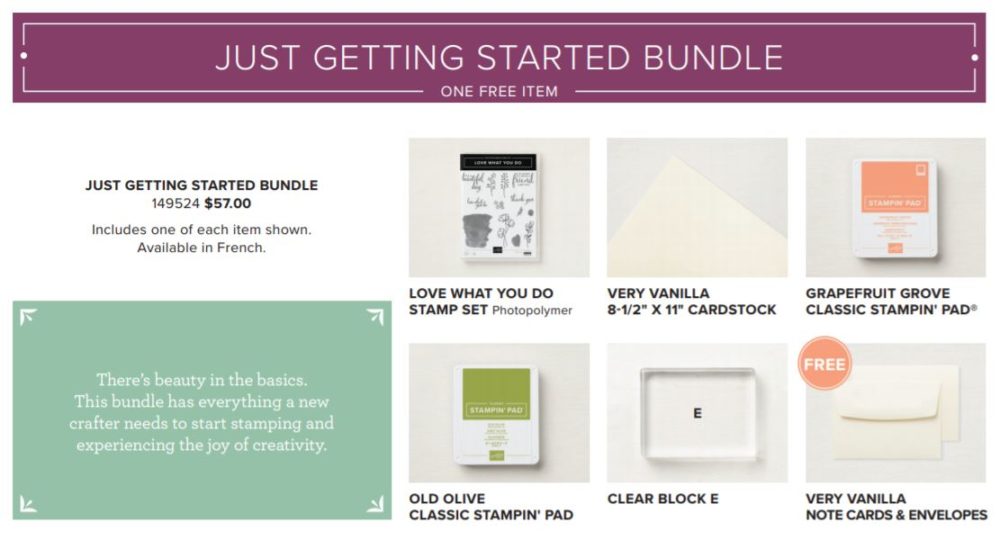
Watch the video above with Brandi from the Home Office and then review the Bundles below!

Just Getting Started Bundle

A Little More Please Bundle

Gotta Have It All Bundle

Here are the details:

  • Bundles may be included as part of a new demonstrator’s Starter Kit (free items will be included).
  • Bundles (with free items) are exclusive to the suite early release and will no longer be available after May 31, 2018. Individual items from the Share What You Love suite will be available when the 2018–2019 annual catalog is released on June 1, 2018.
  • There is no minimum purchase required to participate in this promotion.
  • There are no purchase limits in place during the customer sales period.
  • If items in the bundles become unavailable during the sales period, available items will ship, and backordered items will ship separately when available.
  • Customer Sales Period: May 1–31, 2018 until May 31, 2018; 11:59 PM (MT)

You can add any other items to your order just like usual.  Check out the Last-Chance List and the Clearance Rack.

If your order reaches $150 or more, you earn Stampin’ Rewards as usual.

Download the Share What You Love Flyer with all the Bundles HERE and print it out if you like!

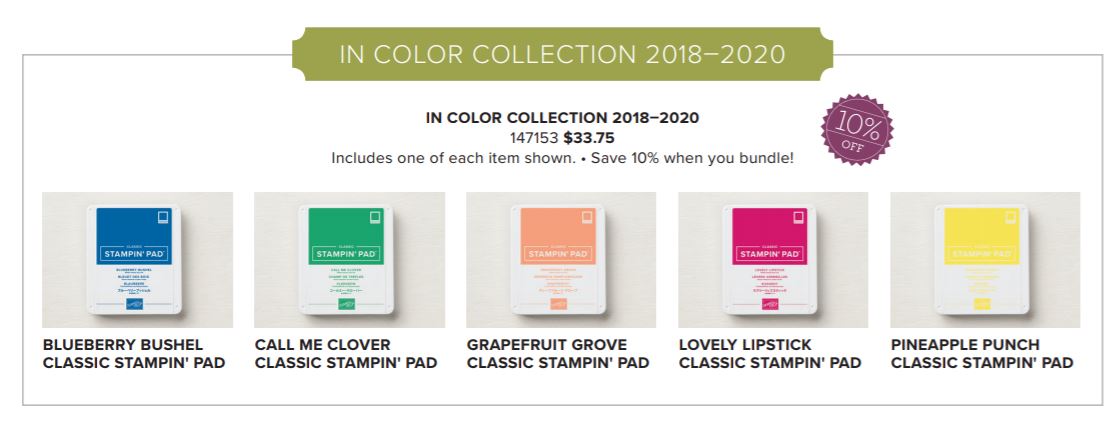
In Color Collection Ink Pads 2018-2020As Brandi said in the video, if you would like to get those new In Color Ink pads and try out the new style, you can order the group of 5 for 10% off.

Time to go check out these new Share What You Love Bundles &

In Color Ink Pads because we all like to share what we love when it

comes to stamping and Stampin’ Up!


Just Add Color Paper For Adult Coloring

Just Add Color Paper For Adult Coloring

Something you may have passed up on the Last-Chance retiring list of Stampin’ Up! products is the Just Add Color Paper which is great for “adult coloring”.  This paper is heavyweight, perfect for whatever style of coloring you prefer. You get 2 pages each of 6 designs. Color them in or leave them as the outline images for a simplistic card or project.  Whatever you like!

Stampin’ Up! offers many coloring options!  On these cards I used my Stampin’ Blends alcohol markers, which, hopefully will be back in stock in time for the new catalog! You could also color with the Aqua Painter and ink refills, like watercoloring, or a watercolor paintbrush.  Use the Watercolor Pencils and Blender Pens. Use the Stampin’ Write markers – usually the lighter colors work best as the dark would be a bit heavy for this kind of coloring.

On these two cards, I colored a whole section of the paper and then cut into the paper to fit on a card.  The underwater card was not as hard it might appear!  I didn’t color inside the lines on every bit of the seaweed, just kind of colored most of it green without staying in the lines.  Then I usesd my Pool Party marker to kind of fill in empty spaces to look like water, since it is under the water after all!  Then I colored kind of all over the area with the Light Pool Party to give it the watery look.  Just play and see what you come up with!

If you would like an easier way to make a card with this paper, consider cutting out the exact image(s) you want to use and color those, not the whole area!

Check out THIS BLOG POST to see the card I made with just a teapot that I colored and cut out and mounted on a card!

They say adult coloring is really good therapy for all of us!  Did you like to color as a kid?  Well, it’s time to stop and enjoy it again with the fun adult coloring techniques!  Forget your problems for awhile as you concentrate on your artistic coloring, staying in the lines (or not!), and enjoying the pretty colors!

Grab this fun paper if you are the coloring type before it is gone!  Put the Just Add Color Specialty Designer Series Paper on your next Stampin’ Up! order so you can do some adult coloring!

Stampin’ Up! Last-Chance Retiring List While Supplies Last!

Easy Birthday Memories Birthday Card

Easy Birthday Memories Birthday Card

Here’s an Easy Birthday Memories Birthday Card that you could make with the delightful Birthday Memories Designer Series Paper if you get it before it retires!  I love red so I was particularly drawn to this pattern in the package!  There also is a coordinating framelits set that goes with this paper.

The Birthday Memories Designer Series Paper is unique because there are some framelit dies that fit some of the images in the paper so you can die cut those. These Birthday Friends Framelits Dies also coordinate with the Birthday Delivery Stamp Set. And the best part is that if you like all three of these items – the paper, the stamp set, and the dies – you can purchase them all in a Bundle and save 10%.  It’s the Birthday Delivery Photopolymer Bundle.  It’s almost always a good idea to go ahead and buy the bundle so you have everything you need! Stampin’ Up! does such a good job of coordinating lots of products with images and colors.

To make this card, I started with a Real Red card base.  If you are following the new Color Revamp, Real Red is not retiring, it is being moved to the Regals color family! Kind of surprising to me, but we’ll see how it works!  As long as they aren’t getting rid of Real Red!

Real Red is actually what taught me the quality of Stampin’ Up! products way back when I was a new customer. I saw no need to purchase the Stampin’ Up! cardstock and went to a craft store to buy paper at a discount.  I was thrilled to find a whole package of red cardstock AND envelopes!  What a deal!  But when I learned how that “red” compared to the Stampin’ Up! Real Red I could tell there was NO comparison!  Stampin’ Up! had the better red by far!  Even more than “by far”!  In my opinion, it is the BEST red anywhere!

I chose this red piece of designer paper for the card front and layered it on a piece of Whisper White with a thin margin, just to help it stand out against the Real Red card base.  Then I die cut a cake from the designer paper with a framelit. Next I needed something to make the cake stand out a bit, so I layered it on a Stitched Shapes Circle Framelit and even layered it lower on the circle rather than in the center. I don’t know why, but I liked it better in that position.

For some bling, I added the Silver 3/8″ Metallic-Edge Ribbon just adhered back and forth behind the circle piece. Then this whole focal piece is popped up on Stampin’ Dimensionals.

For the greeting, which didn’t fit on the circle as I had originally planned, I chose one from the Happy Birthday Gorgeous Stamp Set.  I also stamped “It’s Your Day” and “Happy Birthday” on a piece of Whisper White inside the card.  I could have used a greeting from the coordinating Birthday Delivery Stamp Set, but I happened to have this other stamp set handy.

So all in all, this is an easy birthday card to make, and easy enough to use the layout and just change up the theme and greeting by changing the paper and the sentiment.

This Bundle and all the separate pieces are on the Last Chance List of retiring products, so these will only be available until May 31 at the latest, while supplies last!

SHOP STAMPIN’ UP! FOR ANY PRODUCTS YOU HAVE HAD ON YOUR WISH LIST!

Coming May 1st For You: Share What You Love Bundle

Share What You Love Card2

Images © Stampin’ Up! 2018

Coming May 1st for you, the Share What You Love Bundle, your chance to get your hands on some new product before the Stampin’ Up! Catalog comes out!

Stampin’ Up! wants to share the love with every crafter with the upcoming Share What You Love Suite and as a tribute to those who have made the company what it is today!  And during May, CUSTOMERS get the chance to preorder products from this suite.

Stampin’ Up! is offering Bundles, suited to different kinds of crafters, only during this Preorder Early Release period.  The products will be available in the new catalog, but not in Bundles.

Click HERE to download the flyer describing all the Bundles available to you and the a la carte products!

You can also purchase the new In Color ink pads for 2018-2020.

In Color Collection Ink Pads 2018-2020

Pretty exciting, right?!!  Be sure to check out the FREE products you get with each Bundle. Order more than one Bundle if you like.

More details later!  Stay tuned! Get ready for Tuesday, May 1st!

Remember, this Pre-Release is FOR YOU, beginning May 1st through May 31, for the Share What You Love Bundle!


Get Craft Kits on Sale From Paper Pumpkin Up To 75% Off!

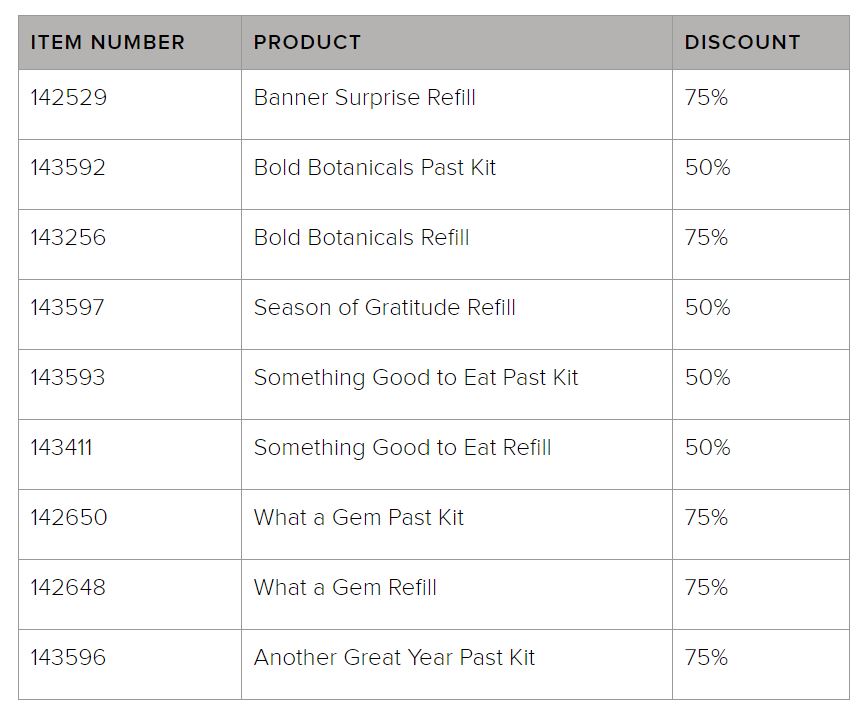
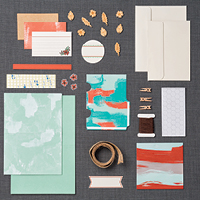
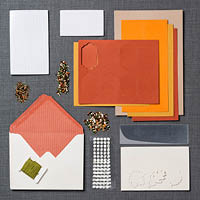
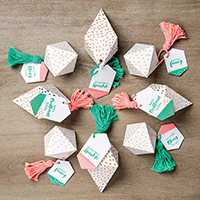
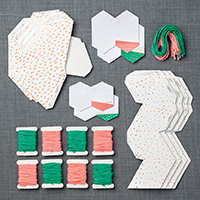
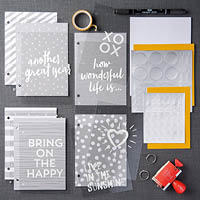
Usually past Paper Pumpkin Kits and Refills to the kits are reserved only for Paper Pumpkin subscribers.  But starting today, until May 9, or WHILE SUPPLIES LAST, everybody can stock up on great deals on these papercrafting kits! Check out the list below!

Paper Pumpkin Spring Sale 2018

Just add the Item Number to your Stampin’ Up! order.  The Refill kits do not include the ink spot nor the exclusive stamp set, but all other supplies are included.  The “Past Kit” contains the full kit.  Even if you do not get the ink spot and stamps, you would probably find ways to use the supplies inside to make similar or alternative projects using the stamps you do have!  Just play!

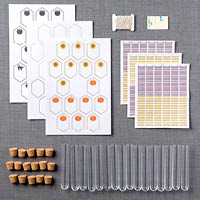
I believe the Something Good to Eat Kit (143593) may be sold out….and for good reason!  This is the kit that comes with 16 “test tubes” (treat tubes) that you can fill with candy or something and decorate for Halloween or Christmas or any fun occasion!  I know my Trick-or-Treaters loved getting them at my door!  So even if you just order the Refill to get the tubes, it will be a great deal and you will have fun playing with them! While they last!!!

Although the kit was made for Halloween, here is a project I made for St. Patrick’s Day! Click HERE.

Check out these Stampin’ Up! videos to get more details on these kits and more! Just click on the “Show More” after the first few videos to get to the older ones.
These “Spring Cleaning” Paper Pumpkin kits and refills will be discontinued May 9th if not sold. Everything is available while supplies last, of course!
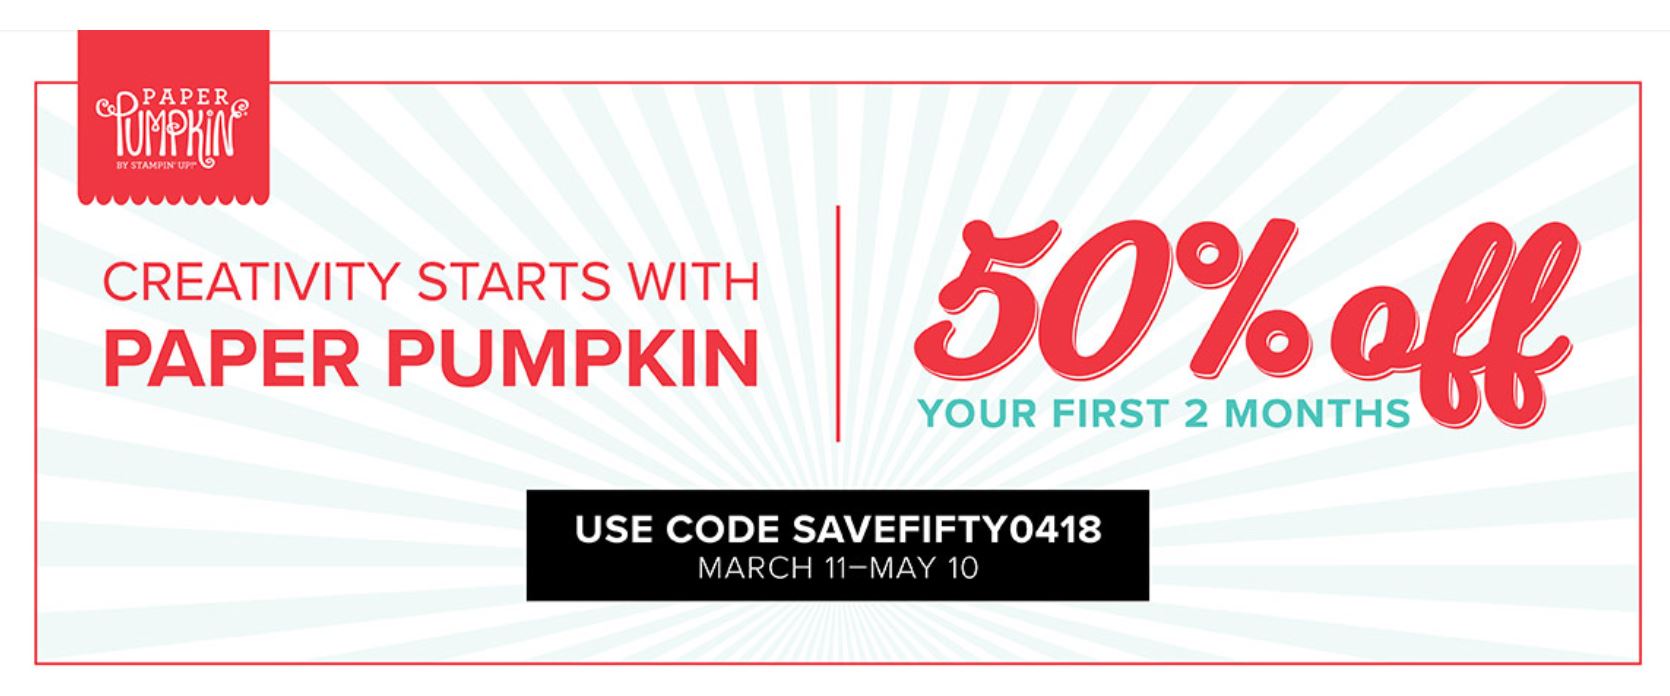
And if you are interested in Paper Pumpkin, try it out for two months with this special offer!
Paper Pumpkin 50 off 2018

Subscribe today (or at least by May 10th) and get the May and June Kits each at 50% off! That’s quite a deal for what you get!  An exclusive stamp set, an ink spot, an acrylic block with your first kit to mount the stamps, directions, a video to watch, and all the supplies in the kit to make the project.

JOIN PAPER PUMPKIN HERE!

Take advantage of Stampin’ Up!’s spring cleaning sale and pick up a few of these craft kits on sale from Paper Pumpkin up to 75% off to add to your crafting fun!

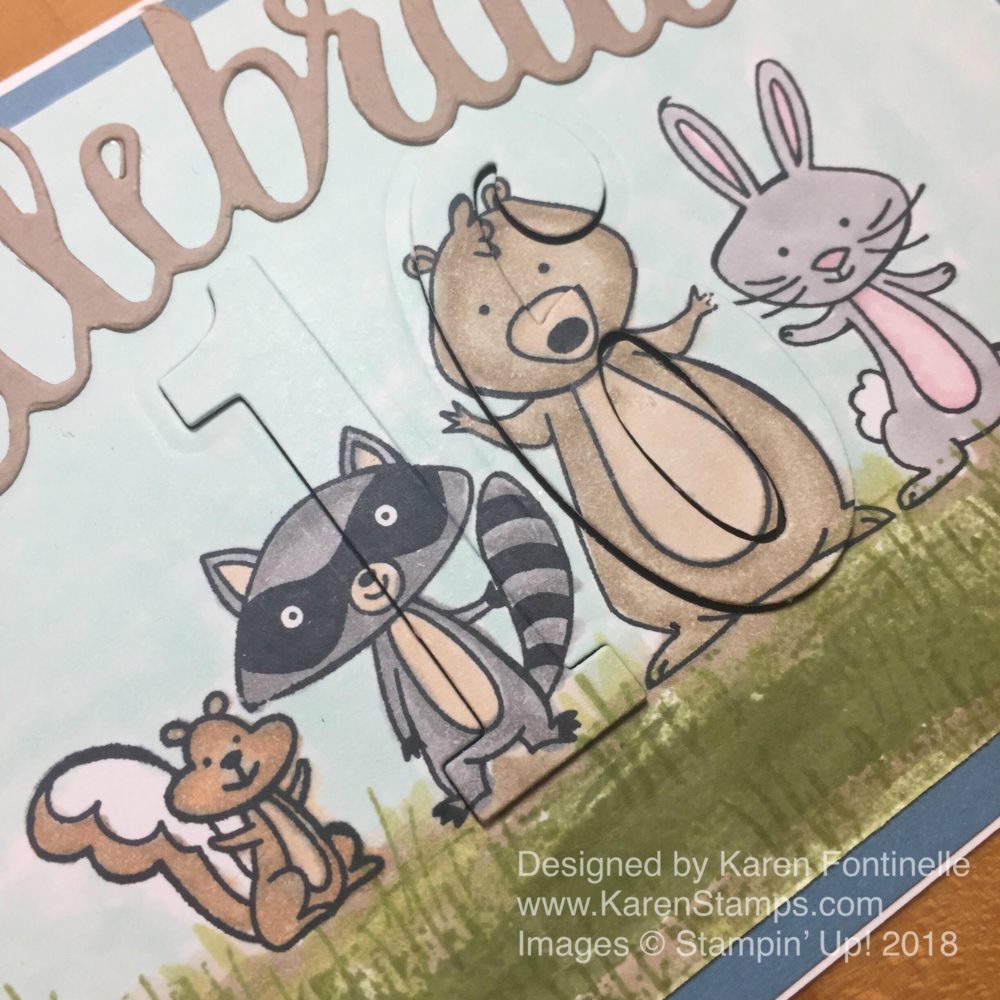
Eclipse Technique 16th Birthday Celebrate Animals Card

Eclipse Technique 16th Birthday Celebrate Animals Card

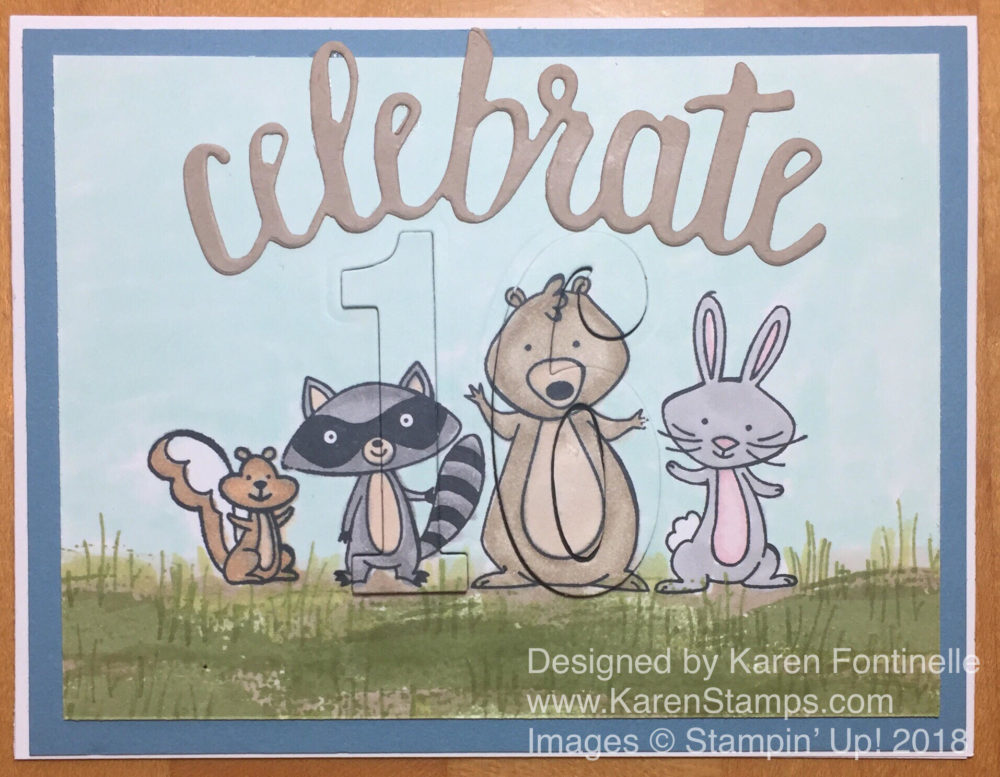
Sometimes you can just copy yourself as I did with this card because I love this stamp set and wanted to try the Eclipse Technique for a 16th Birthday card with the We Must Celebrate Animals!  Maybe not quite your typical 16th birthday card, but it was what I was in the mood to make that day! I love this stamp set and thought I would try the Eclipse Technique with the numbers.

Sadly, the We Must Celebrate Stamp Set is retiring the end of May.  I didn’t purchase it at first when it came out in the Occasions Catalog, but then I fell in love with it when I saw a lot of samples using it online.  Isn’t that what always happens?!  I even was so daring as to cut the animals apart carefully so I could use them separately, or even put them back together side by side on the acrylic block to stamp this card.

To do the Eclipse Technique, stamp the front of the card first, the do the die cuts. This must be a separate layer so that a darker layer will go underneath to make the numbers show up.  The darker layer underneath can either be the card base itself or just hide a darker layer underneath! After being die cut with the Big Shot, the numbers are then replaced in the space and popped up on Stampin’ Dimensionals.  I used the Large Numbers Framelits Dies, which I am also sad to report are retiring!  They are so great to use for birthdays and anniversaries and other special occasions, like graduations.  The coordinating stamp set, Number of Years Photopolymer Stamp Set is also going out.

Eclipse Technique 16th Birthday Celebrate Animals Card closeup

The card base is Whisper White Cardstock with a layer of Marina Mist.  I put a small layer of Basic Black behind the die cut numbers. The front of the card is colored in with Stampin’ Blends Markers.  The grass is stamped with two stamps from the Sheltering Tree Stamp Set.  First I stamp the large swath of grass and then I go back and stamp with the blades of grass stamp.  Maybe I fill in the empty spaces with a little bit of brown for a little dirt or even another shade of green.  The die-cut “Celebrate” is in the Celebrate You Thinlits Dies that were available during Sale-A-Bration, BUT this set will also be available in the upcoming Stampin’ Up! Catalog.

If you would like to see the same card I made without the Eclipse Technique, please click HERE.

If you love this animal stamp set, be sure to check it out on the Last-Chance list and get it before it is gone!

Some retiring items are already sold out, but you can see the ones that are still available by checking the Online Store rather than depending on the written list.

Try the Eclipse Technique on a card using whatever dies you think you can use, something like my Eclipse Technique 16th Birthday Celebrate Animals Card.


Easy Birthday Memories Birthday Cards

Easy Birthday Memories Birthday Cards

Images © Stampin’ Up! 2018

Take some time to make an assortment of easy Birthday Memories Birthday Cards using the Birthday Memories Designer Series Paper.  This paper, along with the coordinating Birthday Delivery Stamp Set and the Birthday Friends Framelits Dies.  All of these products are on the Last-Chance List of retiring products so don’t delay if you are interested!  And you can buy the stamp set, paper, and dies in a Bundle and save 10%!

The card with the vintage little girl is a z-fold card. All this means is you make the card base as usual, but then score the front of the card base at 2 1/8″, which is down the middle of the 4 1/4″ card front, and fold it back.  So, in essence, you just fold the front of the card back on itself in half!  Then add a front panel of whatever size you like, mainly one that will hide the greeting that you will stamp on the inside!  You can decorate each panel with designer paper or stamp as I did on the front panel.  That little girl always reminds me of paper dolls I used to have as a kid!

The card with the cakes doesn’t need much else since the paper pattern is so bold!  It makes you hungry just to look at that paper with all the beautifully decorated cakes!  Just adhere a layer of the designer paper to the Pacific Point card base with a Real Red layer in between to help the paper stand out.  The greeting is stamped in Real Red with a greeting in the stamp set and die cut with the Stitched Shapes Framelits Dies and layered on a scalloped oval in the Layering Ovals Framelits Dies.  This is popped up on Stampin’ Dimensionals with a bit of Gold Metallic Thread would around behind the greeting in a little “nest”.

The third card uses a simpler pattern in the Birthday Memories package and the birthday fox is die cut right from another piece of the designer paper!  How handy is that?!  You don’t even have to stamp and color the image! To spotlight him and his banner, stamped with a greeting from the stamp set, I die cut a large circle with the Layering Circles Framelits Dies.

All of these cards are pretty quick and easy to make, especially if you just copy mine and don’t think about a design.

Here’s another popular card I made earlier in the z-fold style.  It’s such an easy way to make a card yet the recipient will think you are a true designer!

If you are interested in any of the products in this birthday bundle, be sure to check if out in the Stampin’ Up! Online Store!  Then you, too, can make cards like these Easy Birthday Memories Birthday Cards!

Did You Miss Out on the April Paper Pumpkin Kit From Stampin’ Up!?

If you did not subscribe to Paper Pumpkin by April 10th, this is the April Paper Pumpkin Kit from Stampin’ Up! that you missed out on!  Not to mention 50% off!  If you love nautical, you would have loved this kit!

You can still subscribe now and receive the May and June Kits and even get them at 50% off with the special Promo Code:  SAVEFIFTY0418.  Just sign up for Paper Pumpkin HERE by May 10th!

And another benefit is that once you sign up, you can go to the Stampin’ Up! Online Store and look under Paper Pumpkin.  Later each month, after all the Paper Pumpkin kits have gone out, if Stampin’ Up! still has some full kits or refills (no ink spot, no stamp set) to sell, they will add them to the store.  Once you are a Paper Pumpkin subscriber, you will be able to go in the Store and purchase those kits. We don’t know yet about any extra April 2018 kits so we’ll have to wait and see, but if you subscribe to Paper Pumpkin today, you can start checking the store and maybe in a few more days they will add the April kit (or refill) to the store and you can purchase it.  In the mean time, you can start looking forward to the May kit coming to your mailbox mid-month!

This 50% off offer is for new subscribers only.  With your first Paper Pumpkin kit, you will receive an acrylic block on which to mount (stick) the stamps that come in the kit.

No risk, no obligation!  Try Paper Pumpkin for a few months and see how you like it.  Busy??  Just skip a month!  Hate it?? (no, that couldn’t happen!), not your thing?  Just cancel your account, no problem. I’ll even take care of it for you with Stampin’ Up!

You can follow the video and instructions for that kit exactly, or you can use all the supplies to make something different!  Some people do a little bit of both!  But for a beginner crafter who doesn’t have extra supplies, everything you need is included in the red box!  If you are experienced, it’s an opportunity to open the box and start creating without having to think of an idea first and then get out your supplies.  They are all right there ready to go!

TRY PAPER PUMPKIN FOR 50% OFF the FIRST TWO MONTHS!

Use Promo Code:  SAVEFIFTY0418

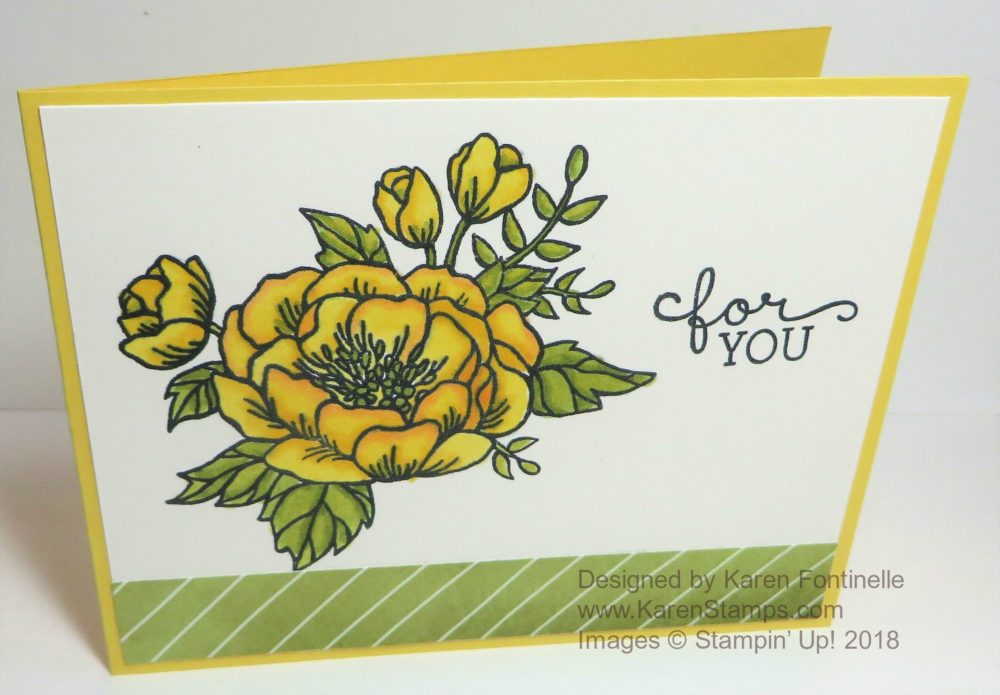
Birthday Blooms Floral All-Occasion Card

Birthday Blooms Floral All-Occasion Card

One of the beautiful stamp sets that is on the Last Chance list that I hate to l see leave is the Birthday Blooms Stamp Set, with which  stamped this Birthday Blooms Floral All-Occasion Card.  I’ve always thought this stamp set was so pretty and I loved the fonts of the sentiments. This stamp set can be used various ways. The flower image could be embossed, could be stamped and cut out around the outline, or stamped in a color with no coloring in a monochromatic card. Color in the flower image many different ways. You can make beautiful cards with this stamp set!

For my card, I used a card base of Daffodil Delight. This was a card base already cut in my pack of paper, cut the “long” way that I must not have used, that would have the fold at the top of card.  I chose to put the fold on the side of the card for something different.  We don’t usually make a card with the fold on the side but there’s no reason not to!

I stamped the flower and greeting on a piece of Shimmery White Cardstock, one of my favorite papers!  It has just the tiniest bit of shimmer that you can see if you hold the paper at the right angle, but it’s also good for watercoloring. I wasn’t watercoloring on this card,  I was using the Stampin’ Blends alcohol markers, but the paper is just good and works well with these markers.  The Stampin’ Blends got caught up in the Chinese New Year factory shut down right at the time that more and more people were ordering them, causing a huge backorder situation, so Stampin’ Up! took them off the ordering list for now until they are fully resupplied, probably around the time the new Stampin’ Up! catalog comes out.  It won’t be long now, hopefully!  I LOVE using these markers!!  There is just something about them!

For a little interest I added a strip of designer paper at the bottom. This happens to be from the Delightful Daisy Designer Series Paper, which has sold out already, but you can substitute from lots of choices.  You could even add a bit of ribbon tied around the side or some small accents, like pearls or dots or sequins to the front of the card, but there’s nothing wrong with simple!

I have to add that I used the Stamparatus to make this card.  I did try to do it without but when I stamped the greeting, it didn’t stamp fully!  So I was sunk!  I turned the paper over and stamped again….but this time, the flower didn’t ink up in the center ( probably needed to reink my ink pad!) so it didn’t stamp nicely. Then I grabbed my Stamparatus and when each of the stamps didn’t stamp fully, I could just ink up the stamp again and stamp again right over the image, thanks to the magnets holding my card front down like nobody’s business!  When you get a Stamparatus in the new catalog, you will want to be very careful with the magnets!  They are very strong!

If you want to make a simple card with a beautiful flower and lovely sentiment, be sure to get this Birthday Blooms Stamp Set before it retires May 31 and try a card like my Birthday Blooms Floral All-Occasion Card.

SHOP THE LAST-CHANCE RETIREMENT PRODUCTS TODAY!


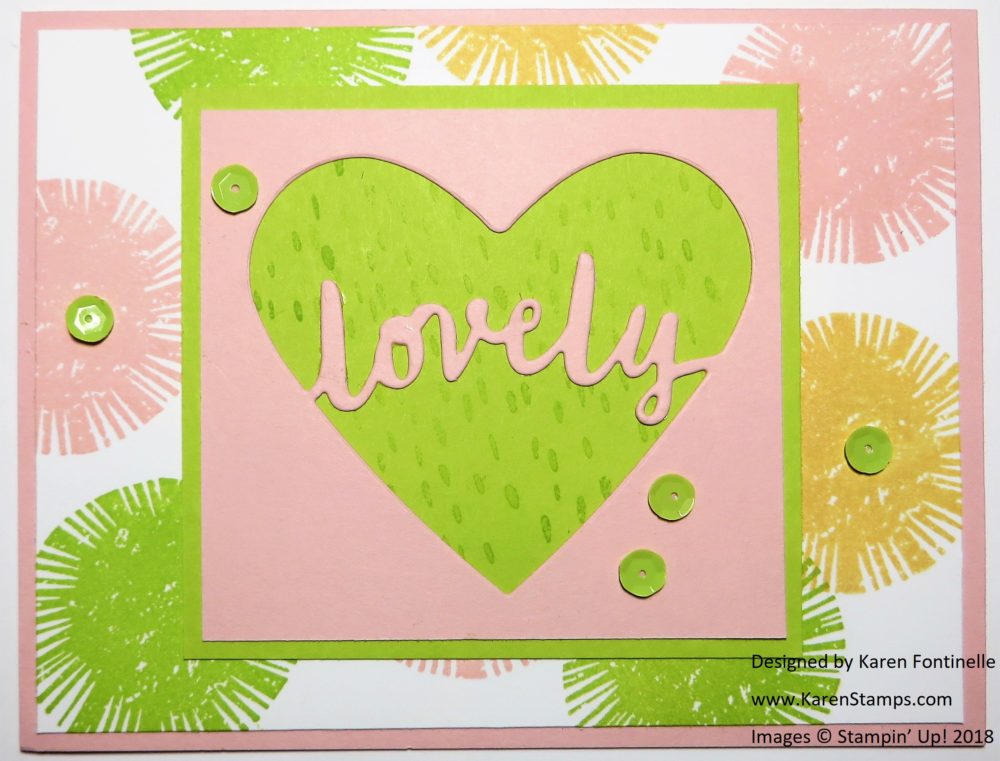
Lovely Inside and Out Multicolored Thinking of You Card

Lovely Inside and Out Multicolored Card

This Lovely Inside and Out Multicolored Thinking of You Card will certainly brighten up your day with the colors I chose! This is one of the stamp sets that is retiring, but I haven’t stamped with very much.  So sad!

What I was really interested in when I bought this Lovely Inside and Out Bundle was the Lovely Words Thinlits Dies.  You can use these dies in many ways, either like I did on the front of this card, just cutting out the word and shape out of a piece of rectangular paper. Or you can cut the word out by itself. You could have used another heart die on the outside of this die to make it an outline heart with the word inside.

Remember, Bundles in the current catalog will all retire as “Bundles”….in some cases, the stamp set and dies will continue on in the new catalog but separately (as there will be Bundles of the new products in the new catalog). In this case, with the Lovely Inside and Out Bundle, the stamp set and dies are all actually retiring, not just the Bundle configuration. So if you want to save 10% on any Bundles in the current catalog or Occasions Catalog, get them now and save 10% before May 31.

This card has a card base of Powder Pink. The Whisper White layer is stamped with two In Colors, Powder Pink and Lemon Lime Twist plus  some So Saffron thrown in for a third color.  The stamp set is called Lovely Inside and Out.  The die cut piece is layered over a piece of Lemon Lime Twist, but to add a little interest in the background, I stamped the scattered dot image in the stamp set, even stamping off first (when I remembered!!). This would make a great shaker card, too, but I was making something simple.  For a bit of bling, I used some Tutti-Fruitti Adhesive-Backed Sequins.  

You could use this card to send just as a “happy” card to send to a friend or someone you know. You never know who could really use a card on the day that it arrives in their mailbox! They won’t care if it is a simple card, just that you thought of them.

Remember, don’t wait too long on retiring products that you want, especially the ones you REALLY want!  Or ask me if something is showing as “Low Inventory” so you can get your order in right away.

Here are the products that are already sold out as of early this morning:

Make some “happy” cards today and mail them out to people!  Whether you hear back or not (and you probably will!) you will have the satisfaction of brightening someone’s day, not to mention the good therapy stamping cards will be for you! Use this Lovely Inside and Out Multicolored Thinking of You Card as your inspiration!

Shop Stampin’ Up! Online!