Category Archives: Big Shot

Make Easy Punch Art Easter Bunnies

Easy Punch Art Easter Bunnies

If you are making some last minute Easter cards or bunny tags for Easter baskets, here are two ways to make easy punch art Easter bunnies.  Punch art is always fun and easy to make and you can be so creative with your punch shapes and of course Big Shot dies.

I started with the card on the right with the Crumb Cake card base. To give a little interest, I stamped the Easter eggs from Basket Bunch randomly on the background of the card. You can do each one individually or do as I did, put all three eggs on a block and stamp! I stamped off once after inking up the stamps with Crumb Cake ink to give a very light watermark look on the card.  You can achieve the same look with Versamark Ink.

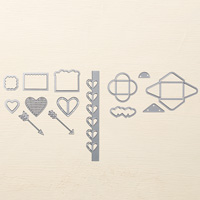
For the bunny on the Crumb Cake card — I used a heart shape from the Sweet & Sassy Framelits Dies and turned it upside down. The ovals for the ears are made with the Layering Ovals Framelits Dies.  The face is stamped with the bunny face pieces in the March 2017 Paper Pumpkin Kit.  I often forget to use the exclusive stamp set I get in each Paper Pumpkin Kit, but today I remembered!  The Easter greeting is stamped with the Teeny Tiny Wishes Stamp Set!  Boy, was I glad THAT set was not on the retirement list!  I use it all the time!  Such a good “go-to” stamp set for almost any greeting you need! I prefer the wood-mount set. Those are little Enamel Shapes on the end of the greeting, punched with the Classic Label Punch.

The other punch art Easter bunny on the Pink Pirouette card base, is made with the 2″ Circle Punch for the face.  The ears are made with the same oval die cuts as the other card.  The greeting has little pearls (retired). I couldn’t resist putting a little blush on the bunny’s cheeks with some Pink PIrouette ink and adding a little bow with the Smokey Slate 1/8″ Ribbon.

Here’s another Punch Art Easter Bunny I made a few years ago.  Just click the link.  If you would like more ideas, just do a search in the box on the right for “bunny”.

Sometimes you have to think outside the box for new ways to use your punches and dies and other tools and accessories.  There are so many creative ideas out there!  If only there was enough time to make everything that is cute!

You could also use a punch art or die cut bunny on a baby card or tag for a baby gift!  Bunnies aren’t just for Easter!

Shop Stampin’ Up! Online!  Check out the Retiring Products category!

Basket Bunch Easter Card

Basket Bunch Easter Card

Easter will be here in just one week! I don’t know where the time has gone considering Easter is late this year! Here is a Basket Bunch Easter Card that I got the basic inspiration from a card I saw online that was an egg-shaped card.  Instead of making mine an egg-shaped card, which I have done in that past, like THIS CARD,  I gave the impression of an egg by die-cutting an oval in the front of the card with the Layering Ovals Framelits Dies. Then I cut a Whisper White layer to put behind the opening and placed some of the Basket Bunch images on that layer inside the oval as well as stamping the greeting from the Basket Bunch Photopolymer Stamp Set.

There are a lot of little dies in the Basket Builder Framelits Dies  that you can use with the stamped images to die cut Easter eggs, bunnies, grass, a basket, a bow and more!  So many fun choices! As I was putting this little scene together, I thought I should have had a scalloped border around the oval, but the largest scallop was too small for the shape.  However, since the bottom portion was going to be covered up anyway, I just die cut the largest scalloped oval and then cut it open at the bottom to that I could “stretch” the oval around my opening to make it fit!  I think it worked pretty well!

Basket Bunch Easter Card Scallop

Here is a close-up of the die-cut elements of the card:

Basket Bunch Easter Card Close Up

While there are a lot of Easter elements in this Basket Bunch Photopolymer Bundle , I’m sure you can see how it can also be a good set for lots of occasions leaving out the parts that say “Easter”. A basket full of flowers, for example, is good for any occasion and is made even cuter with this die cut basket. And bunnies are cute any time!

Remember, the Stampin’ Up! Retirement List comes out tomorrow, April 10th at 1:00 pm MT, which is 2:00 PM Central Time. Remember, on big days like this, there can always be computer glitches and delays so just exercise patience if you have any problems viewing the website or putting in an order.

To order anything today or to see the Retiring Products tomorrow afternoon, just go to my Stampin’ Up! Online Store HERE!

Mini Treat Bag Birthday Pocket Card

Mini Treat Bag Birthday Pocket Card

Two of my favorites here in this blog post:  I used the Mini Treat Bag Thinlits Dies to make this treat bag turned into a birthday pocket card AND the Cool Treats Suite of products in the Occasions Catalog! I used the Tasty Treats Specialty Designer Series Paper for the Mini Treat Bag.

Watch the pattern when you run it through the Big Shot because the popsicles on the paper are going in one direction!  The first one I did I had it upside down! Since there are no mistakes in stamping, however, I will save that upside down treat bag and cut it apart and use the smaller pieces of paper on other projects! When you are working with patterned paper on any project, you do have to think about which way your design is going to go on your project and cut it or lay it out accordingly!

Although this die is named “Mini Treat Bag” you can design a card to add on the inside, which can be a greeting or hold a gift card. If you like another design, you can fold the top over and make a smaller type of little package. Click HERE to see my Altered Folded Mini Treat Bag. It was very cute, if I do say so myself!

There are lots of dies in this collection that can help embellish your Mini Treat Bag.  Use plain cardstock or designer paper, your choice.  It is easy to assemble and fun to make!

Today, tomorrow and Friday — these are the last 3 days of Sale-A-Bration so be sure to get your order in! If you are new, Sale-A-Bration has been going on since January but is Stampin’ Up!’s biggest promotion! You can order from the Occasions Catalog or the Annual Catalog or even the Clearance Rack!

With every $50 you spend on Stampin’ Up! merchandise (before shipping and tax) you get to choose a FREE product in one of the Sale-A-Bration Brochures.

Remember, we had a few new options released last week! Here are the choices!

Original Sale-A-Bration Brochure

New February Releases

Final Days New Releases

Not all items are still available, so if your online order says an item cannot be added that means the supply is exhausted,

It’s time to shop! Get whatever you want! If you get close to another $50 increment, add on some adhesive or reinkers or cardstock so you can get another FREE Sale-A-Bration product!

Have fun! Shop Stampin’ Up! HERE!


Cool Treats Ice Cream Sundae Card

Cool Treats Ice Cream Sundae Card

When I first read the Occasions Catalog, the suite that stood out to me was the Cool Treats Suite! I didn’t order it right away, but I loved everything on pages 32-33. I haven’t really had time to stamp with it yet, so when I finally did, I started with inspiration from the Occasions Catalog.  I decided to mostly copy one of the cards on page 32.

Really the only stamping on the card is the greeting, the rest are all die cuts with the Frozen Treats Framelits Dies. I also did not make my card square as I believe the catalog sample is. Did you know that if you mail a card in a square envelope you have to pay a surcharge? Even if you make a square card, it is better to put it in a rectangular envelope. To stamp the greeting in the two colors, I inked it up with the lighter color, Peekaboo Peach, and then colored over on the “cherry” word with the Watermelon Wonder Stampin’ Write Marker. Always remember to “huff” or breathe on a stamp when you have delayed stamping with it to remoisten the ink.

Before I adhered the ice cream scoops and bowl onto the Whisper White layer, I sponged some Pool Party ink for the background. For the little spoon, I die cut the Silver Foil paper.  How cute! Now you can die cut the sprinkles, but oh my, they are as tiny as a strand of hair! I don’t know how you glue those down, or barely even see them without magnifying glasses!  So instead, I used the Sprinkles Embellishments! These are a combination of sequins and tiny pearls, all very small. Just put a tiny drop of glue on the ice cream and then add the Sprinkles Embellishments. Or maybe punch some tiny circles or stars!

The little ice cream dish is die cut from the Tasty Treats Specialty Designer Series Paper. Such cute designs on this paper!  Remember that usually Stampin’ Up! makes their designer paper so that one side is bold or graphic or themed, and usually the other side is something more generic that you can use for other things as well.

You probably have seen many yummy samples of cards and other projects with this Cool Treats Suite of products. I love the colors and all the cuteness! Not to mention I love ice cream!  If you like the stamp set and the dies, be sure to use the Cool Treats Bundle number to order and save 10%!

The Occasions Catalog will come to an end but not until May 31.  However, if you wish to take advantage of Sale-A-Bration, this is the last week!!  Can you believe it?! Get your $50 or more orders in by March 31 to take advantage of this fun promotion! A few Sale-A-Bration choices are no longer available.

If you love ice cream and other frozen treats, you might enjoy the Cool Treats Suite of products, especially with summer coming up!  Lots of potential for party invitations, birthday cards, neighborhood get-togethers, happy cards!

Shop Stampin’ Up! Online HERE!

Easy Masculine Thinking of You Notecard

Easy Masculine Thinking of You Notecard

Stampin’ Up! has so many great products that it is difficult to keep up with all of them! One very overlooked product, I think, are the notecards and envelopes which make creating a card such as this Easy Masculine Thinking of You Notecard so simple and quick. The notecards are available in Whisper White and also in Crumb CakeSometimes you would even rather have a smaller card with less space because you just want to write a short and quick note and notecards are perfect for this!

Another great product in the Stampin’ Up! Annual Catalog is the Serene Scenery Designer Series Paper StackThere are many different designs, a lot that are perfect for masculine cards. On this Easy Masculine Thinking of You Notecard I used a Whisper White Notecard but put a layer of Soft Suede Cardstock on top and then a woodgrain patte.rn from the Serene Scenery Paper Stack.  The greeting is from the Window Shopping Stamp Set and die cut with the Big Shot and the Stitched Shapes Framelits Dies.  Then this piece was layered on a die cut made with the Layering Ovals Framelits Dies.  For an embellishment, I wrapped a piece of the Kraft Rope (retired) around.

While we get very excited about the seasonal catalogs, such as the current Occasions Catalog, don’t forget to look in the main Stampin’ Up! Catalog because there are lots of goodies in there, too! In fact, this catalog will fairly soon be on it’s way out, so it would be a good idea to look through it and reacquaint yourself with the catalog so you know if there are any products in there that you want before the retirement list hits!

Check out the Stampin’ Up! Notecards and Envelopes, both in Whisper White and Crumb Cake, although I would suggest the Whisper White ones are a little more useful. You can simply stamp right on the notecard with an image and/or greeting and be done. You can’t get any quicker and easier than that! Yet you can also embellish to your heart’s desire if you want! It is also great to know that you have the proper size envelopes with the notecards.

Click here to see a similar masculine notecard I made with the Serene Scenery Designer Series Paper Stack. We’re always looking for ideas for masculine cards and the Serene Scenery paper will really help you out!

Remember, with a $50 purchase, you get to choose a FREE Sale-A-Bration item!  This promotion ends March 31.

Shop Stampin’ Up! Online 24/7!

How To Make An Easy All-Occasion DIY Gift Bag

DIY Gift Bag

Save yourself a trip to the store and learn how to make an easy all-occasion DIY gift bag out of designer paper! You can make a gift bag using the Stampin’ Up! Gift Bag Punch Board or you can make one by just scoring paper to determine the size you want. I use my Paper Trimmer as I cut the paper to score with the Scoring Blade, (one comes with the Paper Trimmer)  but you could also use the Simply Scored Board.

Decide what paper or cardstock you want to use.  I used the beautiful Falling In Love Designer Series Paper. While I could have used either side of paper, I had planned to use this soft bokeh-look pattern and that is what I cut.  But when I turned the paper over, I saw that the pattern on the other side was a butterfly print. Had I wanted to use that side and didn’t give it any thought, as you can see in the photo below, I would have the pattern going wrong, so be sure you check which way you want your pattern to go and make sure you cut the paper in the correct direction.

Designer Paper Pattern Wrong Direction

For this particular gift bag, I cut the paper at 6″ x 11 3/8″. I placed the paper “long-ways” (portrait) in my Paper Trimmer and scored at 1 3/8″ for the bottom flaps. Then I turned the paper “sideways” (landscape) and scored at 2 1/8″, 5 1/4″ 7 3/8″, and 10 7/16″. You can’t really see all the score lines in the photo below and the photo is not blurry!  That’s the design on the paper!

Designer Paper Scored for Bag

As you can see, I cut out that tiny little piece on one end that you will see after you score your paper. And just to make the flap easier to fold without the top and bottom edges showing, I trimmed off the edges of the flap. This flap is where you will put adhesive to start assembling your box. As for the bottom of the paper with the 1 3/8″ scored area, just snip each score line up to the 1 3/8″ scored line to form the flaps.  Assemble your gift bag and decorate!

To decorate my gift bag, I die cut a butterfly with the Big Shot and the Butterflies Thinlits Dies, the largest butterfly, out of a Gold Foil Sheet. (My daughter used to call butterflies “foof-flies”.) How beautiful is this large gold foil butterfly? And to make it even more elegant, I added some Pearl Basic Jewels to the body. After I punched a hole in the top of the bag I tied on a Whisper White 5/8″ Organza Ribbon (my all-time favorite ribbon!) using the ribbon with the gold accents in the Sale-A-Bration 3/8″ Metallic Ribbon Combo Pack (143601)You can also add a greeting or tag if you want for whatever occasion you need.

Check out another card I made when the Butterflies Thinlits Dies first came out. These butterflies are made with the smaller medium size butterfly die, cut out of designer paper.

Remember, Sale-A-Bration comes to an end on March 31 so don’t let time fly by and miss it! Remember, there are three new releases since February 21 so you have two brochures to view at that link above.  One thing that is no longer available is the gold-striped Card Tin. Everything is available only while supplies last so don’t wait too long!

Make some easy all-occasion DIY gift bags to keep on hand for any last-minute gifts!

Shop Stampin’ Up! Online HERE!

How To Make a Hexagonal Decorated Birthday Gift Box

Hexagonal Decorated Birthday Gift Box

This Hexagonal Decorated Birthday Gift Box is fairly easy to make and turns out really cute! I strongly suggest you watch the Stampin’ Up! video below on how to make the box, even if you have watched it before because you might need a review like I did!

To make this hexagonal gift box, use the Big Shot and Window Box Thinlits Dies by Stampin’ Up! This set of dies is amazing! Besides the basic hexagonal box shape, it has pieces to decorate the to and sides of the box with decorative little cutouts! There are also other little pieces, one makes a tag and one makes those flag ends on a strip of paper.

On this box, even though it has those decorative dies to use, I opted to just make the basic box and then decorate it with designer paper and balloons for a birthday! You can make these boxes for ANY occasion or holiday! I’ve even seen them online where it is like they are stacked to make a taller box.  I’ll have to learn about that and try it! After I made the Hexagonal Window Box, I die cut  a piece of the polka dot paper in the Party Animal Designer Series Paper package with just, the lid portion of the basic box die. Then I cut along the score lines or slightly inside, so that it would fit on the top lid of the box. Around the side of the box, I cut a strip of the candles pattern paper to go around. Luckily a 12″ strip does fit and even overlaps a little on the back. For the candle pattern, I cut it so that the candles themselves would be fully pictured, which meant I first cut off a strip on the edge that just had partial images of the candles. My strip is 1 3/4″ wide, but you can make yours narrower if you like depending on the pattern or look you want. Another choice would be to stamp on the box before you assemble it. After I had the paper around the side, I tied on some 1/8″ Taffeta Ribbon in Emerald Envy. For the top of the box, I stamped and punched three balloons with the Balloon Adventures Stamp Set and the Balloon Bouquet Punch. I attached some Whisper White Thick Baker’s Twine to the balloons and tied on a bow.  If I hadn’t tied the bow, I might have put a “Happy Birthday Banner” instead. This Hexagonal Decorated Birthday Gift Box is a cute box and can be made in any colors for any occasion. It’s big enough for a small gift or some candies or treats.

Hexagonal Birthday Gift Box

To make the window box (with or without windows!), die cut two of the basic box pieces. If you want the decorative inserts you can cut them now or cut them before you assemble the box.

Window Box Pieces

One thing to remember is to cut off the end tabs of the straight strip portion on ONE piece. That is because when you go to assemble the box, you won’t need two tabs matching up, just one. Use a strong glue like the Multipurpose Liquid Glue or the Tear & Tape Adhesive.

Window Box Assembly

Fold the scored lines for the tabs.  I think it is easiest to glue the beginning part with the box laying flat. Just make sure everything is straight.

Enjoy the Stampin’ Up! video to learn about and how to use these Window Box Thinlits Dies!

Now are you ready to make these beautiful boxes for gifts or even just decorations or party favors? Order yours today at my Stampin’ Up! Online Store HERE.  Get the Bundle with the Window Shopping Stamp Set  so you have everything you want and save 10% over buying them separately. The cost of the Bundle will earn you a FREE Sale-A-Bration product as well!

Order HERE at Stampin’ Up! Online During Sale-A-Bration!

Placing Glimmer Paper Under Die Cuts on a Card

Using Glimmer Paper Under Die Cuts

This blog post will be about placing glimmer paper under die cuts on a card so that you can use the beautiful new 6″ x 6″ Glimmer Paper Assortment Pack (143831) that you can earn FREE during Sale-A-Bration. You’ll find this Glimmer Paper Pack in the extra Sale-A-Bration Brochure that came out February 21 to give you a few more choices during Sale-A-Bration,  which ends March 31.

I love the beautiful Special Reason Stamp Set and especially the Stylish Stems Framelits Dies. If you buy both in a Special Reason Bundle you can save 10% and you will be all set to go! It seems that Stampin’ Up! never wants us to be without flower choices!  These dies are particularly unique in the way they can cut out the flowers so that makes them even more interesting.

This card isn’t what I started out making, and I have to say, I don’t like my card! But since it is really about how I made the card rather than if I loved it and since I’m a bit under the weather today, I don’t really care that this isn’t one of my favorite designs!

I was going to just die cut a big flower and two smaller ones and place the new Glimmer Paper underneath. But then I realized that what I was thinking of was having the top card layer popped up with Stampin’ Dimensionals, so placing the Glimmer Paper underneath was going to be just a wee bit trickier. I couldn’t just place the glimmer paper underneath the die cuts directly, seeing what I was doing. I was going to have to adhere the glimmer paper to the card base and have it lined up perfectly with the die cut images on the layer I was going to place over it.

Glimmer Paper Placement Under Die Cuts

There was just a bit more playing around to make sure the color was under the entire area of the die cut flower without sticking out underneath the sides of the top layer or running into an adjacent flower. Once I thought I had it placed perfectly, I put a few pencil marks where the glimmer paper would go and glued down with my Multipurpose Liquid Glue.

Next I added the Stampin’ Dimensionals, with a few in the center of the card for support.

Using Glimmer Paper Under a Layer

Finally I stuck on the top layer on which, of course, I had already die cut the flowers with the Stylish Stems Framelits Dies.

Now after I did that, I realized I should have already stamped a greeting on the card front! I did finally take a chance and stamped a happy birthday greeting from the stamp set but it doesn’t look that eye-catching on the card. But for today, “oh well”!

The card still looked like it lacked something so I die cut some glimmer paper leaves!  They are pretty but I’m not sure they worked that well on this card.  Maybe they did on the big flower, but then the little flowers didn’t have anything!  So I took a chance and stamped some leaves with Mint Macaron ink around the little flowers. That didn’t look great so I added Clear Wink of Stella to the leaves. That didn’t do much, so I added the Gold Wink of Stella to the leaves! Finally I stamped the leaf veins and then I liked it a little better!

Maybe you like the card after all!  In some moments I do, but I think I could do better. Sometimes you have to know when to STOP when you are designing something! My friend and I used to always say that back in the day when we were painting tee shirts and wine glasses and plates! Maybe I will give this card another shot later, but now you know one way to use the Glimmer Paper, one of the new releases for Stampin’ Up! Sale-A-Bration, with die cuts!

Take Advantage of Stampin’ Up! Sale-A-Bration Before March 31 and Get Something FREE!

Easy Stamped Flower Card with Special Reason Stamps

Easy Stamped Flower Card with Special Reason Stamps

Here is an easy stamped flower card with the Special Reason Stamp Set. I wanted this to be a quick and easy card and it was.  For the card base I just used the Whisper White Thick Cardstock and I have no layers except for the greeting. To stamp the flowers and leaves, I used the 2016-2018 In Colors, all of them except Dapper Denim.  The greeting is one that is in the stamp set, Special Reason, as well as the shape that it is stamped on. I forgot that the matching Stylish Stems Framelits Dies have a shape to cut out both the greeting shape and the layer underneath, so I actually just hand cut them with my Paper Snips! Not too hard at all if you don’t have the framelits!  The ribbon is one of the Sale-A-Bration FREE choices with a $50 purchase of Stampin’ Up! merchandise. It’s called the 3/8″ Metallic Ribbon Combo Pack (143601) and is on page 11 of the Sale-A-Bration Brochure. One ribbon is white with silver accents and the other is vanilla ribbon with shiny gold accents woven through. It’s very soft and easy to tie and very pretty! I’ve ordered it twice!

I find that stamping a LOT on a card or scrapbook page is therapeutic. It just feels good having that stamp and block in my hand and fun to stamp randomly and see what turns out. If you need to get some stress-relief, just get out a clean piece of cardstock, choose a stamp and some ink and just stamp all over! And after what happened in our neighborhood on Tuesday, some stress-relief was in order! As I sat down to eat lunch and checked my phone, I also checked our neighborhood website for new posts.  Wow!  There was  a warning for my street and some others nearby to stay inside, there were burglary suspects on the loose!! In about another hour, someone posted that they heard gunshots. Very unfortunately, a neighbor down the street who is a policeman, answered the call even though it wasn’t for him, and he and another policeman went into a backyard to check out a shed where the door was open. At least one suspect was in there and shot both officers, although the gang member criminal was shot and killed by a third officer. Luckily the other officer was hit “only” in the leg and foot but our neighbor was critically injured. At that point, even more police, helicopters, ambulances and news media flooded into our neighborhood and we were “sheltered -in-place” all day while they searched for the suspect who got away.  Our neighborhood is not like this at all but for some reason this all happened the other day. I guess we never know what can happen from minute to minute. I plan to stamp some notecards that the officer’s wife down the street can use later on if she has people to thank and I’m sure she will. At least it is reassuring to know that the whole police community will be by their family’s side through this.

So on a lighter note, consider this pretty Special Reason Stamp Set and the Stylish Stems Framelits Dies, which you can purchase in a bundle and save 10%. The stamps have just a little texture on them, so don’t think they didn’t stamp well if you see some lighter areas. You will be able to make lots of beautiful cards and projects with this stamp set and dies.

Sometimes you just need to do some stamping, and by that I mean really pounding that ink pad and stamp to paper!  Try it!  It feels good! And when you do some random stamping, you can make an easy stamped flower card like this one with the Special Reason Stamp Set!

Shop Stampin’ Up! Online Today!

Shimmery Heart Die Cut Engagement Card

Shimmery Heart Die Cut Engagement Card

If you need an engagement card for an engagement party, use the Shimmery White Cardstock, which is beautiful in itself, and the gorgeous Bloomin’ Heart Thinlit Dies to make a Shimmery Heart Die Cut Engagement Card. 

Here is how I made the card.  The card base is Shimmery White Cardstock. The next layer is embossed with the Falling Petals Textured Impressions Embossing Folder. To me, this looks like little hearts, but I guess they are meant to be flower petals! It makes it hard to remember the name because I think the folder should be named “heart-something”! But it is a beautiful embossing folder and will be great to use on many, many cards.  The heart and little flowers are die cut with the Bloomin’ Heart Thinlits. It’s best to use the Precision Base Plate with the Big Shot since this is a more intricate die, and be sure to run it through twice, depending on your machine.  And I also highly recommend that you have the Big Shot Die Brush to use to get the little pieces out of the die and the die cut. Then adhere the little flowers on to the heart. I used the Dazzling Diamonds Glimmer Paper for the heart and flowers. And for a little bling, Rhinestone Basic Jewels are always good! The “Congratulations” greeting is from the Floral Phrases Stamp Set.

This card doesn’t photograph well because of the subtle shimmer of the Shimmery White Cardstock and the dazzle from the Dazzling Diamonds Glimmer Paper! In person, it looks very pretty and elegant.  You wouldn’t even have to have the Falling Petals embossed background, the die cut heart is pretty enough by itself on a card. You could even color the glimmer paper with a little reinker and Aqua Painter or brush to add some lightly colored flowers on the heart.  You can see this coloring technique that I did on some punched hearts on this card here on my blog.

They say June is the month for weddings, so maybe you need to start an engagement and wedding stack of cards!  It’s always nice to have some extra cards on hand.  When you make one card and like it, make a couple more of the same while you have the supplies out. You could also make this same card for other occasions, just by changing the greeting or leaving any greeting off. This Shimmery Heart Die Cut Engagement Card is well suited for an engagement card, wedding, birthdays, congratulations and many occasions.

Shop Stampin’ Up! During Sale-A-Bration!

Stylish Stems Cutout Die Birthday Card

Stylish Stems Cutout Die Birthday Card

I saw a card like this one and immediately thought I needed to make one like it, a Stylish Stems Cutout Die Birthday Card.  I used a Pool Party card base with a Whisper White layer die cut with a flower die with a glimmer paper behind it. I love the simplicity and elegance of the card, and it has tons of possibilities! I want to make more!

Just think!  Using this basic card idea, you could make a card for almost any occasion! Die cut the flower, put some contrasting paper behind it, and stamp a greeting! So simple and so easy! I was going to make the card white on white like the sample I saw online, but decided to add some color with the Pool Party cardstock. To make the flower I just used my Big Shot and the Stylish Stems Framelits DiesThese dies are special because the large flower die just cuts out the flower pieces as you see on the card above. If you want to die cut the whole flower to use elsewhere, then you can add the shape around it to die cut it. I just adhered a piece of Silver Glimmer Paper behind the die cut flower for some pizzazz!  The greeting is from the Window Shopping Stamp Set.

There is a coordinating stamp set, Special Reason, to use with these dies. If you want to save 10%, the Special Reason Bundle comes with both the stamp set and the framelits dies. I’m sure you will want both sets to make beautiful cards and projects.

Check out the Stampin’ Up! video below to see how to use this stamp set and framelits dies!

And don’t forget……Sale-A-Bration is going on!  For each $50 you spend at Stampin’ Up!, you get to choose a FREE product in the Sale-A-Bration Brochure!

Shop Stampin’ Up! Online HERE!

Die Cut Hearts Easy Valentine Card

Die Cut Hearts Easy Valentine Card

In playing with my new Love Notes Framelits Dies, I decided to cut a lot of hearts and make a die cut hearts easy Valentine card.  I just chose some Real Red card stock and Silver Glimmer Paper for the hearts. Then I just played with arranging the hearts until I came up with a pleasing layout.  You can see that one of the dies makes the hearts pop up on a center fold! On one of the them I snipped the inside heart off so that I had just the thin outline heart. The card base is just Whisper White Thick Cardstock although I have it laying on a piece of red cardstock for the photo. But as you can see, it would be a pretty card with a Real Red card base and a Whisper White layer with the hearts adhered. In fact, you could use pink or many colors of hearts! Makes me want to play some more with this same idea!

The greeting is a stamp in the Sealed with Love Photopolymer Stamp Set.  There are so many great stamps in this set and they don’t all have to only be used on Valentine’s Day. We can use hearts in lots of ways for lots of occasions. And along with the Love Notes Framelits Dies, you will really be in business!  One of the dies even makes cute little bitty envelopes! If you would like to save 10%, just purchase the Sealed with Love Bundle to get the stamp set and framelits!

Valentine’s Day is coming, but you do still have time to order Stampin’ Up! supplies to make your cards and projects! And remember, you can use them for more than Valentine’s Day!  You will be making wedding cards, baby cards, birthday cards, love notes, all-occasion cards!

Shop Stampin’ Up! Online HERE!

Do you need the current catalogs and Sale-A-Bration Brochure? If you are interested in Stampin’ Up! products, email me at Karen@KarenStamps.com and I’d be happy to mail you complimentary catalogs! More fun than looking at them online, I say!

Stamp Tee Shirts and More with the Custom Tee Stamp Set!

Custom Tee Bundle

Images (c) Stampin’ Up! 2017

One stamp set you possibly could have overlooked in the new Occasions Catalog is the Custom Tee Photopolymer Stamp Set by Stampin’ Up! along with the T-shirt Builder Framelits Dies.  You can purchase both of these in a Bundle, the Custom Tee Bundle, and save 10%! Just add a little something more to your order and you will earn a FREE Sale-A-Bration item in the Sale-A-Bration Brochure!  Surely you want free stuff! To go along with this Bundle, one thing you might want to choose is the Designer Tee Stamp Set on page 19 of the Sale-A-Bration Brochure.  You could use these greetings on your tee shirts you stamp but also on any cards or projects as greetings!

Here is a new video from Stampin’ Up! telling you about the t-shirt products!  Enjoy!

This stamp set also reminds me of when I was a young girl and I loved designing and drawing clothing. It wasn’t a phase that lasted too long but I do remember a little booklet I put together drawn with colored pencils! If you yourself or a future clothing designer in your family likes that sort of thing, they could have lots of fun with this tee shirt stamp set.

This stamp set is also good for making masculine cards, something we always seem to have a bit of difficulty with.  And as Holly describes in the video, you can use some of the stamps just for adding a little background interest or as greetings on other projects.

To order any or all of these tee shirt products, please visit my Stampin’ Up! Online Store HERE!

Red White and Blue Patriotic Card for Inauguration Day

Red White and Blue Patriotic Card for Inauguration Day

Today, January 20, 2017 is Inauguration Day here in the United States. No matter everyone’s political choices, it is the day we celebrate the peaceful transition of power from one President to the other. In honor of today, here is a red, white and blue patriotic card for Inauguration Day!

This card is made with the Balloon Adventures Stamp Set and the Balloon Pop-Up Thinlits DiesI made it extra glitzy with the Gold Glimmer Paper, die cut with the big pop-up piece. Then I stamped the balloons with Real Red and Pacific Point Ink, punched out with the Balloon Bouquet Punch and adhered them over the Gold Glimmer paper balloons.  I also stamped the banner and greeting and just cut out by hand. The red paper behind the balloons is in the Sending Love Designer Series Paper Stack.  The card base is Pacific Point cardstock and cut the length of the paper, 11″ x 4 1/4″ with a fold at the top.

Just in case you don’t need an Inauguration Day card, you can easily use this card for a birthday!  Lots of possibilities with this stamp set and dies! Want to save 10%?  Buy the Balloon Adventures Photopolymer Bundle!  Get both the stamp set and set of dies at a discount.

Shop Stampin’ Up! Online HERE!

Stitched Shapes Framelits Dies Are Available Again!

If you recall, back in November, Stampin’ Up! released these new Stitched Shapes Framelits Dies as an early release from the upcoming new Stampin’ Up! Catalog. Well, they were SO popular that Stampin’ Up! couldn’t keep up with the demand until they got a lot more in stock! Well, that day was yesterday so now the Stitched Shapes Framelits Dies are available again!  I ordered mine at the time and have been using them ever since.  I really love these dies!  They just add a little something to the piece with the stitched look, just a little something that looks really nice.  And as stampers, we are always looking for that little extra that finishes a card or project.

Easy Ghirardelli Candy Holder

Here is just one sample I made with the Stitched Framelits Dies to add that stitched look border to my greeting, If you have some of the other shape dies with the scalloped edges, you can add another layer underneath the stitched shape and it adds a nice look, too.

Watch this Stampin’ Up! video for more ideas on using these framelits!  Then go to Stampin’ Up! Online and order yours today! (And remember, these were originally released before the holidays!!)

Check out these dies and other products at Stampin’ Up! today!  And don’t forget, with every $50 purchase you get a FREE Sale-A-Bration product!

Shop Stampin’ Up! Online!