Author Archives: Karen Fontinelle

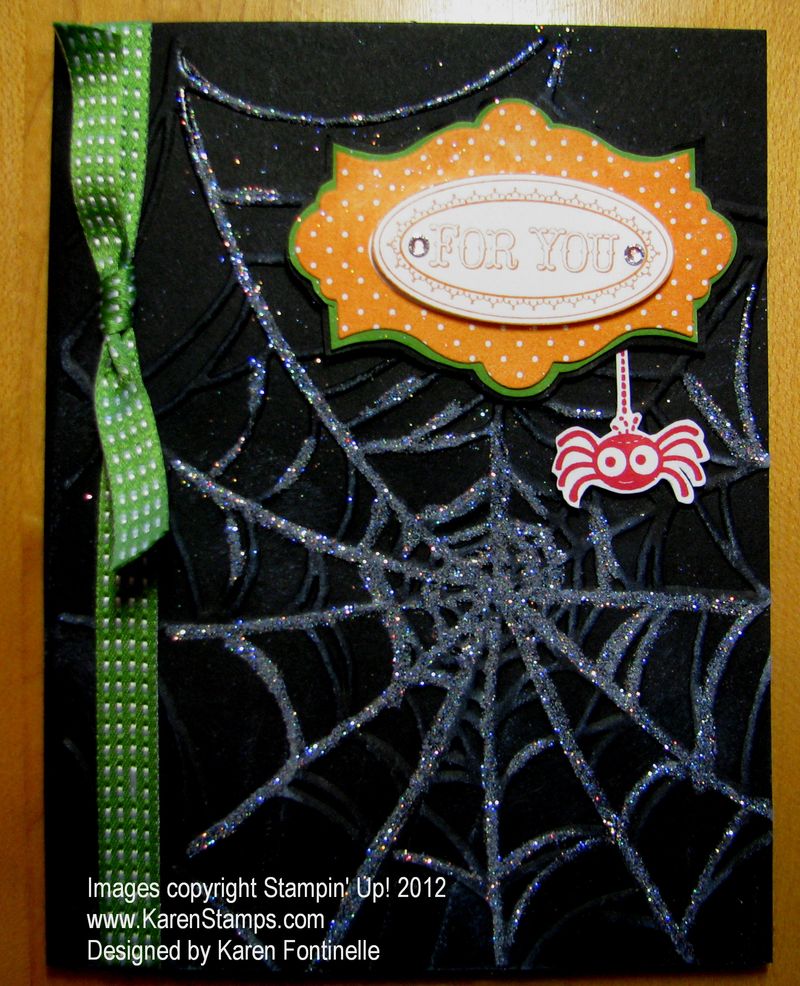
Halloween Glittery Spider Web Card


Halloween Card Spider Web

If you need a Halloween greeting card with a glittery spider web, this is the card for you! The Stampin' Up! Embossing Folders make it so easy with the Big Shot to jazz up your cards!

For this card, I just ran my Basic Black card stock card front through the Big Shot Die-Cutting Machine #113439 with the Spider Web Folder #120889 and sponged a little White Craft Ink #101731 over the raised edges.  But for some extra glitz, I couldn't resist using the 2-Way Glue Pen #100425 and some Dazzling Diamonds Glitter #102023 on parts of the spider web.

To make the label and greeting at the top, I stamped the "For You" frame image from Layered Labels (p. 103 in the Catalog) and cut out with the Apothecary Accents Framelits #127003. Since there isn't a large framelit to layer, I just cut out a slightly larger layer by hand.  Using your Paper Snips #103579  makes it an easy job. And then if you stamp the Layered Label again and punch out the words with the Oval Punch, you can layer that on top, popped up with a Stampin' Dimensional.

The little red spider is from Googly Ghouls in the Stampin' Up! Holiday Catalog p. 27. I don't know if any spiders are red, but I thought this one would be cute in red! I just cut him out by hand, again with my Paper Snips.

For the finishing touches, I added a couple of Rhinestone Jewels to the label and tied the Gumball Green ribbon around the side of the card.  Remember, you can get a spool of that ribbon FREE with a $40 purchase in September!

It's time to order your supplies for your Halloween projects!  You can do so easily at my Online Store!
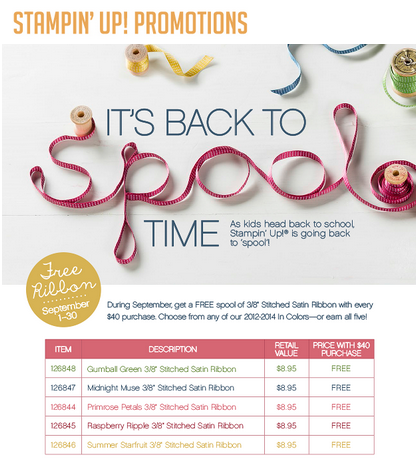
Stampin’ Up! Free Ribbon with Purchase….Back to”Spool” Time!


Spool Promotion

Don't forget this free ribbon promotion from Stampin' Up! during the whole month of September!  For every $40 you purchase in product, you may choose one free spool of 3/8" Stitched Satin Ribbon in the 2012-14 In Colors!  It's real "purty"!  You'll want to get some!!

Click on the image above for details.

Shop for your Stampin' Up! supplies at my Online Store!

Punch Art Panda Card

Panda Punch Art Card
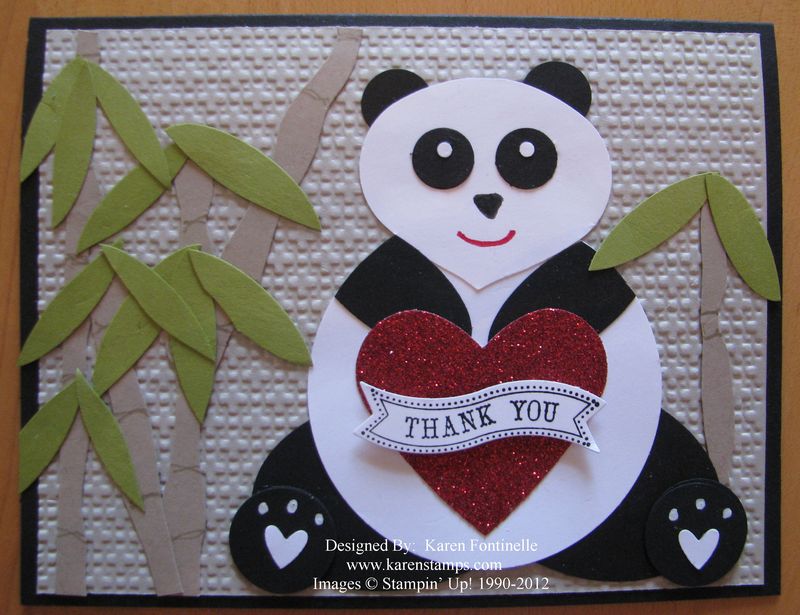
While in St. Louis a few weeks ago, we were able to attend the Lantern Festival at the Missouri Botanical Garden. It was a beautiful and colorful display of wire forms covered with silk, and after dark they lit all the displays and scenes. One of the displays was called "Panda's Paradise".  My sister-in-law's friend was able to get us all tickets to go, so when I heard her say she loved pandas, I knew I would make her a punch art panda card!
I know I found this idea somewhere on the stamping internet, but I modified it a little bit and added the red glimmer heart for my thank you. I thought the Lattice embossing folder made a good background. Can you guess that the panda's face is made with the Ornament Punch with the little top cut off?
Stampin' Up! sells a great variety of punches, and plenty of talented stampers, demos and customers alike, come up with all the creative uses for them, not just what you first see! So you know you will get your money's worth out of all the punches!
You can shop here for your Stampin' Up! punches  and any other papercrafting supplies! Of course if you prefer to email me your order, I'm happy to place it for you.

Stampin’ Up! Spooktacular Kit Offer…Last Day Sunday Sept 16th!


Spooktacular Project Kit for Recruits Aug 2012

Sunday, Sept. 16th, is the last day to get this adorable kit for Halloween when you sign up to be a Stampin' Up! Demonstrator! If you would like to make some extra money for the holidays, if you need some extra money for some bills, if you want a stash of money for yourself….or if you just plain want to enjoy being a Stampin' Up! Demonstrator….then take advantage of this offer!  Of course, any day is a good day to sign up to be part of the Stampin' Up! family, kit or no kit!  But this is just an extra fun perk!  One of many, as you will discover, being a Stampin' Up! Demonstrator.

Being a Stampin' Up! Demonstrator gives you flexibility to have a business and run it the way that works best for you and your family.

For more information on this promotion, click here and then scroll way down!

For general information about becoming a Stampin' Up! Demonstrator and starting your new business, please look at my Stampin' Up! website here. You'll find information about choosing $125 in product for your Starter Kit which only costs $99! You'll also receive some business supplies to get you started and your kit ships for free!  You Halloween project kit will also ship with your Starter Kit.

Email me if you have any questions.

When you're ready (anytime) just sign up online here!  Once on the page, just click the "JOIN NOW" button on the left.  No password required. It will ask you to read and agree to the Demonstrator Agreement, then choose and purchase your Starter Kit. Stampin' Up! will then email you your Demonstrator number and information to get into the Demo website!  Once you choose your kit, it only takes minutes!

31% of Digital for 31 Days…..Last Day Today!


31 off

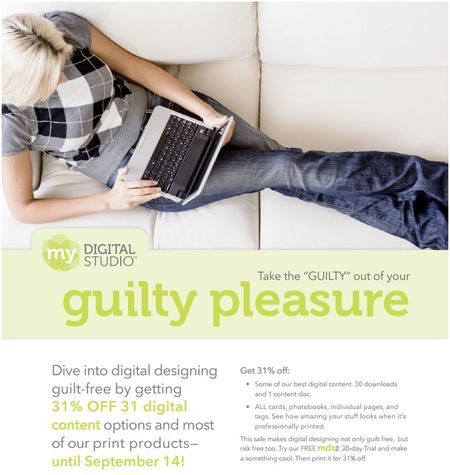
Today is the last day for the Stampin' Up! 31% OFF 31 digital promotion! It's not just about getting your projects printed, there is also digital content to purchase….downloads AND the Floral District Collection DVD! Check it all out in my Stampin' Up! Online Store! Downloads ship free of course…..because they don't ship!! You get them immediately to download!

Get the My Digital Studio FREE 30-Day Trial today and also purchase some extra downloads you think you might like….believe me, you'll like them all!

And now I've got to finish up my swatchbook and get it sent in to the Stampin' Up! printer to take advantage of the sale myself!!

Layered Labels Trick or Treat Halloween Card

Trick or Treat Halloween Card
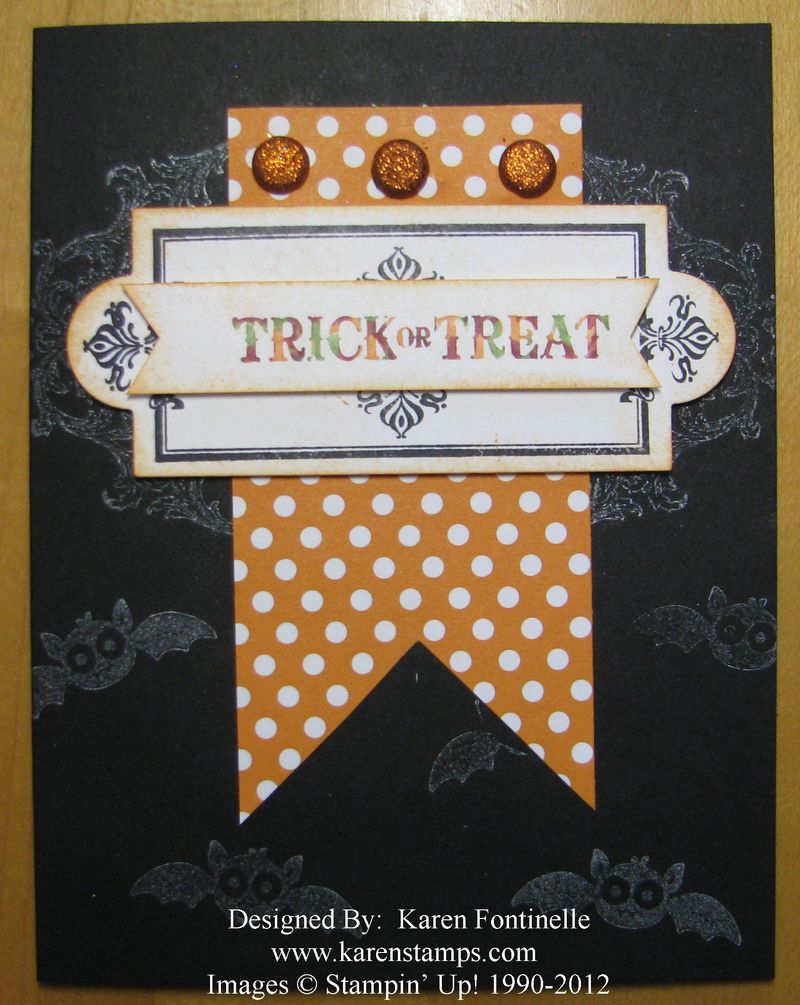
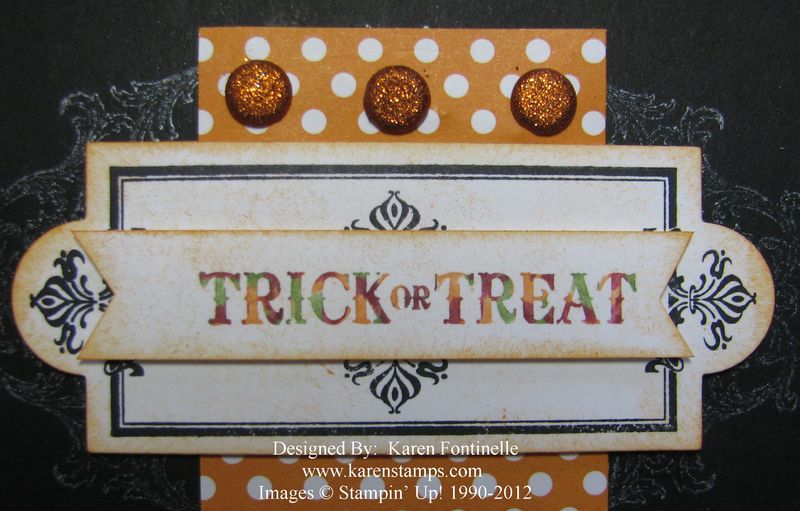
While I already had out the Layered Labels Stamp Set  and the cute Polka Dot Parade Designer Series Paper I decided to make another card in the same mode as yesterday's post.  Well, it turned out to be a Halloween Card! Notice how I did the "Trick or Treat" greeting! I'll tell you about that in a minute.
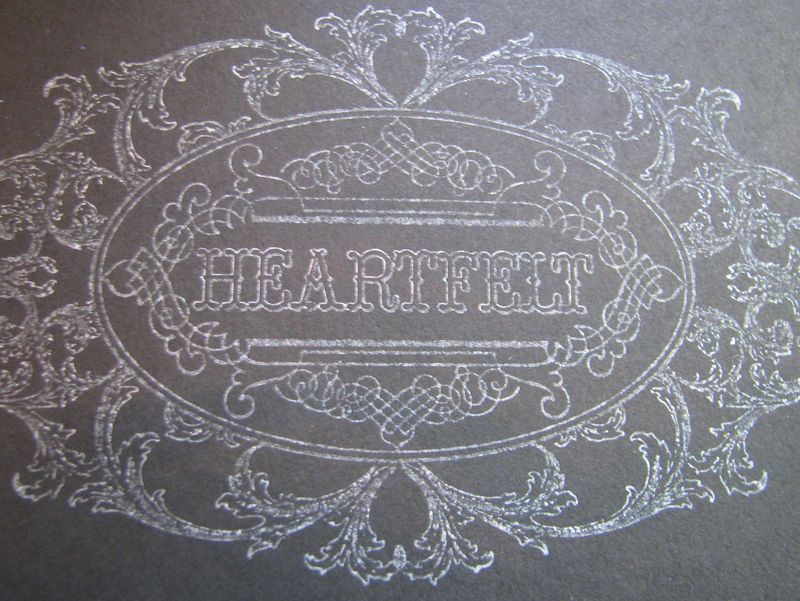
In stamping the large background image, which has "Heartfelt" on it, I used the new Illuminate Glimmer Watermark Stampin' Pad #126857.
Illuminate Glimmer Pad Stamping
The photo really doesn't pick up the slight shimmer of the ink, which is why it just looks white. The Holiday Catalog describes it as "a luminescent shimmer" and "watermark ink for tone-on-tone shimmer stamping.  Acid free." I also stamped the little bats on my card from Googly Ghouls with this Illuminate Glimmer pad.
To make the multi-colored "Trick or Treat" on the Layered Label, I colored the image randomly with markers.  I started with the lightest color first (because you don't want to mess up your markers with other colors!) and just colored here and there with one color, then did the same with the next color.  Of course it is very hard to tell if you hit all the spots except to look carefully and see if all the areas of the stamp are wet.  I got pretty lucky on this one, although after looking at the photo, I can see some tiny areas I missed!  But overall I loved the way it turned out!
Here is a close-up:
Halloween Layered Labels on Card
Instead of a ribbon bow at the top, I used three Glimmer Brads. I also sponged the labels with Pumpkin Pie ink to take off a little of the bright white.  I love the way it turned out!
It's time to order your supplies for your Halloween crafting!  My Online Store is always open!

Rubber Stamped Layered Labels Congratulations Card

Rubber Stamped Layered Labels Congratulations Card
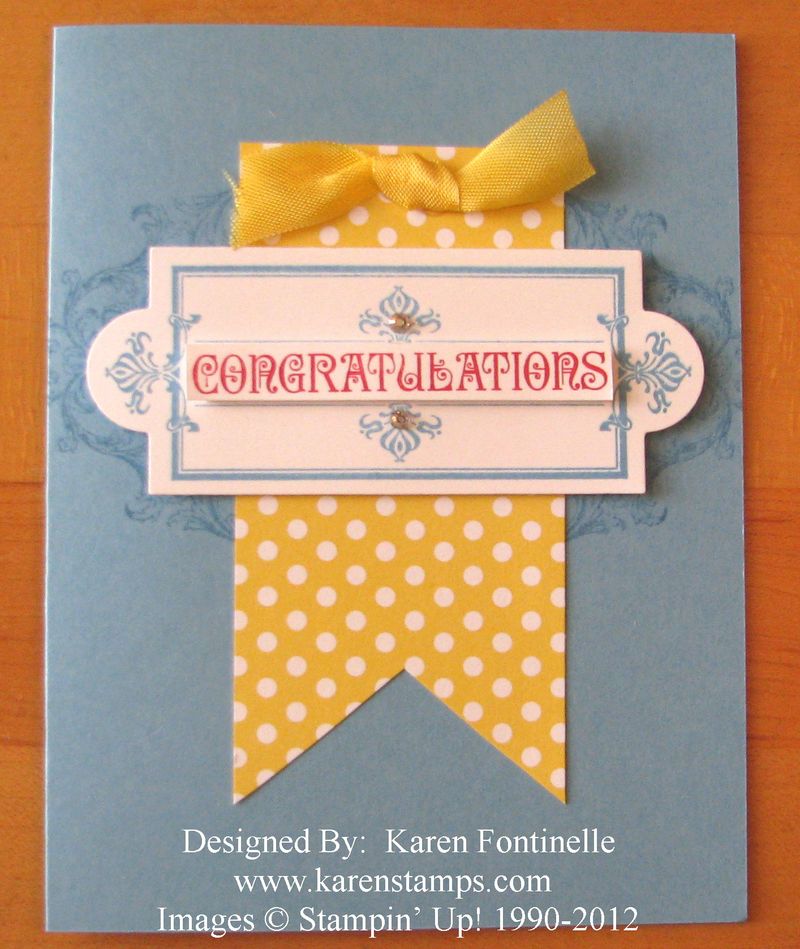
Sometimes you need to say "congratulations" to someone so it is good to make some rubber stamped cards to have on hand. This versatile card is made with the stamp set Layered Labels, found in the Stampin' Up! Catalog on page 103. I actually used the sample on that page to duplicate this card. And the Apothecary Accents Framelits Dies (p. 191) make it easy to cut out the frame with the Big Shot. I stamped the same frame again in Real Red and used my Paper Snips to cut out just the word "Congratulations".
The card base is Marina Mist card stock and the designer paper is the new fun Polka Dot Parade. The bow is made with a little piece of Daffodil Delight Seam Binding Ribbon. And for a little bling, I added a couple of Rhinestone Jewels. You gotta have some rhinestones now and then!!
The Layered Labels stamp set and the Apothecary Accents Framelits Dies work so well together to help you make lovely cards and other projects for all occasions.
You can find these stamping supplies and more at my Stampin' Up! Online Store! Put in your own order online….or if you prefer, call or email me with your order any time.

New My Digital Studio Downloads…A Halloween Party Ensemble

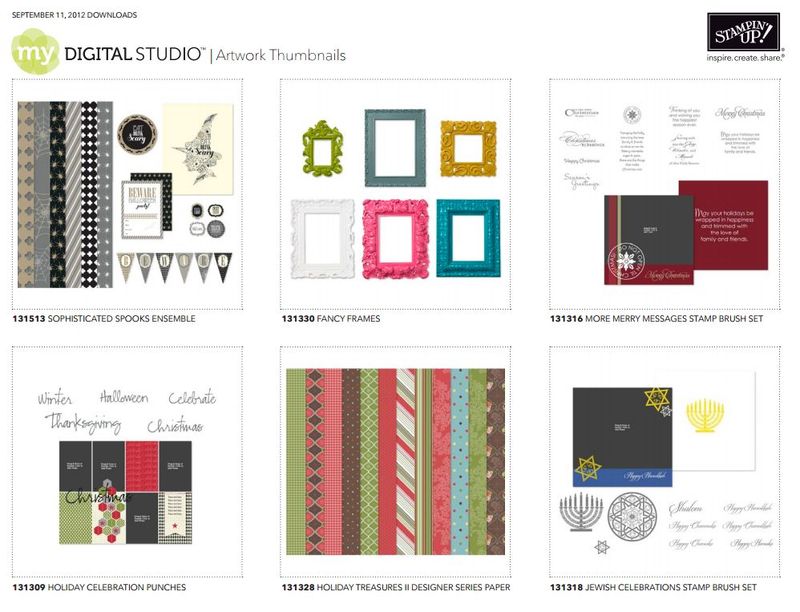
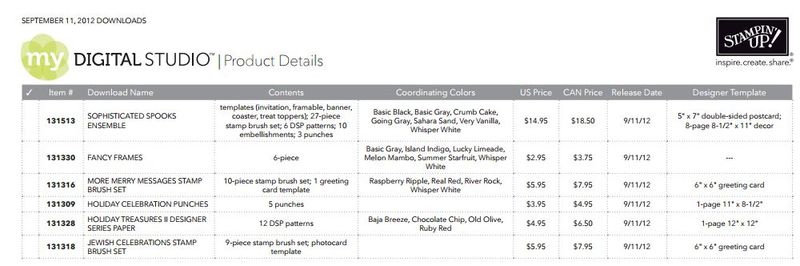
New downloads for My Digital Studio are released today! It's quite the assortment, with a whole Halloween Party Ensemble, a Jewish Celebrations stamp brush set, Christmas papers, punches and more; and Fancy Frames (they look like real picture frames!) Just think what projects you can make with these!

Click on the images below to enlarge:

MDS Downloads_Sept 11 2012

MDS Downloads_Sept 11 2012 Prices

Don't forget you can get the FREE 30-DAY TRIAL of My Digital Studio and purchase any extra downloads you would like!  You can even get your projects printed!

To see the most recent downloads, click here for my Online Store.

To see the whole area of My Digital Studio, click here for my Online Store.

And don't forget the 31 Days of Digital, 31% off select digital content and print products, extended until Sept. 14…..only 3 more days!  This promotion ends Friday, September 14, 2012.

Perfectly Preserved Stamp Set and My Jar Quilt

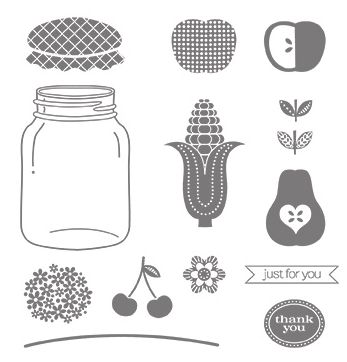
Perfectly Preserved Stamp Set
Images copyright Stampin' Up! 2012

When I first saw the Perfectly Preserved Stamp Set with its jar and some fruits and vegetables for its contents, I couldn't help but think of my jar quilt!

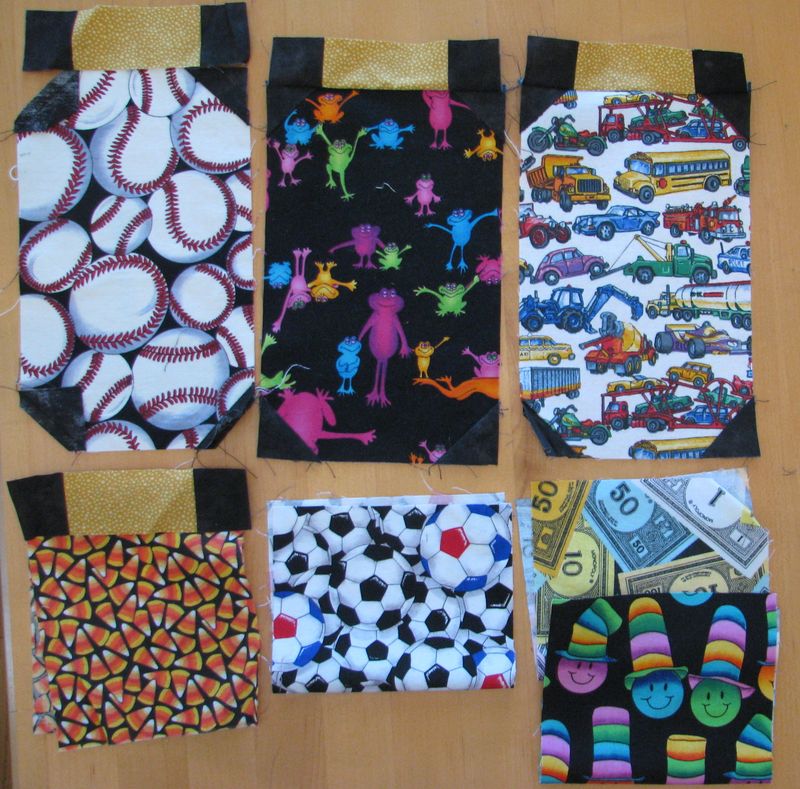
Many years ago I took a quilting class where we were going to make a quilt that would look like jars lined up on a black background filled with different things.  It was five jars across and then 4 jars going down. The jar shape was made out of print fabric that could have bugs or monsters or whatever you wanted "in" your jar and another strip of fabric for the lid of the jar. Little triangle pieces of black fabric would make the shape of the jar.

I'm not an expert seamstress so mine started as a disaster! In my own defense, I think it was the sewing machine that clumped all the thread together. What a mess! Some other lady taking the class tried ripping mine apart so I could start over, even as the teacher was worrying that the lady was using her class time to try to fix my quilt! I actually thought I had some part of mine put together but apparently not!   Like lots of unfinished craft projects, this was found in a drawer barely started!

Jar Quilt Pieces

I don't remember if the sample quilt had "jars" of bugs or not, but I knew I didn't want mine to be all about bugs….so I found fabric pieces of baseballs, monsters, play money, soccer balls, candy corn, vehicles and many other things. I think it would have been cute if only I had finished it! Maybe someday!!  

I think you could use the same idea with the Stampin' Up! Perfectly Preserved Stamp Set, use some other stamps, like sports balls or butterflies or ornaments or whatever to "fill" the jar! It doesn't have to be about food!

You can find the Perfectly Preserved Stamp Set in the Stampin' Up! Holiday Catalog on page 29.  If you are also interested in the matching Cannery Set Framelits Dies, then get the Perfectly Preserved Bundle and save 15%!

Let me know if you need any help in ordering or just go to my Online Store any time! And don't forget, if you spend $40, you can choose a free roll of 3/8" Stitched Satin Ribbon.  Spend $80 and get two rolls!  You'll love that ribbon!

A Text a Stamping Mother Would Love!

My son was coming home today with his girlfriend to attend a friend's wedding this evening.

This was the text I received from him this morning:

"Could I possibly commission you for one of your world famous handmade cards? 🙂 "

Wouldn't any stamping mother just love that??!

So if we ever think that what we do isn't valued or appreciated by our family, this is one of those moments that we have to savor!

I was glad that I had several wedding cards already in my stash so he and his girlfriend were able to go through my pile and pick one out.  She happened to love the one with the little wedding birds from Easy Events. Naturally I don't have a picture of it, but the stamped birds are centered on the card with the (retired) Lace Ribbon Punch behind it across the card and a couple of rhinestones.  I think the background was embossed with the Perfect Polka Dots Embossing Folder.  So you get the idea!

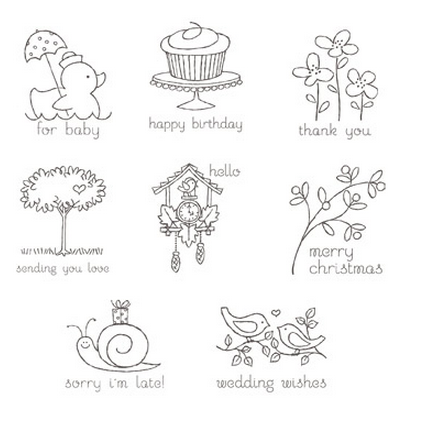
Easy Events Stamp Set

This is a great stamp set as I've said many times.  It covers most occasions and you can even leave off the words and just use the image! You can order the stamps in either wood- or clear-mount.  You can even cut the words apart from the image and use them separately.

If you need a good versatile stamp set, this would be one I would recommend.  Just visit my Online Store!

Don't forget the free ribbon promotion with every $40 you spend!


Keep a Journal of Your Child’s Senior Year of High School

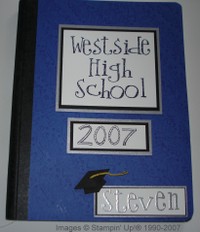
Senior Year Notebook

Now that it is “back to school” for most everyone by now, I remembered this idea of keeping a journal about your child’s senior year of high school which I blogged about back in 2007! Wow!
I read this idea in a magazine:  
During your child’s senior year of high school, keep a daily journal of what happened in your child’s life…now here’s the challenge….keeping it positive! Not so easy at that point in time everyday! I kept the notebook by my bedside and was pretty good at writing something every night. I didn’t tell anyone that I was doing it; in fact, I didn’t decorate the front of the notebook until right before graduation. Now I was under no illusion that my child was going to think this was fantastic at the time….but I told them that in twenty, thirty, forty years from now when they found this in a box of their “stuff” they would probably find it quite interesting and valuable.
I’ve had some mothers tell me they do this every year for their child.  I doubt I could have kept it up that long and that well, but at least I did for this one important year! This isn’t a scrapbook and it’s not my lofty thoughts…it’s just a notebook with the date and a write-up of what happened that day (unless it was something ugly!) (C’mon, we all know those days exist!). Some might be short, some longer.
You could do whatever suits you…the point is, just do something that will be a keepsake (someday!) for your child.  And please do it in your own handwriting! I’m a big believer in handwriting….maybe I’m old-fashioned like that. I think to see someone’s handwriting brings them back to you. It’s part of our personality.
Let me know if you decide to do this and how it turns out!

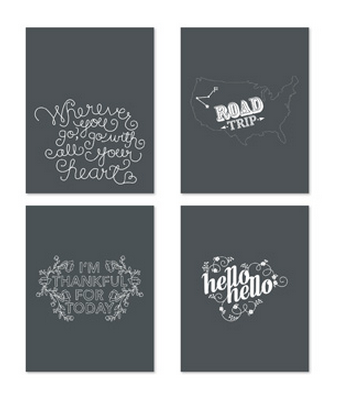
Wherever You Go Stamp Brush Set

The "Wherever You Go" Stamp Brush Set was one of the latest digital downloads released for My Digital Studio this week. "Stamp Brush" means it acts like a regular stamp.  One of the new features of MDS2 is that some stamp brushes are SVG files which means they can be enlarged without pixelating, and if you have an e-cutter you can use them with that. I didn't realize as I first looked over the new downloads that this one was designed like an overlay. These can be used over photos to perhaps create home decor and be framed.

Wherever You Go Stamp Brush Set
You can find out more about this stamp brush set here.

To get some great ideas on how to really use this set, check out the MDS site where one of the Stampin' Up! MDS experts has written a post about it and you'll see her fabulous artwork.

Let me know if you have any questions about trying My Digital Studio Version 2!

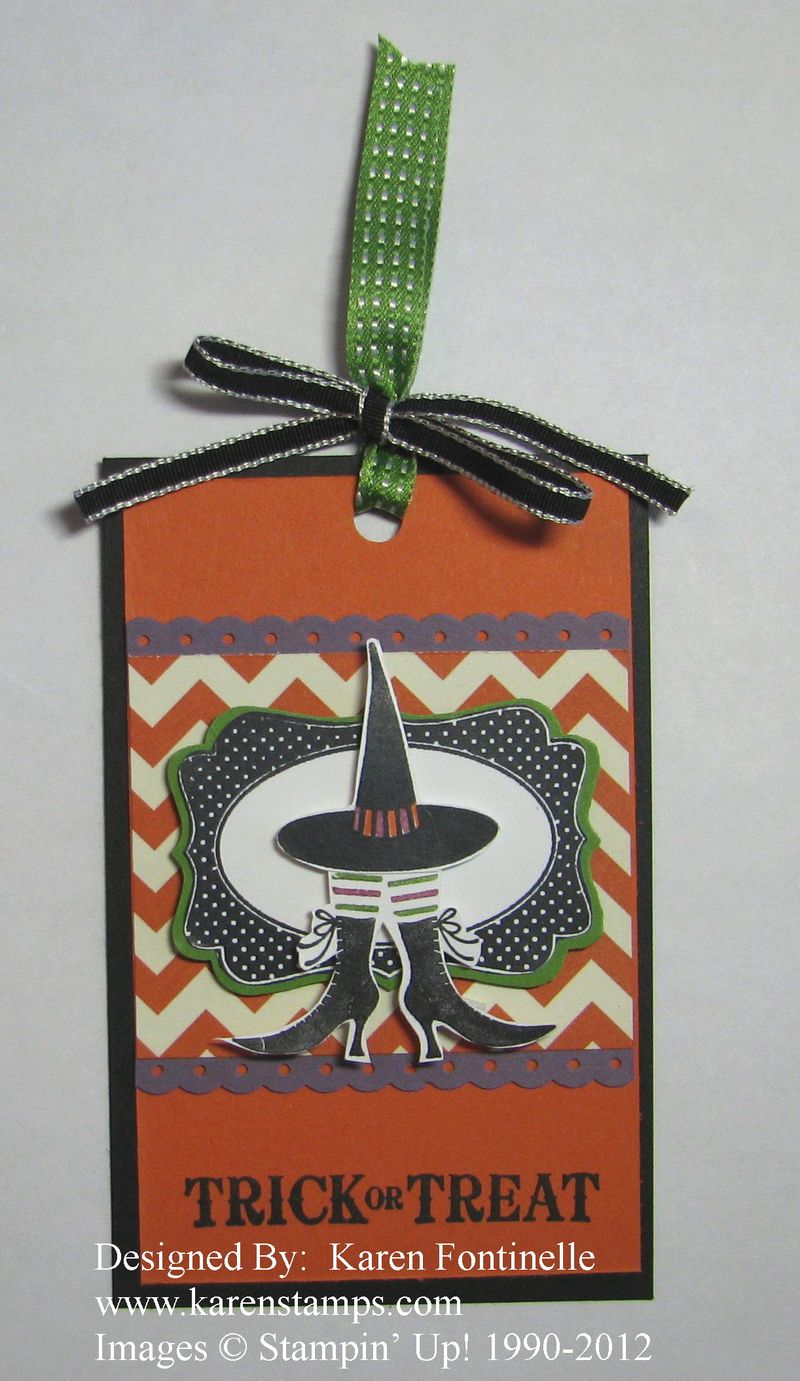
A Spooky Halloween Tag


Spooky Halloween Tag

You might need a Spooky Halloween Tag and here is a Wicked Cool one! Yes, it is stamped with the Wicked Cool stamp set (don't you just love those witch's boots?!) And don't forget, with every $40 purchase, you can choose a FREE roll of 3/8" Stitched Satin Ribbon during the month of September! I used the Gumball Green Stitched Satin Ribbon on this tag, tied with the 1/8" Basic Black Taffeta Ribbon.

Other supplies on this tag:

  • Basic Black, Tangerine Tango, Gumball Green, Perfect Plum Card Stock
  • Howlstooth & Scaringbone Designer Series Paper #126906
  • Toxic Treats Stamp Set (Trick or Treat)
  • Four Frames Stamp Set
  • Dotted Scallop Ribbon Border Punch #119275
  • Decorative Label Punch #120907

Just a fun handstamped spooky Halloween tag, just in case you need one!

If you need any Halloween stamping supplies, I would love to be your Demonstrator!

You can find my Online Store here….or just email me with your order.

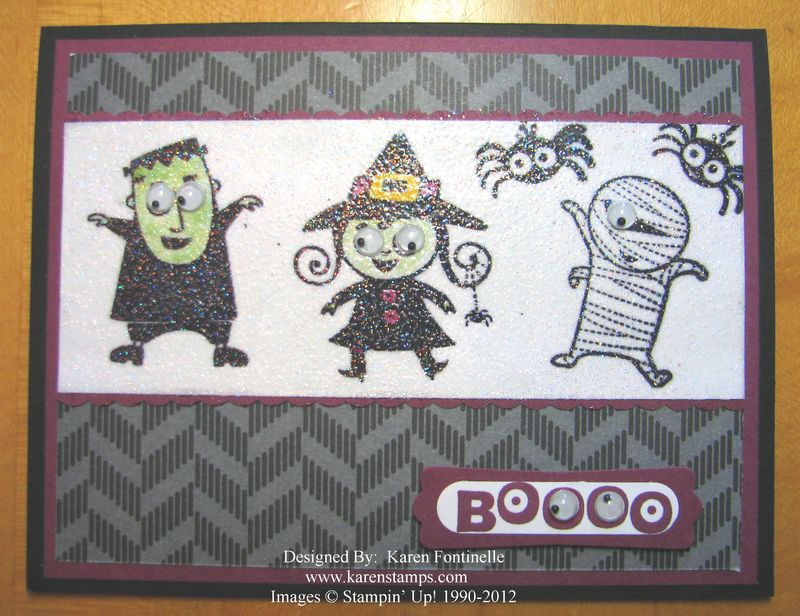
Googly Ghouls Sparkly Halloween Card

Googly Ghouls Sparkly Halloween Card

I hope you enjoy this Googly Ghouls Halloween card with some sparkly Iridescent Ice embossed over the ghouls!  I think you can see the sparkle in the photo. I simply stamped the Googly Ghouls with Stazon Black ink #101406, colored in with markers, tapped the Versamark pad #102283 all over it and embossed with the Iridescent Ice embossing powder #101930.  We have a new Heat Tool in the new Stampin' Up! catalog as well, on page 159, #129053. And for a finishing touch, I added some Googlie eyes #127539.

As I was putting this card together, I found I just loved the combination of this sheet of the Howlstooth & Scaringbone Designer Series Paper #126906 with the Raspberry Ripple #126842 and Basic Black #121045 card stock. I'm going to have to make something else with that combination!

Don't forget that the Stampin' Up! Holiday Catalog has "Bundles" on the inside of the front page to save you money!  And if you are in a Halloween mood, be sure to check out the Ghoulish Googlies Bundle on page 27.  Choose which stamp set you want, wood- or clear-mount and the Ghoulish Googlies Designer Kit together and save 15%. You'll get the stamps, the googly eyes, the bags, the tags, and the Baker's Twine. Believe me, it is such a fun purchase!

To get your Halloween stamping supplies, just go to my Online Store here.

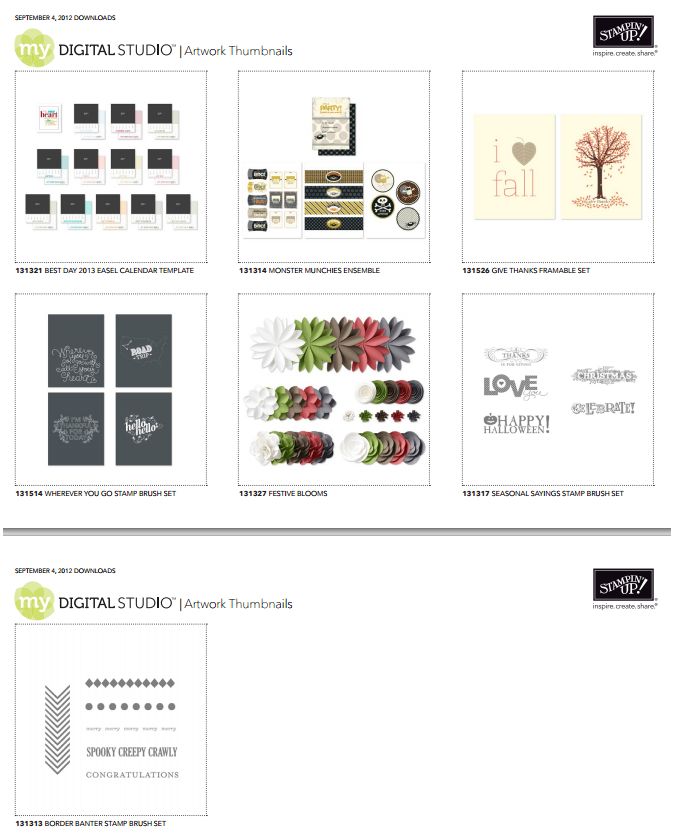
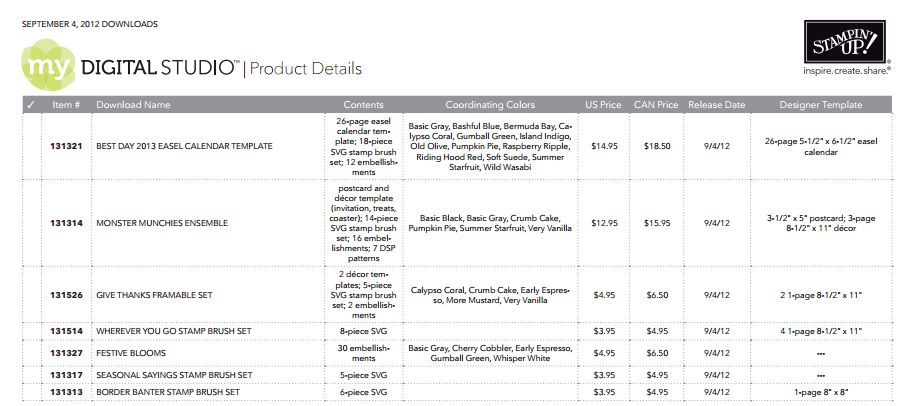
Stampin’ Up! My Digital Studio….Newest Downloads!

Even though it feels like Monday, after the Labor Day holiday yesterday, today is Tuesday and that means one thing…..new downloads from the Stampin' Up! digital papercrafting design software, My Digital Studio!

MDS Downloads_Sept 4 2012
MDS Downloads_Sept 4 2012 Prices

Just click on the images above to go to the pdf where you can see the downloads better.  Once there, zoom in a bit. AND you can also go HERE to my Online Store to see the newest downloads (and go back and look at the past ones because they never get old!)

Let me know if you have any questions! Just email me at Karen@KarenStamps.com