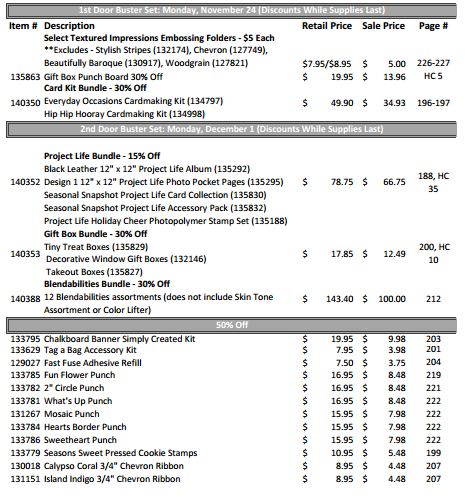
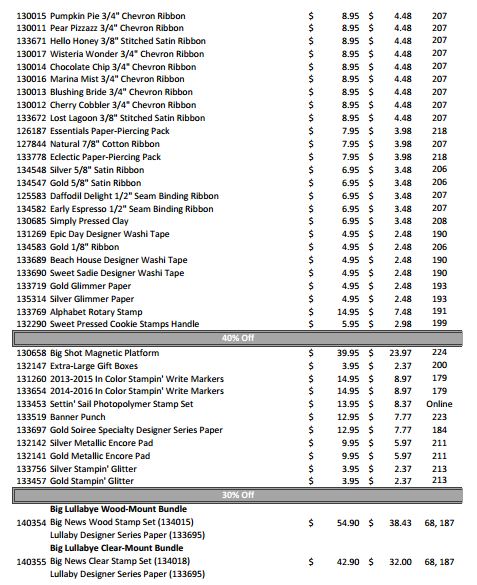
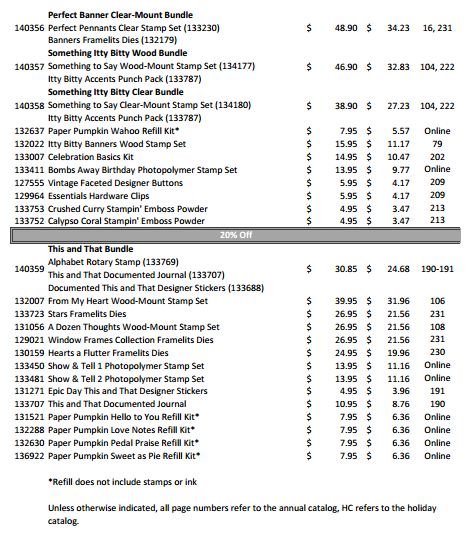
Get your Wish List ready because the Stampin’ Up! Online Extravaganza begins on Monday! Get Hot Deals Monday, November 24 through Tuesday, December 2, 2014. There will be discounts on select products and bundles, Plus DOORBUSTERS on the first day and again on Monday, Dec. 1st!You don’t want to miss them!
Don’t let the term “Online Extravaganza” scare you off if you don’t like putting your order in online. Just contact me and I can put it in for you!
Print out your list, think about it over the weekend and be ready to get your deals on Monday! Let me know if you have any questions that I can answer for you!
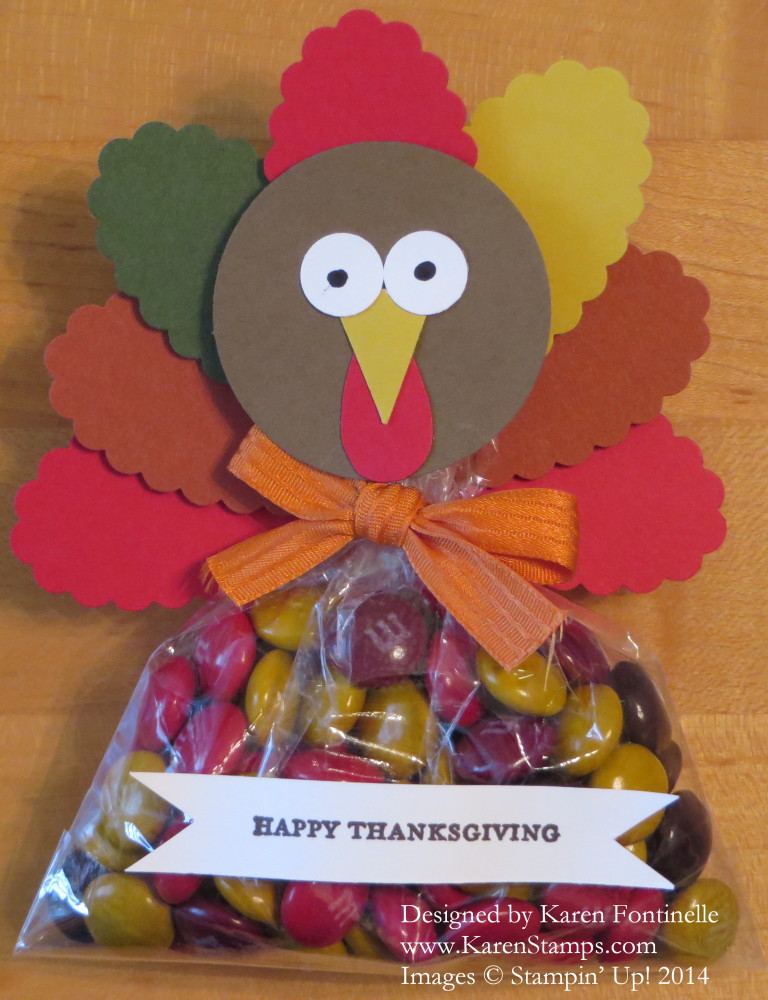
If you are looking for a Thanksgiving favor with a candy treat for your dinner table or maybe a little gift for someone, here is a bag of M&M’s made into a Thanksgiving turkey! I filled a Stampin’ Up!Cellophane 4″ x 6″ Bagwith candy and tied the top with the Tangelo Twist 3/8″ Satin Stitched Ribbon.I cut off about one inch of the top of the bag and then adhered the turkey head (1 3/4″ Circle Punch) with SNAIL Adhesive. Make the turkey facial features however you like, but I used the Owl Punch for the eyes and just colored with a black marker. The beak is the tip of the Triangle Punch and the wattle is made with the wing on the Bird Punchbut trimmed down a little more evenly. You don’t need punches for any of these pieces, just cut them yourself. For the turkey feathers, I just punched with the Scallop Oval Punch. You could also use Oval Punches, and you could emboss the feathers with an embossing folder. You could also use designer paper for a little more interest and varied colors. So many options!
Pssst! There’s a Stampin’ Up! Online Extravaganza coming next week! Be sure to keep in touch! Better yet, make sure you are signed up for my Mailing List as I will probably send out an email with these specials! Sign up in the red box at the top of this page on my blog!
Shop anytime at my Stampin’ Up! Online Store for all the best in stamping supplies!
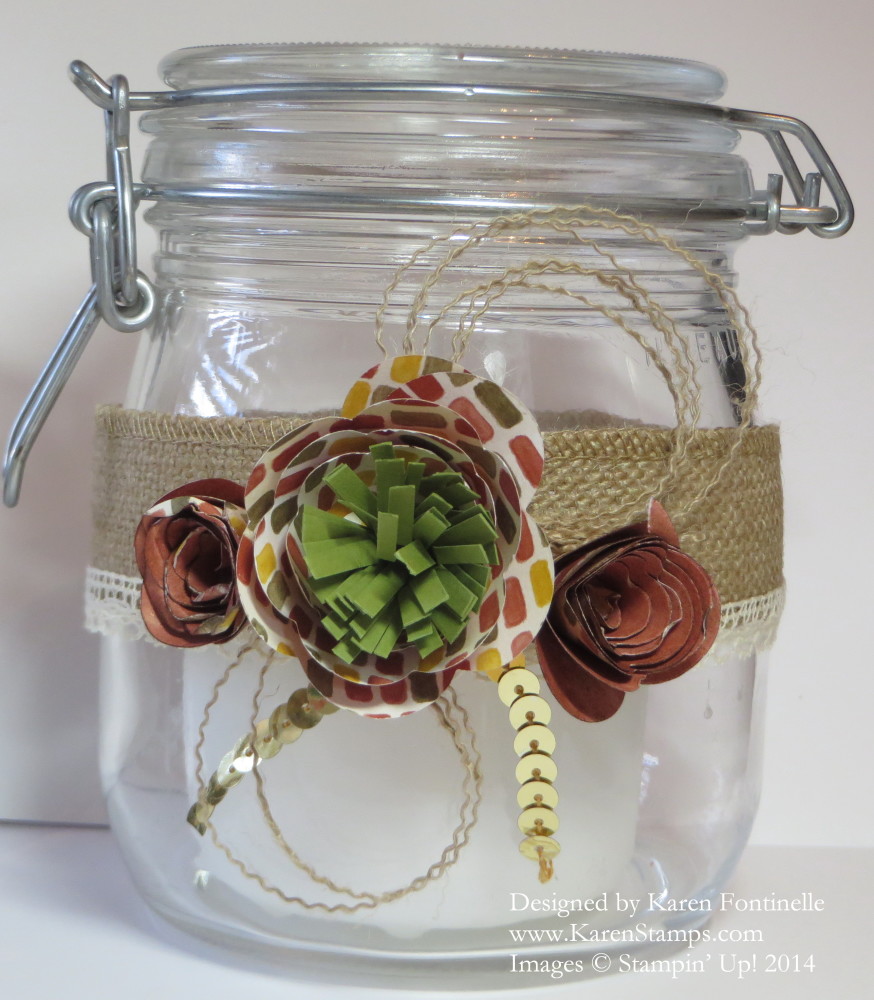
I found this glass jar in my craft stash and decided to add some Stampin’ Up! Burlap Ribbon and paper flowers made with the Originals Flower Spiral Bigz Die. The Burlap Ribbon also has a piece of Venetian Crochet Trim adhered to the bottom of the ribbon. I made the paper flowers with the Flower Spiral Die using the Color Me Autumn Designer Series Paper.It’s the same sheet of paper, just using the other side for one flower. The center of the big flower is made with a strip of Old Olive card stock, cut with the Fringe Scissors and rolled up and glued to the inside of the flower. For some extra embellishments I snipped a piece of Gold Sequin Trimand attached it with a Glue Dot. Then I took another piece of Burlap Ribbon, pulled off the bound edge and pulled several threads off to fray the edge of the ribbon. Then I just circled those burlap threads and adhered them behind the flowers with Glue Dots.
There is a white candle inside the jar although it can’t be seen very well in this photo. You could add some candy corn to the bottom of the jar and set the candle on top of that, or add some coffee beans or whatever you can think of to make the bottom of the jar more interesting. I bet if you look around your cabinets or craft supplies, you can find something like this jar to make into a bit of fall home decor and use it for Thanksgiving! If you don’t own the Flower Spiral Die, just make flowers with punches or simply tearing some circles out of paper, crumpling them up and distressing them a bit and putting them together into flowers. Or attach some paper or real colored leaves, perhaps even a Thanksgiving greeting. So many choices!
Burlap is so trendy right now. I was surprised walking around a craft store the other day how they have burlap on just about everything! And mason jars and similar are very popular right now as well.
See what you can find to make a piece of home decor for the Thanksgiving holiday….before it is time for all Christmas decor!
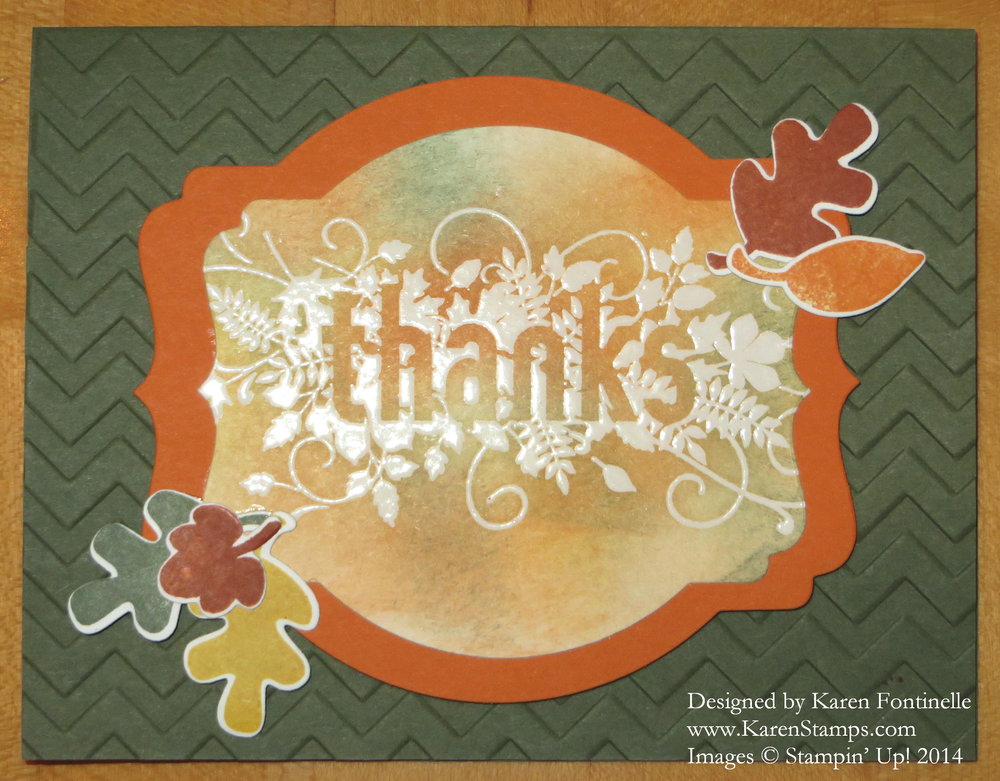
Finally I played with my Seasonally Scattered Stamp Set! Funny how some sets can get a little lost in the shuffle sometimes, but then it’s a thrill to “find” that new set one day and play! I stamped the “Thanks” in Versamark Inkand embossed with the Crystal Clear Embossing Powder and the Heat Tool.After the image was embossed, I sponged on various fall colors of ink and rubbed it right over the embossing (which is really fun in itself!). Then to clean it up a bit and make sure the embossed images shows through, I rubbed a tissue over the image to get off any excess ink. That’s it!
You might think the Fall Fest Stamp Set is only for Halloween, but the leaves and pumpkins can be used any time. I stamped the leaves and then used the Fun Fall Framelitsto cut them out. You can buy the stamp set and the framelits in a Bundle and save 15%!
Make a pretty Thanksgiving card (or several!) and send them out this week to your friends and family!
Here are the Stampin’ Up! Weekly Deals for November 18 -14, 2014. These deals are available until midnight Monday Nov. 24 so be sure to put them on your order this week!
Shop at my Stampin’ Up! Online Store any time it is handy for you! Or I can always put your order in for you!
If you are reading my blog, are you on my Mailing List?? If not, sign up in the top right of my blog and receive my next “12 Weeks of Christmas” emailtomorrow with another holiday idea you can make!
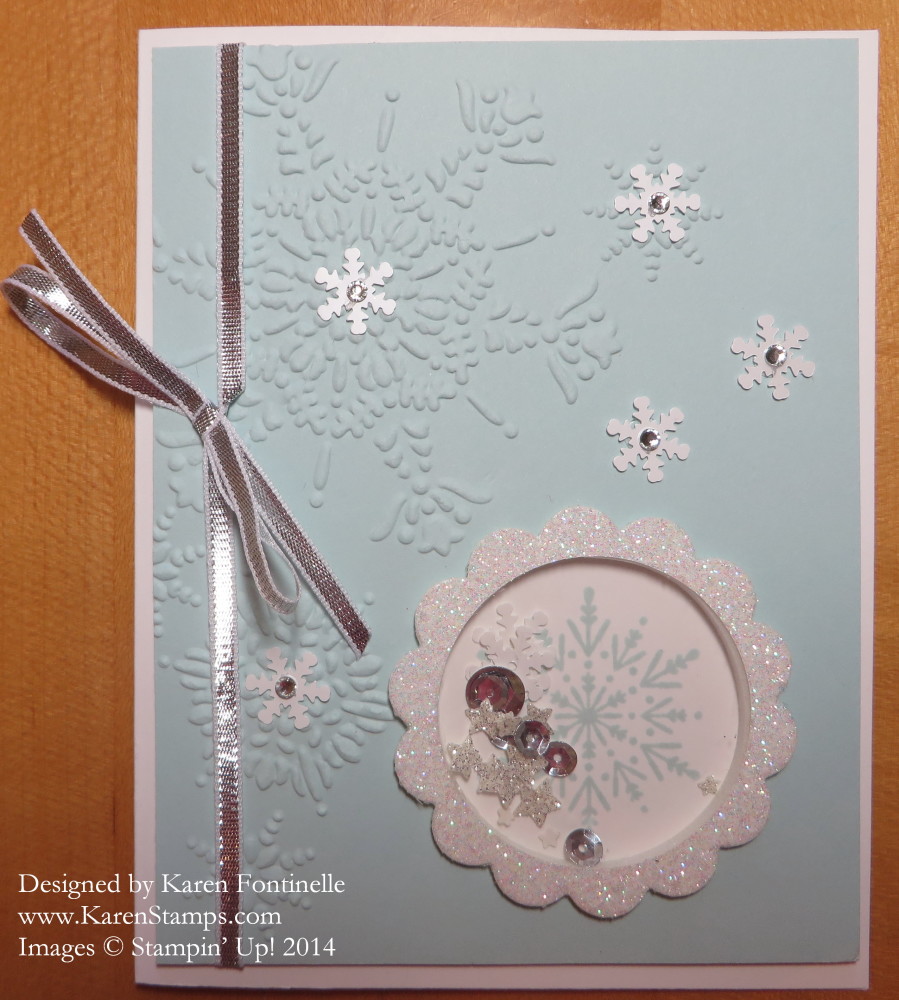
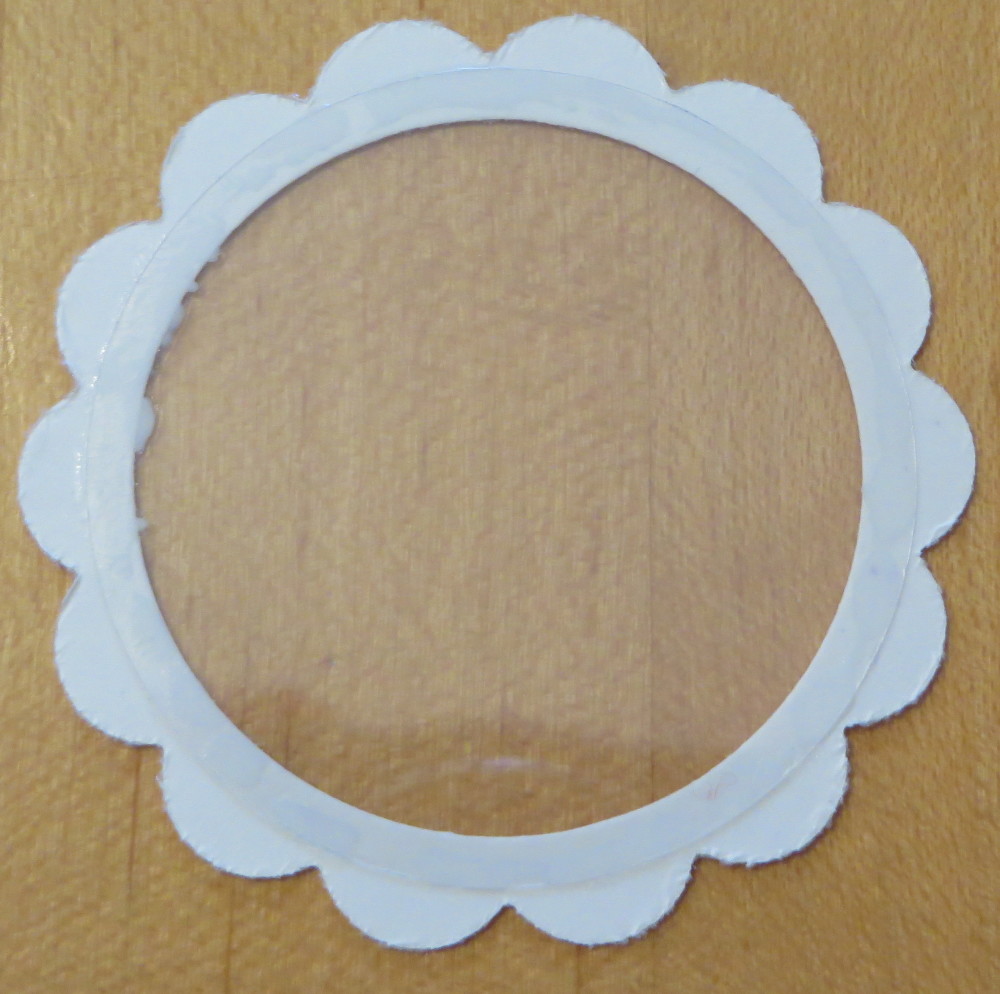
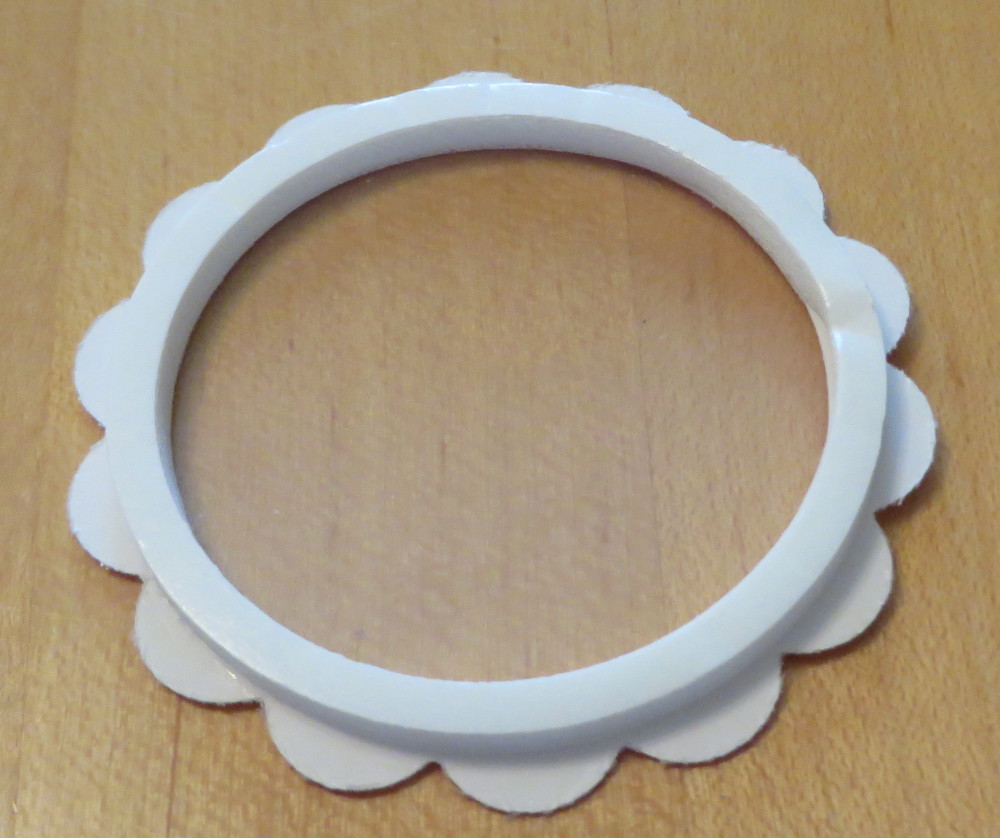
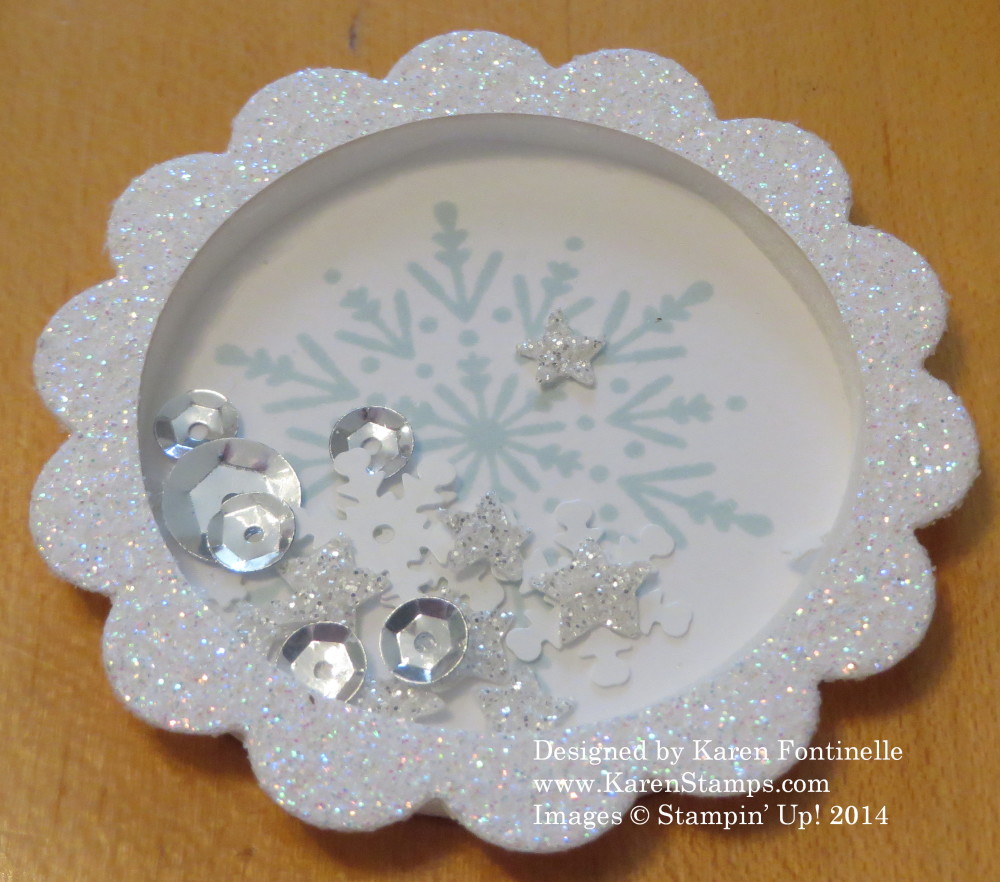
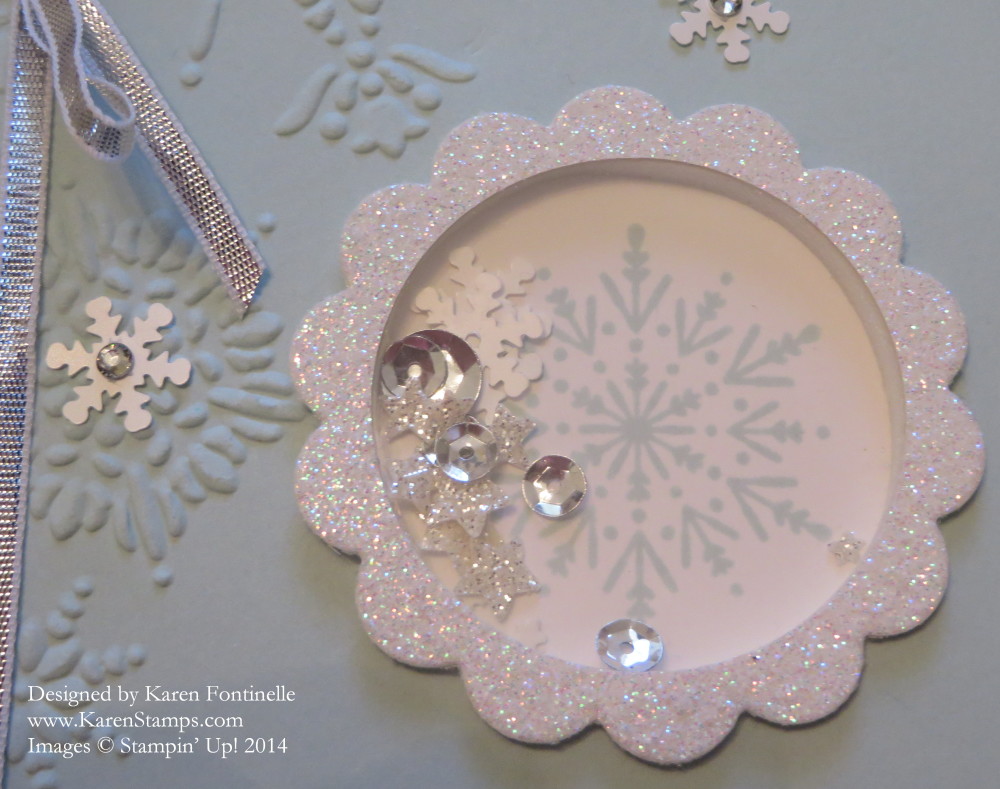
Stampin’ Up! sells these little sticky circles in lots of sizes called Shaker Frames, and here is a Christmas card I finally made using snowflakes and a Shaker Frame! Shaker Frames use punches and window sheets to make a dimensional shaker. (If you don’t have window sheets, you can use a scrap of plastic packaging you might have or a transparency.) They’re really fun to play with after you get the hang of it. And it’s also fun to fill them with something to shake around! In this case, I had a stack of tiny little Glimmer Paperstars from the Confetti Stars Punchthat I wanted to use in a Shaker Frame. I also added some snowflakes and sequins from the Frosted Sequins package. I probably could have added a bit more “stuff” in my Shaker Frame, but you can also add too much so I wanted to avoid that. The snowflake stamped in the background is from the Many Merry Stars Photopolymer Stamp Set.The scalloped Dazzling Diamonds Glimmer Paper frame around the Shaker Frame is die cut with the framelit in the Circle Card Thinlits Die. The Soft Sky card layer is embossed with the Northern Flurry Embossing Folderand a hole was punched in the card stock to accomodate the shaker. Since I was going to pop up the Soft Sky layer, I decided to push the shaker frame into that layer. I tied some Silver 1/8″ Ribbon around the Soft Sky layer and added some of the Frosted Sequins and Rhinestones to the front of the card for some pizzazz.
This Shaker Frame started out to be a snowman! That’s what I was going to make when I began making this card. So you don’t always know what you will end up with when you start your stamping project! And it’s good to let your creativity flow wherever it takes you! Just have fun!
Be sure to check out the Stampin’ Up! 2014 Holiday Supplement! I’d especially recommend the new Project Life by Stampin’ Up! products! You can use these cards and accessories to make scrapbook pages using the Project Life pocket pages system OR use them on traditional scrapbook pages. The products are not limited to scrapbooking and memory-keeping! Use them on cards or other projects for the holidays. You will be so inspired just to hold the cards in your hands and play! Watch the video below for some real inspiration! It shows the Hello December Project Life Card Collection and the Hello December Project Life Accessory Pack I know it will make you want to get out some photos and make some pages and projects!
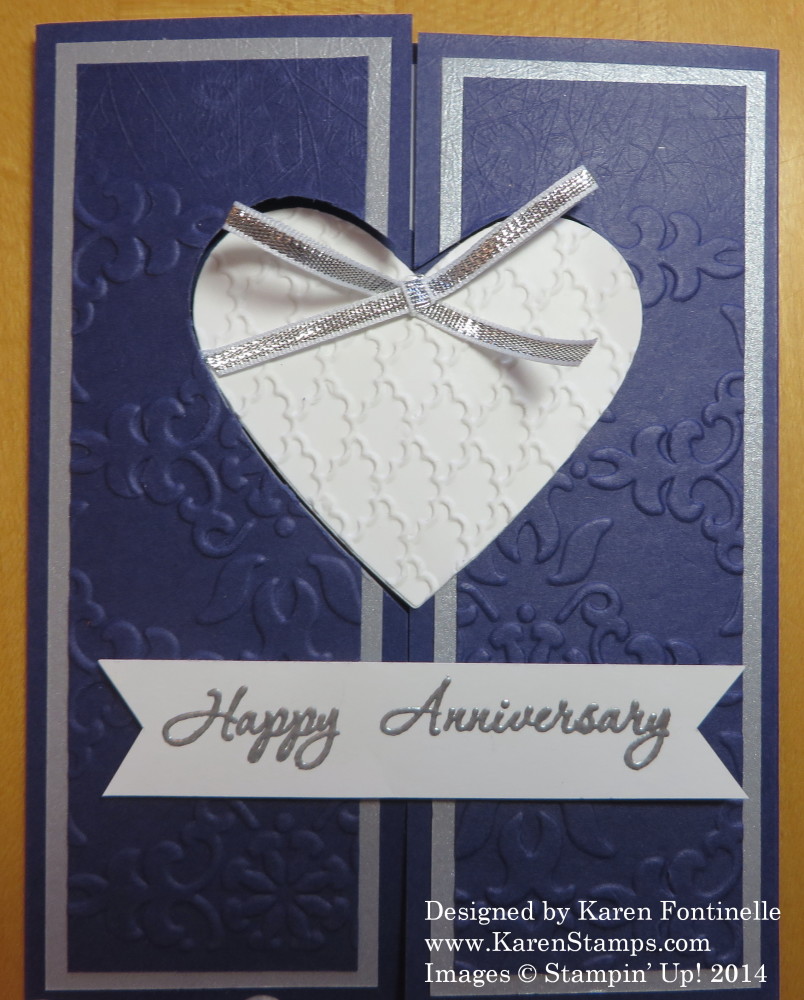
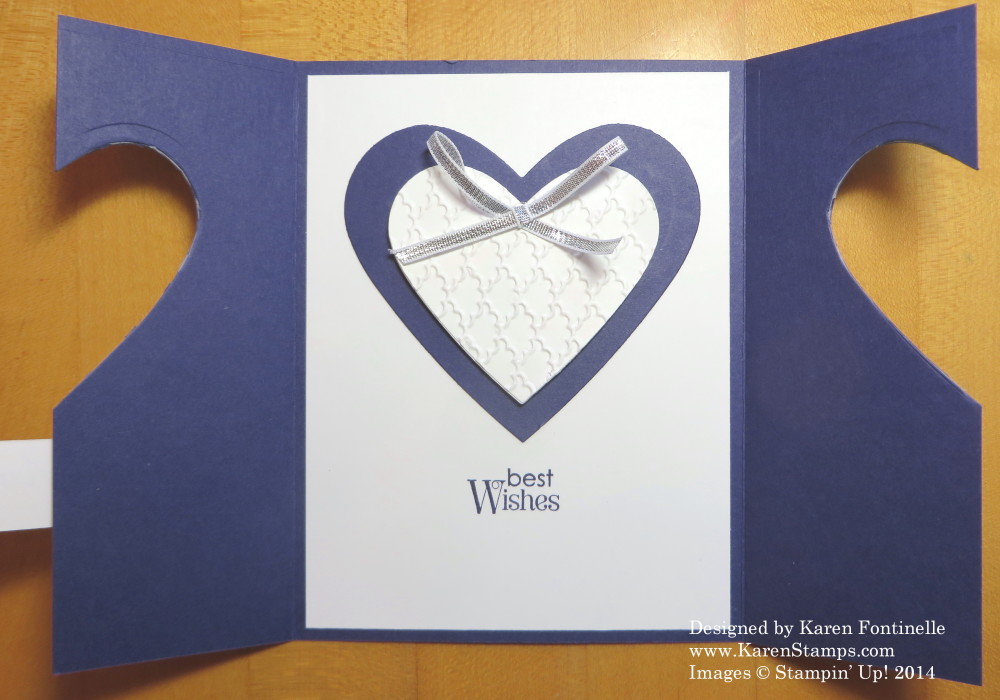
This is the wedding anniversary card I made for my daughter and son-in-law using the Heart Framelits and a technique I saw online by Deb Valder. To make the card special for them, I used the same color card stock (Concord Crush), and embossing folder (Vintage Wallpaper) I used to make their wedding invitations four years ago. (The Concord Crush color is retired now as is the beautiful Vintage Wallpaper folder.) I also used Brushed Silver Card Stock as I did on their wedding invitations, plus, of course, Whisper White.
Here is the inside of the card.
The idea is that the front of the card is cut out in the shape of the framelit so that the die cut on the inside of the card decorates the front of the card! And it is not that hard to make!
Take your usual half sheet of card stock, but to make the flaps, score 2 1/8″ from each end and fold. Make sure the center meets. Layer a piece of card stock or designer paper inside the card, 4″ x 5 1/4″. On the two outer “flaps”, decorate however you like, perhaps with designer series paper, remembering that you are going to cut through those layers with a framelit so you don’t want it too thick. I made this card over a month ago so I don’t remember exactly, but I made have had to do some extra trimming to cut through entirely that the framelit couldn’t do. But you need to have the front done before you cut with the framelit. Lay the framelit cutting edge UP inside the card, centered and exactly where you want it, knowing that it is going to cut the front flaps of the card. Close the flaps over the framelit and cut out with the Big Shot. Now you want to cut the same framelit shape to go on the inside of the card, keeping in mind it needs to fit exactly in the shape you just cut out on the front of the card. This didn’t matter with the heart, but if you did another shape you need to make sure it is going in the same direction and perhaps cut with the framelit cutting edge “up” again. When you have your shape, pop it up on Stampin’ Dimensionalsand adhere inside the card so that it fits perfectly with the front cut-out. Hopefully you can kind of tuck the front flaps underneath that die-cut a bit to hold them closed.
This is a neat idea to experiment with and make an elegant card. You just have to think about what you are doing and which way things are going to make it all work! But we paper engineers are pretty good at doing that!
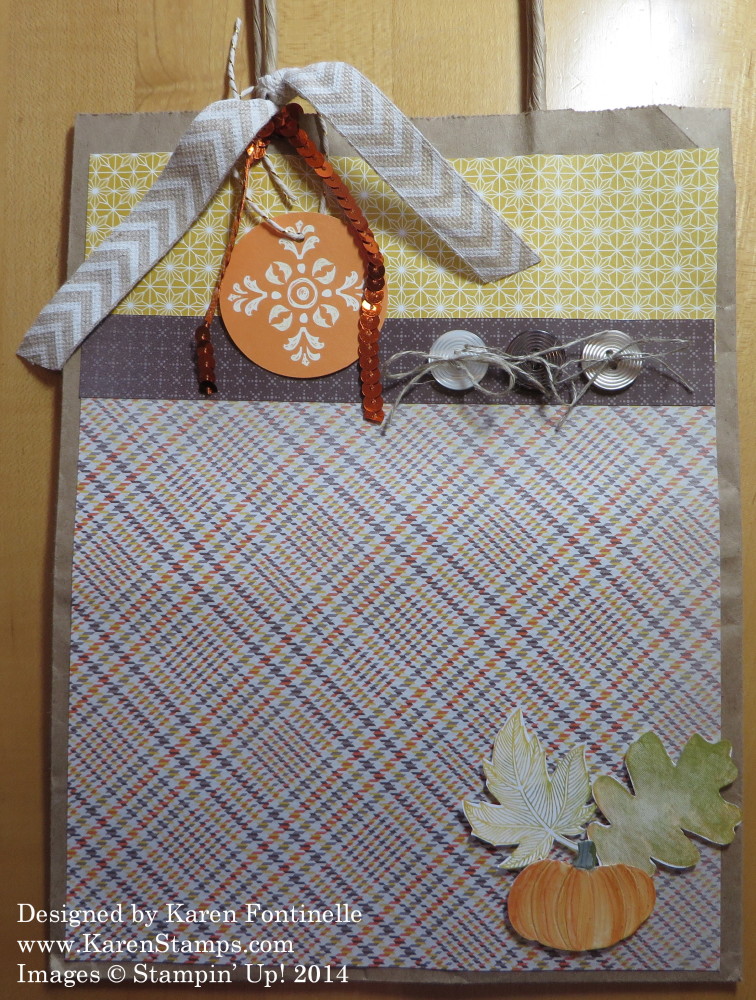
Make your own personally designed gift bag by decorating a regular shopping bag you probably received at the store yourself, or you can buy plain sacks at the craft store. For this bag, I used the retired designer paper Sweater Weather from last year because it matched the gift that was going inside. If you want to see the Thanksgiving banner I made that went in this bag, look back at this post. I even used a couple embellishments leftover from a Paper Pumpkin kit. I added some Neutrals Designer Buttonstied with some Linen Threadand adhered with Mini Glue Dots.
Here’s a tip dealing with buttons like this – put the thread through and then adhere the button to the bag with the Glue Dot. THEN tie the bow or the knot because now it is stuck on to something and won’t be flipping all over the place while you try to tie it!
I tied a piece of Natural 5/8″ Chevron Ribbon on to the handle of the bag. It seemed to match perfectly. The leaves and pumpkin were stamped and adhered to the bag.
Stamp some tissue paper that will go inside, too!
It’s so much fun to be able to make a personalized gift and gift bag with just your stamping supplies!
Stampin’ Up! has many packaging supplies available now for purchase in the Stampin’ Up! Online Store or you can probably find boxes and things around your house. Use some of your older papers and scraps to decorate and embellish!
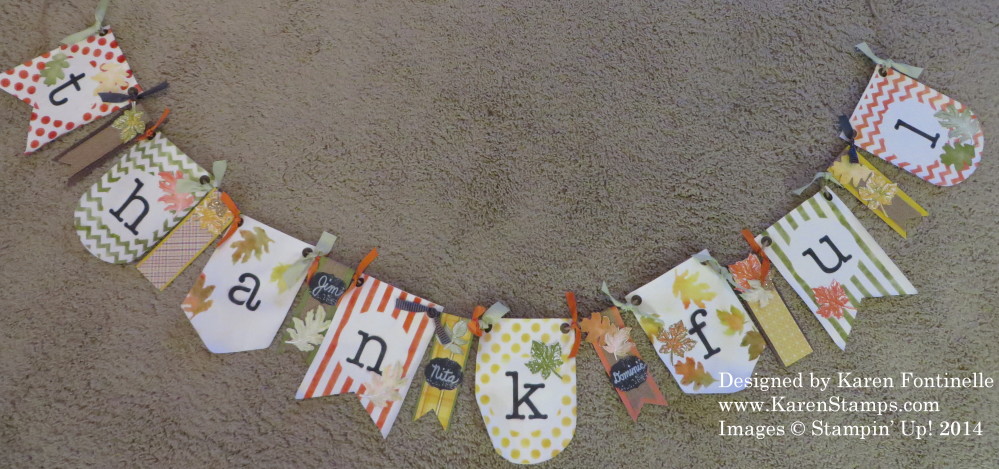
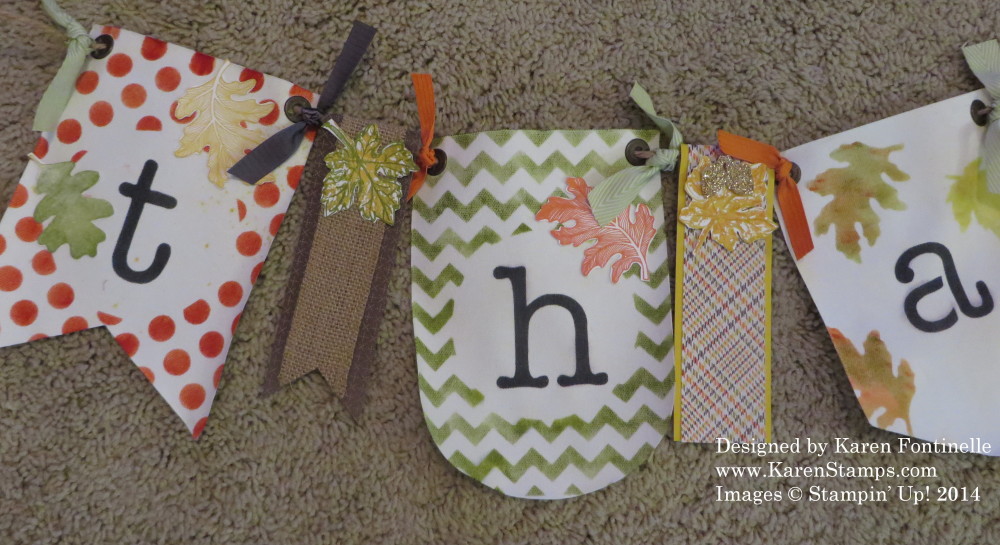
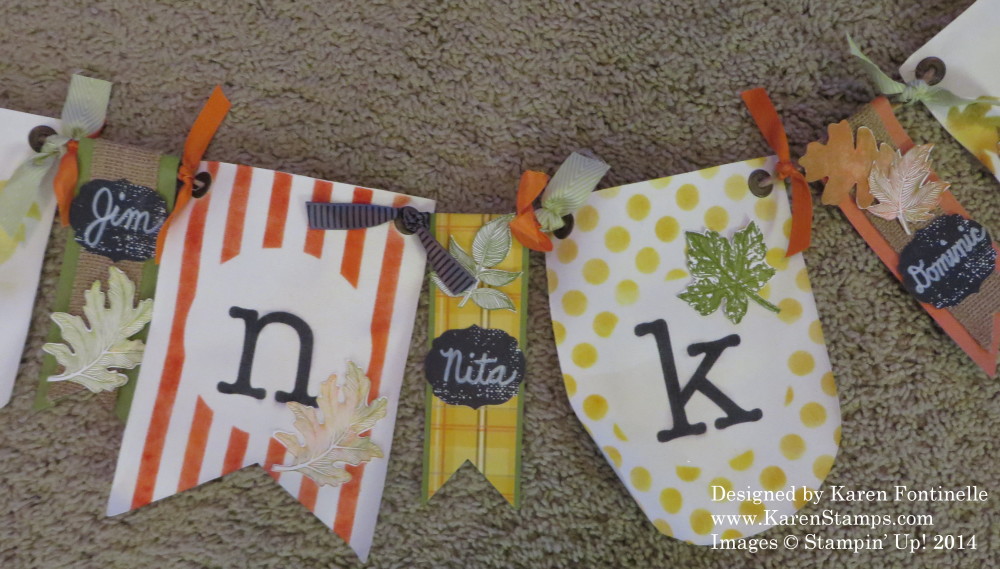
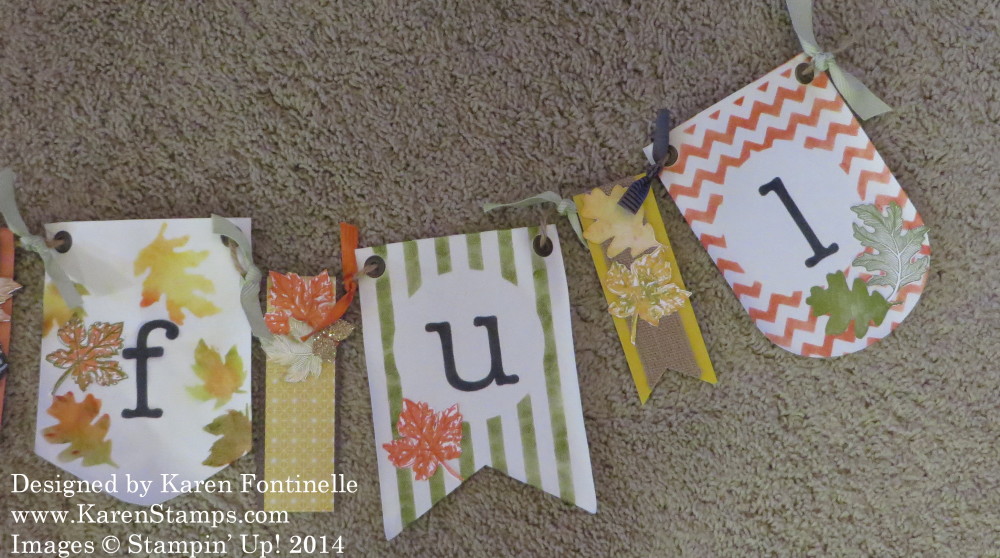
The Simply Created Banner KIt was a new product in last year’s Holiday Catalog, but it is still available in the current Stampin’ Up! Annual Catalog. This is a “Thankful” Banner I made with the Simply Created Banner Kit for a birthday gift for a friend since she had been over recently and admired my “Spooky” Halloween Banner in THIS POST! The Simply Created Banner Kit comes with the stencils to decorate the banners as you see here,even the alphabet letters. You can spritz the ink on lightly (lightly is all it takes) but for me I preferred sponging on the ink. You can use a piece of a Stamping Sponge(I cut mine into 4-6 pieces) orSponge Daubers. I think I used Sponge Daubers!
For the leaves (since I do not have the Autumn Accents Die, which would have made this SO much easier!), I simply stamped some leaves to cut out with my Paper Snipsand then used some of those “negative spaces” as stencils and sponged in several colors of ink on the banner pieces to make my fall leaves. The Designer Series Paper I used on the in between strips is retired, I believe from last year, but of course you could substitute anything you like. Of course I was using some samples I saw online to make my banner and liked the idea of using chalkboard style pieces to write names with my White Stampin’ Chalk Marker. As a long-time lover of chalk, this marker is the next best thing! You should have one on hand to use when the mood strikes you in a project! My friend can clip on some photos of her family if she likes on the extra strips in between the banners or just leave them plain for decoration.
When this Simply Created Banner Kit first came out, I did not see it as anything I would have a need for. But after seeing it demonstrated at the previous Convention, it looked like so much fun that I ordered it right away. You can also still order refill banners for the kit, Simply Created Bannerand it also comes with the jute twine you can use to hang the banner. You can use these banners for any holidays, for weddings, for birthdays, just any kind of decoration you like. And banners are IN!
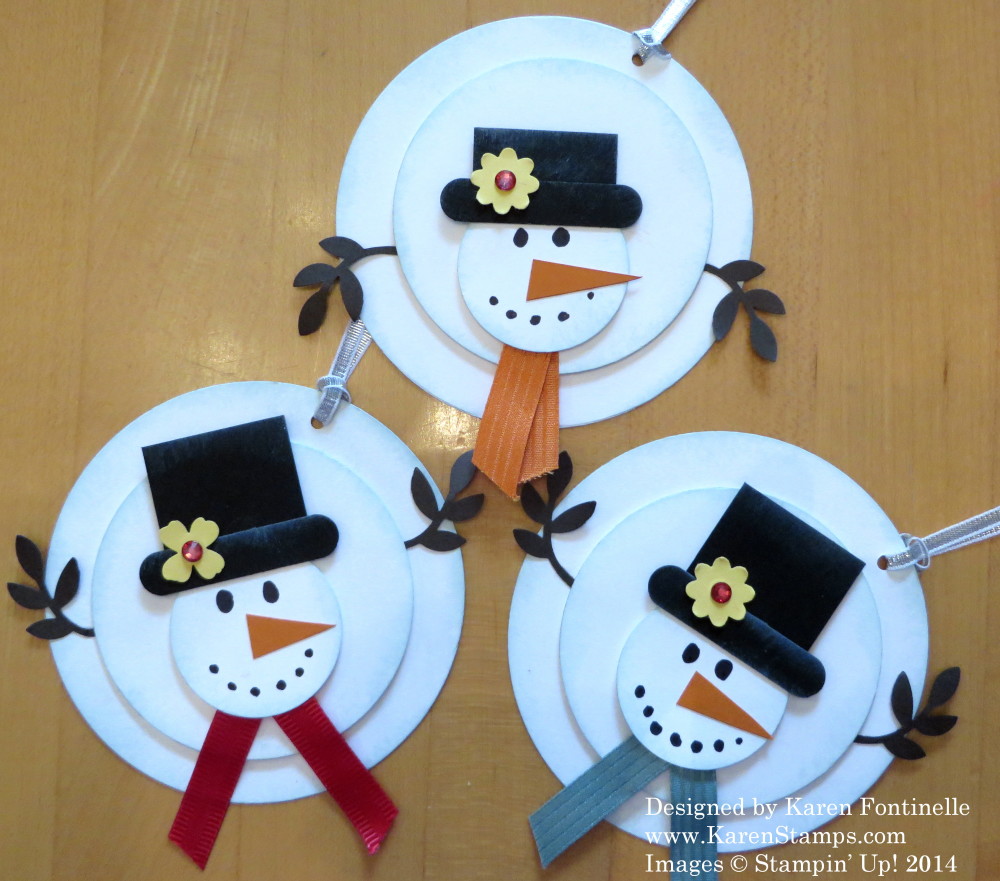
It feels like winter today, even in Houston,Texas! I even wore my real winter jacket this morning to go out since the temperature was about 43 degrees. That is pretty cold for Houston! I know there may be blizzards in other parts of the country, but cold weather here just means “put on a jacket of some sort”. So in honor of the polar vortex or whatever cold blast most of the country is seeing right now, I thought some snowman project was in order! Here are some super simple snowmen that could be placed on a card or scrapbook page or in this case, I have made them into tags.
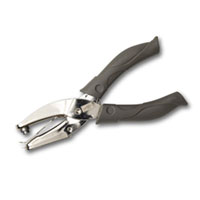
You can make them whatever size you like. Either use the Circle Framelits as I did for three different sizes or use your circle punches. You just need any pleasing sizes of small, medium, and large circles. Then cut a square for the hat (mine is 1 1/4″ square) and a piece from the Word Window Punch (who knew how handy THAT punch was going to be when it came out!). I sponged a little White Craft Ink on his hat and brim. The snowman pieces are also sponged with a little bit of Soft Sky Ink. We used to make the snowman arms with the old Snowflake Punch (don’t know if that was the name or not) but since that is not current, I just punched out the branches/leaves from the Bird Punch and those will be the snowman’s arms. Stick on a little piece of ribbon for his scarf, maybe a little flower on his hat from either the Itty Bitty Accents Punch Pack or the Boho Blossoms Punch. I just used a black marker to draw in his eyes and coal mouth, handcut the little snip of orange (any orange will do) for his carrot nose and popped all three pieces up with Stampin’ Dimensionals. You could do him flat as well. The hole for the tag is punched with the 1/8″ Handheld Punch and tied with Silver 1/8″ Ribbon. Before adding the Rhinestone to the flower on his hat, I colored it with the Cherry Cobbler Blendabilities Marker, but you could leave it plain. Another project that you can do as fancy or plain as you like.
Here are some of the main supplies I used for this project. Just click on any picture to see it in my Stampin’ Up! Online Store!
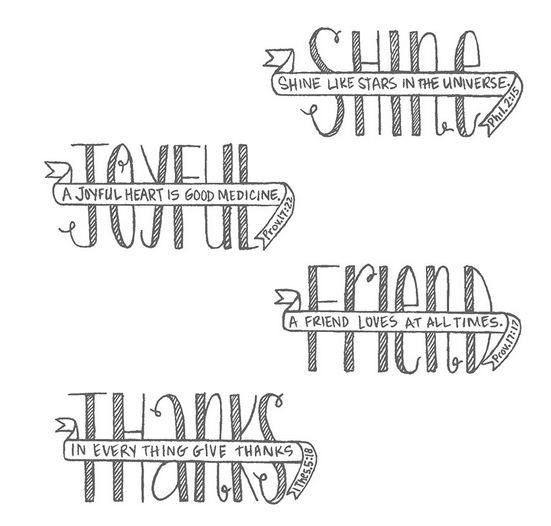
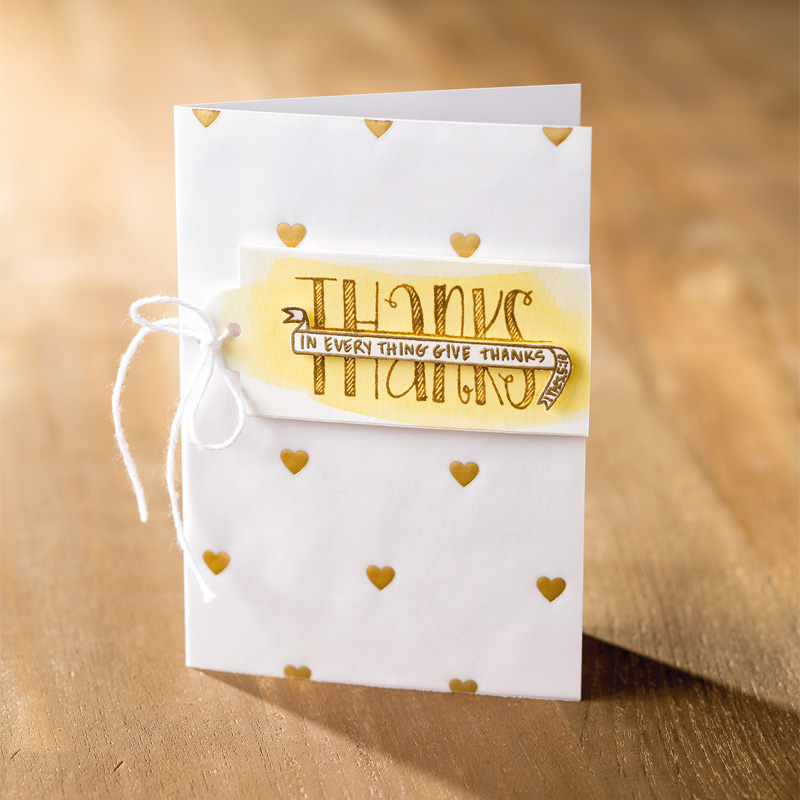
Today Stampin’ Up! introduced this beautiful new stamp set, Banner Blessings Photopolymer Stamp Set #136720. You can read the whole article on the Stampin’ Up! Blog about the Demonstrator who created the Banner Blessings Stamp Set for a contest. Very interesting story and especially poignant today on Veteran’s Day as she was in the Air Force for nine years. You’ll read about where she came up with the “Shine” stamp in this set.
Here are some projects you could copy to make with this new stamp set! You’ll see more on the SU Blog!
If you would like to order this stamp set, please click HEREto add it to your order.
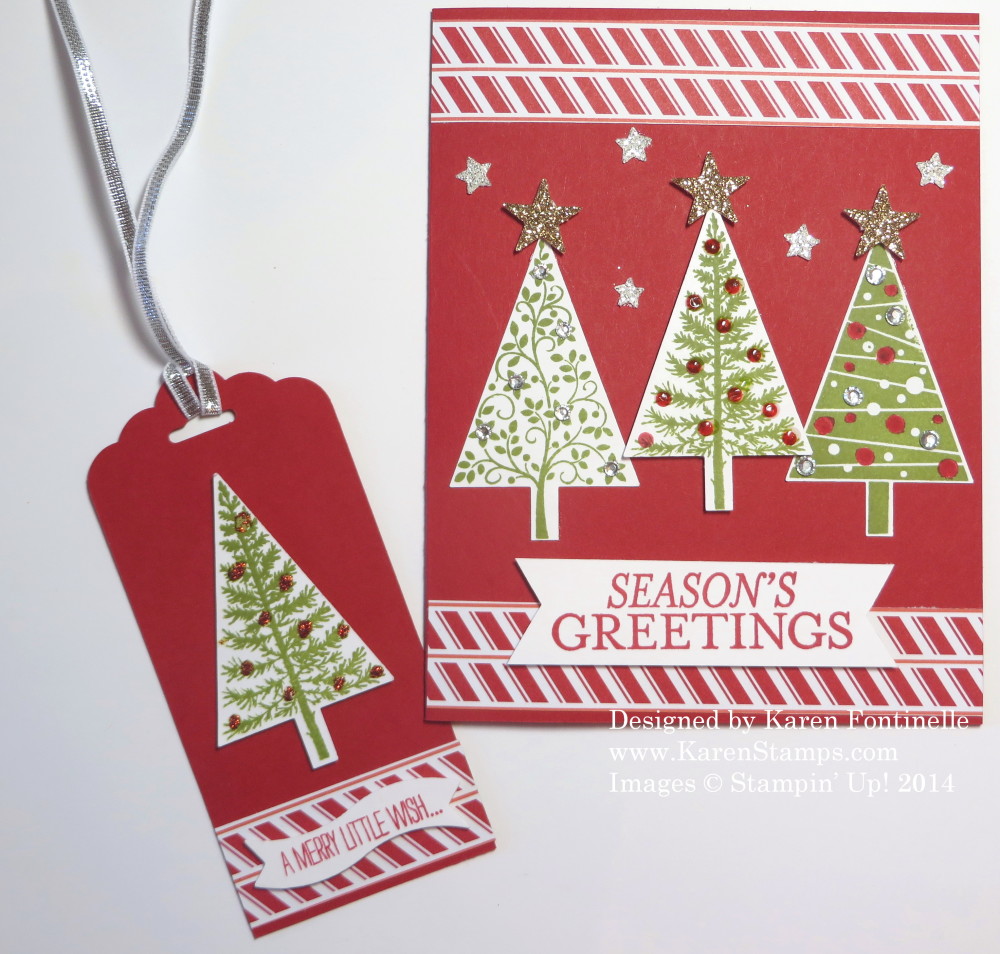
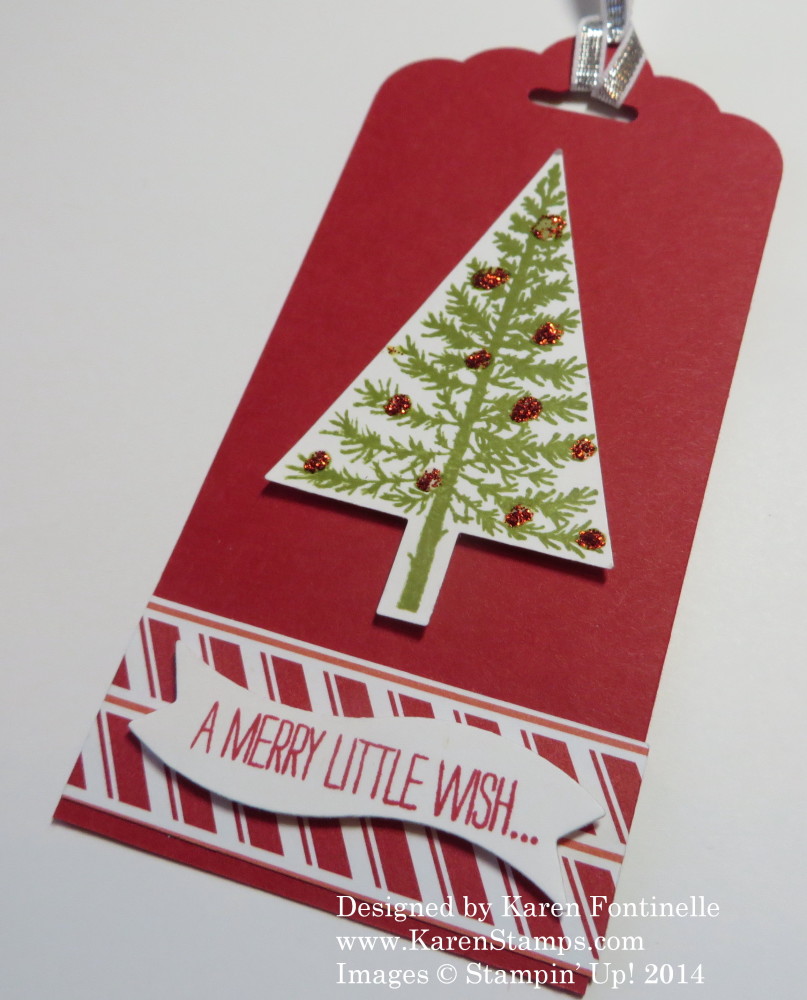
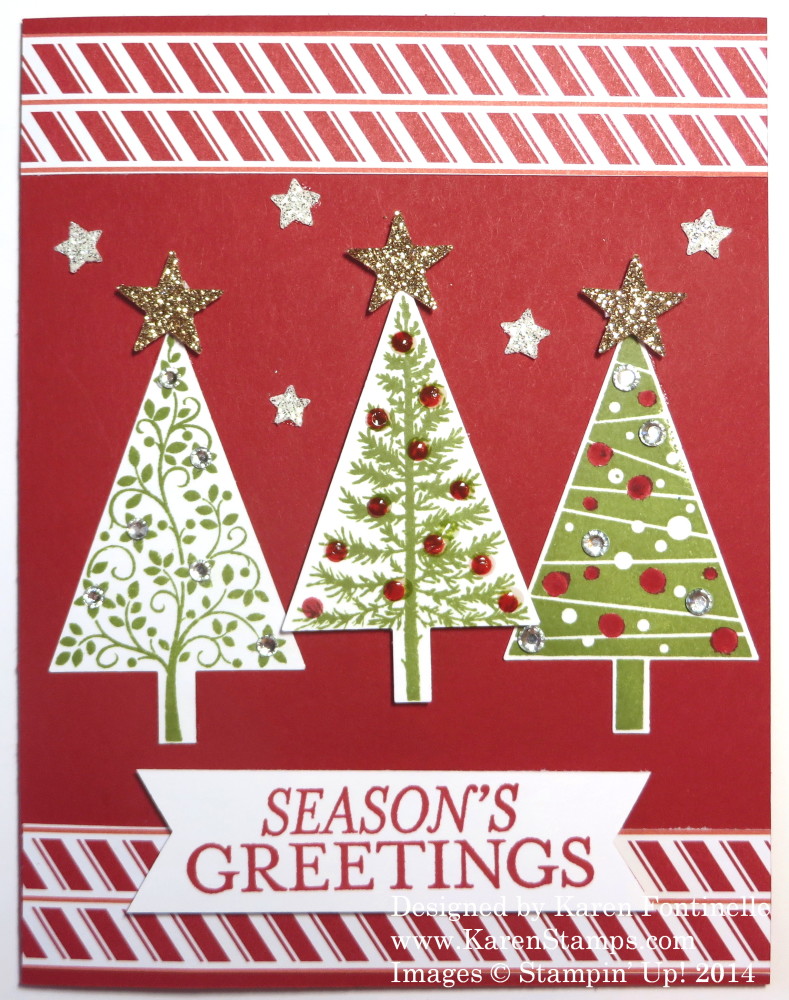
Today I thought I would make a Christmas tag, and after I made the Christmas tag, I decided to make a coordinating Christmas card. I obviously got carried away with the “bling” on the card, but I still like it! Just do whatever makes it fun!
When I started on the Christmas card, I already had the remainder of the Nordic Noel DSP strip leftover so I used it all, top and bottom! Then I stamped three trees (the middle one is popped up on Stampin’ Dimensionals as is the tree on the tag) and decorated various ways with Rhinestones, Stampin’ Write Markerand Crystal Effects. Crystal Effects is just applied over the colored “ornament” on the center tree which, when dry, will provide a shiny little 3D effect.
The tiny stars are made with the Confetti Stars Punch. I only used the largest stars! It just seemed like it would be fun to add a few! I saved the excess stars for another possible project. The stars on top of the tree are made with the Itty Bitty Accents Punch Pack, with the star punch. The greeting, since I needed a large one, is from the Bright & Beautiful stamp set.
There you have it! Now go make an easy Christmas tag (using the Festival of Trees and Tree Punch) makes it really simple. And then make a matching card!
If you need any supplies, please visit my Stampin’ Up! Online Store HERE. Or if you prefer, I’m always happy to put an order in for you.
Also, today is the day to sign up for Paper Pumpkin, the cute red box that comes in your mailbox once a month with a fun papercrafting project inside! You can sign up any time, but if you sign up on the tenth or before of the month, you will receive that month’s kit as soon as it ships mid-month.
This is the perfect time to join Paper Pumpkin, the delightful papercrafting kit that comes to you in your mailbox once a month! It is almost November 10th, and if you sign up by November 10th, you will receive the November Kit. Not long to wait! (After the 10th of any month and you will receive the following month’s kit.) We all look forward to seeing that red box arrive! It’s all in the presentation, as they say, and when you open the box, you will find all of the supplies you need (except adhesive) perfectly wrapped as a gift for YOU! And if you would like to gift others, you can order kits for them as well! There is no obligation, no risk. Cancel or pause your subscription as you see fit. And an additional perk, once you subscribe, you are eligible to order any available past kits or refills, in case you missed something you really liked.
Directions are included to make the project as designed, but with a little googling after the kids arrive, you will find plenty of alternate ideas you might like. The are plenty of creative people out there! Sometimes I make part of the kit as designed and then make some alternate things, just to play! It’s not just cards, it’s a mixture of projects through the months, and I can say, as time has gone on, Stampin’ Up! has only improved the kits with more supplies and better ideas! With your first kit you will receive a special clear block to use with your included stamps. Usually you need to provide some adhesive, but often there are glue dots or some kind of adhesive included in the kit. So it can hardly get any easier for you to enjoy a little while of crafting time just for you. Yes, each month is a surprise! Some people like surprises, some people would prefer knowing. On occasion there is a sneak peek, but otherwise just step out of the box and take a chance on a surprise. Like I said, if you don’t like the project that comes, use your imagination and creativity (or internet search skills!) and make something to your liking! Or send that kit to your college student or your mother or aunt or nephew or birthday gift to a friend!
Cost is just $19.95 per month, which INCLUDES shipping! Sign up by the 10th of any month to receive your Paper Pumpkin Kit THAT month! So sign up by November 10 or sooner, and mid-month, when Paper Pumpkin Kits ship, your kit will be on its way. You will not be billed until your kit ships.
To find out more and to sign up, please visit my Paper Pumpkin site HERE!
Here is a video from Stampin’ Up! showcasing the October Paper Pumpkin Kit!
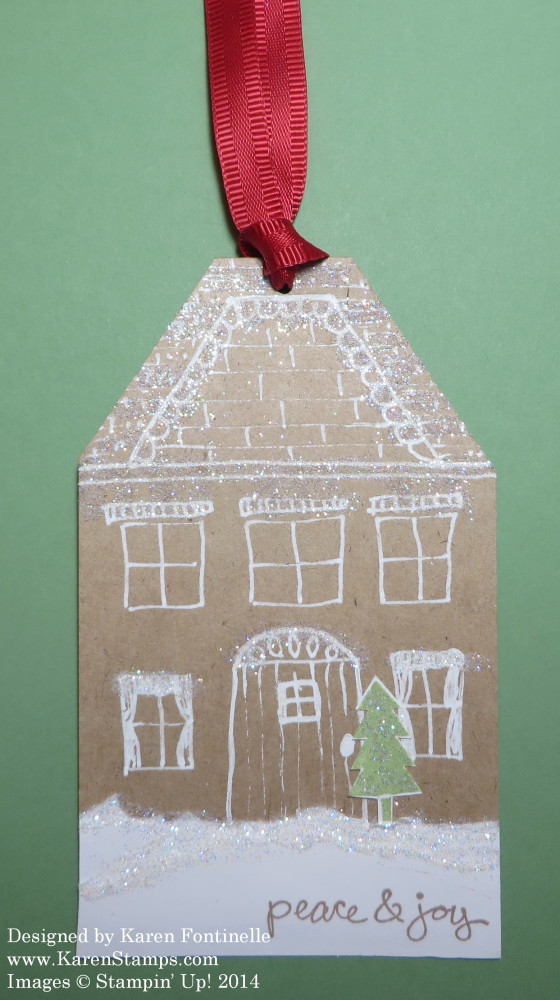
This Christmas Snowy House Tag came about after browsing the internet for some inspiration for a Christmas card or tag! There were some scrap pieces in the bag of Kraft 12″ x 12″ Card Stock(which is a little heavier than regular card stock) so I decided on a tag. This one is a little wide at 3″, but it is fine and I just cut off the top corners. Once I did that, it looked like a house, so I decided to take my White Signo Gel Penand draw in the house features! I felt like a little kid drawing a picture with not a care in the world for how perfect or imperfect it was! Oh, you couldn’t tell it was hand-drawn because it is so meticulous??!!! I don’t think so!! Anyway, it was fun and we’ll see if it ends up on somebody’s Christmas package this year!
After drawing in my house with my White Gel Pen, I just tore two scraps of Whisper White irregularly for the snow on the ground and adhered with the Liquid Multipurpose Glue. The little tree happened to be stuck on my end table (I don’t know why) so after seeing it laying there, I thought it would look perfect as an accent with this snowy house! Then I took my trusty 2-Way Glue Pen and Dazzling Diamonds Glitter to apply “snow” around on the house! Finally I punched a 1/8″ hole in the top of the tag and tied on the Real Red 3/8″ Satin Woven Ribbon. This ribbon is beautiful! Of course I love that it is red but it is a beatiful RED! I thought my tag was finished, but then I thought it needed a little greeting in the bottom corner. The greeting is from Good Greetings and is stamped with Crumb Cake ink.
Make a few Christmas tags today. Just get out some stamp sets, ink and paper scraps and see what you come up with! If you need any supplies, just go to my Stampin’ Up! Online Store!