Author Archives: Karen Fontinelle

Rudolph the Red-Nosed Reindeer Mini Treat Bag

Rudolph the Red-Nosed Reindeer Mini Treat Bag

Last year I decorated a kraft gift bag much like this Rudolph the Red-Nosed Reindeer Mini Treat Bag and it was quite popular. This year I thought I would try something similar with one of my favorite products, the Mini Treat Bag Thinlits Dies!  I loved this project because you can use the treat bag as a treat holder, a small gift holder, or as a Christmas card! If you look closely you can see the top of the card I inserted in the treat bag with a strip of the Candy Cane Lane Specialty Designer Series Paper.

Rudolph the Red-Nosed Reindeer Mini Treat Bag Card

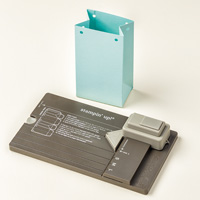
To make the mini treat bag, of course I used the Big Shot and the Mini Treat Bag Thinlits Dies. I made this bag out of our Kraft 12″ x 12″ Cardstock. Rudolph’s antlers are punched with the Tree Builder Punch.  The eyes are punched with the 1 1/4″ Circle Punch out of Whisper White and the black pupils with the 3/4″ Circle PunchI marked a little “highlight” on the eyes with my White Stampin’ Chalk MarkerThe Red Glimmer Paper nose is punched with the 1″ Circle Punch.  And I had to tie a bow on the reindeer with the Real Red 3/8″ Stitched Ribbon.

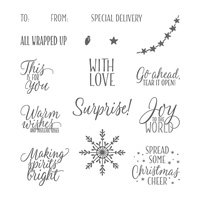
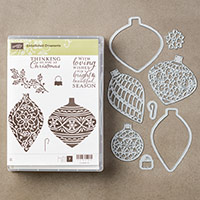
The card is cut from Whisper White Cardstock to fit inside the treat bag. I adhered a strip of designer paper to the top and stamped a greeting from the Tin of Tags Stamp Set. You don’t have to have the Tin of Tags in order to make good use out of this stamp set. It stands on its own!

LAST DAY For STITCHED FROM THE HEART STAMP SALE!!

Stamp Set Sale Nov 2016

Today, November 30, is the last day for the Stitched From the Heart Stamp Sale! Check out the list one more time (click HERE) and see if you can pass up any of these great stamp sets at 25% off!

Year End Closeout 2016 Banner

New Announcement!

Check back tomorrow, December 1st (if you can believe that December will be here tomorrow!!!) to see the list of all items from the 2016 Holiday Catalog that are retiring and will no longer be available for purchase after January 3, 2017.

I don’t know yet what is on the list!  We will all find out tomorrow! Check back here on my blog or at my Online Store HERE.  I’m sure you will be able to click on the banner you see there to see all the products!

I hope you got a kick out of the Rudolph the Red-Nosed Reindeer Mini Treat Bag and can use this inspiration for one of your own projects!

SHOP STAMPIN’ UP! ONLINE HERE!

White Gift Box Santa Wrap

White Gift Box Santa Wrap

Stampin’ Up! recently had these White Gift Boxes on sale on the Online Extravaganza, so yours might be on their way if you ordered them, or you might have already purchased them, or sale or not, they still are a good product to have on hand!  Look at just one way you can decorate them, like this White Gift Box Santa Wrap.  You can also add a greeting or tag to the top.

To decorate this White Gift Box, I creased all the folds and assembled the box. Depending on what cardstock you have, you can do this one of two ways – or maybe even three ways. Since I had Real Red 12″ x 12″ cardstock, I cut a 3″ x 12″ wide strip and wrapped it around the box. You might think it would fit exactly, but those folds on the box just take up a little bit of space, so you do end up a little short at the back of the box. Now if you cut a piece from regular size cardstock, you could make it 3″ x 11″ and still do the same on the back that I will explain. Or you could cut 3″ x 3″ pieces for each side of the box.

White Gift Box Wrapping

Where I came up short on the back of the box, I just cut a 3″ x 3″ piece to cover it. I used Multipurpose Liquid Glue to adhere the cardstock to the box because it gave it that little bit of time to position the paper exactly right on the gift box.

To keep that little half circle where the tab tucks into the gift box,  traced the opening onto the Real Red piece that would be on the front and punched with the 3/4″ Circle Punch (or just cut out with your Paper Snips). Yes, that tiny bit of white shows, but I decided it wasn’t important. If you don’t like that bit of white, then adhere a strip of Real Red onto that tab.

To make it look like a Santa coat, I cut a 1 1/4″ x 11″ strip of Basic Black. This I began gluing at the back of the box because I knew the belt buckle would overlap the part that didn’t reach on the front portion, Who would know?? For the belt buckle, I used a 2″ x 2″ piece of Gold Foil Sheet. Instead of cutting and putting the “belt” through the buckle, just cut a 1 1/4″ square piece of Basic Black (same width as the belt) and glue it in the center of the foil, making sure it lines up with the belt!  Neat trick, huh?!

To finish off the box, I glued a 3″ x 3″ piece of Real Red cardstock on the lid of the box. After that you could add a stamped greeting or tag or whatever to the top.

These White Gift Boxes also come with a clear plastic sleeve to go around the box, but I didn’t use that this time. While these boxes are not large, they are not teeny either, so they’re pretty practical to keep on hand for any occasion.  You could even decorate all the boxes in the package ahead of Christmas and then your gift-wrapped box is ready for the gift inside, like this Santa Wrap idea!

To purchase your White Gift Boxes and any other Stampin’ Up! products you need, please visit my Stampin’ Up! Online Store HERE!

Don’t forget:  Today and tomorrow are the last days for the Stitched From the Heart stamp sale!


It’s Cyber Monday! 24-Hour Flash Sale at Stampin’ Up! & Last Day Online Extravaganza!

Stampin' Up! Online Extravaganza 2016 Shop with Karen

It’s Cyber Monday, and today is the LAST DAY of the Online Extravaganza by Stampin’ Up! Take advantage of the 24-Hour Flash Sale during this last day!

Online Extravaganza Flash Sale Nov. 28, 2016

Stampin' Up! Online Exravaganza 2016 Flash Sale Nov 28

Here are all the other sale items available, from 10% to 40% off!  Today is the last day!

Stampin' Up! Online Extravaganza 2016

Stampin' Up! Online Extravaganza 2016

Stampin' Up! Online Extravaganza 2016

Stampin' Up! Online Extravaganza 2016

Download the whole Online Extravaganza list HERE!

You can add any other Stampin’ Up! products to your order as well!

Online Extravaganza ends at 11:50 pm MT on November 28, 2016.

Don’t forget the Stitched From the Heart Sale on stamp sets.  This sale ends November 30.

Order directly from my Online Store Here!  Let me know if you have any questions or if you would like me to put an order in for you. Email me at Karen@KarenStamps.com.


Stampin’ Up! Specials & Sales! Don’t Miss Any!

Stampin' Up! Online Extravaganza 2016

The Online Extravaganza is Stampin’ Up!’s version of all the Black Friday sales out there this weekend except it has been going on longer!  And certainly more fun to buy Stampin’ Up! products on sale!! Be sure to check out all the choices from 10% to 40% off!  This sale is ongoing today and tomorrow, Monday November 28 and then it comes to an end!

Go directly to my Online Store HERE!

Online Extravaganza Flash Sale Nov. 28, 2016

AND TOMORROW, November 28 is the 24-Hour Flash Sale!  This second 24-hour sale begins at 12:01 AM (MT) on November 28 and runs through 11:50 PM (MT) that same day.Stampin' Up! Online Exravaganza 2016 Flash Sale Nov 28

If you don’t already own the Big Shot Magnetic Platform, this would be the first thing I would order!  I use mine almost everyday!  Great for holding those metal framelits and thinlits in place over a stamped image! Otherwise, take advantage of the other great items, including the Bell Punch, which is not just for Christmas!  Think of wedding cards and wedding bells!

**Because of the strong magnetic field, the Magnetic Platform may not be safe for pacemaker wearers, according to Stampin’ Up!

And there’s MORE!

Stitched Framelits and Stamps Flyer

Click to enlarge!

Besides the Online Extravaganza, don’t forget the Stitched From the Heart Stamp Sale! Although the number for the Stitched Shapes Framelits has been turned off until Stampin’ Up! is re-supplied, all of these stamp sets are on sale 25% off! This sale continues through the last day of November, Wednesday November 30th.  I picked up the Suite Seasons Stamp Set and have already used it a multitude of times.  I already owned the Tin of Tags Stamp Set and the Oh, What Fun Stamp Set and have used those Christmas and other greetings a lot also! And no denying, the Christmas Pines Stamp Set makes beautiful cards and projects as well!  What choices you have!!

Paper Pumpkin November 2016 Kit Wonderful Winterland

Paper Pumpkin November 2016 Kit Wonderful Winterland

On the day after Thanksgiving, it seemed like a good idea to start working on my Paper Pumpkin November 2016 Kit Wonderful Winterland. This is a beautiful kit with these die cut scenes that are layered one on top of another but popped up with dimensionals with a vellum layer in the background and then adhered to the little note card. The snowflakes, trees and greeting are all stamped. The sequins and metallic baker’s twine add the finishing touches to the cards (as well as the twine holding the vellum in place so no adhesive will show!).

If you haven’t heard of Paper Pumpkin, it’s a monthly subscription kit from Stampin’ Up! that comes to you in the mail. Whether you are an advanced crafter or a beginner or not a crafter at all, it’s a kit that entices you to spend some time for yourself, relaxing, and enjoying making the project inside the box! With your first kit, you receive a clear acrylic block on which to mount the stamps. Each kit includes an exclusive stamp set and an ink spot (a 1″ square ink pad!) plus directions and all the materials you need for the project. Each month is a surprise! There is even a Stampin’ Up! video each month showing you how to assemble the kit if you like to watch rather than just read the directions.

Of course it’s your box, so you can change the project and make alternate creations or make it exactly as it is designed! Whatever you want, it’s your craft time! (Some would call it therapy time!!).

Join Paper Pumpkin by December 10th to receive the December kit! Once you are a subscriber, you can purchase any past kits or refills that are available. (There are some available now on the Online Extravaganza.)

Maybe you would like to gift someone with Paper Pumpkin for Christmas as well as getting a subscription for yourself!  You can also order extra kits any month that you choose as long as you change the quantity by the 10th of any month. Skip a month when you need to or cancel your subscription if you must.  No risk, no obligation!  Worth a try!

Check out the video for the November 2016 Kit!

You can get more information  at www.PaperPumpkin.com or go to my direct link HERE.

Do it for yourself!  You deserve it!

Sprinkles Punch Easy Holiday Card

Sprinkles Punch Easy Holiday Card

In the midst of your Black Friday shopping, don’t forget the Stampin’ Up! version, the Stampin’ Up! Online Extravaganza with items on sale such as a couple of things on my Sprinkles Punch Easy Holiday Card.

This is a super easy card to make!  Just change the greeting and you can have a holiday card, a birthday card, a congratulations card, a new baby card, etc. I used a Whisper White card base with a Watermelon Wonder layer for color. On top of that, I added another Whisper White layer and then punched lots of In Color confetti with the Sprinkles PunchThe Sprinkles Punch is on sale through Monday, November 28, for 30% off!  All it takes are some tiny drops of the Multipurpose Liquid Glue either on the confetti piece or for the tiniest ones, just a tiny drop on the spot where you want to adhere the confetti. Then use a paper piercer to lightly stab the confetti to pick up and place over the glue!

Stamp the greeting first, of course!  Mine is from the Suite Seasons Stamp Set, another sale item on the Stitched From the Heart November Stamp Sale 25% off! I stamped it in Watermelon Wonder Ink to match the Watermelon Wonder 5/8″ Mini Striped Ribbon, also on sale 30% off!

You could even jazz up this card a little more with some Rhinestone Jewels or Enamel Dots or maybe some Wink of Stella!

Stamping With Karen’s Black Friday Special!

Place a $25 Stampin’ Up! order or more today through Monday, November 28 and get at least 5 random cards from me! Plus my usual Thank You card and surprise goodie inside!

Be sure to shop the Stampin’ Up! Online Extravaganza this weekend!

Happy Thanksgiving Day!

Happy Thanksgiving Day

Happy Thanksgiving! 

I am thankful in my stamping world for my stamping customers, my downline, my subscribers, my blog readers and all the friends I have made through this wonderful hobby and business of ours!!  I hope you are enjoying your Thanksgiving Day (and eating lots of turkey and pie!!).

Wondrous Wreath Wine Bottle Tag for Thanksgiving

Wondrous Wreath Wine Bottle Tag for Thanksgiving

If you are taking a bottle of wine or another beverage to your Thanksgiving dinner for the host or even if you just want to fancy up your own wine bottle, make a tag to decorate the bottle, something like this Wondrous Wreath Wine Bottle Tag for Thanksgiving.  It is so easy and won’t take you more than a few minutes to make a simple one. Of course you can embellish it to your delight, but if you are short on time, just make the tag and stamp something simple on it. That’s it!  Your host or hostess will be thrilled!

To make the bottle tag, cut a piece of cardstock 9″ x 3″ and score at 2 1/2″. Punch a hole in the small portion using the 1 3/8″ Circle Punch. Add a Very Vanilla layer to the tag base of 8 3/4″ x 2 3/4″ and stamp or decorate.  I used the Wondrous Wreath Stamp Set and die cut with the Wonderful Wreath Framelits Dies. To get the multi-colored fall colors, I first stamped the wreath in Crushed Curry and then took Stampin’ Write Markers to color in various leaves randomly with Old Olive, Pumpkin Pie and a little Cherry Cobbler, I added a bow of Peekaboo Peach and popped the wreath up with Stampin’ Dimensionals,  The greeting is stamped from the Suite of Seasons Stamp Set (on sale now, 25% off!). I’m so glad I purchases that stamp set for myself on the sale because I have used it many times already!

If you aren’t taking a bottle of wine, perhaps your hostess would enjoy a few cards that you made and are hoarding in your craft room!  Put them in a cello bag and tie on a ribbon or make some easy pretty presentation!

Don’t forget about the Online Extravaganza during the Thanksgiving Holiday!  Stampin’ Up! Online will be open all through Thanksgiving!

Star Wars Inspiration BB8 Punch Art Handmade Birthday Card

Star Wars Inspiration BB8 Punch Art Handmade Birthday Card

A few weeks ago I came up with this Star Wars Inspiration BB8 Punch Art Handmade Birthday Card  for my son-in-law’s birthday and I liked it so much I made another one for my son’s birthday a few days later. By now they both have received their cards in the mail so it’s safe to show it on my blog!

When you have a Star Wars fan in the family (who even appreciates your handmade cards), you just have to come up with a new idea for each birthday or occasion. After searching the internet of course, I came up with this card of BB8, one of the characters in the Star Wars movie that came out last year. The background paper is the foil embossed paper in the Halloween Night Specialty Designer Series Paper.  I think it is perfect for this card. To make BB8 I used several circle punches. I probably used the 1 3/4″ Circle Punch for the lower body, maybe the 1 3/8″ Circle Punch for the upper body, and then smaller punches for all the details.  I’m sure you can try the punches you have and see what fits on your card the way you want it!  Of course the birthday balloons are punched with the Balloon Bouquet Punch and punched out of Silver Glimmer Paper. The greeting piece is punched with the Classic Label Punch and I added a silver star from the Metallic Enamel Shapes.  

I love these Enamel Shapes and ordered the Bundle of all of them yesterday on the 24-Hour Flash Sale on the Online Extravaganza.  You missed that but you can still add them (not discounted) to your Online Extravaganza order any day this week until November 28! Don’t miss out on anything else!  And be ready for the Flash Sale on the last day, Monday November 28!

Shop Stampin’ Up! and the Online Extravaganza!


The Stampin’ Up! Online Extravaganza Is Here! 24-Hour Flash Sale Today!

The Stampin’ Up! Online Extravaganza only happens once a year and today is the day! This sale runs November 21-28, but today only is this 24-hour sale! Don’t miss it!

Stampin' Up! 24-Hour Flash Sale Nov. 21

Some of these are Bundles that will only be offered during this sale. Sale prices are shown. You can click on the photos to go to the item in the store for more information.

Go directly to my Stampin’ Up! Online Store HERE to shop!

Stampin' Up! Online Extravaganza 2016 Weeklong Products Part 1

Stampin' Up! Online Extravaganza 2016 Weeklong Products Part 2

Stampin' Up! Online Extravaganza 2016 Weeklong Products Part 3

Stampin' Up! Online Extravaganza 2016 Weeklong Products Part 4

On the last day, Nov. 28, there will be another Flash Sale!

Online Extravaganza Flash Sale November 28

And don’t forget the Stampin’ Up! November Stamp Sale ongoing!! (Stitched Shapes Framelits Dies will be unorderable at 10:00 AM Mountain Time today!  Put yours on your order “Anyway” on backorder and you will get them sooner.)

Stitched Framelits and Stamps Flyer

Shop Stampin’ Up! Online today so you don’t miss out on a product you really want! Just because it says “online” doesn’t mean I can’t help you with your order, so contact me if you’d like me to put it in for you.

Click HERE to download the Online Extraganza flyer!

Shop Stampin’ Up! Online for the best in stamping and papercrafting products!

Thanksgiving Punch Art Turkey Candy Bar Wrapper

Thanksgiving Punch Art Turkey Candy Bar Wrapper

If you want a quick and easy favor for your Thanksgiving dinner, try this Thanksgiving Punch Art Turkey Candy Bar Wrapper. Just get some chocolate bars and wrap them in designer paper.  I used this generic sheet from the Halloween Night Specialty Designer Series Paper.

To make the punch art turkey to fit on the candy bar, I used the 1 3/8″ Circle Punch for the body and the 1″ Circle Punch for the turkey head. The feathers were cut out with the Layering Ovals Framelits Dies  and Big Shot, but you could also use an oval punch. The turkey feet are punched with the feet of the Owl Punch!  What would we do without the Owl Punch?! The eyes are also punched with the Owl Punch but I just colored in the pupil with a black marker. The red waddle on the turkey is the little heart from the …..Owl Punch! Just cut the beak freehand.

The Thanksgiving greeting is from the ever-useful stamp set, Teeny Tiny Wishes and punched with the Classic Label Punch.  I still love and use the Teeny Tiny Wishes Stamp Set a lot.  It has almost every greeting in it that you could possibly need.

Just a fun punch art turkey to make for a  Thanksgiving candy bar wrapper or you could make the same one on a Thanksgiving card. Play with the idea and make something fun!

Shop Stampin’ Up! Online 24/7


Thanksgiving Candy Turkey Cookie Favor

Thanksgiving Candy Turkey Cookie Favor

This Thanksgiving Candy Turkey Cookie Favor is not made with stamps, ink, or paper but it still is one of my favorite things at Thanksgiving! I think I found the idea in a family magazine way back when my kids were little and I made lots of them for preschool parties and elementary school or Scouts or whatever at Thanksgiving. There are similar ideas out there, usually involving Oreos, candy corn and frosting as glue. Those are cute, too, but I always thought these were the easiest to make and so cute!!

You will need Keebler Fudge Stripe Cookies, Hershey Kisses, candy corn and Kraft Caramels (or whatever similar brands you find at your store).

Unwrap several Hershey Kisses and have them sitting on a plate or napkin so they are ready, with a cookie and candy corn handy also. Put a caramel on a plate nad microwave it just a few seconds until it is slightly soft, but not melted or too soft. When the caramel comes out of the microwave, plop it on top of the Hershey’s Kiss. Immediately “smoosh” the cookie against the backside of the caramel until it sticks. Take the candy corn on edge and stick it into the caramel! There you have a turkey!

These turkeys are so fun to make for Thanksgiving! To make multiples, just have your ingredients ready to go. You can soften several caramels at a time on a paper plate in the microwave, maybe about six. You want to be able to work quickly when the caramels come out of the microwave so you can stick everything together. Have extras on hand because there will be some broken cookies! And you will need to kind of test your microwave and caramel softening factor to get the timing right. So just have extra ingredients on hand. And of course you can eat any malfunctions or leftover ingredients!

You can place these at each setting at your Thanksgiving table. If you want to add a placecard with someone’s name, can probably do that one way or another. My, how I used to like making placecards for family dinners when I was little!!

Pick up these ingredients at the store and try your hand at these Thanksgiving Candy Turkey Cookie Favors! Something different for Thanksgiving!

Thanksgiving Candy Turkey Cookie Favor Side

Don’t forget the Stampin’ Up! Online Extravaganza starting Monday, November 21!  Lots of products and special bundles on sale up to 40% off all week plus a Flash Sale on Monday ONLY, plus another Flash Sale on the last day, November 28. Get your wish list ready this weekend so you don’t waste time on Monday! You may be cleaning and cooking, but you deserve a break and some shopping!

Download the Online Extravaganza List HERE.

Shop Stampin’ Up! HERE!

(On Monday when you click the store link you will undoubtedly see a banner about the Online Extravaganza but it’s not there today yet.)


Stampin’ Up! Online Extravaganza 2016

Stampin' Up! Online Extravaganza 2016 Shop with Karen

MONDAY, NOV. 21 – MONDAY, NOV. 28

Stampin’ Up! Online Extravaganza only happens once a year, so be sure to take advantage of it. For one week only, November 21-28, you can save up to 40% on select products. To sweeten the deals, Stampin’ Up! will be having 24-hour sales on the first and last day of the promotion,featuring special products available for that day only. You can even get a sneak peek AND save on products that will be on the future holiday catalog retiring list. Don’t miss out on this great opportunity to stock up and save!

FLASH SALE MONDAY, NOV. 21 ONLY

Stampin' Up! Online Extravaganza 2016 Product List Flash Sale Nov 21

Stampin' Up! Online Extravaganza 2016 Product List Flash Sale Nov 21 Part 2

Stampin' Up! Online Extravaganza 2016 Weeklong Products Part 1

Stampin' Up! Online Extravaganza 2016 Weeklong Products Part 2

Stampin' Up! Online Extravaganza 2016 Weeklong Products Part 3

Stampin' Up! Online Extravaganza 2016 Weeklong Products Part 4

FLASH SALE MONDAY NOV. 28 ONLY

Stampin' Up! Online Exravaganza 2016 Flash Sale Nov 28

DOWNLOAD THE ONLINE EXTRAVAGANZA LIST OF PRODUCTS HERE!

Details

• Promotion period: November 21-28, 2016
• Discounted items/bundles available on all order types (customer, demonstrator, workshop, starter kit, and online).
• You must use the bundle item codes provided. Discounts will not be applied if individual item numbers are entered separately.
• Some bundles have been created exclusively for Online Extravaganza and will not be available after the promotion ends.
• There is no minimum purchase required in order to receive the discounted price.
• Additional products from current catalogs may be purchased on the same order.
• Discounts range from 10-40 percent and may vary per market. Note: While some retiring holiday products may be discounted during the retiring list promotion in December, no discounts will be greater than the discounts being offered during Online Extravaganza.
• During Online Extravaganza, a selection of past Paper Pumpkin kits and refill kits will be available to both subscribers and non-subscribers.
• Online Extravaganza includes two 24-hour sales.
• The first 24-hour sale begins at 12:01 AM (MT) on November 21 and runs
through 11:50 PM (MT) that same day.
• The second 24-hour sale begins at 12:01 AM (MT) on November 28 and
runs through 11:50 PM (MT) that same day.

Paper Pumpkin kits and products on the future holiday catalog retiring list, except stamp sets, are only available while supplies last.
• All products that are while supplies last have been noted in the Online Extravaganza deals list.

AND DON’T FORGET THE ONGOING NOVEMBER STAMP SALE!

Stitched Framelits and Stamps Flyer

Remember, these stamps are on sale and available through the end of November.  You can add them to your Online Extravaganza order! Remember, too, that the very popular Stitched Shapes Framelits Dies will be unorderable starting Monday, right now are backordered. I think that if you ordered those before Monday you would receive them sooner than if you wait until they are orderable again. Either way, you won’t be able to combine the dies with an Online Extravaganza order.

Check out the Stampin’ Up! November Stamp Sale HERE!


Cookie Cutter Christmas Bear Baby Cards

Cookie Cutter Christmas Bear Baby Cards

Would you guess you could take a Christmas stamp set and make a baby card with it? Take a good look at your holiday stamp sets and see if you can get some other uses out of the stamps during the year before you put them away! For example, these Cookie Cutter Christmas bear baby cards are made with the bear in a Christmas stamp set and even with holiday or wintery designer paper. But if you don’t use the holiday patterns in the Warmth & Cheer Designer Series Paper Stack, there are plenty of generic patterns you can use at other times. While the Cookie Cutter Christmas Stamp Set is obviously for the holidays, once you notice the cute bear stamp, face, and ears, you can see that you can use that stamped image for other occasions!

These cards are square, 4 1/4″ x 4 1/4″, with a Whisper White Thick Cardstock base. The designer papers are from the Warmth & Cheer Paper Stack.  The bear is stamped on Whisper White and then the circle is cut out with the Stitched Shapes Framelits DiesLove these!! If you put them on your order now, even though they are backordered, you will be in line to get them sent to you as soon as they are available again. They have been so popular that Stampin’ Up! will have to turn the number off until they have sufficient supply again.

On the card on the left, I added a Flirty Flamingo scalloped circle layer die cut with the Layering Circles Framelits DiesI also added a strip of Flirty Flamingo 3/8″ Ruched Ribbon across the middle of the card.  The greeting is from the Flourishing Phrases Stamp Set. I added two In Color Enamel Dots because I LOVE these little dots!

The baby card on the right is very similar.  I added a strip of 1/8″ Gold Ribbon underneath the banner greeting.  That greeting is from the Better Together Stamp Set.  Once I looked at these two cards side by side I noticed the word “Congratulations” looks exactly the same even though they are two separate greetings from two different stamp sets! Hmmm!

So look at your stamp sets a little diffferently and see if you can get even more use out of them that they seem intended! This is very difficult for me until I see someone else’s idea!

If you want to make a Cookie Cutter Christmas Bear Baby Card and need some supplies, please click this link below to order your Stampin’ Up! products!

Stampin’ Up! Online Ordering HERE!

Petals & Paisleys Copper Foil Thanksgiving Card

Petals & Paisleys Copper Foil Thanksgiving Card

I will say the photograph of this Petals & Paisleys Copper Foil Thanksgiving Card does not do it justice!  I think it is one of the prettiest cards I have ever made, not because I made it because it is a very simple design, but because of the materials! Just get the Petals & Paisleys Specialty Designer Series Paper and you will see why! Inside that package is this gorgeous Night of Navy paper with copper foil embossing on it! So pretty!!

I made the card base with Night of Navy Cardstock. When you are not sure what color to use with Stampin’ Up! designer paper, just look on the back of the package to see the list of coordinating colors (you might need your reading glasses though!)! It’s a great resource right at hand!

The greeting is from the Suite Seasons Stamp Set and is perfect for Thanksgiving. I wiped a piece of Very Vanilla Cardstock with my Embossing Buddywhich lessens the static on the paper and prevents the stray specks of embossing powder, for the most part. I stamped with Versamark Ink, sprinkled on the Copper Stampin’ Emboss Powderand heated with the Heat Tool. I can guarantee that each time you do heat embossing you will be amazed like the first time you ever saw it! It is just magical!

After looking through my framelits, I decided on the Stitched Shapes Framelits Dies to cut the stitched oval shape around the greeting.  Then I die cut a layer from Copper Foil with the Layering Ovals Framelits DiesI choose the scalloped edge die.  Love it! Then I decided to use my Copper Metallic Thread to wrap around the designer paper. It’s very thin so I had to wrap it around many times!  It barely shows on the photo but it’s there and very pretty.

I like this card so much I think I will make more cards with the rest of that foil designer paper to send out at Thanksgiving! I often forget my own piece of advice – I used to always say “when you make one card, make three” because as long as you have the supplies out and the design in mind, make extras to have on hand!

Remember, the Stitched Shapes Framelits Dies are or will go on backorder this week and by next week they will not be able to be ordered until Stampin’ Up! receives sufficient supply to fill orders. If you want them, I would add them to an order and hope that you still get one of the thousands of sets coming in to the warehouse by the end of the month.  Otherwise it might be a longer wait.

The stamp sets on the November sale are still available so be sure to check those out!

I hope you will make a few Thanksgiving cards to mail out to special people. Just think how happy that will make their holiday!

Shop Stampin’ Up! Online HERE!