Author Archives: Karen Fontinelle

Quick and Easy Easter Tiny Treat Box

Quick and Easy Easter Tiny Treat Box

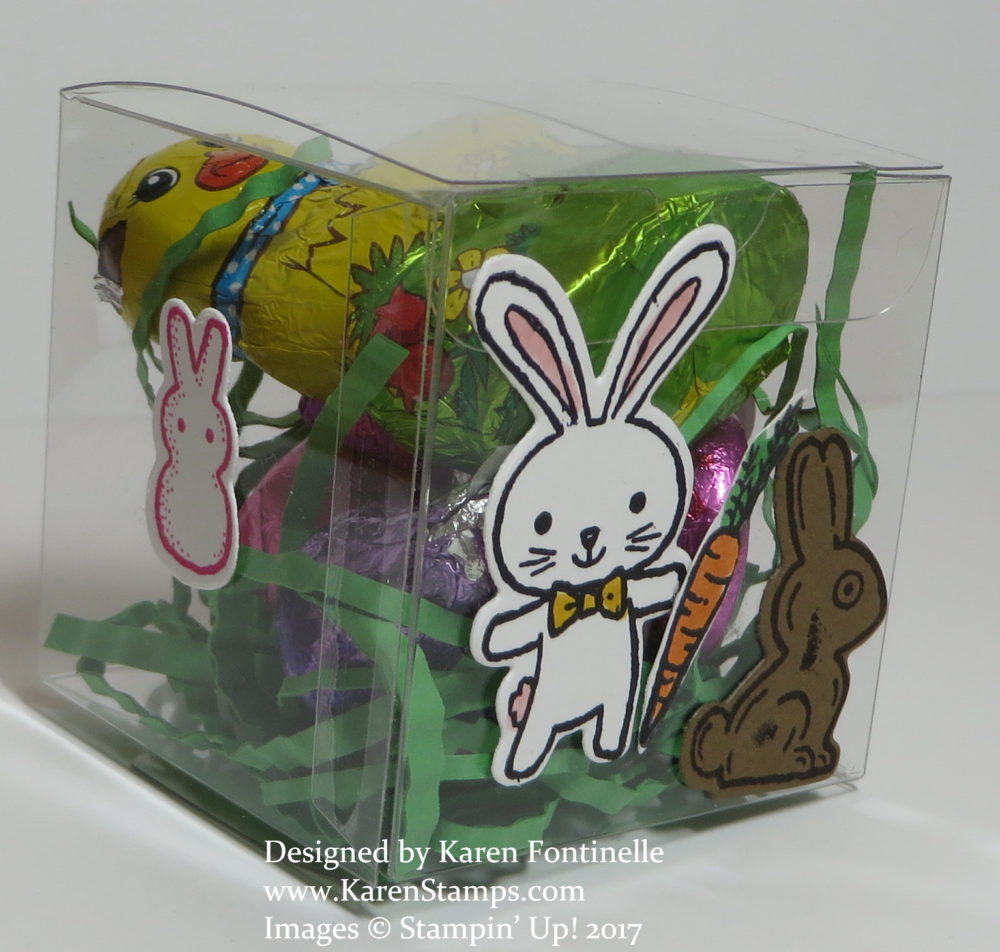
Make a quick and easy Easter Tiny Treat Box for a little gift or a table favor or even a decoration in your home!  And you can eat the candy later!  The Stampin’ Up! Tiny Treat Boxes make this project so quick and easy. If you don’t have any “Easter grass” to put inside, just cut narrow strips of cardstock and moosh them up with your hands, unless you have the old Paper Crimper, which is what I used to get the crinkly effect.

My project was made super-quick because I already had extra Easter figures cut out while doing another project. I had already stamped and die cut the Easter bunny, carrot, chocolate bunny and little bunnies with the Basket Bunch Photopolymer Bundle. The Bundle includes the stamp set and matching framelits dies and is on the Stampin’ Up! Retirement List. Now the Bundle at $46.75  in the Occasions Catalog has always been the best deal if you wanted both the stamp set and the framelits, but now that the Retirement List is here, it looks to me like the best deal is to buy the Basket Bunch Photopolymer Stamp Set on sale at $16.80 and the Basket Builder Framelits Dies on sale at $15.50.

This set can be used for other occasions, not just Easter, so don’t worry that you don’t have time to order and use it now!  There is always next year, but even now you can use bunnies for any happy occasion and certainly the basket and flowers. One day I made a baby card with the bunnies that had nothing to do with Easter.

The Retirement List was released yesterday so be sure to check it out early so as not to be disappointed if any products sell out early!

  • Retiring stamp sets will continue to be manufactured by Stampin’ Up! in Kanab, UT until May 22, then it will be while supplies last.
  • Some items on the Retirement List are discounted, but not all.
  • Bundles in any catalog are only priced as bundles with the 10% discount for the first year in the catalog, after that the items may be available separately.
  • Tools and accessories are available “while supplies last”.
Shop Stampin’ Up! for all the Retiring Products HERE!

Retiring Stamp Sets

Retiring Bundles

Retiring Everything Else

Check out the Retirement List  in PDF or EXCEL.

Basket Bunch Easter Card

Basket Bunch Easter Card

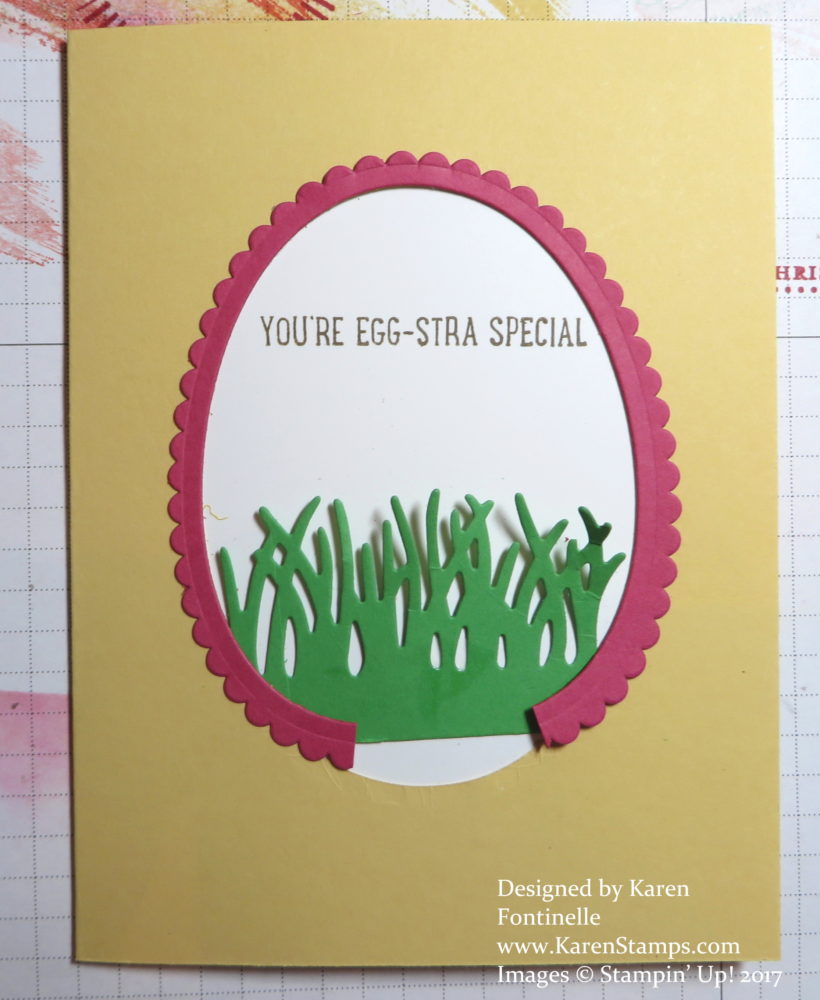
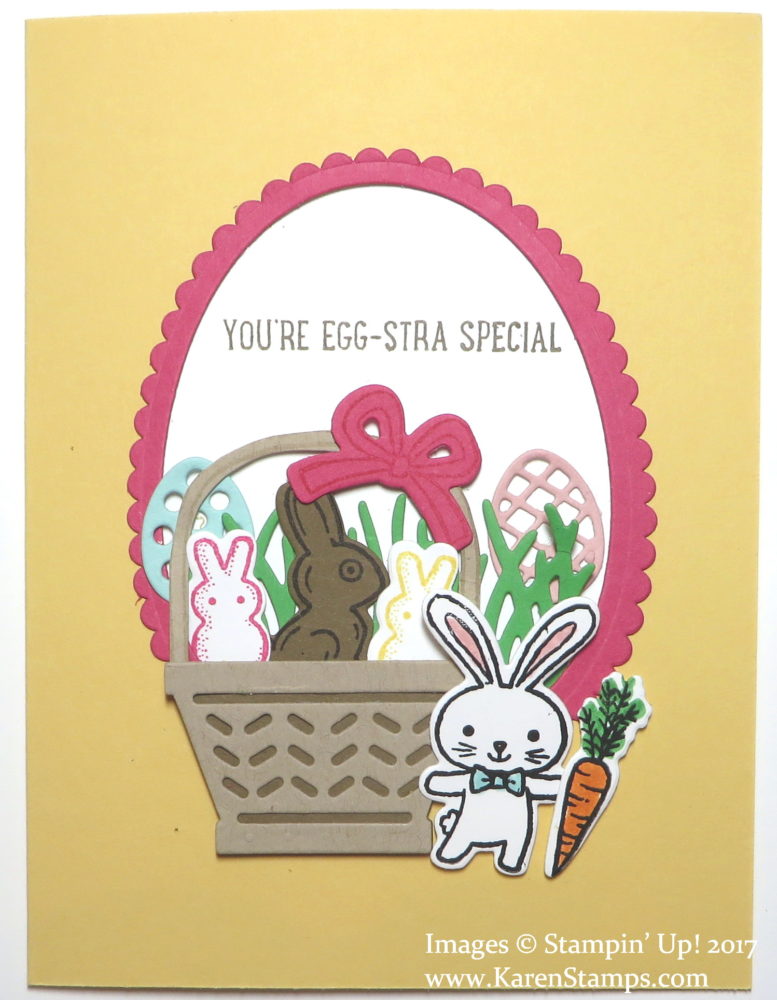
Easter will be here in just one week! I don’t know where the time has gone considering Easter is late this year! Here is a Basket Bunch Easter Card that I got the basic inspiration from a card I saw online that was an egg-shaped card.  Instead of making mine an egg-shaped card, which I have done in that past, like THIS CARD,  I gave the impression of an egg by die-cutting an oval in the front of the card with the Layering Ovals Framelits Dies. Then I cut a Whisper White layer to put behind the opening and placed some of the Basket Bunch images on that layer inside the oval as well as stamping the greeting from the Basket Bunch Photopolymer Stamp Set.

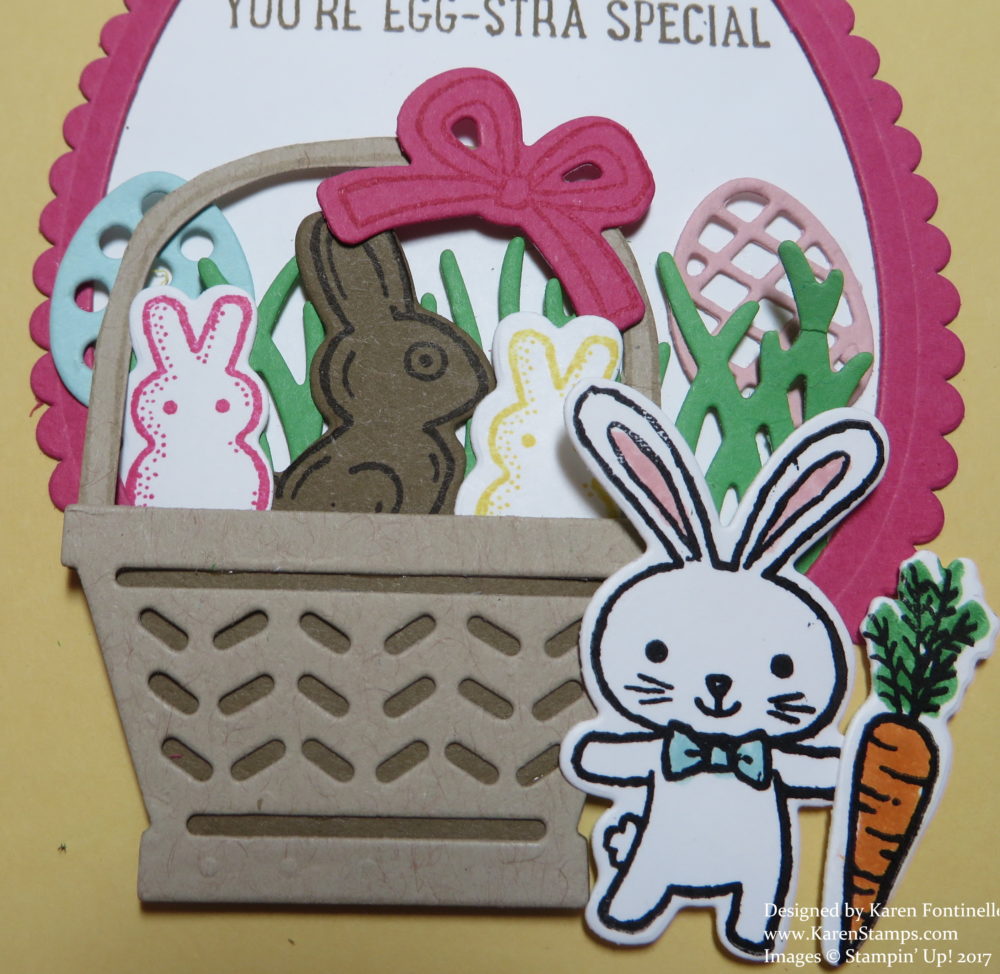
There are a lot of little dies in the Basket Builder Framelits Dies  that you can use with the stamped images to die cut Easter eggs, bunnies, grass, a basket, a bow and more!  So many fun choices! As I was putting this little scene together, I thought I should have had a scalloped border around the oval, but the largest scallop was too small for the shape.  However, since the bottom portion was going to be covered up anyway, I just die cut the largest scalloped oval and then cut it open at the bottom to that I could “stretch” the oval around my opening to make it fit!  I think it worked pretty well!

Basket Bunch Easter Card Scallop

Here is a close-up of the die-cut elements of the card:

Basket Bunch Easter Card Close Up

While there are a lot of Easter elements in this Basket Bunch Photopolymer Bundle , I’m sure you can see how it can also be a good set for lots of occasions leaving out the parts that say “Easter”. A basket full of flowers, for example, is good for any occasion and is made even cuter with this die cut basket. And bunnies are cute any time!

Remember, the Stampin’ Up! Retirement List comes out tomorrow, April 10th at 1:00 pm MT, which is 2:00 PM Central Time. Remember, on big days like this, there can always be computer glitches and delays so just exercise patience if you have any problems viewing the website or putting in an order.

To order anything today or to see the Retiring Products tomorrow afternoon, just go to my Stampin’ Up! Online Store HERE!

A Fun Shaker Card to Make

A Fun Shaker Card to Make
Doesn’t everyone love a shaker card?  I think it brings out the child in us! It is so fun to move the card back and forth to see the movement of the beads or confetti or whatever the contents in the window are! Shaker cards are really easy to make and certainly fun.

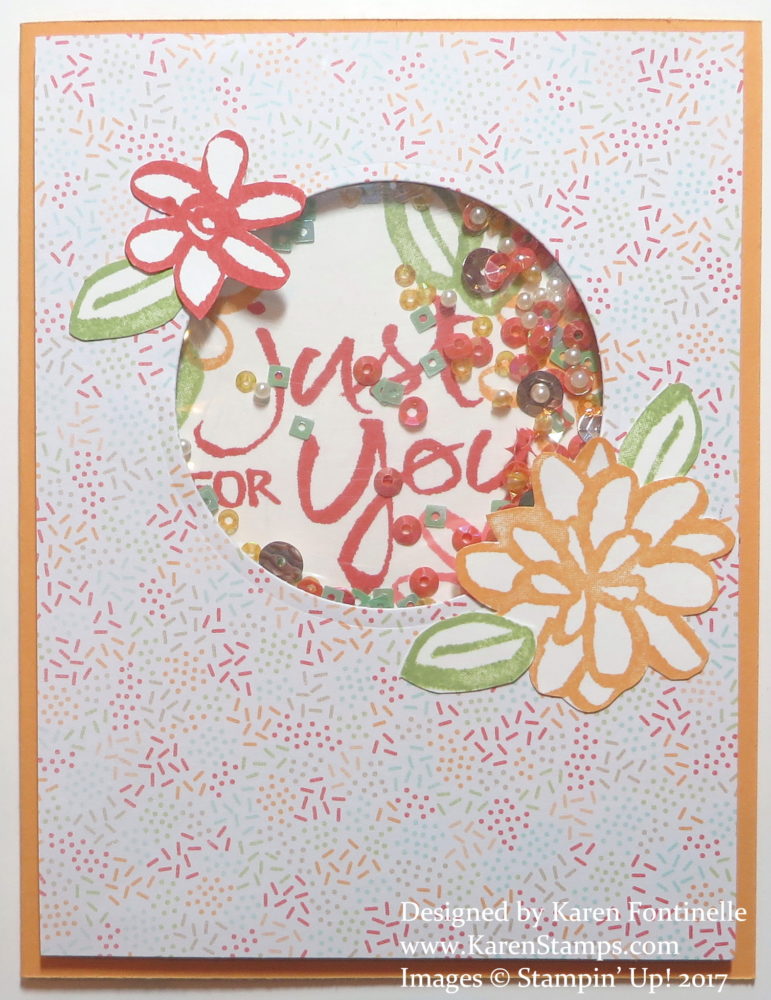
First I made the card base with a piece of Peekaboo Peach cardstock folded in half.  I chose Peekaboo Peach because it is one of the coordinating colors of the Tasty Treats Specialty Designer Series Paper that I had already chosen to use. I die cut a circle in the designer paper for the window with the Layering Circle Framelits Dies or perhaps you could use a punch if you had the right size. Then I cut a piece of Whisper White cardstock to go behind the window on which I would stamp a greeting. I think a smaller greeting would have been a better choice.  I used the Watercolor Words Stamp Set for the greeting and the flowers on my card. A greeting this large made it a little difficult to make sure it was placed just right to show through the window. You’ll also need a piece of Window Sheet (or some piece of plastic like a transparency sheet) to adhere on the back of the window. After the window sheet is in place, place the Foam Adhesive Strips completely around the hole on the back of the window.  This forms the “well” where you will put your shaker pieces. For my card, I added the Sprinkles Embellishments in the Occasions Catalog and a few miscellanous sequins that I think are retired but I had handy. Next, peel off the adhesive strip on top of the foam strips and place the stamped white background piece over the window. This is tricky because you are doing it from the backside without seeing how it lines up. Once that is adhered, add some more Foam Strips or Dimensionals around the back of the window layer to hold that layer up all around the edge the same as the window.  Adhere to card base.  And there you have your Shaker Card! It just takes making one to get the hang of it!

The Watercolor Words flowers are stamped and cut out by hand with my Paper Snips. I just adhered those to the front of the card around the shaker window. Another tip is that you don’t want too much in your shaker window or it obscures your greeting or image and doesn’t move around as well. And if you don’t have the Foam Adhesive Strips yet, you can substitute the edge strips from the Dimensionals, just make sure you don’t leave any open spaces!

Try making a fun Shaker Card! You can also have the front of the card flat and the shaker area inside the card.  Just cover with another layer of cardstock to make it look pretty on the inside!

If you need any Foam Adhesive Strips, Sprinkles Embellishments, or other sequins and materials to make a Shaker Card, just order at my Stampin’ Up! Online Store!


Making a Generic Card For Any Occasion

Generic Butterfly Work of Art Card

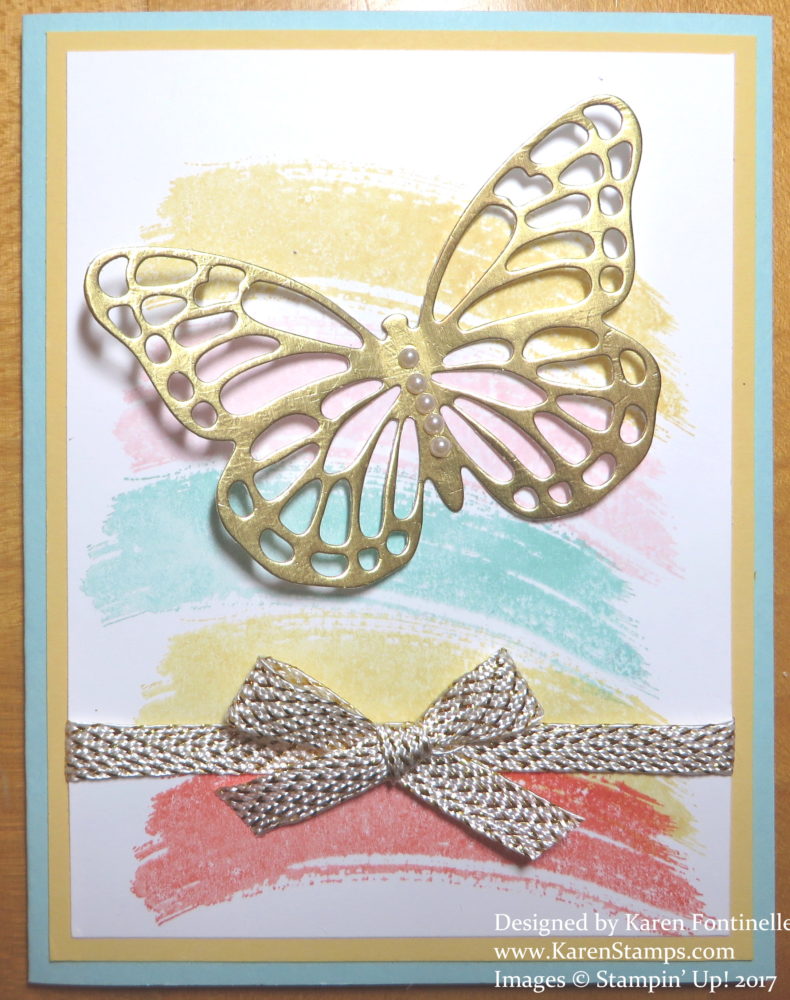
Sometimes it is a good idea to make some generic cards to have on hand so you are ready for almost any occasion. In this case, I have a butterly work of art card!
To make this generic card, I used Pool Party cardstock for the card base and layered it with So Saffron for an accent. The Whisper White layer is stamped, lightly, with various swaths of color with the Work of Art image.  I used So Saffron, PInk Pirouette, Pool Party, and Calypso Coral ink. This provides a generic background but has color and interest in it.  The gold foil butterfly I found in my scraps! It was die cut with the Butterflies Thinlits Dies and the Big Shot. I added a few Pearl Basic Jewels on the butterfly for a little more accent. For the ribbon embellishment, I thought the Sale-A-Bration ribbon (retired) with the gold accents would be good for this card.

After you have some generic cards made, you will be ready to pull out a card for almost any occasion when you need one at the last minute. Add a greeting if you like or leave it without. Another way to add a greeting is to stamp a generic one, like “Just For You” or “Thinking of You”, something like that. Here’s an example of another card I made that could be considered generic and could be used for birthday, thinking of you, a written note, get well, congratulations, etc.

Look through the catalog and choose some stamp sets that could help you make generic cards. Flowers are probably always good but there are many others.

(Something is making my blog post push all the paragraphs together so I will have to find a way to fix this issue, just know I’m not trying to make my post difficult for you to read!)

Shop Stampin’ Up! Online 24/7 HERE!

Baseball Opening Day Card For Baseball Fans

Baseball Opening Day Card for Baseball FansHooray! Today is Opening Day for Houston Astros Baseball here in Houston, Texas! Here is an opening day baseball card for baseball fans nationwide, no matter what day your Opening Day is on. Any time I think about baseball, it takes me back to so many memories, and the sounds remind me of summer time during my childhood.  The first baseball game I ever went to was with Girl Scouts and I wasn’t even that excited about going.  My mother, a baseball fan, told me it would be fun and that she loved the hotdogs at the ballpark. Maybe it’s the power of suggestion, but in my memory, the best hotdog I ever had in my life was at that ballpark at my first baseball game! That game was at the old Sportsman’s Park in St. Louis, long gone now. Later, Busch Stadium was built and that was where I attended the rest of the St. Louis Cardinals baseball games. Now there’s another new stadium in St. Louis!

My family didn’t attend many baseball games at all, we probably didn’t have the money to spend at that time, and my dad wasn’t that big of a sports fan to say the least, although he thought baseball was okay. Being a baseball fan really came from my mother’s side of the family, especially my grandpa. One time when his eyesight was failing, he said he would buy the tickets if a family friend (huge baseball fan!) would drive him and us kids to the game. We had field boxes that night so he could sit as close as possible to see! Schools often gave free baseball tickets if you got “straight A’s” and sometimes my brother or I earned those and we got to go to the game. When I was in 6th grade, I got in trouble for bringing my transistor radio to school and loaning it to a classmate to listen to a Cardinals World Series game during class. She had the earplug in with the wire underneath her sweater but we still got  caught!

After my husband and I moved to Houston, one of the first things I wanted to do was go to a ballgame at the Astrodome! Back when it was new, my family visited Houston and we went on the Astrodome tour, something I loved and still remember, and how I wished I would have bought a square of the AstroTurf in the gift shop I think for a dollar! When my husband and I went to our first game at the Astrodome, I remember even dressing up a bit because I thought going to the Astrodome was a special experience. Now, of course, the Houston Astros have a newer stadium, but I still like seeing the Astrodome, dwarfed by the big new football stadium!

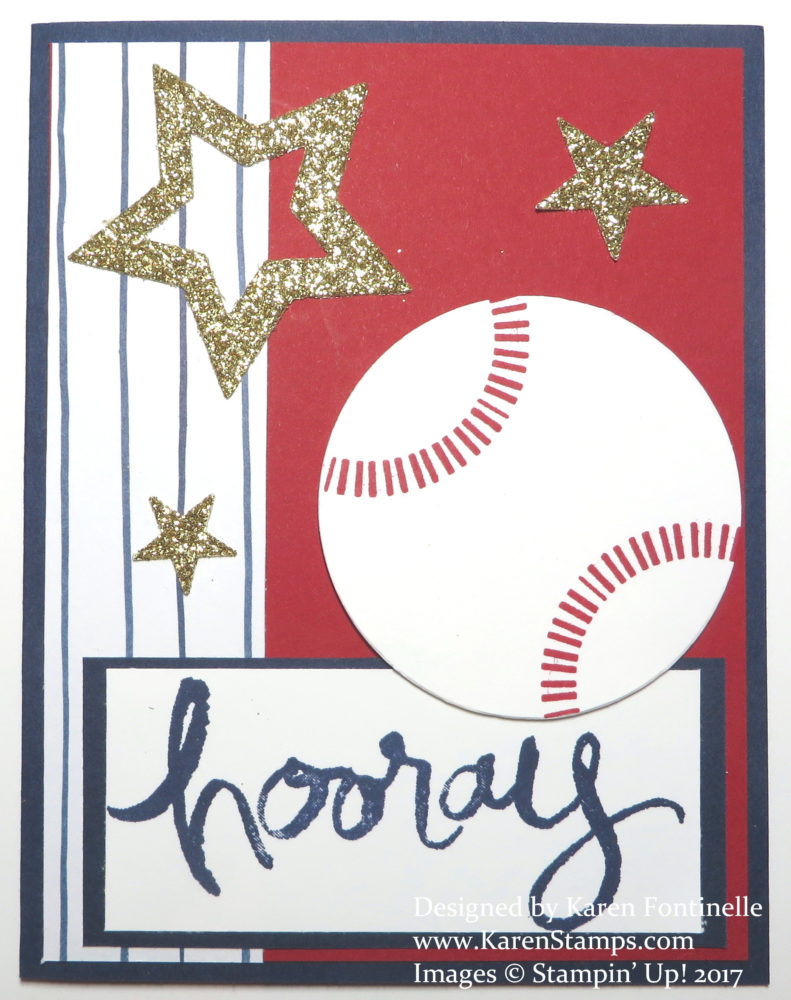
So for Opening Day, I made this baseball card.  You can copy it or be inspired by it to make one to send to your favorite baseball fan! Click here to see a class valentine I designed for a boy who is a big baseball fan.  The card base is Night of Navy with a little strip from the Floral Boutique Designer Series Paper.  You wouldn’t think this paper had anything to do with baseball, but when I saw the white with blue stripes pattern, it reminded me of the pinstriped uniforms some baseball teams wear.  The “hooray” is from the Watercolor Words Stamp Set, which I love.  The baseball is die cut with the Layering Circle Framelits Dies and the faux stitching is made with a Paper Pumpkin stamp. The stars I found in my box of scraps already die cut from Gold Glimmer Paper. I added a Real Red layer on the front to help everything stand out.

The Stampin’ Up! Retirement List comes out a week from today!  The only thing we know is that the In Colors from 2015 will be retiring so if you want any of those colors or coordinating products and especially the reinkers, I suggest you grab them now while they are available because they could go fast once the list comes out!

Enjoy baseball’s opening day by making a card for a baseball fan!

Shop Stampin’ Up! Online HERE!


Mini Treat Bag Birthday Pocket Card

Mini Treat Bag Birthday Pocket Card

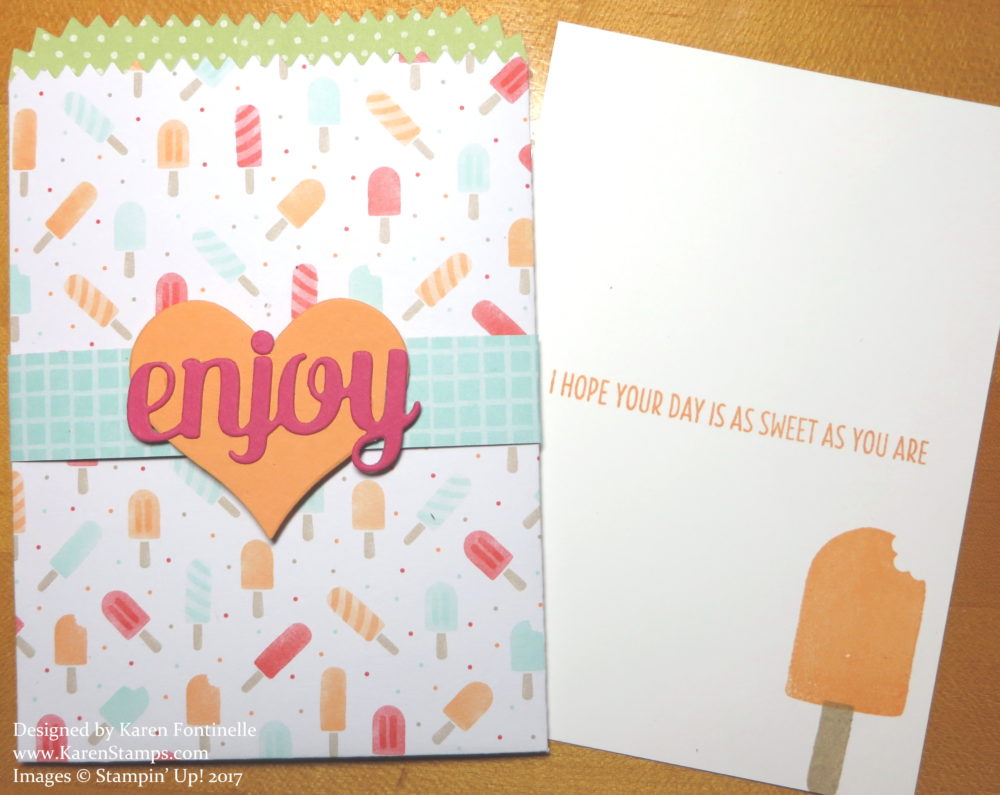
Two of my favorites here in this blog post:  I used the Mini Treat Bag Thinlits Dies to make this treat bag turned into a birthday pocket card AND the Cool Treats Suite of products in the Occasions Catalog! I used the Tasty Treats Specialty Designer Series Paper for the Mini Treat Bag.

Watch the pattern when you run it through the Big Shot because the popsicles on the paper are going in one direction!  The first one I did I had it upside down! Since there are no mistakes in stamping, however, I will save that upside down treat bag and cut it apart and use the smaller pieces of paper on other projects! When you are working with patterned paper on any project, you do have to think about which way your design is going to go on your project and cut it or lay it out accordingly!

Although this die is named “Mini Treat Bag” you can design a card to add on the inside, which can be a greeting or hold a gift card. If you like another design, you can fold the top over and make a smaller type of little package. Click HERE to see my Altered Folded Mini Treat Bag. It was very cute, if I do say so myself!

There are lots of dies in this collection that can help embellish your Mini Treat Bag.  Use plain cardstock or designer paper, your choice.  It is easy to assemble and fun to make!

Today, tomorrow and Friday — these are the last 3 days of Sale-A-Bration so be sure to get your order in! If you are new, Sale-A-Bration has been going on since January but is Stampin’ Up!’s biggest promotion! You can order from the Occasions Catalog or the Annual Catalog or even the Clearance Rack!

With every $50 you spend on Stampin’ Up! merchandise (before shipping and tax) you get to choose a FREE product in one of the Sale-A-Bration Brochures.

Remember, we had a few new options released last week! Here are the choices!

Original Sale-A-Bration Brochure

New February Releases

Final Days New Releases

Not all items are still available, so if your online order says an item cannot be added that means the supply is exhausted,

It’s time to shop! Get whatever you want! If you get close to another $50 increment, add on some adhesive or reinkers or cardstock so you can get another FREE Sale-A-Bration product!

Have fun! Shop Stampin’ Up! HERE!


Cool Treats Ice Cream Sundae Card

Cool Treats Ice Cream Sundae Card

When I first read the Occasions Catalog, the suite that stood out to me was the Cool Treats Suite! I didn’t order it right away, but I loved everything on pages 32-33. I haven’t really had time to stamp with it yet, so when I finally did, I started with inspiration from the Occasions Catalog.  I decided to mostly copy one of the cards on page 32.

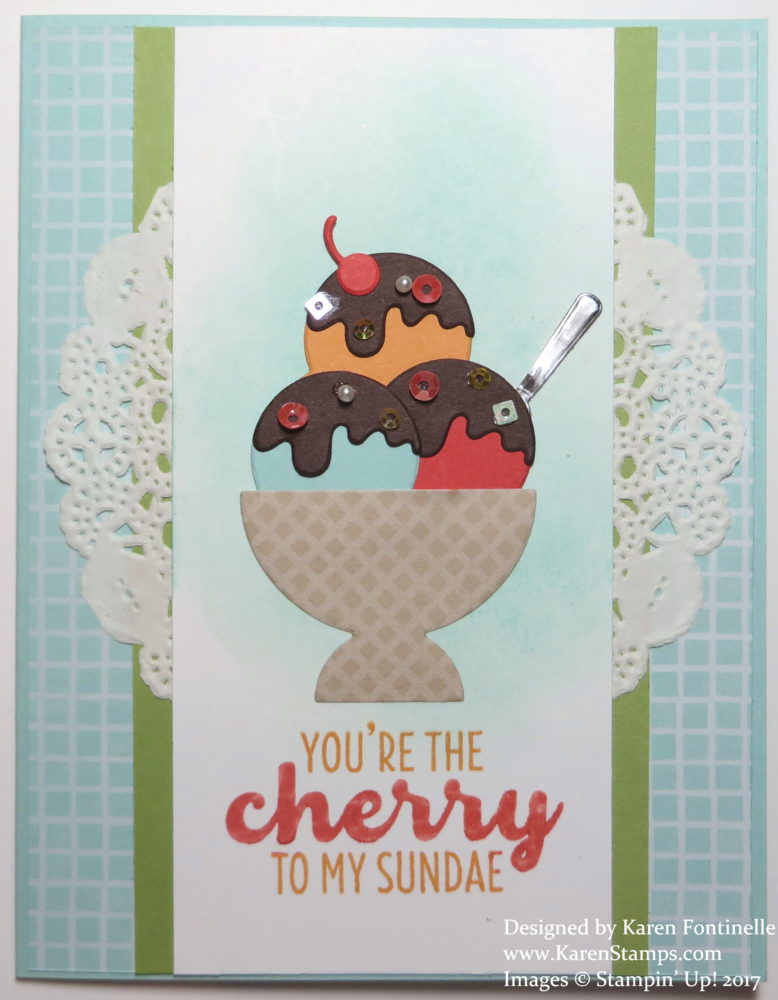
Really the only stamping on the card is the greeting, the rest are all die cuts with the Frozen Treats Framelits Dies. I also did not make my card square as I believe the catalog sample is. Did you know that if you mail a card in a square envelope you have to pay a surcharge? Even if you make a square card, it is better to put it in a rectangular envelope. To stamp the greeting in the two colors, I inked it up with the lighter color, Peekaboo Peach, and then colored over on the “cherry” word with the Watermelon Wonder Stampin’ Write Marker. Always remember to “huff” or breathe on a stamp when you have delayed stamping with it to remoisten the ink.

Before I adhered the ice cream scoops and bowl onto the Whisper White layer, I sponged some Pool Party ink for the background. For the little spoon, I die cut the Silver Foil paper.  How cute! Now you can die cut the sprinkles, but oh my, they are as tiny as a strand of hair! I don’t know how you glue those down, or barely even see them without magnifying glasses!  So instead, I used the Sprinkles Embellishments! These are a combination of sequins and tiny pearls, all very small. Just put a tiny drop of glue on the ice cream and then add the Sprinkles Embellishments. Or maybe punch some tiny circles or stars!

The little ice cream dish is die cut from the Tasty Treats Specialty Designer Series Paper. Such cute designs on this paper!  Remember that usually Stampin’ Up! makes their designer paper so that one side is bold or graphic or themed, and usually the other side is something more generic that you can use for other things as well.

You probably have seen many yummy samples of cards and other projects with this Cool Treats Suite of products. I love the colors and all the cuteness! Not to mention I love ice cream!  If you like the stamp set and the dies, be sure to use the Cool Treats Bundle number to order and save 10%!

The Occasions Catalog will come to an end but not until May 31.  However, if you wish to take advantage of Sale-A-Bration, this is the last week!!  Can you believe it?! Get your $50 or more orders in by March 31 to take advantage of this fun promotion! A few Sale-A-Bration choices are no longer available.

If you love ice cream and other frozen treats, you might enjoy the Cool Treats Suite of products, especially with summer coming up!  Lots of potential for party invitations, birthday cards, neighborhood get-togethers, happy cards!

Shop Stampin’ Up! Online HERE!

How to Marble Paper With Shaving Cream and Ink the Easy Way!

Try a new technique this weekend, like how to marble paper with shaving cream and ink! There just just seems to be no end to creativity with stamps, paper and ink, or in this case with shaving cream!  I remember making some card backgrounds with this technique a long time ago and probably around Easter time. Of course you can do it for any occasion or season or holiday, just use the appropriate colors, but there is something soft and beautiful about this technique for springtime and Easter I think.

Watch Donna Griffith from the Stampin’ Up! Home Office show you this easy technique for marbling paper!

Doesn’t that look fun and easy?!  And what a fun technique to do with your kids or grandkids, not to mention Girl Scouts or Cub Scouts!  Donna used an empty stamp case, but you can also use a paper plate or other container.  Use a plastic knife or a skewer to mix the colors, but don’t overdo it unless you are going for that look.

We always say, “There are no mistakes in stamping!” but I can also add, “There are no mistakes in marbling!”  Every piece of paper you do will look different!  Have lots of pieces of paper cut and ready to go because you won’t be able to stop!  You can save the pieces you don’t need right away and use them on other projects in the future.

As you can see in the video, the marbling technique isn’t just for backgrounds, you can punch or die cut pieces and shapes to use on other projects. If you use a large area of shaving cream, you could marble a whole sheet of paper, perhaps for a scrapbook page!  Once you start playing, you will come up with other ideas, perhaps inspired by the colors and marbling you create!  If you don’t like the color combination, just wash that cream away and start over. Perhaps you want your own can of shaving cream (remember that Donna said not to use gel!) for your papercrafting so your husband doesn’t get upset if you are using his!

Shop Stampin’ Up! ink refills if you need them for your ink pads or to to try this technique!

Only 6 more days of Sale-A-Bration, so if you need paper, stamps or ink refills, be sure to order soon with a $50 order so you can get your free Sale-A-Bration product!

SHOP NOW AT STAMPIN’ UP!

Making an Easy Paper Pumpkin Kit Bunny Favor For Spring

March 2017 Paper Pumpkin Bunny Bag

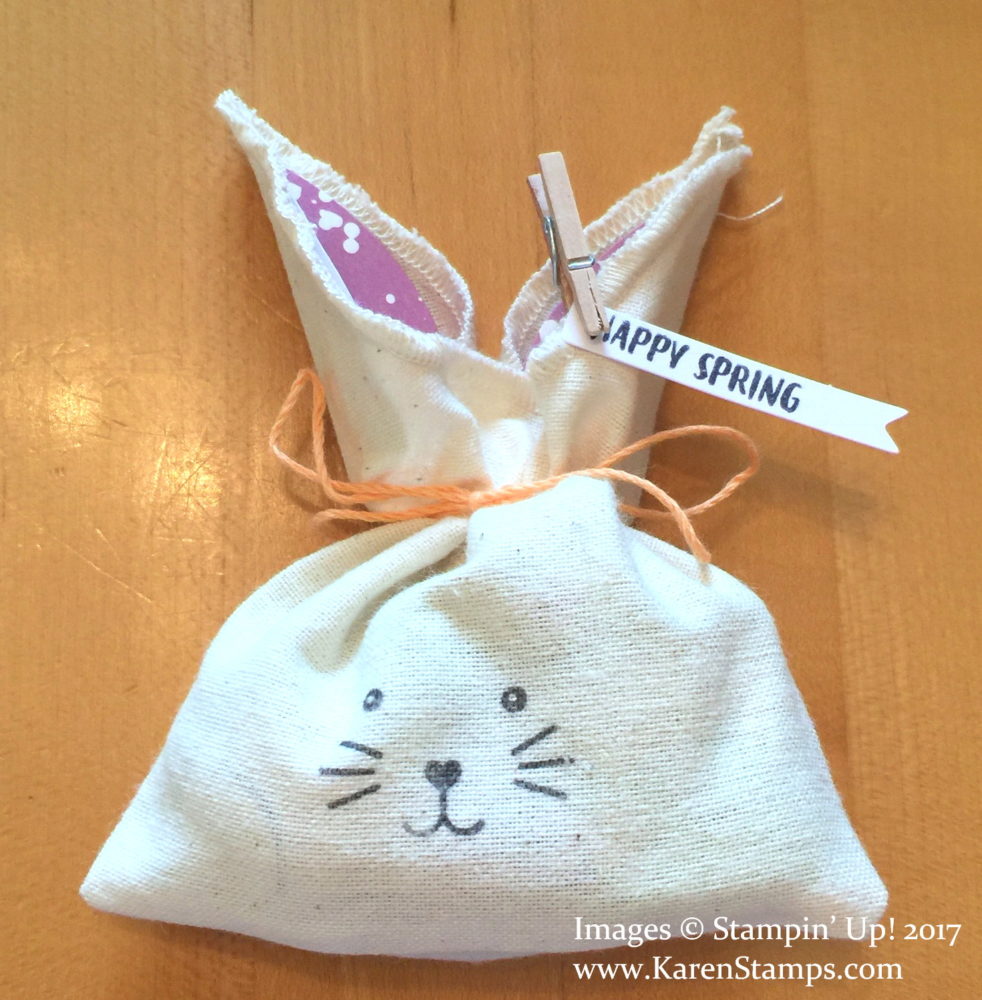
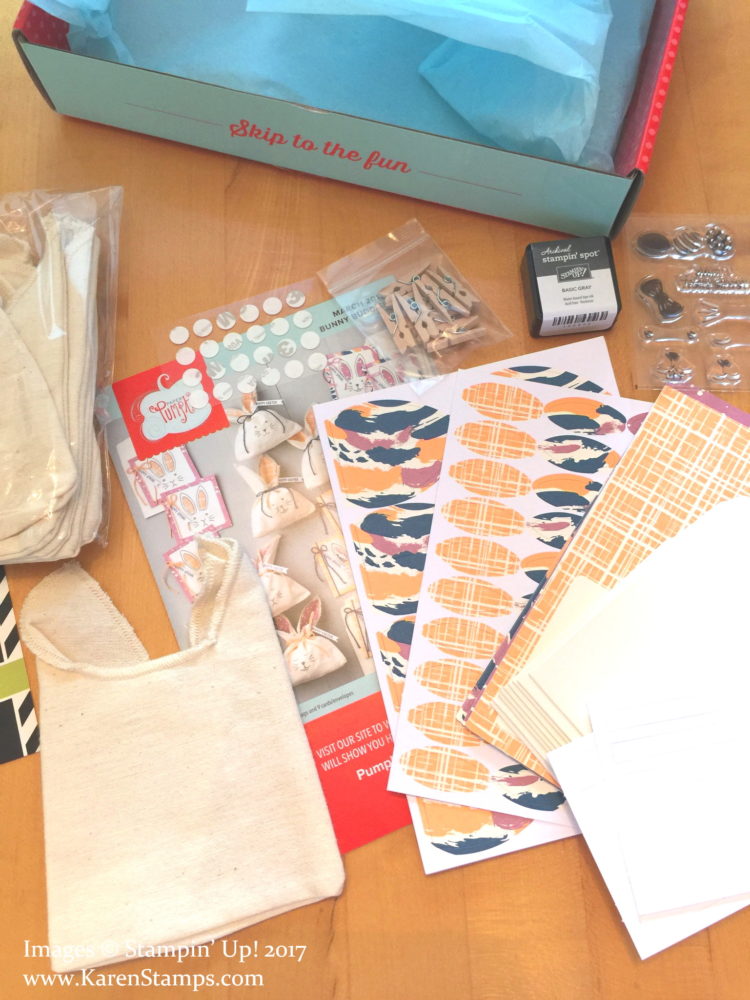
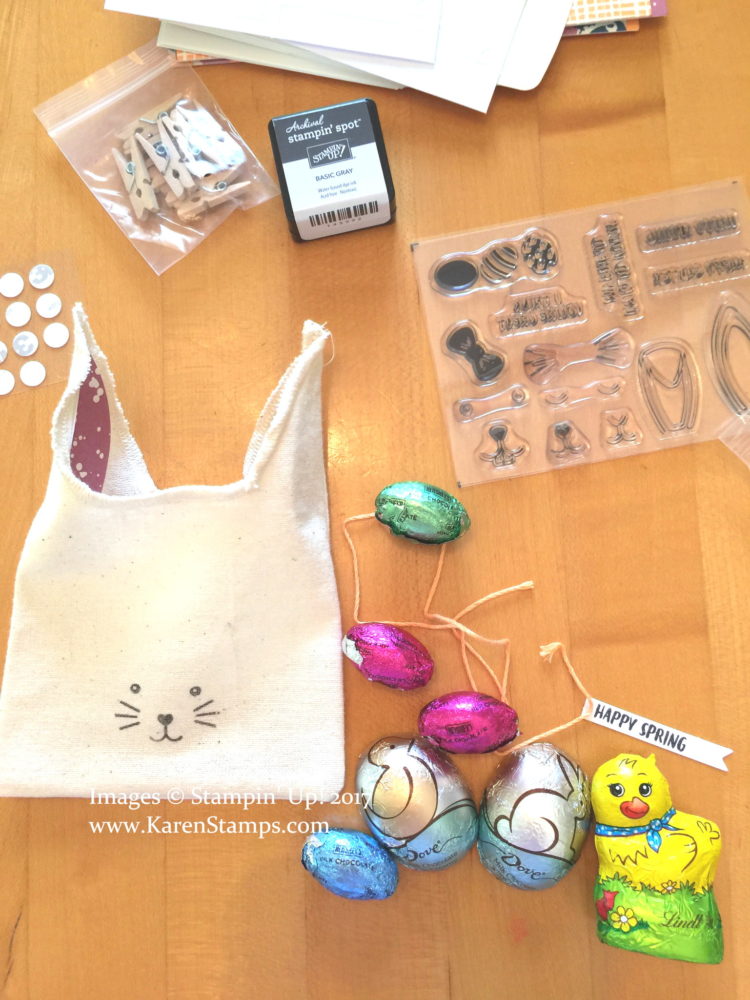
I finally opened my March 2017 Paper Pumpkin Kit from Stampin’ Up! and within minutes had made this cute bunny favor for spring. I wanted to take something to my friend who was in town when we met for dinner and I thought of this little bunny bag that would be perfect and something different than cards. All I had to do was open the Paper Pumpkin box and everything I needed was in there except a pair of scissors to snip the baker’s twine! Everything!  Well, except the chocolate candy!

March 2017 Paper Pumpkin Kit

The little cloth bags were ready to be stamped with a bunny face, and the kit even included an adhesive dot with which to stick the little pom pom for the bunny tail on the back of the bag! So cute! Ears with adhesive on the back were included to stick inside the flaps of the bag. I stamped the little tag and attached to the bag with the tiny clothespin. All so easy!  All I had to do was add some chocolate treats inside the bag and tie with a 12″ piece of the included baker’s twine. My little favor was ready to go in just a couple of minutes, if that long!

March 2017 Paper Pumpkin Bag

Even if you didn’t want to make all the bags for Easter, think how cute they would be to save for a baby gift, like a package decoration for your baby gift or for a little one’s birthday gift. They don’t have to be for Easter or even spring!  Little notecards are also included in the kit that you can put in the bag for a little gift! So many possibilities with these Paper Pumpkin Kits!

Watch the Stampin’ Up! video below to see the entire Paper Pumpkin March 2017 kit and assembly!

Join Paper Pumpkin now and get the April 2017 kit if you subscribe by April 10th. This kit is going to be extra-special because it is designed by the CEO of Stampin’ Up!, Sara Douglass, and will even include a FREE GIFT!  I can’t wait!  And at any moment, once you are a subscriber you can go into the Past Kits and purchase any that you might have missed and liked if they are available or the Refill Kits.

If you prefer, add a Paper Pumpkin subscription to your regular Stampin’ Up! order and possibly earn a free Sale-A-Bration product or maybe reach Hostess Rewards. You will receive an email with directions of how to activate your account.  Do this before April 10th to receive the April kit that Sara designed.

JOIN PAPER PUMPKIN TODAY!  YOU DESERVE IT!

Sale-A-Bration Adult Coloring Card

Sale-A-Bration Adult Coloring Card

If you like adult coloring, as it is called these days, you will enjoy the Inside the Lines Designer Series Paper available FREE during Stampin’ Up!’s Sale-A-Bration promotion. Just spend $50 on any Stampin’ Up! merchandise HERE (which we all know is easy enough to do!) and choose a free product in one of the two Sale-A-Bration Brochures. And after you finish your adult coloring, you can make your creation into a card!

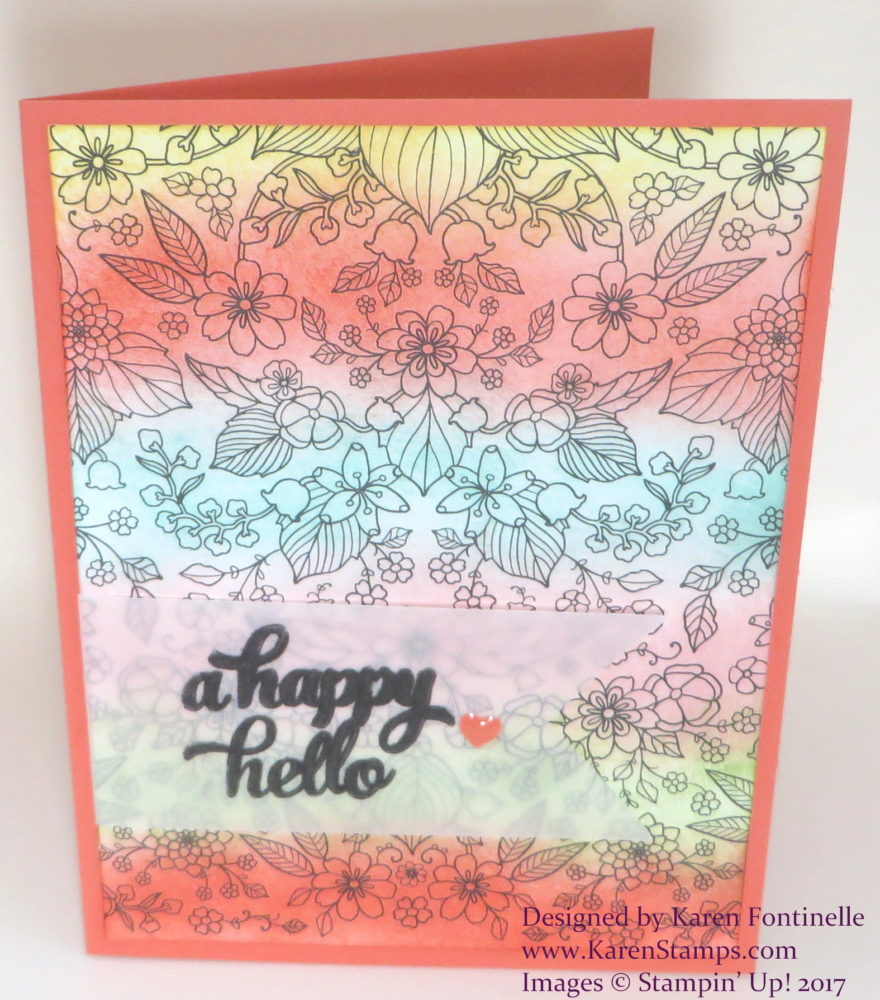
Now if you REALLY like coloring like we did as kids, you will love coloring in every image on this paper. Personally I find it a little time-consuming although I like it for a little while. A faster way it to take a sponge and ink it up with one color at a time and just sponge color on to the coloring paper.  You can do it in rows like I did on this card or do it randomly around the card, covering all the white space.

Today I have jury duty, or at least I have to report, we will see what happens, so besides magazines and my phone, I have cut pieces of the Inside the Lines DSP to take along and will color those with my Watercolor Pencils and soften with the Blender Pen. I don’t mind having a lot of sitting around time, I just hope I do not get chosen for something, but I’m afraid my luck might run out this time. I will definitely need “stress relief” while I wait so hopefully plenty of coloring will help to de-stress me! I absolutely love using the Watercolor Pencils and Blender Pen! Hopefully playing with some of my Stampin’ Up! stuff will keep me calm!

If you are interested in the Watercolor Pencils, I would order them as soon as possible because they expect inventory to run really low soon. Blender Pens are backordered but you can add them to your order anyway and they will be sent when they come in.

This card is much like this one I made another day. However, for this card, I stamped with Stazon on a piece of Vellum Cardstock which I thought would soften all the colors a bit. To adhere the vellum, I wrapped the left edge around to the back of the designer paper with adhesive and also used a Glue Dot, but then covered it with an Enamel Shape.

Sale-A-Bration does not go on forever – in fact, it will be ending March 31 so we are getting real close to the last day!  Be sure to think about an order before you run out of time!  Remember, you choose a free Sale-A-Bration item for EVERY $50 you spend!

Go Spend $50 for Sale-A-Bration! Who Doesn’t Want Free Stuff?!


Easy Masculine Thinking of You Notecard

Easy Masculine Thinking of You Notecard

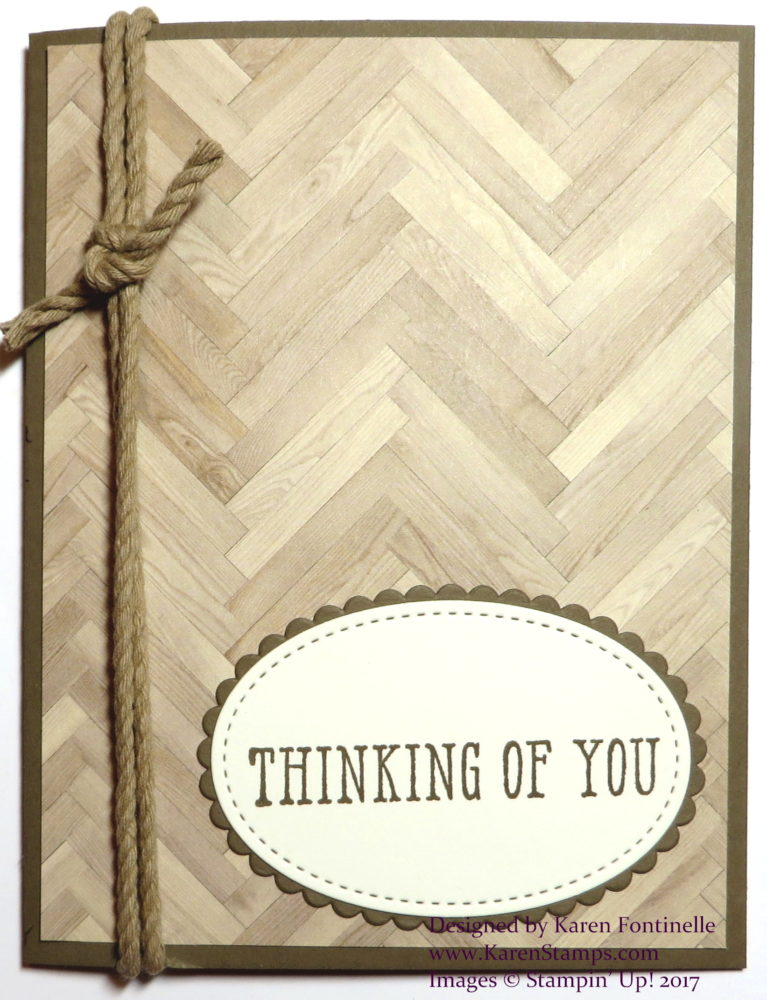
Stampin’ Up! has so many great products that it is difficult to keep up with all of them! One very overlooked product, I think, are the notecards and envelopes which make creating a card such as this Easy Masculine Thinking of You Notecard so simple and quick. The notecards are available in Whisper White and also in Crumb CakeSometimes you would even rather have a smaller card with less space because you just want to write a short and quick note and notecards are perfect for this!

Another great product in the Stampin’ Up! Annual Catalog is the Serene Scenery Designer Series Paper StackThere are many different designs, a lot that are perfect for masculine cards. On this Easy Masculine Thinking of You Notecard I used a Whisper White Notecard but put a layer of Soft Suede Cardstock on top and then a woodgrain patte.rn from the Serene Scenery Paper Stack.  The greeting is from the Window Shopping Stamp Set and die cut with the Big Shot and the Stitched Shapes Framelits Dies.  Then this piece was layered on a die cut made with the Layering Ovals Framelits Dies.  For an embellishment, I wrapped a piece of the Kraft Rope (retired) around.

While we get very excited about the seasonal catalogs, such as the current Occasions Catalog, don’t forget to look in the main Stampin’ Up! Catalog because there are lots of goodies in there, too! In fact, this catalog will fairly soon be on it’s way out, so it would be a good idea to look through it and reacquaint yourself with the catalog so you know if there are any products in there that you want before the retirement list hits!

Check out the Stampin’ Up! Notecards and Envelopes, both in Whisper White and Crumb Cake, although I would suggest the Whisper White ones are a little more useful. You can simply stamp right on the notecard with an image and/or greeting and be done. You can’t get any quicker and easier than that! Yet you can also embellish to your heart’s desire if you want! It is also great to know that you have the proper size envelopes with the notecards.

Click here to see a similar masculine notecard I made with the Serene Scenery Designer Series Paper Stack. We’re always looking for ideas for masculine cards and the Serene Scenery paper will really help you out!

Remember, with a $50 purchase, you get to choose a FREE Sale-A-Bration item!  This promotion ends March 31.

Shop Stampin’ Up! Online 24/7!

A Fun St. Patrick’s Day Card Idea

A Fun St. Patrick's Day Card Idea

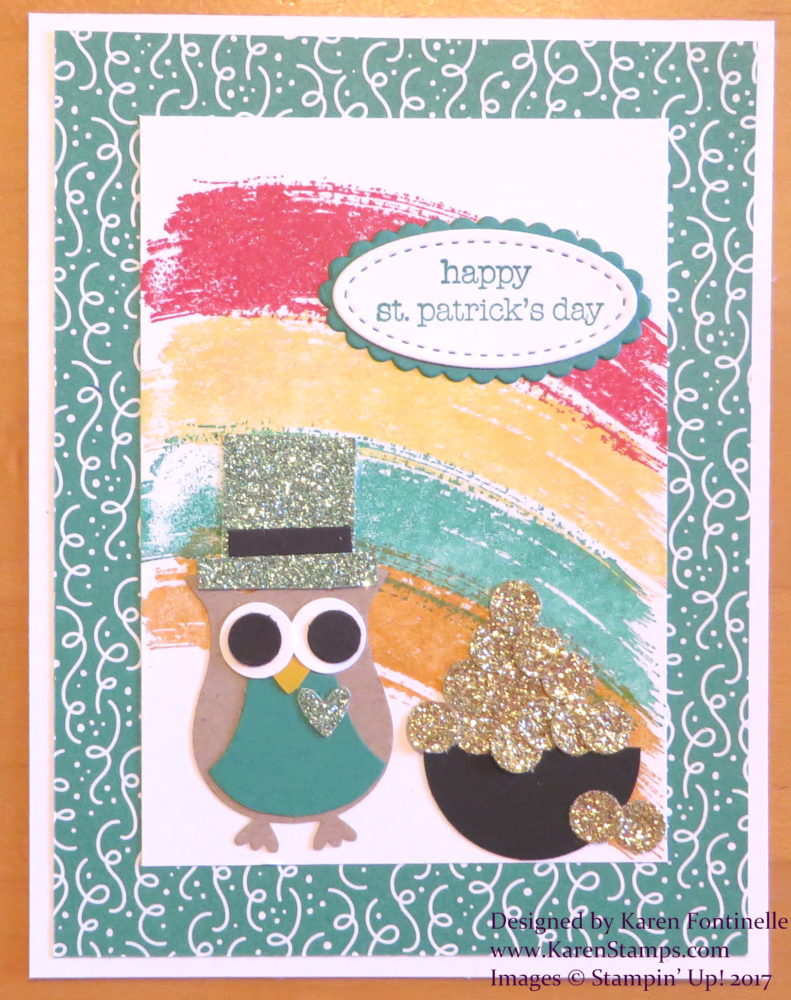
If you are wearing green and celebrating St. Patrick’s Day today, here is a fun St. Patrick’s Day card idea. This is a card I had a little bit of a hard time getting it to come out like I had it in my head, but then it all came together!  I think  the stamped rainbow in the background really pulled it all together, and now I love the card!

Do you notice one of my favorite tools on the card?  It’s the Owl Builder Punch to make a St. Patrick’s Day owl!  I punched the owl out of Crumb Cake Cardstock and dressed him in a vest punched from Emerald Envy Cardstock.  I had tried various designer papers, but finally decided on plain green with a Gold Glimmer Heart. The owl’s hat is made from the Sale-A-Bration freebie, the 6″ x 6″ Glimmer Paper Assortment Pack (143831).

The pot of gold is made from Basic Black Cardstock punched with the 1 1/4″ Circle Punch, cut in half. Then I used the Owl Punch again to punch the gold coins from Gold Glimmer Paper.

The card base is Whisper White with a layer of designer paper from the Party Animal Designer Series Paper package. The smaller Whisper White center panel is 3″ x 4 1/4″. The rainbow is stamped with an image in the Work of Art Stamp Set. You can use whatever colors you like. I chose Real Red, Daffodil Delight, Emerald Envy and Pumpkin Pie inks. I did stamp off a little bit before stamping on the card.  The greeting is from Teeny Tiny Wishes. The words are die cut with the Stitched Shapes Framelits Dies and layered on piece of Emerald Envy cut with the Layering Ovals Framelits Dies.

You can use the St. Patrick’s Day Owl on a candy treat or little gift bag if you are doing something special today for someone. Or just make a pot of gold and stamp a greeting!  So many fun choices when you are a stamper!

Need some other St. Patrick’s Day ideas? Check out the votive I decorated.  Want to make some shamrocks?  See how I made them by stamping hearts HERE. And if you need a leprechaun, here’s a punch art one on a card on display at a Stampin’ Up! event. If you need more ideas, just type in what you are looking for in the Search box here on my blog down on the right side.

Remember, Sale-A-Bration comes to an end on March 31 which is starting to get closer and closer so don’t delay!  If you want this fun Glimmer Paper Pack I mentioned earlier, check out the new release SAB brochure.

Celebrate St. Patrick’s Day by making something fun like a St. Patrick’s Day card or a treat!

Shop Stampin’ Up! Before Sale-A-Bration Ends March 31!

St. Patrick’s Day Easy Candy Treat Holder

St. Patrick's Day Easy Candy Treat Holder

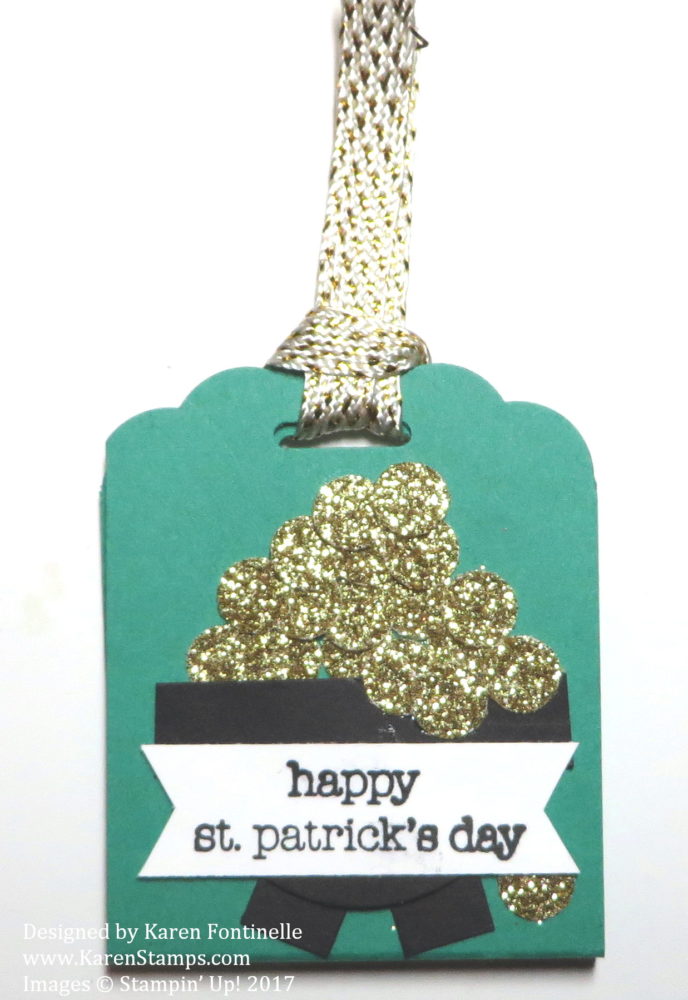
St. Patrick’s Day is coming up on Friday, March 17th, so if you are looking for a fun little treat maybe for your family, your co-workers, teachers, whomever, here is a St. Patrick’s Day Easy Candy Treat Holder. You can put a chocolate square on the inside or whatever you find that fits. Or modify the measurements to suit your treat!

This project is so easy to make and as usual, can be made and decorated for any occasion.  Cut a piece of cardstock 5 1/2″ x 2″ so that it will fit inside the Scalloped Tag Topper Punch. Score at 2 5/8″ and at 2 7/8″.  Then insert each end of the strip into the punch for the fancy top. If you don’t have this punch, you can leave it plain or snip off the corners at an angle.

For the decoration on the front, I made a pot of gold!  The pot is just a 1 3/8″ Circle Punch cut in about half. Either just cut little strips for the pot legs or use, as I did, the Classic Label Punch, cut in half or smaller. I first thought I would like the pointy ends for the legs, but I changed my mind. I also punched another strip to go across the top of the pot. If you have the retired Window Punch, that works great, too!

For the gold coins, I used the always-useful Owl Builder Punch!  If you don’t own this punch, you really need to put it on your next order. It’s so fun! I use it in so many ways. For the coins, I punched the small circles that would be eyes. They are adhered with the Liquid Multipurpose Glue.

Click here to see a similar St. Patrick’s Day design I made last year. As you can see, I used Gold Sequins.

The greeting is from another of my favorite things, the Teeny Tiny Wishes Stamp Set. There aren’t many places you will find a “Happy St. Patrick’s Day” stamp but this set has it!

The ribbon is the one with gold accents, free in the Sale-A-Bration Brochure, with a $50 purchase.  You get a Combo Pack of two ribbons, one with the silver accents and one with the gold accents. It’s called the 3/8″ Metallic Ribbon Combo Pack.  The ribbon is very soft and nice.  You will like it.

Sale-A-Bration ends the last day of March and we know that will sneak up fast!

Be prepared for all special occasions by knowing how to make this St. Patrick’s Day Easy Candy Treat Holder! 

 Shop Stampin’ Up! Online HERE!

Quick and Easy Easter Bunny Card

Quick and Easy Easter Bunny Card

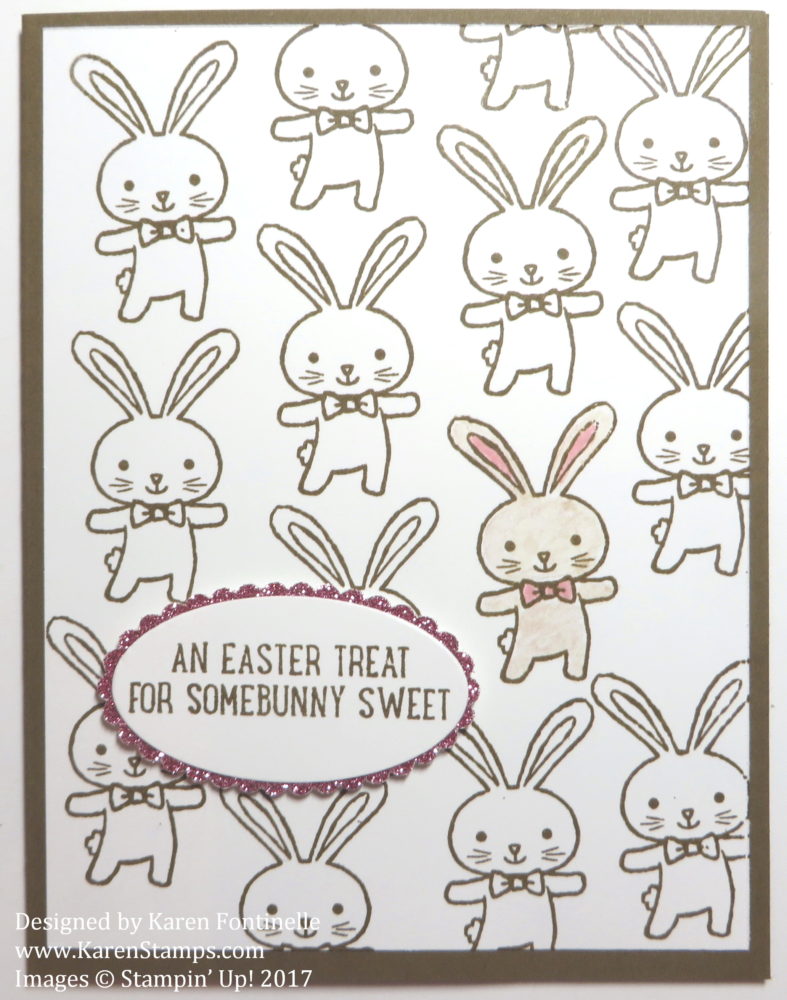
Here is a quick and easy Easter Bunny card that is fun to stamp and make! The stamp set, Basket Bunch, has so many possibilities and it’s not just for Easter! This bunny is so cute, he can be used for Easter, spring or baby cards and many other occasions.

For this card, I simply stamped the bunny randomly on the Whisper White card layer in Soft Suede ink. To color in the bunny ears and bow, I used the Pink PIrouette marker. That’s all I colored at first, but then I decided to add some brown to the one bunny to let him stand out from the others. I colored very lightly with the Early Espresso Watercolor Pencil and then blended the color with a Blender Pen. So fun to color with the Watercolor Pencils!  I also thought about coloring the ears and bows on all the bunnies on the card. There’s no one perfectly right way to design this card. Just do what you like. The card base is Soft Suede cardstock.

The greeting is one that is included in the stamp set.  I stamped it in Soft Suede ink and die cut with one of the ovals in the Layering Ovals Framelits Dies and also die cut a pink glimmer layer with one of the scalloped ovals in the same set. The glimmer paper is one of the Sale-A-Bration choices when you spend $50 on a Stampin’ Up! purchase.

If you are interested in the Watercolor Pencils, order them soon before the supply runs out!

The Basket Bunch Photopolymer Stamp Set is in the Occasions Catalog and also has coordinating Basket Builder Framelits Dies.  If you purchase the stamp set and dies together in the Basket Bunch Bundle, you will save 10% and have everything you need for this fun stamp set!

I hope you remembered to change your clocks for Daylight Savings Time! Just “spring” forward, this is when we lose an hour of sleep! But I think I’m looking forward to more daylight in the evening after dinner to go for a walk!

Try your hand at making a card like this Quick and Easy Easter Bunny Card with whatever stamps you have, just stamp randomly on the cardstock and see what you come up with! It’s so much fun to just stamp this way!

If you need any stamping supplies and want to take advantage of Sale-A-Bration before it ends March 31, just check out the Stampin’ Up! Online Store HERE!

How To Make An Easy All-Occasion DIY Gift Bag

DIY Gift Bag

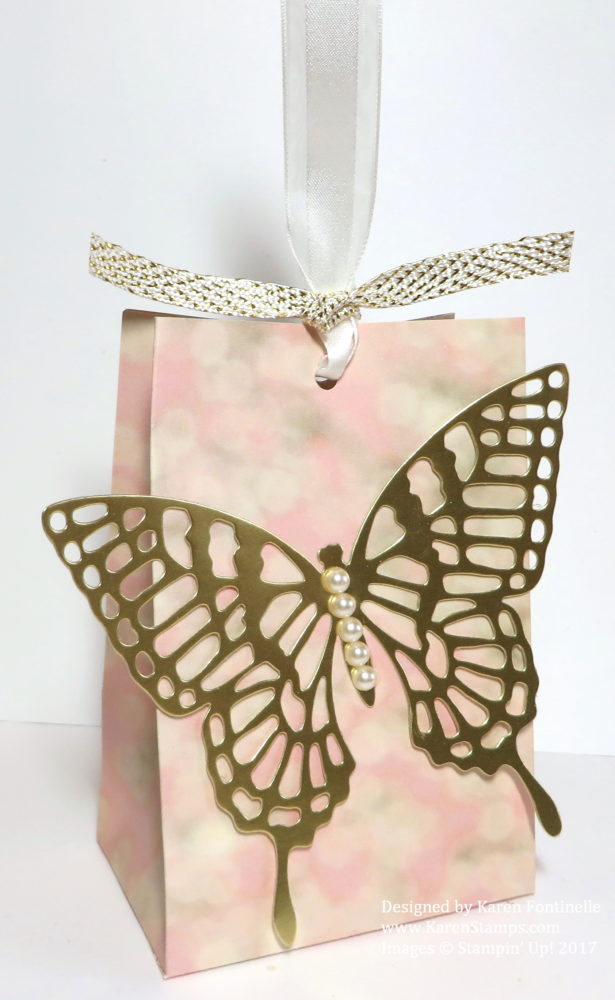
Save yourself a trip to the store and learn how to make an easy all-occasion DIY gift bag out of designer paper! You can make a gift bag using the Stampin’ Up! Gift Bag Punch Board or you can make one by just scoring paper to determine the size you want. I use my Paper Trimmer as I cut the paper to score with the Scoring Blade, (one comes with the Paper Trimmer)  but you could also use the Simply Scored Board.

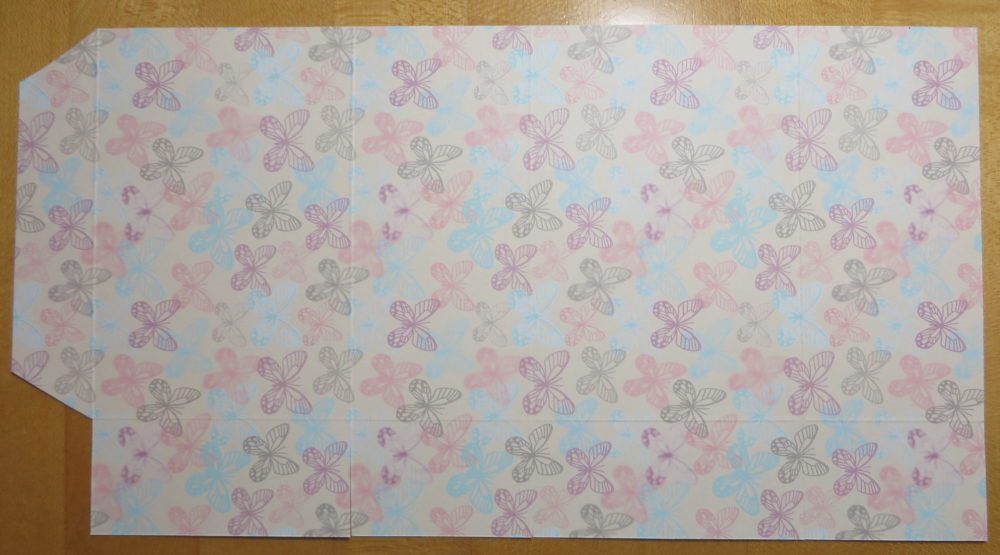
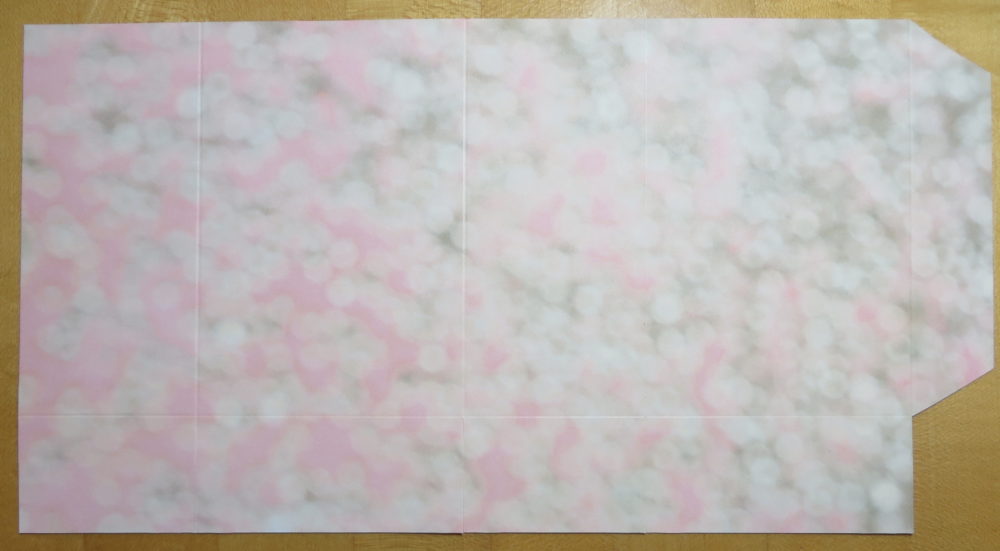
Decide what paper or cardstock you want to use.  I used the beautiful Falling In Love Designer Series Paper. While I could have used either side of paper, I had planned to use this soft bokeh-look pattern and that is what I cut.  But when I turned the paper over, I saw that the pattern on the other side was a butterfly print. Had I wanted to use that side and didn’t give it any thought, as you can see in the photo below, I would have the pattern going wrong, so be sure you check which way you want your pattern to go and make sure you cut the paper in the correct direction.

Designer Paper Pattern Wrong Direction

For this particular gift bag, I cut the paper at 6″ x 11 3/8″. I placed the paper “long-ways” (portrait) in my Paper Trimmer and scored at 1 3/8″ for the bottom flaps. Then I turned the paper “sideways” (landscape) and scored at 2 1/8″, 5 1/4″ 7 3/8″, and 10 7/16″. You can’t really see all the score lines in the photo below and the photo is not blurry!  That’s the design on the paper!

Designer Paper Scored for Bag

As you can see, I cut out that tiny little piece on one end that you will see after you score your paper. And just to make the flap easier to fold without the top and bottom edges showing, I trimmed off the edges of the flap. This flap is where you will put adhesive to start assembling your box. As for the bottom of the paper with the 1 3/8″ scored area, just snip each score line up to the 1 3/8″ scored line to form the flaps.  Assemble your gift bag and decorate!

To decorate my gift bag, I die cut a butterfly with the Big Shot and the Butterflies Thinlits Dies, the largest butterfly, out of a Gold Foil Sheet. (My daughter used to call butterflies “foof-flies”.) How beautiful is this large gold foil butterfly? And to make it even more elegant, I added some Pearl Basic Jewels to the body. After I punched a hole in the top of the bag I tied on a Whisper White 5/8″ Organza Ribbon (my all-time favorite ribbon!) using the ribbon with the gold accents in the Sale-A-Bration 3/8″ Metallic Ribbon Combo Pack (143601)You can also add a greeting or tag if you want for whatever occasion you need.

Check out another card I made when the Butterflies Thinlits Dies first came out. These butterflies are made with the smaller medium size butterfly die, cut out of designer paper.

Remember, Sale-A-Bration comes to an end on March 31 so don’t let time fly by and miss it! Remember, there are three new releases since February 21 so you have two brochures to view at that link above.  One thing that is no longer available is the gold-striped Card Tin. Everything is available only while supplies last so don’t wait too long!

Make some easy all-occasion DIY gift bags to keep on hand for any last-minute gifts!

Shop Stampin’ Up! Online HERE!