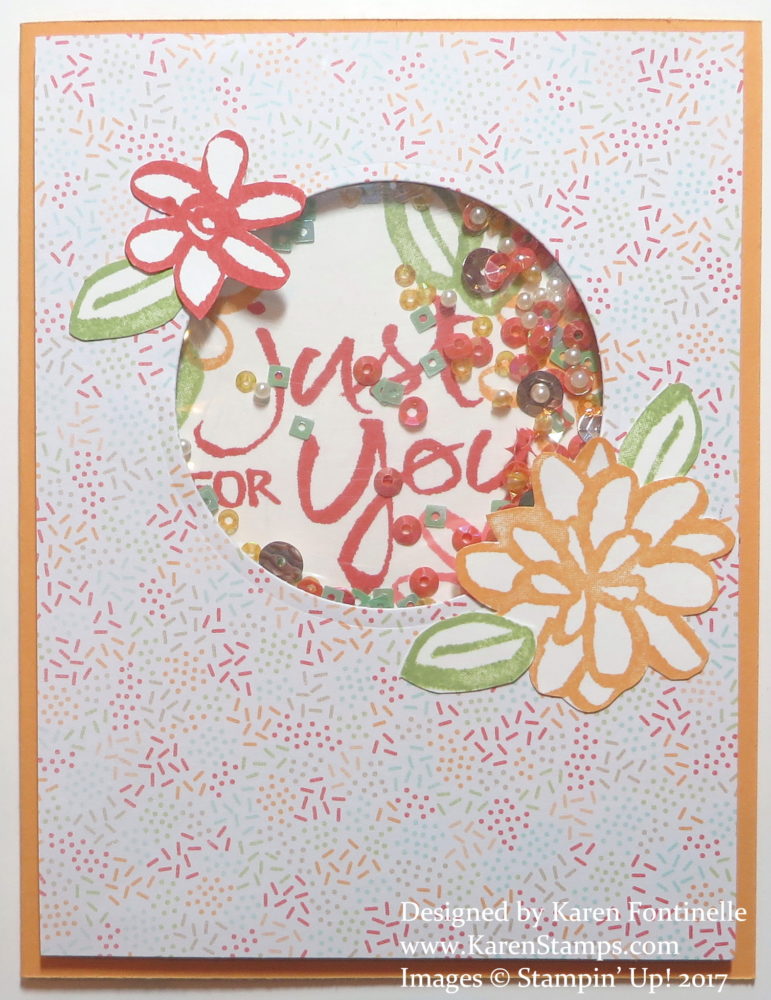
Doesn’t everyone love a shaker card? I think it brings out the child in us! It is so fun to move the card back and forth to see the movement of the beads or confetti or whatever the contents in the window are! Shaker cards are really easy to make and certainly fun.
First I made the card base with a piece of Peekaboo Peach cardstock folded in half. I chose Peekaboo Peach because it is one of the coordinating colors of the Tasty Treats Specialty Designer Series Paper that I had already chosen to use. I die cut a circle in the designer paper for the window with the Layering Circle Framelits Dies or perhaps you could use a punch if you had the right size. Then I cut a piece of Whisper White cardstock to go behind the window on which I would stamp a greeting. I think a smaller greeting would have been a better choice. I used the Watercolor Words Stamp Set for the greeting and the flowers on my card. A greeting this large made it a little difficult to make sure it was placed just right to show through the window. You’ll also need a piece of Window Sheet (or some piece of plastic like a transparency sheet) to adhere on the back of the window. After the window sheet is in place, place the Foam Adhesive Strips completely around the hole on the back of the window. This forms the “well” where you will put your shaker pieces. For my card, I added the Sprinkles Embellishments in the Occasions Catalog and a few miscellanous sequins that I think are retired but I had handy. Next, peel off the adhesive strip on top of the foam strips and place the stamped white background piece over the window. This is tricky because you are doing it from the backside without seeing how it lines up. Once that is adhered, add some more Foam Strips or Dimensionals around the back of the window layer to hold that layer up all around the edge the same as the window. Adhere to card base. And there you have your Shaker Card! It just takes making one to get the hang of it!
The Watercolor Words flowers are stamped and cut out by hand with my Paper Snips. I just adhered those to the front of the card around the shaker window. Another tip is that you don’t want too much in your shaker window or it obscures your greeting or image and doesn’t move around as well. And if you don’t have the Foam Adhesive Strips yet, you can substitute the edge strips from the Dimensionals, just make sure you don’t leave any open spaces!
Try making a fun Shaker Card! You can also have the front of the card flat and the shaker area inside the card. Just cover with another layer of cardstock to make it look pretty on the inside!
If you need any Foam Adhesive Strips, Sprinkles Embellishments, or other sequins and materials to make a Shaker Card, just order at my Stampin’ Up! Online Store!

Love it.
Thanks so much Sophia! It was a fun card to make….and play with!!