Category Archives: Congratulations

One More Day Until the Occasions Catalog and Sale-A-Bration!

Today is the last day for some things at Stampin’ Up! and tomorrow, January 4, 2017, is the first day for some things, namely the new Stampin’ Up! Occasions Catalog and the first day of the annual promotion called Sale-A-Bration!

In case you need help with choosing new products from the Occasions Catalog, you might enjoy watching some of these Stampin’ Up! videos! I know I want everything when I see the videos of the new products!

See the fun ways to use the Balloon Adventure Stamp Set, Balloon Bouquet Punch, and Balloon Pop-Up Thinlits.

And wait until you see this beautiful So in Love Stamp Set and So Detailed Thinlits Dies! Perfect for making wedding cards or any elegant card or project!

Here’s a new look from the new Happy Celebrations Stamp Set and Celebrations Duo Textured Impressions Embossing Folder.

And something I think everyone should put on their first order, the new Watercolor Pencils in Stampin’ Up! colors!
s

Check out the Year-End Closeouts Sale today before it comes to an end. Otherwise, wait until tomorrow, January 4, 2017 to order and take advantage of the Sale-A-Bration promotion where for every $50 you spend on Stampin’ Up! products, you get to choose one free item from the Sale-A-Bration brochure.

The new Occasions Catalog and Sale-A-Bration Brochure will both be online tomorrow when they go live, if you did not receive a catalog in the mail.  If you are interested in Stampin’ Up! products and don’t already have a Demonstrator you are working with and would like beautiful hard copies of the new catalogs, please email me with your contact information and I will mail them out to you.

Shop Stampin’ Up!

Gift Wrap Ideas With Cellophane Bags


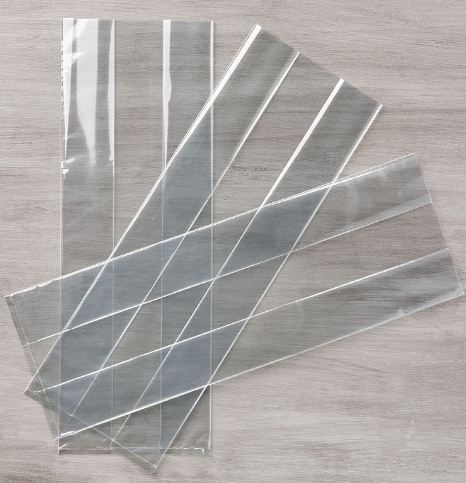
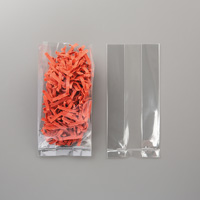
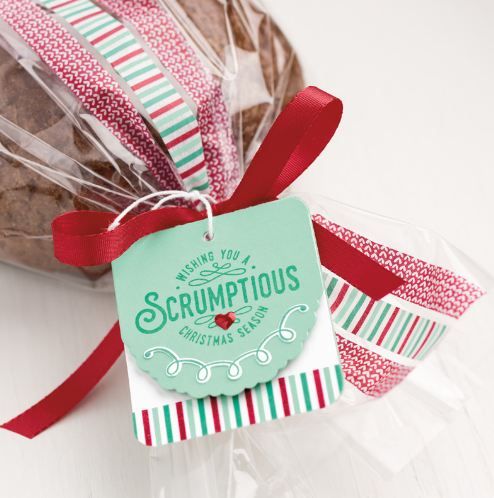
Enjoy this video from Stampin’ Up! and get wonderful gift wrap ideas and maybe just gift ideas themselves using the 6″ x 17″ Gusseted Cellophane Bags.  These are pretty large bags, given the 17″ length, so you can stick a large gift or treat inside! Think about when you are ready to make special treats for the neighbors or a group of friends, wouldn’t these bags be perfect to use for your holiday mix, special bread or cake, bag of cookies or candy, bottle of wine, and more? Just put your gift inside,  tie with a pretty ribbon and add a cute tag! If you don’t want the bag quite so long for a smaller gift, just cut off some of the length.

For another gift presentation when you want the gift to be hidden, just wrap pretty tissue paper all around the gift and insert it in the cello bag! You can also stamp on the outside of the bag if you use Stazon ink.

Remember, presentation is everything!! No matter what the gift, a big part of the thrill will be how you wrap and present the gift, and we stampers have all kinds of materials and ideas to make that the best part!

6x17 Cellophane Bag Gift Wrap

6x17 Cellophane Bags

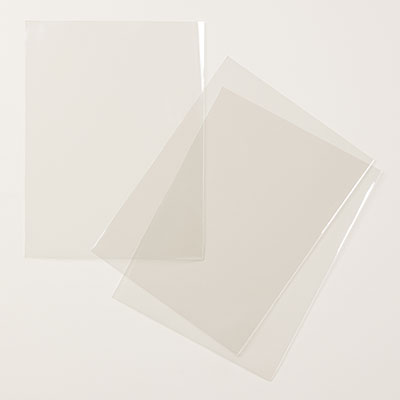
Stampin’ Up! also carries other sizes of cellophane bags. These are nice bags, completely clear and crisp, not that kind of thick, cloudy, cheaper looking kind of bag you can sometimes buy at other places.

Anniversary Card with a Silver Glimmer Flourish

Anniversary Card with a Silver Glimmer Flourish

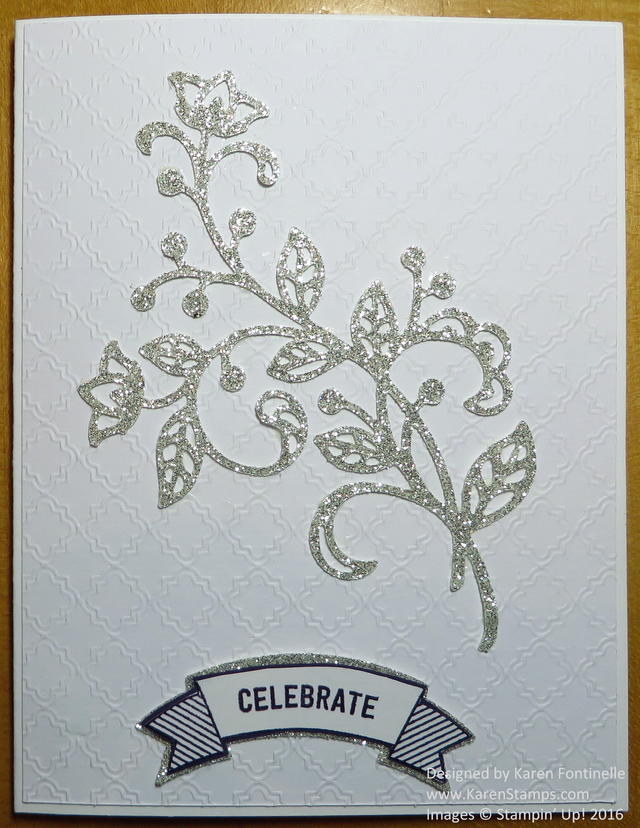
Recently I made this anniversary card with a silver glimmer flourish. I wanted to use the new Fancy Frost Specialty Designer Series Paper because it is so beautiful, and I knew it would make a lovely wedding or anniversary card. In spite of the name and the fact that it appeared in the Holiday Catalog, doesn’t mean it is only for Christmas! There are a few patterns that do suggest the holidays a bit, but the rest are definitely “plain” and can be used for anything. This paper is a little difficult to photograph but I think you can see the pattern I used.

I thought some Silver Glimmer Paper would look pretty with the white patterned paper, so I die cut a flourish with the Flourish Thinlits Dies.  Apparently I am short on “Happy Anniversary” greetings, but I thought “Celebrate” would also work! I found the word and the banner in the Thoughtful Banners Photopolymer Stamp Set. After punching out the banner stamped on white with Elegant Eggplant ink I trimmed it down a little and layered it on Elegant Eggplant cardstock and then on Silver Glimmer Paper.

You can purchase the Thoughtful Banners Photopolymer Bundle which includes the stamp set and Duet Banner Punch so you will be all set and save 10% in the process!

Try the Fancy Frost Specialty Designer Series Paper!  It’s different than anything else we have had since it is a dry embossed textured pattern. You can leave it white or you can color it a bit with Sponge Daubers, Brayer or Sponges.

Shop Stampin’ Up! Online for all your papercrafting supplies!

Easy Definitely Dahlia All Occasion Card

Easy Definitely Dahlia All Occasion Card

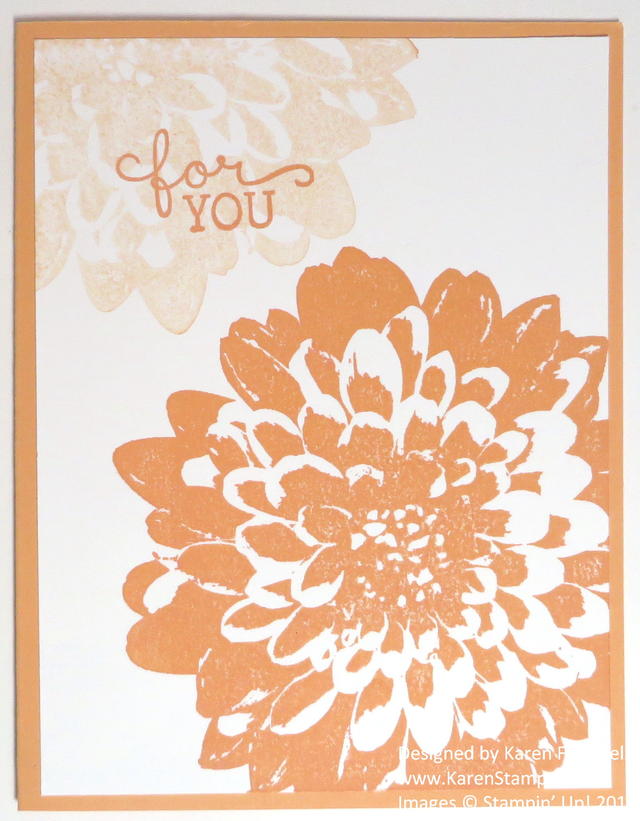
Here’s how to make this Easy Definitely Dahlia All Occasion Card. The Definitely Dahlia Stamp is one large stamp! Personally, I recommend the wood-mount version for such a large stamp. I just think it is easier than trying to mount the clear-mount on a block each time. The wood-mount is only $5 more than the clear-mount.

To make this card, I just used Peekaboo Peach Card Stock for the card base.  You could use most any color. Then a layer of Whisper White Card Stock.  My intention was to just stamp the large dahlia, but when I did, I wondered if the color was too bright and bold. So I stamped again in the upper portion of the Whisper White without reinking and I loved the look of the light version of the dahlia! You never know what you might come up with in the end when you start stamping!  The greeting is from the Birthday Blooms Stamp Set.  That’s really all you need for this card. It is dramatic as it is, so you don’t have to do any more.

Try your hand at an easy card with big impact like this Easy Definitely Dahlia All Occasion Card, and change the greeting for any occasion you need. Pure stamping at its best on this card!

Shop Stampin’ Up! Online During Bonus Days!

Graduation Congratulations Card with Large Numbers Framelits

Graduation Congratulations Card with Large Numbers Framelits

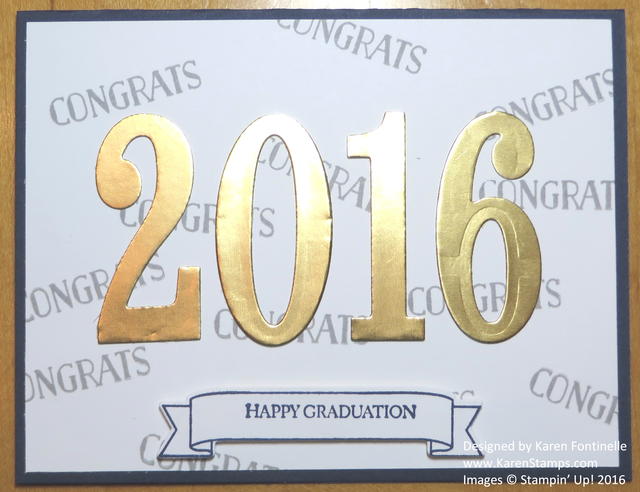
It is hard to believe that it is graduation time for schools, so if you need a graduation card, perhaps this Graduation Congratulations Card with Large Numbers Framelits will help you out.  I wanted to use the Large Numbers Framelits Dies so I die cut the numbers with my Big Shot for the graduation year. I used the Gold Foil Sheets for the numbers.  I tried another idea on the card but it didn’t work so then I thought of stamping “Congrats” randomly on the background of the card. This stamp comes from the Tin of Cards Stamp Set. I stamped it with Smoky Slate Ink  because I wanted it to show up but still be kind of muted in the background. The banner stamp is also included in the Number of Years Photopolymer Stamp Set and can be die cut with the banner framelit in the Large Numbers Framelits Dies. The greeting is stamped from the Teeny Tiny Wishes Stamp Set, one of my favorites and most used stamp sets.  It fits perfectly inside this banner.

Now I did make a little graduation cap to put on the card but it didn’t fit very well, so I finally decided to just let it go, the card is fine without it.  Sometimes you have to stand back and realize that even if the card or project you are making isn’t as perfect or fantastic as YOU want it, someone else will not be looking at it as critically as you are. No one will open this card and say, “Why on earth did she not put a punch art graduation cap on the front??!”  You have to remember that when you are creating and don’t make stamping more difficult for yourself! And sometimes less is more!

You might want to consider purchasing the Number of Years Bundle of the Number of Years Stamp Set and the Large Numbers Framelits Dies so you are all set for making all kinds of birthday, anniversary, graduation and other cards, scrapbook pages, and who knows what?! Both items will be in the new Stampin’ Up! Catalog June 1st, but they will no longer be in a bundle, so get them now in a bundle while you can and save 15%!

Shop Stampin’ Up! Online or contact me to place an order!

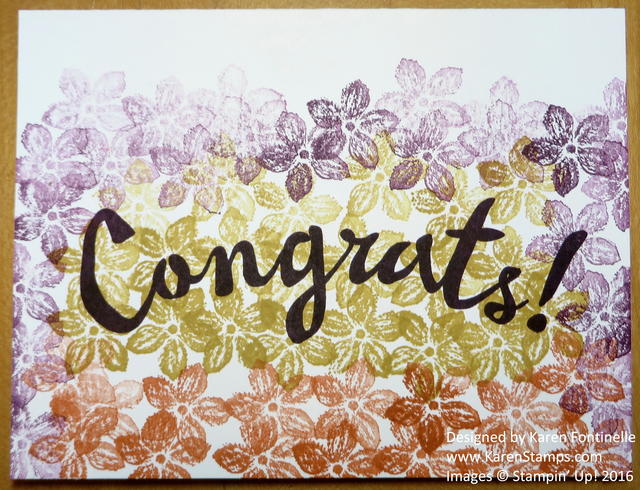
Stamping Off Easy Petite Petals Congratulations Card

Petite Petals Congratulations Card

I’m getting a little more use out of my 2014-16 In Colors before they retire in this Stamping Off Easy Petite Petals Congratulations Card. I have to admit, I stole the idea from a sample in the new upcoming Stampin’ Up! Catalog! Mine is even simpler, just stamped on a folded piece of Whisper White Thick Cardstock and stamped the greeting right on the center of the card.  I could have stamped and punched a few extra Petite Petals to adhere in a popped-up fashion, but I just kept it simple.

I chose to use three of the retiring In Colors:  Hello Honey, Tangelo Twist, and Blackberry Bliss (ink pad not available). I did LOTS of stamping off to get the lighter colors of the flowers and less stamping off to keep getting darker colors. What is it about having a stamp in your hand and doing repetitive stamping that is so satisfying?! The flower is from the Petite Petals Stamp Set, which is not retiring and you will see in the new catalog. And for the small price difference, only $4, I would recommend getting the wood-mount stamp set.

For the greeting, I chose the Bravo Photopolymer Stamp Set with it’s great bold greetings for many occasions. Sadly, this is a retiring stamp set, so if you are interested, be sure to put it on your order!

This Stamping Off Easy Petite Petals Congratulations Card is fun to stamp and would work for graduations, weddings, thinking of you, birthday, hello, birthday, Mother’s Day – many occasions!

Shop Stampin’ Up! Online

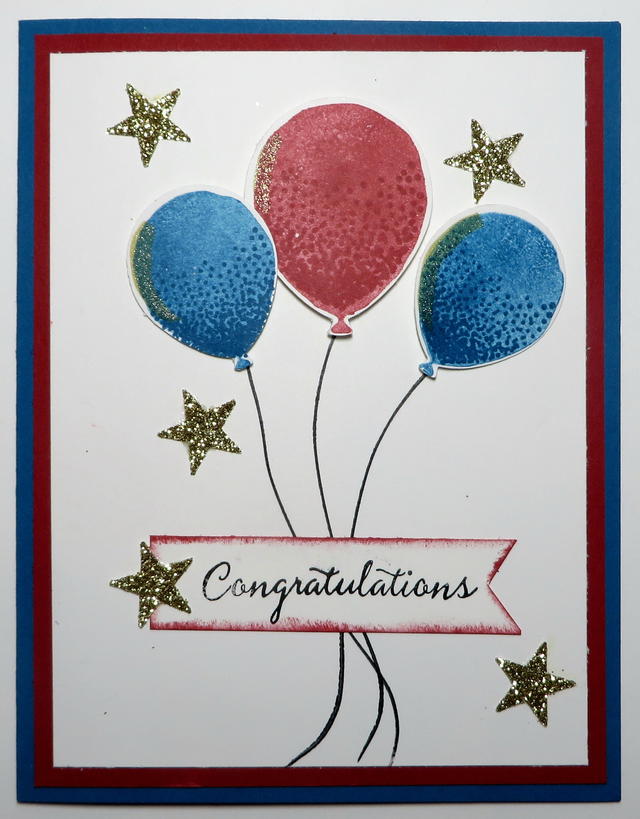
Balloon Celebration Congratulations Card

Balloon Celebration Congratulations Card

I always say it’s good to have stars for making all kinds of cards and now I think I could say the same about balloons, such as this Balloon Celebration Congratulations Card. Balloons can be used for birthdays, for congratulations, for a party invitation, for kids, for babies, for all kinds of occasions! Whether you have the Balloon Celebration Photopolymer Bundlecomplete with the Balloon Celebration Stamp Set and the Balloon Bouquet Punch, or even just one of those, you can stamp or punch balloons for cards or gifts or other projects with so many themes.

For this card, I stamped the balloons by “stamping off” one time on scrap paper to make the ink lighter and then overstamped with the shading dots. Then the balloons were punched out with the Balloon Bouquet Punch. You can get two sizes of balloons with this punch! The strings are stamped or you could just draw them in, depending on your placement. I stamped the word “Congratulations” from the stamp set and made a banner, inking the edges a bit.  For a bit more oomph, I punched some Gold Glimmer Stars with the star punch in the Itty Bitty Accents Punch Pack. I could have also stamped some very small stars included in the stamp set.

Just a couple more weeks of Sale-A-Bration, the biggest Stampin’ Up! promotion of the year! Spend $50 in Stampin’ Up! products and choose a FREE Sale-A-Bration product! How much fun is that??!

Shop Stampin’ Up! Online HERE!

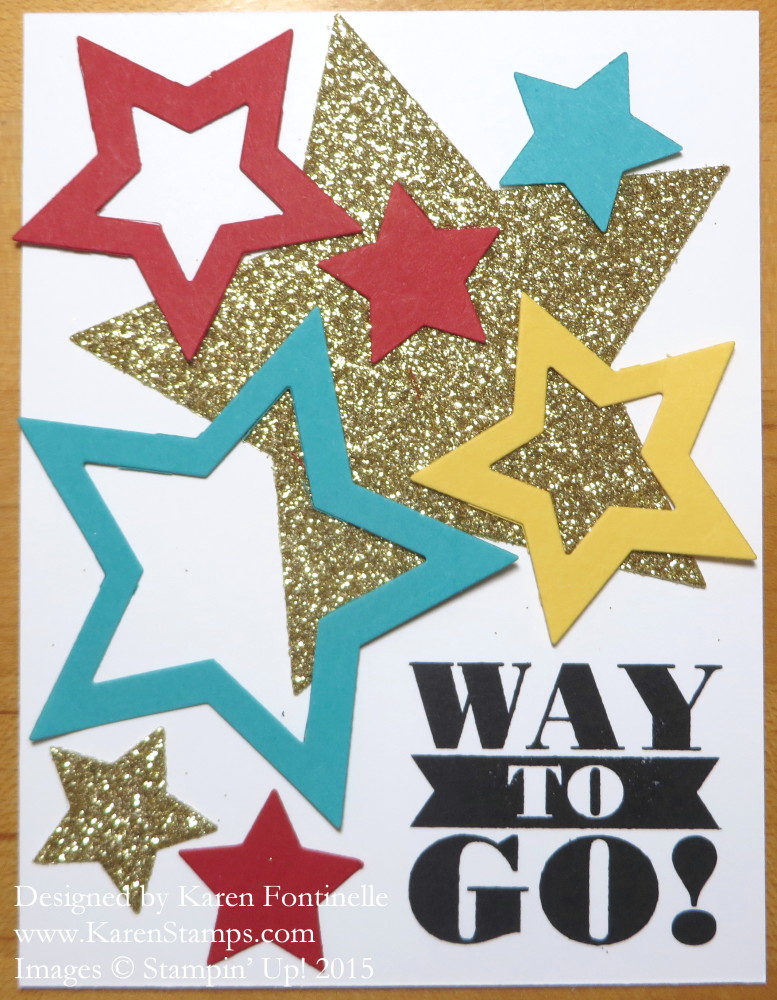
Back to School Bravo Star Card

Back to School Bravo Star Card

Here in Houston it is almost the end of the first week of school, so I thought maybe people would want to make a Back to School Bravo Star Card either for the student that has completely their first week of school or perhaps for the teacher who has completed a week (and probably more) of back to school! Use the Bravo Stamp Set and some stars cut with the Stars Framelits and Big Shot to choose an appropriate greeting. Change the greeting and make the card for someone getting ready to start school next week or after Labor Day!

For the card base I just used the new Whisper White Thick Cardstock. You will love the weight of this card stock if you would like to make a card with less layers. Then just die cut a bunch of assorted stars with the Stars Framelits and play around with the arrangement until you are happy with the placement of the stars and greeting.  Use a lot or use a few!  Place one framelit inside the other to make the stars with the center cut out.

I’ve always said everyone should have some star punches, star stamps, or in this case Star Framelits because stars can be used for just about anything. They are so good for congratulations, birthday, promotions, achievements, baby, thank you, anything special that you are making!

I loved making this simple Back to School Bravo Star Card using multiple stars and the Bravo Stamp Set! If you need any supplies, please visit my Stampin’ Up! Online Store!

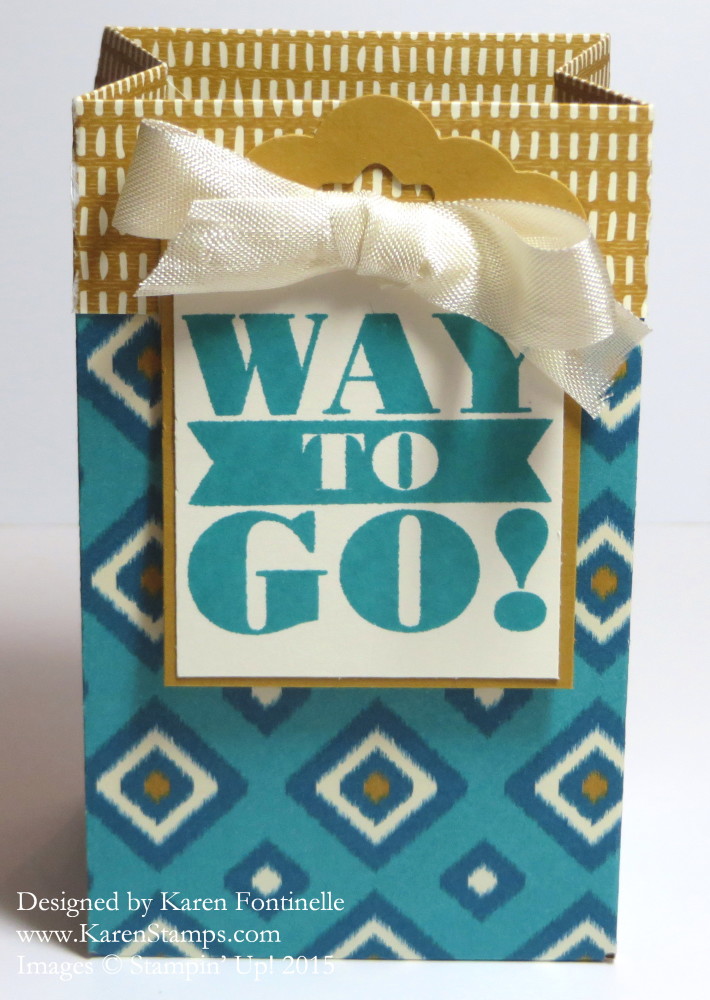
Gift Bag Punch Board Bohemian Gift Bag

Gift Bag Punch Board Bohemian Gift Bag

One of the new products in the new Stampin’ Up! 2015-16 Annual Catalog is the Gift Bag Punch Board,  With this punch board, you can create many different sizes of gift bags, using card stock or designer series paper. There are three sizes of bags listed on the punch board, based on the size of the bottom of the bag. But then you can make the bag as tall or short as you like. It also punches holes in the top to thread ribbon through to tie closed, but I didn’t make this bag that way. On this bag, I also scored about an inch across the top so I could fold the paper over at the top to see the pattern on the other side. You could also make a decorative top edge. You can bet people will figure out many ways to make different sized bags and who knows what projects with this Gift Bag Punch Board! The sides can be straight and plain, or they can be gusseted to fold in a bit. And then of course, the possibilities of decorating are endless, especially for Stampin’ Up! papercrafters!

This gift bag is made with a pattern in the Bohemian Designer Series Paper. You could use any of the papers, any side. With some patterns of paper, you probably want to pay attention to which way the pattern is going before you cut your paper for the punch board. Don’t score too hard with designer paper so as not to tear the paper. It will probably hold up pretty well, though. The tag is made with the Scalloped Tag Topper Punch and the new Delightful Dijon card stock  and the greeting is from the Bravo Photopolymer Stamp Set.  What a fun greeting set to have on hand!

There are directions that come with the Gift Bag Punch Board and they are even printed on the board itself, But the best bet is to watch this Stampin’ Up! video to really get a feel for it.  Make a bag or two with some scrap paper to get the idea and you will be all set!  Not that hard!

Watch this Stampin’ Up! video!

Then visit my Stampin’ Up! Online Store to order yours today!

Stacked With Love Cheerful Critters Congratulations Card

Stacked With Love Cheerful Critters Congratulations Card

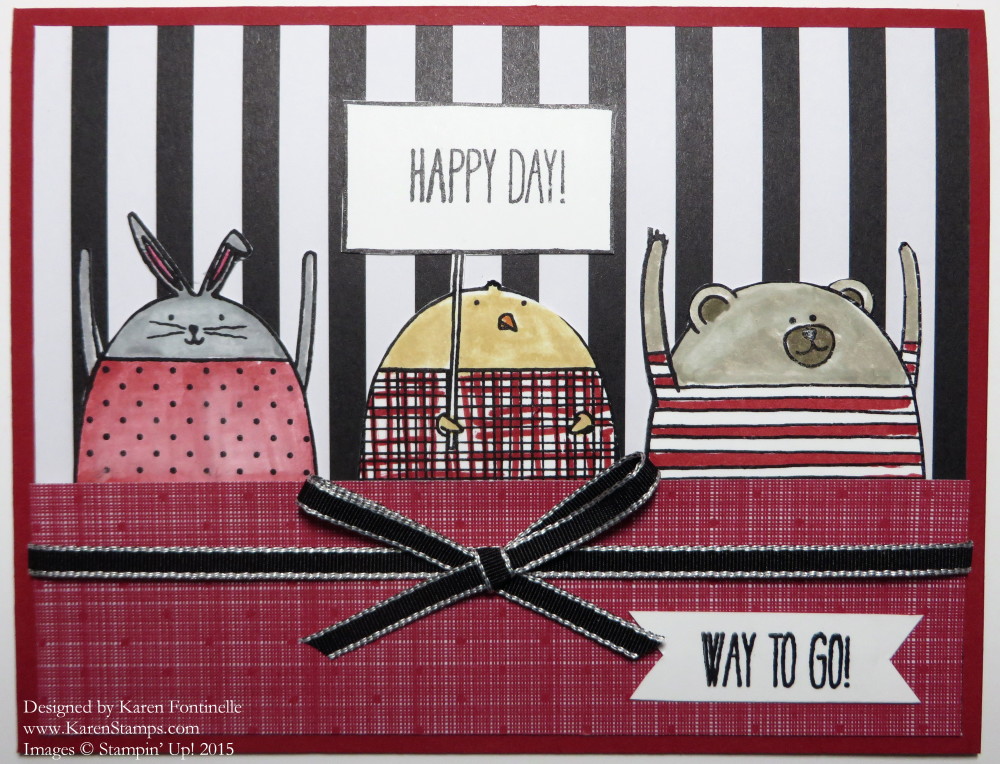
The Stacked With Love Designer Series Paper Stack is not just for Valentine’s Day! It’s on the Stampin’ Up! Weekly Deals this week. I wanted to play with my Cheerful Critters Stamp Set that is in the outgoing Occasions Catalog so I used the Stacked With Love Paper Stack to make my card. The Cheerful Critters are all stamped with Stazon ink, colored with Stampin’ Write Markers and cut out with Paper Snips.  Paper Snips make “fussy cutting” fairly easy and not tedious because they can fit into small spaces. I consider them an essential tool!

This stamp set as several cute sayings, like “Let’s Party” and “Hooray”, not to mention “I Like Your Face”. I suppose that’s more of a younger generation saying! Just a fun set to play with and makes great cards for congratulatory and happy situations that you might want to make a card for!

Less than two weeks for the Stampin’ Up! Retiring Products!  Check the lists and get your order in before the last minute rush! If you want to order a combination of retiring and new catalog products, then your day to order is Tuesday, June 2 when all catalogs will be available!

Shop Stampin’ Up! Online today!

Wildflower Meadow Butterfly All Occasions Card

Wildflower Meadow Butterfly All Occasions Card

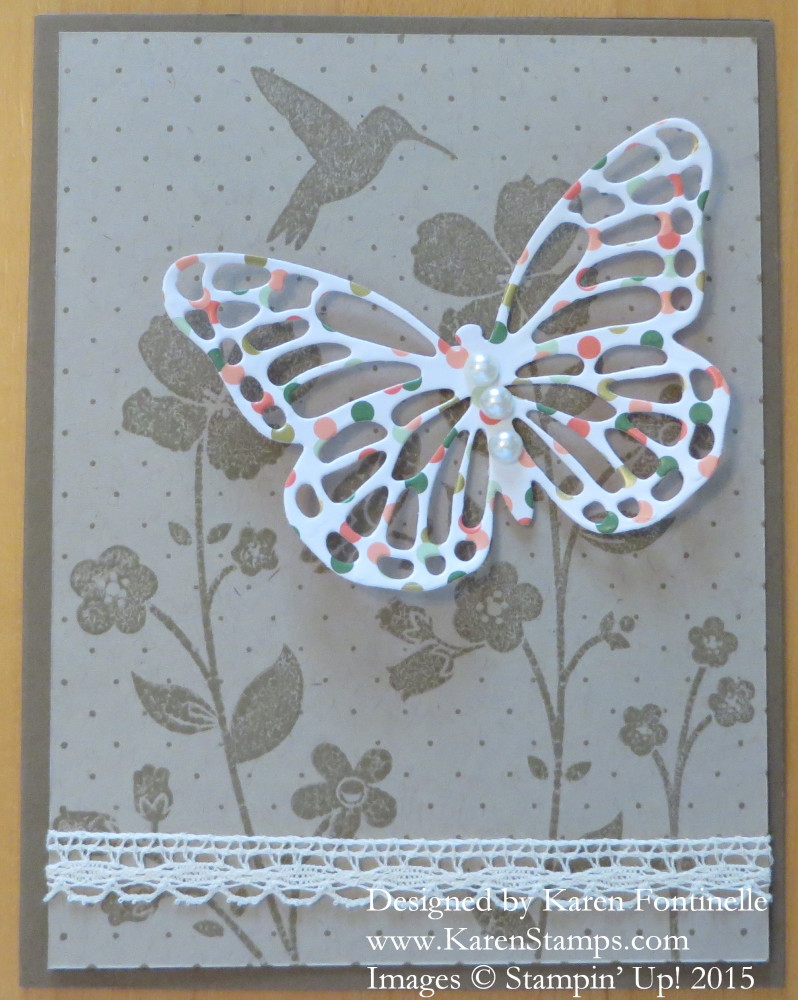
One of the retiring stamps is Wildflower Meadow with a matching embossing folder, Wildflower Meadow Textured Impressions Embossing FolderThey are discounted now on the Stampin’ Up! Retiring List so check them out! Wildflower Meadow is very pretty although I know I didn’t use it as often as I could have. It’s a large background stamp so I actually prefer the wood-mount verson which is a little easier to use I think.

I decided to use the Wildflower Meadow stamp in kind of a monochromatic look on this card, stamping the Crumb Cake card stock with Crumb Cake ink.  You could also use Versamark Ink for the same look. The card base is Soft Suede. I wanted to see a pretty background but I wanted a butterfly to be the focal point.

The butterfly is a piece of paper from the Gold Soiree Specialty Designer Series Paper which is so pretty with its Metallic Gold and is discounted 50% on the Stampin’ Up! Retired List also! The butterfly is die-cut with the Butterflies Thinlits Dies. I added a few Pearl Basic Jewels Embellishments for the butterfly’s body and just adhered it with a Stampin’ Dimensional (a thin scrap from the edge of the Dimensional page to fit) so the butterfly would look 3D. Then for just a little more embellishment I added a strip of Venetian Crochet Trim across the bottom.

This card could be used for almost any occasion so I decided to leave off a greeting until I need to send the card and see what I want to put on it. It certainly could be used for Mother’s Day which is coming up next Sunday, May 10, 2015. It could also be birthday, thinking of you, get well, graduation, sympathy, even a wedding card.

Go to my Stampin’ Up! Online Store now and see all the great products and certainly many discounted prices available!

Starburst Sayings Happy Day Card

Starburst Sayings Happy Day Card

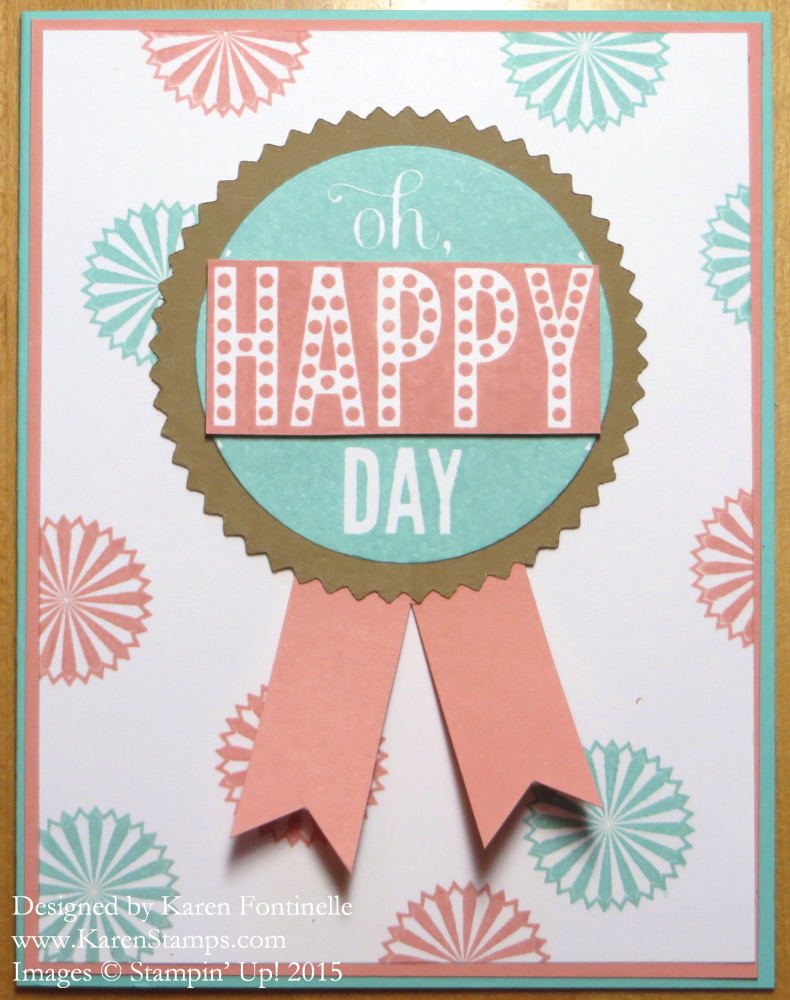
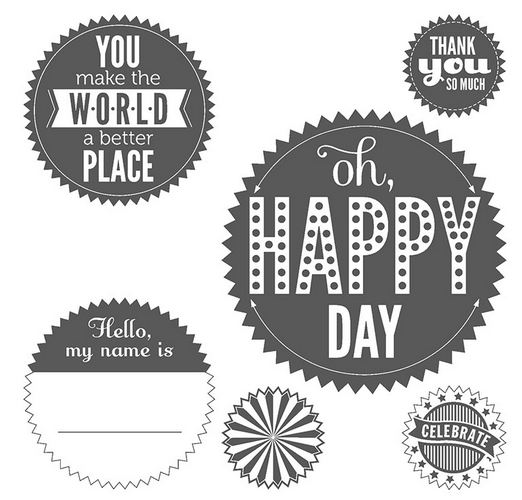
Starburst Sayings is one of the stamp sets on the Stampin’ Up! Retired List that I was so surprised to see on there! It’s a fun stamp set to use and can cover many occasions from congratulations, birthdays, anniversaries, new baby, encouragement, and even weddings. All it takes is using the appropriate colors, papers and embellishments.  Dress it up or dress it down, as they say! You can use circle punches with several of the stamps if you don’t mind punching inside the starburst edges.  Use the matching Starburst Framelits Dies to use with these stamps or just paper.

The Starburst Sayings Stamp Set is discounted on the Retired List right now or you can purchase the Bundle with the stamp set and the framelits and save a little money.

Starburst Saying Stamp Set Images

Here’s another card I made awhile back with one of the other sayings:

Starburst Sayings and Retro Fresh

This card is from last year and has retired paper and trim on it, but you can easily change it with something current.  You can read that blog post HERE.

To shop for any of the Stampin’ Up! Retired products, just go to my Stampin’ Up! Online Store HERE.  You can choose Stamps or Accessories. Click the View ALL dropdown box so that you can just scroll through all the products rather than having to go to the next page and the next.

Chocolate Inspiration Card

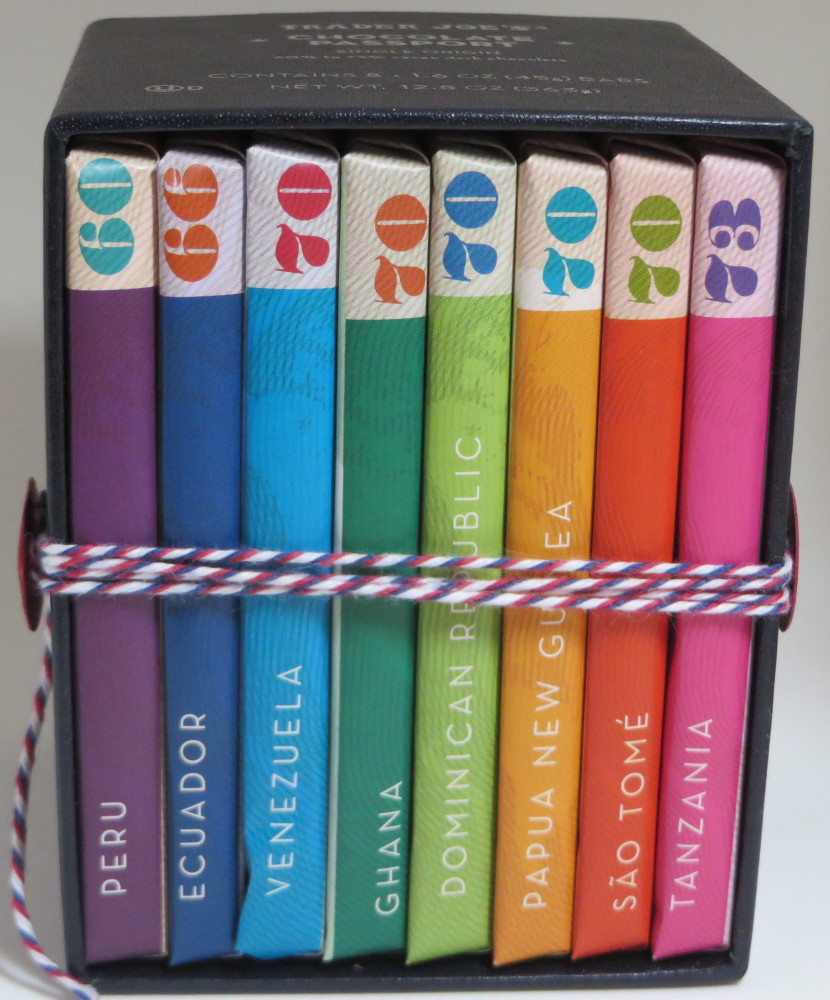
Chocolate Box

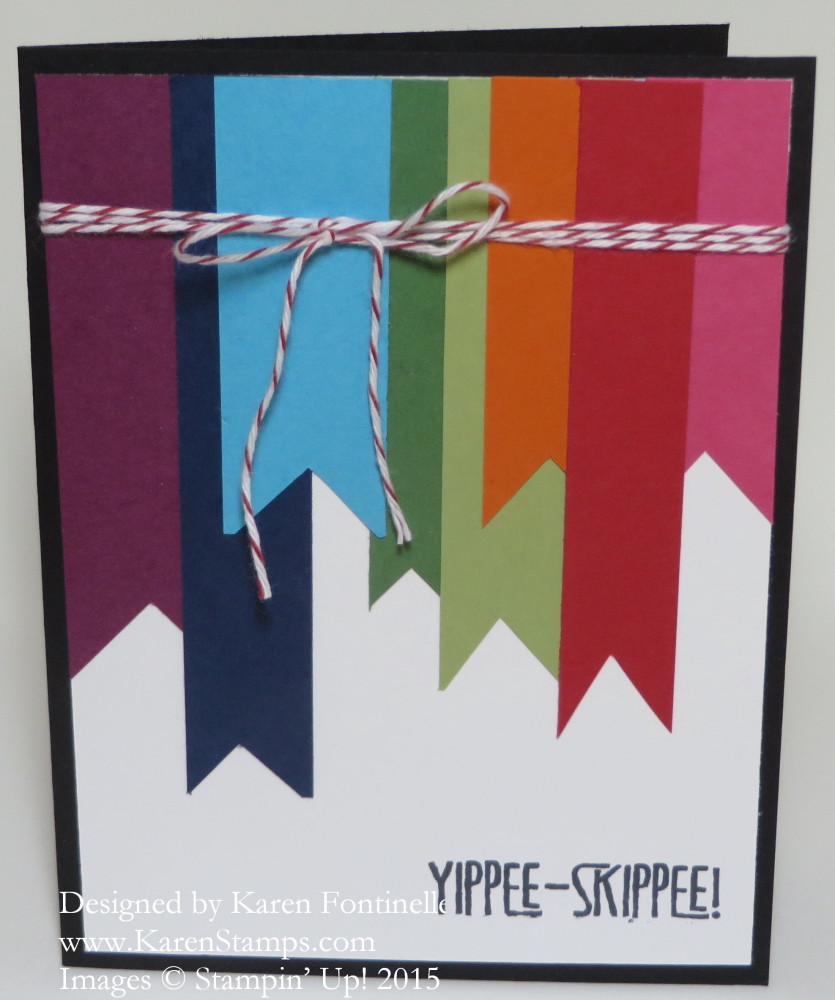
How about some chocolate inspiration for a card?  My daughter gave me this box of chocolates for Christmas (I know, you can’t believe I haven’t eaten it all by now!) but it is almost too cute to eat! At least it is so colorful that I enjoy looking at it on the counter. The other day I thought, those colors would make a good card! So this is my chocolate inspiration card below:

Chocolate Inspiration Card

I just matched up some colors of card stock to the wrappers in the candy box.  They didn’t have to be perfect but I was going for the look. I wanted to stamp just a fun greeting at the bottom, so I chose “Yippee-Skippee!” from the Yippee-Skippee Stamp Set. Just imagine the different greetings you could put on this same card!

I thought the top portion needed a little something, and then I noticed the candy box had some multi-colored twine wrapped around it! That was perfect! I just grabbed some Cherry Cobbler Baker’s Twine and wrapped it around. I like it!

So you never know where your inspiration can come from!  It can come from anywhere, not just a card website or magazine or something only stamping related. It might be a canned goods label in your pantry, a pillow at the store, a dress or scarf in a magazine, a map in an atlas – anything!

Don’t forget to take advantage of Sale-A-Bration so you’ll have even more stamps and supplies with which to make your gorgeous creations when inspiration strikes! Just purchase $50 in Stampin’ Up! products and choose a free Sale-A-Bration item FREE!

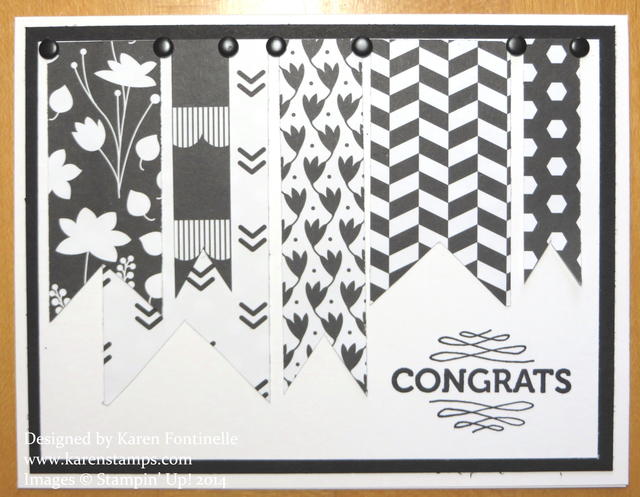
Back To Black Designer Paper Congratulations Card

Back To Black Congratulations Card

I think just using black and white can make a beautiful card, and that’s why the Back To Black Designer Series Paper from Stampin’ Up! is so useful. Here is an easy black and white Congratulations card that you could be proud to send to anyone. Or change out the greeting and make it a birthday card or whatever occasion you need. I just chose several scraps of my Back To Black DSP and cut strips and made them into banners of varying widths and lengths and adhered them to my card front (stamp first in case you mess up!). I tend to just cut the flag end of the banner with my Paper Snips, it doesn’t have to be perfect, but you could also punch with the arrow punch or the square punch or some others.

The greeting is from the Hey You Stamp SetAnd for a finishing touch, I added some black Neutrals Candy Dots to look like they are holding up the banner.

Buy 3 Get 1 DSP Free Offer (last day July 31)

Stampin’ Up! Weekly Deals (last day July 28)

Subscribe to Paper Pumpkin Use HALFOFF2 code.


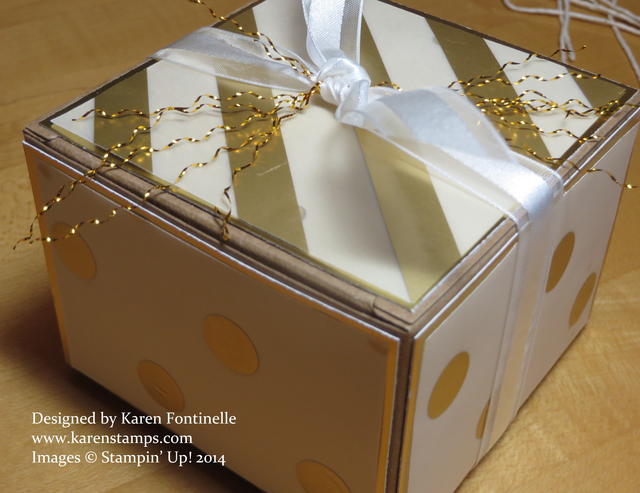
Gift Wrap Idea: Gold Kraft Gift Box with Gold Frizzle

Gold Gift Box with Gold Frizzle

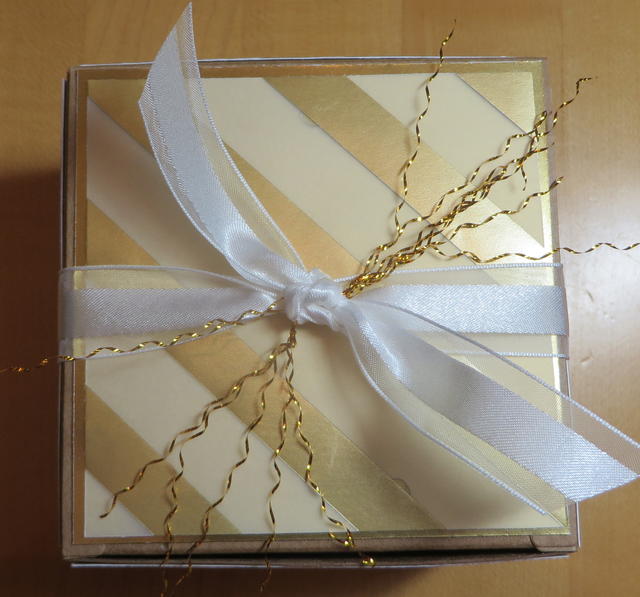
Do you need a fancy gift wrap idea?  Use the Stampin’ Up! Kraft Gift Box and gold, gold, gold! Gold is IN these days so you might as well use it! I love these little Kraft Gift Boxes. They are 3 1/2″ wide on each side so perfect for a small gift or treat. I decorated this one first with a layer of Gold Foil on each side, cut just 1/8″ smaller on each side than the box. Then I layered a piece of Gold Fancy Foil Designer Vellum on each side (choose whichever pattern you like the best). I put a different pattern on the top.

Then to really jazz it up a bit, I put a little “frizzle” on the top! I didn’t know where I came up with that term or description, but it turns out “frizzle” does mean curl or kink or ringlets so I guess I was correct! Do you know where I got it?  From the Gold Baker’s Twine! The Gold Baker’s Twine is really just White Baker’s Twine with the metallic gold thread twisted around in it. Some people have even complained that when using the Gold Baker’s Twine, it came untwisted and frayed at the ends. But you can embrace that idea and untwist the gold thread from the white twine! Cut the Baker’s Twine into pieces several inches long each to make it easier.  Then gather your pile of gold threads and tie onto a bow or knot. Very easy! I could have also added a piece of Gold Sequin Trim for some extra bling!

If you are looking for more gift-wrap ideas and haven’t signed up for my Mailing List yet, do it today and get your FREE GIFT, “A Dozen Creative Gift Wrap Ideas”. You’ll see the sign up box in the upper right corner of my blog!

Gold Gift Box Top with Gold Frizzle