I’m reposting this from last year, as I came across it for a Quick and Easy Gift Card Holder. I’m thinking that at this late date, a lot of us might be looking for simple gift card (or cash!) holders. Of course you can use any cardstock and designer series paper you have.
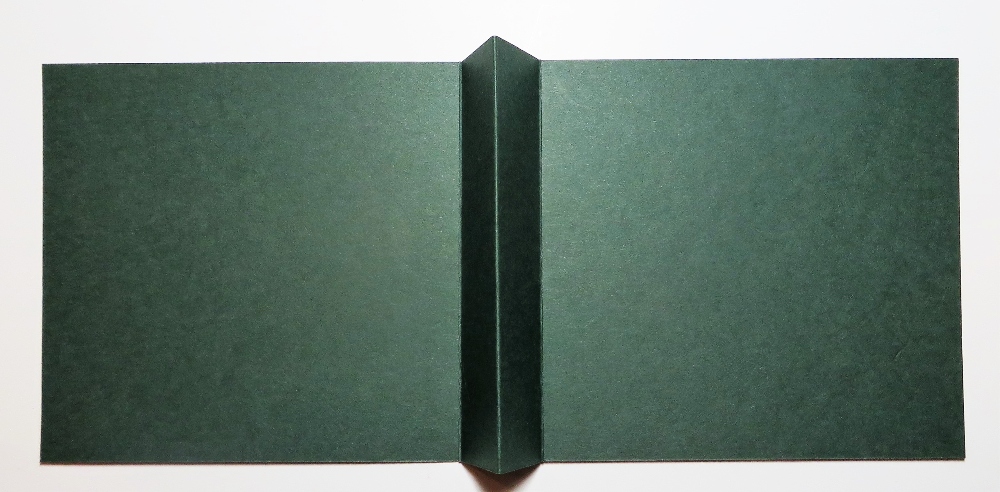
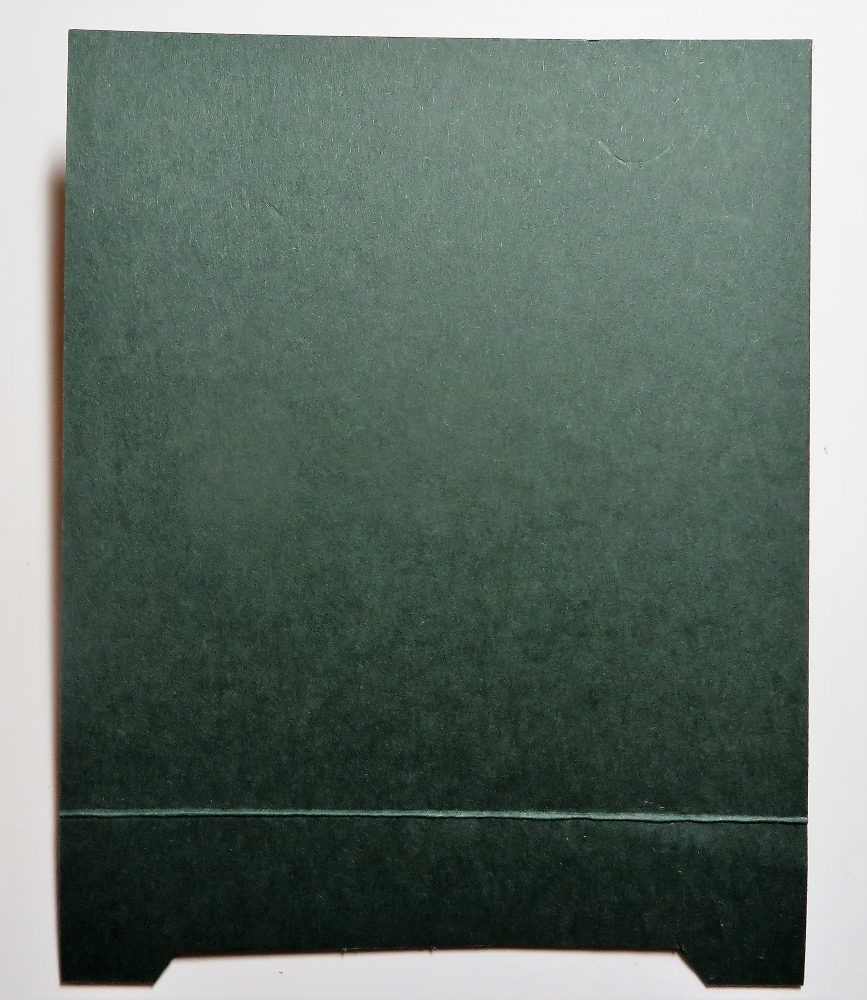
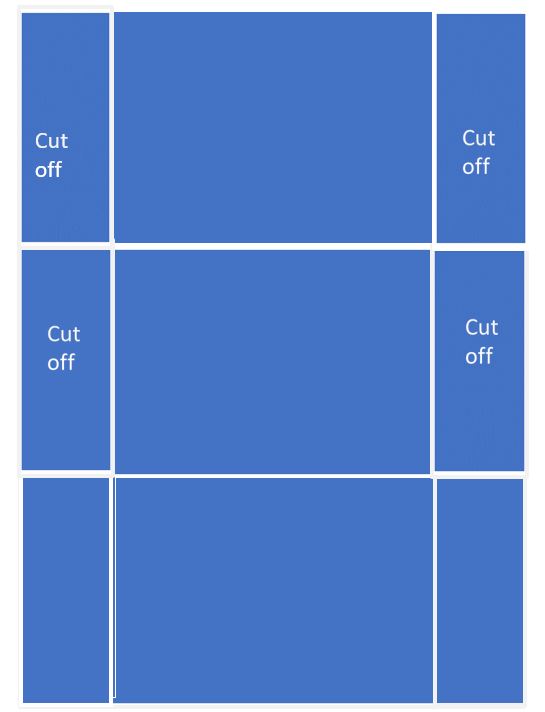
Start with a 4″ x 12″ strip of cardstock. You could make it taller if you wanted to. Score this strip of paper at 4″ and 8″, basically in thirds, since the paper is 12″ long. Then on the end section, cut from the score line down to the corner on a diagonal. This can be on either end of the card.

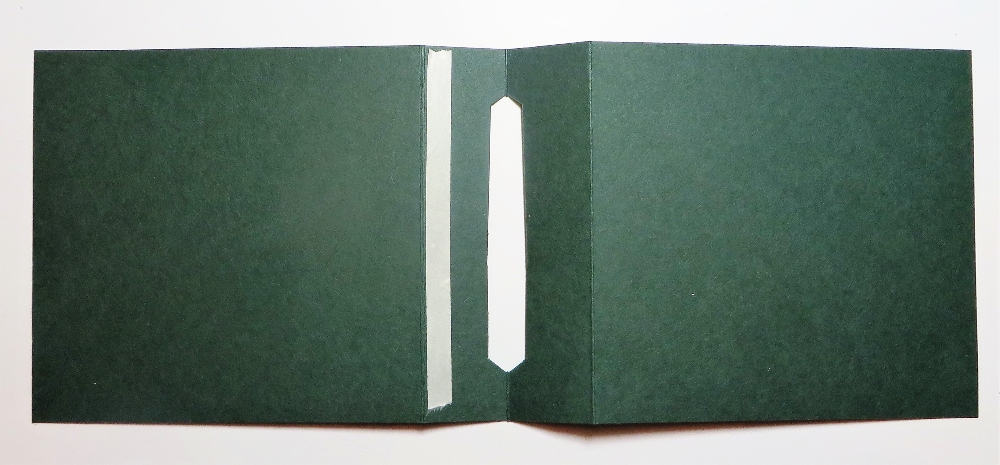
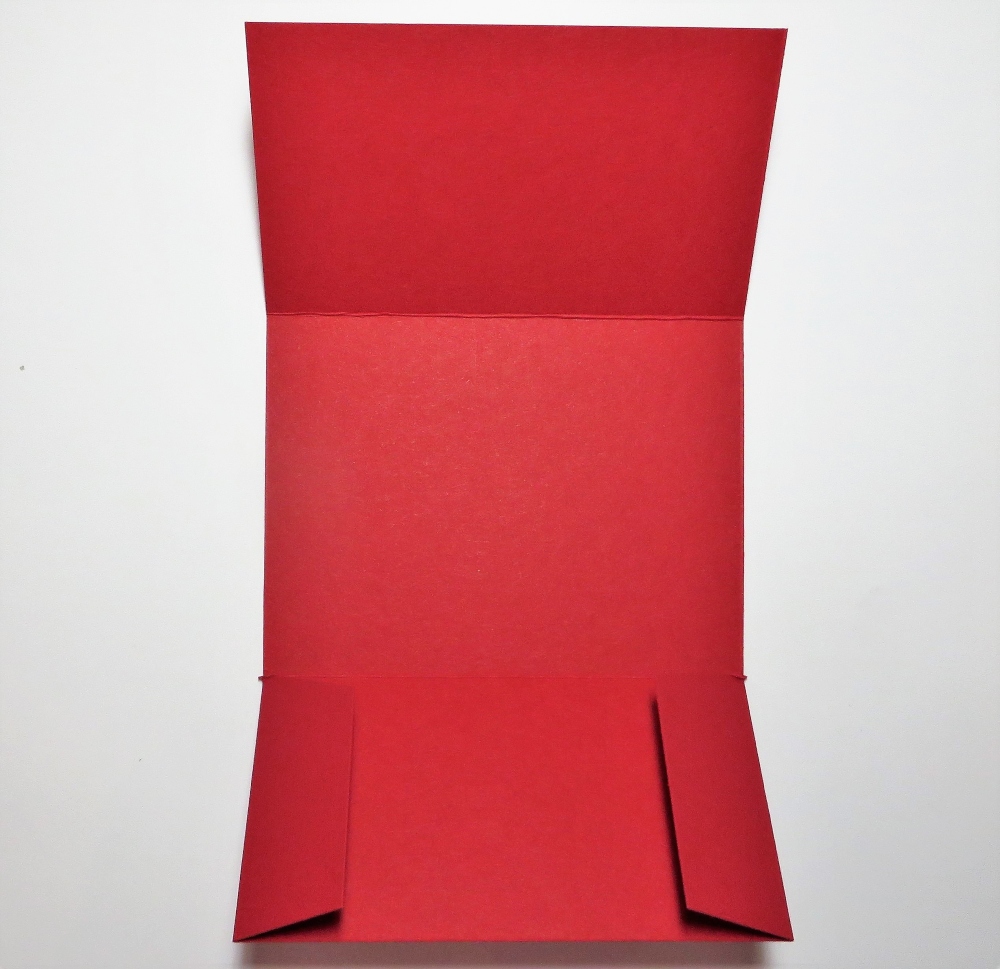
Put a strip of Tear & Tape Adhesive or other strong adhesive on the bottom of that section with the diagonal cut. Then fold that diagonal piece over to the inside panel next to it.
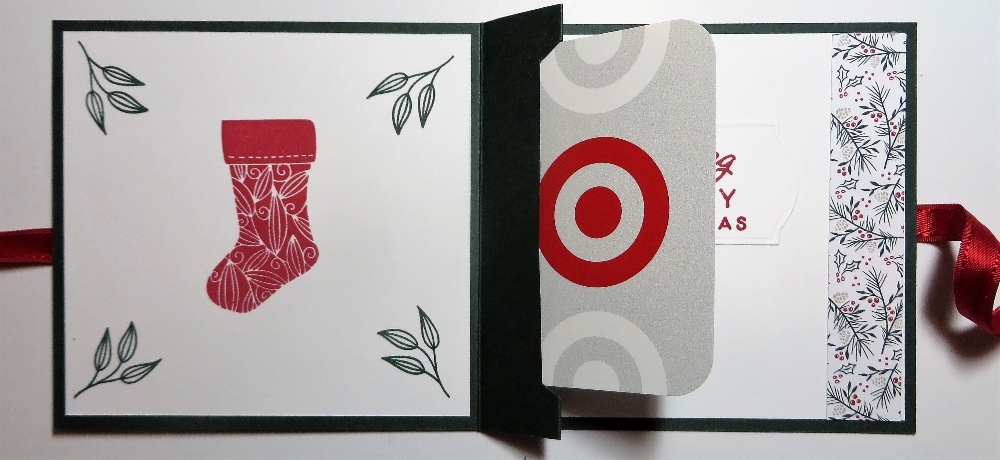
My sample is a card base of Real Red, and I used the Reindeer Days Designer Series Paper and Sticker Sheet to decorate the holder. On the front, I cut a piece of designer paper with the packages at 3 3/4″ x 3 3/4″. The tree and strip of holly leaves behind it are stickers from the Reindeer Days Sticker Sheet.
You can decorate the inside however you like or leave it plain. I put another paper behind the diagonal piece and a diagonally cut piece of designer paper on that diagonal corner. Just cut a square of 3 3/4″ x 3 3/4″ and cut diagonally from one corner to the other. Just make sure you have the pattern going the right way and that you cut to and from the correct corners. You can write a message on the inside left of the holder or add a piece of Basic White on which to write or stamp something.

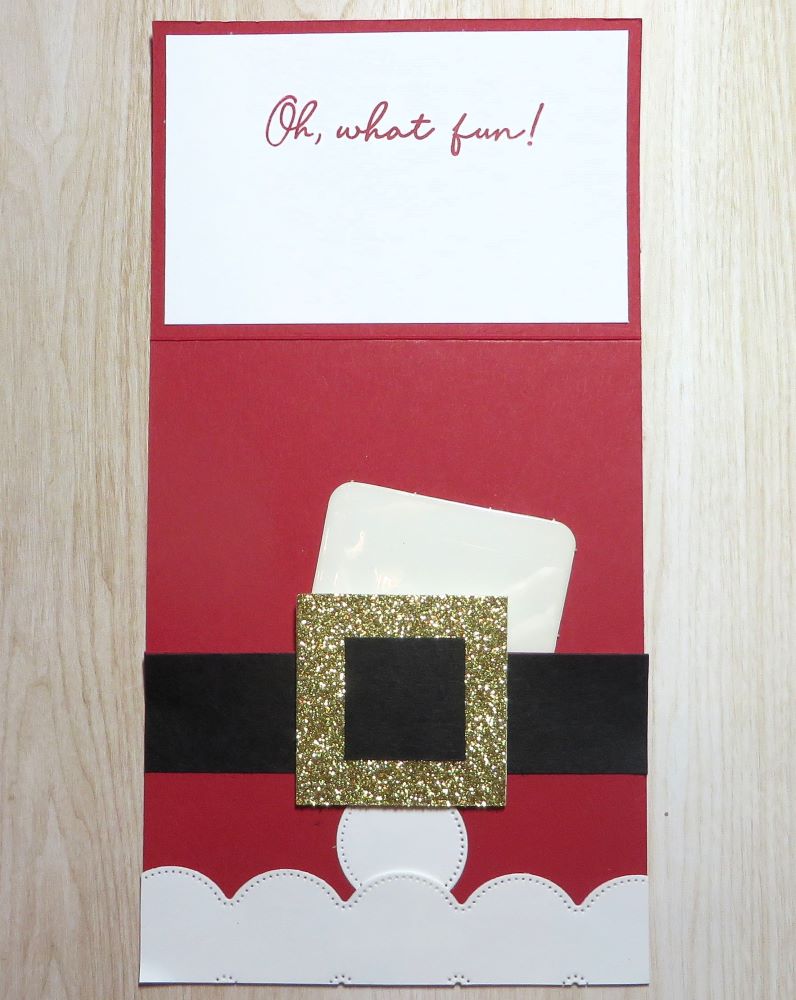
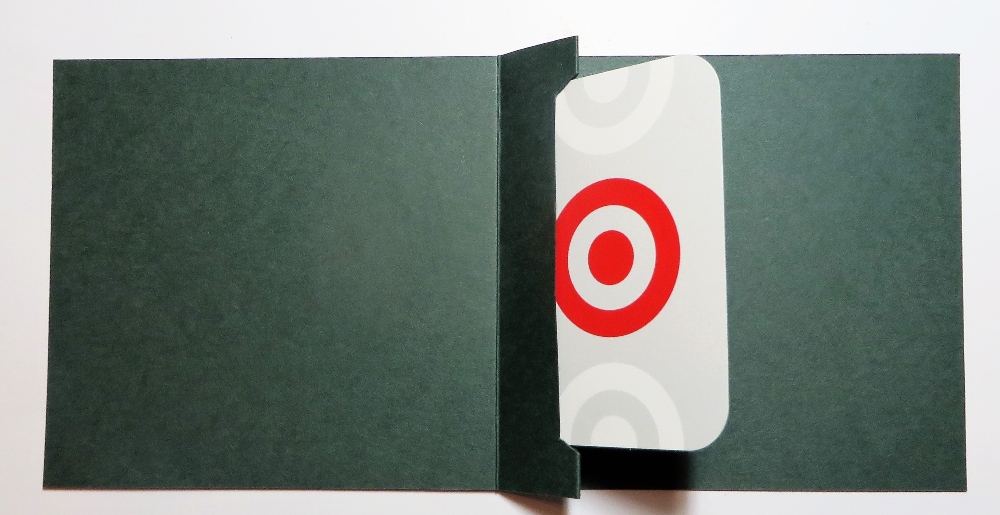
Put your gift card or cash in the pocket. Decorate the front a little more with some bling, like these Iridescent Faceted Gems on the tree. If you prefer, make a belly band to go around the gift card holder to keep it closed. These are so quick and easy, I bet you can’t make just one!