Tag Archives: Frightfully Fun Designer Series paper

Frightfully Fun Stack and Shuffle Halloween Cards

Frightfully Fun Stack & Shuffle Halloween Cards

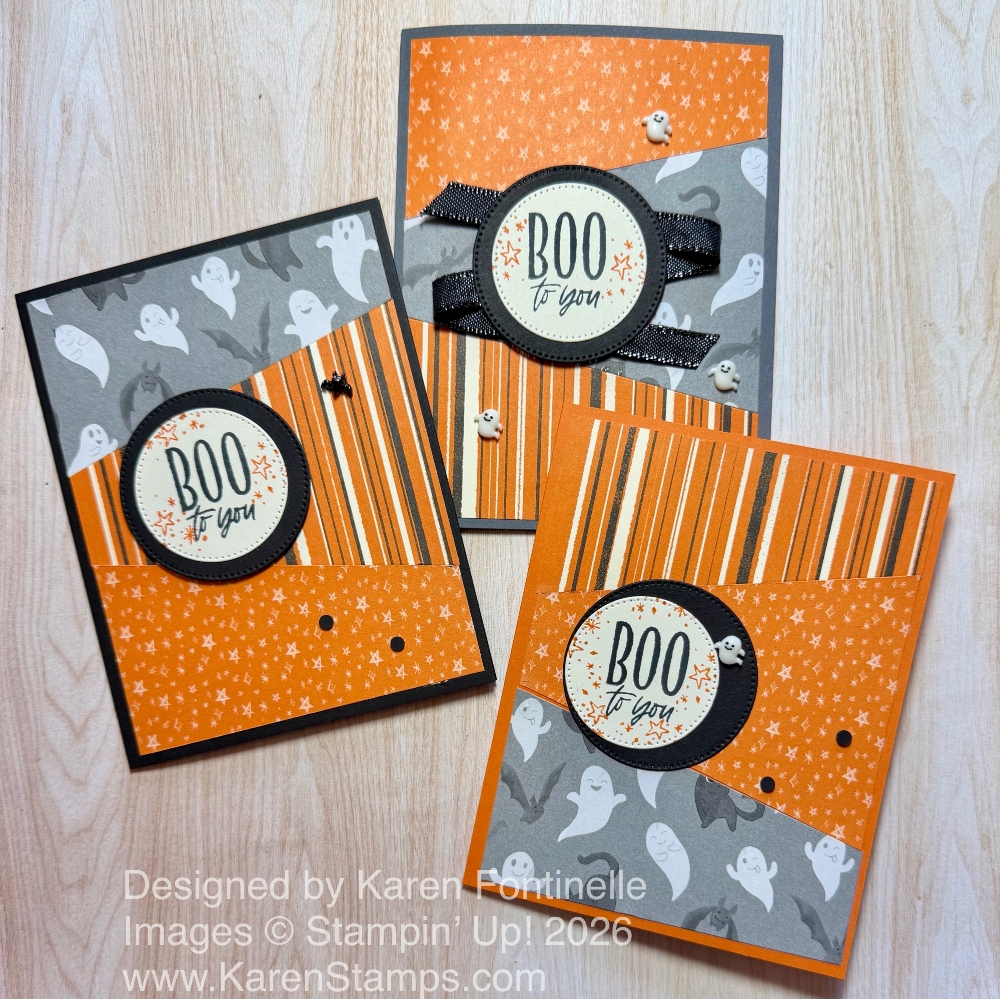
Try this easy way to quickly and easily make three similar cards using the stack and shuffle method as I did with these Frightfully Fun Stack and Shuffle Halloween Cards! I’ve been seeing different versions of these cards and decided to try it and to make Halloween cards. How is it October 1st already today?!! It’s easy and fun!

Start by choosing three different designer series patterns, most likely in the same package of paper (although no reason you couldn’t use three coordinating papers of different packages). Cut one piece from each pattern at 4″ x 5 1/4″. The reason you cut this size is because it is the size if you were using the whole piece on the card base as a DSP layer. I used the Frightfully Fun Designer Series Paper. As you can see, I chose a piece of the ghost print paper, the striped paper, and the little stars paper. Stack the three papers together on one pile, each 4″ x 5 1/4″.

Next, make marks with a pencil on the right side of the card at 1″ and 4″ and at 2″ and 3″ on the left side of the pile. You don’t have to mark each paper, just the top one. Using your Paper Trimmer, cut on a diagonal from the 1″ mark on the right down to the 2″ mark on the left side of the paper. Then cut on the diagonal from the 4″ mark on the right to the 3″ mark on the left side. Keep each stack together at first.
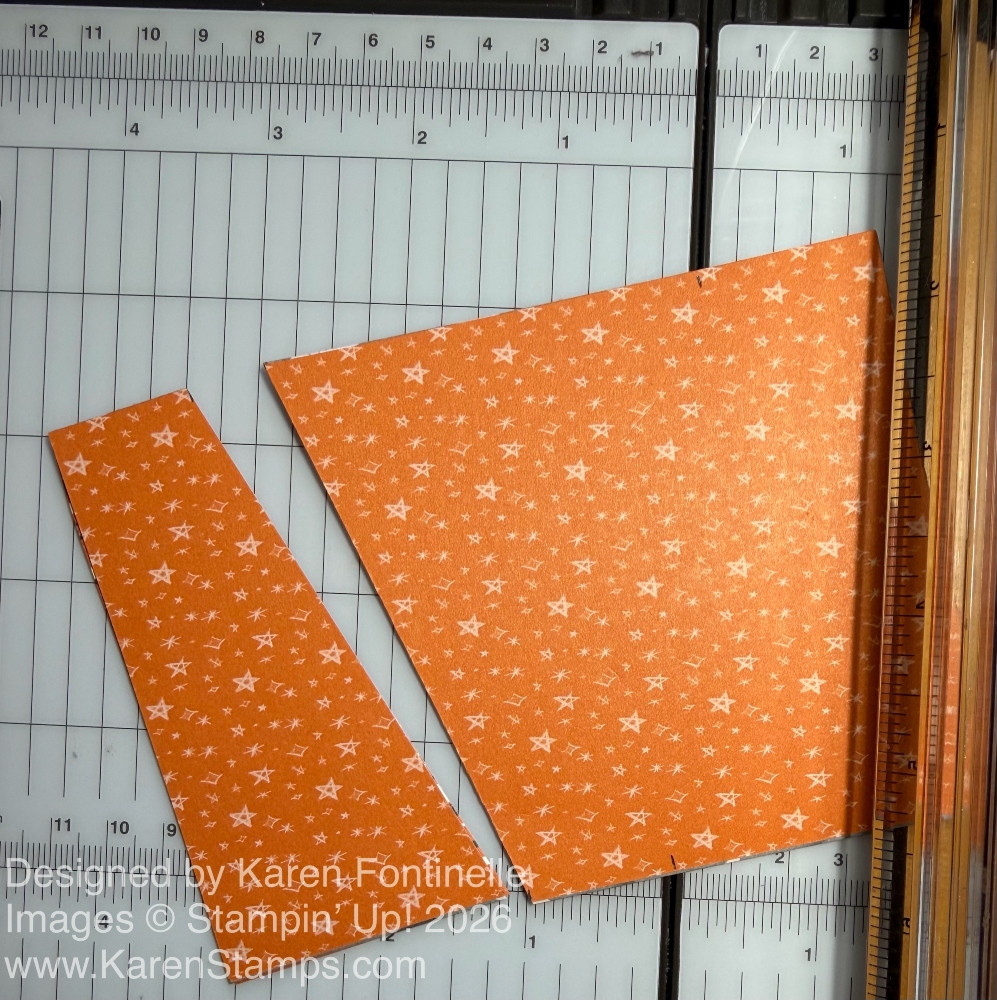
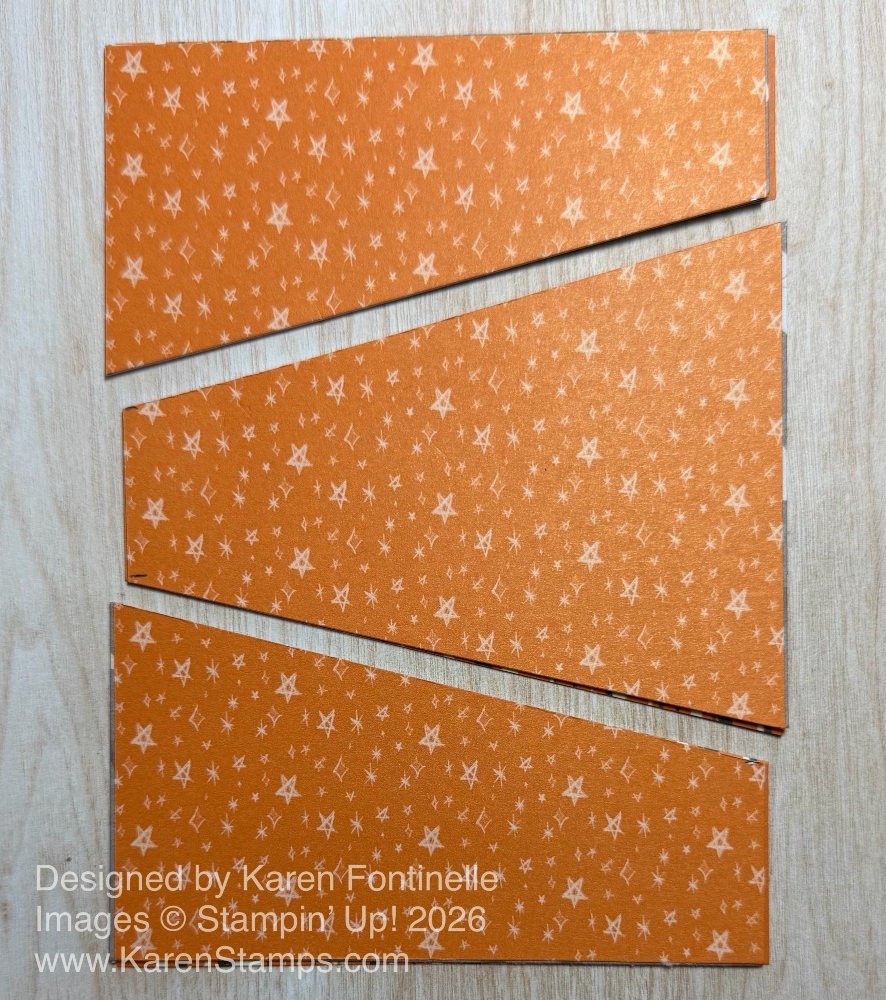
Stack and Shuffle Cutting

Stack and Shuffle DSP Cuts

Above you see what the papers should look like, cut and still stacked.

Then just sort them out so each paper is in a different position on a different card.
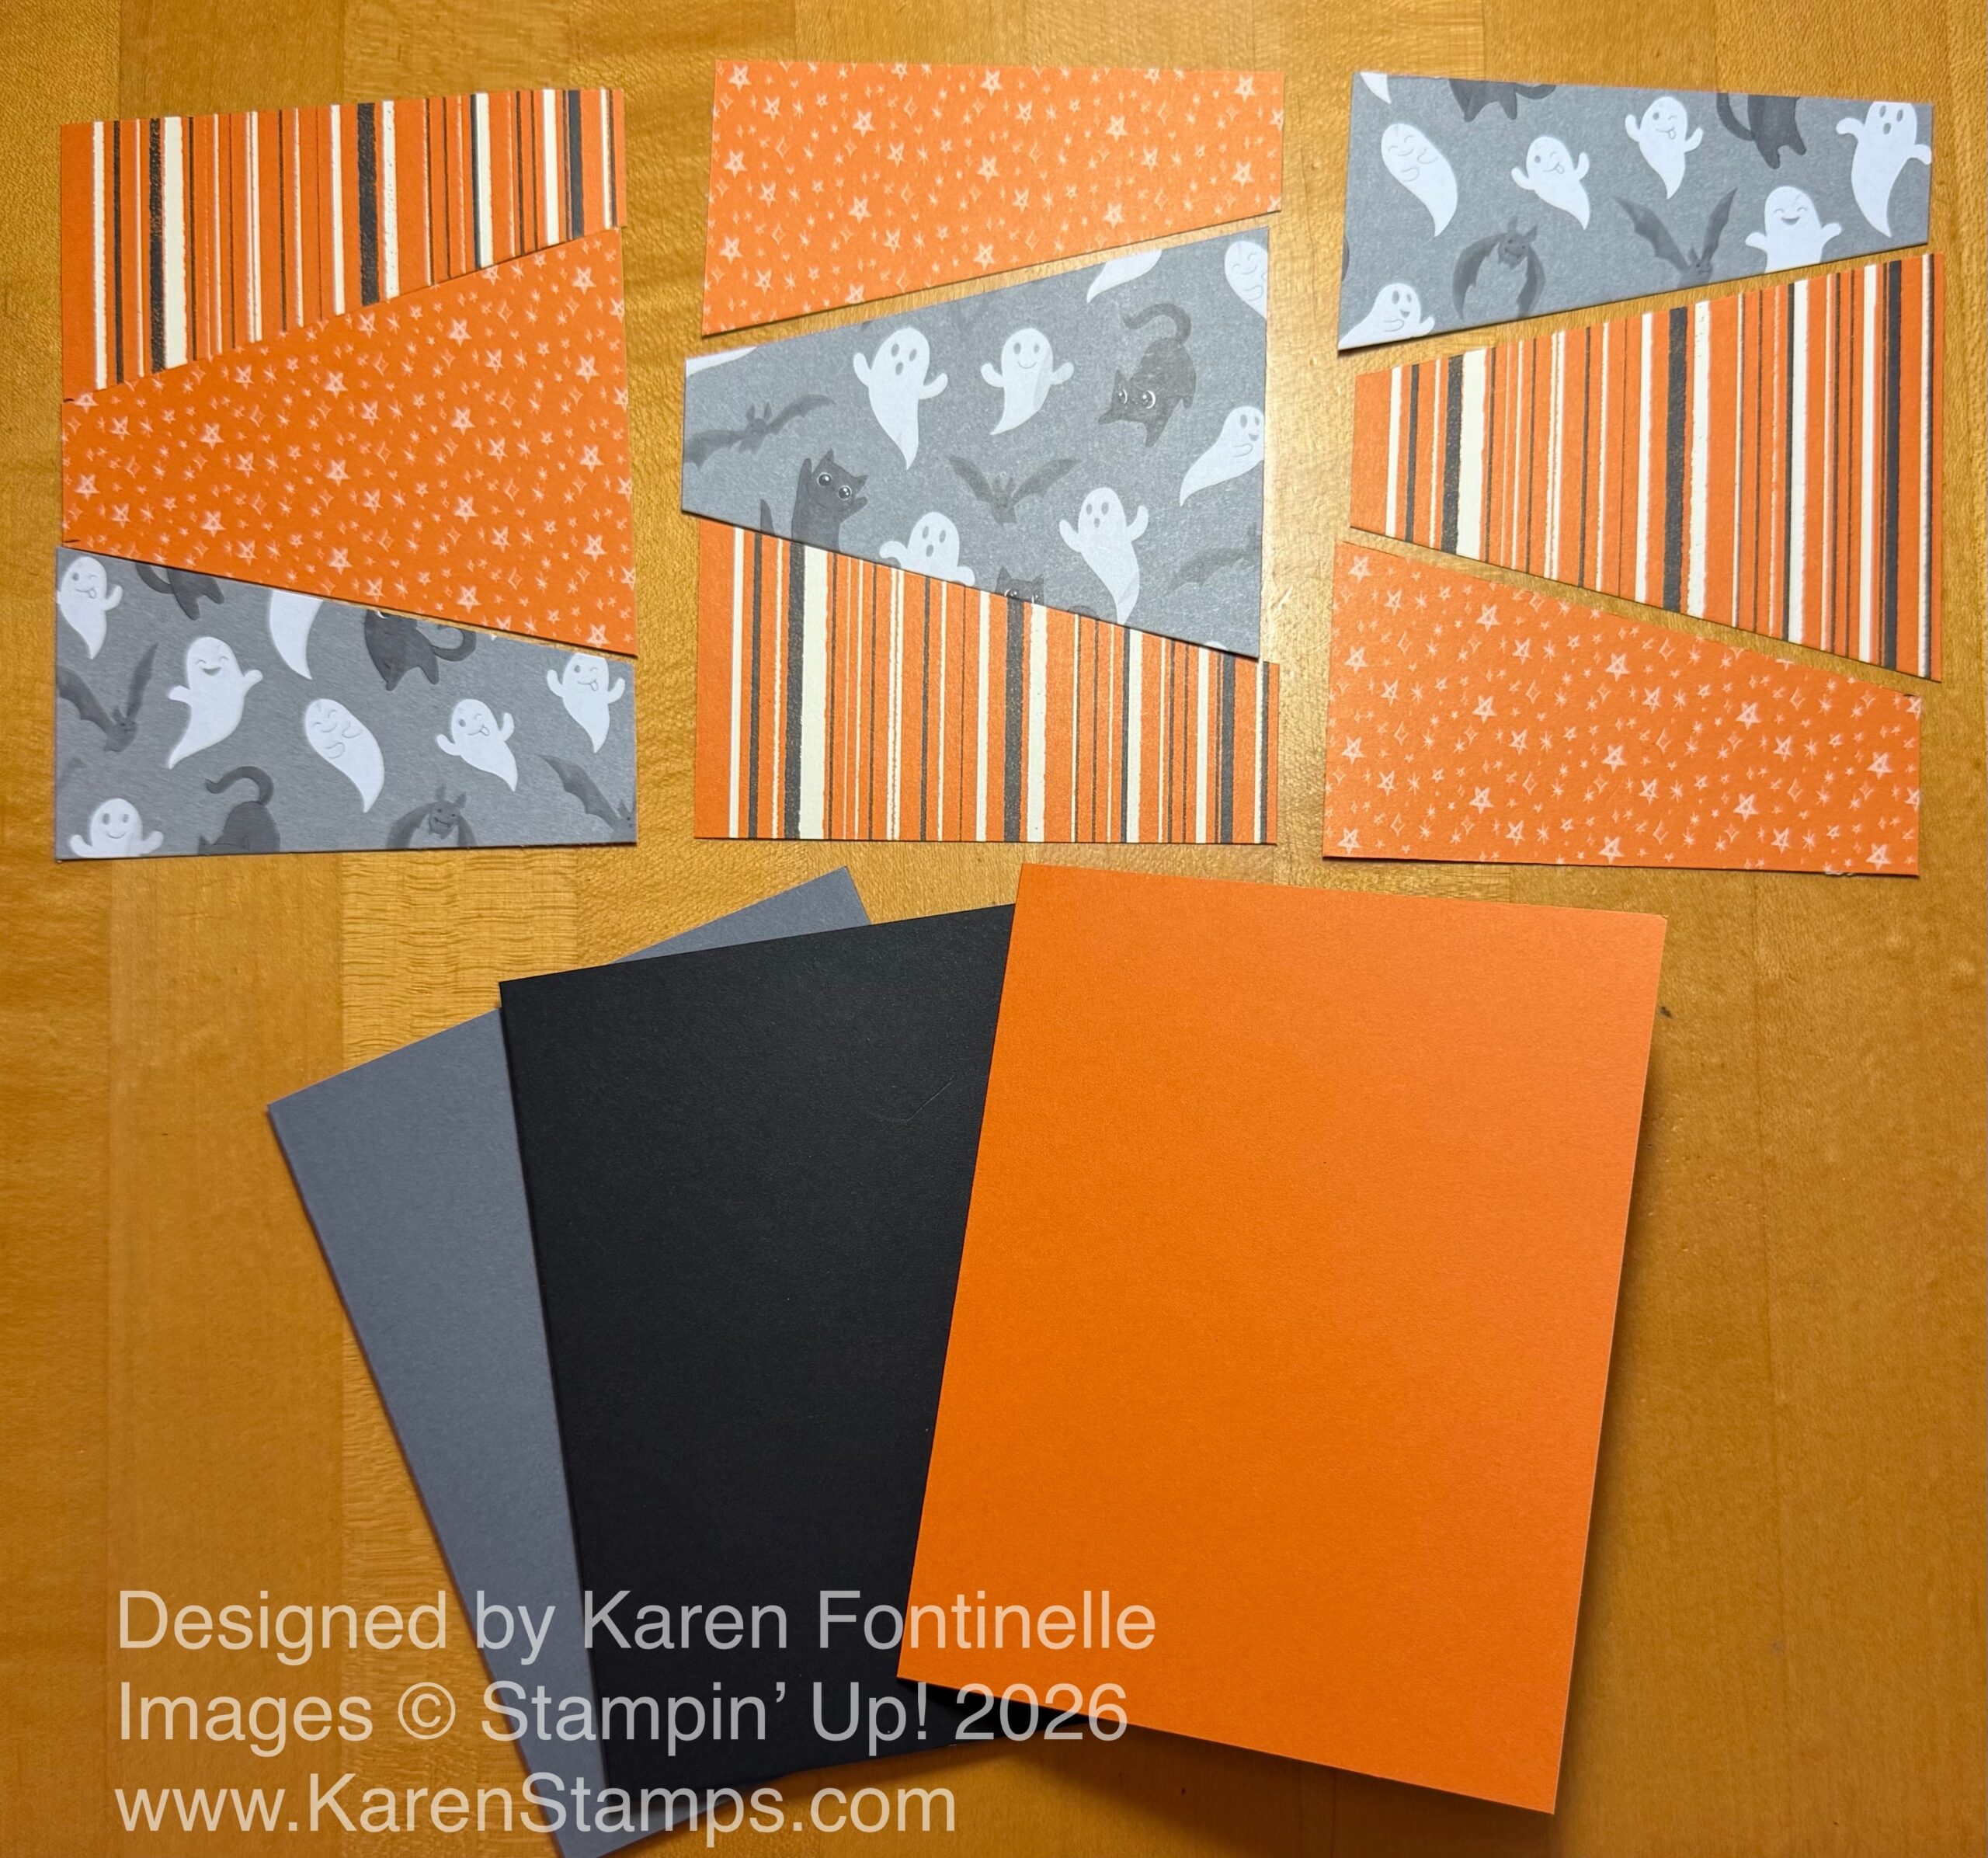
Tape on Back of Sour Cream Container

I chose three different colors of card bases, but you could do all the same. I used Basic Gray, Basic Black, and Pumpkin Pie cardstock. Then just adhere the designer paper pieces to the card bases in the same order you have laid out already. There are no spaces in between the pieces. I just started at the top and then did the middle piece and bottom piece. That worked for me.

For the greeting, I used the “Boo to You” sentiment in the Oh My Fright Stamp Set. It is stamped in Memento ink on Very Vanilla cardstock and the cut out with one of the Stylish Shapes Dies, plus a larger Basic Black circle for the layer. I also stamped some stars and sparkles with a stamp in the same set in Pumpkin Pie ink on the greeting. I popped up the greeting with Stampin’ Dimensionals on two of the cards and adhered it flat on the third card. On one card, I added some Black 3/8″ Iridescent Ribbon under the greeting.

For a little more fun, I remembered I had the new embellishments, the Adhesive-Backed Bats Ghosts and Dots. I added a few ghosts on one card, a couple dots and a bat on another, and a ghost and two dots on another.

See the inside of the card below. I used a piece of Very Vanilla cardstock, stamped with a Pumpkin Pie greeting from the Oh My Fright Stamp Set, and a ghost!
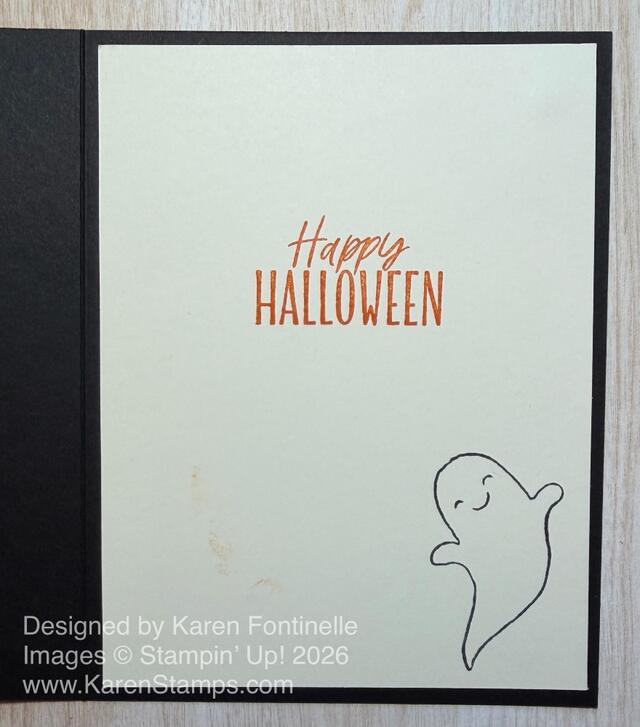
Halloween Shuffle Card Inside

I’ve seen other “stack and shuffle” cards that used different size rectangles instead of the angled pieces I used, so you could do that if it seems easier to you. You could also eyeball the cutting lines if you don’t like to measure. They don’t have to be the measurements I used. Try it out! Use other designer papers or Christmas papers if you don’t need Halloween cards.
SHOP STAMPIN’ UP! ONLINE HERE!

Frightfully Fun Halloween Tag Card

Frightfully Fun Halloween Tag Card

Halloween is getting close (yes, I know it’s not even the middle of August yet!), and here is a fun card, the Frightfully Fun Halloween Tag Card, to get you in the mood! At least if you are starting early! Well, once the products come out, how can we resist playing with them? You will find Stampin’ Up! Halloween stamp sets, dies, papers, and more in the July Online Exclusives that are out already! Crafters want an early start!

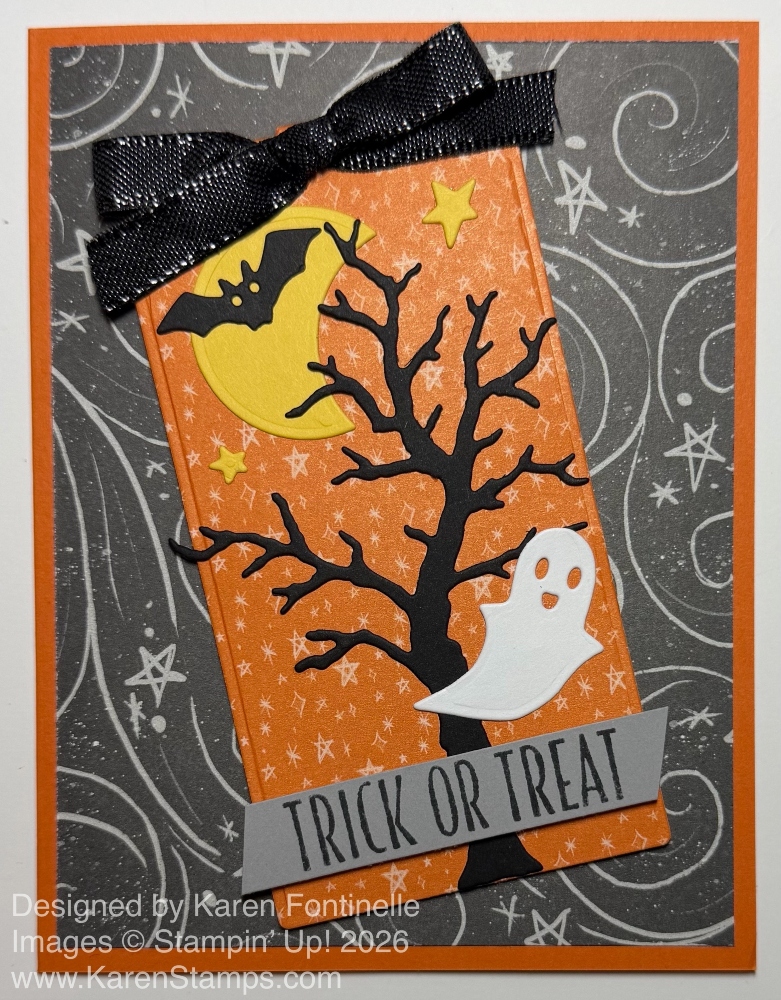
This card is somewhat of a copy of a sample in the Online Exclusives for this Frightfully Fun Designer Series Paper. The sample is of a White Gable Box in the Frightfully Fun Suite Collection. The gable box is decorated with one of the designer papers and has a Halloween tag hanging on it. So for this card, I made a tag much like the one on the Stampin’ Up! sample and turned it into a card.

The card base is Pumpkin Pie with a layer of the Frightfully Fun DSP that has a dark background with swirls and stars. The tag is made with the tag die in the Oh My Fright Dies. This die set has a bunch of fun Halloween shapes – ghosts, a tree, bats, a moon, stars, cats, and clouds. It goes with the Oh My Fright Stamp Set. Check out both the dies and stamps together in the Oh My Fright Bundle and save 10%.

The tag is a diecut piece of orange DSP with tiny stars on it. If you think ahead, like I don’t, use Adhesive Sheets on the back of the cardstock pieces that you are going to diecut and turn them into stickers. Otherwise, you will have to put the teeniest drops of glue on some of them, like the tree. But either way works! I diecut a crescent moon out of Daffodil Delight and a couple of the tiny stars, a bat, the tree, and a ghost. I love those ghosts. Everything is glued down flat and then the whole tag is popped up on Stampin’ Dimensionals. The greeting is stamped on Smoky Slate cardstock with Memento ink from the Oh My Fright Stamp Set. I trimmed it so it was a narrow strip and cut the ends on diagonals. It is also popped up on Dimensionals. The finishing touch is a black bow at the top using the Black 3/8″ Iridescent Ribbon in the Suite.

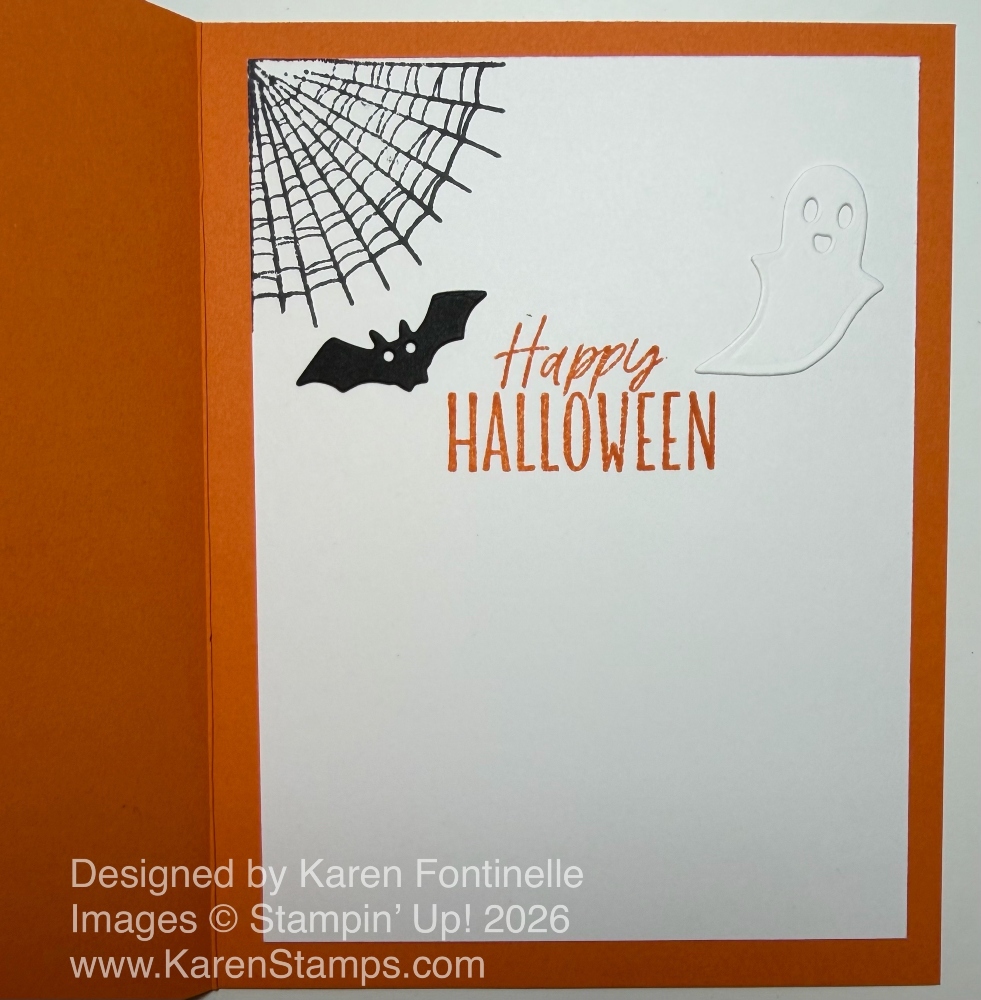
I also decorated the inside of the card a little bit. I added a piece of Basic White, cut at 3 3/4″ x 5″, a little smaller than usual, just because that’s the piece of paper that I had handy. I stamped a spider web in the top corner, then added an extra diecut bat and ghost, plus stamped “Happy Halloween” in Pumpkin Pie ink in the center. I think it sll turned out real cute!

Frightfully Fun Halloween Tag Card Inside

SHOP STAMPIN’ UP! ONLINE FOR ALL THE THINGS!

Frightfully Fun Ghosts Halloween Card

Frightfully Fun Ghosts Halloween Card

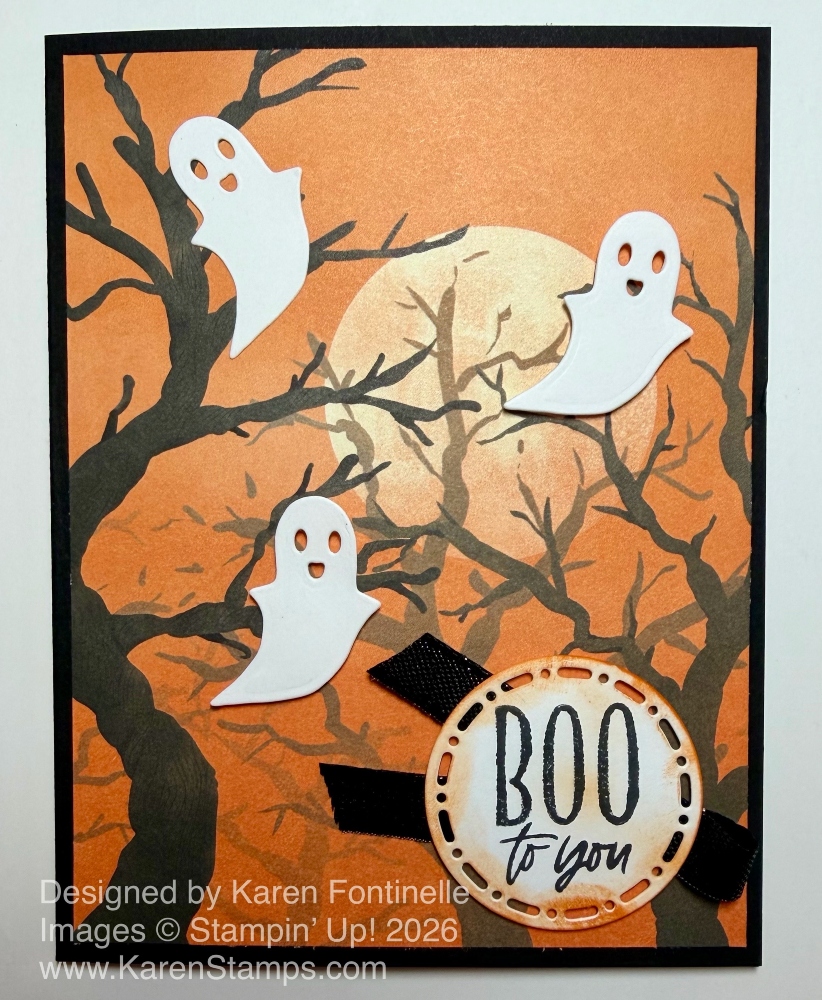
The 4th of July is over, so it’s time for Halloween!! Here is my first Halloween card of the year, the Frightfully Fun Ghosts Halloween Card! Is it too soon?! Besides my birthday, what other big holidays come between now and October 31? Just Labor Day, but we don’t make Labor Day cards and decorations! Just kidding, I’m not ready to go full in on Halloween YET, but it will be here before we know it.

The real reason I made this Halloween card is that the paper and Bundle are the things I preordered from the new Online Exclusives that were just released by Stampin’ Up! on July 1st. I don’t remember what else I ordered that time, but I know I wasn’t ready for all the holiday things offered in the Online Exclusives. And I think I was too busy getting ready for a trip. I have more new Online Exclusives coming, but for now I’ve been looking at this Halloween paper, Frightfully Fun Designer Series Paper, on my table for a few weeks now without using it. It is part of the Frightfully Fun Suite Collection. I think I bought all the parts of the Suite except for the White Gable Boxes. There are also extra products, like the designer paper with stickers and the Frightfully Fun Times Two-Tone Cardstock, and more!

For an easy beginner Halloween project, I started with this card. The card base is Basic Black, and I’ll add a Basic White layer inside so I can stamp or write a message, and probably add a ghost or stamp something inside for a fun little surprise. The whole background is one of the “panels” of designer paper as we have had before. You can cut the paper into panels, 4″ wide, then cut each into 4″ x 5 1/4″ pieces to use. Or use the whole thing for a scrapbook page.

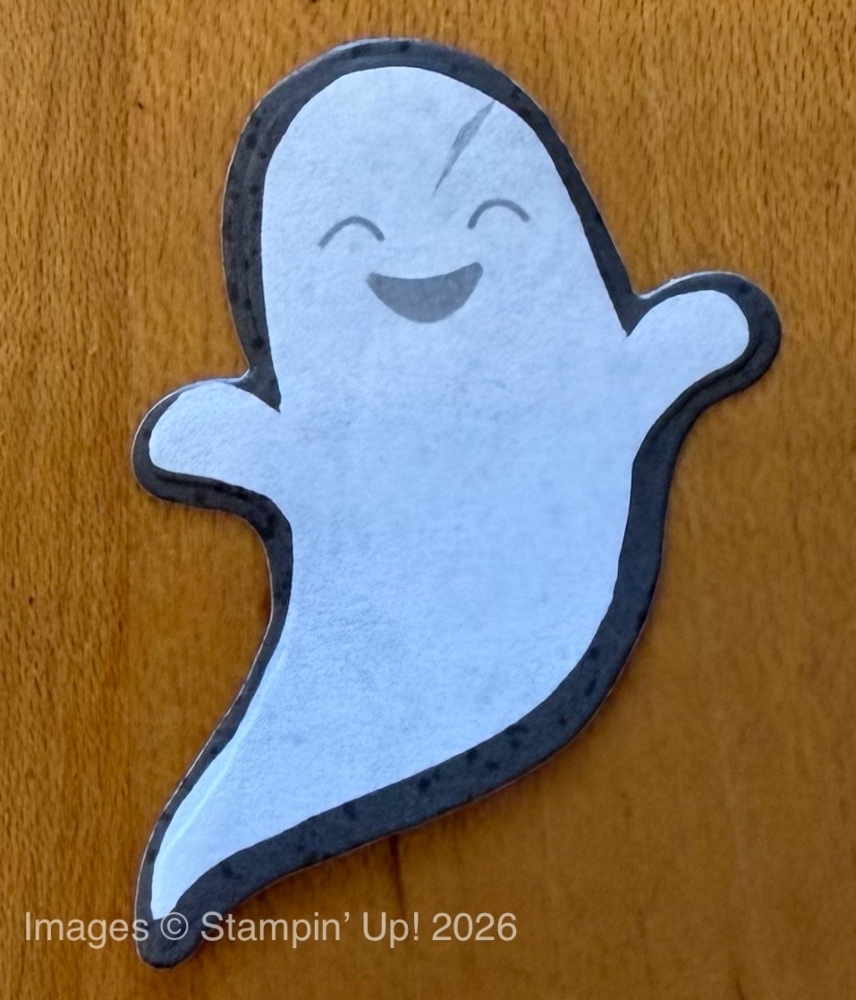
When I tried out the new Oh My Fright Dies, I thought the one ghost die looked like it would cut out one certain shape of ghost on the designer series paper. But when I tried it, I got a margin around the ghost! It didn’t fit the ghost exactly. Maybe in some circumstances the extra margin around the ghost would help it stand out, but for this card, I didn’t want it. You can see the photo below. I just trimmed off the excess and fussy-cut some of the other ghosts on the paper.

Frightfully Fun Diecut Ghost

However, when I tried out the little ghost die in the set, it cut out these CUTE little ghosts with faces that I put on my card! I love these! So I used three of these little ghosts out of Basic White cardstock rather than the designer paper ghosts. Just so you know, the larger ghost die DOES cut out a stamped ghost in the Oh My Fright Stamp Set. You can get both the stamp set and dies in a Bundle and save 10%. The top ghost is glued down flat on the card, the other two ghosts are popped up with one Stampin’ Dimensional.

For the greeting, I stamped one in the Oh My Fright Stamp Set in Memento Ink on Basic White and diecut it with a circle in the Spotlight on Nature Dies. To make it a little less stark white, I used a small Blending Brush and Pumpkin Pie ink to just ink the edges a little bit and even the center of the greeting very lightly. You could use a sponge if you don’t have the Blending Brushes. Behind the greeting, I put a small piece of the Black 3/8″ Iridescent Ribbon and popped it up on Stampin’ Dimensionals.

This is really an easy card to duplicate, so if you are into Halloween, go ahead and get this paper or the entire Frightfully Fun Suite before anything sells out and so you can get an early start!

SHOP STAMPIN’ UP! ONLINE HERE!