Tag Archives: Celebratory Sips Designer Series Paper

Sweet Jar Candies Card

Sweet Jar Candies

I ordered this stamp set, then it got lost in the shuffle and I kept forgetting about it. After awhile I remembered to take it out and made a card or two. But now I’m kind of getting into it and made a cute card with it for a friend’s birthday. And I’ve seen lots of cute cards of all sorts made with this stamp set and punch! So here is my Sweet Jar Candies Card that was fun to make!

If you like this Sweet Jar Bundle with the cute jar and lid punch, be sure to check out the Jar of Joy Stamp Set that is the holiday version and also works with the Sweet Jar Builder Punch. I’m anxious to try out that one! You’ll find it in the Online Exclusives.

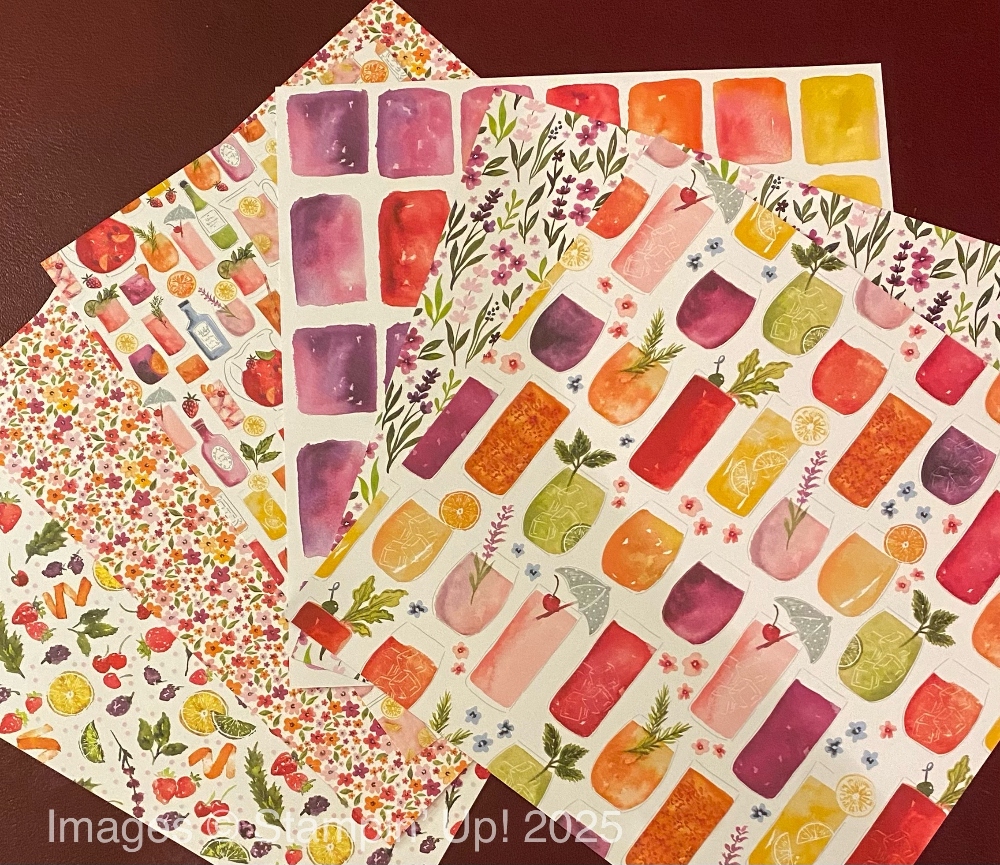
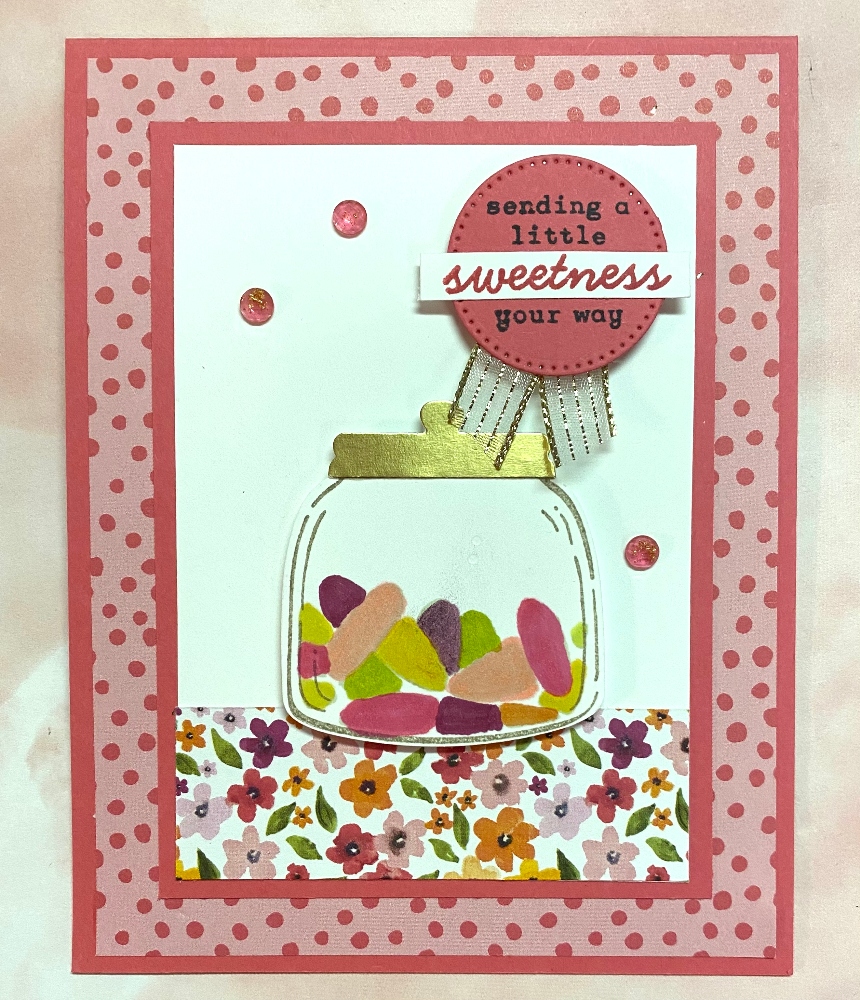
For this card I used two patterns in the Celebratory Sips Designer Series Paper. You can see this paper is not only about drinks in spite of its name! The card base is Strawberry Slush, one of my current favorite colors. I cut it at 4 1/4″ x 11″ and scored at 5 1/2″ so the fold is at the top. Basically, this is cutting the sheet of cardstock in half lengthwise instead of our normal horizontal. The polka dot paper is 4″ x 5 1/4″. The Basic White background is cut at 3″ x 4 1/4″ and is layered on a piece of Strawberry Slush cut at 3 1/4″ x 4 1/4″. You could make these pieces larger if you wanted to. At the bottom of the Basic White piece I adhered a floral print pattern 1″ x 3″ to suggest a tabletop on which the jar is sitting.

The jar is stamped with the Sweet Jar stamp on a small piece of Basic White using Gray Granite ink. You could use black ink but I thought Gray Granite looked a little more like glass. I also heard the new In Color, Cloud Cover, is a good color to use stamping the jar. If you recall, the Cloud Cover ink pads did not meet Stampin’ Up! standard in the current ink pad style so they stopped selling them. However, the ink does work with the Stampin’ Spots.

If you want the Cloud Cover ink, you can buy the Uninked Stampin’ Spots and use the Cloud Cover Ink Refill OR you can purchase the Classic Stampin’ Spot Small Assortment 1 (this assortment is on sale in the In Color Sale right now) which has the Cloud Cover Ink Spot in the assortment. These Stampin’ Spots, if you don’t have any, are rather handy to have. They are good for inking a small area on a stamp and good for “going places” with your stamping supplies because they are so much smaller than regular ink pads to take along. And if you are subscribed to Paper Pumpkin then you already have a collection of other colors of ink spots because you get one new spot in every kit. However, I don’t think Cloud Cover has been in a Paper Pumpkin Kit yet.

The jar is kind of like two-step stamping. You stamp the jar and then you stamp the contents. There are several different stamps of contents in the Sweet Jar Stamp Set and you can improvise a little with those or just with the jar. For this card, I stamped the little oval shapes, which, on my card, are meant to be colored candies, but on my friend’s birthday card they were chocolate chip cookies! I had read a tip to stamp them in Basic Beige ink and then color over those inked images with markers if you want different colors. I did that and colored over the shapes with various colors of Stampin’ Blends, mostly going by what the coordinating colors were with the Celebratory Sips Designer Paper. I think they turned out fine. Next time I will try “stamping off” the ink once to get a lighter layer and see if that works a little better as far as coloring on top so that maybe the colors are a little more vibrant. But they are fine as is, really.

The Sweet Jar Builder Punch punches out the jar and the lid at the same time. Save those scrap lids. Even if they are the Basic White, you can color them with a marker to make them whatever color you want or punch a scrap of colored cardstock. For this card, I punched a lid out of the Gold Foil Sheets. I only needed the tiniest edge of a scrap of the gold foil. Put a tiny bit of glue on the top of the jar and adhere the lid. Or maybe you want to set the lid on the side of the jar as if the jar is open to reach inside.

The greeting is stamped on a small Strawberry Slush Stylish Shapes diecut circle in Memento Ink. It is in the stamp set as well as the word “Sweetness” which is stamped in Strawberry Slush ink, cut out in the little strip and adhered to the circle. The circle is then popped up on a small piece of a Foam Adhesive Sheet under which I stuck a small piece of Gold Striped 3/8″ Mesh Ribbon. I love this pretty ribbon and it certainly goes with the gold jar lid. The jar is also popped up on a scrap piece of the Foam Adhesive. These are small sheets and then you just cut the size and shape that you want. You could also use Stampin’ Dimensionals, which I always use, but this day I thought to use the Foam Sheet scrap I had which gives a little stronger backing to the piece and there’s only one piece to peel off instead of all those single covers that get everywhere! For a little embellishment, I used the Strawberry Slush & Pretty In Pink Gems. These are so pretty that I bought a second package, especially since it is on sale 15% off in the 2025-2027 In Color Sale! This sale runs through August 31 and that date is getting pretty close now! Don’t miss out!

You can save 10% by purchasing the Sweet Jar Builder Punch and Sweet Jar Stamp Set in the Bundle. Also remember, the Stampin’ Write Markers are being discontinued but are available while supplies last in the Last Chance category. The new 2025-2027 In Color Stampin’ Write Markers are on sale because they are in the In Color Sale. The other markers packages are still regular price.

Be sure to keep an eye on the Online Exclusives because there are a lot of great products in that category as well as the Last Chance category and possibly find some bargains.

SHOP STAMPIN’ UP! ONLINE HERE!

Celebratory Sips Rosy Drinks Card

Celebratory Sips Rosy Drinks Card

This is one of those cards, this Celebratory Sips Rosy Drinks Card, that as relatively simple as it is, it was very pleasing to see the end result. I think the designer series paper and the greeting make the card! Not only is the designer paper fun to use, but all the elements just came together.

The Celebratory Sips Designer Series Paper may surprise you if you don’t look at it carefully online. It is in the Online Exclusives category PLUS is on sale during August because some of the coordinating colors are the new 2025-2027 In Colors. Get it for 15% off until August 31! What is surprising is that it’s not just pretty drinks! The papers also contain flowers, whimsical designs, citrus fruit images and watercoloring. And no need to assume that the “drinks” are alcoholic! They can be anything! Just refreshing summer drinks perhaps!

The card base is Strawberry Slush cardstock. It is also in the In Color Sale going on now! The designer paper, Celebratory Sips, would normally be cut at 4″ x 5 1/4″ but since I wanted to fold over one side of the DSP to show “the other side”, I cut it an inch wider, so 5″ x 5 1/4″, scored at 1″ on the left side, and folded it over. I glued it down, then wrapped around some ribbon. This is the Strawberry Slush 3/8″ Faux Linen Ribbon and it is a very lovely type of ribbon! And on sale! The bow is tied separately and stuck on with Mini Glue Dots or you can use a bit of Stampin’ Seal Adhesive right on the ribbon.

The greeting is in the Saying Something Ephemera Pack in the Annual Catalog. As I write this, it says “Low Inventory” so if you want it, I would order it SOON! It really is a fantastic product, especially when you want a quick greeting to finish off the card or you don’t have quite the right one in your stamp sets. There are all sorts of greetings, styles, colors, and shapes so you are almost sure to find one you can use. This one I found in the package I thought was PERFECT for this card, with the word “rosy” in it, just in case any of the drinks perhaps had some Rose wine in them! Or even just a reference to enjoying any of these drinks with their rosy color!

I also diecut a Stylish Shapes circle on which to pop up the greeting to help it stand out. For a little embellishment, I added three of the Strawberry Slush & Pretty In Pink Gems on the Strawberry Slush diecut circle. I love those particular gems so I recommend them!

You could make cards like this design with other designer series paper by just folding over one edge of the designer paper to show the other side, or cut a strip from another paper for a contrast to the main paper. We do have great designer series paper!

Here is another card I made with the Celebratory Sips Designer Series Paper but I cut out the larger drink images and used one of the other papers for the background.

SHOP STAMPIN’ UP! HERE!

Celebratory Sips Birthday Drinks Card

Celebratory Sips Birthday Drinks

Maybe you have seen this paper and Suite Collection around on the internet from the May Online Exclusives at Stampin’ Up! I didn’t order it right away, but later on I couldn’t resist. However, this is the first time I have really gotten it out to make a card and I’m happy with the way this Celebratory Sips Birthday Drinks Card turned out! It was fun to make. As I am writing this, the Celebratory Sips Suite Collection is not available because the two embossing folders in the suite are not available. But you can order everything else, just separately.

You might think that all the papers have to do with fancy drinks, but that’s not the case! The Celebratory Sips Designer Series Paper also has flowers, citrus images, watercolor designs, plus summer-inspired drinks. As hot as the weather is across the country you might like to cool off by designing some cards or scrapbook pages with these summer drinks! I’m really happy with the variety of designs on these papers, plus some whimsical designs on “the other side” of the papers.

Here are the Celebratory Sips papers up close:

Celebratory Sips DSP Other Side

Celebratory Sips DSP Other Side

The card starts with Berry Burst cardstock for the card base. There are so many colors you can choose from that coordinate with these papers! I hardly ever use Berry Burst but I liked it with the background paper I used. As you can see, that paper is one of the generic designs on “the other side”. I fussy-cut three drinks from one of the designer paper sheets. If you get the Cheers & Sips Bundle you can stamp and diecut some drink images and maybe some from the designer paper, but I only have the paper. To make the drinks stand out a little better against the rather dark background, I die cut a Basic White circle from the Spotlight On Nature Dies. How often do I use these particular dies? A whole bunch! They are a good set to have in your collection!

Then it was just a matter of placing the drinks. I popped up the pink drink with the cherry and umbrella on the left, but the lemonade drink, shall we say, is adhered flat to the card. The green drink in the center ( I don’t think it is a Margarita!) is popped up right in between on Stampin’ Dimensionals just on the right side because the left side is flat on the pink drink.

The greeting is in the Charming Day Stamp Set. It just happened to be nearby and I thought the “Happy Birthday” font was perfect to use on this card. I stamped it with Berry Burst ink and then cut around the shape instead of taking up too much space on the card. I saw a tip about drawing around the stamp itself lightly with pencil, stamping within that line, and then you can cut out the greeting following the line. If it is too difficult to get your stamp placed right, just eyeball it. There is no right or wrong way to cut around the words. The greeting is popped up on Stampin’ Dimensionals.

Since I wanted it to be a fun birthday card, I aded several Shiny Sequins that I had in my stash. You can use whatever gems or sequins you have to add a little sparkle!

Remember, you will find the Celebratory Sips Suite products in the Online Exclusives category or just search for the name.

SHOP STAMPIN’ UP! ONLINE HERE!