Tag Archives: Bee Builder Punch

Bee Mine Gift Bag

Bee Mine Gift Bag

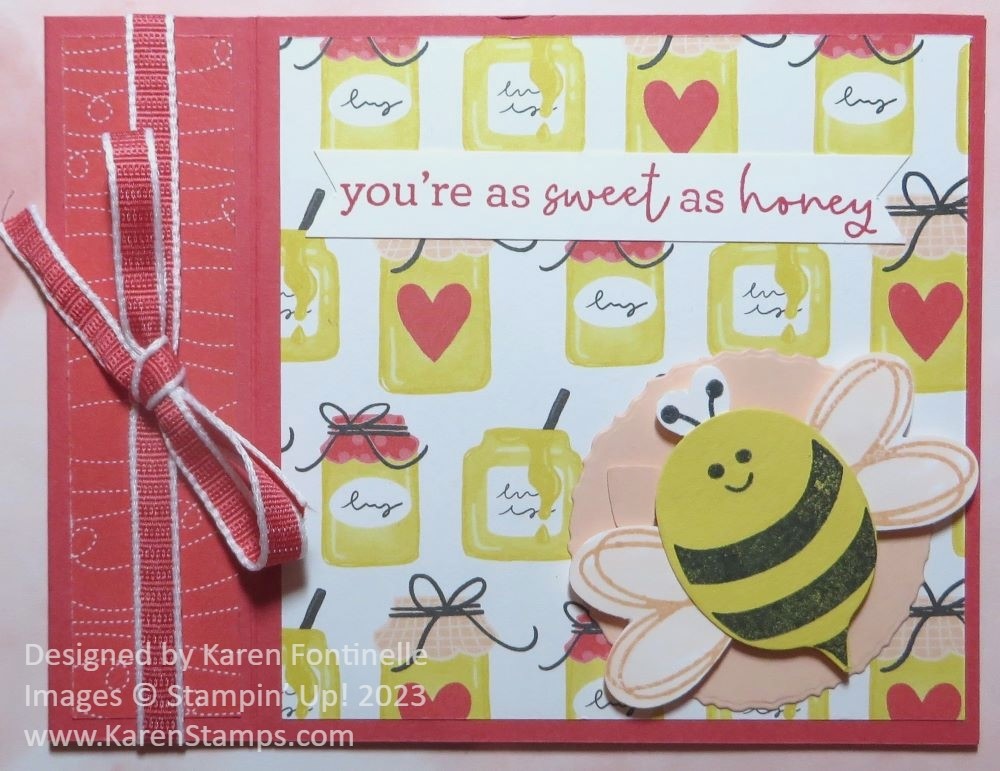
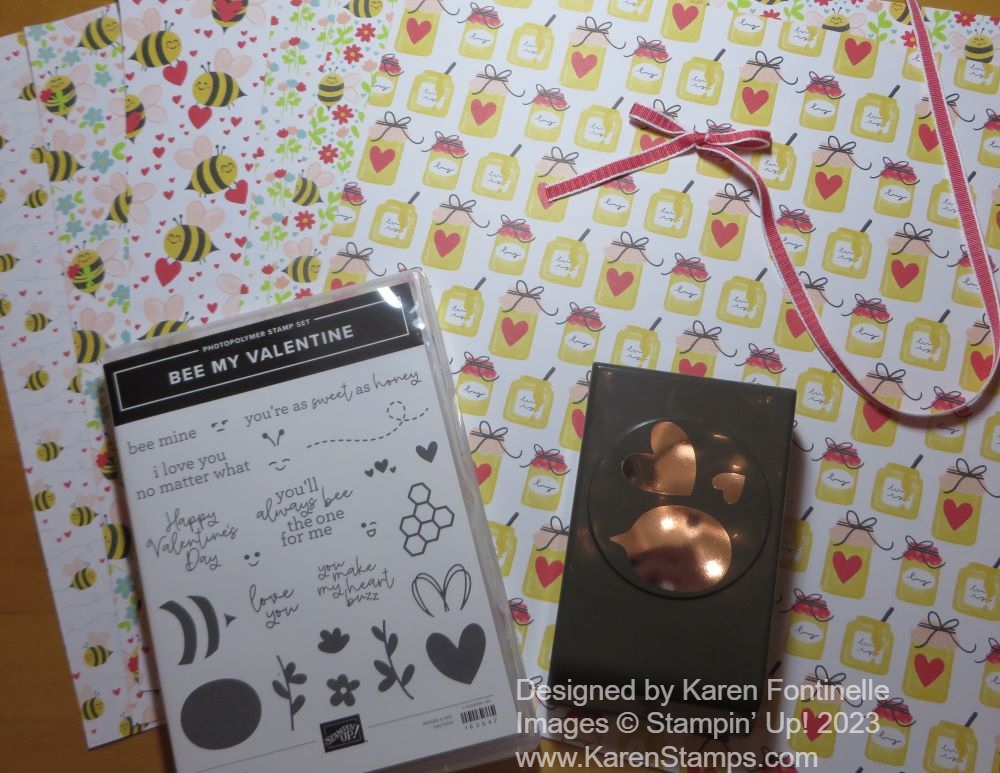
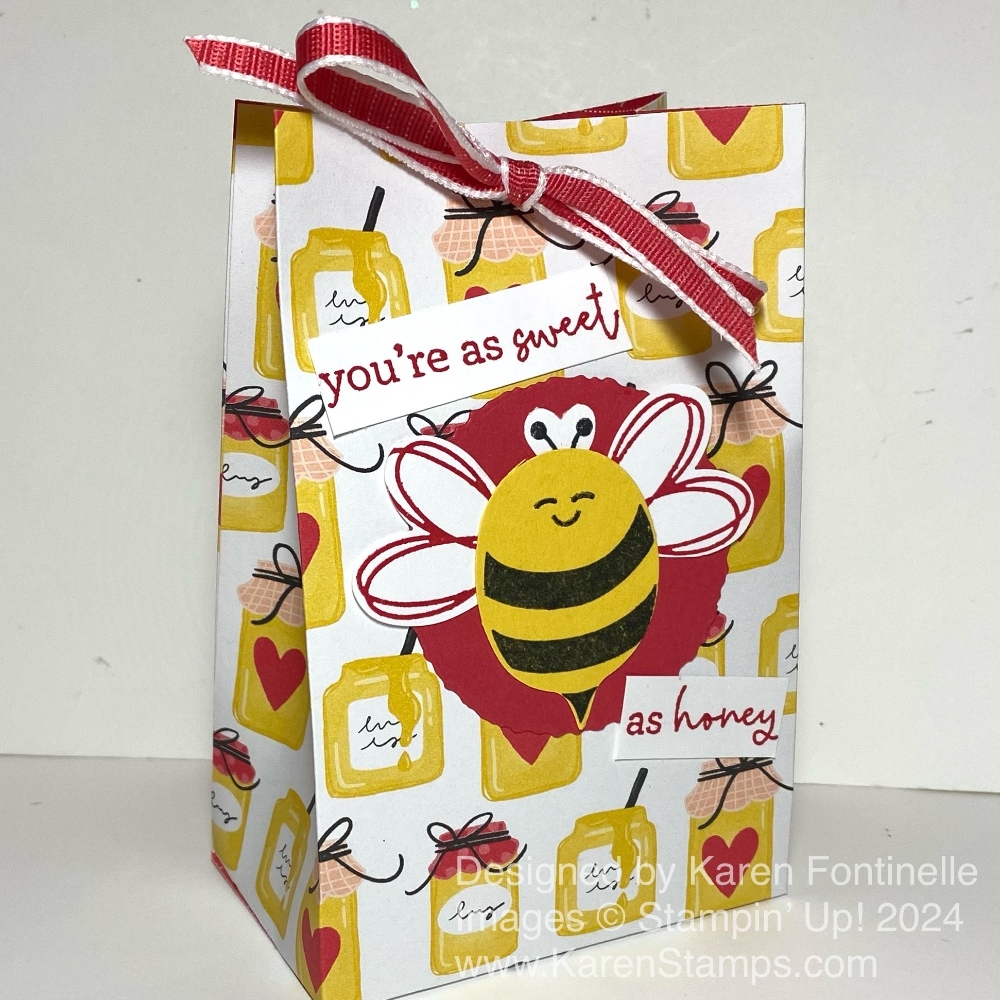
Another pretty thing that is retiring from Stampin’ Up! on Tuesday, April 30 is this cute Bee Mine Designer Series Paper. You only have today and tomorrow to pick up anything that is retiring that will likely be gone for good! Before time is up, I thought I would make one more thing with the honey jar pattern in the Bee Mine paper. This paper doesn’t have to be for Valentine’s Day. You could make this Bee Mine Gift Bag for any time of year for someone! It’s easy to make and would be nice for a “sweet” gift, maybe a special jar of honey and some cookies or tea!

You can vary the height of this bag if you want it taller or shorter. My gift bag starts with a piece of the Bee Mine Designer Paper cut at 6″ x 11″. You want to think about the direction of the pattern, if you use a paper like this one with a pattern. You wouldn’t want the honey jars to be upside down! Score at 2″ across the bottom of the paper, which is where the bottom flaps of the bag will be. Then score at 2″, 5 1/4″. 7 1/4″ and 10 1/2″. Cut up on bottom flap score lines up to that 2″ score line. Cut off the little corner piece that is 1/2″ x 2″. Crease and fold all the score lines and see how the bag is going to go together.

Fold the 1/2″ piece on one side to the inside and apply adhesive. Fold the other side over to adhere both sides to form the bag. Then fold in the bottom flaps and adhere. Stick a Bone Folder or ruler or something down inside the bag to press the bottom flaps together so the adhesive will hold.

You can leave the bag open at the top or pinch it closed, as I did. Then use a hole punch to punch holes for ribbon if you want to tie it closed. You could also use some kind of clip to just clip the top of the bag shut after you put the gift or goodies inside. I used the pretty Sweet Sorbet 1/4″ Bordered Ribbon. I hate to see that color and that ribbon retire!

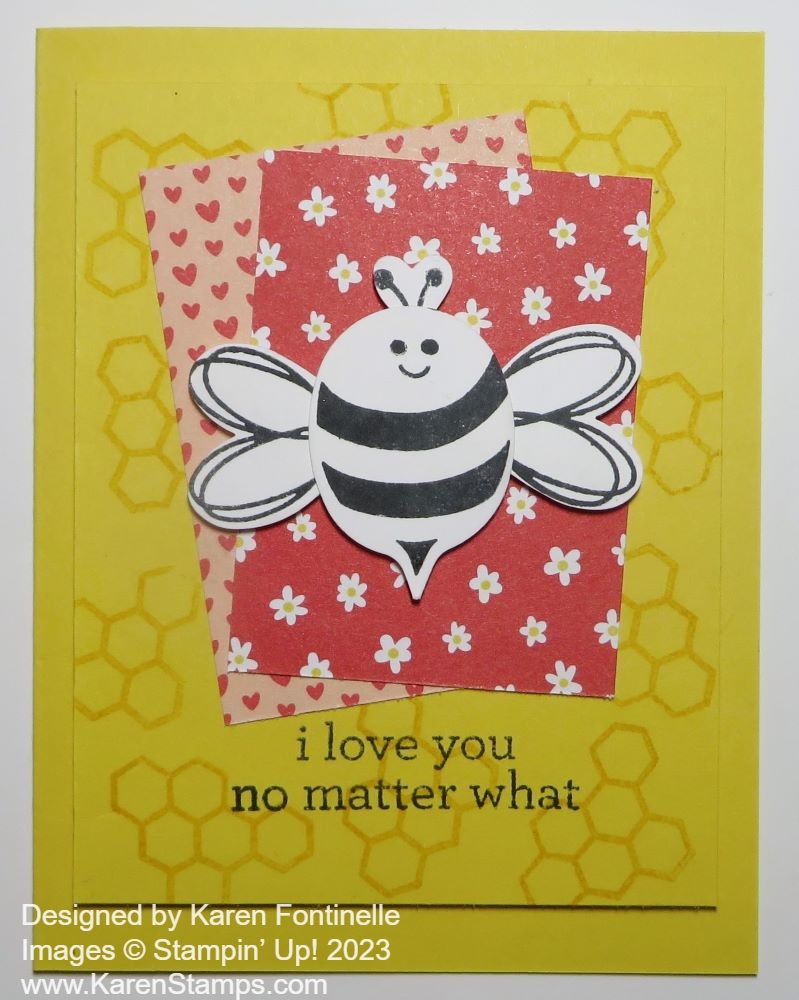
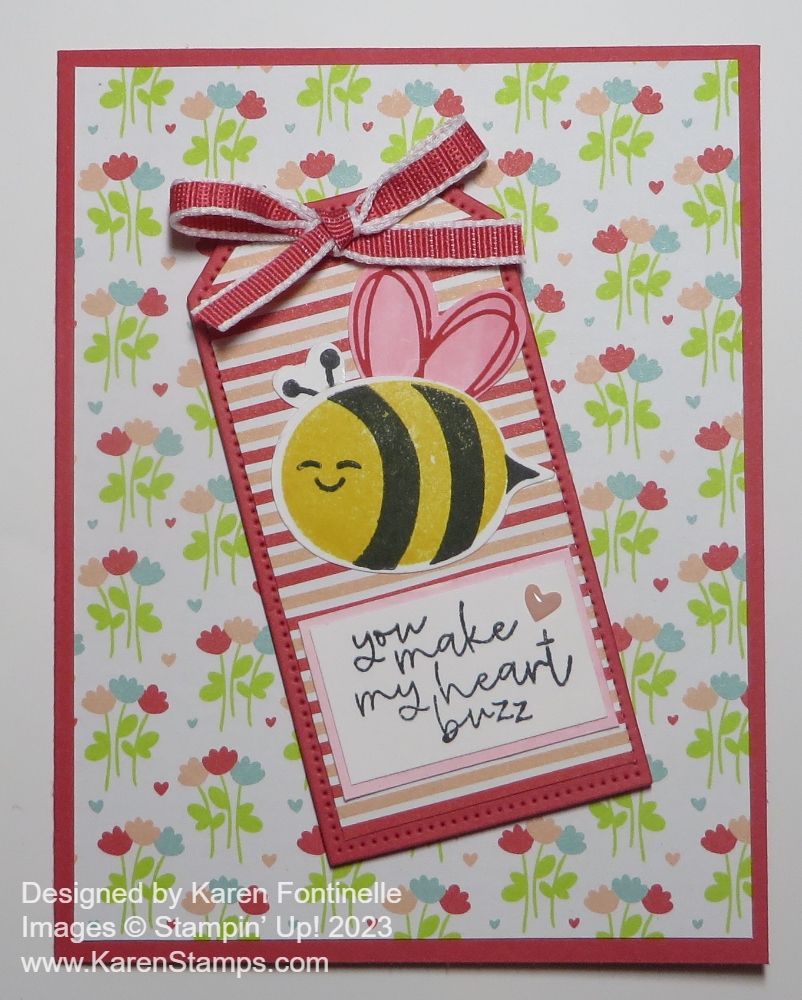
To decorate the bag a bit, I stamped and punched out parts of the bee with the Bee Builder Punch. To help the bee stand out on the bag, I diecut a Deckled Circle in Sweet Sorbet. The greeting is in the Bee My Valentine Stamp Set. This stamp set and the Bee Punch are NOT retiring, but will not be available as a Bundle in the new catalog. So if you want to save 10% on the stamp set and punch, you need to purchase them before they retire.

Since the greeting was pretty long, I cut it apart and put one part of the greeting above the bee and the remainder at the bottom. I think it turned out cuter like that than one long strip across the bottom of the bag.

If you want to see another gift bag project, click HERE.

This is an easy and cute little project! Make the gift bag and hang on to it until you need it for a gift or treat! You will be happy to have something handy!

SHOP STAMPIN’ UP! HERE!

Bee Mine Sweet As Honey Card

Bee Mine Sweet As Honey Card

If you stop and think about it, even if some of us still have our Christmas trees up, it is about a month until we probably need to mail out the valentines we make! This Bee Mine Sweet As Honey Card doesn’t have to be a Valentine, but it could be. Or should I say, “It could BEE”?! Yes, the Bee Mine Suite is in the new Spring Mini Catalog on pages 8-10 and will be fun to use for making valentines and any other cards.

This card is called a “Book Fold” card. It is so easy to make. The card base is cut at 11″ x 4 1/4″, then scored at 4 1/4″ and 5 1/2″. The 5 1/2″ score line is actually the center fold of the card. The 4 1/4″ score line makes the “binding” on the side of the card. Glue that area to the card base so that only the 4 1/4″ portion of the card opens. You can put the fold at the top or to the side. Decorate with pieces of designer paper or stamping, whatever you like.

This card has a card base of Sweet Sorbet. I used the Bee Mine Designer Series Paper to decorate the card. I chose the paper with the little jars of honey for the front of the card. This piece is 4″ x 4″. The opposite side of the paper is the Sweet Sorbet pattern with the dotted lines. I used that small piece, 1″ x 4″ on the book fold area. Before adhering that area to the inside of the card, I adhered ends of the Sweet Sorbet 1/4″ Bordered Ribbon to the inside of the card and then adhered that side of the card to itself for the book fold. Then I tied on a separate piece of ribbon to make a bow and adhered with a Mini Glue Dot.

If you like punches, using the Bee Builder Punch will be fun to make a bee. For my bee, I stamped the black stripes on a piece of Daffodil Delight cardstock, the punched it out for the bee body. There are stamps for different bee faces and even the antennae, which can abe stamped on a little heart made with the punch. I thought they were just little hearts until I realized the antennae would fit! The wings are stamped with Petal Pink ink. Actually, I first stamped the wings on a piece of Basic White, but I wanted them to be pink so I colored in with a Petal Pink Stampin’ Blend marker. They are adhered behind the bee body and the antennae on top of his head. You can make your bee “standing up” like this bee or flying from the side. For a little background to help the bee stand out, I diecut a Deckled Circle from Petal Pink cardstock. The whole bee is popped up on Stampin’ Dimensionals.

The greeting is in the Bee My Valentine Stamp Set. I stamped it in Sweet Sorbet ink on a scrap strip of Basic White. I flagged the ends and adhered it to the card. You could add a layer of Sweet Sorbet to make it stand out a little more but I didn’t want to cover up the jars of honey any more than necessary.

For the inside of the card, you can add a layer of Basic White 4″ x 4″ and then stamp a little something or cut out a little bee from the designer paper.

If you would like to see another example of a Book Fold Card, just click HERE.

SHOP STAMPIN’ UP! HERE!

Two Bee Mine Cards After OnStage 2023

Bee Mine I Love You Card

On Saturday Stampin’ Up! held a virtual event called Onstage 2023 for Demonstrators, somewhat like a mini-convention, to introduce upcoming Spring Mini Catalog products as well as the big promotion called Sale-A-Bration. One of the fun Suites they showed, stamped with, and allowed us to purchase ahead of the event is the Bee Mine Suite, coming in the January-April 2024 Mini Catalog. I hadn’t had a chance to use it beforehand, but after watching the event I opened the package and got stamping!

Here are some of the Bee Mine Designer Series Papers, the Sweet Sorbet 1/4″ Bordered Ribbon, the Bee My Valentine Stamp Set, and the Bee Builder Punch. There are also adorable Adhesive-Backed Hearts & Flowers (you’ll probably want more than one package!) and Square Pillow Boxes that I forgot to put in the photo. If you like bees, and they are popular these days, you will want this Suite! And if you are not “into” bees, you will find these papers and stamp set so cute you will love them anyway!

Bee Mine Suite

The card I posted was one that Shannon made during the online event yesterday. The card base is Daffodil Delight as is the first layer which is stamped randomly with the honeycomb stamp in Daffodil Delight ink. This layer is cut at 3 3/4″ x 4 3/4″. Be sure to stamp the greeting at the bottom before adhering that top layer. It is stamped in Memento ink and is in the Bee My Valentine Stamp Set.

The two layers of designer paper, the little hearts and the little white flowers, are cut at 2 1/4″ x 3 1/4″ and 2 1/4″ x 3″. They are both placed on angles and staggered, not lined up straight.

The bee is made by stamping on Basic White with Memento Ink and then punched out with the Bee Builder Punch. If you look at the bottom of the punch and line up your images somewhat in the same direction as they are arranged in the punch (and allow space in between images!) you will find punching them out a little easier. Or you can punch a template and then use that to place the stamps when you are stamping the images. You could color the bee or use yellow cardstock, but I was copying the card as Shannon made it. Then just put a drop of glue to adhere the wings to the body and the antennae to the top of his head. You can pop up the bee with Stampin’ Dimensionals and even place them on the back where the wings and antennae meet on the bee’s body to hold them in place perfectly.

Once you have everything adhered, use Stampin’ Dimensionals to pop up the Daffodil Delight finished layer on the card base. On the inside of the card, you could use a strip of designer paper or cut out a small bee from the paper to decorate the inside of the card.

Then I had to make another card right away because I just loved the designer paper! It is all so cute!

Bee Mine You Make My Heart Buzz Card

I love that Sweet Sorbet is one of the coordinating colors with the designer series paper because I haven’t used it in a while and I love that color! It is one of the In Colors from last year but on its second year right now in the Annual Catalog. I used Sweet Sorbet for the card base. Next, I chose this flowered pattern in the Bee Mine Designer Series Paper for the background.

For the focal part of the card, I decided to diecut the largest tag in the Tailor Made Tags Dies out of Sweet Sorbet. Then I cut another tag, the same size, out of the same paper but used the striped side. This striped pattern I trimmed down with my Paper Trimmer just inside the stitched perforations to make it a layer on the Sweet Sorbet.

The bee body is stamped with Daffodil Delight ink on Basic White (or you could just use Daffodil Delight cardstock) and then the stripes and antennae are stamped in Memento ink. The face is another tiny stamp. There are several faces to choose from!

I stamped the wing in Sweet Sorbet for something fun, but first I watercolored a piece of Basic White with Sweet Sorbet ink and one of the Water Painters. Then it was punched out with the Bee Builder Punch and adhered to the top of the bee body along with the antennae. The bee was adhered flat to the tag along with the stamped greeting. I felt like the greeting needed a little layer, so I watercolored another little piece of Basic White with the Sweet Sorbet ink and trimmed a tiny layer behind the greeting. The whole tag is popped up on Stampin’ Dimensionals.

To embellish the tag, I tied a bow with the Sweet Sorbet 1/4″ Bordered Ribbon and adhered it on the top of the tag over the hole (I didn’t thread it through) with Mini Glue Dots. I also used just one tiny Petal Pink heart in the Hearts & Flowers embellishments to the greeting.

There you have two card ideas you can make with the Bee Mine Suite when it becomes available in January! If you want it sooner, sign up to be a Demonstrator and be able to preorder select products before January! And remember, Sale-A-Bration will be coming up in January at the same time. When you spend $50 you get to choose one FREE Sale-A-Bration product! With a $100 purchase, you can choose a Level 2 item or two Level 1 products. Your choice! It’s a VERY popular promotion Stampin’ Up! has been doing almost forever! Lots to look forward to in January!