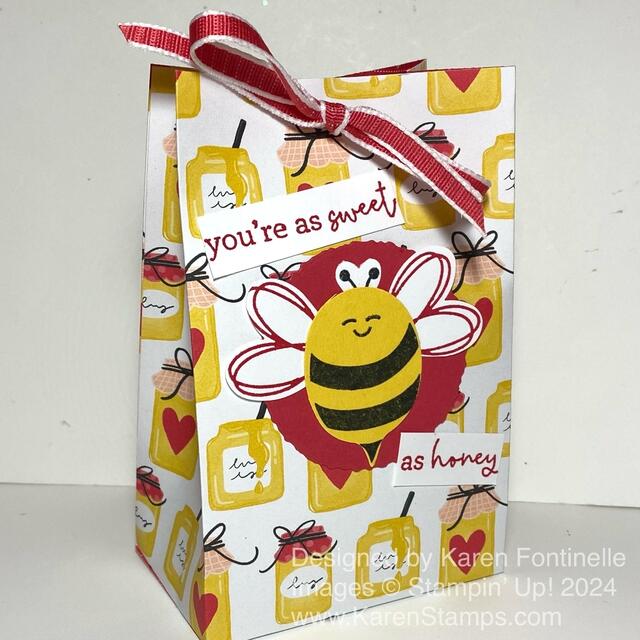
Another pretty thing that is retiring from Stampin’ Up! on Tuesday, April 30 is this cute Bee Mine Designer Series Paper. You only have today and tomorrow to pick up anything that is retiring that will likely be gone for good! Before time is up, I thought I would make one more thing with the honey jar pattern in the Bee Mine paper. This paper doesn’t have to be for Valentine’s Day. You could make this Bee Mine Gift Bag for any time of year for someone! It’s easy to make and would be nice for a “sweet” gift, maybe a special jar of honey and some cookies or tea!
You can vary the height of this bag if you want it taller or shorter. My gift bag starts with a piece of the Bee Mine Designer Paper cut at 6″ x 11″. You want to think about the direction of the pattern, if you use a paper like this one with a pattern. You wouldn’t want the honey jars to be upside down! Score at 2″ across the bottom of the paper, which is where the bottom flaps of the bag will be. Then score at 2″, 5 1/4″. 7 1/4″ and 10 1/2″. Cut up on bottom flap score lines up to that 2″ score line. Cut off the little corner piece that is 1/2″ x 2″. Crease and fold all the score lines and see how the bag is going to go together.
Fold the 1/2″ piece on one side to the inside and apply adhesive. Fold the other side over to adhere both sides to form the bag. Then fold in the bottom flaps and adhere. Stick a Bone Folder or ruler or something down inside the bag to press the bottom flaps together so the adhesive will hold.
You can leave the bag open at the top or pinch it closed, as I did. Then use a hole punch to punch holes for ribbon if you want to tie it closed. You could also use some kind of clip to just clip the top of the bag shut after you put the gift or goodies inside. I used the pretty Sweet Sorbet 1/4″ Bordered Ribbon. I hate to see that color and that ribbon retire!
To decorate the bag a bit, I stamped and punched out parts of the bee with the Bee Builder Punch. To help the bee stand out on the bag, I diecut a Deckled Circle in Sweet Sorbet. The greeting is in the Bee My Valentine Stamp Set. This stamp set and the Bee Punch are NOT retiring, but will not be available as a Bundle in the new catalog. So if you want to save 10% on the stamp set and punch, you need to purchase them before they retire.
Since the greeting was pretty long, I cut it apart and put one part of the greeting above the bee and the remainder at the bottom. I think it turned out cuter like that than one long strip across the bottom of the bag.
If you want to see another gift bag project, click HERE.
This is an easy and cute little project! Make the gift bag and hang on to it until you need it for a gift or treat! You will be happy to have something handy!
Last Two Days for the Annual Catalog and the Spring Mini!

