Last Minute Christmas Ideas for Crafters

Festival of Trees Christmas TagsIt’s down to the wire for Christmas ideas for crafters and stampers and anybody, but there are always ideas for something simple and easy, even if you have just a few minutes!  I still need to make a few gift card holders today!! Here are some easy ideas you maybe can use at the last minute from Christmases past!

Don’t run to the drugstore for more tags – just do a little stamping and glueing and you’ve got tags like the ones in the photo above!

Christmas Candy Bar Wrapper Ideas

Grab a candy bar and wrap some paper around it and decorate as simple or complicated as you want!

Snowman Christmas Tags

Punch a few circles and make a snowman!

All Is Calm Kraft Gift Box For Christmas

Make a box or use a box you have and adhere designer paper to the sides and top and embellish with ribbon and a tag!

Christmas Fudge Candy Wrapper Poem

This was always a favorite!  Print out this poem and stick it on a chocolate bar, preferably one of those big ones!

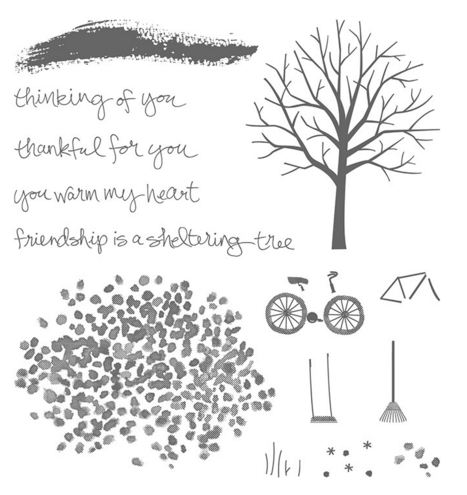
Lovely As a Tree Christmas Card

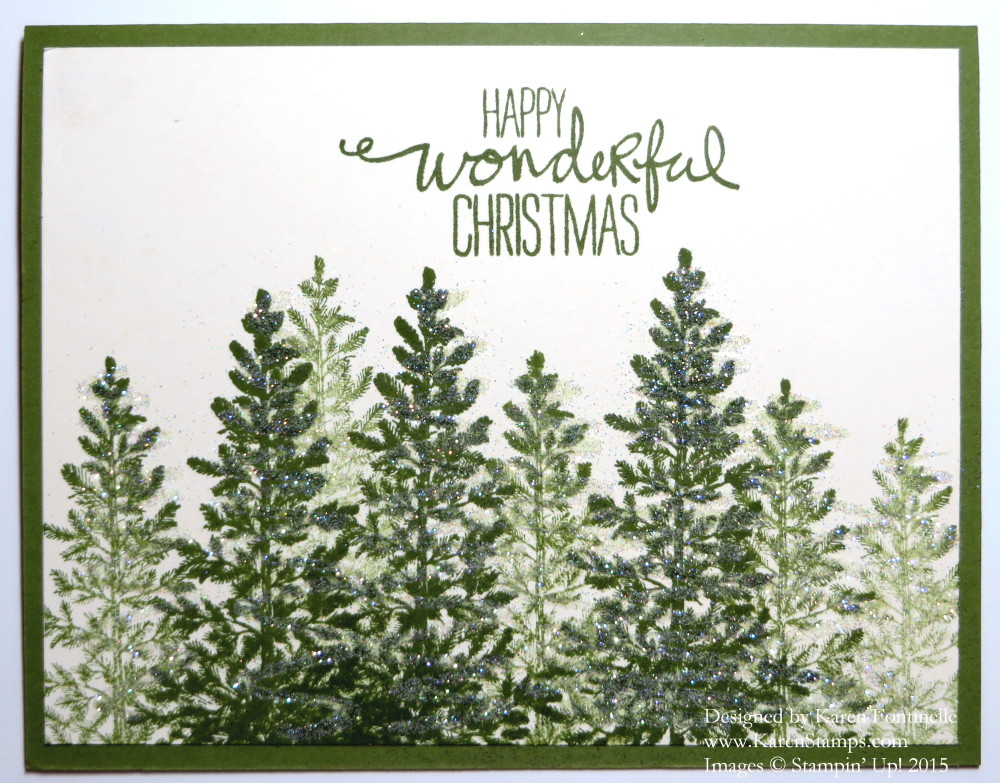
Don’t forget Lovely As a Tree makes one of the best and easiest Christmas cards ever!

Merry Christmas!

Need a Last Minute Christmas Gift?? Paper Pumpkin to the Rescue!

Paper Pumpkin Box

I love getting mail and I especially love getting my Paper Pumpkin Kit by Stampin’ Up! in the mail every month, so if you need a quick Christmas gift for someone, just give them a subscription to Paper Pumpkin! It’s a papercrafting kit that comes in the mail! Every month is a new surprise and comes with all the materials you need except perhaps adhesive and scissors. You receive a set of stamps, an ink spot and all the materials for the project. Sometimes there are even leftovers you can use another time.  Follow the directions or do your own thing! Paper Pumpkin is good for anyone and I would even hazard a guess that someone who never crafts would even enjoy it.  It might surprise you! And maybe YOU deserve a subscription for a little crafting time every month after all the time you have put in making everyone else’s Christmas a happy one!

For more information, read about Paper Pumpkin HERE!

To purchase a Prepaid Subscription, check HERE!


Stampin’ Up! Weekly Deals and Year-End Sale!

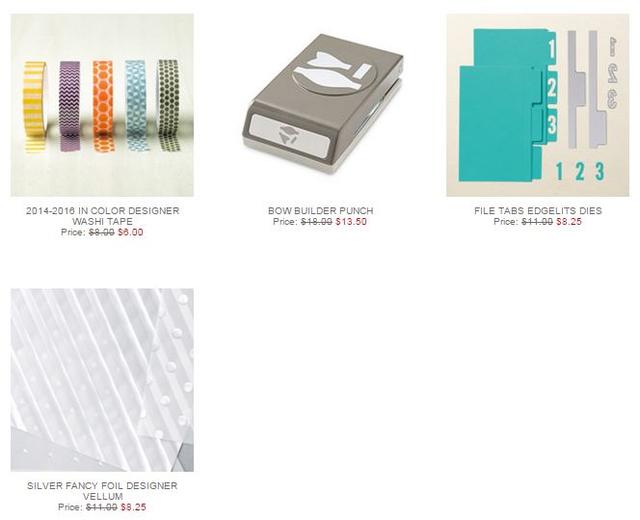
It may almost be Christmas, but Stampin’ Up! still has some Weekly Deals for you! These deals are good today through December 28. The item I would most recommend is the Silver Glimmer Paper!  I love all the Glimmer Papers!

Stampin’ Up! also announced that they added more items to the Year-End Sale. I think the Artisan Embellishment Kit is one of the new items plus some Project Life Kits (love those!). The Artisan Embellisment Kit was very popular last year so you may want to pick that up for future Valentines and other cards. Remember, all of these products are only available while supplies last!

If you need anything, just click on the link below to shop online or contact me and I’ll be glad to help you!  Be sure to watch your mail for those Occasions and Sale-A-Bration Catalogs coming in the mail if you have been a regular customer of mine.

Shop Stampin’ Up! Online Today!

Decorate An Easy Christmas Gift Bag

Easy Christmas Tree Punch Gift Bag

We’re getting down to the wire, and don’t forget, you can decorate an easy Christmas Gift Bag on a moment’s notice! If you need more gift bags or run out of wrapping paper, just grab one of the plain shopping bags with handles that you undoubtedly have somewhere in your house! Even if it has printing on it, you can probably cover it with cardstock and make your own personalized Christmas gift bag quickly and easily.

On this gift bag, I just cut a piece of Old Olive cardstock and added some strips of Gold Glimmer Paper to the top and bottom of that cardstock.  You could add just colored card stock or designer paper instead.  Then I just punched out five trees with the Tree Punch from the Merry Moments Designer Series Paper Stack and added Gold Glimmer stars, punched with the star punch in the Itty Bitty Accents Punch Pack.  I use that star punch SO much! Your gift bag is done! Perhaps add some ribbon to the handle or stamp a greeting on the bag as well.

Easy Christmas Gift Bag Trim

I have had such good luck with these little shopping bags! You can also buy them at the craft store if you want to be sure to have some on hand. But you probably have been getting them at the store and not thinking about how you could recycle them much more creatively!

If you would like some more gift-wrapping ideas, just sign up for my Mailing List and get your free gift, A Dozen Creative Gift Wrapping Ideas. Be sure you watch for the confirmation email and click the link in there to get your free gift!

Check your shopping bags and see if you can decorate  an easy Christmas gift bag for the holidays!

Make an Easy Santa Gift Bag

Easy Santa Gift Bag

I have a quick and simple project for you today. Here’s an idea to make an easy Santa Gift Bag just out of some red paper and a strip of black and a scrap of Silver Glimmer Paper! I used the Gift Bag Punch Board using a full sheet of Real Red 8 1/2″ x 11″ cardstock. If you don’t have the punch board, just score and fold your paper according to the size you want, making flaps at the bottom. Perhaps you have a red craft sack in your stash somewhere! Then wrap a strip of black around for Santa’s belt.  For the buckle just punch a piece of Silver Glimmer Paper with the Decorative Label Punch. To make it look like a real belt buckle, just cut a scrap of Basic Black to fit inside the punched piece the same width as the belt.

Now this is the simplest version!  I’m very short on time as you probably are.  This version is fine!  But if you want to add maybe torn white strips of paper, or Glimmer Paper, for his fur down the center of his jacket or some buttons or a fur collar or whatever, go ahead.  I opted to just stop with this. This would be super cute as a very small little gift bag too! Put a gift inside and some tissue paper and you have a great Santa’s Gift Bag!

The New Star Wars Movie Is Out! The Force Awakens!

Star Wars Golden Canyon

Are you going to see the new Star Wars movie, The Force Awakens, soon?  I may go with my family over Christmas on the one day that everyone is here and not flying in or out.  I’m not that excited about it and may prefer some peace and quiet at home, but then again, I should probably go so I know what everyone is talking about! So in honor of the new Star Wars movie that I guess began showing last night, I thought I would post some of the Star Wars themed cards I have made.
The photo above is from Death Valley, where we visited last spring (awesome place, by the way, as long as you go when it is not too hot!!) and thought some areas of the park looked like Star Wars could have been shot there.  When we got home, we found out they HAD filmed some scenes there so I took this photo of my son, perhaps in the area where they did film (not the new movie, the original!) and through the magic of the now defunct My Digital Studio gave him a light sabre!  You can read more in this post HERE.

Star Wars Day Yoda Card

Here’s a Yoda card I made last year for Star Wars Day! It was an idea I got from a Demonstrator in the UK. You can read about this card in my blog post HERE.

Star Wars R2D2 Punch Art Birthday Card

Here is my most recent Star Wars card, a punch art R2D2 that I made for my son-in-law.  Of course I found this idea on the internet and then figured it out to make this card. You can read about it in THIS POST.

Star Wars Birthday Card Yoda and Darth Vader

This Star Wars card with Darth Vader and Yoda is probably my favorite since it is the first one I made and because I found something to help with Yoda phrasing! If you want to have your wording sound like Yoda, use this website:  http://www.yodaspeak.co.uk/  . This is really fun! Try it several times and see what your results are and then you can pick the best!

Here is a link to this older blog post about my Darth Vader and Yoda card.

So using the website, I would say, “I am going to the new Star Wars movie!” and Yoda would say, “Going to the new star wars movie, I am!  Yeesssssss.” Maybe you will want to make some Star Wars cards yourself, even for Christmas or use them as tag ideas or as gift card holder designs! Whether you choose to speak as yourself or as Yoda, let me know if you are going to the new Star Wars movie and how you liked it!


Home For Christmas Santa and Tree Card

Home For Christmas Santa and Tree Card

Here is another Christmas card using the Home For Christmas Designer Series Paper using the Santa and the Christmas tree on the paper. Two days ago I told you, in this post, how easy and basic this design was to just make a card with a strip of designer paper on the bottom portion of the card layer, stamp a greeting at the top, and maybe add some ribbon or embellishment across the middle. I did the same thing on this card except I cut out (by hand!) some of the designs on the paper.

The card base is Mossy Meadow cardstock with a Very Vanilla cardstock layer. The ribbon is the cute red stripe that comes with green stripe ribbon in the Real Red & Garden Green 1/8″ Striped Ribbon (on sale!!) The greeting is from the Embellished Ornaments Stamp Set.

I LOVE this vintage-look paper! If you have Paper Snips, it makes cutting by hand SO much easier. A regular scissors is just too big. The smaller Paper Snips with their sharp blade really make a difference and you can get into the curves and corners so much easier. You can see in the photo below that I don’t cut right on the line of the picture.  I leave a very slim border around the edge, or at least I try to! This is something I learned through Stampin’ Up! and you don’t have to worry about cutting absolutely exactly! Originally I was only going to cut out the Christmas tree – then I decided to add the cute Santa – and then I thought the little packages would add a great touch!  I popped each one up with some Stampin’ Dimensionals.

Home For Christmas elements

You could also use the poinsettias in the Home For Christmas paper to decorate a card or use as the designer paper.  Just have fun!  So many possibilities! Try the basic layout for this Home For Christmas Santa and Tree Card for a card or perhaps a gift card holder for a lucky recipient!

Stampin’ Up! Weekly Deal Dec 15 2015

Stampin' Up! Weekly Deal Dec 15 2015

Here are the new Stampin’ Up! Weekly Deals for December 15-21.  The Cherry On Top Cotton Paper has such pretty colors!  Can’t resist!  Use the cotton paper, lighter weight but still sturdy, for making flowers or fringe or tassels as a colorful accent on a card or project! The Handpicked Framelits Dies are clearly made to look like they are for gardening for your friends with a green thumb, but don’t think that’s all they can do! They can be for any greeting, not just gardening. One of the cutest ideas I’ve seen is to turn the little signs upside down, then fold the “pick” part over to wrap around some ribbon or the edge of your project.  The Pretty Petals Designer Series Paper Stack has some really pretty patterns in it, especially good for spring coming up! And then there is the Tag a Bag Accessory Pack, an easy way to make a bunch of tags to have on hand.  Get it now and after the holidays get some tags ready for birthdays and other occasions coming up in the new year!

Stampin' Up! Year End Sale 2015

Don’t forget about the Stampin’ Up! Year-End Sale! It’s the Clearance Rack with more things added last week! These items are only available while supplies last so be sure to get your order in! It’s not too late for the Christmas things on that sale, plus plenty of ribbon, twine, washi tape, paper, and embellishments you can use for gift-wrapping, not to mention the Oh What Fun Tag Project Kit.  Really, so much good stuff from the Holiday Catalog!  You gotta get it!

Check out the Year-End Sale and the Stampin’ Up! Weekly Deals HERE!

Home For Christmas Gold Glitter Ribbon Card

Home For Christmas Gold Glitter Ribbon Card

Time is getting short so I thought I would show you a quick and easy card in this Home For Christmas Gold Glitter Ribbon Card. It’s one of the simplest ways to make a card.  Make a card base – in this case – Mossy Meadow Cardstock. Cut a layer of a neutral cardstock – in this case- Very Vanilla. Add a strip of designer paper to the bottom and stamp a greeting in the blank space above. Tie a ribbon or another strip of cardstock across the card at the top of the designer paper.  So easy!

On this card, as I was cutting the strip of designer paper from the Home For Christmas Designer Series Paper in the Holiday Catalog, the other side of the ornament pattern is the red and white stripe!  I had a narrow strip of that left over, so I thought why not put a strip of the stripe at the bottom?! Then I adhered a piece of the Gold Glitter Ribbon (on sale!) across the top of the designer paper (SNAIL on back edges) and tied a little piece of ribbon on for a knot (easier than a bow!). I stamped a greeting from the Embellished Ornaments Stamp Set and it was done!  Since the card base is a dark color, I also cut a layer of Very Vanilla to put inside and stamped the other greeting from the stamp set for the inside of the card.

If you haven’t made some Christmas cards yet, there is still time, especially if you choose an easy design like this Home For Christmas Gold Glitter Ribbon Card.

Order Stampin’ Up! Online HERE!

Embellished Ornament Christmas Card

Embellished Ornament Christmas Card

Sometimes it pays to do a little housecleaning because I found an old idea I had saved for a card similar to this layout for this Embellished Ornament Christmas Card. It’s a little stamping, a little Big Shot die-cutting and pretty paper!

Die cut an ornament with the Delicate Ornament Thinlits Dies and the Big Shot. Make. a card base of Real Red cardstock. Cut a piece of Whisper White cardstock for the center panel about 3″ wide x 5 1/4″ high. Stamp holly leaves at the top of the panel from the Embellished Ornaments stamp set. I colored mine in a bit using a Blender Pen and picking up a little bit of ink from the Old Olive ink pad. I should also mention I used the Blender Pen to pick up ink off the holly berries on the stamp and used a Real Red Stampin’ Write Marker to color in the berries. Then the ornament is placed on the panel with a little Gold Cording Trim to “hang” from the holly leaves and to tie a bow around the ornament top. The greeting is stamped at the bottom and is from the same stamp set.  There is also a greeting to use to stamp inside the card.

I adhered two narrow strips (about 1″) of the green stripe pattern from the Season of Cheer Designer Series Paper to the Whisper White panel and then adhered all this to the card base. As you can see, even if you do not have “Christmas” paper, you can use something else on a Christmas card and no one will know it is not “Christmas”.

Be sure to check out the Stampin’ Up! Year End Sale!  Lots of good discounts on there and products you can use right now, like boxes and ribbon for gift-wrapping! Only available while supplies last so order early for best selection, as they say! For all the details, read my post from yesterday.

This is a great weekend to make some simple Christmas cards to send out to your friends and family. Try something like this Embellished Ornament Christmas Card – use a stamp if you don’t have the particular framelit.

Shop Stampin’ Up! Here

Stampin’ Up! Year End Sale 2015

Stampin' Up! Year End Sale 2015

It’s the end of the year, so we’re cleaning our inventory and making room for new products–and we’re offering you some great savings while we do it! We’re adding more products to our clearance rack and discounting select items from the holiday catalog. (Products on the Holiday Retiring List are now discounted up to 40 percent.) During the Year-End Sale, you can find ALL discounted products in one location in the online store: under the Year-End Sale category. So don’t fret if you don’t see the category “Clearance Rack” on the online store right now–it has been integrated into the Year-End Sale.

Details:

  • Promotion Dates: December 10, 2015-January 4, 2016.
  • No minimum purchase required.
  • No refunds or exchanges on Year-End Sale items.
  • Items offered during the Year-End Sale are while supplies last.
  • You can add non-Year-End-Sale items to your order.
  • Year-End Sale orders are eligible for Stampin’ Rewards with qualifying orders
  • Following the Year-End Sale, some remaining items may stay in the Clearance Rack. Other items may be removed from the Clearance Rack to be added at another undetermined time.
  • Orders must be placed online or as demonstrator orders.
  • Deadlines:
    Online orders: January 4, 2016; 11:50 PM (MT)

Don’t forget the Weekly Deals!

Retiring Holiday Catalog products discounted up to 40%!

Go shop right now!  Sale products only available While Supplies Last! (and you know sometimes that is not long!)

Shop the Stampin’ Up! Year-End Sale HERE!

Tree Punch Christmas Tree Tag

Tree Punch Christmas Tree Tag

Here is my Tree Punch Christmas Tree Tag, a sample tag I had made for our tag-making day last weekend.  The designer paper I used is retired, from last year I think, a paper stack called Festival of Prints. This was a sample to see if I liked the tree so it didn’t matter what I used. Of course you can use any paper or stamped card stock. I also had cut out circles of Gold Glimmer Paper to use as layers instead of the designer paper and that looked really pretty too – just didn’t take any photos. The tag base is Cherry Cobbler (because I was out of Real Red, if you can believe it!) The stars are stamped in Crushed Curry ink from the To You and Yours Too Stamp Set. This is the stamp set that coordinates with the To You & Yours Shaker Card Kit.

To make the tree, just punch two trees with the Tree Punch and either cut off the tree trunks and add one you cut yourself from a sliver of a scrap or leave the bottom one on.  Fold the trees in half lengthwise, open, then using the Stampin’ Up! cute Handheld Stapler, staple in the center longways on the fold.  This will hold the trees together but allow them to be separated and fluffed up to look 3D.  I guess no reason you couldn’t staple three trees together for more oomph!  Punch a hole in the top and string ribbon through for a tag or use it for an ornament!

Stampin' Up! Paper Pumpkin Monthly Papercrafting Kit

It’s time to remind you about Paper Pumpkin!  The 10th of the month is always the date to be signed up by to receive that month’s kit. Sign up today or tomorrow and get the December kit in the mail around mid-month. Order extras and give as a gift or give it to yourself as a gift for all you are doing for everyone else right now in this busy season! Paper Pumpkin is a monthly subscription from Stampin’ Up! with a surprise inside that comes in the mail.  Each month is a new papercrafting/stamping kit complete with all the supplies for the project except for basic adhesive and scissors (if even needed). You receive a set of photopolymer stamps, a small ink spot, and all the supplies for the project.  It might be cards or gift boxes or a mini album or a decor piece or party favor or candy holder — it’s always a surprise! Paper Pumpkin has gotten tons better since it started so if you tried it way back when, you really need to try again and see how it has improved.  Lots more stuff!!  Make the project the way it is designed or do it your own way. No obligation, stop when you need to or just pause your subscription for a month or two.

Join Paper Pumpkin Today!  Click HERE for information or to sign up!

Decorate a Rudolph the Red-Nosed Reindeer Gift Bag

Rudolph the Red-Nosed Reindeer Gift Bag

As I was looking through Instagram, I found cute little reindeer boxes made with the Baker’s Box Framelits by @thepapercaper, a Stampin’ Up! Demonstrator in Australia named Jessica. It reminded me that I had a small plain kraft gift bag laying on my desk waiting to be decorated, so I thought this might be the perfect inspiration!  So easy, so simple! Jessica’s had the box lid open and little ears and candy canes, but of course my bag was different and I didn’t have any candy canes yet.

I made a great big red nose for Rudolph with the Red Glimmer Paper, punched with the 2 1/2″ Circle Punch. The eyes are punched with the 1 3/4″ Circle Punch and the 1″ Circle Punch.  For the antlers, I came up with punching the tree branch with the Tree Builder Punch (the one that coordinates with the Ronald McDonald stamp set, Sprinkles of Life).  I punched four branches or trees and trimmed the ends of two of them so I could glue one behind the other to look like antlers.  Since they are rather delicate being so thin, I didn’t have them pop up from the top of the bag or they would probably get bent up pretty easily, so I just glued them to the top corners of the gift bag. And for a little extra color, and to resemble the candy canes, I tied on a bow with the Real Red 1/8″ Striped Ribbon.

If you are looking for a cute and simple way to decorate a gift bag or a gift box or even the front of a card, try making this cute punch art Rudolph the Red-Nosed Reindeer.

If you enjoyed this project, please join me and sign up for my Mailing List!  You will see the red sign-up box in the upper right of my blog!

Join My Mailing List


Christmas Tag Card

Christmas Tag CardYesterday my friend and I (and her little daughter) had a wonderful Sunday afternoon making Christmas tags for a certain group of children, teenagers I believe. Not only is it  fun to stamp, but it is especially fun to stamp with someone else! I had made several tag designs for her to choose from and in the end, she let her daughter choose which tag we would make!  Then we all dove in and stamped and punched and Big-Shotted and glued!

I chose some retired paper to use called Under the Tree. It is a heavier weight kraft paper, kraft colored with a white pattern on one side and a colored design on the other. So once we punched 24 tree shapes with the Tree Punchas I was cleaning up, I noticed I now had a bunch of trees with the colored pattern on the other side!  Something cute to use on another project! So today I decided to use that same tag design to make a Christmas card and insert the punched out tree back into the tree shape hole but flip it over so the colored pattern on the back would show. Yesterday to make the tags, we stamped the tree with one from the Festival of Trees Stamp Set in the Annual Stampin’ Up! Catalog.

The card base is Cherry Cobbler card stock with Whisper White stamped with a few Crushed Curry stars from the stamp set To You & Yours Too.  The star is punched from Gold Glimmer Paper with the star punch in the Itty Bitty Accents Punch Pack. For the circle I needed to use the Big Shot and the circle framelit that is a bit over 3″ wide. On this card, and also the tags yesterday, the top layer is popped up with several Stampin’ Dimensionals so there is a little space between the layers,. For the greeting I used a stamp in the Petite Pairs Stamp Set. It is layered, on this card, on a little strip of paper from the Season of Cheer Designer Series Paper. And for a finishing touch, I tied some Gold Cord through a (retired) red button and stuck it on with a Glue Dot.

Here is a photo of our pile of finished Christmas tags for the kids.

Christmas Tags for Kids

Whether or not  you have this exact paper, you can use something similar – or look around in your retired stash and remind yourself of what you have!  Make some tags, decorate some bags, or make cards, but just enjoy the process!  And if you can do it with a friend, all the better!

It’s not too late to order some Christmas stamp sets or supplies to make Christmas cards and projects if you haven’t already!

Shop at my Stampin’ Up! Online Store HERE or contact me to put your order in for you. Don’t forget about the current Weekly Deals!  These end tonight at 11:50 pm MT.

Weekly Deal Dec 1 2015