Occasions Catalog “Enjoy the Little Things” Project Kit

Enjoy the Little Things Project Kit Photo

I guess there are so many wonderful new things in the Occasions Catalog, that I completely missed this Enjoy the Little Things Project Kit on page 33.  It was only when I read online somewhere about the “easel kit” in the catalog that I went back and looked and found out what this project kit is all about!  And it looks like a cute one!

You get a ton of materials to make 13 display pieces for this nice easel. If you watch the video, you will see (and hear!) that it is very sturdy, almost like a chalkboard, with a gold clip on top, of course. You can change the display piece out as you desire, some are certainly seasonal, but others are not. It all comes in a nice box in which to store the extra pieces while they await their turn on the easel! And if you wanted to make an extra one of these (or more!) for a gift, you have the gift box right there for a nice presentation.

You will want to purchase the stamp set that goes with it, Enjoy the Little Thingswhich you can use in plenty of other projects and cards, it won’t just be for this project kit. In the catalog you will see what other inks and adhesives you will need to make this project.

Watch Brandi in the Stampin’ Up! video below tell you all about the kit and give tips on assembling each display page. It’s fun to watch someone make something, I think, even if you aren’t doing it yourself at the moment!

If you want to order the Enjoy the Little Things Project Kit along with the Enjoy the Little Things Stamp Set, just add on a few more dollars to your Stampin’ Up! order and you will qualify for a FREE Sale-A-Bration product at $50 or more. Remember, you get a free SAB product with EVERY $50 you spend, no limit!

If you are new to Stampin’ Up! or don’t have a Demonstrator that you are working with, I would be happy to send you copies of the catalogs. You can view them online, but, in my opinion, there is nothing like a Stampin’ Up! Catalog in your own hands! Just email me at Karen@KarenStamps.com.

Shop Stampin’ Up! Online HERE!

Stampin’ Up! Envelope Punch Board Card Boxes

Envelope Punch Board Card Boxes

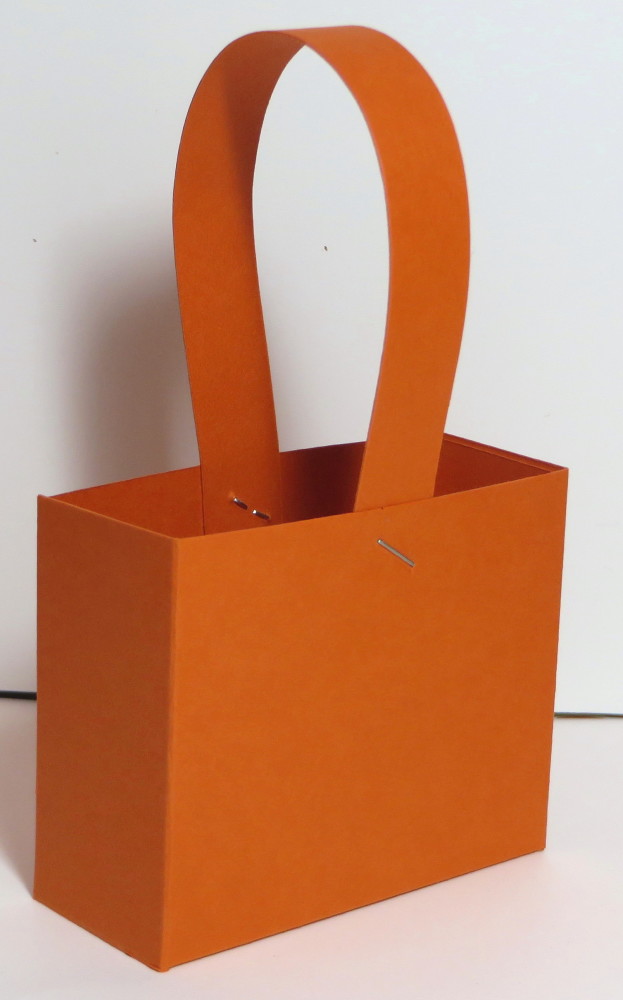
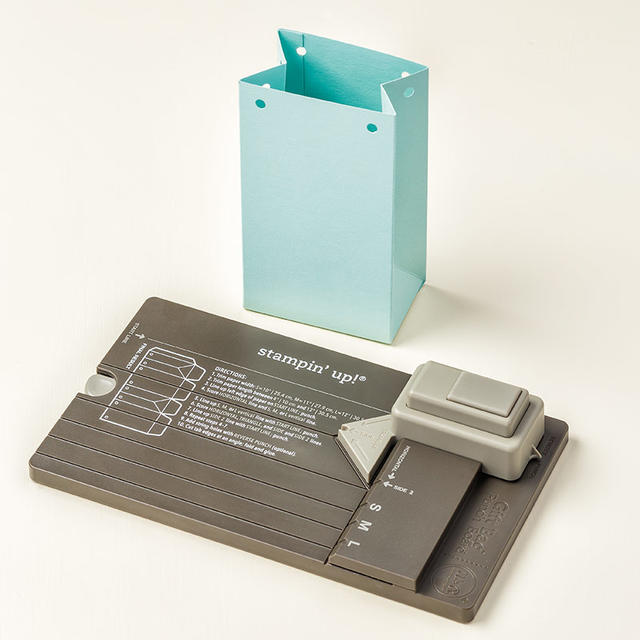
I’ve owned the Envelope Punch Board by Stampin’ Up! since it came out, but I had never tried making one of these card boxes.  I was gifting some cards to a couple friends and wanted to give them a nice presentation. I watched some tutorials online to figure out how to make these and then got to work. Once I figured it out, it was easy and I was pleased with the result. You do need 12″ x 12″ paper to make this size which starts with 9″ x 9″ paper – not that I didn’t pull out a regular size piece of cardstock since it was 9″ x 9″ and I didn’t need something as large as 10″ x 10″ or something!  Duh!!  This is a good time to pull out some old designer paper to practice on (I know, I can hear the gasps, but surely you have some old paper and patterns you aren’t that crazy about anymore!).

This is how I made my card box although it may be difficult to understand without a video.

  • Place a 9″ x 9″ piece of paper in the Envelope Punch Board lined up with the 3 1/2″ measurement.  Punch and score. Move the paper over to the 4 1/2″ measurement, punch and score.
  • Turn the paper around to the opposite side and repeat the above directions.
  • Turn the paper to one of the sides that hasn’t been scored and punched. On this side, match up each of the score lines with the guide as you would normally do to make an envelope, punch and score.
  • Turn the paper to the last side and repeat the above directions of lining up the score lines with the guide.
  • Fold lightly on all the score lines to see how your envelope box is going to go together. Making sure it is in a landscape position, determine which flap is the top of the box and, if you want, punch the tip to round using the Envelope Punch Board.
  • Now that you know which side is the top, trim off the tabs from the top flap and cut slits for the bottom to make tabs just to make the bottom a little stronger with the tabs. (See photo)
  • Adhere the flaps to form the box, making sure the box is lined up well.
  • If you want to stamp on the box, do this before putting the box together.

Envelope Punch Board Scoring

Envelope Punch Board Card Box Cuts

Envelope Punch Board Card Box Scored

Envelope Punch Board Card Box Folded

Try this and you will probably find making this card box fun to make with the Envelope Punch Board! And any time we can get more use out of our tools and products, it’s a good thing!

Shop Stampin’ Up! Online!  Get a FREE Sale-A-Bration product with each $50 purchase!

Stampin’ Up! Weekly Deal

Stampin' Up! Weekly Deal Jan 12 2016

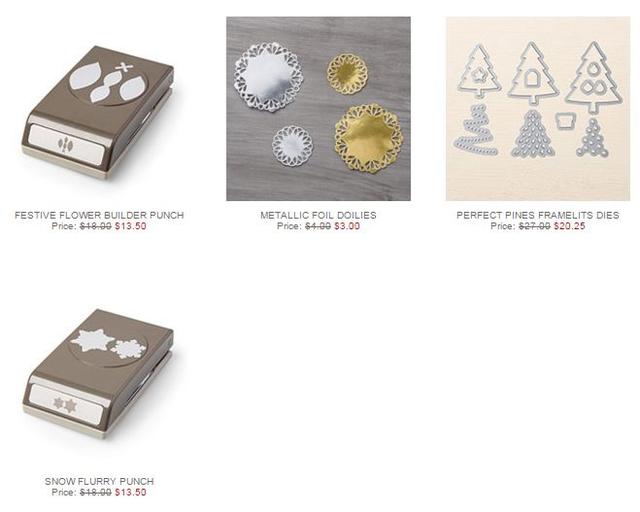
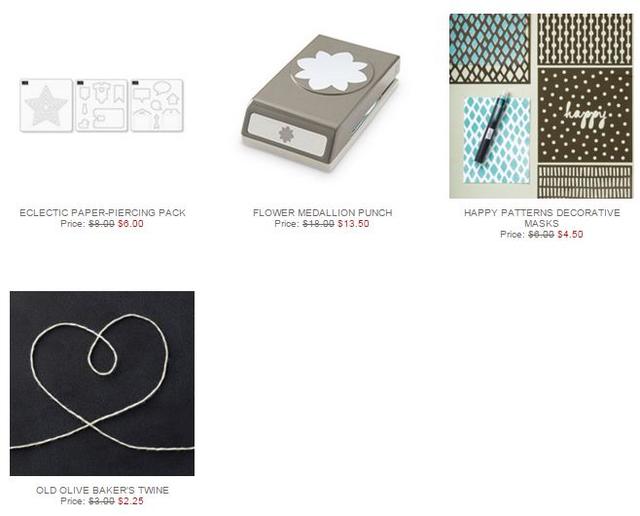
It’s Tuesday so here are the new Stampin’ Up! Weekly Deals for January 12 – 18, 2016. Weekly Deals are your chance to get some great Stampin’ Up! products at a discount for one week! This week we have a great stamp set with multiple sayings to use on your projects as well as extra tools and embellishments to use to jazz things up!

One of the most interesting and fun new products in the Stampin’ Up! Occasions Catalog is the Playful Pals Photopolymer Bundle. You can purchase just the Pyramid Pals Thinlits Diesbut if you also purchase the Playful Pals Stamp Set in the Bundle (use the Bundle #) you will save 15% on everything! Of course you will also need the Big Shot for using the dies! It is an expensive item but I can almost guarantee you will use it a LOT! Mine is out and accessible at all times (sad to say, on my dining room table!) and I use it almost everyday. And if there is ever a good time to buy a Big Shot it’s during Sale-A-Bration when you will earn two free SAB products from the Sale-A-Bration Brochure right off the bat! Then if you add a few more products to use with the Big Shot you could be at a Hostess Level and be able to shop with Hostess Dollars!

Links to Use:

Stampin’ Up! Occasions Catalog

Stampin’ Up! Sale-A-Bration Brochure

Join Stampin’ Up!

Save $5 on 3-Month Prepaid Paper Pumpkin Kit in the Mail

Shop Stampin’ Up! Online


Honeycomb Happiness Ice Cream Cone Card

Honeycomb Happiness Ice Cream Cone Card

Making this Honeycomb Happiness Ice Cream Cone Card sure made me hungry for ice cream! This stamp set is one of the free Sale-A-Bration stamp sets you can earn with a $50 Stampin’ Up! purchase, a special promotion going on right now!

The Honeycomb Happiness Stamp Set on page 15 of the Sale-A-Bration Brochure comes with the ice cream cone, the chick (or bird?), and balloon plus three greetings. I’m sure it is destined to be one of the most popular SAB stamp sets. The little Honeycomb Embellishments (page 9 of the Occasions Catalog) are perfect on each of these images and I intended to put one on the ice cream cone, but I forgot! I had already applied my Wink of Stella Brush to add some glimmer, so I’ll just have to make another ice cream cone card and use one of the honeycombs!

This card base is made with the Thick Whisper White card stockThe ice cream cones on the background are stamped with Soft Sky, Pink Pirouette, and Crumb Cake. The ice cream cone for the focal point is stamped with Stazon Ink and colored in with a Blender Pen and So Saffron and Pink Pirouette Ink. On the greeting for a little oomph I used the Subtles Candy Dots.  Love the Candy Dots!!

Shop Stampin’ Up! Online and then choose your free Sale-A-Bration product with a $50 purchase!  No limit!

Mini Treat Bag Thinlits Birthday Card

Mini Treat Bag Thinlits Birthday Card

You know how I love the Mini Treat Bag Thinlits Dies and here I have made a Mini Treat Bag birthday card using one of the patterns in the English Garden Designer Series Paper collection.  I’m not sure I had noticed this particular pattern before, but it jumped out at me the other day.  I knew it was perfect for this project.  The other side is also nice, wide dark pink stripes, which you can barely see on the inside of the treat bag at the top. For the card part, I just slipped a piece of Whisper White that fit inside and stamped with a greeting from the Amazing Birthday Stamp Set.  I have used the “Happy Happy Happy Happy Birthday to you” greeting over and over again in birthday cards I have made. I attached one of the Mini Metallic Clothespins to the top of the card so it is clear that the recipient needs to pull out that inside card, and to make it stand out I die cut the little bow that comes with the dies and adhered that to the clothespin, along with a small Rhinestone Jewel. Why not?!

The front of the mini treat bag card is pretty simple.  I stamped the banner in the Amazing Birthday Stamp Set and just cut it out by hand. Then I stamped the birthday cake, punched it out, layered it on a larger circle punch, and then mounted it on the Silver Glimmer Paper scallop punch. For a little more pizzazz, I added a piece of the Silver Sequin Trim to dangle.

The Mini Treat Bag Thinlit Die card is perfect for slipping a gift card inside, too, if you like, or folding the top over and adding a belly band.  So many possibilities! And you get lots of pieces in the die package.  I love making cards and other projects with the Mini Treat Bag Thinlits such as this birthday card.

Shop Stampin’ Up! Online During Sale-A-Bration!

(One free Sale-A-Bration product with every $50 Stampin’ Up! purchase!)

Save $5 on a 3-Month Prepaid Paper Pumpkin Subscription

Save $5 on a 3-Month Prepaid Paper Pumpkin Subscription
During Stampin’ Up! Sale-A-Bration, you can save $5 on a 3-month Prepaid Subscription to Paper Pumpkin, the papercrafting kit that comes in your mailbox once a month! AND you will qualify for a free Sale-A-Bration item! You can order JUST the prepaid subscription (although you will have to pay $6.95 shipping for your free Sale-A-Bration item) or add it to any Stampin’ Up! order. Even if you are doing the monthly subscription, if you want to get credit toward Hostess Dollars on your Stampin’ Up! order, you can purchase the prepaid subscription and your monthly subscription will continue after your prepaid is used up. Trust me, it works somehow! I should remember to do it that way more often myself!

The great news is that if you order one or more prepaid subscriptions today or tomorrow (by Jan. 10th) you will receive the January kit! The 10th of the month is the date to remember if you want to pause or cancel or START your Paper Pumpkin subscription. You can still sign up after the 10th and receive the next month’s kit.  Even if you have never stamped, you will find all the materials you need in the kit, including a clear block on which to mount the stamps in your very first kit.

Read all about Paper Pumpkin here or email me with questions. The kit is not always cards, but it is always a surprise each month and something to look forward to in your mailbox besides bills and junk mail! The December 2015 kit was a calendar on a little stand, which I intend to turn into a small photo album at the end of the year. Other kits have been cards, gift boxes, framed art, holiday treat bags, gift bags, etc. You can keep the stamp set and ink spot to use over and over, and sometimes you might have extra supplies to use on other projects. Follow the directions for the project (and watch the video!) or make your own version!

Put Paper Pumpkin on your Stampin’ Up! Order today (or tomorrow!) to receive the January kit!


Card For a Baby Shower

Baby Shower Card

There’s a little bit of the new mixed in with the old on this baby shower card. The other day I had a fun afternoon stamping with a friend, and she wanted to make a baby shower card for a friend. Normally I would search online for at least 100 ideas and then look for 500 more just to be sure I had all the cutest ideas floating around in my head or one to copy. But this day, immediately the Something For Baby Stamp Set and the Baby’s First Framelits Dies popped into my head along with this cute paper, part of the English Garden Designer Series Paper. I love that simple but cute pattern on the paper! I think it reminds me of a comforter I bought for my daughter many moons ago.

The card base is Blushing Bride, which I seem to have used a lot recently! The Whisper White background is embossed with the Happy Hearts Embossing Folder.  The baby onesie is diecut with the Baby’s First Framelits, as I mentioned before. The little hanger is stamped with a hanger stamp from the Something For Baby stamp set. The bow is the Melon Mambo 1/4″ Cotton RibbonThe banner is from the new stamp set in the Occasions Catalog, Bloomin’ Love Photopolymer Stamp Set. I just colored it with markers so I could make the little leaves Old Olive and the rest Melon Mambo. The words come from Teeny Tiny Wishes, one of my favorite and most useful stamp sets of words.

Although I don’t have a photo of the inside of the card, my friend stamped the inside with the “Your little baby is big news” from the Big News Stamp Set. And she also grabbed the little heart from the Bloomin’ Love set and stamped that below the greeting.  We laughed about whether or not she should stamp more hearts randomly on the inside – you know, how you can go from something that is perfectly fine and then go crazy with a little too much stamping! Suddenly you have way too many hearts! As another friend who I used to paint with always said, “Know when to stop!”

All in all, my friend and I were pleased with this baby shower card we came up, just out of our own heads!

Shop Stampin’ Up! Online for all your stamping and papercrafting needs!

Make a Beautiful Bloomin’ Love Card For a Friend

Bloomin' Love Friend CardOne of the beautiful new stamp sets in the Occasions Catalog is Bloomin’ Love, and with the little banner and words in the set, you can make a Bloomin’ Love Card for a friend or for someone you love. This card is so simple yet turned out very pretty. I don’t have any of the new paper yet in the catalog so I made my own background with one of the stamps in the set by stamping randomly with Blushing Bride ink on Whisper White.  The card base is 8 1/2″ x 4 1/4″, Blushing Bride, folded in half, just for something different than the usual size. The heart is stamped and just cut out with Paper Snips, my favorite scissors for trimming small images. The banner and the word “Friend” comes in the stamp set and adds a nice dimension to the card. I just popped the banner up with Stampin’ Dimensionals on the back.

The card still needed a little pizzazz and I achieved that with the new Clear Wink of Stella Glitter Brush.  I hadn’t tried it yet over the holidays, but wow!  It is addictive!  So easy to use and so pretty!  It dries really fast and adds sparkle while being completely flat. No feeling of glitter or anything. The brush tip is fine so you can add small amounts or outline images easily. I love it already!  It also comes in Gold. And I couldn’t resist adding some little Rhinestone Jewels to the banner!

I think this stamp set is going to be one of the most popular sets in the Occasions Catalog! It can be for valentines, but hearts, like stars, can be for lots of occasions and projects. Be sure to check out the Bloomin’ Love Photopolymer Bundle and save 15% if you buy the Bloomin’ Love Stamp Set plus the Bloomin’ Heart Thinlits Dies!

Bloomin' Love Photopolymer Bundle

(c) Stampin’ Up! 2016

Remember, with every $50 purchase from Stampin’ Up! you qualify for one free Sale-A-Bration product! Need a catalog?  Please email me and I will mail one to you!

Shop for all these new products to make the Bloomin’ Love Friend Card and many other projects at my Stampin’ Up! Online Store!

Stampin’ Up! Sale-A-Bration and the Occasions Catalog Begin Today!

Stampin' Up! Occasions Spring 2016 Catalog

Sale-A-Bration 2016 Catalog

Today is the day!  The Stampin’ Up! Spring Occasions Catalog 2016 has gone live as well as the biggest Stampin’ Up! promotion of the year, Sale-A-Bration!  Be sure to check out these online catalogs today!  If you would like hard copies and do not have a Demonstrator, I would be happy to mail some to you.  Just email me at Karen@KarenStamps.com.

Sale-A-Bration has long been a very special promotion from Stampin’ Up! And boy, has it grown in the years I have been a Demonstrator! During Sale-A-Bration, for every $50 you spend on catalog product (from ANY of the current catalogs, my Online Store, or Clearance Rack and Weekly Deals), you get to choose a FREE product from the Sale-A-Bration (SAB) Brochure! And who doesn’t love free??!!

To clear up some confusion:  You do not have to purchase any specific products listed in the SAB Brochure in order to get a certain free product. Where it lists current product, those are just suggestions for the sample project. Just spend $50 with Stampin’ Up! and choose anything marked FREE in the SAB Catalog.

This year there are some products only available until February 15 and then there will be some new products coming February 16th!  Just to keep things fresh and exciting! I’ll remind you so you don’t miss out!

Have a workshop with your friends or place your own big order of $250 or more and receive an extra $25 in Stampin’ Rewards!!

JOIN STAMPIN’ UP! DURING SALE-A-BRATION!

Want to join the Stampin’ Up! family? Purchase the Starter Kit for only $99 and choose $125 worth of products. But there’s more!! During Sale-A-Bration choose an EXTRA $30 in product! That’s $155 in Stampin’ Up! products for only $99! Email me if I can answer any questions for you or CLICK HERE for more information!

OK, enough reading, go look at the catalogs and go shopping!  Have fun!!

Shop Stampin’ Up! for new products in the Occasions Catalog and then choose your FREE Sale-A-Bration items for EVERY $50 you spend!  No limits!

Honeycomb Happiness Sale-A-Bration: One Day Away!

Honeycomb Happiness Chick

Yes, who can believe it that today is the last day for the beautiful Stampin’ Up! Holiday Catalog and one day away from Stampin’ Up!’s biggest promotion, Sale-A-Bration, one of the free stamp sets being this Honeycomb Happiness!  If you aren’t familiar with Stampin’ Up!, Sale-A-Bration is when for every $50 you spend on any Stampin’ Up! order, you will be able to choose one free product from the special Sale-A-Bration brochure! There are special Sale-A-Bration stamp sets and paper to choose from, plus a special Project Life by Stampin’ Up! Card Collection. Everyone loves Sale-A-Bration and getting “free stuff”!

One way to qualify for free Sale-A-Bration products, is to place an order from the brand new Stampin’ Up! Occasions Catalog for spring!  That also begins tomorrow, January 5th! Lots of new goodies in there for you to enjoy! My regular customers should have received their catalogs in the mail by now – if not, please let me know – and if you don’t have catalogs and would like hard copies (catalogs will also be available online tomorrow!), just email me at Karen@KarenStamps.com and I will get them out to you!

This Sale-A-Bration stamp set, Honeycomb Happiness, is one of my favorites with the cute chick, balloon, and ice cream cone plus greetings. I kept the card simple, copying the sample, but adding a strip of Kraft Corrugated Paper to the side and tying on some Whisper White Baker’s TwineI could also add a little Honeycomb Embellishment.

Get ready for the new Occasions Spring Catalog and Sale-A-Bration tomorrow!!  One more day!

Shop Stampin’ Up! Online HERE!

Paper Pumpkin December 2015 Kit Calendar

Paper Pumpkin December 2015 Kit Calendar in Stand

I received my December 2015 Paper Pumpkin Kit in the mail before Christmas and finally got around to making it!  I knew it was a calendar so I knew I better get it made! As cute as it is as a calendar, I don’t really need a calendar like this, so I looked for alternate ideas, which you can do with any of the Paper Pumpkin kits. I actually found a great idea on the Stampin’ Up! Blog HERE, to make the pages into a photo album rather than a calendar.  I can choose a photo for every month as the year goes along. For this project, I turned the calendar pages sideways rather than vertical as designed in the kit. And actually I can still have it sitting out as a decorative calendar for 2016 and make it into an album at the end of the year!

It was fun putting this calendar together and doing some stamping! Stampin’ Up! always provides a video showing how to assemble the project and all materials you need (except maybe glue and scissors) plus the instructions. With your first kit, you receive a clear block for mounting the photopolymer stamps that come in the kit. So each Paper Pumpkin kit has a set of stamps, an ink spot, and all the supplies to make the papercrafting project!

Here are the months for the calendar.

Paper Pumpkin December 2015 Kit Calendar

Paper Pumpkin December 2015 Kit Calendar

The Paper Pumpkin Kits are getting so popular that the refills for this kit sold out very quickly. To avoid seeing something you like but being unable to purchase it, you should become a Paper Pumpkin subscriber yourself! You can subscribe by the month, or you can add a subscription to your Stampin’ Up! order.

Stampin’ Up! will be offering a special on a 3-Month Prepaid Paper Pumpkin Subscription starting January 5th, when Sale-A-Bration starts! Instead of paying $59.85 for a 3-month subscription, you will only pay $55. And when you spend over $50, you instantly qualify for a FREE Sale-A-Bration item, just by purchasing the prepaid Paper Pumpkin Subscription for 3 months!

Do something special for yourself and get a Paper Pumpkin Kit! You will look forward to that red box showing up in your mailbox each month! Put a prepaid subscription on your Stampin’ Up! order between January 5-10 so that you receive the January kit!

Paper Pumpkin Sale for Sale-A-Bration

Happy New Year 2016!

Happy New Year 2016

Can you believe it?! It’s January 1, 2016! And if you didn’t know, the Chinese New Year is the Year of the Monkey!  Just think!  A whole new year ahead of us of fun stamping projects, papercrafting “therapy”, crafting with friends, new catalogs, new creative ideas!  I can’t wait!

Happy New Year to You and Yours!!

Handmade Christmas Tags

Handmade Christmas Tags

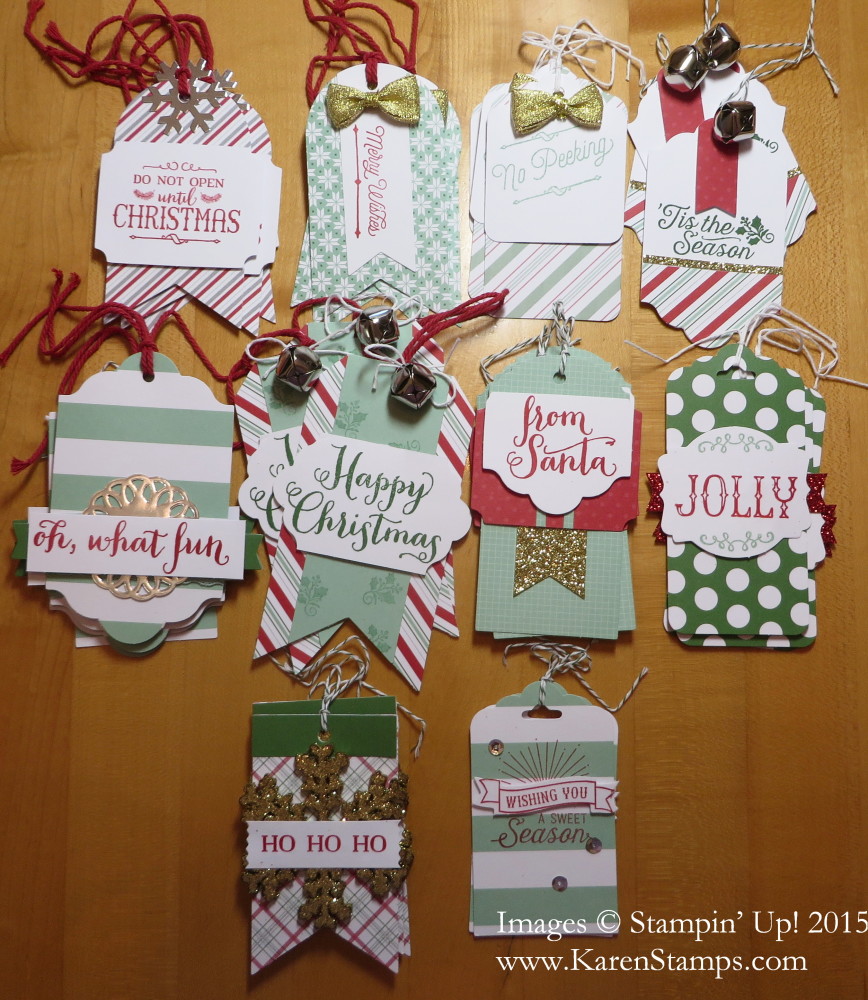
Christmas may be over, but I bet you still have your Christmas paper and ribbons handy and could make some of these handmade Christmas tags to use for next year! I guarantee you, you will be so happy to come across beautiful tags NEXT year when you go to wrap packages and are in such a rush you don’t have time to make new tags then!  I found some tags I didn’t know I had from previous years this year when I started to wrap gifts and I was so happy to have them! So in just a few minutes I made some of the tags above and others you have seen on my blog (and I forgot to use THIS year!!). Use the Scalloped Tag Topper Punch, but if you don’t have one, just cut a rectangle for the tag and round the corners or snip off the top corners in a diagonal for a tag shape. Easy peasy and fun to do now that you are more relaxed! If you are not out partying on New Year’s Eve or New Year’s Day, relax by stamping and making tags and things for next year!  Perhaps even a few cards just to have on hand!

Just a quick idea for today!  Use that paper and embellishments so that you can restock next year when the Holiday Catalog comes out and you want all the NEW stuff! It’s a good way to de-clutter! Make some handmade Christmas tags now to enjoy next year!

Make Christmas Last Longer With Stampin’ Up! Deals!

Stampin' Up! Weekly Deal Dec 29 2015

Christmas may be over, technically, but if your favorite gift wasn’t under the tree, maybe you need to order something for yourself from Stampin’ Up! I say, order anything you want, but certainly take a look at the Stampin’ Up! Weekly Deals for today through Monday, January 4.  I use that birthday stamp set a lot, and who doesn’t need another punch??!

Then check out the Stampin’ Up! Year-End Sale!  Lots of ribbons, twine, paper, punches, washi tape and Project Life Kits (to name a few!). Don’t think that because you aren’t doing the “theme” of the Project Life by Stampin’ Up! Kit that you can’t buy it.  The cards are very versatile and you can use many of them for any occasion. Those kits are so cute, all those cards in a special box!!

Stampin' Up! Year End Sale 2015

AND – when Sale-A-Bration begins January 5th, so does a special on Paper Pumpkin, the Stampin’ Up! papercrafting kit that comes to you in the mail! The 3-month Prepaid Subscription will be on sale but will qualify you for one free Sale-A-Bration product! If you want to order more Stampin’ Up! product, just add it to your order and get bigger Hostess Rewards when you reach $150 or more.  The prepaid kits count toward your order total!

So if Santa didn’t bring you what you wanted, then just take care of that yourself!  Order some of your favorite products at a discount with the Stampin’ Up! Weekly Deals and Year-End Sale!

Happy Shopping!

Time to Make Thank You Cards Using Your Christmas Paper

Season of Cheer Thank You Card

Christmas is over, sadly, and now it is time to make thank you cards with leftover Christmas paper, such as this thank you card made with a piece of the Season of Cheer Designer Series Paper. I think it is sold out now, which means you probably have some!  Whatever sheets you have left over, turn them over from the Christmasy side and you might find a plain pattern you can use for any other cards.

This is the simplest kind of card to make.  The card base is Soft Sky because it coordinates with the designer paper (remember, colors are listed on the back of every package of designer series paper by Stampin’ Up!) . I cut a layer of Whisper White card stock and adhered a strip of the designer paper to the bottom. Then I stamped a thank you from the very useful One Big Meaning Stamp Set, full of different styles and phrasings of thank yous! Rather than tying the whole piece of the Whisper White 3/8″ Stitched Satin Ribbon all around, just adhere the ends around the back with some SNAIL Adhesive, then adhere that whole piece to the card.  Tie a little piece of ribbon on just in a knot for an accent.  Or do a bow if you are more adventurous! Very quick and easy and done!

Some of the “Christmas” paper isn’t necessarily Christmasy.  Here is the backside of the same striped paper.  Perfect for winter (if you are having winter where you live!).

Season of Cheer Soft Sky Thank You Card

Remember your manners and send those thank you notes, not just an email!  It only takes a few minutes to make a card like this and you KNOW you have paper in your stash you can use! Go ahead and use up that precious, pretty Christmas paper we had this year because you know next year will be even better! I’ll have another idea for you another day!

Don’t forget the Year-End Sale!  Great discounted Stampin’ Up! products!