Less Than 24 Hours Until My 12 Weeks of Christmas Holiday Emails Begin!

!2 Weeks of Christmas Banner


Do you love to get ideas for handmade Christmas cards, holiday gifts, gift wrap ideas and holiday tags?

If so, then you will want to be on my Stamping With Karen mailing list!  In less than 24 hours, I will begin sending out my 12 Weeks of Christmas Holiday Emails, and the only way you can get them is to be on my mailing list!

Sign Up in the red Mailing List sign up in the upper right corner of my blog!

Every week on Wednesday at 1:00 pm Central Time you are going to receive via email a holiday project idea complete with instructions and list of supplies. We will start with Christmas cards, then some gift ideas, and finally wrapping ideas, bags and tags.  You can copy these ideas or use them for inspiration to come up with your own creations!

The 12 Weeks of Christmas emails are a gift from me to my newsletter subscribers! I appreciate your loyalty and interest and hope that you enjoy these extra holiday ideas! These projects will not be seen on my blog, Facebook page or anywhere else, just in this special email. By the end of twelve weeks, you will have twelve wonderful holiday projects that you can complete or be inspired by!

If you would like to receive these 12 Weeks of Christmas Holiday Emails, you must be subscribed to my mailing list by October 5th at 1:00 pm Central time or you will not receive these great projects!

Sign up in the red Mailing List Box in the upper right side column of my blog! You will also get a free gift just for signing up!

*If you already receive my regular newsletters, then you are already on my list and will be getting the 12 Weeks of Christmas emails. You do not need to do anything!

I hope you will join us for 12 terrific holiday ideas! There’s nothing I like better than looking for more and more ideas!

Stamping with Karen 12 Weeks of Christmas

Paper Pumpkin Halloween Test Tube Candy Treats

Paper Pumpkin Halloween Test Tubes Candy Treat

Yesterday I got around to playing with my September 2016 Paper Pumpkin Kit and here is what I made!  I still have some extra tags and banners that I can use to make some other cards. Lucky for me that I had enough CANDY to fill all these test tubes!!! As I worked on these test tube treats, I started thinking of people I could give them to besides my kids, so don’t worry that maybe you don’t have children, grandchildren or trick-or-treaters to pass them out to! Think about taking one or a few along to a doctor appointment, or give to a couple of your neighbors, or take along to a restaurant and give to a good server in addition to a tip, or the drive-thru window at a coffee or fast-food place, there are just all kinds of ways to pass them out to people!

This was such a cute project and so easy to make! I know in the past Demonstrators have loved getting their hands on these fun test tubes to make various treats, so how great to just get them delivered in a Paper Pumpkin Kit!

paper-pumpkin-bogo-ends-october-10

Lucky for new subscribers, Stampin’ Up! has a deal for you!  Subscribe to Paper Pumpkin now (by October 10th) which pays for the October kit and you will receive the November kit FREE! Just use Promo Code:  BOGO

ALSO:  Once you subscribe, you can go to the Stampin’ Up! Online Store, click on Paper Pumpkin and then Past Kits. These are only available to subscribers. A “Kit” means you get the full kit including stamp set. A “Refill” means you get the supplies but not the ink spot or stamp set. But you can still substitute with stamps you have in many cases and still make cute projects with the supplies! The cute Paper Pumpkin Kit from last year with the Halloween treat bags is available as I write this! So subscribe and then grab the past kits or refills that you missed!

Click HERE to Join Paper Pumpkin today!

(You deserve it!)

Best Tips and Tricks for Using Fast Fuse Adhesive by Stampin’ Up!

Celebrate World Card Making Day Stampin' Up! Specials

Stampin’ Up! has special offers for you to celebrate World Card Making Day except the specials last through Wednesday, October 5th! One of the deals is to buy a Fast Fuse Adhesive and get a refill FREE (a $7.50 value!)! Fast Fuse works great where you want a strong hold, like making a box yourself!

Fast Fuse Adhesive for Box

Handmade Box Embossed Paper


When Stampin’ Up! first came out with Fast Fuse a few years ago, I did not have much luck with it, admittedly! I probably ruined a few rolls of adhesive before I got the hang of it, and even then, I didn’t always have the hang of it!  If it worked for me, it was probably just luck. But then I watched some videos online and kept playing with it, and now I can say I really like Fast Fuse!  I probably even use it more than I use SNAIL Adhesive.  So if you have had the same experience and written off Fast Fuse, I would urge you to watch these videos below and see if you can pick up some tips you may have forgotten or never knew about how to use Fast Fuse.

This first video shows the basics of using Fast Fuse and how to fix it if the adhesive has “snapped back” from not breaking at the end of your adhesive line. She says to not open the case!  Even now I sometimes have to roll that little applicator to get the adhesive back in place or pick off the gooby stuff aroun the opening on the case. But otherwise, it works fine and these things are an easy fix.

This second video is Donna Griffith from the Home Office showing how to make a box out of cardstock, which is a great video anyway, but later in the video she also gives tips about using Fast Fuse. If you only want to see that part, skip to about 6:40 in the video. (But I think watching how she makes this cute box is well worth your time and enjoyment!)

Donna suggests not putting your finger on the top of the Fast Fuse case like we are used to doing with SNAIL. I’m not positive that you can’t use it with your finger on top, but use a light pressure. I have been trying to remember to NOT put my finger on the top like Donna suggests. Just try it and see what you think. It was good for me to find that first video above again and listen to how this adhesive really works, even if you have been using Fast Fuse. It’s a good review.  I think Fast Fuse works well when you want a really good “stick”. But since it does stick so well, there’s no playing around when adhering your two things.  If you need a little time to move one layer or image around to get it just right, then you might prefer the Multipurpose Liquid Glue which allows for a little bit of repositioning before it sets up.

Here are all the other #WCMD Special Offers from Stampin’ Up!

World Card Making Day Stampin' Up! Discounts

So many great things to shop for at Stampin’ Up!  Check out these World Card Making cardmaking essentials through October 5th, the Designer Series Paper Buy 3 Get 1 Free Offer, the Holiday Catalog, the Clearance Rack and more!  Just click HERE to shop Stampin’ Up! Online!

Happy #WCMD World Card Making Day! Celebrate With Stampin’ Up! and Make a Handmade Card!

World Card Making Day Discounts

Today is World Card Making Day so celebrate with Stampin’ Up! and choose a few things discounted for the occasion!

Check out the In Color cardstock!

And you might like the In Color Envelope Paper to make your own envelopes with the Envelope Punch Board to match your beautiful cards!

Here is a video about the Envelope Punch Board!  You can make more things than envelopes, too!

And the Designer Tin of Cards Project Kit is on sale!  If you need lots of cards, get this kit, enjoy making the cards, and you will be set for awhile! And we should all be sending more cards!

And last but not least – Buy one Fast Fuse Adhesive and get a refill free (a $7.50 value)!

Don’t forget!  Select Designer Series Papers are on a special all during October beginning today!  Buy 3, Get One FREE!

Designer Series Paper Sale List of PapersShop Stampin’ Up! for all these great stamping and papercrafting supplies!!

Happy World Card Making Day! Be sure to make a card for someone today and mail it!! #WCMD


How to Make a Halloween Small Hexagon Box

Halloween Small Hexagon Box

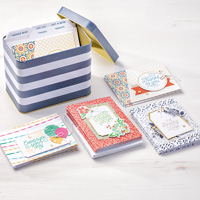
You may be surprised to know that this Halloween Small Hexagon Box is actually very simple to make! I saw a lot of these boxes being made and found some directions to try!

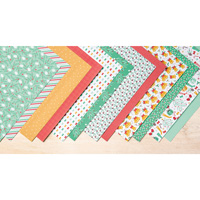
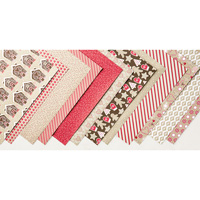
The base of the hexagon box is made with Basic Black cardstock. The lid is made with a piece of Halloween Night Specialty Designer Series Paper. The top circles are punched with the     1 1/4″ Circle Punch, the 1 3/8″ Circle Punchand the 1 3/4″ Circle Punch.  The greeting on the lid is from the Spooky Fun Photopolymer Stamp Set. And the cute little bat I found on my table already cut out with the Home Sweet Home Thinlits Dies. Of course the Halloween monster on the side of the box is from the popular Cookie Cutter Halloween Stamp Set.

Here’s a funny story!  After I stamped and colored in the little Halloween guy, I went to my Big Shot to cut him out. I happened to have several different framelit packages out on the table already but couldn’t find these Cookie Cutter framelits.  I looked through the box where I keep them, no luck.  I looked on my kitchen table where I stamp and on the desk, couldn’t find them. Looked by the Big Shot again, no sign of the framelits to cut out this Cookie Cutter Halloween guy! So frustrating!  I finally decided there was nothing hard about cutting this guy out with my Paper Snips, it would take less time than tearing the house apart looking for the framelits!  I was pretty sure I’d bought the framelits to match this stamp set and the Christmas one!  But maybe I hadn’t! When I sat down to write this blog post I decided to look up these framelits to try and jog my memory about whether or not I’d bought them! WELL……..crazy me!!!! There are not matching framelits!!  There is the Cookie Cutter Builder Punch!!!  I don’t know why I wasn’t thinking of that punch except that we have so many framelit dies now!

So for some directions for the box! Start with a piece of paper for the base (box) that is 7″ x         3 3/4″. Put the paper lengthwise in the Simply Scored board and score at 1 1/4″ on just one side.  Turn the paper sideways and score at 1 1/8″, 2 1/4″, 3 3/8″,  4 1/2″, 5 5/8″ and 6 3/4″. Now looking at the paper the same way (landscape) cut on all the short score lines from the bottom up to the one sideways score line. The very shortest little tab on the right, cut off. Crease all the score lines. Put adhesive on the very narrow tab above the one that was just cut off and adhere that tab to the other side of the paper to form the hexagon box. All the short tabs are going to be the bottom of the box. Turn the box upside down so that the short tabs are at the top for you to adhere, but place something inside the box, like a stack of washi tape inside, to help hold ,the shape of the box. I adhered opposite tabs to each other making sure they were straight to each other to form the hexagon shape of the box.

The lid goes pretty much the same way! Start with the paper 7 1/4″ x 2″. Turning the paper lengthwise, score at 1 1/4″ on one side.  Turn the paper sideways and score at 1 1/8″, 2 1/4″, 3 1/2″, 4 5/8″, 5 3/4″ and 7″.  Crease all the score lines. Turn the paper sideways like you did the box piece except instead of cutting the short score lines, this time you are going to cut on the longer score lines down to that one lengthwise score line.  Cut off the very narrow long tab above the score line plus all the other long score lines.  Adhere the narrow short tab to the other side to form the lid. Place the lid onto the box so that you can adhere the flaps in the same manner as you did for the box. If you make the lid while on the box you can be assured it will fit properly.

For a little extra strength, punch a piece of cardstock with the 1 3/4″ inch Circle Punch to adhere to the bottom of the box and then decorate the top of the lid and the rest of the  box however you like.

For a link to the blog and tutorial where I found the directions, click here.

Try making your own small hexagon box and see how easy it is!  Make them for any occasion for small gifts or treats for a holiday or party favor!  Endless opportunities!

If you need any supplies, check out the Stampin’ Up! Online Store!


Stampin’ Up! Designer Series Paper Sale Buy Three, Get One Free in October!

Stampin' Up! Designer Series Paper Sale in October

It’s almost October so here is a sneak peek of an amazing Designer Paper Sale for you in October! Imagine the cards and projects you can make with this beautiful paper!

Designer Paper:  Buy Three, Get One Free!

October 1 through 31 , you can buy three packages of Designer Series Paper and get one free! That’s great news since everyone can use more Designer Series Paper. This sale includes Designer Series Paper from both the annual catalog and the recently released holiday catalog (not including Specialty Designer Series Paper or Designer Series Paper Stacks). 

Designer Series Paper Sale List of Papers

Remember, not every paper is included in the sale or redemption! Details below! But you can click on the photos below of each paper for more information and better views.  Remember, it always looks even better in person than it does in the catalogs!

Details
Promotion period: October 1–31, 2016
• There is no limit to how many times participants can buy three packages of Designer Series Paper and get one free during this promotion.
Specialty Designer Series Paper and Designer Series Paper Stacks do not qualify for this promotion and cannot be redeemed through this offer.
• Designer Series Paper purchased with Stampin’ Rewards or the Stampin’ Rewards 50%-off perk does not qualify for this promotion.
• Designer Series Paper purchased as part of a Starter Kit does not qualify for this promotion.

Remember, this sale begins October 1st and lasts all of October! But if I were you, I would order my favorite papers as early as you can to get them in your hands to use and to avoid any delay with backorders or anything! Just my two cents!

Don’t forget adhesives and whatever else you need to stock up on!

Shop Stampin’ Up! Online HERE 24/7!

Sign Up for Stamping with Karen “12 Weeks of Christmas” Holiday Card and Project Ideas

Gingerbread man and woman for Christmas holidays

Christmas Is Coming!

Do you need ideas for handmade Christmas cards, gifts, wrapping and tags?

If you do, then join my Stamping With Karen mailing list today to receive my special holiday newsletter every week up until Christmas! Sign up in the red Mailing List box in the upper right!

I’m excited to announce that I will begin sending out my annual 12 Weeks of Christmas holiday emails one week from today on Wednesday, October 5, 2016!  Every week you are going to receive via email a holiday project idea complete with instructions and list of supplies.  We will   start with Christmas cards, then some gift ideas, and finally wrapping ideas, bags and tags.

The 12 Weeks of Christmas emails are a gift from me to my newsletter subscribers! I appreciate your loyalty and interest and hope that you enjoy these extra holiday ideas!  These projects will not be seen on my blog, Facebook page or anywhere else, just in this special email. By the end of twelve weeks, you will have twelve wonderful holiday projects that you can complete or be inspired by!

If you would like to receive these 12 Weeks of Christmas holiday emails, you must be subscribed to my mailing list by October 5th at 1:00 pm Central time or you will not receive these great projects!

Sign up in the red Mailing List Box in the upper right side column of my blog! You will also get a free gift just for signing up!

*If you already receive my regular newsletters, then you are already on my list and will be getting the 12 Weeks of Christmas emails. You do not need to do anything!

The 12 Weeks of Christmas emails always get a positive response, so I hope you will join us at Stamping With Karen for this gift I love to send to my newsletter subscribers!

World Card Making Day Is Coming October 1st!

World Card Making Day Discounts

World Card Making Day is coming Saturday, October 1, 2016! Let’s all make and send  AT LEAST one card to someone to brighten their day. Don’t we all love to get real mail in our mailbox rather than all this junk mail that isn’t even worth the trip to get the mail?!

To celebrate #WCMD, Stampin’ Up! will be offering these specials beginning October 1 through October 5. Be sure to check them out in the chart above! The products are pictured below but do not reflect the discounted price YET because the sale does not start until Saturday!

Click on the images above to see them in the Stampin’ Up! Online Store for more information!  Remember, these deals and discounted prices are not available until October 1, 2016!

Purchase the regular Fast Fuse and receive a Fast Fuse Refill free October 1 – 5, 2016.

Let me know if you have any questions!  Start making some cards or getting ideas for cards today to mail on World Card Making Day on Saturday!

Fun Gift Wrap with the Stampin’ Up! White Gift Boxes

Christmas Decorated White Gift Box

Something you might overlook in the Stampin’ Up! Holiday Catalog are the White Gift Boxes that can be decorated in so many different ways for Christmas and any occasion! These boxes are 3″ on each side, so a decent size for a gift or treats – not too big and not too little. Leave them plain and just tie on a ribbon and a tag or decorate fully however you like. An added bonus is that they come with acetate sleeves that you can slip over the box. It just doubles the decorative possibilities! The boxes themselves have a rather slick surface so it is best not to stamp directly on the box. If you really want that look, I would just stamp on Whisper White cardstock and then adhere that to the sides of the box.

To decorate my White Gift Box, I decided to cut squares from the 6″ x 6″ sheets of the Warmth & Cheer Designer Series Paper StackOn the top of the lid I adhered a piece of Cherry Cobbler cardstock and made sort of a double-ended banner strip to lay across the top. I glued down the top and the back but left the front flap unglued so the person can open the box!  It stays down with the Kraft Rope Trim. This is a fun kind of “ribbon” to use on packaging and projects – not too heavy and easy enough to tie in a bow!

Here is what the White Gift Boxes look like out of the package!

Stampin' Up! White Gift Boxes

You get 8 boxes for $8.00 and they are food safe. You know right well you will be scrambling for just the right size box for a gift during the holidays, so grab a couple packages of these and have them ready to go.  Even if you don’t decorate them except for ribbon and a tag, they will look snazzy and high quality, especially with the acetate sleeve around them!

Since these boxes are food safe, maybe you would put in a stack of homebaked cookies or candy! You could also put the treat in a cello bag and then into the box. And the boxes aren’t just for Christmas, obviously. Special Halloween treats or a Thanksgiving mix or cookie would be great. Not to mention birthdays and any gift-giving occasion!

For the tag on my gift box, I just grabbed a scrap of Cherry Cobbler and put it in the Scalloped Tag Topper Punch.  I trimmed the Whisper White layer with a scrap piece from the Warmth & Cheer paper to match the box.  The greeting is stamped in Cherry Cobbler ink with a stamp from the Tin of Tags Photopolymer Stamp Set.

Find these White Gift Boxes, paper, ribbon, adhesives, tag punch, stamps – everything you need for gifting – in the Stampin’ Up! Online Store HERE! If you need help with your order, just contact me.  I’m happy to put your order in for you if you prefer!

Do you need a copy of the spectacular Stampin’ Up! Holiday Catalog? Email me with your contact information if you are interested in Stampin’ Up! products at Karen@Karenstamps.com. I have some extra catalogs in stock!

See Stampin’ Up! Cardstock Being Cut and Packaged!

Stampin' Up! Cardstock Cutting and Packaging

I LOVE seeing behind the scenes for just about anything! Yesterday Sara Douglass, CEO of Stampin’ Up!, was in Kanab, Utah at the Stampin’ Up! manufacturing facility and did a Facebook Live video showing how our beautiful cardstock is cut and packaged. I love finding out things like this! The top Demonstrators who always got to go on a special retreat always got a side trip to Kanab to tour this facility and meet the employees, but for the rest of us, this is mostly our first glimpse.

You will see the giant sheets that our cardstock starts out being and how it is cut with an amazing cutter that slices right through the stack and then how it is packaged before it is shipped out to us!  Sara says she will do more videos for us! Kanab is also where they make our stamps!  That would be interesting to see!

Click on the photo above or HERE which just takes you to Sara’s Facebook business page. Then depending on when you see this, you will have to scroll down or find the video in her feed. I don’t think there is a way to link directly. Perhaps it will be on YouTube at some point if you are unable to view it on Facebook. I also shared it on my Facebook page, Stamping with Karen.

I hope you enjoy the video. And if you need any of that cardstock, you can order it from Stampin’ Up! Online HERE!

It’s Time for Pumpkins! Get Paper Pumpkin from Stampin’ Up!

Paper Pumpkin BOGO

Yesterday was the first day of fall so as we think of pumpkins, colored leaves, cooler temperatures and Halloween, remember Paper Pumpkin from Stampin’ Up! and this special BOGO (buy one get one free) offer!

Paper Pumpkin is the papercrafting kit that comes to you in the mail once a month with a surprise project all ready for you to sit down and craft! Inside the cute red box is a craft gift for you, all wrapped just like a present! Included is an exclusive stamp set, an ink spot, and all the materials you need for the project already die cut if need be.  Each month is a surprise, not always cards, but sometimes cards. There are instructions and a video you can watch. Or you can do your own thing with your box!

Try Paper Pumpkin with this special offer.  Subscribe before October 10th, purchasing the October Kit and get the November Kit FREE!

Use Promo Code:  BOGO

Offer Details: Use promo code “BOGO” at PaperPumpkin.com.  You’ll pay the regular price of $19.95 and get your second month for FREE!  Subscribe by October 10, your first kit will be the October kit and you will get the November kit free.

The Fine Print:

  • IMPORTANT: Offer invalid if subscription is suspended or cancelled during the first two months. In other words, subscribers cannot cancel or suspend their subscription during their first two months—if they do, the offer is void. You can’t put your subscription on hold or cancel until after the first two full months.
  • After the first two months, the subscription will continue for $19.95 USD + tax per month (shipping included) unless cancelled or suspended. Ends October 10, 2016.
  • This offer is open to first-time subscribers only.
  • Not valid on prepaid subscriptions.
  • Ends October 10, 2016 (the last day to subscribe and get the October kit).

Go ahead.  Get Paper Pumpkin!  You deserve it!!

Sign up on my Paper Pumpkin page HERE!

Use Promo Code:  BOGO

First Day of Fall Sheltering Tree

First Day of Fall Sheltering Tree

To celebrate the first day of fall I had to break out my Sheltering Tree Stamp Set that I hadn’t used in awhile. Well, fall begins at 9:20 EDT I think I heard!  I guess at that moment all the trees in my neighborhood will change their leaves to fall colors and the temperature will drop about 30 degrees this afternoon!  Maybe in Houston we need it to drop 40 degrees to get that crisp autumn feel!

What do you enjoy the most about fall?  The cool, crisp air?  The colored leaves? Halloween coming?  I wish I could zap myself right now to somewhere cooler that has colored leaves! Those of you who have colored leaves now or coming can count yourselves lucky!

Sheltering Tree is an all purpose stamp set!  You can stamp the leaves on the tree to be any season you want.  Make them all one color or do like I did and use Stampin’ Write Markers randomly to apply several colors. Then I stamped again with yellow in case I missed any spots.  The set comes with a small stamp of leaves so I used that to put a few leaves on the ground to be raked up with the cute little rake stamp!  The grass can be stamped with just the solid swoosh piece or the individual blades of grass.  I used both.  You also get several nice greetings in the stamp set.  The card base is Garden Green with a layer of Pumpkin Pie.

Enjoy your first day of fall!  Go jump in a pile of leaves! Or stamp something with fall colors!

Shop Stampin’ Up! Online for the Sheltering Tree Stamp Set or fall products in the Holiday Catalog!

Petals & Paisleys Scalloped Tag Thank You Card

Petals & Paisleys Scalloped Tag Thank You Card

The other day I was making several cards with the beautiful Petals & Paisleys Specialty Designer Series Paper, and I think this one, the Petals & Paisleys Scalloped Tag Thank You Card, might be my favorite — well, it’s hard to pick a favorite, I liked them all!  I didn’t even buy the matching stamp set or framelits, just the paper (at least not yet!), but I thought I could make some beautiful cards with just the paper and greetings from other stamp sets.

This package of paper actually surprised me with the different patterns in it. It’s always fun to flip the new paper over and see what pattern is on the other side!  The papers I used on this card are from the same sheet, opposite sides!  I decided to use the patterned paper and leave a wide margin rather than another color of cardstock for a layer. Then the Scalloped Tag Topper Punch came in handy for the focal point on the card. Just cut the paper a smidge under 2 inches to fit into the tag punch. It may seem very narrow, but once the tag is punched and embellished, it is not too small at all.  You could even add layers to it if you wanted.

The greeting is from the Flourishing Phrases Stamp Set.  The ribbon is the Mint Macaron which comes in the Ribbon 3/8″ Trio PackSo great to get three ribbons that coordinate in one package!  And I think these designer papers and ribbon are perfect for any fall or Thanksgiving cards. For a little fun, I added one of the new Brights Enamel Shapes, the heart shape in Rich Razzleberry, to the tag. One thing I love about the Enamel Shapes is that they are pretty flat so easy to mail!

Shop Stampin’ Up! Online for all your stamping and papercrafting supplies!

Flourish Thinlits Fall Leaves Birthday Card

Flourish Thinlits Fall Leaves Birthday Card

My Flourish Thinlits Fall Leaves Birthday Card was copied with a few changes from a sample in the Stampin’ Up! Annual Catalog. I was looking for a card idea for my husband’s birthday, and this one seemed to fill the bill!  Even though it is still so miserably hot here in Houston, I know my husband loves the colors of fall leaves and perhaps this card would make him believe that cooler temperatures will eventually come!  Probably not for the first day of fall this week, though!  And wow, do these Flourish Thinlits make beautiful diecuts!

The card base is Early Espresso card stock. I’m not sure what Stampin’ Up! used in their sample, but I chose the Copper Foil SheetsI cut a piece of the foil for the background for the leaves. The Copper Foil is beautiful and comes packaged with chipboard covering both sides of the foil so that nothing can scratch it.  You do need to be a little careful working with it. But if you order it, don’t think Stampin’ Up! sent you an empty package!  Look inside!!

For the leaves, I chose Pumpkin Pie, Old Olive and Crushed Curry cardstock. As long as I was die cutting, I decided to make the cute little individual leaves also, in case I wanted to use them on my card.  The greeting is from Tin of Cards Photopolymer Stamp Set and layered with the Layering Ovals Framelits Dies, which are discounted this week on the Special Offers through Wednesday, September 21. For some extra texture and embellishment, I used a piece of 5/8″ Burlap Ribbon.

On the inside of the card, I adhered a layer of Very Vanilla since the Early Espresso is so dark and adhered one of the small single leaves. Sometimes it is fun to put a strip of designer paper or stamp something on the inside of the card.

Don’t miss these Flourish Thinlits Dies in the main catalog!  You get lots of pieces and they all will make beautiful die cuts as you can see here on this Flourish Thinlits Fall Leaves Birthday Card.

Shop Stampin’ Up! Online 24/7!

Shop the Stampin’ Up! Clearance Rack for Gift Wrap Supplies

Stampin' Up! Clearance Rack If your weather is like ours is in Houston, it is so stinkin’ hot and humid outside that it is best to just stay inside in the air-conditioning and shop the Stampin’ Up! Clearance Rack!  What is more fun than Stampin’ Up! products up to 60% off?!  Some have already sold out, but there is still plenty left to have fun with!

Know someone who gives lots of gifts?  Or do you?  Pick up every ribbon on the Clearance Rack and give that as a gift! Packaged nicely, of course!

Every ribbon for $3.00 or less on the Clearance Rack! And the Very Vanilla Subtle Stripes Satin Ribbon is one of my favorites!!

Also add these items to help in gift-wrapping or gift-giving!

Good old Stampin’ Up! Glue Sticks!!!  I always particularly liked these if I was wrapping designer paper around a can or tin or box. They have a square shape so good for getting into the corners!  Pick up some for your kids to have for school projects!

If you live somewhere that isn’t going to be 95 degrees today with enough humidity to make you sweat like a pig just walking outside to get the newspaper, then count yourself very lucky! And check out the Stampin’ Up! Clearance Rack before things you wanted are gone!