Color Your Season Wreath Card

Color Your Season Wreath Card

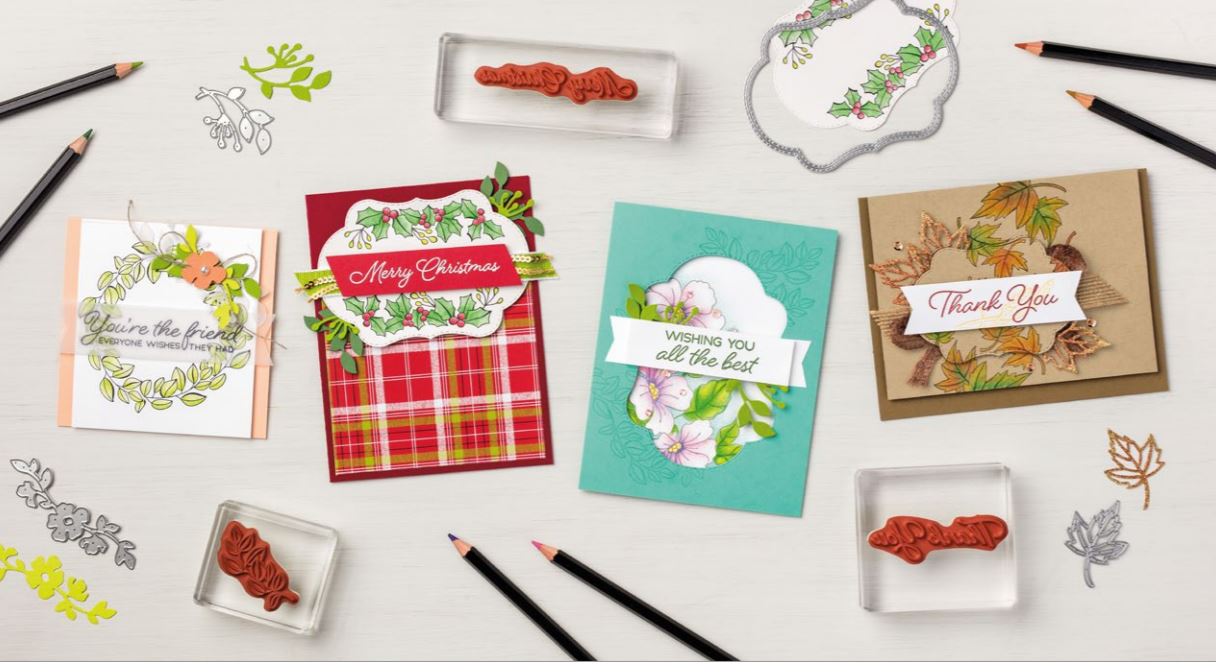
This Color Your Season Wreath Card is just one of the hundreds of cards you could make with the Blended Seasons Bundle. It is a set with which you can make cards and projects for all four seasons (if you are lucky enough to have four seasons where you live!).  Here in Houston, Texas we have summer, summer, summer, a day or two of fall, a month of winter maybe, a week of spring and then back to summer, summer, summer. But it’s always nice to think that there is light at the end of the tunnel of summer where we can at least put out some pumpkins and fall colors and leaves and pretend that it is autumn!

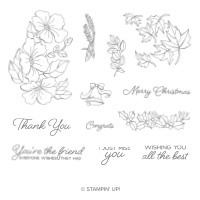
Just think what you could do with just this stamped wreath from the Blended Seasons Stamp SetJust stamp it and then color in the leaves according to the season. The wreath on this card to me looks like spring.  If you colored the leaves darker greens, perhaps, it might look more like summer. And of course fall colors for a fall wreath.

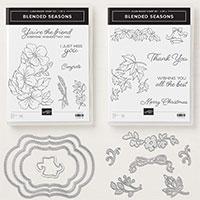
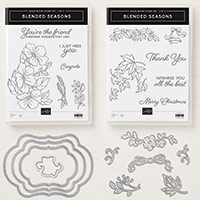
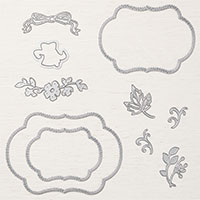
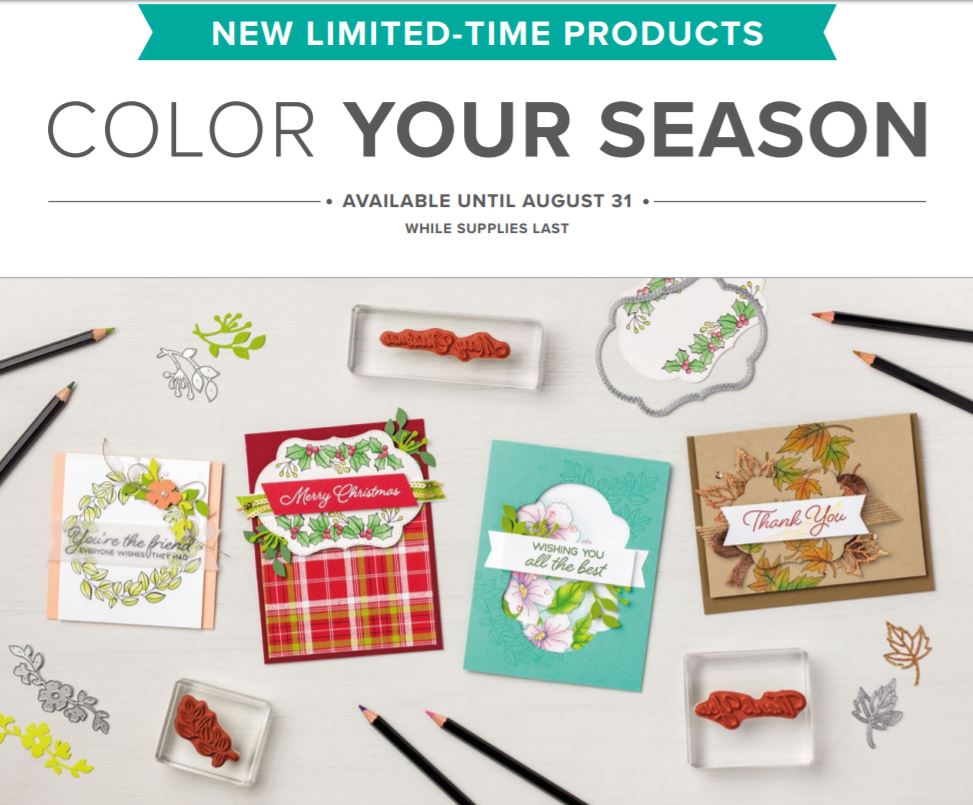
The thing is about this special Blended Seasons Bundle is it is only available now during August.  And August is flying by if you ask me! Be sure to take a look at the options in this suite and see if you want the stamp set only, or the Bundle with the stamp set and framelits dies.  You can also order the new assortment of Watercolor Pencils, which is separate from the Bundle.  These may or may not be available later on, so if you like Watercolor Pencils in Stampin’ Up! colors (years ago when I started Stampin’ Up! sold Watercolor Pencils but they were not in official Stampin’ Up! colors, that’s why these newer ones are special!), you should probably purchase these now while you can.

This Blended Seasons Bundle and Watercolor Pencils are only available until August 31! Less than two weeks!

Color Your Season Photo

Images © Stampin’ Up! 2018

SHOP THE COLORFUL SEASON LIMITED-TIME PRODUCTS TODAY!

Toil & Trouble Halloween Witch Card

Toil & Trouble Halloween Witch Card

Unless you have been inside a craft store, you probably won’t believe it is less than twelve weeks until Halloween!  We are in the midst of summer and back to school, but as a mom of three, I remember that there is just a small pause after school starts while kids get acquainted, before birthday parties start, before sports and activities kick into full gear, before big school projects get assigned. THEN it all hits and before you know it, it is Halloween and we know it is a slippery slope to all the rest of the holidays until the end of the year! So the Stampin’ Up! Holiday Catalog comes out at a good time, early enough for us to take some stock into what we want to make for the holidays and get our supplies purchased and ready to go!

Since Halloween is right around the corner (ha!), here is a card I made to get us in the mood!  I love all things cute an lovely for fall and Halloween and I think this new Toil & Trouble Designer Series  Paper in the upcoming Holiday Catalog fills that bill! You’ll find cute witches and cauldrons, like the ones on this card, plus little spiders, bats, lovely pumpkins, and even some generic paper patterns that you can use for backgrounds or trim on Halloween cards or even on other cards.

I started with this cauldron paper, which lends itself to being cut into strips which can then be used in various ways.

Toil & Trouble Designer Series Paper Cauldrons

Toil & Trouble DSP Strips

For the card base, I used Basic Black Cardstock with a layer of Crushed Curry, then a layer of the designer paper with one of those “generic” backgrounds, the stars.  I chose a piece of Whisper White to die cut and layer on a scalloped piece of Crushed Curry.  I was just going to glue on the witch, cauldron, and greeting, but I decided it needed a little more spookiness!  I used my Sponge Daubers to sponge on some spooky colors of ink for the background. I just hand cut the images from the designer paper, but you can purchase the Cauldron Framelits Dies if you prefer. My greeting is from the Trick or Treat Stamp Set, also coming in the catalog.

Witch Card Closeup

Since the inside of the card is Basic Black I adhered a piece of Whisper White inside for a greeting.  To embellish it a bit, I added a strip of the designer paper on the side and even the little cat which is on the designer paper.  I like the way it turned out for my first Halloween card of the season!

Hopefully, your Holiday Catalogs are starting to arrive in the mail if you are one of my customers.  If you are looking for Stampin’ Up! products, just send me your contact information and I can mail a complimentary catalog to you!  We wouldn’t want you to miss out on these great holiday products!!

I hope this Toil & Trouble Halloween Witch Card gets you in the Halloween and fall mood.  I know I am in the mood, especially for cooler fall weather and time for crafting!

Shop Stampin’ Up! Online!

Animal Expedition Playful Animals Birthday Card

Animal Expedition Playful Animals Birthday Card

Who wouldn’t love this Animal Expedition Playful Animals Birthday Card?  While whimsical and playful, these animals on the Animal Expedition Designer Series Paper, is not just for children! It would make cute cards and projects for children or babies, but it can be for anyone.

Even if you do not want to invest in the entire Animal Outing Bundle, I think just owning the paper can be a very good investment!  And if you really love the paper, stamps, and the dies, then buy the paper and the Bundle!  The Bundle saves you 10%!  I’ve seen so many cute samples using this entire set!  But, so far, I only own the paper because I think it is so cute! If you don’t mind some scissor-cutting, you can trim out the animals in the paper without the dies, while you are watching TV or working on your project.  Or you can use various dies and punches that you may already own to cut out the animals.  The paper is just adorable!

To make this card, I chose Lemon Lime Twist Cardstock for the card base with a layer of the smaller animal pattern.  I used the greeting from the Detailed With Love Stamp Set. It is die cut with an oval in the Stitched Shapes Framelits Dies and layered on a scalloped oval in the Layering Ovals Framelits Dies.  The ribbon is the Lemon Lime Twist 1/4″ Ombre RibbonAnd just for fun, I added some leaves from the Leaf Punch and sponged them a little bit on the edges.

This is one of those basic card designs that are easy for anyone to make – just a card base, a piece of designer paper and a greeting, maybe some ribbon or another pattern of designer paper, and that can be it.  If you want, you can embellish even more. Keep the design and layout in mind when you need to make a card and don’t know where to start!

Remember the Stampin’ Up! Bonus Days going on now!  Spend $50 and earn a $5 coupon code to use on your order in September!  For every $50 you spend, you will receive a coupon code. Be sure to write them down or print out the email from Stampin’ Up! so nothing happens to your codes!  Stampin’ Up! cannot replace lost codes.

This would be a good time to purchase the Animal Expedition Designer Series Paper and perhaps the entire Animal Outing Bundle along with some of the new ink pads, if you don’t have all the new colors already! Don’t forget the Reinkers!  Get as much on your order as you can so you can take advantage of Bonus Days!  Only two weeks left in August!  OMG!  You’ll want those coupon codes in September when you start shopping the Holiday Catalog beginning September 5th.

SHOP STAMPIN’ UP! ONLINE TODAY!

Sign Up For My Stamping With Karen Mailing List!

Sign Up For My Stamping With Karen Mailing List

Are you on my Stamping With Karen Mailing List?  I know we all get a lot of emails, but if you like stamping and Stampin’ Up! then you want to join my Mailing List!

I am sending out a weekly newsletter every Tuesday to keep you updated and to see new, exclusive projects each week!

  • Get a FREE GIFT for signing up!

  • Find out about Stampin’ Up! specials, offers, and news!

  • Get FREE card and project ideas with complete Supply List and Instructions!

  • Learn about new Stampin’ Up! products and stamping tips!

  • Receive my annual “12 Weeks of Christmas” weekly emails with a new holiday project each week for your inspiration and help with the holidays!

  • Sign up on my Blog HERE or click the button below!  We’d love to have you!

Sign up button

First Frost All-Occasion Card

First Frost All-Occasion Card

One of the most beautiful suites in the upcoming Holiday Catalog is the Frosted Floral Suite, and here is a First Frost All-Occasion Card I made with the stamp set and a strip of the designer series paper.  All the paper is printed on shimmery white paper which gives a beautiful elegant look to every sheet.   I chose not to use the most dramatic of the papers with the gorgeous flowers but instead chose another pattern that would kind of go with the stamp.  You can see the beautiful patterns of the paper below on both sides.

For the card base,  chose Blackberry Bliss and then a layer of Pear Pizzazz. I added a one inch strip of designer paper on the side. The stamp is from the First Frost Stamp Set. I colored the stamp with various Stampin’ Write Markers. I had quite the selection of markers I was using so I’m not sure what ultimately made it on the stamp.  I think I used Merry Merlot for the stems, maybe Blackberry Bliss and Night of Navy for the flowers on the stems.  I used the “thumping” technique with the two colors, which means tapping the markers on the stamp.  The leaves are colored with Pear Pizzazz and Mossy Meadow with a bit of yellow applied first.  The stamp has that look to it that you see (can’t think of a descriptive word at the moment) that looks like maybe you missed some spots but you did not.  It is stamped on Shimmery White Cardstock to match the shimmery designer paper.

The stamped image of the flowery sprig is die cut with the Stitched Shapes Framelit Die and layered on the Blackberry Bliss scalloped oval piece.

The greeting on the card is from the First Frost Stamp Set. I stamped it directly on the card front with Blackberry Bliss ink.  This is where the Stamparatus can come in handy! If you don’t want to stamp the greeting crooked or miss a part that didn’t get inked well, etc. use the Stamparatus and a clear window sheet.  Put the window sheet over the paper in the Stamparatus so that you can stamp on that and see how you have the stamp placed for alignment.  Once you have it how you like it, remove the window sheet and stamp directly on the cardstock.  If you need to re-ink and re-stamp you can with the Stamparatus!  It’s great!

Frosted Floral Specialty Designer Series Paper

Frosted Floral Specialty Designer Series Paper

This month would be a good time to purchase the Stamparatus if you haven’t already!  It will really come in handy for making multiple Christmas cards.  I remember last Christmas thinking I wished I had my Stamparatus to use at that time!  This Christmas I have it and it will make stamping Christmas cards much easier and quicker. I say this is a good month to purchase the Stamparatus because it is just under $50 and with every $50 of product you order during August, you earn a $5 coupon to use in September!  Add an ink pad or buy more products from the new Annual Stampin’ Up! Catalog this month to get your Bonus Days coupon(s), then you will have those to spend on the Holiday Catalog in September!

Put this Frosted Floral paper and Suite on your Holiday Catalog Wish List now so you can make some beautiful cards like this First Frost All-Occasion Card and many, many more!

SHOP STAMPIN’ UP! ONLINE DURING BONUS DAYS!

All Is Bright Merry Christmas Card


All Is Bright Merry Christmas Card

My Holiday Catalog preorder arrived very late Friday night (sometimes UPS must like to tease us knowing how impatiently we are waiting for our Stampin’ Up! order to arrive!) and then with my birthday festivities this weekend I barely had time to even look at all the new goodies! However, here is an easy to make All Is Bright Merry Christmas Card!  It just takes a few minutes and would be a good layout if you are making a lot of similar cards for the holidays.

The designer paper, All Is Bright, has those photographic images plus other festive designs and some a little more plain.  It is the perfect paper for making traditional Christmas cards.  You will enjoy the entire All Is Bright Suite of products!

All Is Bright Designer Series Paper

All Is Bright Designer Series Paper 2

I used Real Red for the card base and just cut a piece of the designer paper to fit on the front.  I thought Gold Foil would look great on the front of this card so I die cut a piece with the Stitched Labels Framelits Die and layered a greeting from the set Merry Christmas to All.  You can make your own greetings with the individual words so it’s very useful.

For a little bling, I added some Mini Gold Sequin Trim.  You can see on the photo below how I saved maybe an inch or so of the trim but using two pieces and adhering them with SNAIL adhesive plus Stampin’ Dimensionals.

Using Mini Sequin Trim

The Holiday Catalogs have probably been mailed from Stampin’ Up! so if you are a regular customer of mine, yours is most likely on the way!  If you are interested in Stampin’ Up! products, particularly holiday products, please email me at Karen@Karenstamps.com and I’d be happy to send a Holiday Catalog or even an Annual Stampin’ Up! Catalog if you would like one.

This Holiday Catalog, I believe, is going to be very popular!  Once you start seeing samples of cards and projects, you will want even more products!  I already want more and I got a lot of things just the other night!  The Holiday Catalog goes live Sept. 5th.

Keep this simple design in mind for your Christmas cards.  It works pretty well as you can see from this All Is Bright Merry Christmas Card!


Subscribe to Paper Pumpkin For a Spooky Papercrafting Kit!

Paper Pumpkin Spooky Banner 2018

It’s hard to believe in the middle of the heat wave that is summer that we can think ahead to Halloween, but here’s an easy way to get into fall crafting with the September Paper Pumpkin Kit with a spooky Halloween project inside the exclusive Halloween-designed box.  You will love finding this special box in your mailbox mid-September and getting excited about Halloween!  I personally love Halloween and have boxes of decorations, not the gory, scary stuff but the cute and fun Halloween things!  I will be looking forward to this kit for sure!

You may think there is no rush, but it wouldn’t hurt to subscribe TODAY and then you don’t have to think about it anymore!  You can go to paperpumpkin.com, fill out the information, and then choose me as your Demonstrator OR you can just go to my personalized link for Paper Pumpkin HERE and you’re right there on my Paper Pumpkin site!  If you have any questions, just ask!  Here is a Stampin’ Up! video to help you and see the process.

Even if you have subscribed to Paper Pumpkin in the past, you are always welcome to come back!  If you subscribed in the very beginning of the program several years ago now, I think you will find now that the kits are much improved and everyone loves them!  The good thing is that there is no risk or obligation to continue for any length of time.  Try Paper Pumpkin and if it doesn’t suit you, just cancel. If you like Paper Pumpkin but know you will be super busy one month, just go into your account and skip that month.  It’s all up to you!  Just subscribe or amend your account by the 10th of any month.  You can add kits any month if you want to give one for a gift or have a friend coming over you would like to craft with!

Once you are a Paper Pumpkin subscriber, you also have access to any available past kits in the Stampin’ Up! Online Store. Sometimes it is the full kit and sometimes it is a refill to the kit. If, for example, you subscribed to a certain kit and wanted to make more, you could order just the refill since you would already have the stamps and ink spot. Therefore, the refill would be of less cost.

If you like Halloween, be sure to subscribe to Paper Pumpkin and see what this spooky kit has in store for us!

JOIN PAPER PUMPKIN TODAY!

Last Day to Save 50% Off the August Paper Pumpkin Papercrafting Kit From Stampin’ Up!

Paper Pumpkin Bloomin' Savings Offer 2018 Banner

Treat yourself!  Join Paper Pumpkin for 50% off the August 2018 Kit! Use Promo Code BLOOM0818

Use my direct link to subscribe today!  Kits will be mailed out mid-August!  Sign up by August 10th to receive the August Kit.  No risk, no obligation!

TODAY is the LAST DAY!

Each Paper Pumpkin Kit has all the supplies needed in the kit, including adhesive, for making the project! For first time subscribers, you will receive a free acrylic block with which to mount the stamps in the exclusive stamp set in the kit. You will also get a cute little square ink spot in one color to complete the project.  These are great to save for other projects and for use with the Stamparatus!

The Blooming Summer Savings with Paper Pumpkin is too good of a deal for YOU to pass up! Normal basic monthly price is around $20 but for August get it for around $10.  Shipping is included!

If it is not for you, then cancel before the 10th of the next month – September 10th.  Or if you will be busy, just skip a month!  Paper Pumpkin is pretty flexible!

This offer is for new subscribers (or a new email address).  Please share with any friends who might have fun with Paper Pumpkin!

JOIN PAPER PUMPKIN HERE NOW!

Use Promo Code BLOOM0818


Rooted in Nature Masculine Birthday Card

Rooted in Nature Masculine Birthday Card

This Rooted in Nature Masculine Birthday Card was fun and interesting to make and you could use it for other occasions as well.  I hadn’t used this stamp set and designer paper yet (amazingly!) so I looked in the Stampin’ Up! Annual Catalog for inspiration.  This card is my take on one of the samples in the catalog!  Can you tell which one?

I wasn’t planning to make it a birthday card and I planned to use one of the greetings in the Rooted in Nature Stamp Set. And this is why you should always check everything in your Stampin’ Up! order when you get it!  I’ve never had this happen before, and honestly, rarely have any problems with my orders.  Rooted in Nature is a two-pack stamp set with so many stamps.  I had only used the tree from the first pack.  Then I opened the second case for the greeting I wanted to use. That sheet of rubber was the same as the stamps in the first case!!  The labels for the stamps were correct and the cover on the case was correct….just the stamps weren’t!  Of course I called Stampin’ Up! and of course, they are sending me a correct set!!  So I had to choose a greeting from another set! And I remembered I needed a birthday card for my nephew!

The card base is Cajun Craze and then there is a layer of the Nature’s Poem Designer Series Paper. Too bad it doesn’t show up more!  I should have made the top layer a little smaller! I chose Shimmery White Cardstock for the stamping because I knew I would be doing some watercoloring in the background and Shimmery White holds up to the water. Regular Whisper White Cardstock is likely to pill or get rough from the water.

I stamped the tree with Mossy Meadow Ink, trying not to get the tree trunk inked up and then used a Soft Suede Marker to color directly on the rubber for the tree trunk. Sometimes I stamped directly but usually I stamped off once or even twice.  Then I stamped one tree and die cut with the Nature’s Roots Framelits Dies.  It is adhered with  Stampin’ Dimensionals to pop it up.

Before adhering the tree, I watercolored the background with some Balmy Blue Ink and Soft Suede for the ground.  I used my Aqua Painter and just tiny bits of ink in the lids of the ink pads. So fun!

For the greeting, I chose a birthday greeting in the Beautiful Bouquet Stamp Set because it was the right size for the space.  It is die cut with a Layering Oval Die and layered on a piece of Tranquil Tide cardstock die cut with a scalloped oval die in the same set. For a little extra, I cut a small piece of the 5/8″ Burlap Ribbon to go under the greeting.

This card shows that even though what you thought you had planned to make, various factors, including maybe your creativity, may change that!  In this case, partly my own idea of stamping more trees than the sample in the catalog and then not having the greeting I thought I was going to use changed the original idea of the card!  But now I have a birthday card for my nephew that I might not have had otherwise! (Also a good idea to check your birthday book of dates before the middle of the month to see what birthdays are coming up!)

Remember, Bonus Days are going on, so if you were interested in the Rooted in Nature Bundle of stamps and dies, you would save 10% with the Bundle and also get a $5 coupon code to use with Stampin’ Up! in September (when the Holiday Catalog goes live!)   This has been a very popular Bundle, I’m just slow in getting around to using it! You can make many cards like this Rooted in Nature Masculine Birthday Card.

SHOP STAMPIN’ UP! ONLINE!

Easy Fancy Petal Promenade Z-Fold Birthday Card

Easy Fancy Petal Promenade Z-Fold Birthday Card Open

I wanted to make a card for a long-time friend who has a birthday the day after mine, so I came up with this Easy Fancy Petal Promenade Z-Fold Birthday Card.  What can make a more beautiful birthday card than the Petal Promenade Designer Series Paper!  I just love it, and as you may have seen on a video previously, this paper was photographed in the Stampin’ Up! studio from fresh flowers and then made into a paper design by the graphic designers – I think they mentioned digitally removing a spider or ladybug hiding in the flowers!

One of the coordinating colors for this paper is Petal Pink, so that is what I used for the card base. I decided to jazz it up a bit by making a z-fold card.  So simple, yet it makes you look like a specialty card designer!  Just make the card as usual, then fold the front of the card in half back on itself!  It’s best to score first so half of the card front (4 1/4″) is 2 1/8″.  Just score and fold back, hence the name “Z-Fold”.

The designer paper is layered on to the card using the photographic flowers on the front panel, and the opposite side of the paper that looks like a granite pattern on the inside of the card. Since I was using a light color of ink, I used my Stamparatus to stamp the greeting inside the card on the designer paper (stamp first, glue second!). As I thought, the first stamping looked too light, but I could stamp it a second time and then it was inked up well enough to look good. I even glued another “back” of another pattern of paper on the inside of that front fold.  It’s the one that looks like bokeh dots.

The greeting on the front of the card is stamped in Petal Pink Ink on Whisper White and die cut with the Stitched Shapes Framelits Dies. I was hoping I could layer this on top of the Petal Pink die cut piece from the Stitched Labels Framelits Dies and I think it works. The thing is with a Z-Fold card is you want the stamped greeting on the inside of the card to be hidden behind the greeting on the front of the card. You need to think this through a little bit while you are making the card.

For a little bling, I added the Share What You Love Artisan Pearls on the greeting on the front of the card.  I first looked at sequins and some of my other embellishments, but decided, as I often do, on the Artisan Pearls.  They are so teeny tiny they add a nice accent without being too bold.

Remember, Stampin’ Up! Bonus Days are here during August! Spend $50 and get a $5 coupon by email to spend in September!

Pick up some of this gorgeous Petal Promenade Designer Series Paper on your next order and start making some easy cards and projects that will be beautiful like this simple Z-Fold card.

Easy Fancy Petal Promenade Z-Fold Birthday Card

Make Pretty Floral Cards With the Color Your Season Products During August

Color Your Season Floral Samples

Make beautiful floral cards with the products in the Color Your Season limited time suite! It’s called Color Your Season because with this set of stamps and dies, you can make cards or other projects for any of the four seasons!  Do a little watercoloring with the new colors of Watercolor Pencils with real Stampin’ Up! colors! There is already a set of Watercolor Pencils in the Annual Stampin’ Up! Catalog, but this new set is called Watercolor Pencils Assortment 2.

You can purchase just the stamp set, Blended Seasons, which is pretty enough just in itself. You can also purchase just the framelits dies, Stitched Seasons, if you wanted to use them with other stamp sets you have.  They have dies that will create nice frames, plus embellishments. OR if you want it all, you can get the Bundle, Blended Seasons, at a 10% savings.

With this special limited-time set of products, you can make cards with spring or summer flowers, or Christmas cards and cards for fall!  You are all set!

Remember, this Color Your Season group is available only during August, while supplies last.  Don’t wait too long just in case!  And I would highly recommend the Watercolor Pencils for sure especially with Blender Pens of you don’t already have them.  Go ahead and enjoy this set before we get into the serious holiday crafting season!


SHOP STAMPIN’ UP! ONLINE HERE!

Animal Expedition Baby Card Eclipse Technique

Animal Expedition Baby Card Eclipse Technique

The Animal Expedition Designer Series Paper is some of the cutest paper this year in the Stampin’ Up! Annual Catalog, and here it is used in this Animal Expedition Baby Card with the Eclipse Technique.

I was actually just playing around with this paper and the Eclipse Technique seeing if the letters for “BABY” would fit on a paper layer. When I changed to another design for something I was making, I thought I might as well make a baby card out of what I had already die cut!

There are MANY coordinating colors with this Animal Expedition Designer Series Paper! I always like to write the names of the coordinating colors on the back cardboard of the designer paper so I don’t have to grab my glasses to read the small print!  I wrote and wrote and wrote the names of colors for this DSP! One of the colors is Crumb Cake, which I used for the card base. For the next layer, I used Soft Suede, which surprisingly isn’t on the list of colors!  But I liked it.

The Eclipse Technique is when you die cut or punch out something and then replace that image where it was cut out but popped up on dimensionals so you can just barely see the color underneath.  Oh how I love the Mini Stampin’ Dimensionals!  It saves time cutting down the regular Stampin’ Dimensionals when you need a very small piece. In this case, I used the Large Letters Framelits Dies to spell out Baby.

Animal Expedition Baby Card Eclipse Technique Closeup

Here are photos of both sides of the whimsical Animal Expedition Designer Paper.

Animal Expedition Designer Paper Animals

Animal Expedition Designer Paper Patterns

Images © Stampin’ Up! 2018   www.KarenStamps.com

For a little finishing touch, I tied a piece of the Shady Spruce Ribbon in the Metallic Ribbon Combo Pack around the card.  You also get Petal Pink Ribbon in this combo pack.

This could be a baby card for a girl or boy, and the paper can be used for adults and older children as well – anyone!  There is also a coordinating Bundle with stamp set and dies, the Animal Outing Bundle, that adds even more to your cardmaking and scrapbooking.

Remember the Stampin’ Up! Bonus Days that are going on during August!  With every $50 you spend this month on an order (before shipping and tax) you will receive a coupon code via email (be sure to save that email and write down your codes!) to spend on an order in September! It’s kind of like Sale-A-Bration…. if your order is close to $50, go ahead and add a little something so you can earn a Bonus Days Coupon! (I printed out my email when I got it from my order so in case something happens to may email or computer, I will have a copy.  Stampin’ Up! cannot replace any lost coupon codes!

Use a punch or other dies to try the Eclipse Technique and make a fun card like this Animal Expedition Baby Card Eclipse Technique.

Treat Yourself! Join Paper Pumpkin 50% Off For August Kit!

Paper Pumpkin Bloomin' Savings Offer 2018 Banner

Treat yourself!  Join Paper Pumpkin for 50% off the August 2018 Kit! Use Promo Code BLOOM0818

Use my direct link to subscribe today!  Kits will be mailed out mid-August!  Sign up by August 10th to receive the August Kit.  No risk, no obligation!

Here is the July Paper Pumpkin Kit I have been working on!  Very cute little baskets with tissue paper “cloth” and little fruit note cards with stamped greetings!  With any of these kits, follow directions and make the kit as designed or do your own thing with the supplies.  Or both!

Paper Pumpkin July 2018 Kit Assembly

Watch the video from Stampin’ Up! showing how to assemble the kit!

It’s so much fun to get a new red box in the mail every month with a surprise project inside! Anyone can follow the directions and make the project and all materials are provided, even the adhesive. Get an extra one for a friend or family member who would enjoy it!

The Blooming Summer Savings with Paper Pumpkin is too good of a deal for YOU to pass up! Normal basic monthly price is around $20 but for August get it for around $10. If it is not for you, then cancel before the 10th of the next month – September 10th.  Or if you will be busy, just skip a month!  Paper Pumpkin is pretty flexible!

This offer is for new subscribers (or a new email address).

JOIN TODAY so you won’t forget!  Don’t miss the August 10th deadline!

Coloring With the Stampin’ Up! New Watercolor Pencils

Coloring With Watercolor Pencils 3

One of my favorite things to do since I first learned about Stampin’ Up! and stamping was coloring with Watercolor Pencils. We had a set of Watercolor Pencils back 16 years ago or so when I started stamping as a customer, but they were not the exact Stampin’ Up! colors.  They went away for years, then they were brought back in an assortment of Stampin’ Up! colors. Of course, for us stampers, one assortment is not enough!  We need more colors!  So during the month of August, you can buy a second assortment of colors of Watercolor Pencils! These pencils will likely be in a future catalog, but if you want them now, you better purchase them in August so you don’t have to wait!

I decided to make my card using the Oh So Eclectic Stamp Set and Stazon Ink to stamp three flowers to later color.  The leaves are stamped in Granny Apple Green, stamped off once first.  The card base is Flirty Flamingo Cardstock with a layer of Whisper White. When I was finished, I stamped the little images around in the empty spaces of the card with Flirty Flamingo Ink. Then I tied on a piece of Crumb Cake Twine from the Nature’s Twine assortment to embellish the card.  The greeting is from the same Oh So Eclectic Stamp Set.

I love the Watercolor Pencils because you don’t have to be really precise.  Notice how I colored in the flowers rather sloppily in the photo below!  Just lay down some color.  You can always go back and add more or mix two colors, whatever you like.

Coloring with Watercolor Pencils 1

Then, use a Blender Pen or Aqua Painter to smooth out the coloring. On Whisper White Cardstock I prefer the Blender Pen (used lightly) so that the paper doesn’t pill from too much moisture. For more serious watercoloring, use Shimmery White Cardstock or even better, Watercolor Paper.

Here is a closer look AFTER I used the Blender Pen to smooth out the colors.

Coloring with Watercolor Pencils BlendedThe original set of Watercolor Pencils has 13 colors:  Basic Black, Basic Gray, Bermuda Bay, Calypso Coral, Daffodil Delight, Early Espresso, Melon Mambo, Old Olive, Pacific Point, Pumpkin Pie, Real Red, Rich Razzleberry, Whisper White.

The second assortment, Watercolor Pencils Assortment 2have 10 colors:  Balmy Blue, Cajun Craze, Cherry Cobbler, Coastal Cabana, Crushed Curry, Flirty Flamingo, Garden Green, Gorgeous Grape, Granny Apple Green, Night of Navy.

Watercolor Pencils are a great inexpensive way to have a lot of colors at hand for coloring. Be sure to pick up this second assortment during August to avoid a wait! Also check out the Limited Time Blended Seasons Bundle and save 10% on both the stamps and dies. (The Watercolor Pencils are not included in this Bundle.)

I know you will have fun coloring with the new Watercolor Pencils and trying different techniques!

SHOP STAMPIN’ UP! ONLINE TODAY! 

BONUS DAYS with every $50 purchase!


Stampin’ Up! Bonus Days Are Here!

Bonus Days Flyer 2018 Info

Stampin’ Up! Bonus Days are back!

When you place an order of $50 or more in August, beginning today, you will receive via email from Stampin’ Up! a Bonus Days coupon to use on a purchase in September!  Be sure to save, print out, or write down your coupon code so you have it handy in Sept. lest your email disappears or something!

If you spend multiples of $50 in one order, like $150, you will get one email with all three codes.  If you have separate orders throughout the month, each $50 or more, you will get an email after each order.

If you have an order close to $50, just add another little something to reach $50! Surely you can always use another adhesive, embellishment, or something!

Here’s one way you might want to spend that $50!

Color Your Season Banner

It’s the Color Your Season Limited Time Offer that has the Blended Seasons Bundle if you would like the stamp set and framelits dies. It’s a beautiful set and covers all the seasons you might be making cards for!  In addition, you can order a NEW set of Watercolor Pencils in new Stampin’ Up! colors to add to your previous Watercolor Pencil collection.  Be sure you have a Blender Pen or Aqua Painter to make blending the Watercolor Pencils so easy!  These pencils are not included in the Bundle.  The Bundle is just the stamp set and dies. Just order the WC pencils separately.

Have fun shopping during Stampin’ Up! Bonus Days in August!