
This Masterfully Made Designer Series Paper is so interesting and there are so many ways you can use this paper as you can see with this Masterfully Made Slimline Card. The card turned out differently than I expected, as is often the case, and you can’t tell from the photo, but I will explain!
I just purchased this designer series paper during the Stampin’ Up! designer paper sale in June, but if you missed it, don’t worry because during July 2023 you can earn a $5 coupon for every $50 you spend in July. Then spend that coupon in August! It’s called Bonus Days! Every $5 helps when you want to buy products at Stampin’ Up!
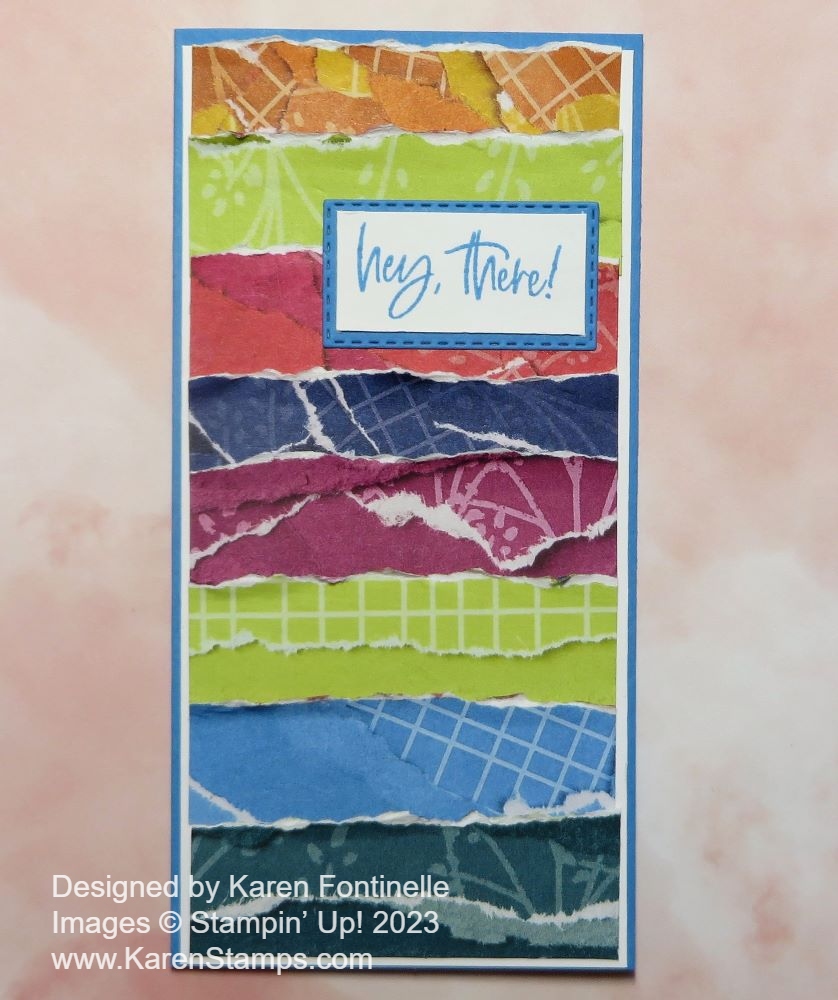
To make this card I started with a card base of Azure Afternoon but in the Slimline design. The cardstock is cut at 6″ x 6″ and then scored at 3″ so the card front is 3″ wide by 6″ high. You can make a slimline card in various sizes but I like this size to go with some standard envelopes I already have.
I thought it would be fun to just cut strips of the Masterfully Made Designer Series Paper to fit across the front of the card. If you had already used a lot of your paper, you might have scraps you could use, but in this case, I had to cut into mostly new sheets of paper just for little strips! A tough thing to do, as you can imagine, with such beautiful paper!
I also added a layer of Basic White over the Azure Afternoon which just brightens up the paper strips a little against the medium blue. I just used very narrow margins, so the Basic White is cut at 2 7/8″ x 5 7/8″ and then the strips are cut at 2 3/4″ x 1″. I wasn’t sure about the width of the strips until I played around with the card a bit. I ended up using eight different strips of paper.
The paper itself already looks like it has torn edges. That is the way it is printed. After I was getting the strips laid out how I liked them, I got the idea to tear the top edge of each strip and even kind of rough it up along the torn edge with my fingernail. I suppose that was an unnecessary step when the paper already looks torn and when it doesn’t really show up in the photograph. Even in person, I barely notice it! But it does add a little texture to the card and surely the recipient will notice it and be impressed!
In looking through greetings to put on the card, it obviously needed something small and I found this one in the Charming Sentiments Stamp Set. “Hey there!” is just cocky enough I think to go with this rather wild designer paper! I stamped it with Azure Afternoon ink on Basic White and diecut it with a rectangular stitched die in the Warm Welcome Dies (which I forgot are retired now but you will find another substitute or just cut a rectangular piece). I also made an Azure Afternoon layer under the greeting.
That’s all there is to this card! You could also make the card horizontal and use longer strips of paper! Just play and see what you come up with! But you will definitely want to experiment with this Masterfully Made Designer Series Paper!
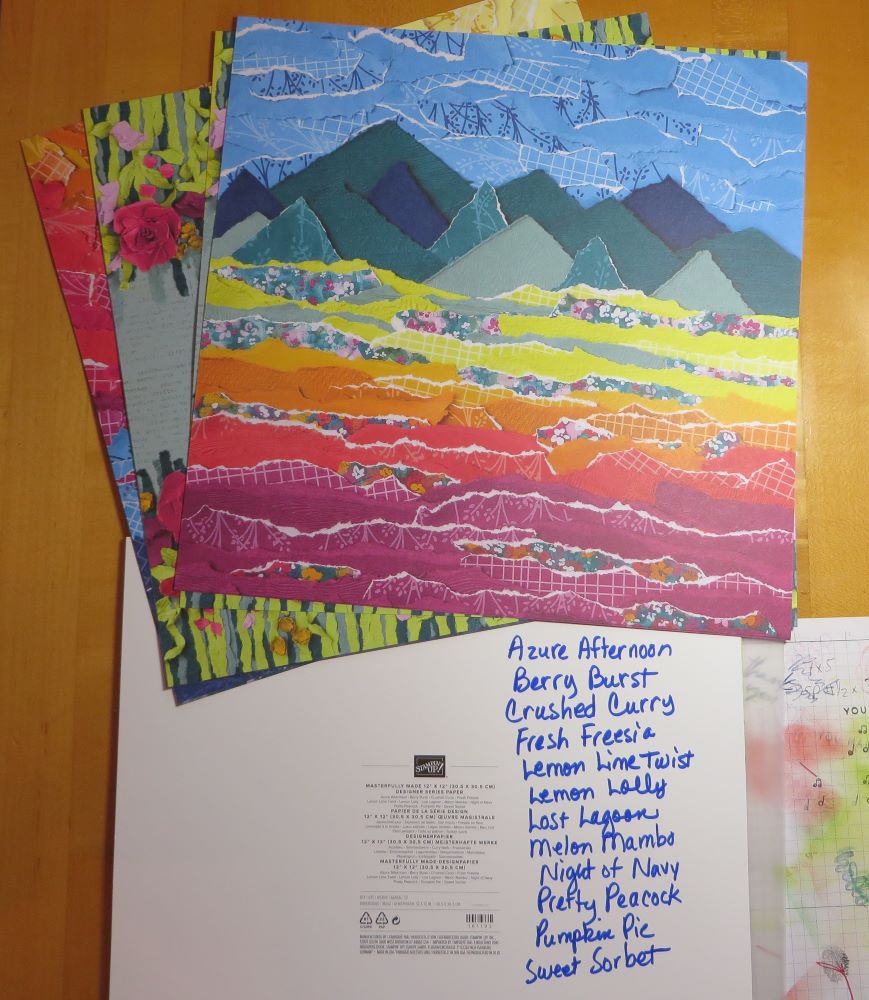
And look at all the colors that these papers coordinate with! I always like to write the color names on the back of the designer paper cardboard so I can READ THEM without getting out my glasses! I wish Stampin’ Up! would print the labels larger!
SHOP STAMPIN’ UP! ONLINE DURING BONUS DAYS! GET YOUR COUPONS!!
What a fun bright card Karen!
Thank you, Kylie! It certainly is interesting paper to work with!!