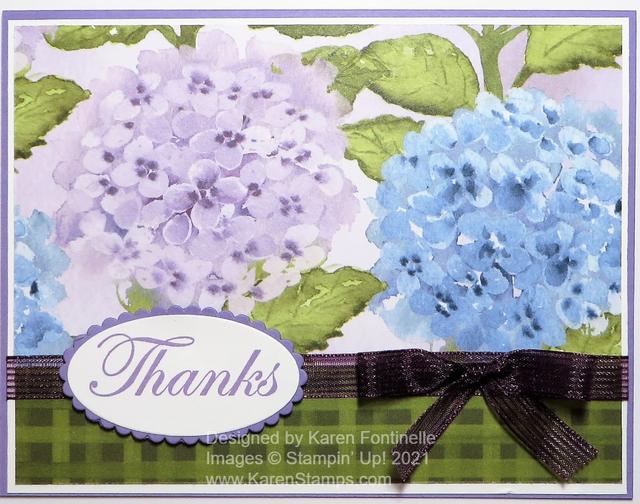
Do you love the look of this Hydrangea Hills Thank You Card as much as I do? I’m not bragging about my own work….it’s the PAPER!! Oh my gosh! I just got it, opened the package, didn’t even look at ALL the paper, just grabbed the top sheet, and went to work!
It was late and I just wanted to make an easy card and this card was certainly it! When I flipped the hydrangea side of the Hydrangea Hill Designer Series Paper over, I saw this green plaid on the other side and thought it would work perfectly with this card design. With the way the hydrangeas are printed on the paper, I knew a horizontal layout on the card would show the hydrangeas the best.
The mistake I made was cutting the designer paper exactly the size for a layer on the front of the card. Since I wanted to wrap some ribbon around the layer, I needed to overlap the flower part of the paper and the green plaid portion. (I could have cut out another strip of paper but I didn’t). The way to get around this is to glue the two designer paper pieces to another piece of cardstock, either covering it entirely or leaving just a tiny margin around the edge (1/8″) like I did on the white cardstock. Sometimes an extra layer like this under the designer paper helps the colors in the designer paper stand out.
Once I had the two pieces of the Hydrangea Hill DSP adhered to a piece of white cardstock, I wrapped a piece of ribbon across the front. While this Blackberry Bliss 3/8″ Striped Ribbon is a little dark, since it’s sheer I think it still works fine on this card. I tied a bow separately and adhered it with a Mini Glue Dot or two.
This whole card front is then adhered to a card base of Highland Heather. There are a lot of colors that coordinate with this designer paper so you can have lots of different looks depending on which colors you use with which papers.
For the greeting, I chose the “Thanks” from the Good Morning Magnolia Stamp Set. The font is so elegant in that set and I thought worked well on this card. The greeting is stamped in Highland Heather Ink, die-cut with the Layering Oval Dies as is the Highland Heather layer. I popped it up over the ribbon with Stampin’ Dimensionals®.
Actually, I only ordered the designer paper in the Hydrangea Hill Suite (because I can’t have everything I want!), but now that I see how pretty the Hydrangea Hill Paper is, I don’t know if I have the will power not to order more things!
I have to say just this one sheet of designer paper I have looked at is SO pretty, so be sure to check out the Hydrangea Hill Suite of products starting on page 18 of the January-June 2021 Mini Catalog. While you might want everything, you can make cards with just the paper and maybe some matching ribbon as I did with this Hydrangea Hill Thank You Card.
