Category Archives: Halloween

It’s Halloween! Trick-or-Treat! Happy Halloween!

Spooky Owl Punch Ghosts Halloween Card

Today is Halloween! There are so many Halloween ideas out there that I didn't get to make that I almost hate to see that the day is here already! But I'm sure that the children who are eager to go trick-or-treating are glad it is October 31st finally!

I love that the Owl Punch can be used to make a ghost!  Do you recognize the owl? Cut off his feet and turn him upside down….he's a ghost! I just drew on little ghost faces with a marker.  The background is stamped with the new Illuminate Glimmer Watermark Stampin' Pad….the bats and spider webs. I wanted purple on my Halloween card so I used the Lattice Die and the Big Shot to add that element.

I almost don't remember how I made the moon, but maybe I just started with Whisper White card stock and sponged it with some colors, like More Mustard, Cajun Craze..maybe some Pumpkin Pie.  You could try any similar inks.  The I stamped a witch on the moon as if you would see her shadow on the moon as she flew by. The witch is from Toxic Treats in the Holiday Catalog but I just colored in the witch, not the whole stamp, with a black Stampin' Write Marker and laid the moon down onto the stamp of the witch. I like the kind of shadowy look I got instead of a crisp stamped black image.

And for some bling, I punched a larger circle of Champagne Glimmer Paper to layer behind the moon.

There are so many fun things to do with Halloween, from outdoor decorations to unique food ideas and recipes to cards and candy favors, party favors, costumes, Halloween decor and just not enough time to do them all!

I hope you have taken some time to make something fun for Halloween, whatever it is. I don't necessarily like the scary part of Halloween but I love the whimsical, the fun and cute ideas for Halloween.  And I hope I get lots of little trick-or-treaters tonight!

Happy Halloween!


Trick-or-Treat! Have Fun with Halloween Candy Bars!

Candy Bars for Halloween

Halloween Candy Bars….Before!

 Trick-or-Treat! It’s almost time to hand out Halloween treats, so why not make your Halloween candy bars something special? There are SO many fun Halloween ideas out there, but this is something easy to do for the kids’ Halloween treats.

Trick-or-Treat Halloween Candy Bars
Trick-or-Treat Halloween Candy Bars…After!!

Just take your candy bars and wrap some paper around them! Designer series paper makes it easy, but you could also use card stock. Then stamp a Halloween image and punch out with a circle punch or scallop punch and glue on. If you are looking for an easy Halloween craft to do with your kids, this might be an idea. This is especially good for those special trick-or-treaters, maybe class treats at Halloween parties at school, or your own Halloween parties.

I used my Googly Ghouls stamp set for the images and the Houndstooth & Scaringbone Designer Series Paper, both in the Stampin’ Up! Holiday Catalog. I colored in a bit with Stampin’ Write Markers. It’s just something fun to do, and why not have some fun at Halloween?!


Have questions?  Just email me at Karen@KarenStamps.com

You can place your order online here or email me. 

Punch Art Pumpkin Halloween Card

Years and years ago I purchased this Halloween gift bag at a craft show and have only used it as one of my many Halloween decorations around the house. It's made with fabric probably ironed on to the paper bag.

Halloween Bag

Then I thought why not make a card like the bag? So I did!

Halloween Pumpkin Card

I started with the pumpkin head, made out of three ovals punched with the Extra-Large Oval Punch.  I sponged Pumpkin Pie ink around all three ovals and then just played with them until I got them placed how I wanted them. You could even use punched circles if you wanted. I just drew on the face with a black marker and drew on the little stitching lines.

For the Halloween hat, I die-cut the medium-size triangle on the Perfect Pennants Bigz L Die using the International Bazaar Designer Series Paper.  Who would think you would use that paper for Halloween? The hat brim I just cut by hand and tied a Summer Starfruit Stitched Satin Ribbon bow.

The moon is a scrap piece of Summer Starfruit card stock.  You can cut it by hand or punch out a small circle for the inside of the crescent moon and then another circle to cut the outside edge.  You still might need to trim the points of the moon.

And for one more embellishment to the card, I stamped the bats from the Wicked Cool stamp set using the new Illuminate Glimmer Watermark Ink Pad. I just wanted a very light, night-time look for the bats in the background. There is a slight shimmer to the ink but it doesn't photograph as such at all…at least not with my camera and skills!

Halloween is getting close!  Time to finish making those cards and mail some out to your friends!

Make Your Own Halloween Ornament with Paper Strips

Paper Strip Halloween Ornament

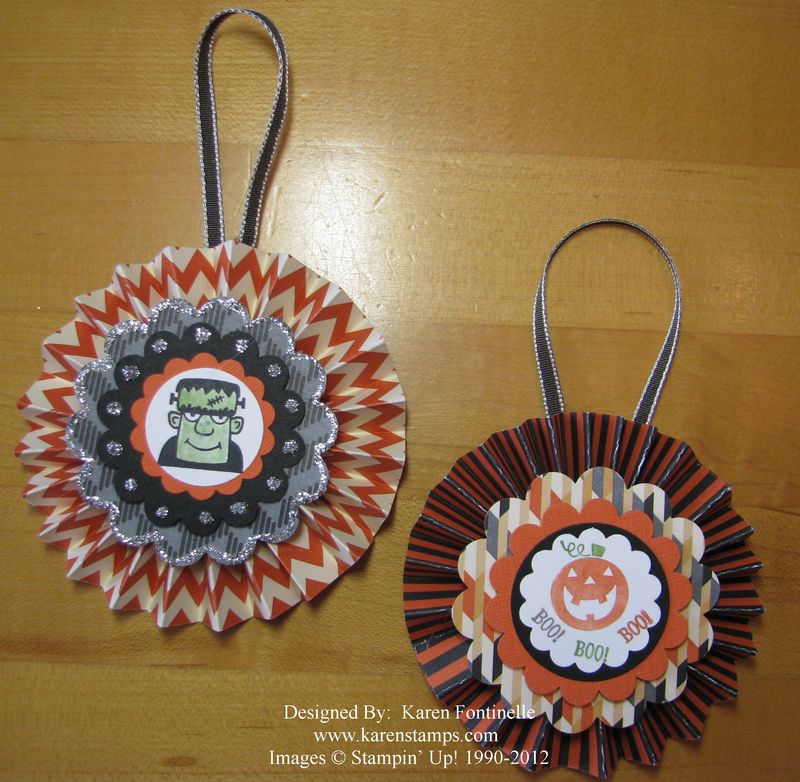
As Stampin' Up! Demonstrators, we receive a magazine that we all love filled with creative ideas, business tips, and the latest Stampin' Up! news.  On the cover of the latest issue are pictures of ornaments like these, except for winter or Christmas. I decided to try making a paper ornament for Halloween with the Howlstooth & Scaringbone Designer Series Paper. These would be so fun to make for Halloween decorations for a party!

Stampin' Up! didn't provide any specific instructions that I found, but I found some examples online! This particular one is made with five strips of paper.  Basically you need two "long" strips, two "shorter" strips, and one "even shorter"!

This is what I used:

Strips are cut 1" wide.

2 strips 10" long, 2 strips 8" long, and 1 strip 6 3/4" long.

Arrange the strips in a "sandwich", paying attention to how you want the sides of your paper to show:  shortest strip in the middle, next longest on each side of the shortest strip, and the longest strips on the outside. So for my ornament, I have the strips stacked 10" – 8" – 6 3/4" – 8" – 10" and make them all flush at one end (they'll be uneven at the opposite end of the pile). Using my paper-piercing tool I poked a hole and inserted a brad. Then I lined up the bottom of the strips, which shapes the ornament and inserted a brad to hold it.  That's it!  Tie a string or ribbon through the top and you've got it!  Experiment with sizes and you can have ornaments of all sizes! I think I would make the next one a little narrower and shorter strips.

Try one with your paper scraps!  Bet you can't make just one!!

When you want to order MORE paper, just go to my Stampin' Up! Online Store….but be sure to check the Clearance Rack because Stampin' Up! added over 70 new products today…some might be gone, so check as soon as you can!  Clearance Rack orders must be made online only because of the availability of the items.

A Tic Tac Pumpkin for Halloween

Tic Tac Pumpkin Folds

I've seen a lot of different characters online made by various stampers using Tic Tac boxes. When you wrap some paper around the Tic Tacs and punch a hold in order to see through to the Tic Tacs, you can make a cute Santa, snowman, jack-o-lantern, elf, etc. Some have used the Two Tags Die and tied it with ribbon on the side, some have used the Top Note Die, and some have just wrapped a piece of card stock around the Tic Tac box.

In this project, I used a piece of Pumpkin Pie card stock cut at 5 1/4 x 2 3/4" (I assume all Tic Tac boxes are the same size, but I'm not sure). Either you can just wrap the strip around the Tic Tac box tightly, sort of scoring the edges with your fingers as you fold, or you can score at 5/8", 2 3/8", 3" and 4 3/4". The fun part is punching out a shape on the front so you can see through to the Tic Tacs inside.  You will need to tear off the label or it might show in your punched hole. For this pumpkin, I used the Extra-Large Oval Punch #119859 but you could use a small circle punch. Figure out which panel is going to be the front, and center the punch as best you can.  You could also punch a Post-it Note, stick it where you want your shape to be punched on your project, and then punch.

Tic Tac Pumpkin for Halloween

Then to make my box look like a pumpkin, I punched some leaves and branches with the Bird Builder Punch #117191 and cut a little scrap of brown for the pumpkin stem. You could also add scraps of black to make a jack-o-lantern face if you wanted to. You could also add a piece of window sheet inside the card stock and glue a face on that…or just stick on the Tic Tac box.  Then for some embellishment, I added a "Boo" from the Tiny Tags stamp set and punched out with the Jewelry Tag punch #117190. Finally, I tied on a little piece of Lucky Limeade Baker's Twine to the little tag.

This is an easy project and fun to do!  Use your imagination and come up with something to coordinate with the color of Tic Tacs you have!

For any card stock and punches, just shop at my Online Store! Don't forget the Merry Christmas promotion if you are interested in the Ornament Keepsakes Bundle.

Tips for Taking Great Halloween Photos!

Today I read an interesting blog article written by Suzanne Kantra about taking great Halloween photos . I admit most of these tips are over and above my point-and-shoot photography skills, but you might be more capable when it comes to cameras! And they're not all advanced tips, so I think we can all benefit.

This article talks about how to get those after dark shots on Halloween night, including how to capture a few ghosts in your photo! She has tips for eliminating blurry shots in the dark and how to get some good shots right at dusk. Maybe you will even want to capture some ghost writing!

To read the full article, you will find it here. I hope this gives you good ideas for Halloween photos!

Plan ahead for your Halloween photos and create some scrapbook pages, traditional or digital, so you can just place those photos right in their places the day after Halloween! If you need some Halloween ideas for scrapbooking, please contact me.

Full-Moon-With-Tree

Toxic Treats Halloween Card with Champagne Glimmer Paper

 Toxic Treat Halloween Card with Champagne Glimmer Paper

It was fun to play around with the Toxic Treats stamp set and the Champagne Glimmer Paper….and all the other elements on this card!  First I used the Spider Web Embossing Folder for the front of the card and then lightly rubbed the new Illuminate Glimmer Watermark Stampin' Pad over the web to give it some shimmer.

I stamped the witch image on Glossy White Card Stock and then sponged the Daffodil Delight moon in the background using a Post-it Note for a stencil.  Then I covered the moon with the punched out circle from the Post-it Note to mask it while I sponged some More Mustard ink around the moon…and then around the rest of it I sponged Cajun Craze. I also used the Labels Collection Framelits to cut out the Toxic Treats image, the Cajun Craze layer and the Champagne Glimmer Paper.  LOVE the glimmer paper!!!  I HAD to put a little spider in the web, although I'm not sure he matches…but oh well, it's Halloween!

Oops, almost forgot to show you the inside of the card, since the card base is black. I just added a layer of Whisper White card stock that I stamped with some images from Toxic Treats stamp set.

  Toxic Treat Halloween Card with Champagne Glimmer Paper _Inside

I hope you will make some fun Halloween cards or projects for your family and friends or maybe neighbors.  It is 90 degrees here today in Houston so anything I can do to make me think it is actually fall here makes me happy!

If you need any Halloween stamping supplies you can find plenty in the Stampin' Up! Holiday Catalog AND the Stampin' Up! Annual Catalog!  Find everything you need in my Stampin' Up! Online Store!

World Card Making Day! Make a Card! How About Spooky Bingo Bits Halloween Card?

Spooky Bingo Bits Halloween Card
Images copyright Stampin' Up! 2012
Today is World Card Making Day, so get in on the fun!  Join cardmakers and papercrafters and stampers all over the world and make a card! Here is one I made in My Digital Studio, the design software from Stampin' Up! for digital papercrafting of all kinds! If you don't own My Digital Studio, you can easily make this same card with some paper, some punches and the stamp set Spooky Bingo Bits! You can get Spooky Bingo Bits in clear-mount or wood-mount. Or you can purchase Spooky Bingo Bits as a digital download to use in My Digital Studio or another design program.
You can purchase My Digital Studio two ways….just get MDS 2 (the new version 2) for $39.95 which is software you can download immediately with a little bit of content and add to it as you like.  Or, purchase MDS 2+ which is the software plus over $500 in digital content for $79.95.  Honestly, this is the best deal….you get SO much content to use for that extra $40.
If you don't even know what I am talking about….digital papercrafting?  digital downloads?  My Digital Studio?? ….. (because I didn't in the beginning!!!), then do the trial version!  Yes, you can try My Digital Studio, the full software plus enough content to play with, for free for 30 days! You can download the free 30-day trial of My Digital Studio.  While you are using the trial version, you can make your projects, print them yourself or send them off to the Stampin' Up! printer.
Whether you make a traditional card, a digital card, or even a hybrid card (digital plus traditional paper additions), stop and make a card today with all the cardmakers around the world on World Card Making Day!

Halloween Medallion Decorations

You can have so much fun with Halloween crafts! Here are two Halloween Medallion Decorations that I made very easily by just pulling out some designer paper, some punches, some stamps, hot glue and my Simply Scored Scoring Tool. Make your medallions (or lollies) whatever size you want, add some layers and add a stamped Halloween image of some kind to the top. Tie on some ribbon or glue onto a stick. You could make big ones or tiny ones to hang on an ornament tree.
**************
Need any stamping supplies? If you order $40 in product before the last day of September, you can choose a roll of ribbon for every $40 you spend! This offer is quickly coming to an end as September 30 is not far off!

My Digital Studio Halloween Card


Hallwn-001

Here is a Halloween card I made in My Digital Studio using a designer template….and then changing it!  It was a birthday card with a little bird, but I changed the background paper, added a layer under the main panel, and added Spooky Bingo Bits images instead of the bird.  A couple of Halloween greetings, of course, change the card from birthday to Halloween!  It's so much fun!  Just start with something already designed and then you can change one thing on it or every single thing!  Whatever you like!

For the free 30-Day Trial of My Digital Studio, just go to my Online Store!

Halloween Glittery Spider Web Card


Halloween Card Spider Web

If you need a Halloween greeting card with a glittery spider web, this is the card for you! The Stampin' Up! Embossing Folders make it so easy with the Big Shot to jazz up your cards!

For this card, I just ran my Basic Black card stock card front through the Big Shot Die-Cutting Machine #113439 with the Spider Web Folder #120889 and sponged a little White Craft Ink #101731 over the raised edges.  But for some extra glitz, I couldn't resist using the 2-Way Glue Pen #100425 and some Dazzling Diamonds Glitter #102023 on parts of the spider web.

To make the label and greeting at the top, I stamped the "For You" frame image from Layered Labels (p. 103 in the Catalog) and cut out with the Apothecary Accents Framelits #127003. Since there isn't a large framelit to layer, I just cut out a slightly larger layer by hand.  Using your Paper Snips #103579  makes it an easy job. And then if you stamp the Layered Label again and punch out the words with the Oval Punch, you can layer that on top, popped up with a Stampin' Dimensional.

The little red spider is from Googly Ghouls in the Stampin' Up! Holiday Catalog p. 27. I don't know if any spiders are red, but I thought this one would be cute in red! I just cut him out by hand, again with my Paper Snips.

For the finishing touches, I added a couple of Rhinestone Jewels to the label and tied the Gumball Green ribbon around the side of the card.  Remember, you can get a spool of that ribbon FREE with a $40 purchase in September!

It's time to order your supplies for your Halloween projects!  You can do so easily at my Online Store!

Layered Labels Trick or Treat Halloween Card

Trick or Treat Halloween Card
While I already had out the Layered Labels Stamp Set  and the cute Polka Dot Parade Designer Series Paper I decided to make another card in the same mode as yesterday's post.  Well, it turned out to be a Halloween Card! Notice how I did the "Trick or Treat" greeting! I'll tell you about that in a minute.
In stamping the large background image, which has "Heartfelt" on it, I used the new Illuminate Glimmer Watermark Stampin' Pad #126857.
Illuminate Glimmer Pad Stamping
The photo really doesn't pick up the slight shimmer of the ink, which is why it just looks white. The Holiday Catalog describes it as "a luminescent shimmer" and "watermark ink for tone-on-tone shimmer stamping.  Acid free." I also stamped the little bats on my card from Googly Ghouls with this Illuminate Glimmer pad.
To make the multi-colored "Trick or Treat" on the Layered Label, I colored the image randomly with markers.  I started with the lightest color first (because you don't want to mess up your markers with other colors!) and just colored here and there with one color, then did the same with the next color.  Of course it is very hard to tell if you hit all the spots except to look carefully and see if all the areas of the stamp are wet.  I got pretty lucky on this one, although after looking at the photo, I can see some tiny areas I missed!  But overall I loved the way it turned out!
Here is a close-up:
Halloween Layered Labels on Card
Instead of a ribbon bow at the top, I used three Glimmer Brads. I also sponged the labels with Pumpkin Pie ink to take off a little of the bright white.  I love the way it turned out!
It's time to order your supplies for your Halloween crafting!  My Online Store is always open!

New My Digital Studio Downloads…A Halloween Party Ensemble

New downloads for My Digital Studio are released today! It's quite the assortment, with a whole Halloween Party Ensemble, a Jewish Celebrations stamp brush set, Christmas papers, punches and more; and Fancy Frames (they look like real picture frames!) Just think what projects you can make with these!

Click on the images below to enlarge:

MDS Downloads_Sept 11 2012

MDS Downloads_Sept 11 2012 Prices

Don't forget you can get the FREE 30-DAY TRIAL of My Digital Studio and purchase any extra downloads you would like!  You can even get your projects printed!

To see the most recent downloads, click here for my Online Store.

To see the whole area of My Digital Studio, click here for my Online Store.

And don't forget the 31 Days of Digital, 31% off select digital content and print products, extended until Sept. 14…..only 3 more days!  This promotion ends Friday, September 14, 2012.

A Spooky Halloween Tag


Spooky Halloween Tag

You might need a Spooky Halloween Tag and here is a Wicked Cool one! Yes, it is stamped with the Wicked Cool stamp set (don't you just love those witch's boots?!) And don't forget, with every $40 purchase, you can choose a FREE roll of 3/8" Stitched Satin Ribbon during the month of September! I used the Gumball Green Stitched Satin Ribbon on this tag, tied with the 1/8" Basic Black Taffeta Ribbon.

Other supplies on this tag:

  • Basic Black, Tangerine Tango, Gumball Green, Perfect Plum Card Stock
  • Howlstooth & Scaringbone Designer Series Paper #126906
  • Toxic Treats Stamp Set (Trick or Treat)
  • Four Frames Stamp Set
  • Dotted Scallop Ribbon Border Punch #119275
  • Decorative Label Punch #120907

Just a fun handstamped spooky Halloween tag, just in case you need one!

If you need any Halloween stamping supplies, I would love to be your Demonstrator!

You can find my Online Store here….or just email me with your order.

Googly Ghouls Sparkly Halloween Card

Googly Ghouls Sparkly Halloween Card

I hope you enjoy this Googly Ghouls Halloween card with some sparkly Iridescent Ice embossed over the ghouls!  I think you can see the sparkle in the photo. I simply stamped the Googly Ghouls with Stazon Black ink #101406, colored in with markers, tapped the Versamark pad #102283 all over it and embossed with the Iridescent Ice embossing powder #101930.  We have a new Heat Tool in the new Stampin' Up! catalog as well, on page 159, #129053. And for a finishing touch, I added some Googlie eyes #127539.

As I was putting this card together, I found I just loved the combination of this sheet of the Howlstooth & Scaringbone Designer Series Paper #126906 with the Raspberry Ripple #126842 and Basic Black #121045 card stock. I'm going to have to make something else with that combination!

Don't forget that the Stampin' Up! Holiday Catalog has "Bundles" on the inside of the front page to save you money!  And if you are in a Halloween mood, be sure to check out the Ghoulish Googlies Bundle on page 27.  Choose which stamp set you want, wood- or clear-mount and the Ghoulish Googlies Designer Kit together and save 15%. You'll get the stamps, the googly eyes, the bags, the tags, and the Baker's Twine. Believe me, it is such a fun purchase!

To get your Halloween stamping supplies, just go to my Online Store here.