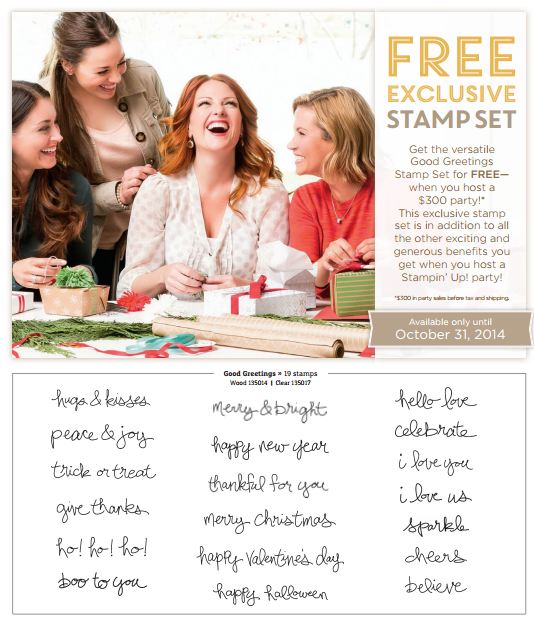
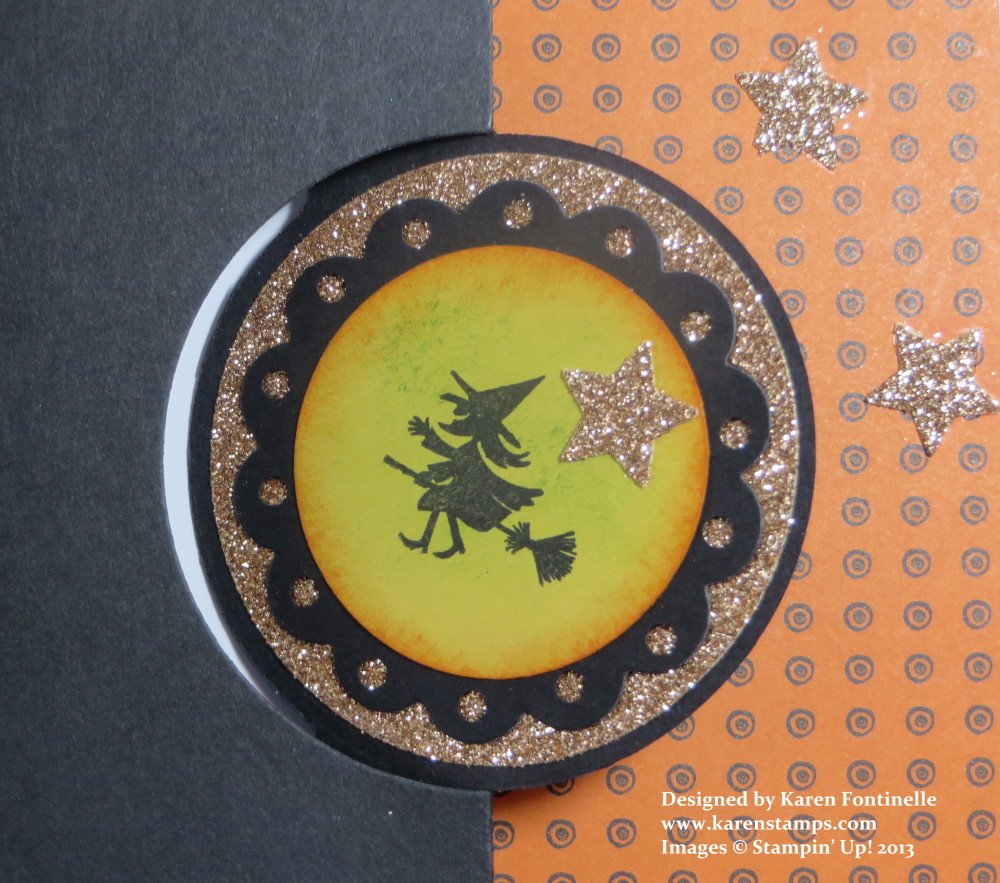
Category Archives: Halloween

Paper Snips and the Motley Monsters DSP to Make a Halloween Card!

Motley Monsters Halloween Card

This is what comes from looking at the Motley Monsters Designer Series Paper, which has such cute Halloween monsters on it, and thinking, “Why not just cut out some of these cuties with my Paper Snips and make a Halloween card that way?!” And also looking through my stamp sets for a greeting and seeing this “S’Up?” stamp in the set Hi There. It struck me very funny at that moment! I used the Fringe Scissors for the grass and sponged it a little bit with Old Olive ink. The woodgrain background is actually the opposite side of the paper with the monsters on it.

Just a fun, silly card for Halloween!

If you love Halloween as much as I do, you’ll probably want to shop the Halloween and fall stamps, paper and embellishments in the Stampin’ Up! Holiday CatalogJust shop at my Stampin’ Up! Online Store any time!  AND be sure to check the Clearance Rack because there are a few Halloween items from last year on there at a great bargain!  Just add them to your order!

Motley Monsters Halloween Treat Box

Motley Monsters Halloween Treat Box

It’s fun playing with the new Gift Box Punch Board to make a Halloween Treat Box with the Motley Monsters Designer Series Paper.  To make the tag, I stamped the bird from the Freaky Friends Stamp Set. The words are from the new special set Good Greetings that you can get FREE with a $300 party or order.  I added a little Linen thread to tie the tag on to the box, a strand of the Burlap ribbon for some interest and some Gold Sequin Trim. The box itself is made with the new Kraft 12″ x 12″ Card Stock in the Stampin’ Up! Annual Catalog. It’s a little bit heavier than regular card stock.

It’s going to be fun playing with the new goodies in the Stampin’ Up! Holiday Catalog! What do you think?  Is it the best one yet??

To purchase any of the Holiday Catalog products, please visit my Stampin’ Up! Online Store!

It’s Time For the Stampin’ Up! Holiday Catalog!

Stampin' Up! Holiday Catalog 2014

Did you wonder if this day would EVER get here?!  The day the Stampin’ Up! Holiday Catalog goes live?! Let the ordering begin so you can get on with your holiday cards and projects! Not just Christmas, but fall, Thanksgiving, Halloween and other fun things! Lots of kits for those who don’t have time or supplies! New products, such as a Gift Box Punch Board!

Here’s a little gift tag card I made in minutes with the Festival of Trees stamp set, some Brights Candy Dots, Silver 1/8″ Ribbon, and a greeting stamp called Good Greetings that you can earn FREE! Just host a $300 party or place your own $300 order!

Festival of Trees Tag Card

Don’t miss the Festival of Trees Bundle with the stamp set and NEW Tree Punch!

Good Greetings Free Stamp Set

Contact me if you want to have a Christmas card party or other fun night or day out with your friends! Now go enjoy the brand new Stampin’ Up! Holiday Catalog! If you are one of my regular customers and didn’t receive a catalog, please let me know.  And if you don’t have a demonstrator and are interested in Stampin’ Up! products, please contact me at Karen@KarenStamps.com.  I would be happy to get a catalog to you!

Today is the LAST DAY for the Short & Sweet Offer:  Become a Stampin’ Up! Demonstrator by purchasing the Starter Kit for $99 and choose an EXTRA $25 in product!  Get $150 in product of your choice for only $99 (regular offer $125 in product)! Click HERE for my link to get started!  It only takes minutes to purchase your Starter Kit online and become a Demonstrator. Then you will be emailed a password to get in to the Demo Site and begin your training and look around and see all the resources available to you to start your own business! Choose items from the Holiday Catalog for your Kit if you like!

Shop my Stampin’ Up! Online Store for all your stamping needs!

Decorated Halloween Candy Tin

Halloween Candy Tin

What could be more fun than decorating some candy and a tin for Halloween? I had this tin with the clear window on top in my “stash” but if you couldn’t find an exact match, I’m sure any tin or container would do. I have always loved these tins because they make sure cute, quick and easy gifts to make up in minutes for someone. Of course you could use different types of candy or other contents in the tin, but this is just to give you some ideas!  I used Hershey Nuggets for my candy and wrapped each one with a 1″ x 3″ strip of designer series paper. You just want to be sure when using adhesive and candy that you don’t let the adhesive make contact with the candy. I just used a Mini Glue Dot to secure the strip of paper to itself so it is not attached to the candy piece.

To decorate the tin, I just took a strip of designer paper and wrapped it around the tin for a bellyband. You could also layer it on a strip of card stock if you wanted. For the flower on top, just use one of the flower punches to punch about three or more flowers or even one of the scallop punches. Crinkle up each layer of the flower if you like that look, then reopen and layer one on top of the other.  Secure in the center with a brad of some sort (looks like I used a retired one!). Adhere to the bellyband with Stampin’ Dimensionals or Mini Glue Dots.

The Witches’ Brew Designer Series Paper was used in this project. My friend I gave this gift to really liked the little skulls on the paper!

If you would like some Witches’ Brew paper for your Halloween projects and cards, now is the time to order some! Just go to my Stampin’ Up! Online Store here for all your stamping supplies!

***Don’t forget the 25% Off 25 Stamps Offer only available through October 28th!***

Halloween Framed Art for a Friend

Halloween Framed Art

We got back home Saturday from a wonderful fall vacation to Michigan! There has been no sign of fall here in Houston, Texas except for the date on the calendar, so to see REAL fall, with colored leaves beyond expectations, cooler (okay, sometimes COLD!) weather, that overcast fall look was just a wonderful change! The people up there decorate for fall, not just Halloween, because it IS fall there!  I saw so many pumpkin stands and corn shucks and fall flowers plus Halloween decorations. I loved it all!

The Halloween framed art above was a gift for my friend we were visiting. I happened to have a frame with a square opening of 10″ x 10″  so I was able to use 2″ squares for the “art”. As you can see, I made two elements 2″ x 4″ to fit into the design.  Some of the stamps were retired ( I couldn’t resist going through some of my “old” Halloween stamp sets) and some designs were ideas I got online or at least got me started on my own ideas.  It was fun to make and an easy project for anyone to make.  Make it as small or large as you want.  Check to see what picture frames you already have in your stash and start there.  You could do something with four squares or 16!  Whatever you like! There’s a glare because I did put the glass in the frame but you can also omit the glass, especially if you want to put a lot of 3D layers on your art.

I’ll tell you more about my trip when I get all the photos sorted out. The trees were unbelievably gorgeous – if they weren’t at “peak” color, I don’t know how they could be any more beautiful. A lot of my photos were shot through the car windshield or passenger window, sometimes through the windshield wiper and raindrops!  Here’s a sneak peek of some trees along the highway when we first arrived!  I just held my camera in my hands at all times as we were driving!

Fall trees in Michigan

Halloween Hello Washi Tape Card

Halloween Hello Washi Tape Card

We made this Halloween card at my recent stamp camp. I got the idea in a magazine and it was very easy to make. There are many ways you can vary the design too, even use it for other occasions. Just apply three strips of Washi Tape spaced out a little on the top card layer. Carefully stamp the images you like in between or randomly on the card. I used the Witches’ Brew Designer Washi Tape and the Halloween Hello Stamp Set on this card.  I also tied a piece of Baker’s Twine around the card.  Very simple and a fun design!

What can you make with a few pieces of Washi Tape?  Remember it is easy to tear and is repositionable!  No mistakes!

Get your washi tape and other fun embellishments at my Stampin’ Up! Online Store!  Click and shop today! Of course I am always happy to help you with your order.

Halloween Hello Candy Card

Halloween Hello Candy Card

Here’s a cute Halloween card idea, one I received as a swap at the Stampin’ Up! Convention last summer! It’s very simple.  Just use the candy stamp and greeting in the Halloween Hello stamp set.  The designer paper is pieces from Witches’ Brew Designer Series Paper or you could use anything similar. Stamp on Pumpkin Pie card stock and mount on Basic Black.

You can shop MORE EASILY at my Stampin’ Up! Online Store now!  Stampin’ Up! has made some much-needed improvements to your shopping experience! Here are some of them:

  •  Customers can now easily save bag contents. Also, when adding items to your bag, you can choose to go directly to the bag or continue shopping.
  •  There is a new progress bar to guide customers through the ordering process.
  • Enjoy more images. . Additional product images are bigger and easier to view.
  • Now you can sort merchandise based on newest or oldest–a real plus when you want to see the latest MDS downloads.
  • Sale prices are clearly marked. Items on sale are clearly marked without having to add them to your bag. You can also sort products by the sales price (instead of according to the original price).

Go to my Stampin’ Up! Online Store NOW and see how you like the new shopping experience!

Halloween Bash Shaker Card

Halloween Shaker Card

I thought this week I would post a new Halloween project everyday but then I went on vacation and did not have wifi!!  Worse than that was that I thought I had a new plan that would give me wifi but it did not work!  Don’t try to add a new technology on a day before you are leaving for vacation, especially without trying it out first!  But now I do have wifi, so here is a Halloween card I LOVE! It’s been around on the internet and I certainly did not come up with the original idea.

Cut a window sheet the same size as your top card layer.  Stamp that top card layer however you like.  Use Washi Tape on three sides of the window sheets, half of the tape on the front window sheet and half wrapped around to the page.  ONLY DO THREE SIDES!  Then punch or stamp the “confetti” you want inside the card.  First insert a couple of the Vintage Faceted Designer Buttons in between the window sheet and card layer.  This will separate the two layers so that the confetti can move around a little. Then insert all the confetti pieces you have made. Once you have that all how you like it, apply the last pieces of washi tape to the open side.  Then adhere that whole packet to the card base.  Shake it around and try it out!  What a fun card to send somebody!

For this Halloween card, I stamped the greeting with the Halloween Bash Stamp Set, coloring with different Stampin’ Write Markers. The Washi Tape is Witches Brew Designer Tape.

Halloween Hello Card

Halloween Hello Card

Happy October!  October sounds a little more “fallish” than September, doesn’t it? Time to start making those Halloween cards and decorations!

This card was easy to create with just the Halloween Hello stamp set, some Witches’ Brew Designer Washi Tapeand a 1″ Circle Punch. Just stamp some Halloween skulls around on the card front and on two scraps of Pumpkin Pie card stock. Punch a couple of circles out of the card layer and adhere the Pumpkin Pie stamped pieces underneath.  Stamp the greeting and adhere some Washi Tape (It’s repositionable!). Adhere the Whisper White layer to the Basic Black layer with Stampin’ Dimensionals and adhere that to the Pumpkin Pie card base. If you have some Googlie Eyes in your stash or left over from last year, just stick a few of those on! Fun, fun, fun!

The Halloween Hello Stamp Set is a cute little one:  7 images plus two greetings!

If you want to stock up on some Halloween stamps and accessories, please just go to my Stampin’ Up! Online Store today and order! Or if you prefer, just email me and I’ll put your order in for you.

Halloween Hello Card Inside

Friday the 13th Black Cat Card Idea

Friday the 13th Black Cat Card Idea

When I realized today was Friday the 13th, I came up with this black cat card idea. The cat face is cut with a Circle Framelit, the eyes with the wing on the Bird Punch. That black ear I punched with the  1″ Square Punch and then cut that square in half diagonally to make the triangle shape. Then I punched a piece of Silver Glimmer Paper in a square, cut the square in half on a diagonal, and then trimmed down the triangles so they would fit on the black.

For the eyeballs, I punched a 1/2″ Circle  of Old Olive and colored in the pupil with a black marker.

The whiskers are just cut by hand from Silver Glimmer Paper and stuck on the back of the Small Heart Punch for the nose.  The mouth is just drawn on with the new White Chalk MarkerI’m afraid people may have overlooked the Chalk Marker in the Holiday Catalog. I’ve found it very useful and think you should check it out on page 20, top right, of the Holiday Catalog. I also used it to draw the little glimmer in the cat eyes.

Do you have any Friday the 13th superstitions?  Why is Friday the 13th lucky?  My one grandfather was born on a Friday the 13th so he always considered it lucky!  My mother’s aunt considered the number 13 unlucky, so if there were already twelve people seated at the dinner table, she wouldn’t sit down. I don’t know if Friday the 13th is always unlucky, but I think my black cat turned out kind of fun looking so hopefully it will be a lucky day!

Make a Halloween Card with Scraps!

Halloween Card with Paper Scraps

This Halloween card was primarily made with scraps after I had made another Halloween card! The background is a piece of the Witches’ Brew Designer Series Paper and the banners are scraps of the same designer paper, card stock, and the Champagne Glimmer Paper.  It was all just laying their on my table anyway!  I punched the ghost with the Owl Punch, cut off the feet, and turned it upside down.  I thought it would be funny for the ghost to be peeking out from the banners!

For the greeting, I stamped the Tags 4 You Trick or Treat image on Summer Starfruit card stock. And then I cut each letter apart with my Paper Snips!  I like the way it looks on this card!  And on that tag were two little spiders, so I cut out around those two spiders also….not super crazy but just around them.  For just using scraps, I like the look of this card.

Click on the link to go to my Stampin’ Up! Online Store if you need some Halloween paper and stamps!  The time is getting close!  You can view the Holiday Catalog items in the store or view the catalog HERE.

Simply Created Spooky Halloween Banner

Spooky Halloween Banner

One thing I easily passed up in the Holiday Catalog  was this Build a Banner Simply Created Kit.  But after seeing several banners created at the Stampin Up! Convention this summer, it was one of the first things to go on my next order!  The Build a Banner Kit has the canvas pennants with grommets and all the stencils.  All you need to do is decorate it!  To make that easy for you, purchase the Halloween Banner Simply Created Accessory Kit and you’ll have everything you need!

I found it worked well to use Sponge Daubers to dab on the ink from the ink pad over the stencils onto the pennants.  Most videos show using alcohol and reinkers sprayed on (lightly!) with the Spritzers, but some people were having trouble with that, and it just seemed easier and cleaner to use the sponge daubers.  I think the Black Stazon works better than the Basic Black, although then you have to scrub that Stazon off the stencil!

This might look like a complicated project, but I really found it pretty simple and quick.  I could have made two more rosettes on my own, but I mostly stuck with what came in the kit, although I used my own modifications a little bit.

Put these supplies to make a Halloween banner on your next order!  I’m sure you will enjoy making one!

Here are some close-ups!  You can use your own imagination and decorate yours how you like.

Spooky Halloween Banner close-up

Spooky Halloween Banner Close-up end

Please order your supplies on my Stampin’ Up! website HERE or contact me with your order.

A Fun Spider Card for Halloween

Fun Spider on Halloween Card

You never know where creative inspiration will come from! I got an email advertising Halloween gifts. The designs on the items were so cute, and I thought, “I could make a card using that idea!” So here is a fun Halloween spider card!

The Halloween spider is made by cutting a Gumball Green circle with one of the Circle Framelits.  In order to get the stripes, I used a technique I’ve seen a million times but hadn’t tried myself. Before I embossed the circle with the Stripes Textured Impressions Embossing FolderI inked the inside stripes of the embossing folder with a darker green color, Garden Green. That made some of the stripes colored! It looked really neat when I took it out of the folder!  For the eyes, I punched two Pumpkin Pie circles and smaller Basic Black circles and colored in the whites with the Signo Gel Pen.  I hand-drew the squigly mouth with a black marker and just hand-cut two little triangles for his teeth. Do you know what the legs are?  They are punched from the new Chevron Border Punch!

The card base is Elegant Eggplant layered with a piece of the new Witches’ Brew Designer Series Paper.  For a little greeting I used a stamp from the Halloween Bash stamp set and punched out with the Ticket Duo Punch.  You could use this stamp and this card as a Halloween party invitation!  Since the card is such a dark color, I put a Whisper White layer on the inside and stamped with a another greeting from the same Halloween Bash stamp set.

It’s fun to spot something cute that you know you can duplicate or at least copy to some extent with your stamps, ink, and paper.  Keep your eyes open for ideas in unusual places for papercrafting inspiration!

New Circle Card Thinlits Die Halloween Card

Circle Thinlits Halloween Card

I LOVE the new Circle Card Thinlits Die! And I loved making this first Halloween card of the season for me!  I didn’t even know what, exactly, I was going to make so actually what I came up with was a pleasant surprise!  I knew I would start with a card base of Basic Black card stock with some Witches’ Brew Designer Series PaperThen I got out my new Halloween stamp sets in the Stampin’ Up! Holiday Catalog to see what I could use. I decided to stamp the flying witch in the stamp set  Halloween Hello on a piece of Summer Starfruit punched with the 1 3/4″ Circle Punch.  It is layered on a scallop circle die cut which comes with the Circle Card Thinlits Die and that is layered on a 2 1/2″ Circle Punch  of Champagne Glimmer Paper.  The die also comes with a small star die but for this card I used the star punch in the carryover punch pack from last year’s Holiday Catalog, Merry Minis Punch Pack #126882.

The Halloween greeting on the front is part of a stamp in the Halloween Bash Stamp Set in the Holiday Catalog.  I covered up the top part I did not want to ink up with a part of an old business card and inked the bottom part with Versamark.  Then I embossed it with White Stampin’ Emboss Powder.

For the inside circle, I thought a surprise was in order since it is a Halloween card and what could be a better surprise than a ghost!  Do you know how I made that ghost?  Just use the Stampin’ Up! Owl Punch! Snip off the feet of the owl and turn him upside down!  You could punch out some eyes and mouth but I just used a black marker.  The “Boo” is handwritten with the brand new White Stampin’ Chalk Marker in the Holiday Catalog.

Circle Thinlits Halloween Card

Here is a close-up of the focal point of the card. The scallop circle die cut does not come with the holes in the scallops.  I wanted more of the Glimmer Paper to show through so I grabbed a hole punch in my stash and punched those holes. I had also considered doing some doodling with the Chalk Marker.  So whatever works for you!  The Summer Starfruit circle is also sponged with some Pumpkin Pie ink and even a little bit of Gumball Green.

Circle Thinlits Halloween Card

I hope you enjoyed my first Halloween card.  You know the fall season is fast approaching!

Go to my Stampin’ Up! Online Store and check out the products in the Holiday Catalog and get yourself in the mood!  I’m sure you will want and enjoy the new Thinlits Dies, too!

It’s Stampin’ Up! Holiday Time!

It may be August, but it is none too early to start thinking about the upcoming holidays!  And just in time is the Stampin’ Up! Holiday Catalog, chock full of creative ideas and new products! Now is the time for us crafty stampers to start working on all these projects we intend to do before each holiday and season and often run out of time to do!  Get an early start now with the Stampin’ Up!  Holiday Catalog!

Stampin' Up! Holiday Catalog 2013

Click catalog image to shop!

Holiday Catalog Flipbook

Holiday Catalog PDF

Holiday Catalog Stampin’ Supplies

Holiday Catalog Spanish Flyer

If you have a copy of the catalog, don’t forget to try out the new feature with your smartphone: little videos!

If you don’t have a Stampin’ Up! Demonstrator and would like a copy of the Holiday Catalog mailed to you, please contact me at Karen@KarenStamps.com.

Yes, you can place an order today, August 1st from the new Stampin’ Up! Holiday Catalog!

And there are even more goodies available starting today!  Check back later!