Category Archives: Christmas

Make an Easy Cozy Christmas Tag

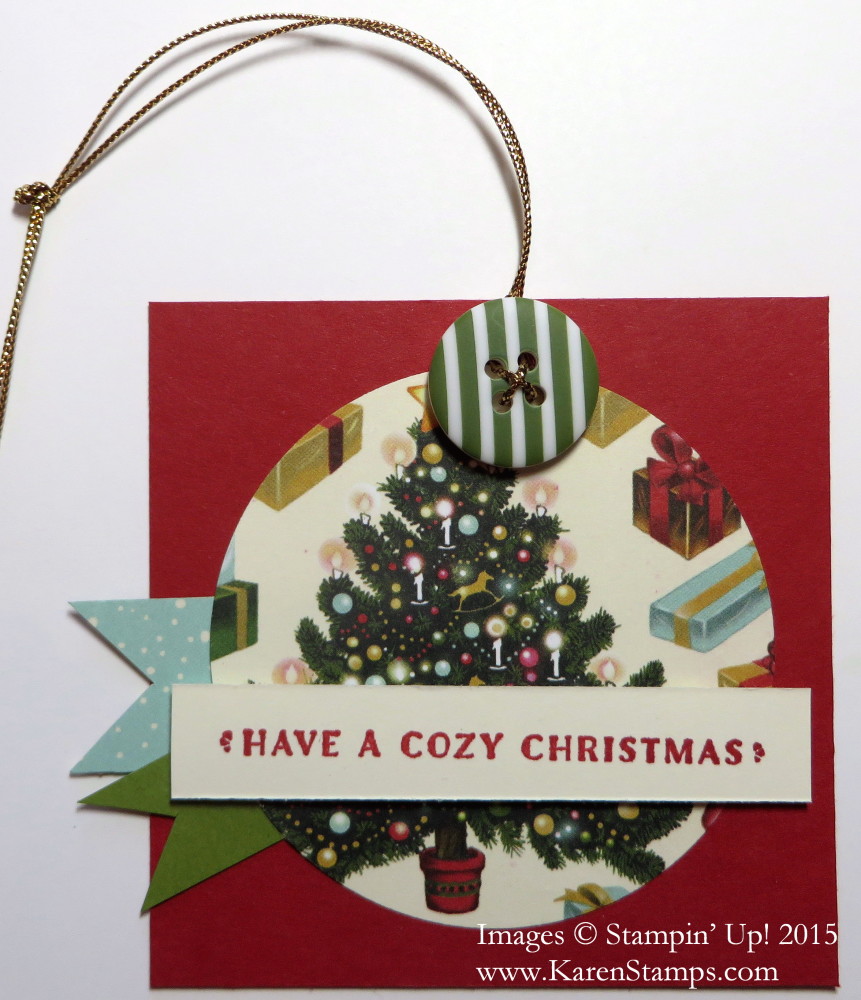
Cozy Christmas Tag

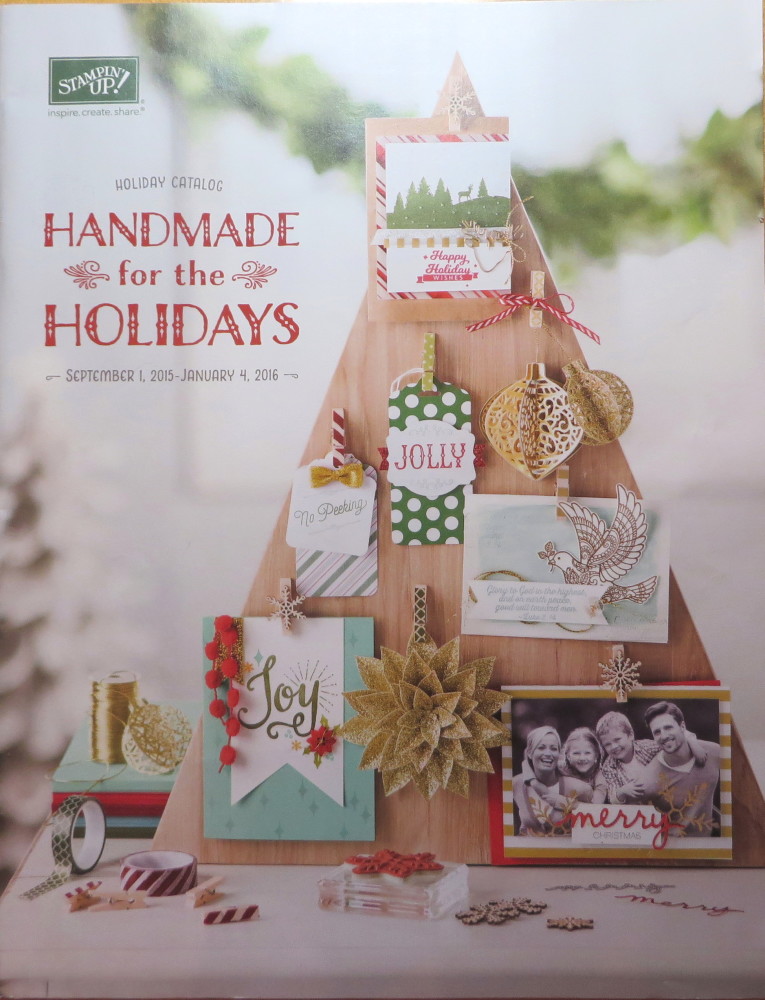
Yes, my Stampin’ Up! Holiday Catalog pre-order arrived and I have quickly made this easy Christmas tag, my first of this upcoming holiday season!  I haven’t had time to really sit down and take in all my holiday goodies yet in my order, so I just grabbed the Holiday Catalog and a couple of items in the box.

The new Home For Christmas Designer Series Paper was one of the things I was anxious to get in my order!  If you like vintage (or you ARE vintage, like me!) this paper will just take you back to your childhood or that nostalgic look! I copied this tag in the catalog on page 8 where the whole Home For Christmas Suite of products is shown. To make this tag, all it took was to punch a Christmas tree from the paper with the 2 1/2″ Circle PunchGrab a small piece from the edge of the paper you punched, turn it over and make the little light blue banner you see sticking out the side. I also added a scrap piece of Old Olive for another banner. Glue that down on to a  3″ x 3″ tag (or have it be a 3″ x 3″ card with a 6″ x 3″ card base). Stamp a greeting from the Cozy Christmas Stamp Set and adhere with Stampin’ Dimensionals.

The pièce de résistance is the Home for Christmas Designer Button on the top threaded with the Gold Cording Trim. So cute!

Easy to make tag, takes just a minute or two, you could sit down and make a stack of them with one sheet of Home For Christmas Designer Paper and a container of buttons!

Holiday Catalogs should be arriving in the mail pretty soon if you are a regular customer of mine!  If you are not a regular customer of mine and want to be, just email me at Karen@KarenStamps.com and request a catalog. I have some extras I can mail to you! You will also find the catalog live online beginning September 1st!

In the meantime, if you want to stock up on some basic Stampin’ Up! supplies, please visit my Stampin’ Up! Online Store HERE!  Be sure to check the Weekly Deals and the Clearance Rack always. You might find a bargain!

Mini Treat Bag Altered Christmas Gift Bag

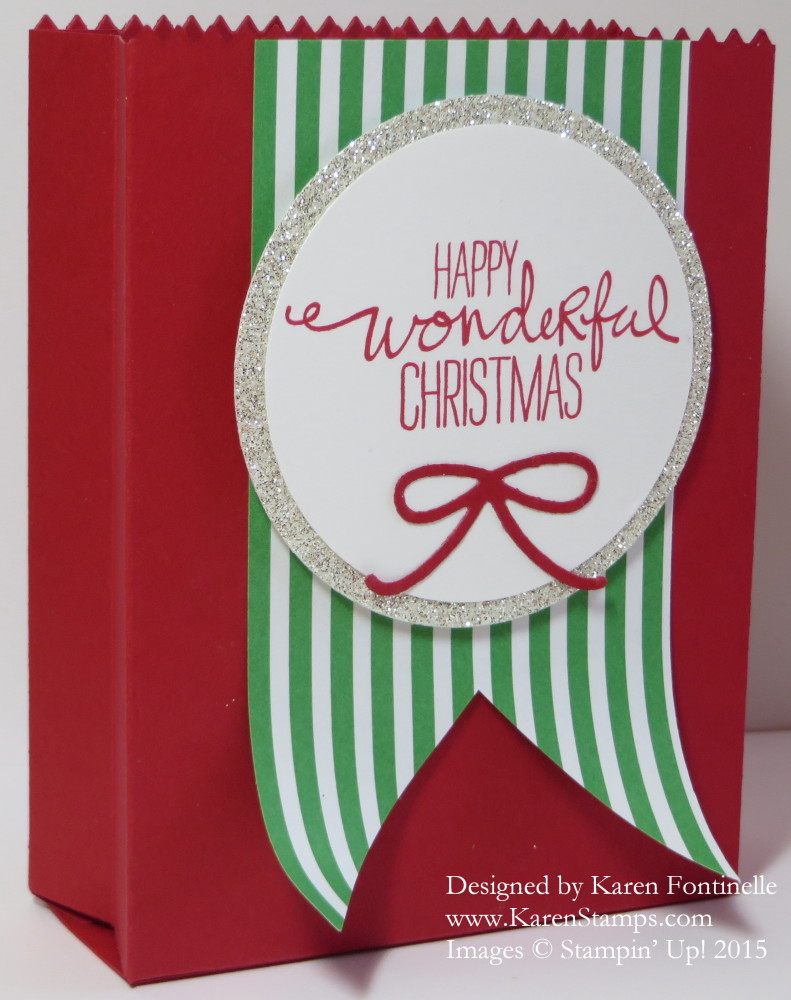
Mini Treat Bag Altered Christmas Gift Bag

Do you realize that six months from today is Christmas Day?! That means there are less than six months to get ready for Christmas! Now that the Mini Treat Bag Thinlits Dies are on sale this week, $10 off, on the Stampin’ Up! Weekly Deals, I thought I would learn how to make an altered size bag, rather than just the flat kind of treat bag into which you would slip a card or gift card or something not very thick. Since it is only six months today until Christmas, I thought I would make a Mini Treat Bag Altered Christmas Gift Bag!

Here is a little tutorial for you:

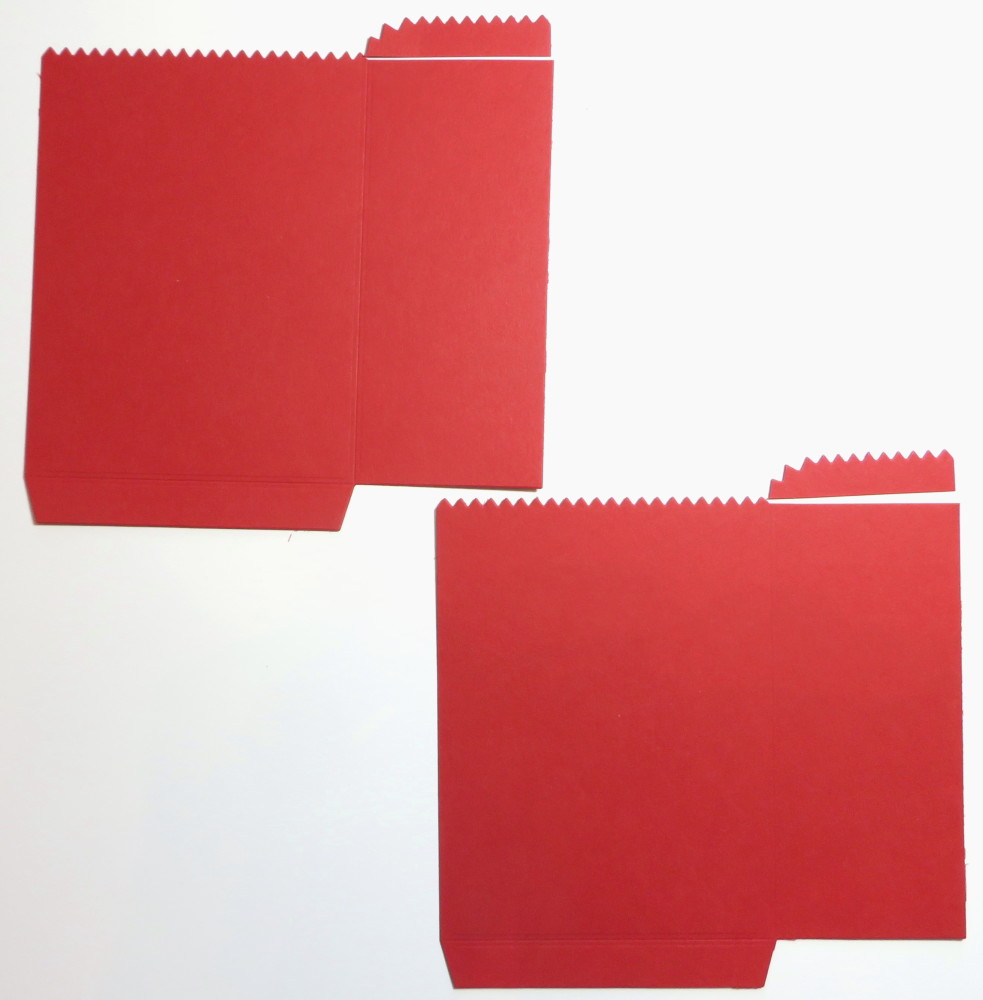
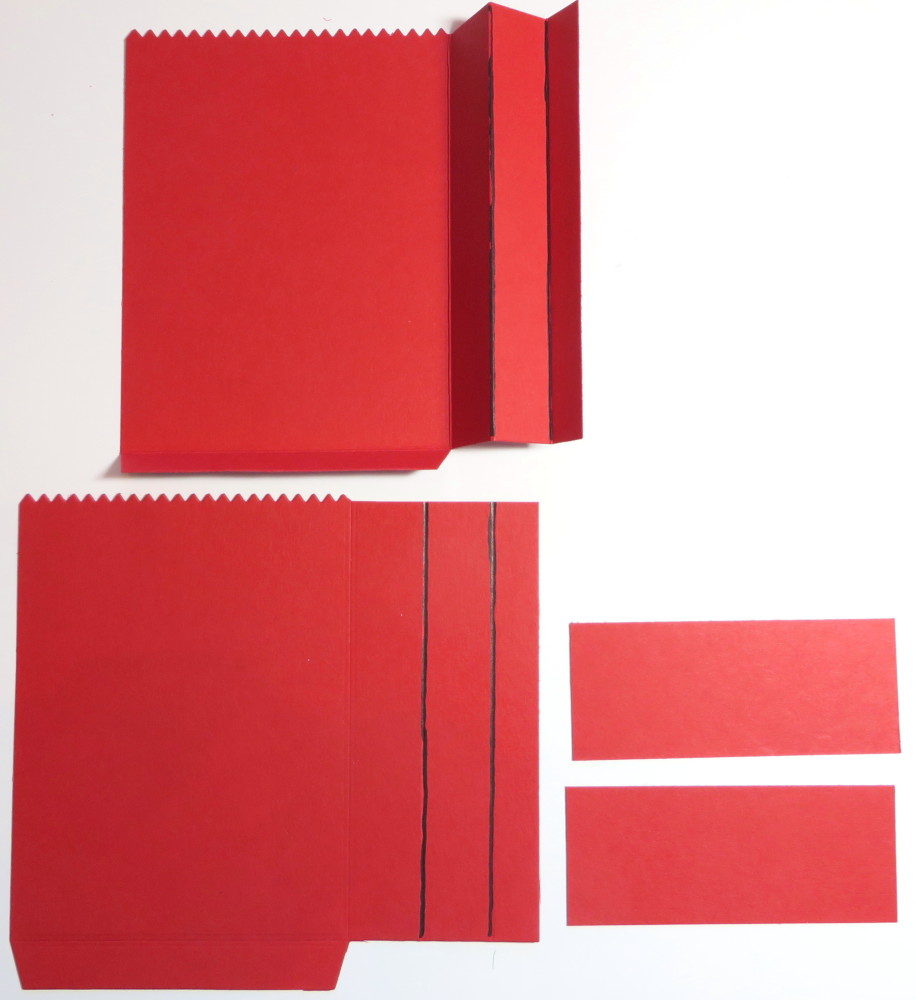
Mini Treat Bag Pieces

Instead of cutting the two different pieces to make the bag like you would normally, cut two pieces with the large bag die. This one piece would normally be the front of the regular Mini Treat Bag. Then just trim off that extra little piece as shown. Just snip it off with a scissors. That side of the bag will be the gusseted side of the bag when assembled.

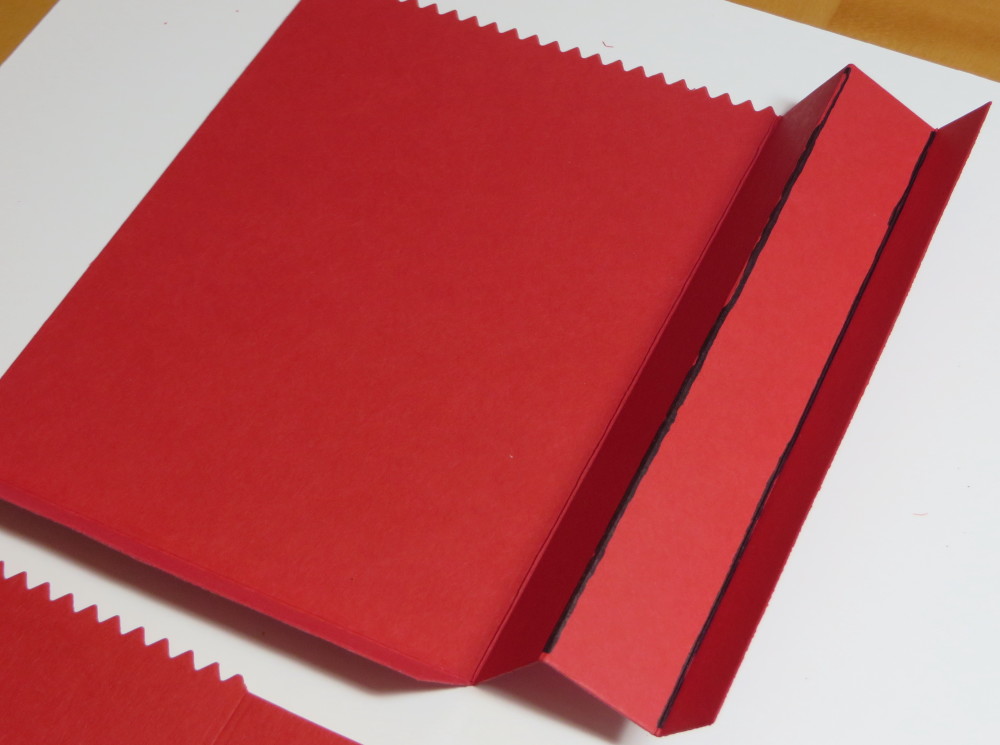
Mini Treat Bag Pieces Scored

Now score just that right side of the large piece at 1/2″ and 1 1/4″ as shown. There will also be a score line made from the die. For the bottom of the bag, cut one or two pieces of paper  1 1/2″ x 3 5/8″. I say one or two because it depends on what kind of paper you are using and how strong and sturdy you want the bottom of the bag to be. With card stock probably just one piece is fine; with designer paper you probably want to glue two pieces together.

Mini Treat Bag Pieces Folded

This is how you will fold on the score lines on both pieces to form the gusset for the side of the bag. If you just want the side flat, then just score at 1/2″ and use the score line made by the die. You won’t need the center one. Play with the two pieces and see how they will fit together so you have the folds going the correct way.

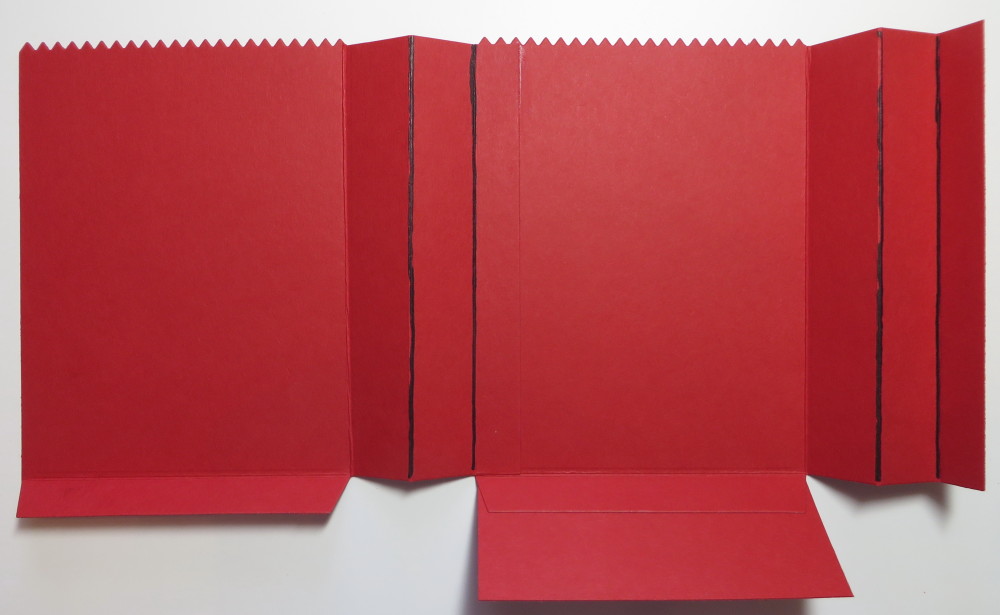
Mini Treat Bag Pieces Glued

Adhere the bottom piece to the bottom tab and all the sides to form the bag.  I like using the Multipurpose Liquid Glue because it gives you time and slip to be able to move the pieces to exactly the right positions. But Fast Fuse or Tear & Tape Adhesive.

Mini Treat Bag Altered Christmas Gift Bag

Next comes the fun part of embellishing the Mini Treat Bag! I used a piece of the In Color Envelope Paper, the Cucumber Crush color, to make a banner.  I stamped a Christmas greeting with a stamp in the Wondrous Wreath Photopolymer Stamp Set in Real Red ink, then punched it out with the 2 1/2″ Circle Punch. I die cut a piece of Silver Glimmer Paper with the Circles Collection Framelits Dies for a layer behind the greeting.  The little bow is a die cut in the Mini Treat Bag Thinlits Dies package! So many cute and useful extra dies in that collection! I would also suggest putting a Rhinestone Jewel on the center of that bow. (I forgot!)

There you have it!  Really the process is pretty easy to make a Mini Treat Bag Altered Christmas Gift Bag. Take advantage of the $10 savings on this die this week.  Weekly Deals are good through Monday night, June 29 until 11:50 pm MT. Shop for these Mini Treat Bag Dies and any other stamping and art supplies you need at my Stampin’ Up! Online Store HERE.  PS:  That Silver Glimmer Paper is also on sale this week on the Weekly Deals!

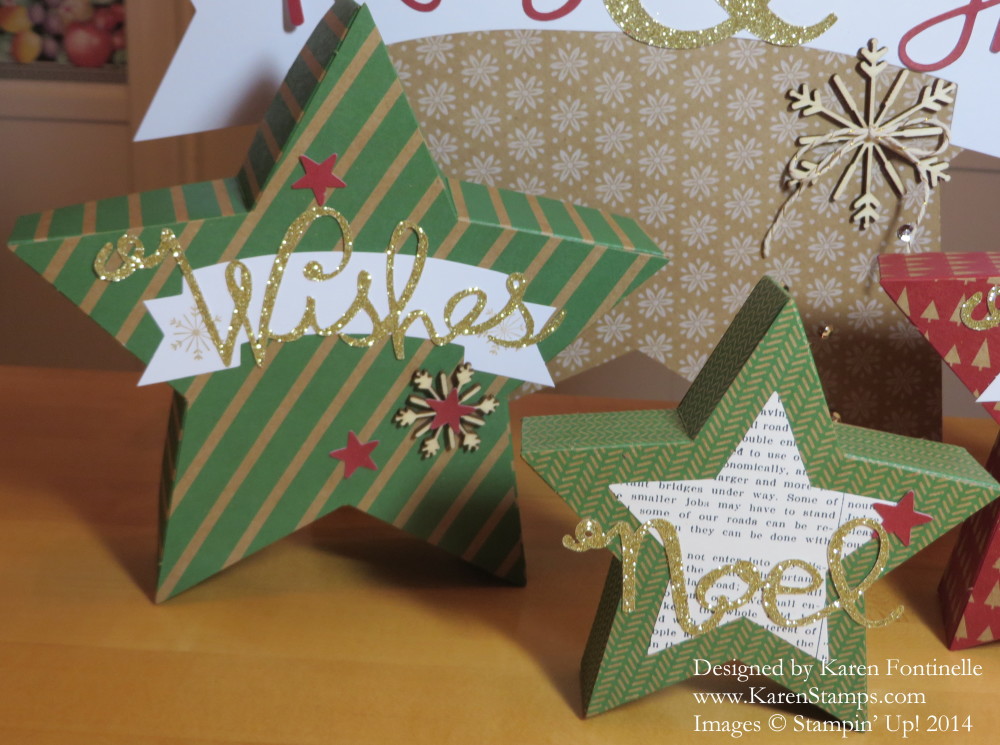
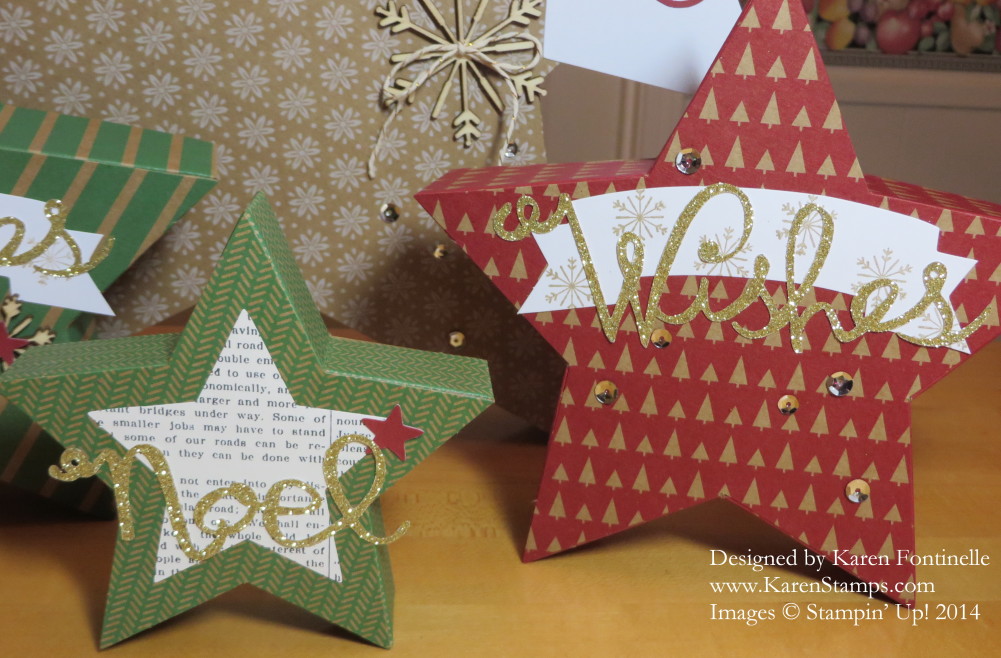
Many Merry Stars Simply Created Kit Boxes

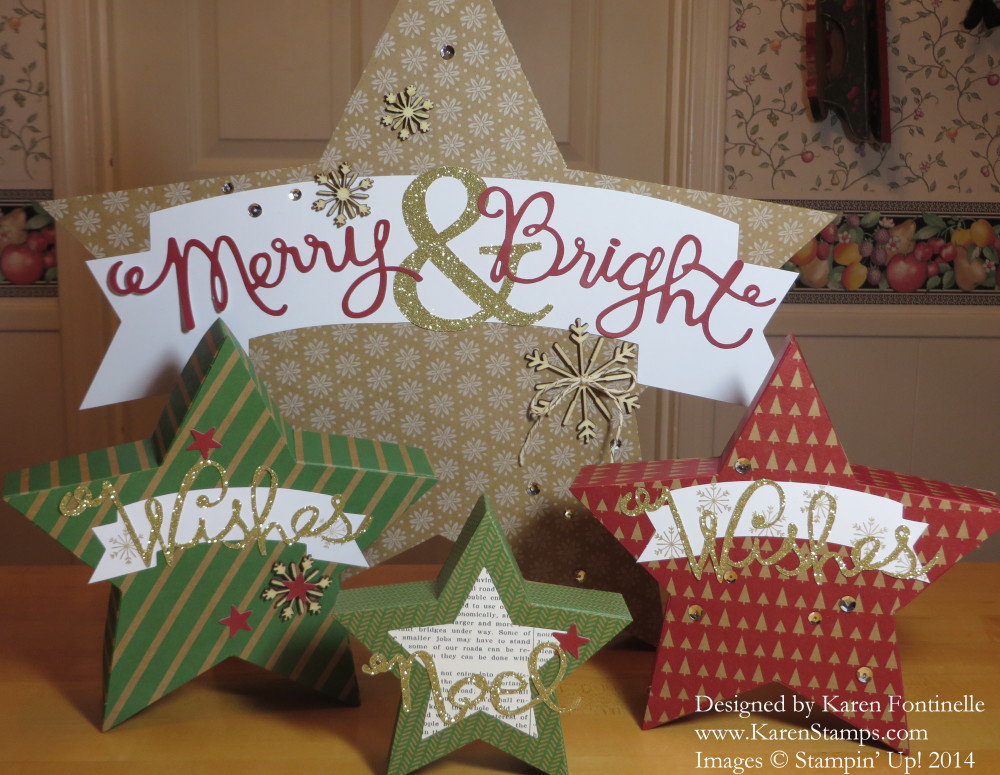
Many Merry Stars Simply Created Kit BoxesYes, I know star boxes from the Many Merry Stars Simply Created Kit were supposed to be made before Christmas, but much as I wanted to, it just didn’t happen!  I frequently do Christmas things AFTER Christmas – like bake cookies, make decorations! I could have saved the whole kit for next year, but for one thing, I’m in the mood now to make these, I’ve been looking forward to making them since I first heard of them, and by next Christmas there will be something new and shiny I am interested in!  So better to just make them now and have them ready next Christmas! What a joy that will be!

There are tons of supplies in the kit and the star boxes really were quite easy to make. They suggest starting with a medium size star box to get the hang of it on an easier size. I also followed someone else’s directions to make two of the boxes into boxes with a lid and bottom so that next year perhaps I can use them to put something inside.  Otherwise you are just adhering the back on to the bottom of the sides of the box and the whole thing is closed up.  Still cute and you can string a ribbon through at the top in the beginning of assembly to make an ornament. I haven’t tried all the variations yet!

Really, you could made some of these stars for just any occasion or for a birthday, not everything is Christmas-themed in the kit!

Just want to let you know it is okay to make Christmas things AFTER Christmas, in case you want to!

And at this moment you can still purchase the Many Merry Stars Simply Created Kit on the Year-End Closeouts Clearance Rack HERE. Only available while supplies last.

Hope you had a happy New Year’s Day yesterday! It seems like the holiday goes on and on with this weekend after! Time for a little more holiday stamping and then on to spring and the new Occasions Catalog and the start of Sale-A-Bration on January 6th! If you do not have a Stampin’ Up! Demonstrator and would like the new catalogs, I have some extras I can mail to you.  They will also be available online January 6th when the catalogs and promotion go live! If you are a customer who regularly receives catalogs from me, I think you should have received them already, so hunt through that Christmas mail you might have put aside and find them!

Many Merry Stars Green Boxes

Many Merry Stars Red and Green Boxes


Bright & Beautiful Christmas Card for Christmas Eve

Bright & Beautiful Christmas Card


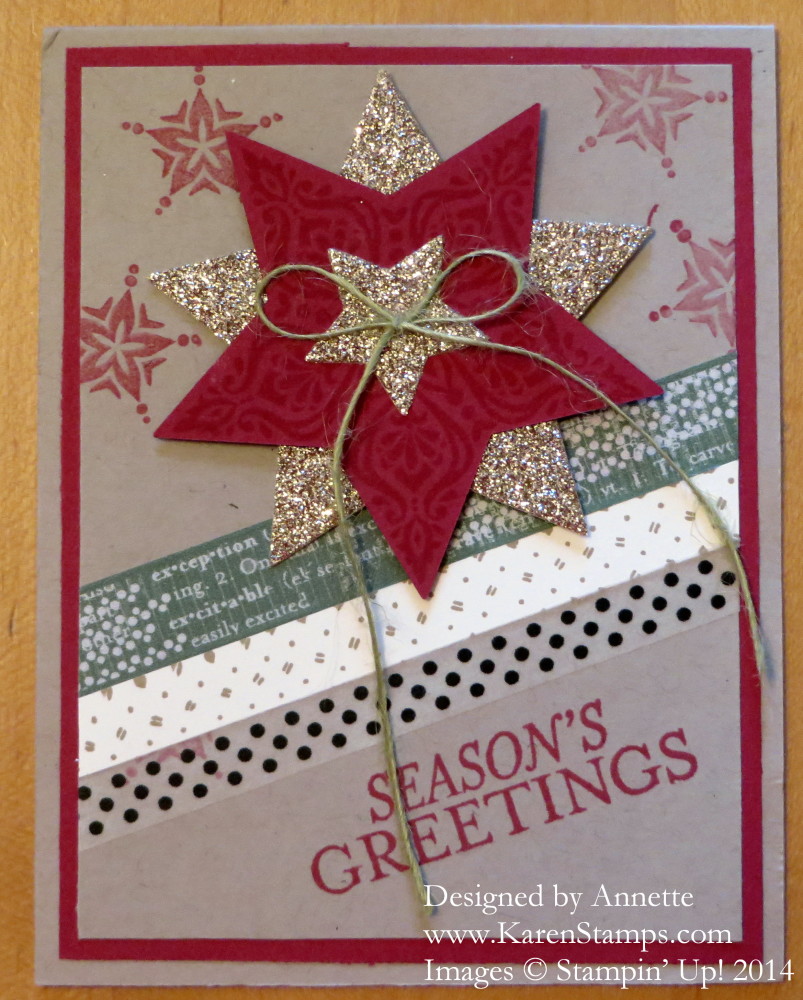
Isn’t this Christmas card perfect for Christmas Eve with the Bright & Beautiful Stamp Set stars and the beautiful Glimmer Paper to add sparkle?! The coordinating Stars Framelits Dies are great to use rather than cutting out the star shapes yourself. She also has washi tape going across the card diagonally.

This card was made by my friend from years and years ago when I was dating my husband and when we were first married and lived in Oklahoma. We haven’t seen each other in over thirty years, yet we have always kept in touch with Christmas cards every year. A few years ago she mentioned she was interested in stamping so we re-connected with Stampin’ Up! on a “stamping level”. Even though we had kept in touch all those years, it’s been even more fun to do so with our common interest in stamping and cardmaking through phone calls, emails, and cards! Never underestimate the power of stamping which goes beyond paper, ink and stamps!

If you want to do some shopping for YOURSELF today or in the days after Christmas, remember that Stampin’ Up! added more items, even from the Holiday Catalog, to the Year-End Closeout Clearance Rack.

Do you open Christmas presents tonight or on Christmas Day? Growing up my family and grandparents always opened presents on Christmas Eve – basically the presents that were at our house we opened Christmas Eve. Christmas morning Santa had come and left presents, unwrapped, and a stocking (too bad my parents were so “poor” that they could only give us one little package to open on Christmas Eve!  Ha! Ha!). In the afternoon we would go to my grandparents’ house and open the presents at their house (from them). So we spread it out and I still like it best that way but nowadays we just open presents on Christmas Day, with a pretty late start!

I hope all of your family members who are traveling today have a safe journey as you look forward to their visit, or that you have a safe trip as you travel.

However you are celebrating Christmas, I hope you have a very merry one!!  And I hope that Santa is very good to you!

Top Note Package Chalkboard Tag

Top Note Package Tag

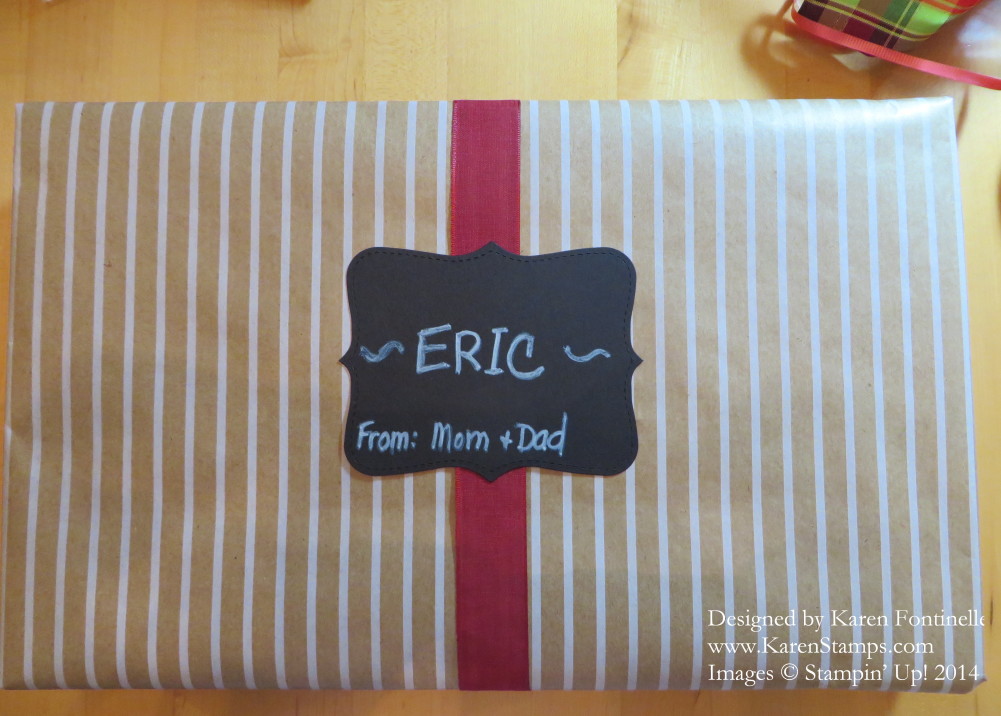
I got this idea from one of the many store ads I have gotten in the mail recently, and I thought it was so cute! The chalkboard style is still “in”, which I love, so I made a package tag with the Top Note Die to look like a chalkboard! Hasn’t the Top Note Die been just about the most versatile die to ever use?! I wrapped the package in the Stampin’ Up! Festive Designer Kraft Paper Roll (on the Clearance Rack!) and tied the Cherry Cobbler 1″ Sheer Linen Ribbon around. Then I die cut the Top Note tag and wrote on it with my White Stampin’ Chalk MarkerEasy, fun, and works for anybody.  If you don’t own the Top Note Die, just use a piece of Basic Black Card Stock that’s not die cut! The kraft wrapping paper you can use any time.

This morning Stampin’ Up! added new items to the Year-End Closeout Clearance Rack so be sure to check those out!

Stampin' Up! Clearance Rack Year End Closeouts

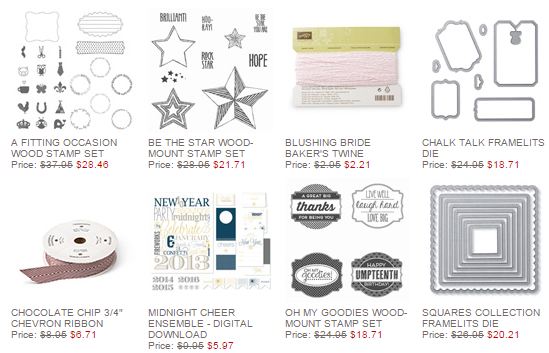
And here are the new Stampin’ Up Weekly Deals for this week Dec. 23 – 29, 2014.

Stampin' Up! Weekly Deal Dec 23 2014

 GIFT CERTIFICATES

If you need last-minute help with your Christmas shopping (or better yet, your husband or family does for you!) I offer gift certificates that I can email and they can print out, wrap up beautifully for you, and you’ll be all set to order from the new Occasions Catalog coming January 6th!

Lovely As a Tree Classic Christmas Card

Lovely As a Tree Classic Christmas Card

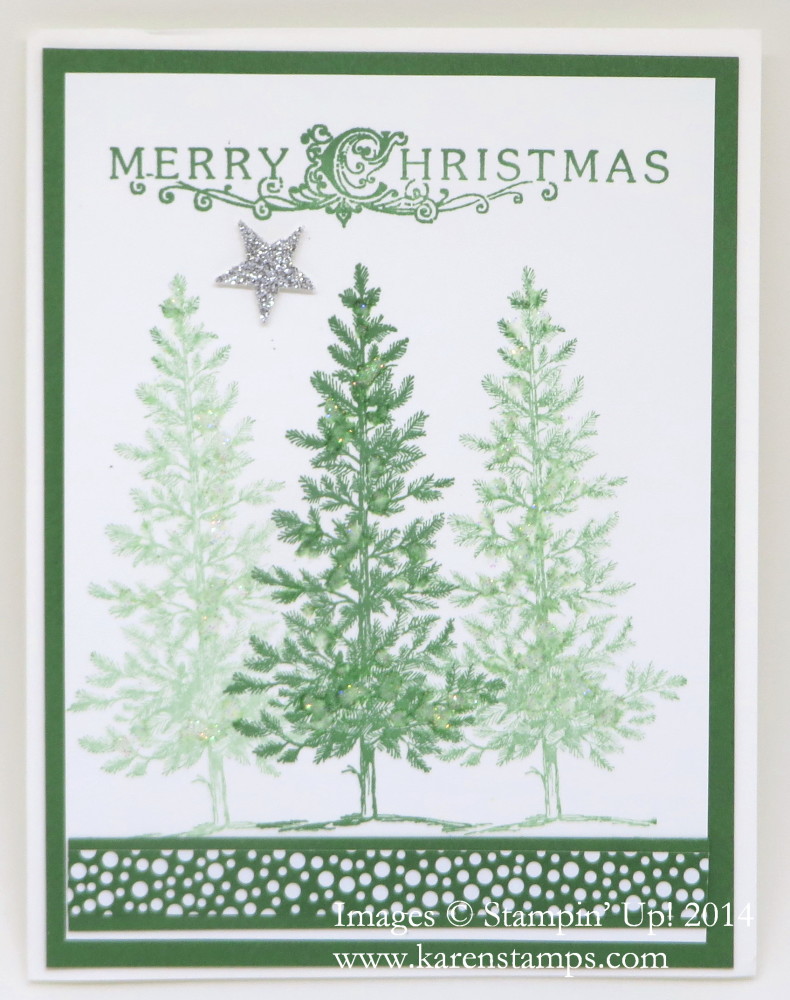
Here is a Stampin’ Up! Christmas card we received from my husband’s cousin! She used the stamp set Lovely As a Tree, a classic stamp set that I can’t imagine ever doing without! Notice how she stamped the center tree fully inked and then stamped each tree on the sides without reinking. For some pretty sparkle, she added a little glitter and a Silver Glimmer Star. She also added a little strip of Nordic Noel Designer Series Paper.

The Lovely As a Tree Stamp Set can be used for Christmas, for masculine cards, for many occasions. It’s just one of those stamp sets that your collection should not be without! It is timeless!

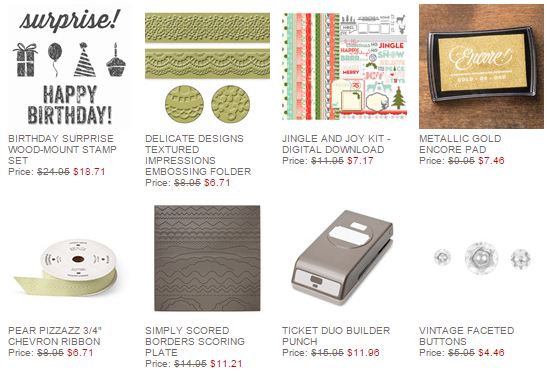
If you are interested in any of the Weekly Deals, remember tonight will be the deadline for ordering. New ones tomorrow! Don’t forget the Year-End Closeouts in the Clearance Rack. You can order the Christmas products on there and save them for next year!

Stampin' Up! Weekly Deal Dec 16 2014

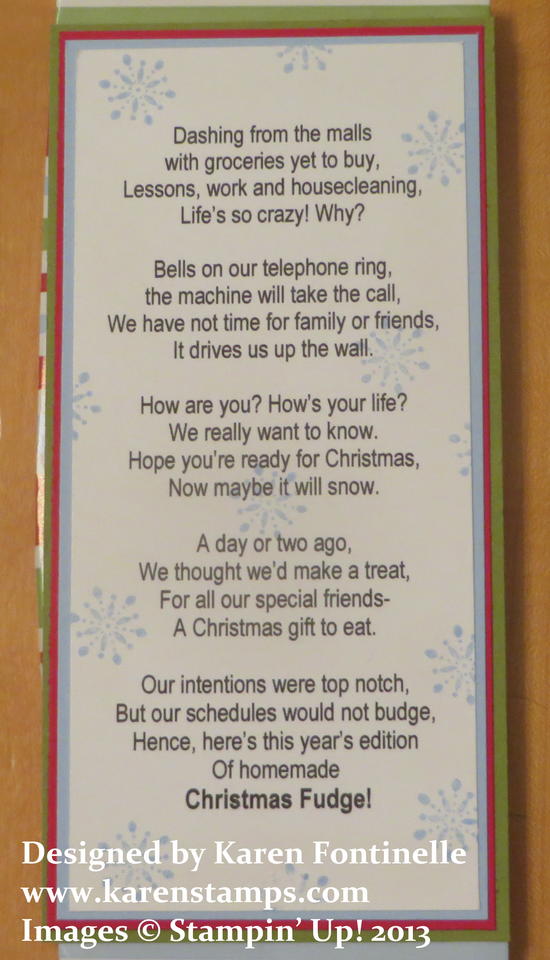
Christmas Fudge! It’s a Joke!

Christmas-Fudge Poem

This is actually from a post from last year, but I thought “Christmas Fudge”  was appropriate at this point in time, so close to Christmas!  If you need a little funny something for somebody, this idea has been around for many years but is still good….and handy!  Just print it out and wrap some card stock or designer paper around one of those very large candy bars and you’ve got a gift! Of course once you read the words you will recognize it as a take-off of “Jingle Bells”!

You can read my previous post HERE.

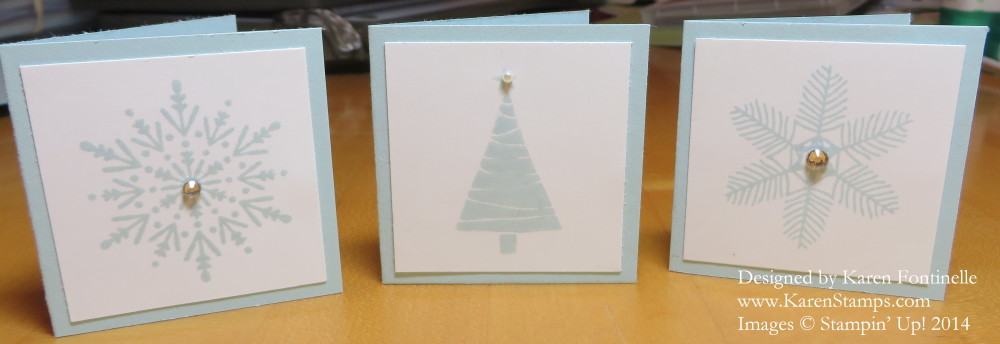
Quick and Easy Tiny Christmas Tags

Tiny Christmas Tags

We’re all rushed for time, but if you find yourself short on tags for wrapping presents, just make some quick and easy tiny Christmas tags like these! The Soft Sky card base is cut at 2″ x 4″ and scored at 2″. The Whisper White layer is cut at 1 3/4″ x 1 3/4″. Just find some small images to stamp easily. The first one is from the stamp set Many Merry Stars and the other two are from the Project Life stamp set December Wonder. The monochromatic look is easy and you don’t even have to think about colors!  Add a tiny rhinestone or pearl for a little something on your tag or gift card! Super simple to make!  At most it took five minutes!  And it was fun!  You won’t be able to buy such cute gift tags at the store!

How close are you to finishing your Christmas shopping and preparations?!

In all the holiday hubbub, don’t forget the Year-End Closeout on the Stampin’ Up! Clearance Rack! Everything is available while supplies last so products can change at any time. There are several Christmas products you could use now or put away for next year!


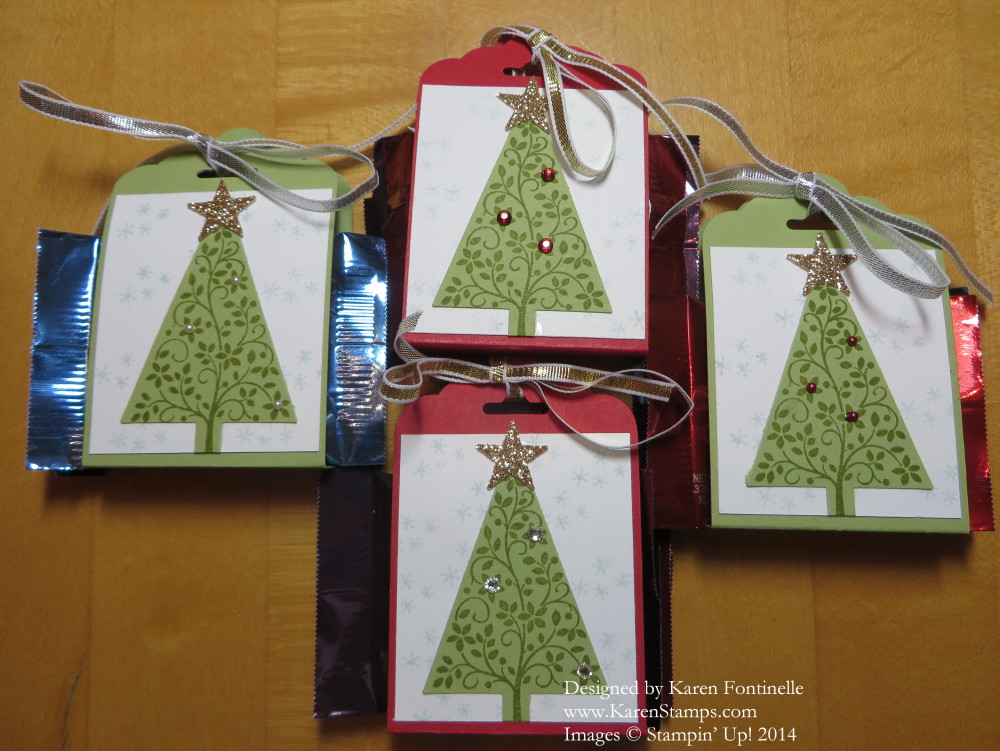
Scalloped Tag Topper Punch Candy Treat Holder

Scalloped Tag Topper Punch Candy Treat Holder

If you need a little candy treat holder for Christmas, try this Scalloped Tag Topper Punch Candy Treat Holder. It’s made with the Scalloped Tag Topper Punchbut if you didn’t have that punch, you could also just make the card stock strip plain and punch holes in the top. The Tag Topper Punches make it easy!

I wanted to be able to enclose two Ghirardelli chocolates inside so I made the spacing for the bottom a little wider and the strip a little longer. I cut my cardstock for the candy holder 7″ x 2″.  It does need to be exactly 2″ or a tad narrower for the strip to fit inside the punch. Score at 3 1/8″ and 3 7/8″. Punch each end with the Tag Topper Punch. Fold on the score lines and decorate the treat holder! I put a little bit of SNAIL Adhesive inside just to help hold the candy. Tie with some ribbon at the top.

To decorate the candy treat holder, I cut a piece of Whisper White for a background layer and stamped with Soft Sky ink the very little snowflakes in Holiday Home. The tree is from Festival of Trees and punched with the Tree Punch. Of course I had to punch out a little star from the Glimmer Paper and I even had to add a little bit of bling with some Pearls and Rhinestones.

This is an easy and fun project to make!  Make it a little smaller if you want to just add one chocolate inside!

Shop Stampin’ Up! HERE.

Make a Gift Card Holder

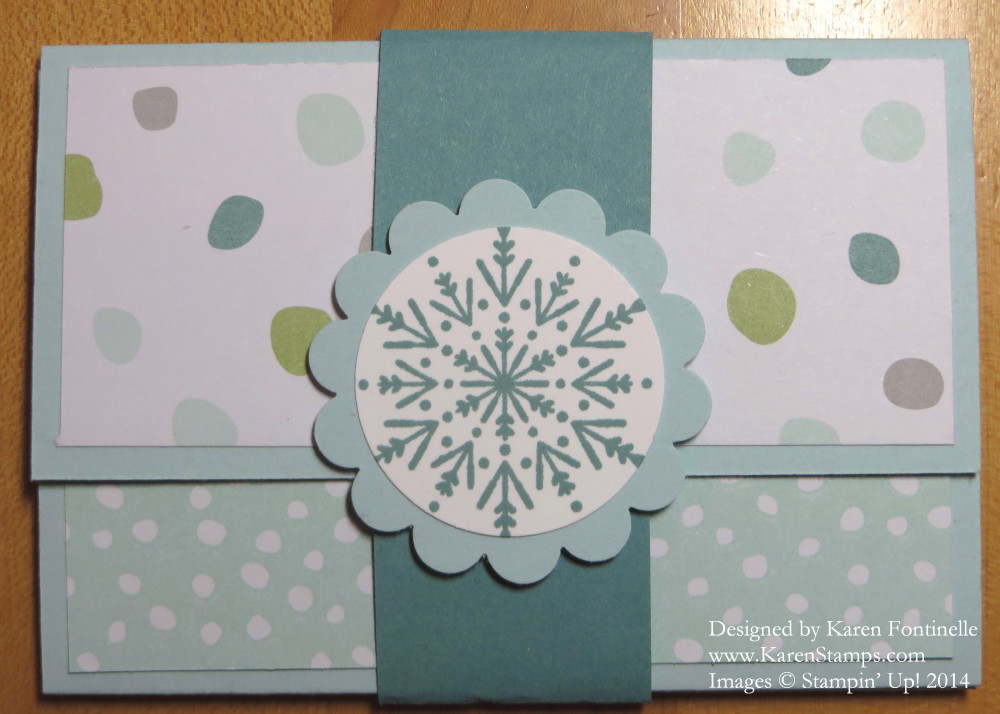
Gift Card HolderShopping time is about over before Christmas (not that I have barely started mine!) so gift cards might be an easy solution for your gift-giving at this point in time! Make a pretty gift card holder with some card stock and designer paper and maybe a stamp or punch or two! My friend and I made a bunch of gift card holders yesterday for her husband’s office, but that version was a little more complicated, although they turned out beautiful. This gift card holder is very easy to make and so versatile.

Cut a piece of card stock 10″ x 4 1/2″.  Score at 3″, 4″, 5″ and 8″. Fold and decorate.

That’s pretty much it!!

Here are the steps since you probably want the details!
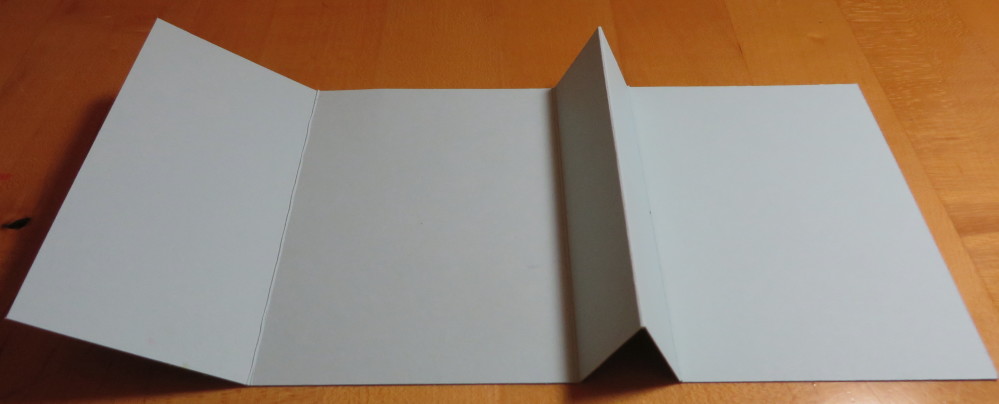
Gift Card Holder Folds

Fold on all the score lines using a Bone Folder to crease them well. Make sure your folds are going like this.
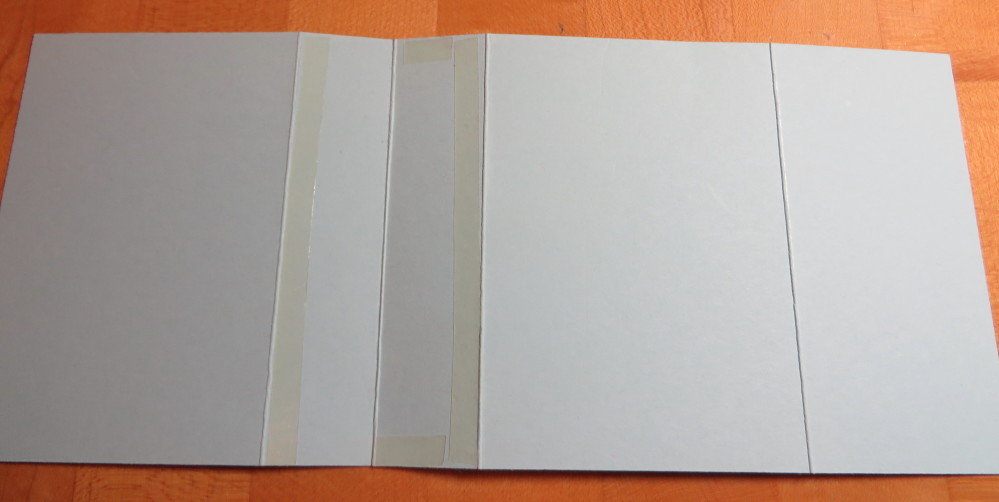
Gift Card Holder Adhesive

Apply adhesive as seen in the photo above.  I used Sticky Strip (and took off the red liner before I took the picture! I like using adhesive on both sides that meet up so it holds well, just in case. In this case, put the adhesive very close to those fold lines because the gift card is going to be inserted in the top part, where the fold is now.
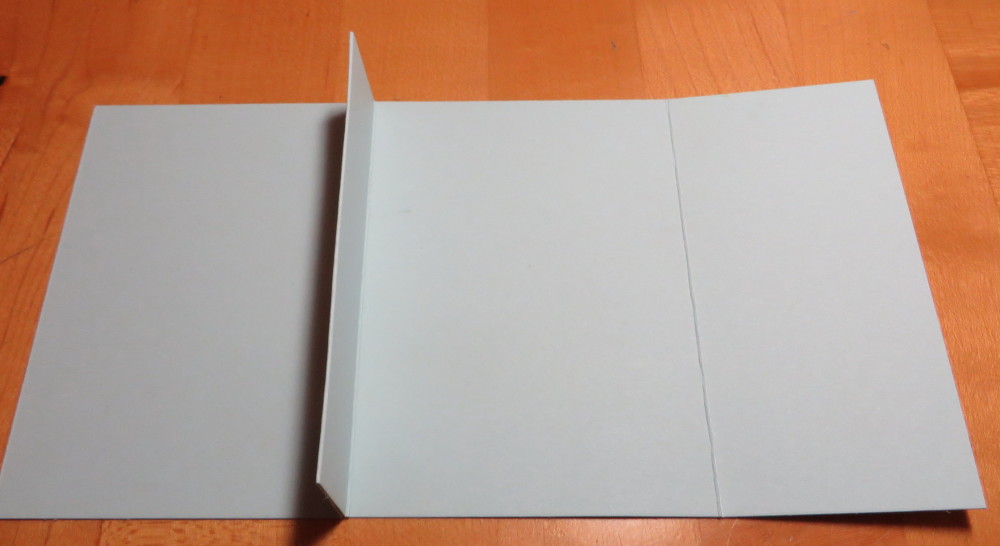
Gift Card Holder GluedPinch that fold together where you have put the Sticky Strip (or Mono Multipurpose Glue). You are eventually going to slice off the top fold to make an opening for the gift card, so don’t worry!
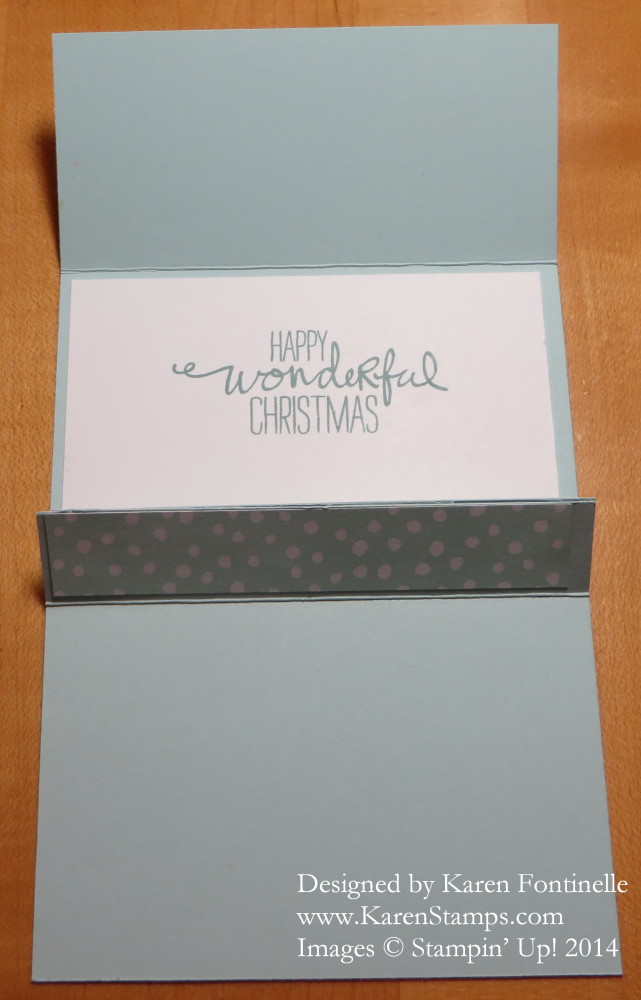
Gift Card Holder Greeting Inside

You can add a greeting to the inside and adhere some designer paper where you like. Using the Paper Trimmer, trim off just a slight bit of the top of that fold line where you will insert the gift card. You could use a framelit or punch that opens up that fold to fit the gift card. In the photo, you can barely see the opening I have after trimming off just about 1/8″ or whatever slight amount of the fold.
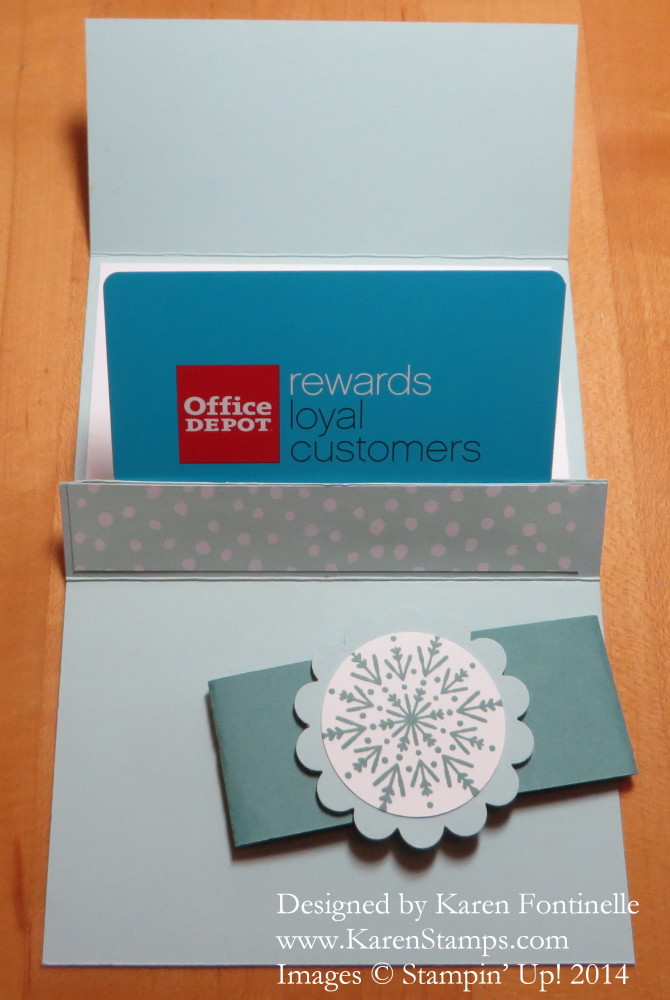
Gift Card Holder with Card

Insert the gift card (not a plug for Office Depot, I just grabbed a card that would fit in the slot!). Make a belly band (mine is 1 1/4″ wide) to fit around or tie a ribbon or whatever you like!

Easy gift card holder!  Unless you choose to make it more complicated!

Today may be the last day to order Stampin’ Up! products and have them arrive before Christmas. Of course it all depends on where you live and weather conditions and road conditions and all that! Did you know Stampin’ Up! offers Expedited Shipping?? Warning:  You can become addicted!  It does cost extra, on top of regular shipping, and you can get 1- or 2-day shipping.  There is a time deadline for it to ship out the same day.  But if you are in a hurry, it’s great! Like my Occasions Catalog pre-order that is arriving today!!!

Shop Stampin’ Up! HERE!

Festival of Trees Christmas Tags

Festival of Trees Christmas Tags

It is crunch time for sure so I plan to show you quick and easy Christmas projects you can make at the last minute this week! Here are some Festival of Trees Christmas Tags you can make with scraps and just a little bit of stamping and embellishing. I cut the tag 2 1/4″ x 4 1/4″ with the Whisper White layer 2″ x 4″. You can use any colors you like. I stamped the trees with the Festival of Trees Stamp Set and punched out with the Tree Punch. That punch is so handy! If you want, you can save 15% by buying the bundle with the stamp set and punch together. You don’t even need to stamp, you can punch out a tree from designer paper or Glimmer Paper! Super Simple!  And then if you like, but not necessary, you can embellish the trees with some bling, like rhinestones or pearls or Candy Dots!

Have fun making some easy Christmas tags!

Last day for Stampin’ Up! Weekly Deals!  Order before midnight tonight!

Weekly Deal Dec 9 2014


More Watercolor Winter Simply Created Kit Christmas Cards

Watercolor Winter Merry Tree

Besides the designed cards in the Watercolor Winter Simply Created Card Kit, I was able to make lots of other designs with the materials in the kit.  Some I copied and some I made up as I went along! That’s the beauty of stamping! The Watercolor Winter Kit is still on the Stampin’ Up! Year-End Closeout Clearance Rack, but is only available while supplies last! There are other holiday products on there that you might like to grab right away so you can use them this year – or save them for next year!

Here are some of the other cards I made from the kit and maybe with a few extra pieces from my stash.

Watercolor Winter Joy Sled Card

Watercolor Winter Card Sled Joy Snowflake

Watercolor Winter Card Bermuda Bay Snowflake

Festival of Trees 4″ x 4″ Card

Festival of Trees 4x4 Card

Sometimes it is fun to make a different size card, so this one is a Festival of Trees  4″ x 4″ Christmas card.  It fits in the envelope perfectly. The Festival of Trees Stamp Set offers so many possibilities for Christmas cards, Christmas treats, Christmas favors and projects! And who doesn’t love the Silver Glimmer Paper to set off the tree! If you purchase the Festival of Trees Photopolymer Bundle then you save 15% and also receive the Tree Punch which makes cutting out the tree so easy. I stamped the star from the set with Real Red and punched out with the star in the Itty Bitty Accents Punch Pack. I use these punches all the time. While I had planned to decorate the tree with Rhinestones perhaps colored with a Cherry Cobbler Blendabilities Marker, I opted instead for the Brights Candy Dots. Originally I was only going to use the red ones, but then decided why not use several colors?! This way for mailing the front of the card is flatter since I already have the tree popped up on Stampin’ Dimensionals. The Silver Glimmer Paper circle is punched with the 2 1/2″ Circle Punch. The Real Red background layer is embossed with the Decorative Dots Embossing Folder. The greeting comes in the stamp set and has another part that does on the inside of the card. Great stamp set!

If you would like any stamping supplies under your Christmas tree, please visit my Stampin’ Up! Online Store! You will find many great deals there including the Stampin’ Up! Weekly Deals, the Year-End Closeout Clearance Rack, the Holiday Catalog and the Holiday Supplement.