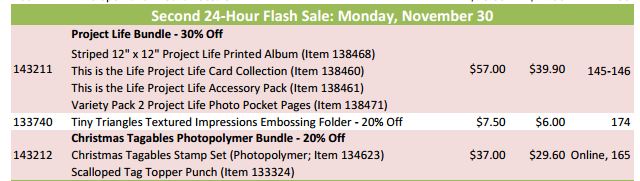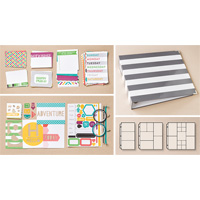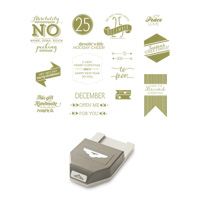
It’s Cyber Monday and today is the last day for the full Stampin’ Up! Online Extravaganza, plus a Flash Sale all day today (while supplies last!)!
Be sure to use the Bundle numbers to order.
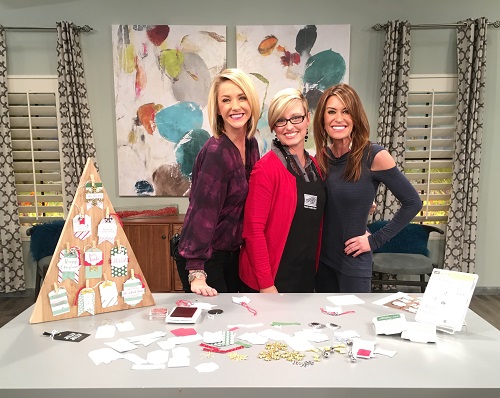
If you have rested and recovered from all the delicious Thanksgiving foods from yesterday and want to take a break from the crazy Black Friday shopping, enjoy this appearance of Sara Douglass, Interim CEO of Stampin’ Up!, (Shelli’s daughter) show the ladies on a local Utah TV show how easy it is to make Christmas tags with the Oh What Fun Tag Project Kit!
Just click this link to watch: bit.ly/GoodThingsUtahTagKit
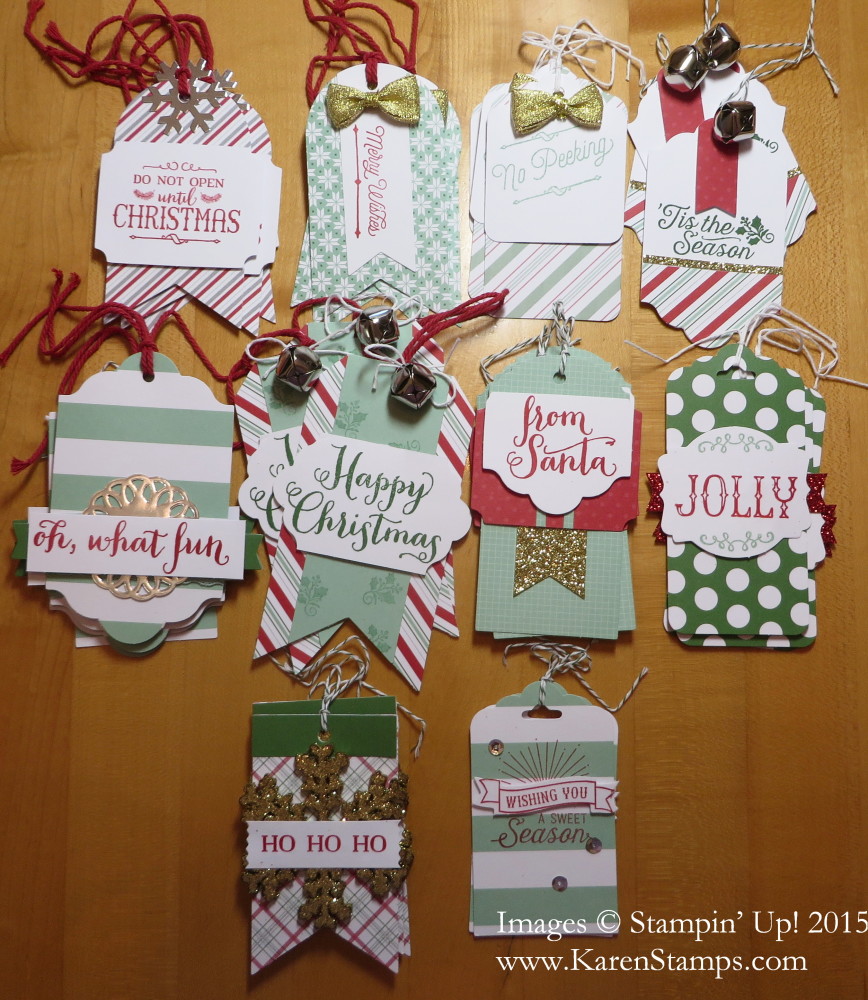
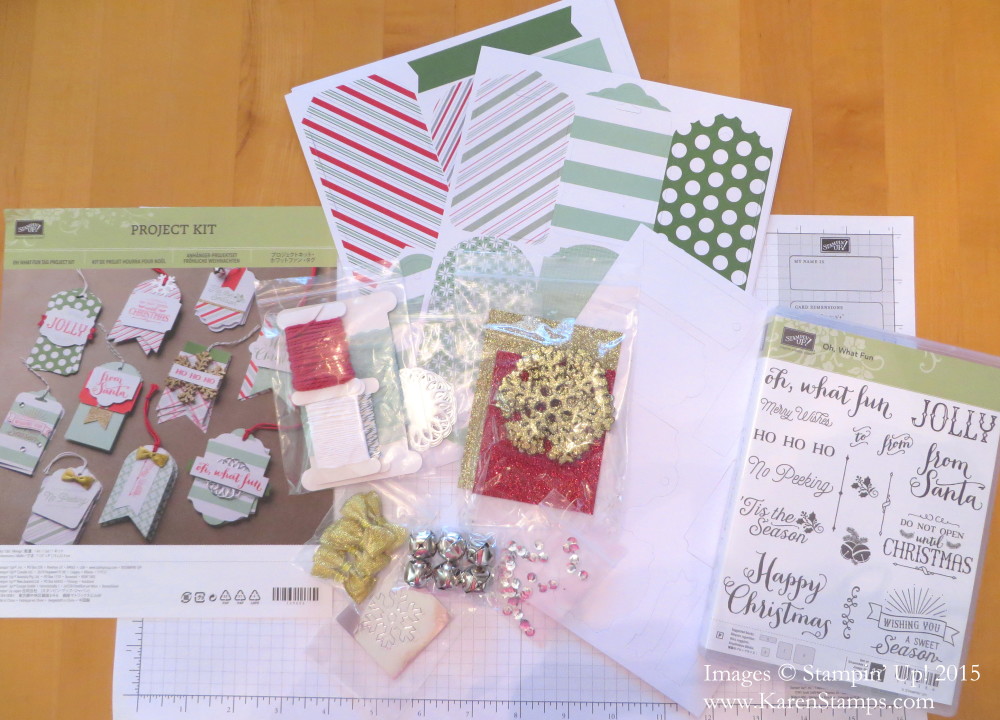
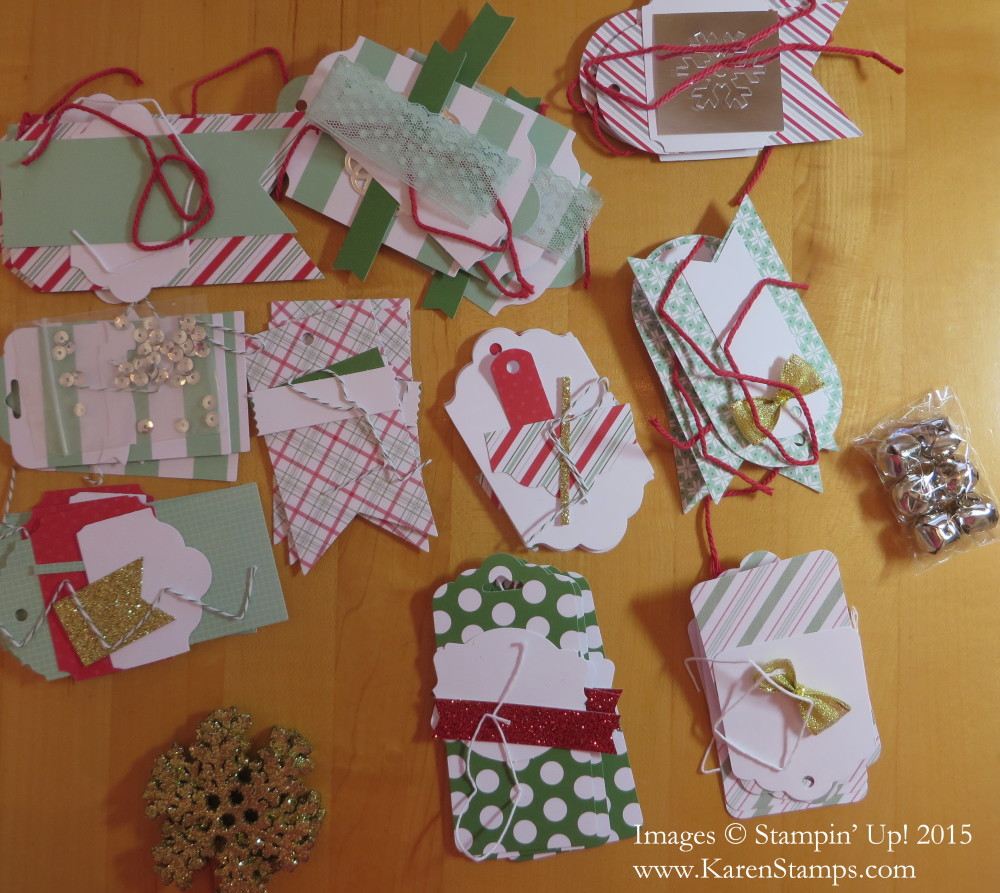
I already made my tag kit! You get 10 different designs, 3 tags each! Follow the directions or do your own thing! They are really pretty and easy to make. Just divide up all the pieces first so you know you have everything for each tag before you begin!
You do need to purchase the stamp set Oh What Fun for the greetings, unless you have another stamp set you want to use. But you can also use this stamp set on your Christmas cards and other holiday projects so it’s not just for making these tags and nothing else!
If you don’t need all these Christmas tags, make some of them into birthday tags or other occasions using other greeting stamps! It doesn’t have to be just Christmas!!
Watch the Stampin’ Up! video for tips on making these fun holiday tags!
Be sure to check out the Stampin’ Up! Online Extravaganza going on right now to get some great Stampin’ Up! stamping and papercrafting products at a discount!! Save up to 50%!
When you are finished watching these fun videos, go to my Stampin’ Up! Online Store and order your Oh What Fun Tag Kit right HERE!
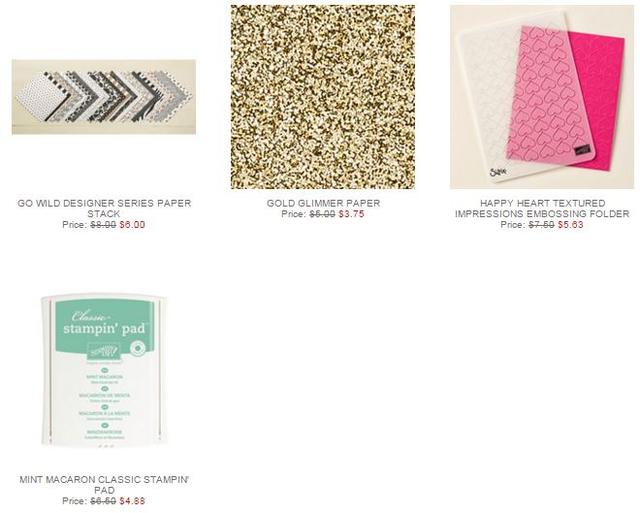
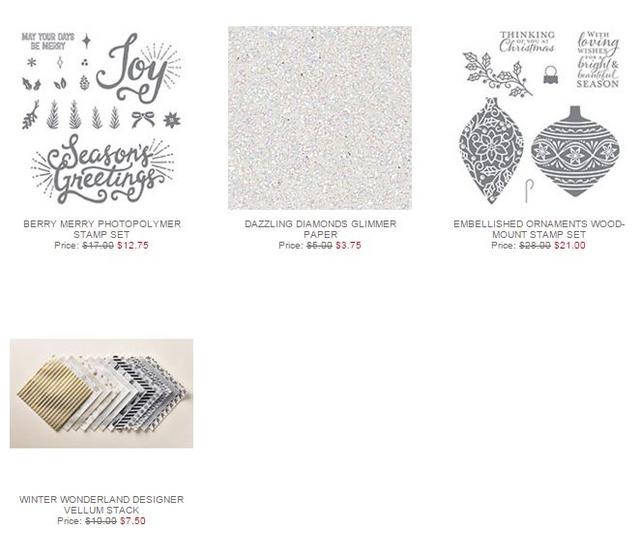
Here are the new Stampin’ Up! Weekly Deals for November 24 – 30. Great ones and very timely this week to use for the holidays! Get the Berry Merry Stamp Set with its bold greetings or the wood-mount Embellished Ornaments Stamp Set. Then you certainly MUST order the Dazzling Diamonds Glimmer Paper, so pretty!! It’s not just for the holidays! You will get lots of use out of this fancy paper. And then there is the Winter Wonderland Designer Vellum Stack! Black and gold vellum sheets to make any of your projects beautiful and on trend! Gold and black are IN!
And the Stampin’ Up! Online Extravaganza is ongoing today! Be sure to check the list! I highly recommend the Magnetic Platform for the Big Shot, which is 40% off. I use mine almost every time I am stamping! It is well worth the money at $24 instead of the regular price of $40! It’s even worth the regular price, that’s how much I use mine!

Stampin’ Up! has announced their ONLINE EXTRAVAGANZA that begins Monday, November 23 and runs through Monday, November 30! Save up to 50 percent on select products!
To make it even better, there will be flash sales that last 24 hours on November 23 and November 30, the first and last days of Online Extravaganza. But remember: Online Extravaganza savings are only available while supplies last, so get them while you can!
TIP: Do not add these items to your cart ahead of time or they will still come up at regular price on Monday. Just write down your list and shop on Monday!
Details:
Deadline:
Orders must be placed by Monday, November 30, 2015 at 11:50 PM (MT)
Don’t Forget!! You can add items from the Holiday Catalog Retiring List to your order – or any Stampin’ Up! products!
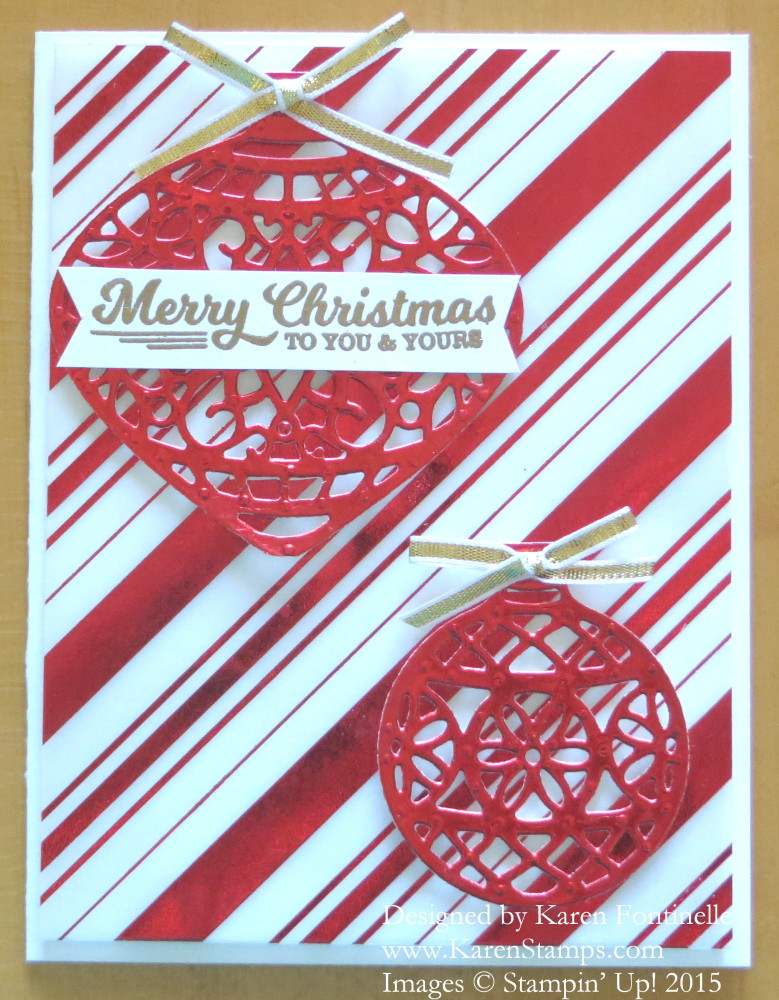
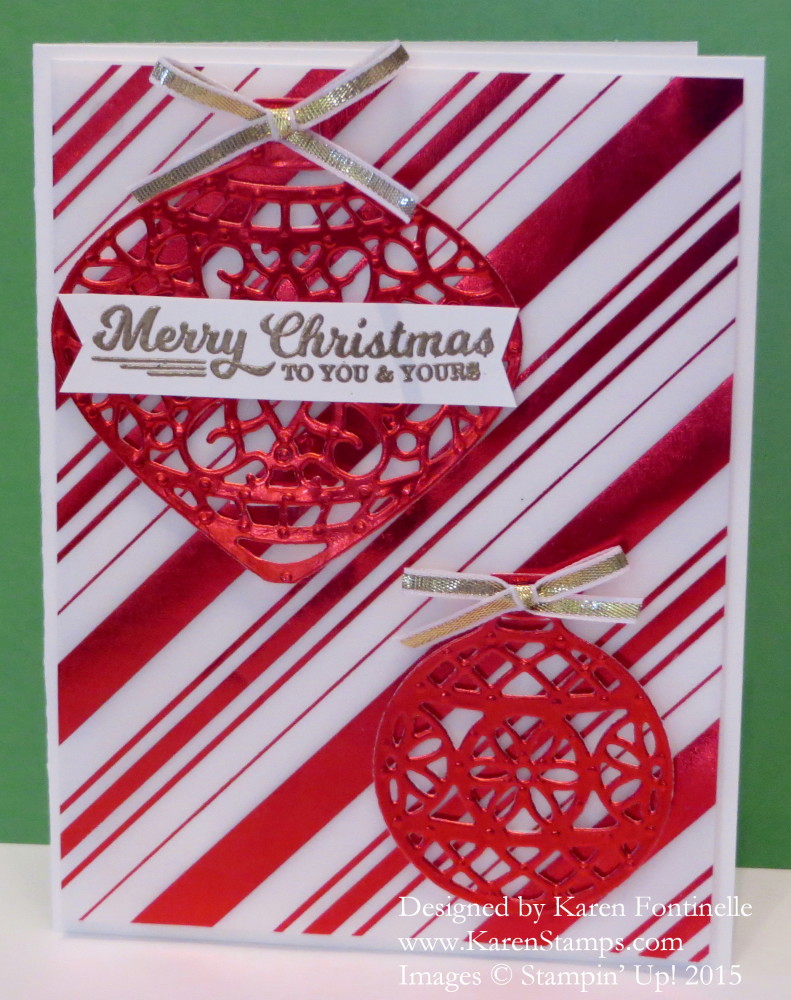
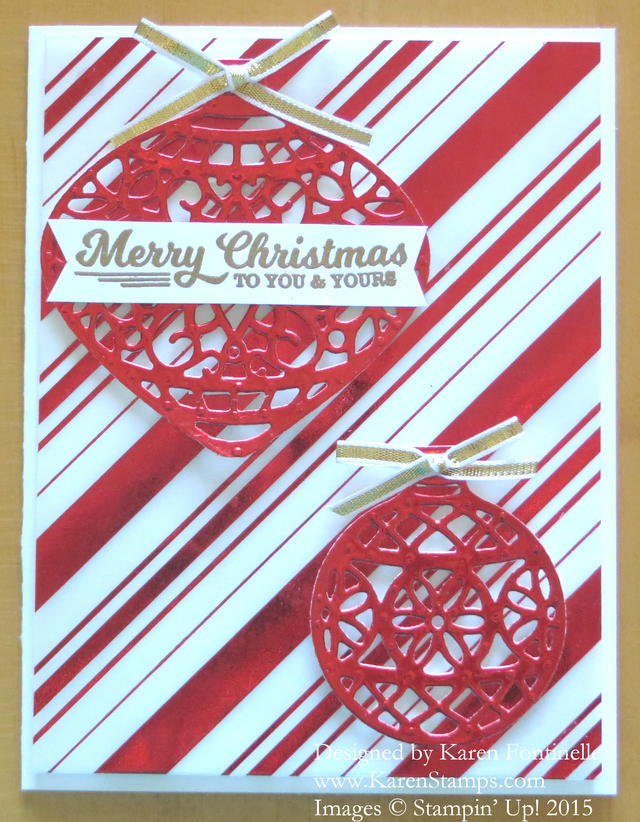
Make this beautiful Christmas card using the Delicate Ornaments Thinlits Dies with red-striped Holidays Fancy Foil Designer Vellum and the shiny Red Foil Sheets. The card base is made with the Whisper White Thick Cardstock and layered with regular Whisper White Card Stock. The striped vellum is then attached to the regular card stock using Glue Dots underneath the stripes to try to hide the adhesive. I popped up this layer (the Whisper White plus the vellum) on Stampin’ Dimensionals.
In order to cut the Delicate Ornaments with the Big Shot, I used the dryer sheet and waxed paper technique! I do not (yet) own the Precision Base Plate in the Holiday Catalog. I had heard both good and bad about it, and of course I had plenty of other products I wanted to order from the Holiday Catalog. Even I can’t have everything! But recently I have heard very good things about this plate and might be inclined to put it on an order soon. It is supposed to help greatly cutting out these intricate dies with all the little pieces. But today I used this sandwich:
I ran this through and rolled it right back again, then ran it through and back again. This worked perfectly, I only had a very few pieces to poke out of the ornaments, no problem at all. The design is so intricate that you really don’t even notice if a few tiny pieces do not all come out. I used some tiny pieces I cut from Stampin’ Dimensionals to pop up the ornaments on the red striped foil. Then I tied little bows from the Gold 1/8″ Ribbon. The silver ribbon would have been pretty also.
The greeting is stamped with Versamark Ink and embossed with Gold Stampin’ Emboss Powder using the Heat Tool. The stamp is from the To You & Yours Too Photopolymer Stamp Set.
It’s time to be making Christmas cards, if you haven’t already! Try these intricate dies and shiny paper to make a Delicate Ornaments Christmas card that will wow your friends!
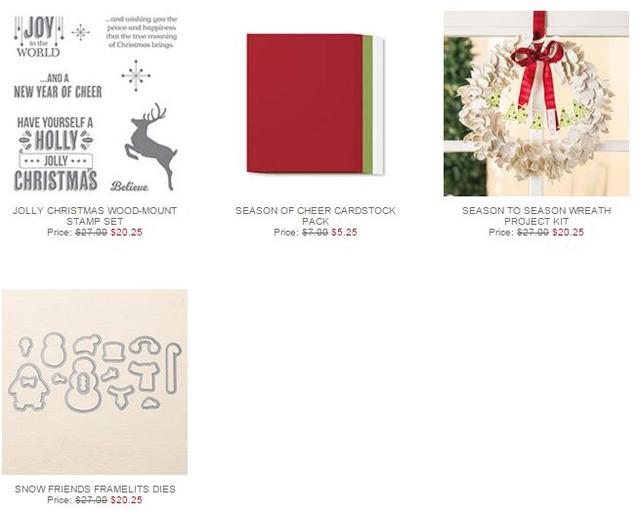
Here are the new Stampin’ Up! Weekly Deals for November 17 -23. Need a Christmas stamp set? Choose the Jolly Christmas stamp set with the reindeer and plenty of greetings. Get the Season of Cheer Cardstock Pack so you have Christmas colors handy. The Season to Season Wreath Kit can be changed out (the center garland) for different seasons. I also saw online a cone tree decorated party with the paper leaves from the wreath kit for something different. And then we have the Snow Friends Framelits Dies that coordinate with the cute Snow Place Photopolymer Stamp Set.
If you want any of these items, just add them to your order or place a separate order. Also, keep in mind the products Stampin’ Up! has listed as “retiring” from the Holiday Catalog. This means that these products will not carry over after the deadline from the Holiday Catalog so if you want any of them and have put off ordering, be sure to get them ordered pretty soon. Unfortunately, the accessories will only be available while supplies last as there is not enough time for reordering by Stampin’ Up! However, stamp sets will continue to be made until December 28 since Stampin’ Up! makes the stamps themselves.
Yesterday I posted photos of the Oh What Fun Tag Project Kit. I made all 30 tags, three each of ten designs. They are easier enough to make and come with directions. If you don’t like the directions (or following them!) just make your own versions! But it is nice to have pieces all die cut and easy to punch out plus some extra-special pieces like jingle bells and gold bows! Just have fun with it! If you don’t need 30 tags, invite two friends over and each one of you make a set of 10 tags! It’s always fun to stamp with friends!! As Holly says in the video, divide up the supplies for each group of tags so you don’t inadvertently use more than you should on other tags and then run out. Enjoy the video and see how great this Tag Kit is!
Place an order with Stampin’ Up! Online for the Oh What Fun Tag Project Kit!
Oh what fun you will have making Christmas tags with the Oh What Fun Tag Project Kit by Stampin’ Up! This is the coordinating Oh What Fun Photopolymer Stamp Set that you can use to make the tags and also use for any cards or other Christmas projects and the contents of the Oh What Fun Tag Project Kit.
It is suggested that you separate the materials you need for each tag so that you are sure you have the right pieces in the right places for the right tags!
Then you are ready to stamp and go for it! In the kit, you receive enough materials to make 30 tags, 3 each of 10 designs! Just think how much fun you can have making these easy tags and how lovely your gifts will look with a fancy tag attached!
This is the time to start stamping things like this so that you are not rushed in December when you will be wishing you had done these projects much farther in advance! I need to listen to my own advice, believe me — but I do have these tags made! On the back you can stamp the “To & From” so you can write in the names when you actually wrap the packages. A friend of mine said she was going to enclose a tag with her Christmas cards as a gift for the recipient! You could also use the tag as the focal point on the front of your card! You could also use some of the tags on scrapbook pages for the holidays, even on Project Life pages.
So there are lots of ways to use the tags in the Oh What Fun Tag Project Kit, whether you use them all for gift wrapping or whether you use them for decorations, cards, scrapbook pages or other projects!
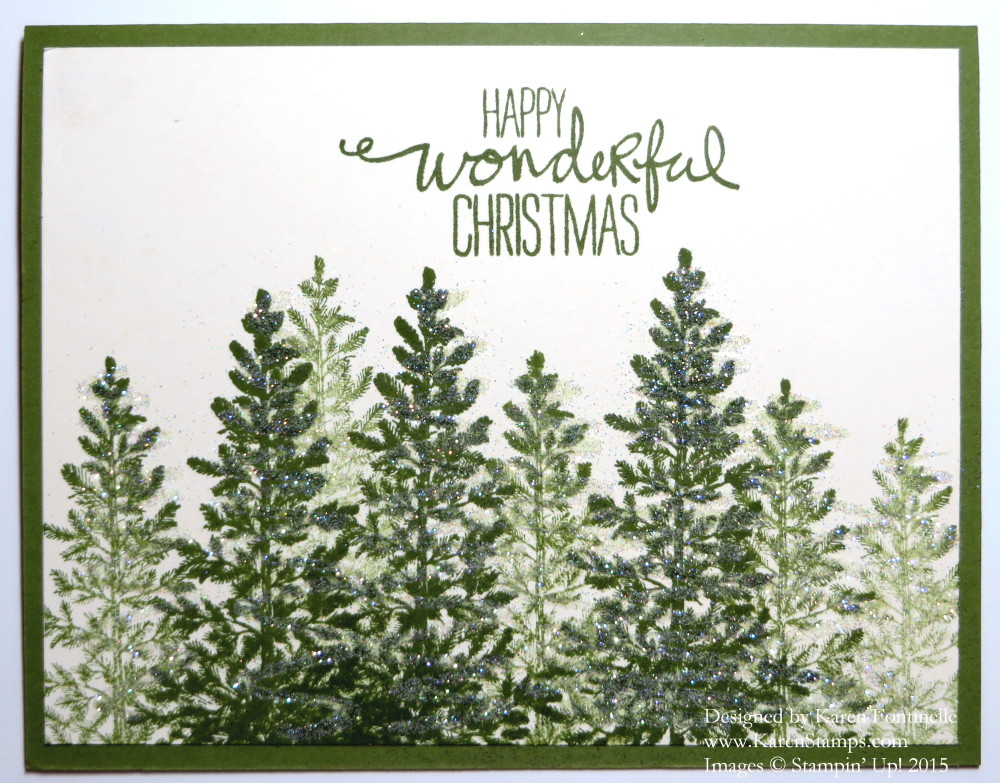
This Lovely As a Tree Christmas Card is one of the easiest and most beautiful Christmas cards you could ever make! With Stampin’ Up! having the 15% Off Stamp Sale this week,
October 19 – 23, I would like to encourage you to make sure you have this stamp set, Lovely As a Tree, in your collection. If you have been with Stampin’ Up! for many years, you probably DO own it. But if you are newer, you should know Lovely As a Tree is one of the most classic stamp sets Stampin’ Up! has ever sold! It has been around since 2001, I believe, which is around the time I started stamping. The fact that it is still in the catalog means that it is still very popular and still getting sales. This is a stamp set every stamper should own!
I saw the design of this card way back when I was first a demonstrator. The stamping is so easy on this card. Simply ink up the single evergreen tree and stamp. Then immediately stamp again right next to that tree. Since there is less ink on the stamp, that tree will stamp lighter. Then ink up the stamp again and stamp – and then stamp again without inking up. Continue stamping this way over the Very Vanilla card front until it is filled with trees. Stamp a greeting at the top. I used the greeting from the Wondrous Wreath Photopolymer Stamp Set.
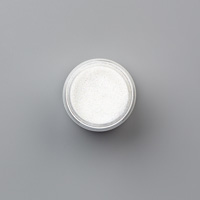
One of everyone’s favorite embellishments back then, and probably still, was Dazzling Diamonds Stampin’ Glitter. This doesn’t require any thought or expertise! Simply take the 2-Way Glue Pen and scribble on each tree from top to bottom. Shake Dazzling Diamonds Glitter all over the trees on the card front and dump off the excess. You will be amazed at how beautiful your Lovely as a Tree Christmas Card is now!
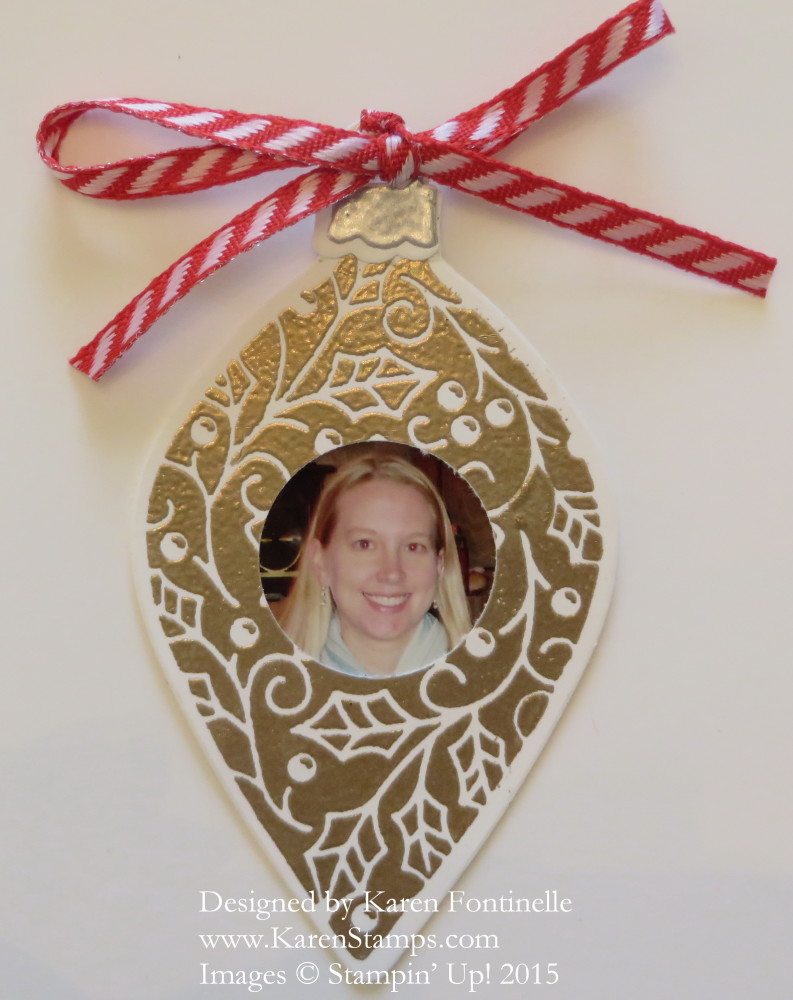
We go from the first day of autumn to an Embellished Ornaments picture frame ornament! Believe me, pretty quickly time will seem to go that fast when we get rolling here! I saw something resembling this idea on some non-stamping website and it reminded me of this stamp set.
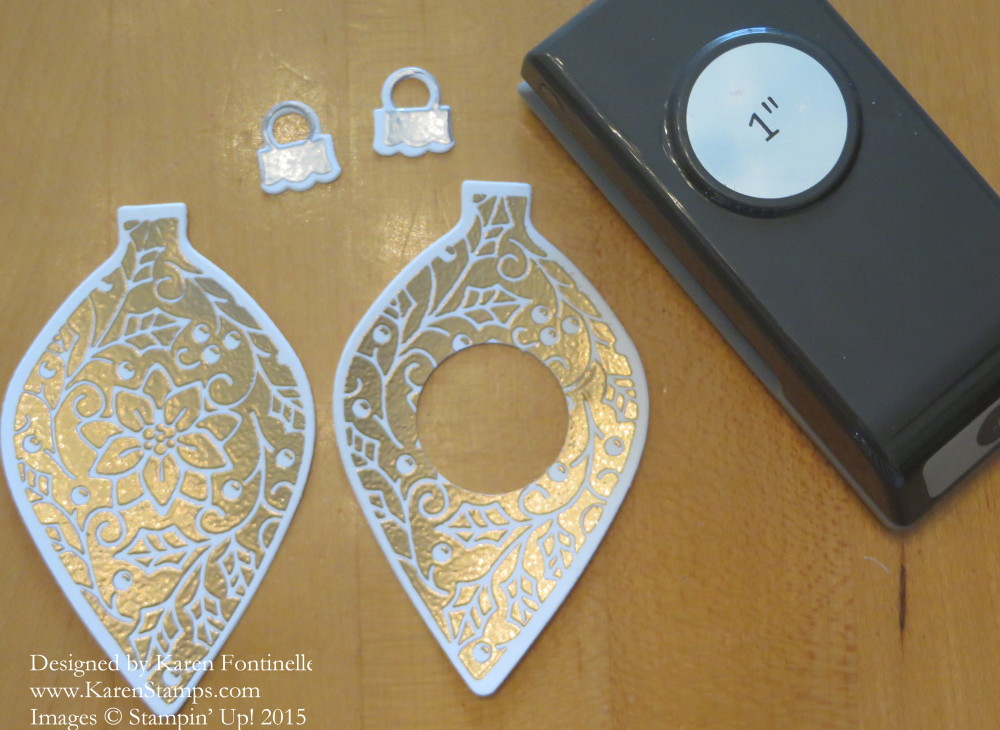
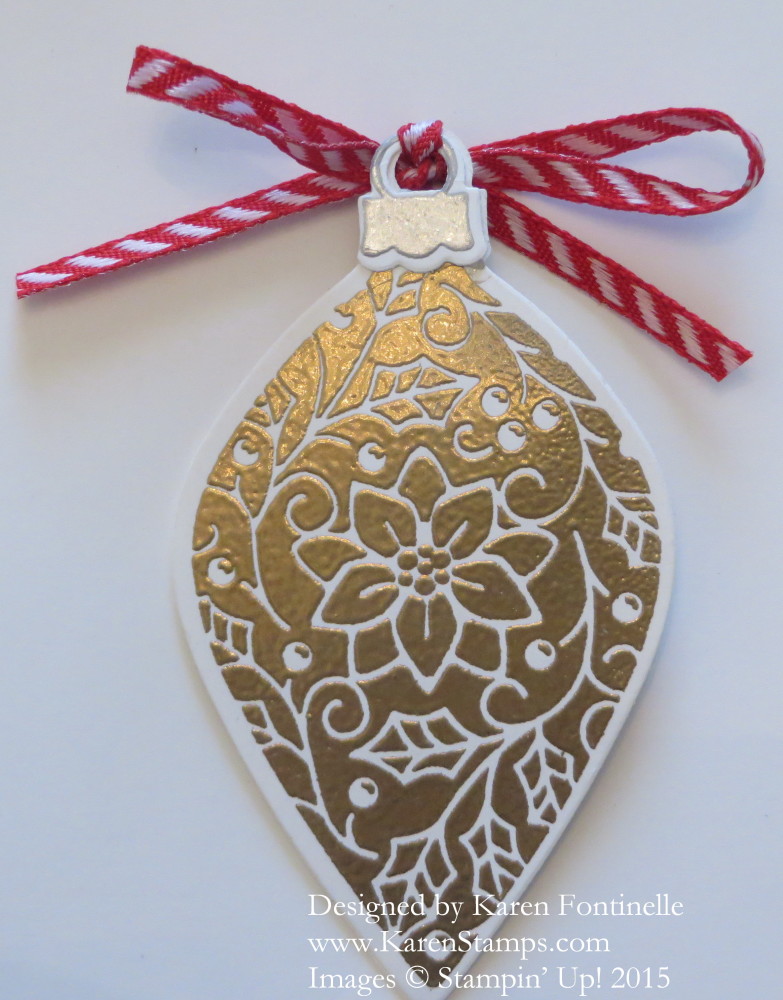
I stamped two ornaments in Versamark Ink and embossed with Gold Embossing Powder using the Stampin’ Up! Heat Tool. I also stamped the ornament hangers and embossed with Silver Embossing Powder. Then I glued the hanger on to the ornament with either a bit of Fast Fuse Adhesive or Multipurpose Liquid Glue.
To make this pretty ornament into a picture frame, I used the 1″ Circle Punch to punch a hole in the center of one ornament to fit a photo. You might punch the hole and then make sure the photo you choose will fit in the area nicely, Cut the photo a little larger than the hole so it can be adhered on the backside of the ornament. Then glue together the two ornaments so you have a front with the photo and the plain back of the ornament. Tie a bow around the hanger, perhaps with the Real Red 1/8″ Striped Ribbon.
There you have it! I nice little photo ornament that you could hang on the tree, tie on a package for a tag, or even attach to a Christmas card. Very easy to make! You could make it even simpler by just stamping with ink and not embossing.
You can do a lot with this Embellished Ornaments Stamp Set. Make some ornaments fancy or plainer. No matter which you do, they will still look elegant on your projects and cards!
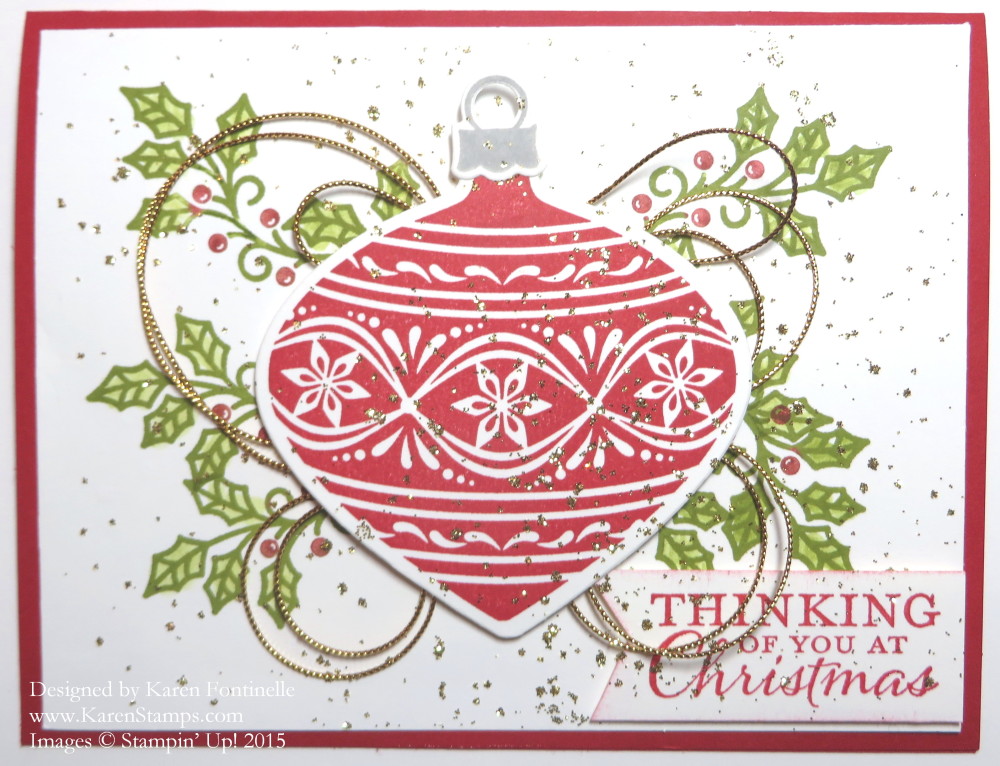
Yesterday I made a super simple, easy Christmas card for my stamping newsletter with this same stamp set, and today I made this more elegant Embellished Ornaments Christmas card with gold glitter. I was actually copying a sample card in the Stampin’ Up! Holiday Catalog on page 15. I used the Embellished Ornaments Stamp Set for the whole card. It also has a nice sentiment to stamp inside the card.
I stamped the holly leaves on the Whisper White card front layer overlapping in the center , which I knew would be underneath the ornament and not show. I inked up the leaves in Old Olive and then used a Blender Pen to remove the green ink from the berries and colored the berries with Real Red marker. Then I went back with the Blender Pen and colored the holly leaves in lightly with Old Olive ink.
The ornament is stamped with Real Red ink and cut out with the Delicate Ornament Thinlits Dies and the Big Shot Die-Cutting Machine. The little ornament hanger/topper piece is also die cut after being stamped with Smoky Slate ink. You could also stamp this piece with Versamark ink and emboss with Silver Embossing powder. The sample in the catalog used the very thin, fine Gold Metallic Thread behind the ornament. I own it, but have lost it! So instead, I used the Gold Cording Trim. I’d prefer the Gold Metallic Thread for a lighter look. The cording is just gathered haphazardly behind the ornament and stuck down with Stampin’ Dimensionals which then adhere the ornament to the card.
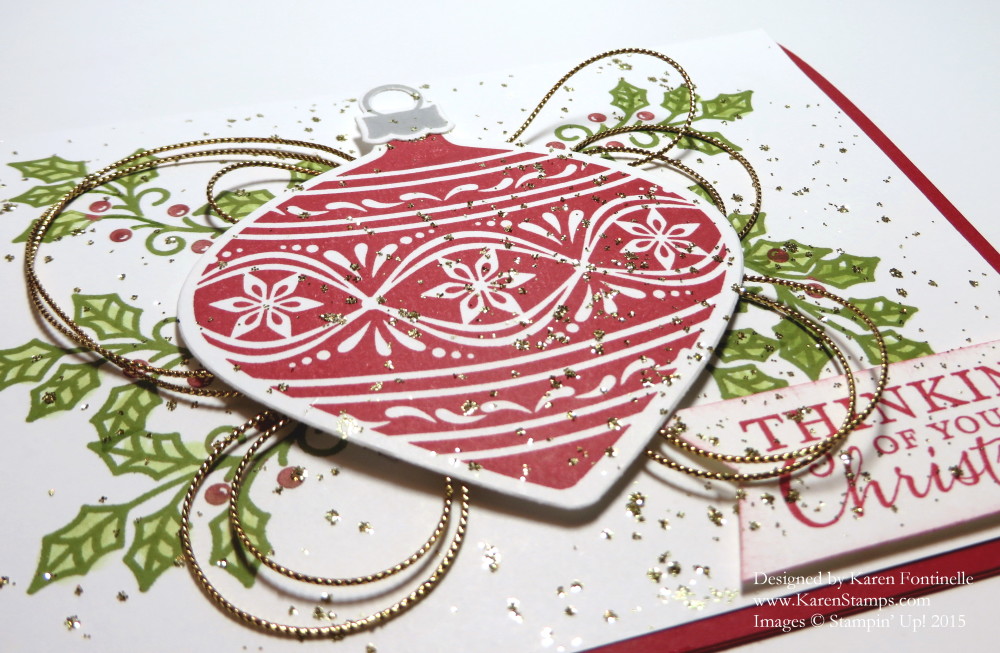
For a finishing touch, I used the splatter technique with the Multipurpose Liquid Glue diluted with water from my Aqua Painter as I did in THIS POST. Since I didn’t look very closely to see my splatters, I kept splattering and got a little carried away!! If I had it to do over, I wouldn’t do quite so much splattering; but oh well, a lot of glitter on a festive Christmas card never hurt anybody! Once you have splattered with the watered down glue, shake on Gold Glitter to cover, then dump off the excess. Voila! You have a glittered splattered card!
Use your Holiday Catalog to shop but also to get ideas! Copy the projects exactly or just take part of the idea for inspiration and make up your own creative idea! That’s why lots of samples are provided in the Holiday Catalog as well as the Annual Stampin’ Up! Catalog. Enjoy!
Here is a close-up so you can see the glitter better.
If you need any supplies to make my Embellished Ornaments Christmas card, please click this link to shop online at Stampin’ Up!
Sara Douglass, daughter of Shelli Gardner, Founder and CEO of Stampin’ Up!, appeared on a local Utah TV show and showed how easy the Season to Season Wreath Project Kit is to assemble and use for multiple occasions. She also shows the completed Witching Decor Project Kit (the witch hat that I love!!). I always enjoy when Stampin’ Up! makes a TV appearance!
Listen to the cute little reporter! She sounds pretty excited with these projects, but I don’t think she has stamped before! Wouldn’t we all love to get our hands on her at a workshop and show her all about stamping and papercrafting?! It’s always fun to see a new person’s eyes light up when they discover the fun of stamping!
If you would like to watch the Stampin’ Up! videos about assembling these two project kits, here they are!
I hope you enjoyed those! The kits in the Stampin’ Up! Holiday Catalog this year are just fantastic! I hope you will choose at least one to make!
I’m happy to mail you the current Stampin’ Up! catalogs if you do not have a Demonstrator to help you yet! Just email me your contact information at Karen@KarenStamps.com.
To shop for the Season to Season Wreath Kit and the Witching Decor Project Kit, as well as all the other wonderful Stampin’ Up! products, just visit my Stampin’ Up! Online Store HERE or let me put your order in for you if you prefer!
Happy Labor Day! If you are just relaxing at home today and perusing the internet catching up on ideas for the Stampin’ Up! Holiday Catalog, here is a Stampin’ Up! video about using the Jingle All the Way Bundle. I’m sure this will be a popular set as it is unique and fun! Watch the video for cute ways to use this Jingle All the Way Stamp Set and the Sleigh Ride Edgelits Dies. You will be able to make a stack of Christmas cards with just this Bundle (and of course a Big Shot!) The Bundle saves you 15% and also comes in wood-mount, of course. Be inspired for the upcoming holidays! Get an early start!
If you want a copy of the Stampin’ Up! Holiday Catalog mailed to you, just email me at Karen@KarenStamps.com.
If you love these ideas and want to shop for any of these great Stampin’ Up! products, please visit my Stampin’ Up! Online Store HERE. If you prefer, I can place an order for you.

Here are the new Stampin’ Up! Weekly Deals, available while supplies last, until Monday September 7, 2015. Don’t miss out! Great embellishments for your cards and projects in the Candy Dots and Rhinestones, of course! Both are adhesive-backed so all you do is stick them on! Any Washi Tape is fun to use, and the White Seam Binding Ribbon is always useful!
Be sure to check the Clearance Rack before you finalize any orders. You never know what you will find. Stampin’ Up! plans to add new items next week! But if you think ahead to the holidays, right now you can stock up on the pretty Cherry Cobbler Sheer Linen Ribbon (more than half off!), the Real Red Satin Ribbon, the Mossy Meadow Satin Stitched Ribbon for some green, and the Extra Large Gift Boxes are handy to have on hand for gifts! And there are many more things, but those items jumped out at me as something you can use soon – and all the time, really!

And of course, in case you missed it, the Stampin’ Up! Holiday Catalog went live yesterday!! If you need a catalog (USA) please email your contact information to Karen@KarenStamps.com.
Check out all the fantastic Holiday Catalog products in my Stampin’ Up! Online Store! .
With my big box of new goodies from the Stampin’ Up! Holiday Catalog, I’ve copied some samples in the catalog itself. Here is one on page 8, a Christmas card using the stamp set Cozy Christmas for the greeting and the stamped bells on the card. There is a strip of the fabulous Home For Christmas Designer Series Paper going across the card, accented with a strip of the new Red Foil. And you will love the cute Home For Christmas Designer Buttons, 10 each of 3 designs!
The Holiday Catalog goes live September 1st! If you are interested in Stampin’ Up! products, especially for the upcoming holidays, and would like a catalog, just contact me.
If you are real anxious to get your hands on the new Holiday Catalog products, you can join Stampin’ Up! and either choose some of the products to go in your Starter Kit, or join and get your Demo number, then go ahead and place a Pre-order since you will be a demo! Start your own stamping business and take advantage of the perks of being a Stampin’ Up! Demonstrator! Let me know if I can answer any questions or provide you with more information.
All the details are here, if you are interested in being a Stampin’ Up! Demonstrator: