Category Archives: Cards

Going to Miss the Two Tags Die

One of the many Stampin’ Up! products that I will miss when it retires next week is the Two Tags Die. You can make cards, tags, even little bags and boxes for treats and little gifts. Today I have used my Two Tags Die for two projects as well as two retiring stamp sets, retiring designer paper, and retiring colors, Regal Rose and Baja Breeze.

Two Tags Die BirthdayThere are actually two tag shapes on the Two Tags Die.  This one pictured above had a score line so can be folded in half and tucked under the little slit, which the die also makes.  I cut out the Twitterpated Designer Paper at the same time as the card stock so it fit perfectly. I stamped the cupcake image from the retiring Easy Events stamp set (a great set for all-occasions, especially for the beginning stamper!) and colored it in with Stampin’ Write Markers. For a little pizzazz I had to add some Dazzling Diamonds Glitter to the frosting with my 2-Way Glue Pen. And for a little trim above and below the stamped image, I used the versatile Dotted Scallop Ribbon Border Punch with only the scallop edge showing. The little flower on the edge is made with the Boho Blossoms Punch.

Two Tags Die Word Play Card
This card I made using the discontinued Regal Rose card stock (admittedly not one of my favorite colors in all these years, but it’s okay) and embossed with the Perfect Polka Dots Folder. The Two Tags Die is stamped with a greeting from the Word Play stamp set (another stamp set I hate to see retire) and decorated with a couple of Subtles Collection Designer Buttons tied with
White Baker’s Twine.  I made a similar card back in this post.

The Two Tags Die is a fun and handy die to own if you also own the Big Shot.  If it is still available, I would add it to your list of must-haves before the retirement period is over.

Remember, the new Stampin’ Up! catalog goes live at Noon Mountain Time on Friday, May 31.  Ordering will be down that morning and the night before so they can make the change to the new catalog.  You will still be able to order from the old catalog until June 3.  The Spring Catalog ends May 31.

Place your order today before time runs out at my Online Store or email me with your order at Karen@KarenStamps.com if you prefer.

.

Another Birthday Purse Card

Pink Purse Card

I think these purse-shaped cards make great birthday cards for young girls! They could also be more than a birthday card.  Instead of just putting a greeting on the inside, make a pocket of some sort and turn it into a gift-card holder.  It is graduation time and I read that cash is the most welcome gift!  Make a pocket inside the card and insert cash or a gift card or check.  My grandmother used to always say you can’t give someone a purse without putting a penny in it!  Must be bad luck or something! Even though I made these purse cards for birthdays, think of all the other fun occasions you could make them for and the ways you could change them out!  Make it super-fancy with some Glimmer Paper or a sparkly closure or flower on the front! Make party invitations out of this idea!  It’s one of those projects that once you make one, you want to make more!

You can barely see the fuzzy thing underneath the closure.  That’s a piece of velcro which will hold the card closed.

Shop for Stampin’ Up! supplies at my Online Store!  Be sure to check the Clearance Rack, too!

Pink Purse Card Inside

Make a Purse Card

Red Purse Card

When I needed to make birthday cards for my twin nieces I found this idea of making purse cards for them. My cards just fold completely flat, but you could make yours more 3-D. I used a piece of designer series paper for the purse shape so that there would be a nice design on the inside when it was opened.  You could just as easily use card stock.  The Top Note Die folded in half is used for the top closure of the purse.  What would we do without the Top Note Die?! I’m glad it is not retiring next week!

  • Cut out the Top Note Die with the Big Shot. Score and fold in half lengthwise.
  • Cut a piece of designer series paper (DSP) 6″ x 6″. Score at 3″ and fold in half. Be mindful of which way the pattern is going and which side you want on the outside.
  • Now you will need to trim the sides of the purse from the bottom to the top edge on a diagonal. To do this, measure in on the top open edges about 5/8″ from each side. Use your paper trimmer to cut from that point on each side to the bottom edge of the folded side. You know, make it look like a purse shape!
  • Adhere the Top Note Die to the back of the “purse”. Make some sort of decoration for the front closure.  Adhere to front of Top Note Die on the front of the purse. Use a small piece of velcro in order to hold the purse closed.
  • Depending on your DSP design, you’ll probably need to stamp the greeting on a plain piece of card stock and adhere to inside of purse card.
  • If you want, you could make some ribbon handles for the top of the purse.

Here is the inside of the card.

Purse card Inside

To order any card-making supplies, just visit my Stampin’ Up! Online Store here. Remember, some stamps and accessories are only available for about one more week!

Using the Stampin’ Up! Owl Punch for a Baby Card

Owl Punch Baby Boy Card

The Stampin’ Up! Owl Builder Punch can be used for way more than owls! If you need to make a baby card, just get out your Owl Punch and get to work.

On this card, I made cute little baby clothes hanging on the clothesline with the Owl Punch. Use the piece that would be the front part of the owl. Then make a little triangle snip in the bottom with your Paper Snips to make the piece look like legs. Add some thin strips of card stock for the outfit straps (or pieces of ribbon) and secure with Mini Brads. Thread some Linen Thread through the outfits to “hang” on the clothesline. Adhere the outfit to the card using Stampin’ Dimensionals.

For the background, I used the Cloudy Day Embossing Folder and Big Shot Die-Cutting Machine to make it look like the sky.  The greeting is from Sweet Essentials stamp set.

If you don’t already own the Stampin’ Up! Owl Punch, you’ll want to add it to your order! You can order online at any time at my Stampin’ Up! Online Store here.  Big discounts on some retiring products right now!
Word Play Graduation Card

Word Play Graduation Card

If you are looking for an easy graduation card to make in just a few minutes, here’s one! You can design it using the school colors if you like or any colors you know the recipient will like. I started with a card base of Midnight Muse and stamped the greeting from Word Play in Midnight Muse ink on the Whisper White card layer. You could use any appropriate greeting you had on a design like this. I adhered two strips of 3/8″ Stitched Satin Ribbon to the Whisper White, adhering the ends under the Whisper White and tied the knots with separate pieces of ribbon. Since the colors of my high school were blue and gold, I chose these two colors of ribbon for my sample…Island Indigo and Summer Starfruit!

I love the stamp set Word Play with so many great sayings in it….but it is retiring in a couple weeks, so don’t miss out!

Check the selection of retiring stamps and accessories here in my Online Store and place your order today!

Making a Star Jasmine Card

Jasmine Card

We have some beautiful star jasmine blooming in our front yard.  I only wish the blog had "smell-o-vision" so you could smell the beautiful fragrance from these flowers!  I wish it bloomed all year!  Sometimes we smell it the most heavily in the back of the driveway.  What a treat!

This card demonstrates how you can get inspiration from lots of places…even some flowers blooming in the yard.  The Garden Green card base is 3 1/4" x 3 1/4" and the Whisper White layer 3" x 3". I punched the flowers with the Itty Bitty Shapes Punch Pack.  To give them a little dimension, I placed them on the Stampin' Pierce Mat and poked them in the center with my Bone Folder! The stems and leaves are punched from the Bird Builder Punch. I just put a dab of glue on the back of each flower and placed them on the stems and dotted a little Daffodil Delight marker in the center of each flower.  The greeting is from the stamp set "A Little Greeting" in the Spring Catalog.
And here is a photo of our blooming jasmine!  There used to be a pine tree in the center of it years ago. It's just gorgeous and the fragrance is wonderful!

Star Jasmine

Star Jasmine and Bee
If you want to play a little "I Spy" can you find the bumble bee and two other orange-ish insects in the photo??

Shop now at my Stampin' Up! Online Store for any of your stamping supplies!

When Is Mother’s Day? Mother’s Day is Sunday!

Pleasant Poppies Mother's Day Card

When is Mother's Day? Yes, Mother's Day is this Sunday, May 12th!

Here are some quotes about mothers that perhaps you can use in your cards or projects for your mother.

 A mother’s heart is a patchwork of love. – Anonymous

A man’s work is from sun to sun, but a mother’s work is never done. – Anonymous

A mom’s hug lasts long after she lets go. – Anonymous 

A mother is a person who seeing there are only four pieces of pie for five people, promptly announces she never did care for pie.- By Tenneva Jordan 

A mother is one to whom you hurry when you are troubled. – By Emily Dickinson

A mother understands what a child does not say. – Jewish proverb

All I am, or can be, I owe to my angel mother. – By Abraham Lincoln

God could not be everywhere and therefore he made mothers. – By Jewish Proverb

Most of all the other beautiful things in life come by twos and threes by dozens and hundreds. Plenty of roses, stars, sunsets, rainbows, brothers, and sisters, aunts and cousins, but only one mother in the whole world. – By Kate Douglas Wiggin

Mothers hold their children’s hands for a short while, but their hearts forever. Anonymous

The most important thing a father can do for his children is to love their mother. – By Theodore Hesburgh

***

I hope you enjoyed these sayings about mothers and that they help you with your Mother's Day card or Mother's Day gift or project.

***

My Mother's Day card is stamped with Pleasant Poppies (a large background stamp) in Stazon Black Ink. The flowers and stems are colored in with Calypso Coral and Tangerine Tango Stampin' Write Markers using an Aqua Painter and just the markers themselves. As a final touch I spritzed the card with Gold Glow Smooch Spritz.  I think you can see it in the photo.


Design Your Designer Paper

Designing Designer Paper

Stampin' Up! Demonstrators receive a magazine from Stampin' Up! every other month packed with stamping and papercrafting ideas and Stampin' Up! news and offers. We all can't WAIT to receive our Stampin' Success Magazine when it comes out! In paging through some recent issues, I found this idea that jumped out at me…design your own designer paper!  On the left you see a sheet of the Patio Party Designer Series Paper…and on the right you see the same paper with the polka dots stamped with a small heart from the stamp set Itty Bitty Bits. Just a fun and different kind of idea and easy to do!
You can purchase the Patio Party Designer Series Paper while supplies last at a discount in the Retirement Sale at my Stampin' Up! Online Store.  As I've said before, it's a paper I didn't use very much but have grown to love!

Look through the designer paper you have and see what unusual ways you can use it! Then use it on a card or project!

An Easy Butterfly Card

An Easy Butterfly Card

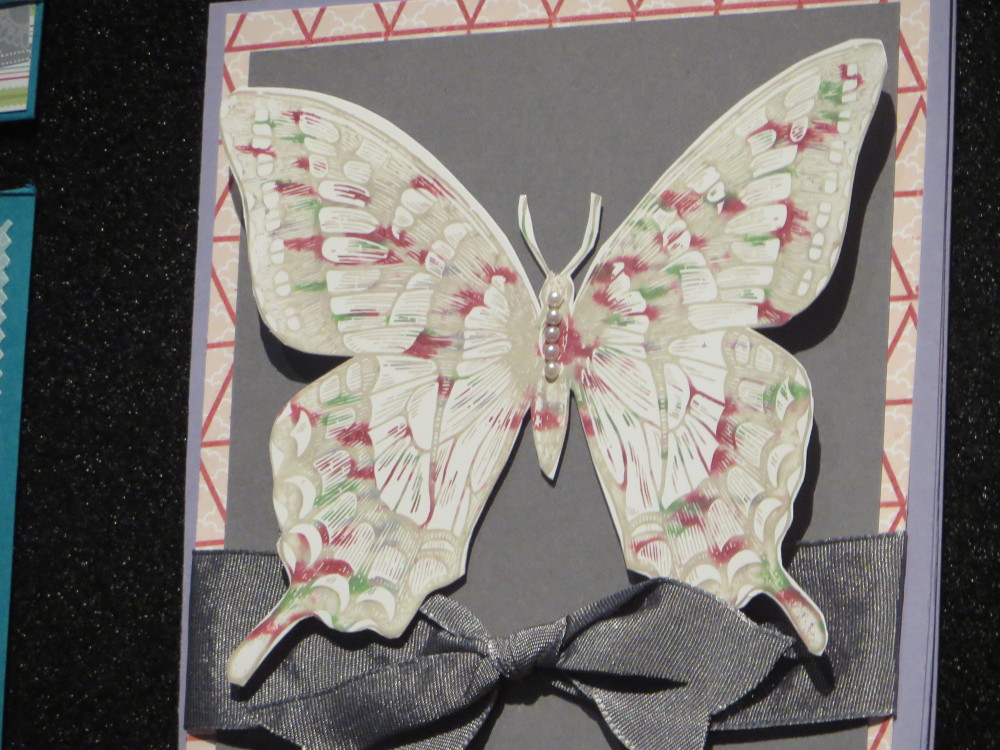
If you’re looking for an easy but elegant card to make, perhaps a card for Mother’s Day, this is a good one. I used Regal Rose card stock, which is being discontinued with the Stampin’ Up! Color Refresh. It’s a pretty color, but I didn’t really use it a lot. I embossed just a strip of Whisper White with the Stripes Embossing Folder, wrapped a bit of 1/4″ Stitched Grosgrain Ribbon around it, and glued it down to the Whisper White layer. The butterflies were made with the Elegant Butterfly Punch, one butterfly punched out of Regal Rose card stock and one out of Vellum Card Stock which was them embossed with the Lacy Brocade Embossing Folder and decorated with the few Basic Pearls.

I love cards like this that you can use for many occasions.This could be for Mother’s Day, a birthday, a wedding, a “thinking of you”, even graduation.

Don’t forget about the stamps and accessories that are retiring the end of this month from Stampin’ Up! Check the retiring stamp list here and the retiring accessories list here.  

You can also see all the retiring products HERE in my Stampin’ Up! Online Store! Some are even discounted!

Get them while they are still available!

Brides & Babies–Best of 25 Years!

Best of 25 Years_May Brides and Babies

Click to Enlarge

In continuing to celebrate their 25th anniversary, Stampin' Up! has released this new collection of stamps for May 2013! One stamp in the set is a new image and the rest are favorites from the last 25 years! Although a new set is being released each month, they will all be available until March 31, 2014.

This is the season for brides and babies, so if you need to be making cards for new babies or weddings, you might want to invest in this set!

Just shop at my Online Store and check out this stamp set!

Best of Brides & Babies   #133482   Clear-mount


Spring Sampler Flower Card

Spring Sampler Flower Card

It's funny how I don't always end up making what I thought I was going to make!  Since I had fun with the Spring Sampler stamp set in yesterday's post, I decided to make another card with it.  I was going to select an image for a baby card and just stamp it in one color on the Whisper White layer, maybe put a ribbon or strip of designer paper down the side.  Simple, simple.

I got out the Bashful Blue pack of paper and in there was a piece already cut but the front was narrower than the back. Either I cut it wrong the first time or I didn't end up using it. Since I had already pulled out the Sunshine & Sprinkles Designer Series Paper to possibly use, I decided to adhere a strip of it to the inside edge which would make it show on the front.  I love the colors in the striped pattern of the paper!! That changed the theme of the card from baby to flowers, choosing colors that coordinated with the paper….Melon Mambo, Daffodil Delight and Marina Mist.  On the Color Coach Marina Mist is the "Dynamic Duo" match with Bashful Blue, if you were doing a monochromatic color scheme.

And since I didn't stamp a couple of the flowers perfectly and since "there are no mistakes in stamping" I decided to stamp some extra flowers, cut them out, and pop them up with Stampin' Dimensionals over the "boo-boo" flowers.  No one would know I didn't plan it this way!

Although it is pretty cool outside today, the sun is out and the weather is gorgeous!  So I think this flowery, spring card is just perfect!

Spring Sampler Flower Card Front

Scallop Square Spring Sampler Card

Spring Sampler Scallop Card
One of the many things that is on the Stampin' Up! Retirement List is the Scallop Square Bigz Clear Die, so when I found one already die-cut in my stash, I decided to make a spring card with it!  I attached a 4" x 8" card base (folded in half) to the back of the scallop square. The scallop square is Melon Mambo with a Daffodil Delight layer. The Spring Sampler Stamp Set seemed like the perfect set to use for this card. So many cute little images to choose from!
Since it is snowing in some parts of the country, raining and flooding in others, and here we have a cold front on its way to drop the temperature from near 80 this morning down to 44 by tomorrow morning, I thought a card that reminds us of spring was a good idea! Although I will be miserable in the cold the next two days, I'm hoping it will cool down the upcoming summer!!  Any cooler weather we can get here in Houston, especially from this month on, I am all in favor of it!
A card like this with nine little stamped squares is a little tedious to make, but once I colored on the stamps with markers and stamped on Whisper White card stock, it was easy to punch them out with the 1" Square Punch and then the layers with the Postage Stamp Punch.

You'll find the Spring Sampler Stamp Set in the Spring Catalog…and by the way, that catalog is only good until May 31st so don't forget to order what you want out of it this month!
If you have nasty weather where you live, why not make a card to cheer yourself up!

Make an Easy Card with the Print Poetry Paper Stack

Print Poetry Easy Card

Today I found the Print Poetry Designer Series Paper Stack on my desk underneath a bunch of stamping stuff, so I thought why not use this somehow? I realized I hadn't used it much, but gee, the paper inside is beautiful! This green print on the bottom of my card is from the other side of the top design!  So easy to coordinate!

If you want to make an easy card, this layout is the simplest ever! The card base is made with a  5.5" x 4.25" piece of Very Vanilla card stock folded in half. Next I cut two pieces of the Print Poetry paper and adhered together.  At that point, I should have wrapped a strip of the ribbon around just the designer paper….but I forgot and glued it down to the card base! Since there are no mistakes in stamping(!), I just wrapped the 3/8" Primrose Petals Stitched Satin Ribbon around the front of the card and attached a separate bow.
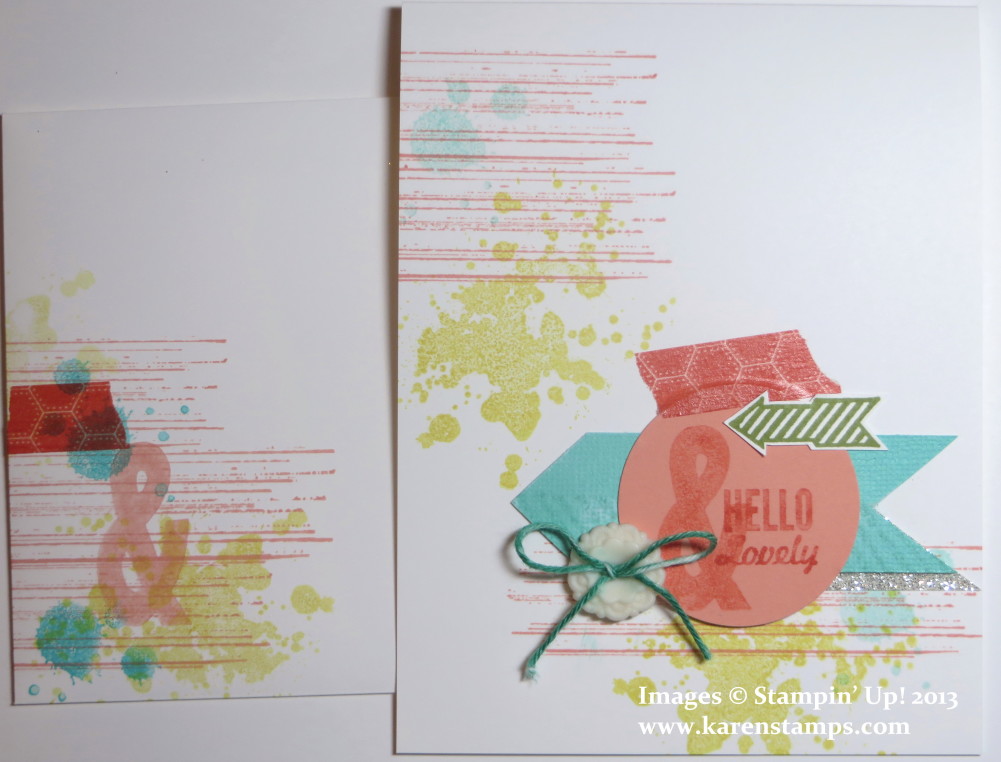
For a little greeting, I stamped the word "friends" from the stamp set Sweet Essentials and layered it on the Ticket Duo Punch #126883.  You could use any greeting and any coordinating punch and you have an easy to make card for any occasion!

For these great Stampin' Up! products, visit my Online Store here!

Stay Tuned!!  RETIRED LISTS coming this Wednesday,

April 24!

If you are new, what does that mean?  Each year around this time, Stampin' Up! retires stamp sets and accessories in order to make room for NEW products in the NEW catalog coming out soon! It's an exciting time and a time to stay in touch with me so you can purchase any retiring products you really want but haven't gotten yet. This won't be the time to procrastinate! In fact, I would suggest not waiting for the list, but getting the products you really want NOW before there is a run on them.  No one can predict what will be retired and what won't…or what will sell fast and what won't.  Just fair warning!  

If you have any questions, please email me at Karen@KarenStamps.com…..and make sure you are on my Mailing List here!

Using Epic Day This and That Designer Washi Tape

My camera is broken at the moment so I thought I would just post some ideas I have seen or had for using the great new Epic Day This and That Designer Washi Tape. You can order this tape as a separate item #131269 from my Stampin' Up! store….but the better idea would be to purchase the entire Epic Day This and That Bundle before the end of April so you can get a 15% discount on the whole package.

Of course the obvious use for Washi Tape is to adhere, decoratively, your photos and memorabilia to your album or journal or whatever. But you can also use the tape itself as a decorative item. Here are a few ideas:

  • Wrap washi tape around a tea light base (use a battery-operated one).
  • Decorate plastic cups, straws, plasticware for a party with washi tape.
  • Wrap washi tape around a gift box or gift bag as decorative borders.
  • Use washi tape on a card or scrapbook page just placing it as lines of tape on the project, as borders or stripes or small banners.
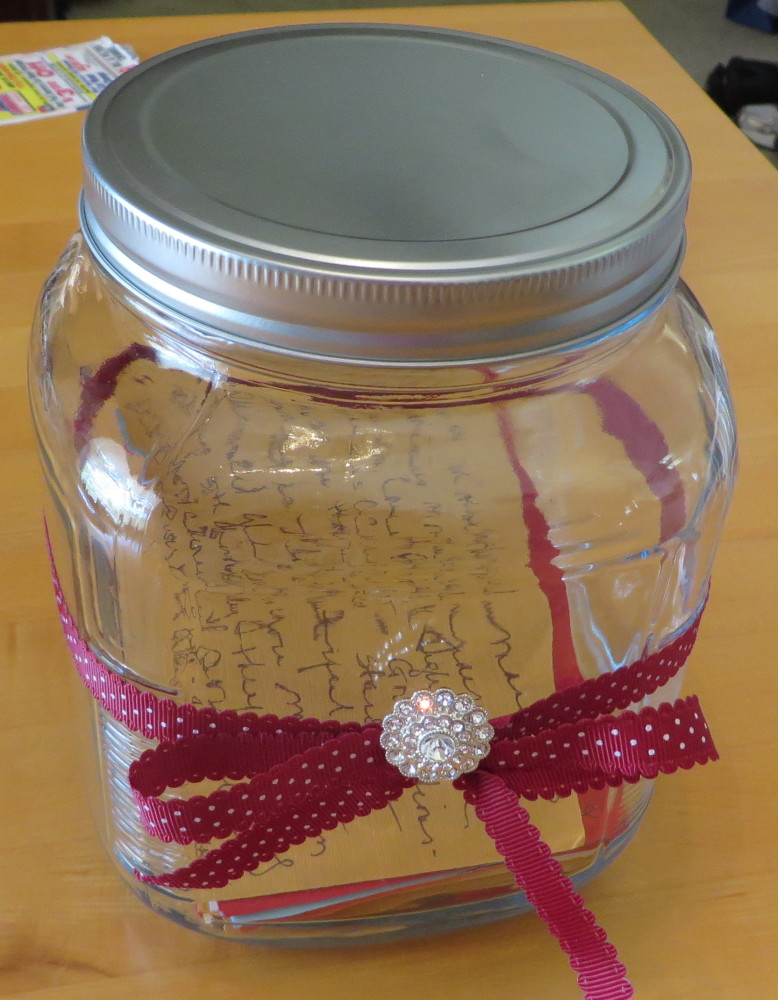
  • Wrap washi tape around a glass jar as a decoration or even as a identifier of the contents.
  • Before making a rosette, place a long strip of washi tape on the strip of paper and you'll have a design on your rosette after you fold it!
  • Tape pieces of washi tape in long or short strips down or across a notebook cover to add color and design.
  • Adhere washi tape around a glass votive holder to decorate your candle.
  • Adhere washi tape on clip clothespins to decorate.  Add a magnet to the back.
  • Decorate a plain file folder with washi tape.

So there you have a FEW ideas to get started!

Get your Stampin' Up! Washi Tape here at my Online Store!


New Dolled Up Birthday Kit from Stampin’ Up!

Dolled Up Birthday Kit

Images copyright Stampin' Up! 2013

If you like kits, I'm sure you will love this brand new Dolled Up Birthday Kit Stampin' Up! just released today! It was designed by another demonstrator and then Stampin' Up! made it into a kit! You know anything with the Vanilla Flower Trim is going to be gorgeous!

The Dolled-Up Birthday kit includes the following:

  • Dolled-Up Birthday Clear-Mount Stamp (1)
  • 8-1/2" x 5-1/2" Crumb Cake Cardstock (6 pieces)
  • 2" x 4-1/4" Very Vanilla Cardstock (6 pieces)
  • Very Vanilla Medium Envelopes (6)
  • Tea Lace Paper Doilies (6)
  • Dress Up die-cuts (6)
  • Soft Suede Classic Stampin' Spot (1)
  • Vanilla 5/8" Flower Trim (6 pieces)
  • Sponge Dauber (1)

Get everything you need to make six cards for only $15.95 (item 133913)!*

*Adhesive not included.

To assemble one card, follow these simple instructions:
1. Place the stamp rubber side up and ink with the Soft Suede Classic Stampin’ Spot.
2. Stamp “Happy Birthday” at the bottom of the card front.
3. Ink the Sponge Dauber with Soft Suede ink and gently antique the doily and the edges of the dress form.
4. Adhere the pieces to the card front in this order:
1. Doily
2. Very Vanilla Cardstock
3. Dress form
4. Flower

I think this one is a winner if you like kits and a "girlie" one at that! And nothing says you can't change it up a bit to follow your own creativity!

Find the Dolled Up Birthday Kit in my Stampin' Up! Online Store.