Category Archives: Cards

New Best of 25 Years Stamp Set from Stampin’ Up!

Best of 25 Years November Best of Snow

Images copyright Stampin’ Up! 2013

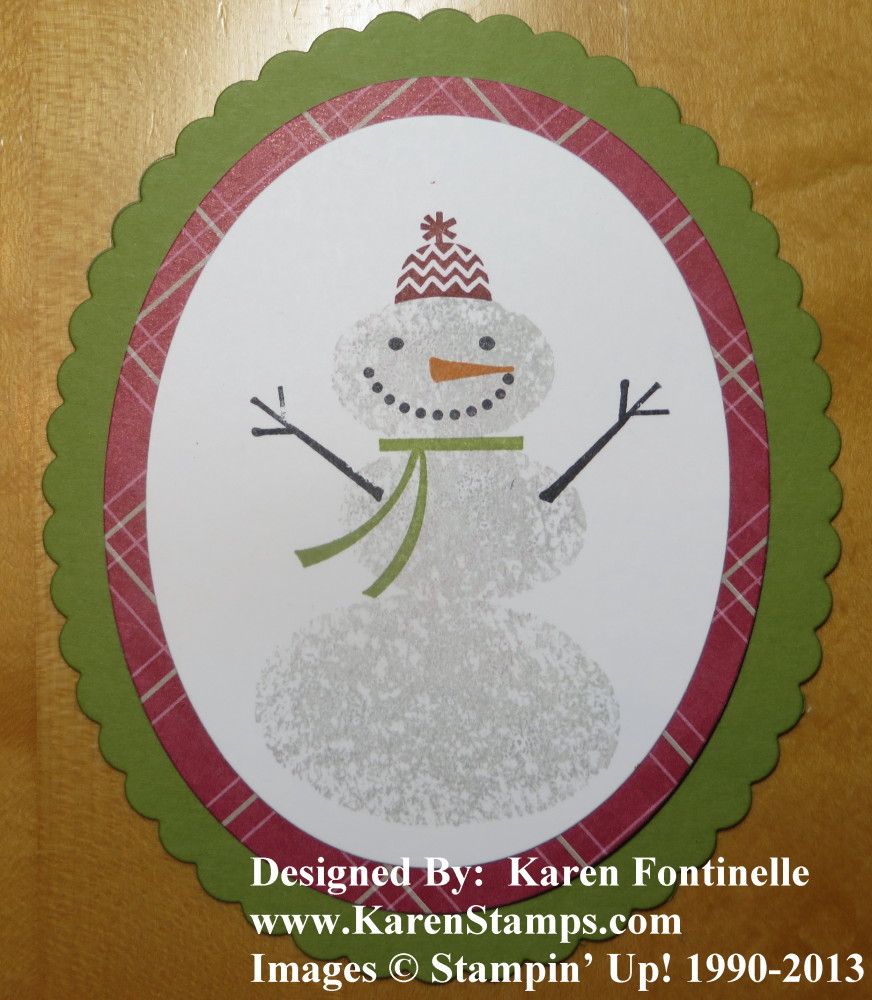
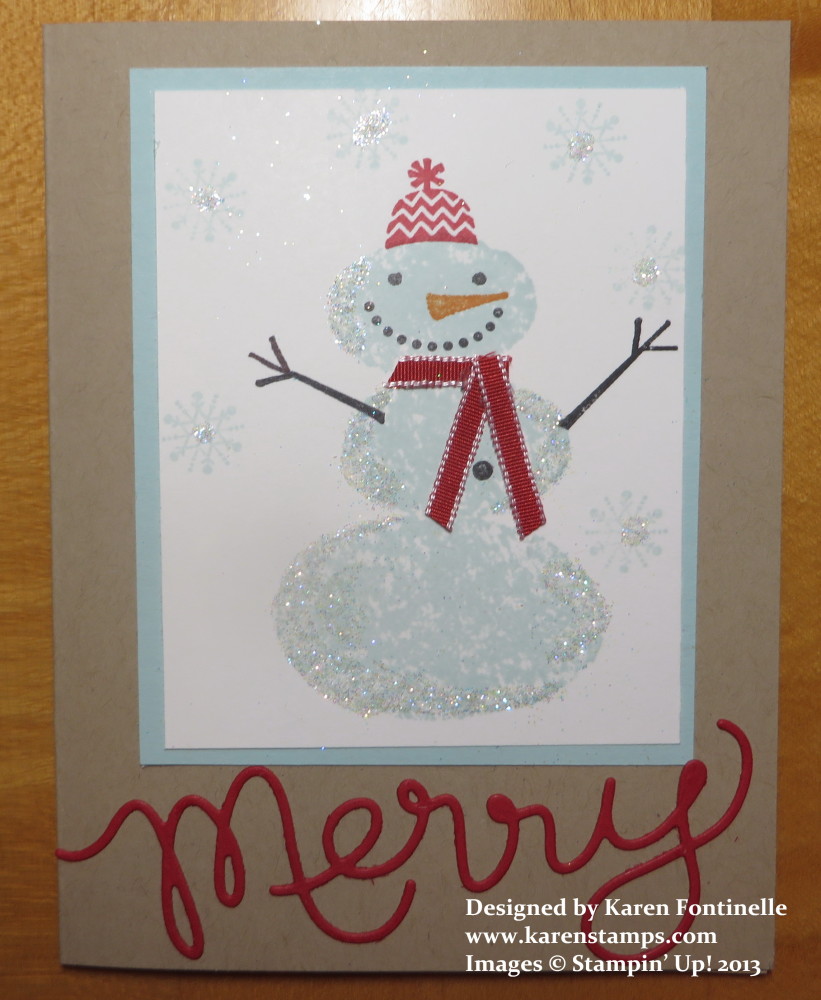
Here is the November Best of 25 Years, celebrating Stampin’ Up!’s 25th Anniversary!  This stamp set, Best of Snow, has one of everyone’s favorite images “Frosty” plus a couple of hedgehogs!! The Frosty stamp set was one of the first ones I bought when I became a Stampin’ Up! Demonstrator.  Frosty became one of those stamp sets that no one wanted to see retire. Although I didn’t own the hedgehogs, I know they were very popular as well.

It’s time to be working on those Christmas cards so if these images speak to you, you should order them right away!  Just go to my Stampin’ Up! Online Store HERE.


Halloween Hello Washi Tape Card

Halloween Hello Washi Tape Card

We made this Halloween card at my recent stamp camp. I got the idea in a magazine and it was very easy to make. There are many ways you can vary the design too, even use it for other occasions. Just apply three strips of Washi Tape spaced out a little on the top card layer. Carefully stamp the images you like in between or randomly on the card. I used the Witches’ Brew Designer Washi Tape and the Halloween Hello Stamp Set on this card.  I also tied a piece of Baker’s Twine around the card.  Very simple and a fun design!

What can you make with a few pieces of Washi Tape?  Remember it is easy to tear and is repositionable!  No mistakes!

Get your washi tape and other fun embellishments at my Stampin’ Up! Online Store!  Click and shop today! Of course I am always happy to help you with your order.
Halloween Hello Candy Card

Halloween Hello Candy Card

Here’s a cute Halloween card idea, one I received as a swap at the Stampin’ Up! Convention last summer! It’s very simple.  Just use the candy stamp and greeting in the Halloween Hello stamp set.  The designer paper is pieces from Witches’ Brew Designer Series Paper or you could use anything similar. Stamp on Pumpkin Pie card stock and mount on Basic Black.

You can shop MORE EASILY at my Stampin’ Up! Online Store now!  Stampin’ Up! has made some much-needed improvements to your shopping experience! Here are some of them:

  •  Customers can now easily save bag contents. Also, when adding items to your bag, you can choose to go directly to the bag or continue shopping.
  •  There is a new progress bar to guide customers through the ordering process.
  • Enjoy more images. . Additional product images are bigger and easier to view.
  • Now you can sort merchandise based on newest or oldest–a real plus when you want to see the latest MDS downloads.
  • Sale prices are clearly marked. Items on sale are clearly marked without having to add them to your bag. You can also sort products by the sales price (instead of according to the original price).

Go to my Stampin’ Up! Online Store NOW and see how you like the new shopping experience!

Halloween Bash Shaker Card

Halloween Shaker Card

I thought this week I would post a new Halloween project everyday but then I went on vacation and did not have wifi!!  Worse than that was that I thought I had a new plan that would give me wifi but it did not work!  Don’t try to add a new technology on a day before you are leaving for vacation, especially without trying it out first!  But now I do have wifi, so here is a Halloween card I LOVE! It’s been around on the internet and I certainly did not come up with the original idea.

Cut a window sheet the same size as your top card layer.  Stamp that top card layer however you like.  Use Washi Tape on three sides of the window sheets, half of the tape on the front window sheet and half wrapped around to the page.  ONLY DO THREE SIDES!  Then punch or stamp the “confetti” you want inside the card.  First insert a couple of the Vintage Faceted Designer Buttons in between the window sheet and card layer.  This will separate the two layers so that the confetti can move around a little. Then insert all the confetti pieces you have made. Once you have that all how you like it, apply the last pieces of washi tape to the open side.  Then adhere that whole packet to the card base.  Shake it around and try it out!  What a fun card to send somebody!

For this Halloween card, I stamped the greeting with the Halloween Bash Stamp Set, coloring with different Stampin’ Write Markers. The Washi Tape is Witches Brew Designer Tape.

Use Your Scraps for a Thanksgiving Sunburst Card

Thanksgiving Sunburst Card

The sunburst technique that I used on this card is easy to make with scraps of designer paper. Using the beautiful Sweater Weather Designer Series Paper with this technique makes a nice autumn or Thanksgiving card.

The card base is Chocolate Chip card stock and the layer is Crushed Curry.  I chose three papers from the Sweater Weather series and cut a 1 1/2″ x 4 1/2″ piece from each pattern. Then I used my Stampin’ Trimmer to cut each rectangle in half on a diagonal. Because I wanted seven “rays” of the sunburst, I cut one more half. You can use both sides of each piece or cut extra pieces.

Lay out the pattern you want and move the pieces around until you like it! Then adhere to the Crushed Curry, keeping in mind some edges of the papers will hang off the edge.  Just kind of judge where you need to put adhesive.  You can always go back and lift up edges to apply more adhesive if you need to.  The points of the papers will be covered by the focal point of the greeting or whatever you put there. Once you have the sunburst adhered the way you want it, just trim off the overhanging edges.  Use the Stampin’ Trimmer or Paper Snips.

For my greeting on the front, I stamped the Thanksgiving sentiment from the stamp set Tags 4 You and punched out with the Bracket Label Punch. And good news:  You can purchase that stamp set and the punch in a Bundle!  Save 15% when you buy them together!  

There are various things you can do with this greeting. You could trim off the border to make it smaller and then punch the same shape out of another piece of cardstock. You could use any of a variety of punches for a background for the greeting.  On this sample, I used the Large Oval Punch and the Decorative Label Punch.

Try this card and then get out some other designer paper and make another sunburst pattern card for a different look and occasion.  You could also use this technique in scrapbooking, just cut longer pieces!  Try it!

Cupcake Birthday Flip Card

Cupcake Birthday Flip Card

Using the new Circle Card Thinlits Die from Stampin’ Up! is my newest favorite way to make a card! These are so cute and so easy!  Hopefully the recipient will also find it a fun card! Bet you can’t pull and “flip” it only once!  So fun to play with!

The card base is Bermuda Bay card stock with Birthday Basics Designer Series Paper decorating it. Be sure to order this Birthday Basics paper because it is really cute, great colors – you will love it! The cupcake is from the Create a Cupcake stamp set and the little banner is from Itty Bitty Banners and cut out with the coordinating Bitty Banners Framelits DieI had to add two little Rhinestones on the banner!

The Silver Glimmer Paper is cut out with the 2 1/2″ Circle Punch, but the scallop is cut out with a die that comes with the Circle Card Thinlits Die.  On the cupcake frosting are three Candy Dots.  Talk about cute!  You’ve got to have Candy Dots in all the colors!

Be sure you put one (or both) of the Thinlits Dies on your next order or Wish List! And Candy Dots! Oh, and don’t forget the Birthday Basics Paper, too!

You can shop at your convenience at my Stampin’ Up! Online Store or you are always welcome to contact me.

New Pop & Place Holiday Gift Tags and Matching Stamp Set

Pop & Place Holiday Gift Tags

Images copyright Stampin’ Up! 2013

It’s not too early to start Christmas preparations! Just think how great it would be to sit down and stamp some tags now for fun before we really get into the craziness of the holidays and then you have one project already to go when it is time to wrap packages and gifts!

The new Pop & Place Holiday Gift Tags come in a booklet of 70+ tags in five designs–created from our existing punch and die shapes. These tags coordinate with the Season of Style products in the 2013 Stampin’ Up! Holiday Catalog.

There is also the coordinating photopolymer stamp set, Christmas Tagables, that you can use to stamp the tags. It has many traditional sayings for gift tags with an updated style, including a funny one about “no peeking” and the best one of all about it being a handmade gift!  Check it out!

  • To make it easy for you, you can purchase the Pop & Place Holiday Gift Tags Book together with the Christmas Tagables Stamp Set here in this Pop & Place Holiday Gift Tags Bundle.
  • And for a new stamper, choose the Pop & Place Holiday Gift Tags Starter Bundle which includes Includes the tag book with 70+ tags, coordinating photopolymer stamp set Christmas Tagables, a Soft Suede Classic Stampin’ Spot, and Clear Block C.

Get one for yourself and one Starter Bundle for someone as a gift!  Then sit down together and make a bunch of Christmas tags!

Pop & Place Holiday Gift Tags

Click to Enlarge

Pop & Place Holiday Gift Tags Bundle

Click to Enlarge

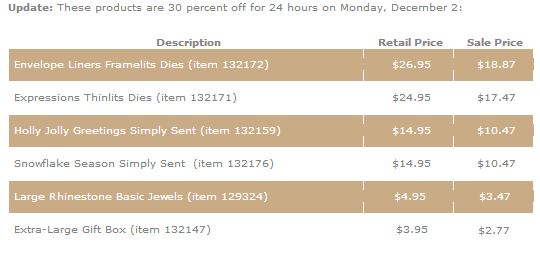
Item Description Price
134975 Pop & Place Holiday Gift Tags Book $9.95
134623 Christmas Tagables Photopolymer Stamp Set $13.95
135921 Pop & Place Holiday Gift Tags Bundle includes

  • Pop & Place Holiday Gift Tags Book
  • Christmas Tagables Photopolymer Stamp Set
$19.95
135290 Pop & Place Holiday Gift Tags Starter Bundle includes

  • Pop & Place Holiday Gift Tags Book
  • Christmas Tagables Photopolymer Stamp Set
  • Soft Suede Classic Stampin’ Spot
  • Clear Block C
$24.95

Shop for anything you need at my Stampin’ Up! Online Store!


Halloween Hello Card

Halloween Hello Card

Happy October!  October sounds a little more “fallish” than September, doesn’t it? Time to start making those Halloween cards and decorations!

This card was easy to create with just the Halloween Hello stamp set, some Witches’ Brew Designer Washi Tapeand a 1″ Circle Punch. Just stamp some Halloween skulls around on the card front and on two scraps of Pumpkin Pie card stock. Punch a couple of circles out of the card layer and adhere the Pumpkin Pie stamped pieces underneath.  Stamp the greeting and adhere some Washi Tape (It’s repositionable!). Adhere the Whisper White layer to the Basic Black layer with Stampin’ Dimensionals and adhere that to the Pumpkin Pie card base. If you have some Googlie Eyes in your stash or left over from last year, just stick a few of those on! Fun, fun, fun!

The Halloween Hello Stamp Set is a cute little one:  7 images plus two greetings!

If you want to stock up on some Halloween stamps and accessories, please just go to my Stampin’ Up! Online Store today and order! Or if you prefer, just email me and I’ll put your order in for you.

Halloween Hello Card Inside

Magnificent Maple Card for Thanksgiving

Magnificent Maple Leaf Thanksgiving Card

The Magnificent Maple stamp is great for you to use for fall cards and projects, and of course it is great to use for a Thanksgiving card. Here is another card you could make with the random stamping of the Magnificent Maple stamp all over your paper in different colors, sometimes known as a “one sheet wonder” because you stamp all over one sheet of card stock and then cut up the paper for individual projects.

I used the Stampin’ Up! 1 1/4″ Burlap Ribbon in the Holiday Catalog on this card with a piece of 1/8″ Early Espresso Taffeta Ribbon down the center.  The Burlap Ribbon is actually frayed on each side, which doesn’t show very well in the photograph. Just pull off the binding on the edge and then pull off several threads from each side. It’s very easy to do. Burlap is quite trendy right now!

The Thanksgiving greeting is from the stamp set Tags 4 You. You get five stamps for four occasions:  Thanksgiving, Halloween, Christmas and Valentine’s Day, plus a little to and from stamp if you are making labels. There is a matching punch, the Label Bracket Punch that fits these stamps perfectly!  In fact, you can save 15% by purchasing the Tags 4 You BundleThe stamp set is available in wood- or clear-mount.

Here is a punch tip: The Label Bracket Punch only comes in one size, of course, but if you want to layer it, as I did on this card, you can use your Paper Snips to cut around the stamped image to make it smaller and then layer it on top of the punch in another color. Cutting something like that is much easier with the small Paper Snips rather than a regular scissors.

*************************************************

If you are reading this blog post and haven’t ever signed up for my Mailing List, do it today! On Monday I will tell you about something special I will be doing ONLY for my mailing list subscribers! You won’t find the same thing on my blog posts or Facebook page, it only goes to my Mailing List Subscribers. It’s fun and I got lots of nice comments about it last year. This year I want YOU to be included!  SIGN UP  now!

Magnificent Maple Card for Fall

Magnificent Maple One Sheet Wonder Card

If you saw my post here about one sheet wonder stamping, this is one of the two cards I made with the scrap of Very Vanilla I decided to stamp randomly with the Magnificent Maple stamp. I inked up the stamp and stamped it on the Very Vanilla, then without reinking stamped it again in a different spot on the paper. Turn your stamp in different positions, even off the edge of the paper, even just stamping a tiny bit of the stamp on the edge of the paper. It doesn’t matter if you stamp over another image, it’s just random stamping.

I love the strip of Natural Trim Ribbon! It goes so perfectly with fall colors and with the Naturals Designer ButtonsIn another post the other day I showed you how I frayed the new Burlap Ribbon and used some of the threads to tie on the button.  The greeting, as it often is, is from the stamp set Teeny Tiny Wishes.

I can’t believe that the beginning of fall finally came and it actually is feeling a little like fall here in Houston!  I think the Magnificent Maple stamp is just beautiful to use on your fall and Thanksgiving projects.

What stamp do you have that you could use for a one sheet wonder project?

Birthday Beer Stein Card

Birthday Beer Stein

Yesterday was my husband’s birthday so of course I launched a search for masculine cards and found this birthday beer stein card idea on Pinterest. I copied it exactly except for the greeting. There are other versions similar to this but this one was made by a demonstrator named Tammy.

You’ll need a piece of Whisper White for the card base and Soft Suede for the layer. Mine is embossed with the Stripes Embossing Folder (hard to see in this photo!) but you could use something different or leave it plain.  The beer stein is a piece of 3″x 3 3/4″ Whisper White with the bottom corners rounded (you can use the new Envelope Punch Board!) with three strips of So Saffron 7/8″ x 3 1/2″, again with the bottom edges rounded.  I stamped the greeting from the stamp set Four You.  Everything is sponged with a little bit of ink around the edges on the card.

Then for the “punch art” part!  Make the beer foam bubbles with three circles from the 1 1/4″ Circle Punch, five circles from the 3/4″ Circle Punch, one circle from the 1/2″ Circle Punch and five scallops from the little scallop punch in the Itty Bitty Shapes Punch Pack.  That’s what I used but you could certainly use lots of other things to make the bubbles, such as other scallop punches or circle sizes.  The beer stein handle is the Large Oval Punch, then punched over with the Extra-Large Oval Punch.

It’s fun to make your own birthday cards for your friends and loved ones!   When you make handmade birthday cards, you can personalize the cards for that person.  My husband might not be a big beer drinker, but what he really likes is to pick out assorted different beers to try, in stores where you can do that. So while I saw lots of masculine card ideas and birthday card ideas I easily could have used for him, I thought the birthday beer stein card idea was one he would enjoy! I think it is important to send happy birthday wishes to people, especially after enjoying my own best birthday ever!

Need any Stampin’ Up! supplies?  Please come shop at my Online Store!

For the Birds Circle Thinlits Card

Thinking of You Circle Thinlits Card with For the Birds

As I’ve said before, I really LOVE the new Circle Card Thinlits Die! I just made this easy card using it and the stamp set  For the Birds, one of those good, all-purpose stamp sets. I used some flowers from the Betsy’s Blossoms stamp set to add some interest to the plain card stock and on the greeting on the inside. I also added some Gingham Garden Washi Tape along the edges of the card.  Washi tape is so much fun and easy to use!  Just tear it off and then trim it with your Paper Snips.  I even pulled one piece off and tried a different Washi tape and then decided to stick with the flowery one and put it back on.  It’s repositionable!  The Early Espresso circle is punched with the 2 1/2″ Circle Punch, a perfect fit for the circle on this card. The stamped image is cut out with the scallop circle that comes with the Thinlits Die.  That’s another great thing with the Thinlits Dies is that they both come with extra elements to use in your designs!

Be sure to watch the Stampin’ Up! video about using the Thinlits Dies on the store page!

Here is the inside of the card!

For the Birds Circle Thinlits Card

The most difficult thing about this type of card is photographing it! Since it doesn’t lay perfectly flat it comes out looking odd-shaped and standing it up also makes for an odd angle.  But I assure you you will enjoy using either one of the thinlits designs. I will warn you, it will make a HORRIBLE noise going through your Big Shot!  But that is normal.

Oh, and in case you need a Big Shot, be sure to order one of those too.  Another decision you won’t regret!!

Artisan Label Punch with Butterflies Card

Butterfly Card

I wanted to play with the Bitty Butterfly Punch included in the Butterfly Bundle Special going on during September and this is the butterfly card I came up with using the Artisan Label Punch as a background for each butterfly. If you don’t already own the Elegant Butterfly Punch I would suggest getting that also in addition to the Butterfly Bundle.  Then you can layer the two butterfly sizes.  The paper is the Modern Medley Designer Series Paper.  The greeting is from the Happy Day stamp set.

To make it less plain, I embossed the Artisan Design Punch pieces with the Perfect Polka Dots Embossing Folder and the butterflies with the Flower Garden Embossing Folder. And I even added some Basic Pearls Jewels for the butterfly body and some Whisper White 5/8″ Organza Ribbon.
The Butterfly Bundle Special is available through September 30, 2013. If you need any Stampin’ Up! supplies, you can always get them here in my Online Store.

Friday the 13th Black Cat Card Idea

Friday the 13th Black Cat Card Idea

When I realized today was Friday the 13th, I came up with this black cat card idea. The cat face is cut with a Circle Framelit, the eyes with the wing on the Bird Punch. That black ear I punched with the  1″ Square Punch and then cut that square in half diagonally to make the triangle shape. Then I punched a piece of Silver Glimmer Paper in a square, cut the square in half on a diagonal, and then trimmed down the triangles so they would fit on the black.

For the eyeballs, I punched a 1/2″ Circle  of Old Olive and colored in the pupil with a black marker.
The whiskers are just cut by hand from Silver Glimmer Paper and stuck on the back of the Small Heart Punch for the nose.  The mouth is just drawn on with the new White Chalk MarkerI’m afraid people may have overlooked the Chalk Marker in the Holiday Catalog. I’ve found it very useful and think you should check it out on page 20, top right, of the Holiday Catalog. I also used it to draw the little glimmer in the cat eyes.

Do you have any Friday the 13th superstitions?  Why is Friday the 13th lucky?  My one grandfather was born on a Friday the 13th so he always considered it lucky!  My mother’s aunt considered the number 13 unlucky, so if there were already twelve people seated at the dinner table, she wouldn’t sit down. I don’t know if Friday the 13th is always unlucky, but I think my black cat turned out kind of fun looking so hopefully it will be a lucky day!

Modern Medley Bitty Butterfly Card

Modern Medley Bitty Butterfly Card

I was working on some cards with the Bitty Butterfly Punch, included in the Stampin’ Up! Butterfly Bundle  during the month of September. The Butterfly Bundle includes
* Papillon Potpourri Clear-mount stamp set and
* Bitty Butterfly Punch

Save 15% by purchasing the Bundle!

For this card, I used a piece of the Modern Medley Designer Series Paper layered on Whisper White on a card base of Coastal Cabana.  The butterfly is mounted on a piece of Coastal Cabana punched with the Artisan Label Punch. I very lightly stamped it with the lines from the Gorgeous Grunge Stamp SetIt just adds a tiny bit of something to the background. Then that punch is layered on a piece of Silver Glimmer Paper on top of a  2 3/8″ Scallop Circle Punch  in Strawberry Slush.

The butterflies are punched with the Bitty Butterfly Punch as well as the larger Elegant Butterfly Punch. I stamped both butterflies with the stamp from Gorgeous Grunge that has the diagonal lines in one direction. I only stamped that once on the Elegant Butterfly.  But on the Bitty Butterfly I stamped the diagonal lines once and for the second time stamped the lines perpendicularly and that made the crossed diagonal lines!  I love how it looks! And a few Rhinestone Jewels add a little bling to the butterfly!  The greeting is from the stamp set A Dozen Thoughts.

Today, as we all remember September 11th, perhaps we should each make a card for someone and send it. It can be to a loved one, to a friend, a neighbor, a teacher, a child, anyone. The act of making the card and sending it will make you feel good today to express your feelings to someone or just to say “hello” or “I’m thinking of you!”. And imagine the good feeling THEY will have in a day or two or three when they receive it as a surprise in their mailbox.

Check out the Butterfly Bundle from Stampin’ Up! today in my Stampin’ Up! Online Store. You’ll find that Bitty Butterfly Punch rather useful as well as the beautiful butterfly stamp set. You can put it on your order tomorrow with the newly available Magnetic Platform, which goes back on sale September 12th.