Category Archives: Cards

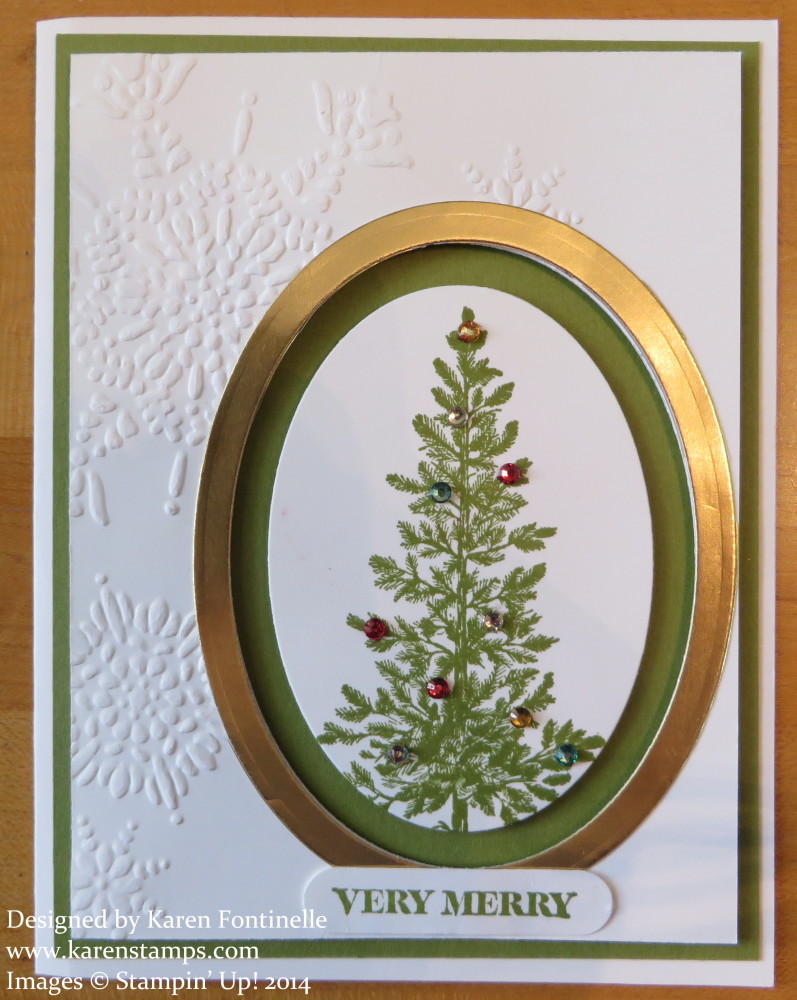
Lovely As a Tree Christmas Card

Lovely As a Tree Christmas Card

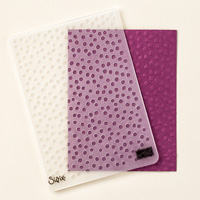
Today is June 25th which means Christmas Day is in 6 months! But really our Christmas preparations have to be done before that so we actually have less than six months to get ready for Christmas! Yes, that is still a lot of time that even I won’t take advantage of, I admit, but I did feel compelled to make a Christmas card today! Now we don’t have new Christmas sets in the Stampin’ Up! Catalog and we won’t get the Holiday Catalog until September, but I bet we all have stamp sets and accessories with which we can make Christmas cards starting today! I got an idea for this card on Pinterest, but I have always loved using Lovely as a Tree for Christmas cards! Lovely As a Tree is a classic stamp set, one that has been around as long as I have been a demo. In fact, it probably was one of the first stamp sets I owned. I also used the Northern Flurry Embossing Folder for the top Whisper White layer. I thought we needed snowflakes with a Christmas tree!

I stamped the tree with Old Olive ink and then die-cut it with the Ovals Collection Framelits Die, the third oval from the center. To cut the larger oval out of the Whisper White card front layer, I used the oval fourth from the center. Since that left a little bit of an embossing edge mark, I decided to cover it with a Gold Foil layer, which is cut with the fourth and fifth ovals. It turned out perfect and I think adds an elegance to the card! The Whisper White layer is popped up with Stampin’ Dimensionals as is the Christmas tree oval.

To decorate the tree, I colored Rhinestone Jewels with the new Blendabilities alcohol markers. The Blendabilities should be available to order from Stampin’ Up! on July 1st! Only six colors will be available, the same ones Demos were able to preorder, plus a few other items:

  • Cherry Cobbler (item #130995)
  • Coastal Cabana (item #131000)
  • Daffodil Delight (item #130998)
  • Old Olive (item #130999)
  • Pumpkin Pie (item #130997)
  • Rich Razzleberry (item #131003)
  • Skin Tone Assortment (item #129370)

In addition, the following accessories will also be available:

  • Memento Ink Pad (item #132708)
  • Memento Ink Refill (item #133456)
  • Color Lifter (item #129369)

There really wasn’t much space for a greeting on this card, but I did choose “Very Merry” from the new stamp set And Many More and used the Word Window Punch to punch it out.

Are you going to make some Christmas cards today to get a head start? If you find a design you like, like this Christmas card with Lovely As a Tree, make at least five cards the same. Make some more of another design another day.
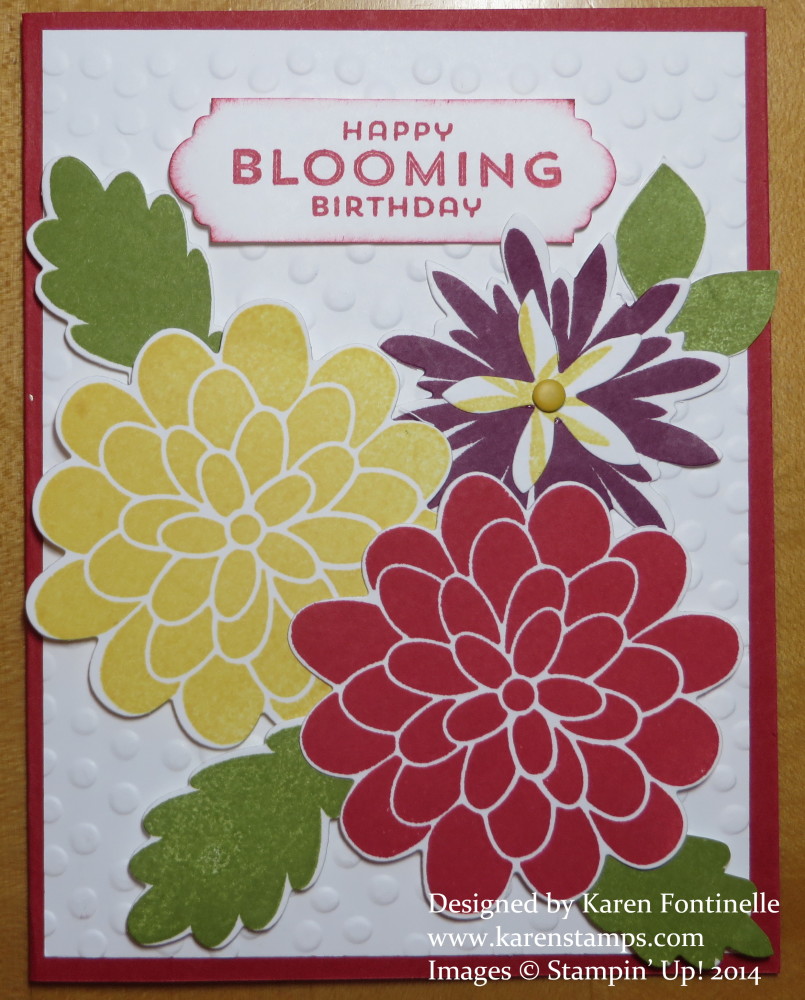
Flower Patch Birthday Card

Flower Patch Birthday Card

It was time to play with the Flower Patch stamp set and the Flower Fair Framelits Dies to make a birthday card. You can also purchase this stamp set and framelits in a bundle, the Flower Patch Photopolymer Bundleand save 15%! Now that summer is officially here, you are bound to be inspired by lots of beautiful flowers blooming and this set will be perfect to use in your projects. The framelits make it easy to cut out most of the stamped images. The greeting I used comes with the set, but to cut it out I used a framelit from the Apothecary Accents FramelitsI stamped the greeting on a narrow strip of Whisper White and centered the framelit over it so I could have a narrow piece but fancy ends. Rather than try to layer it, I lightly sponged the edges in Real Red just to make it stand out a bit from the Whisper White layer. The large Daffodil Delight and Real Red flowers are popped up with Stampin’ Dimensionals and the Rich Razzleberry flower just adhered right on the paper.

If you wanted, you could “bling up” this card, but for today I kept it simple except for the Candy Dot on the Rich Razzleberry flower!

For any of these stamps and stamping supplies, check out all the new products available in the Stampin’ Up! Online Store. Today is the last day for the current Weekly Deals, too!

Summer Begins Summer Solstice Sun Card

Summer Begins Summer Solstice Sun Card

Today is the first day of summer, the Summer Solstice, the longest day of the year. Well, it’s not really any “longer” than any other day of the year, but it is the day with the most hours of daylight. If you walk outside here in Houston you will know that it is the beginning of summer because it is very hot and humid outside! (But then I can say that for most days in Houston!)

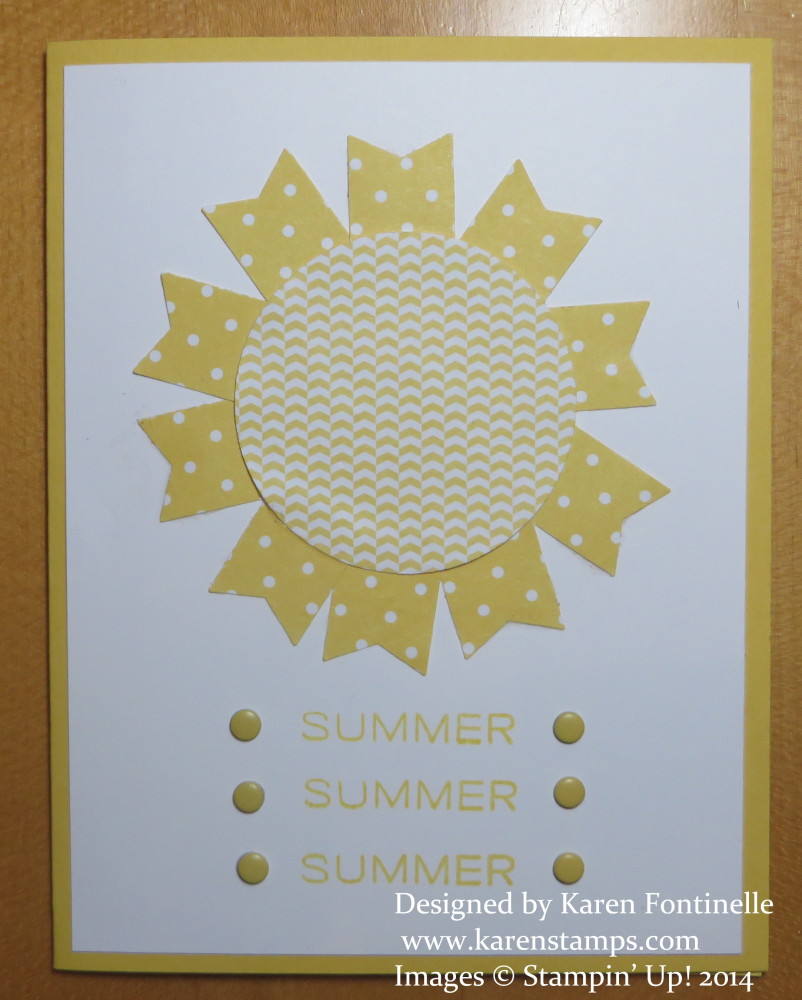
I decided to make a “sunny” card for the first day of summer.  I used our new 2″ Circle Punch for the body of the sun, punched out of Brights Backgrounds Designer Series Paper StackThen I punched more of the same paper with the Banner PunchThe polka dots are actually the opposite side of the pattern I used for the sun! The word “Summer” is from the new Project Life stamp set Day to Day.  And just for a little something, I couldn’t resist using some Brights Candy Dots on the front of the card!
Go enjoy the first day of summer 2014! And when you’ve had enough of the sun and heat, come inside and stamp since you have those extra minutes of daylight today!

Work of Art Hello Card

Work of Art Hello Card

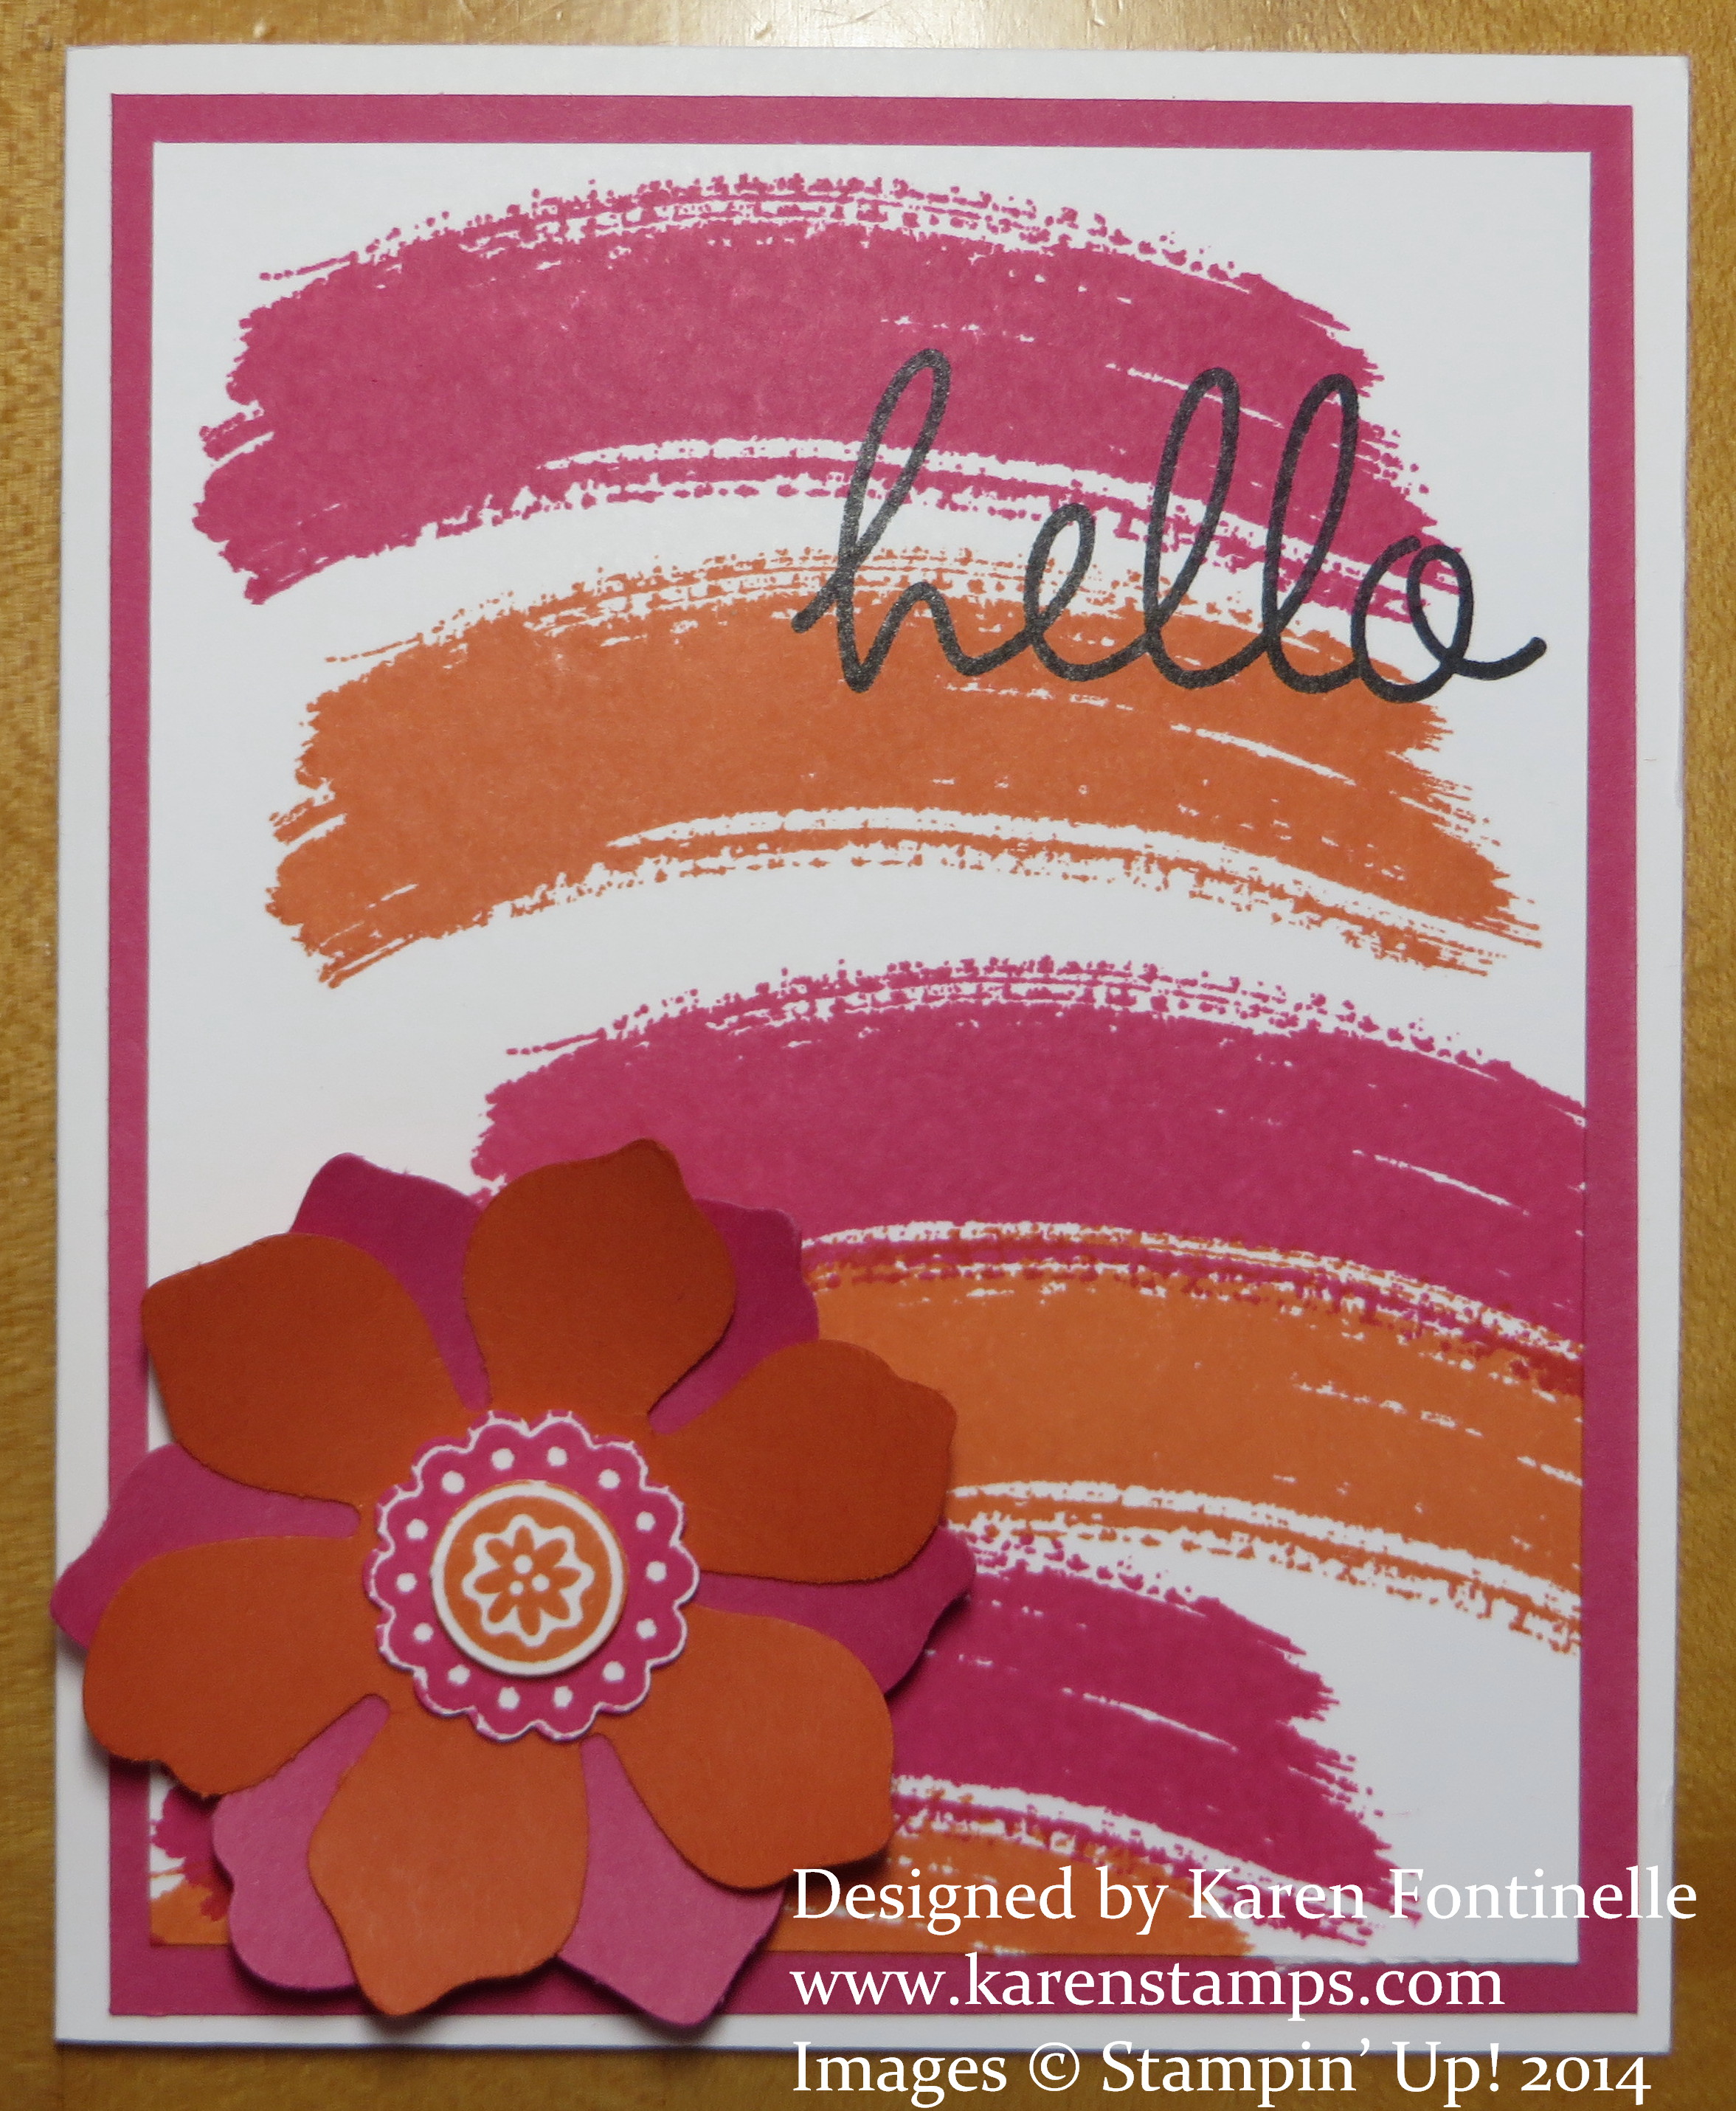
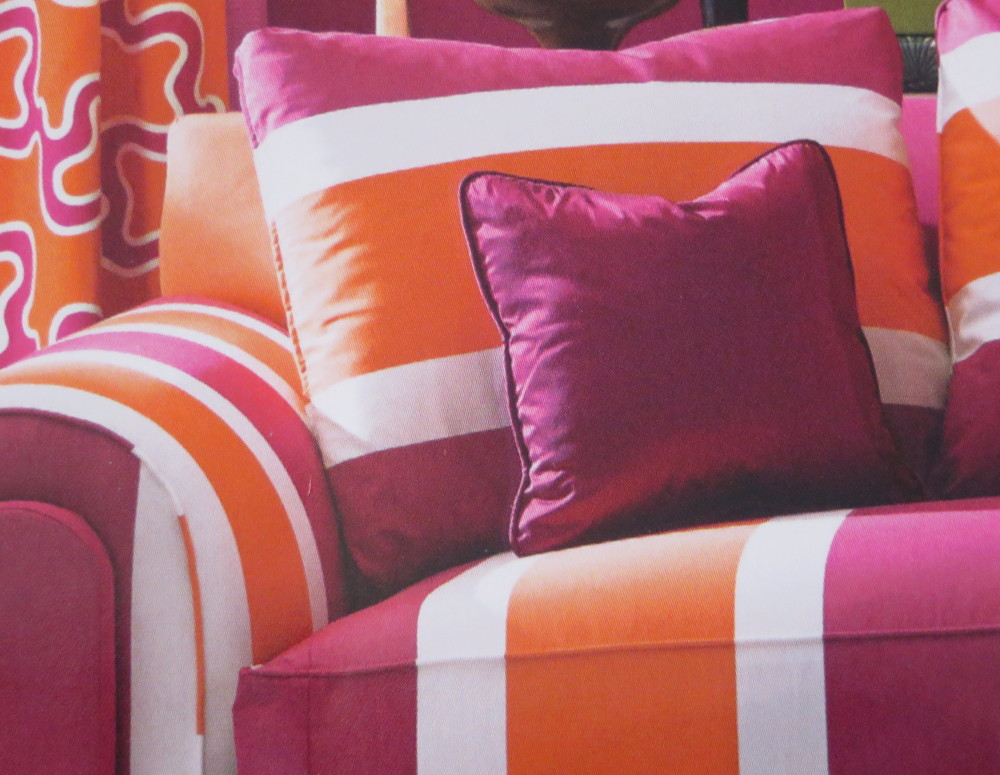
I saw an ad in the magazine the other day of a striped sofa in something close to these two colors, Melon Mambo and Tangerine Tango,  so I decided to use the Work of Art stamp set and the Hello stamp from the Hi There stamp set to make a card. The Work of Art stamps are so fun to play with – anything goes! You just feel free to create! I stamped the word “Hello” at the top and liked it so much I made another card, which you will be able to see later on my Facebook Page HERE. The flower is made with the new punch called Fun Flower Punch. Although the flower itself is only punched from card stock and not stamped first, I did stamp the flower image on the single wood stamp Bloom For You. twice, once in Melon Mambo and once in Tangerine Tango ink so I could punch out pieces for the center of the flower. I used the 1/2″ Circle Punch and the 7/8″ Scallop Circle Punch. Then I mounted those center pieces on the flower using Stampin’ Dimensionals to pop them up.

If you wonder where inspiration comes from, here is part of an ad I saw in a magazine of a striped sofa.  I think the one color was fuschia, but I used Melon Mambo. Just think of these three colors:  Whisper White, Melon Mambo, and Tangerine Tango. They are  a summery combination for sure! Make something with these three colors and brighten your day!

Colorful ad Inspiration

Get ready for summer! Stamp something bright and colorful!  You will find all the latest colors here at Stampin’ Up! in my Online Store!

Banner Banter 3″x3″ Gift Card

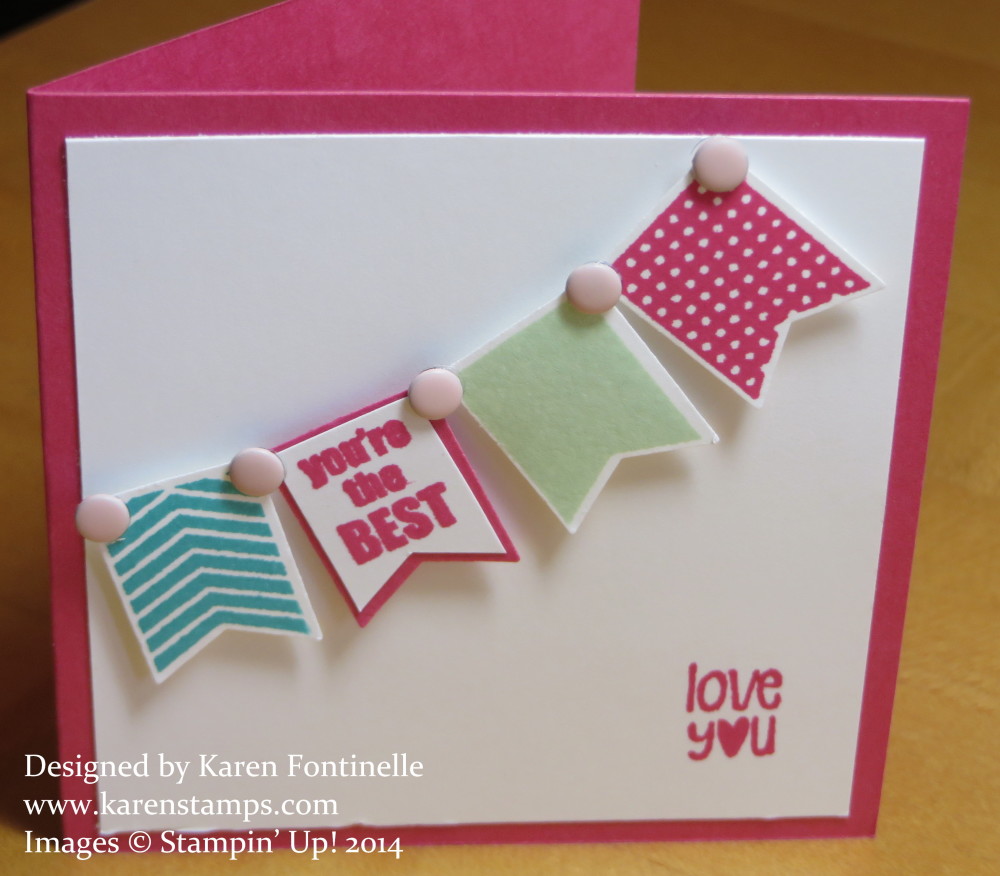
Banner Banter 3x3 Gift CardThis cute little 3″ x 3″ gift card or note card is made with the Banner Banter stamp set and the Banner Punch. It was fun and easy to make! Just stamp some banners in whatever colors you like (I used Melon Mambo, Pistachio Pudding and Bermuda Bay) and adhere to card.  I used Stampin’ Dimensionals to pop them all up.  You could adhere several straight to the card and pop one up, perhaps the one with the greeting. You could even stamp right on the Whisper White card layer. To make it look more like a hanging banner, I used Subtles Candy Dots(LOVE those things!)

If you already own the Banner Punch that you might have gotten free during Sale-A-Bration, I would definitely encourage you to purchase this stamp set to use with your punch.  I would also suggest that you purchase the wood-mount version of the stamp set because the stamps are small, and I think having them already mounted on the wood makes them easier to use.  But to each their own! It’s whatever you prefer!

One more tip – to mount the greeting on the banner on a background layer of card stock, I trimmed that down a little so it would fit on the punched banner. Since it was such a small piece, I just did it with my Paper Snips, and although not perfect, it is fine!  We have to let go of the perfectionism sometimes. No one I give this to will say, “You know, there is  a slight angle to your cutting on this greeting on the banner. Please take it away and make me a new one!”

If you did not choose a free Banner Punch during Sale-A-Bration, you can purchase one in the Stampin’ Up! Online Store HERE along with the Banner Banter stamp set. There is also another stamp set to use with this punch. It is called Itty Bitty Baby on page 81 of the Stampin’ Up! CatalogIt is absolutely adorable, but I had to pass it up (this time!).

Calling All Heroes Superheroes Cards

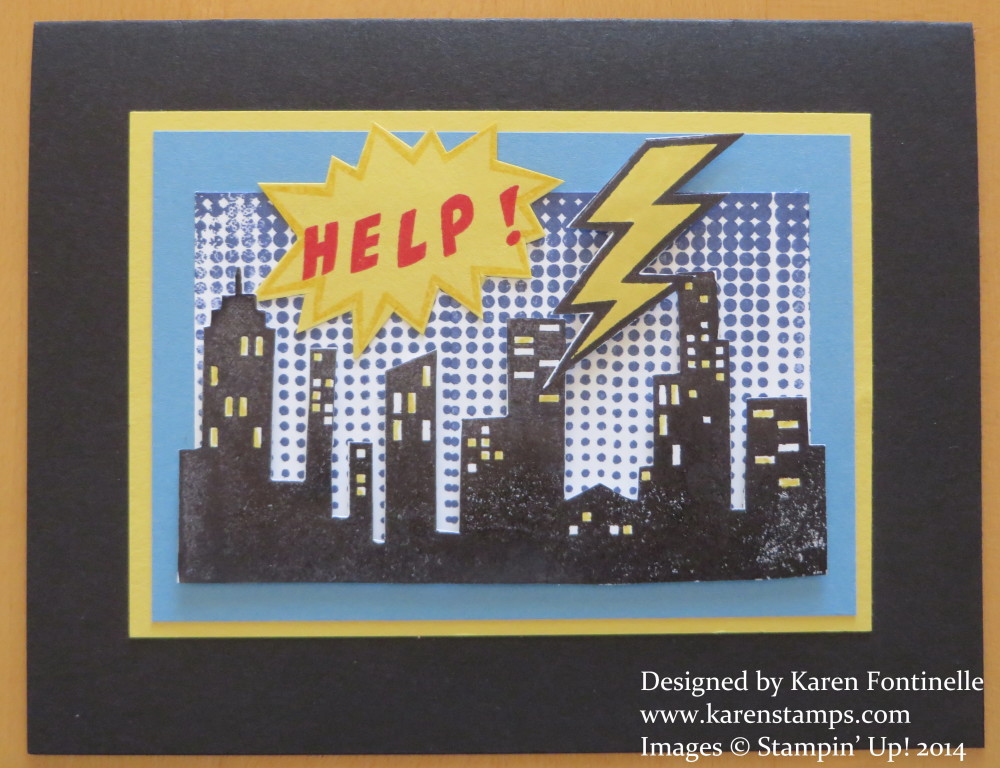
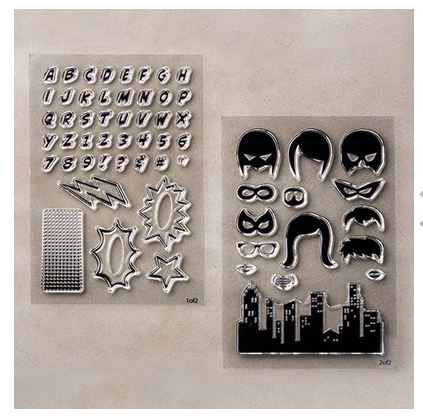
Calling All Heroes Lightning Bolt CardI had some time yesterday to play with my new stamp set Calling All Heroes and made this superheroes card with the photopolymer stamp set. Photopolymer stamps are completely clear so you can see exactly where you are stamping AND they are VERY STICKY! I was pretty klutzy with that aspect of these stamps yesterday, but I got better and better dealing with them as I went along. If you saw my Facebook post yesterday you will see that first I put the stamp face down on the clear block so that when I stamped with it I got a blob of the back of the stamp and then it tore my paper when I lifted it up! Now I know to make sure that I have the stamp image up on the clear block so it will stamp the image and not the backside! I also learned that on my messy table while I am stamping to not just set the clear blocks on top of the photopolymer stamps because the blocks will stick to the stamps!  They are sticky! And that’s a good thing when you are stamping to hold the stamp on the block well, but for me yesterday it was just one thing after the other!  By evening I had it all down pretty well as I made another card!

This stamp set also comes with an alphabet so it is really a double stamp set. You can line up the letters on your block to stamp words or phrases.

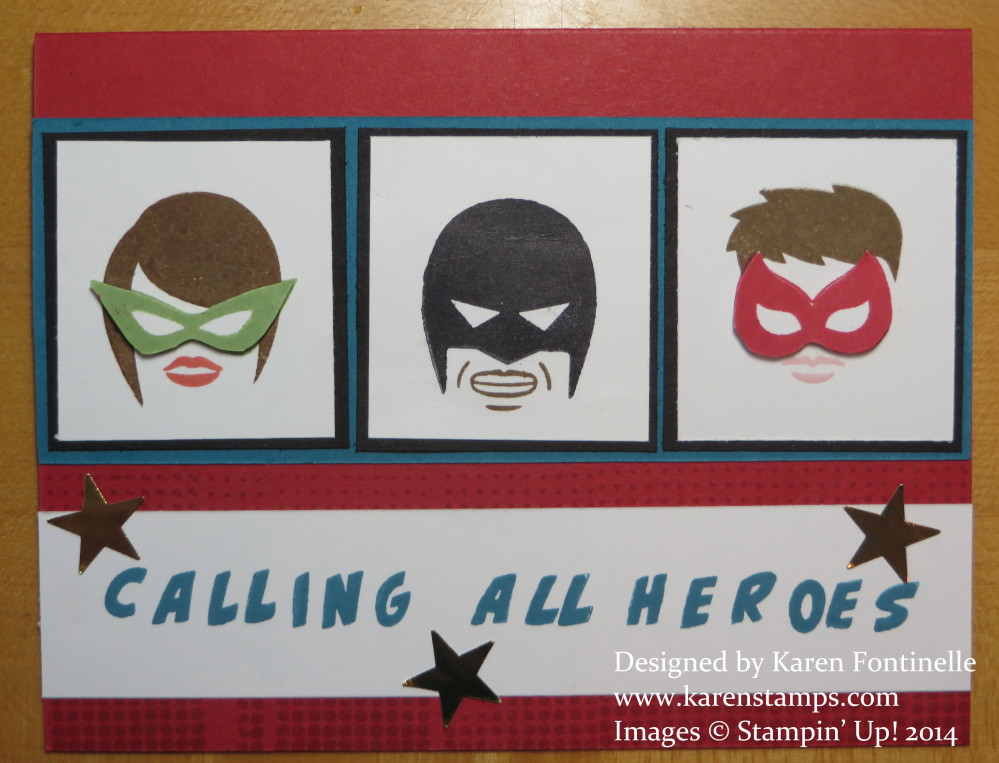
Calling All Heroes Three Hero Faces Card

On this card, I just played with some of the masks and faces of the heroes (or are they villains?) and stamped the phrase, which also happens to be the name of the stamp set. I didn’t try to get it perfect (obviously) but it is nice to be able to stamp more than one letter at a time.  In cases where I needed the same letter twice, I could do one of two things. What I did do, was just place the letters C, A, and L on the block and then stamped the rest:  L, In, N, G to get “Calling”. The other thing I could have done was leave a space for the second “L” and then go back and stamp that in it’s proper place. Since you can see through the stamps, you can see pretty much where you are stamping. The stamps did stamp really well once I didn’t have them upside down on the block! They did clean up pretty well, too, although they are more prone to staining than our red rubber stamps. Even the Stazon ink cleaned off pretty well with Stampin’ Mist and a hard rub on the Stampin’ Scrub Pad.  And the ink that didn’t come off I sprayed the Stampin’ Mist right on the stamp and rubbed with a paper towel.

I think this will be a fun stamp set to play with.  I have a couple people in mind that I want to create cards for with this set!

Check out the brand new Calling All Heroes Stamp Set in my Stampin’ Up! Online Store under “New Arrivals”! You will only find it online, not in the catalog.

The Best Handmade Father’s Day Card!

Father's Day Hardwood Fence Card

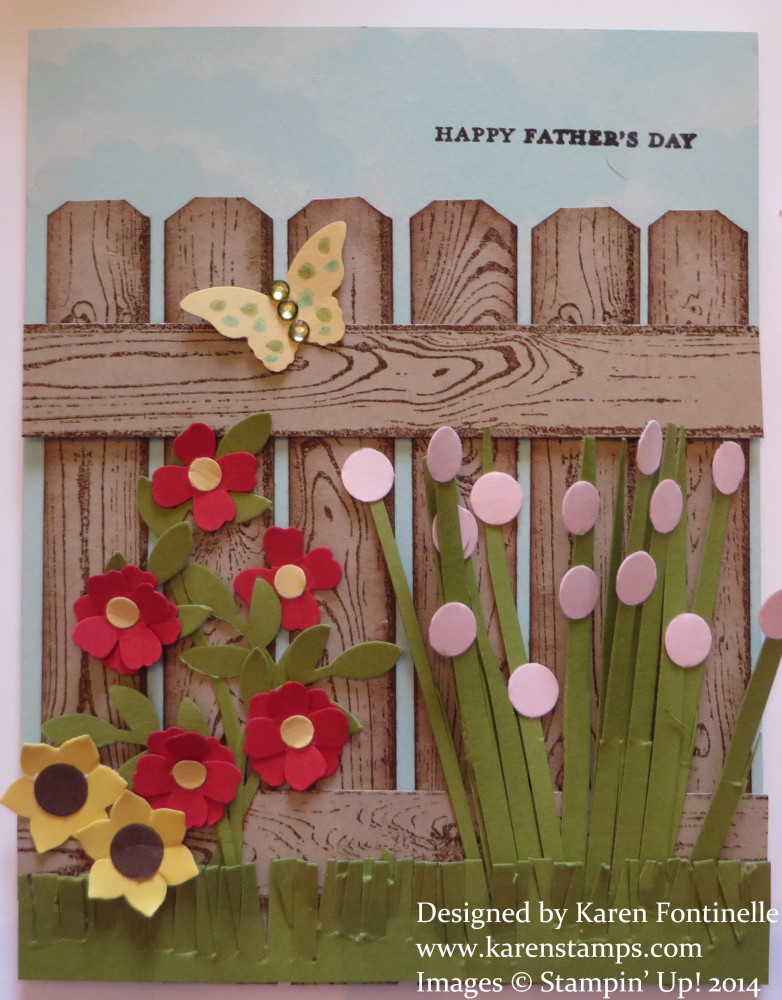
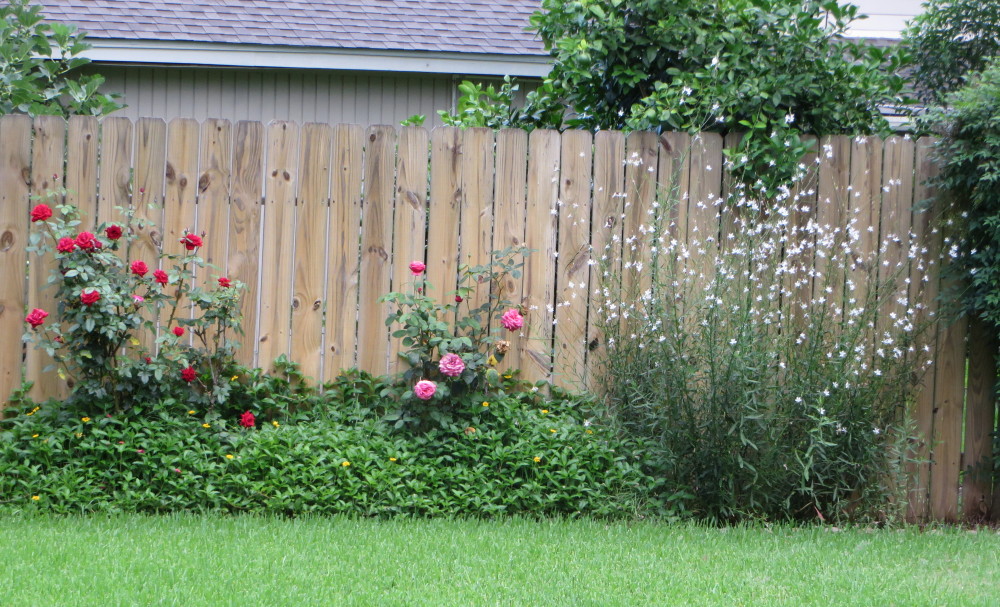
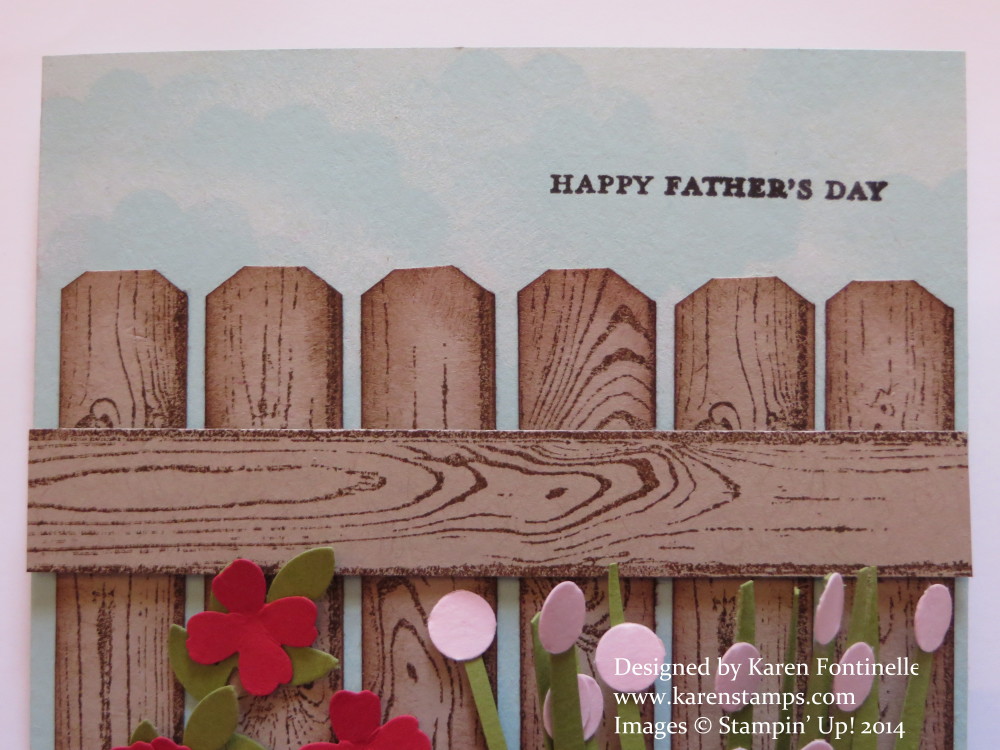
It’s the day to wish all the fathers out there a very Happy Father’s Day! And especially to my husband, the father of our three children!  Since he works out in the yard a lot and tries to have a nice garden, I thought I would make a personalized card for him that somewhat matches our back fence, the view out our window. I got the idea for this card from another demonstrator, Patty Bennett, who stamped with the Hardwood Wood background stamp with Soft Suede ink on Crumb Cake card stock. To make it into a fence, she used the Stampin’ Trimmer to cut along the Hardwood lines to make separate fence posts and sponged the edges. We have this same kind of “privacy fence” in our backyard, in face they are about the only kind of backyard fences in Houston. I like it for the privacy it provides and I don’t like it for the privacy it provides because you don’t get to know your neighbors as well, especially the ones behind you. And the kids can’t just run from one yard to another.

Here is a photo of your backyard that inspired this card:

Backyard Fence and Flowers

I forget what that flowering plant on the right is called, but it is really pretty in the morning against the fence. Whatever that plant is below the rose bushes has just taken over in the last few days. That’s how it is down here in the jungle, plants don’t stay small like they are supposed to!

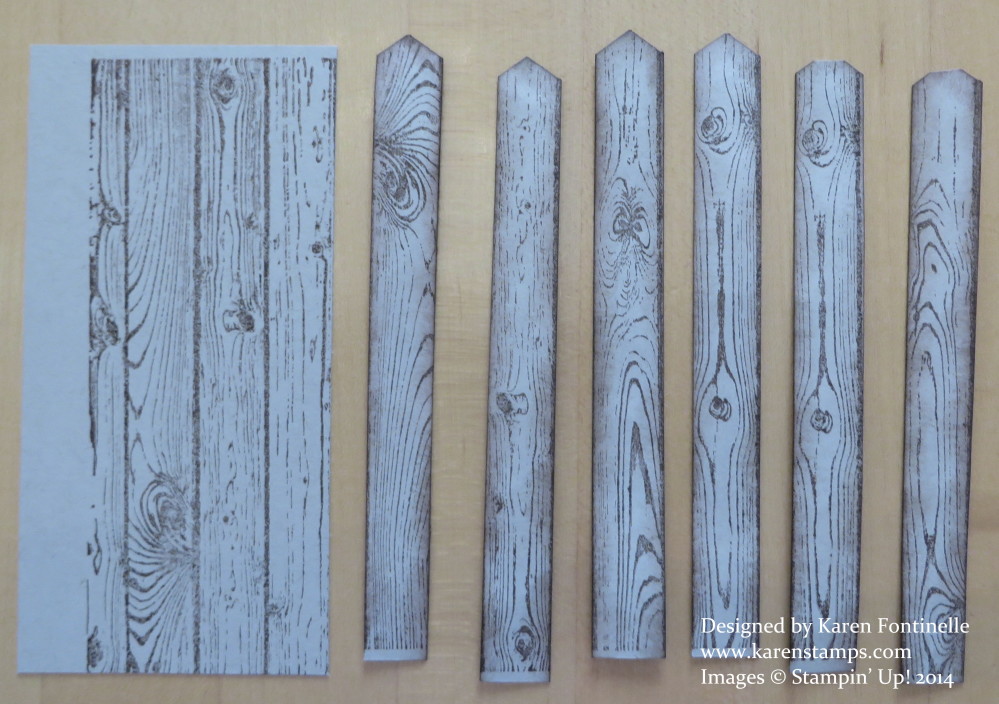
Here is how to cut apart the fence posts from the Hardwood Wood stamp (even if you stamp the image crooked on the paper, just follow the straight lines in cutting the posts apart.  You will need to stamp two images so you end up with six full-size fence posts. Depending on where you place them on your card, the fence posts will likely overhang the bottom of your card. This is ok, just snip off the excess when you are finished.  Be sure to play with the spacing of the posts before you glue.  It doesn’t have to be perfect, but you want to see how the spacing works on your card.

Making Hardwood Fence Posts

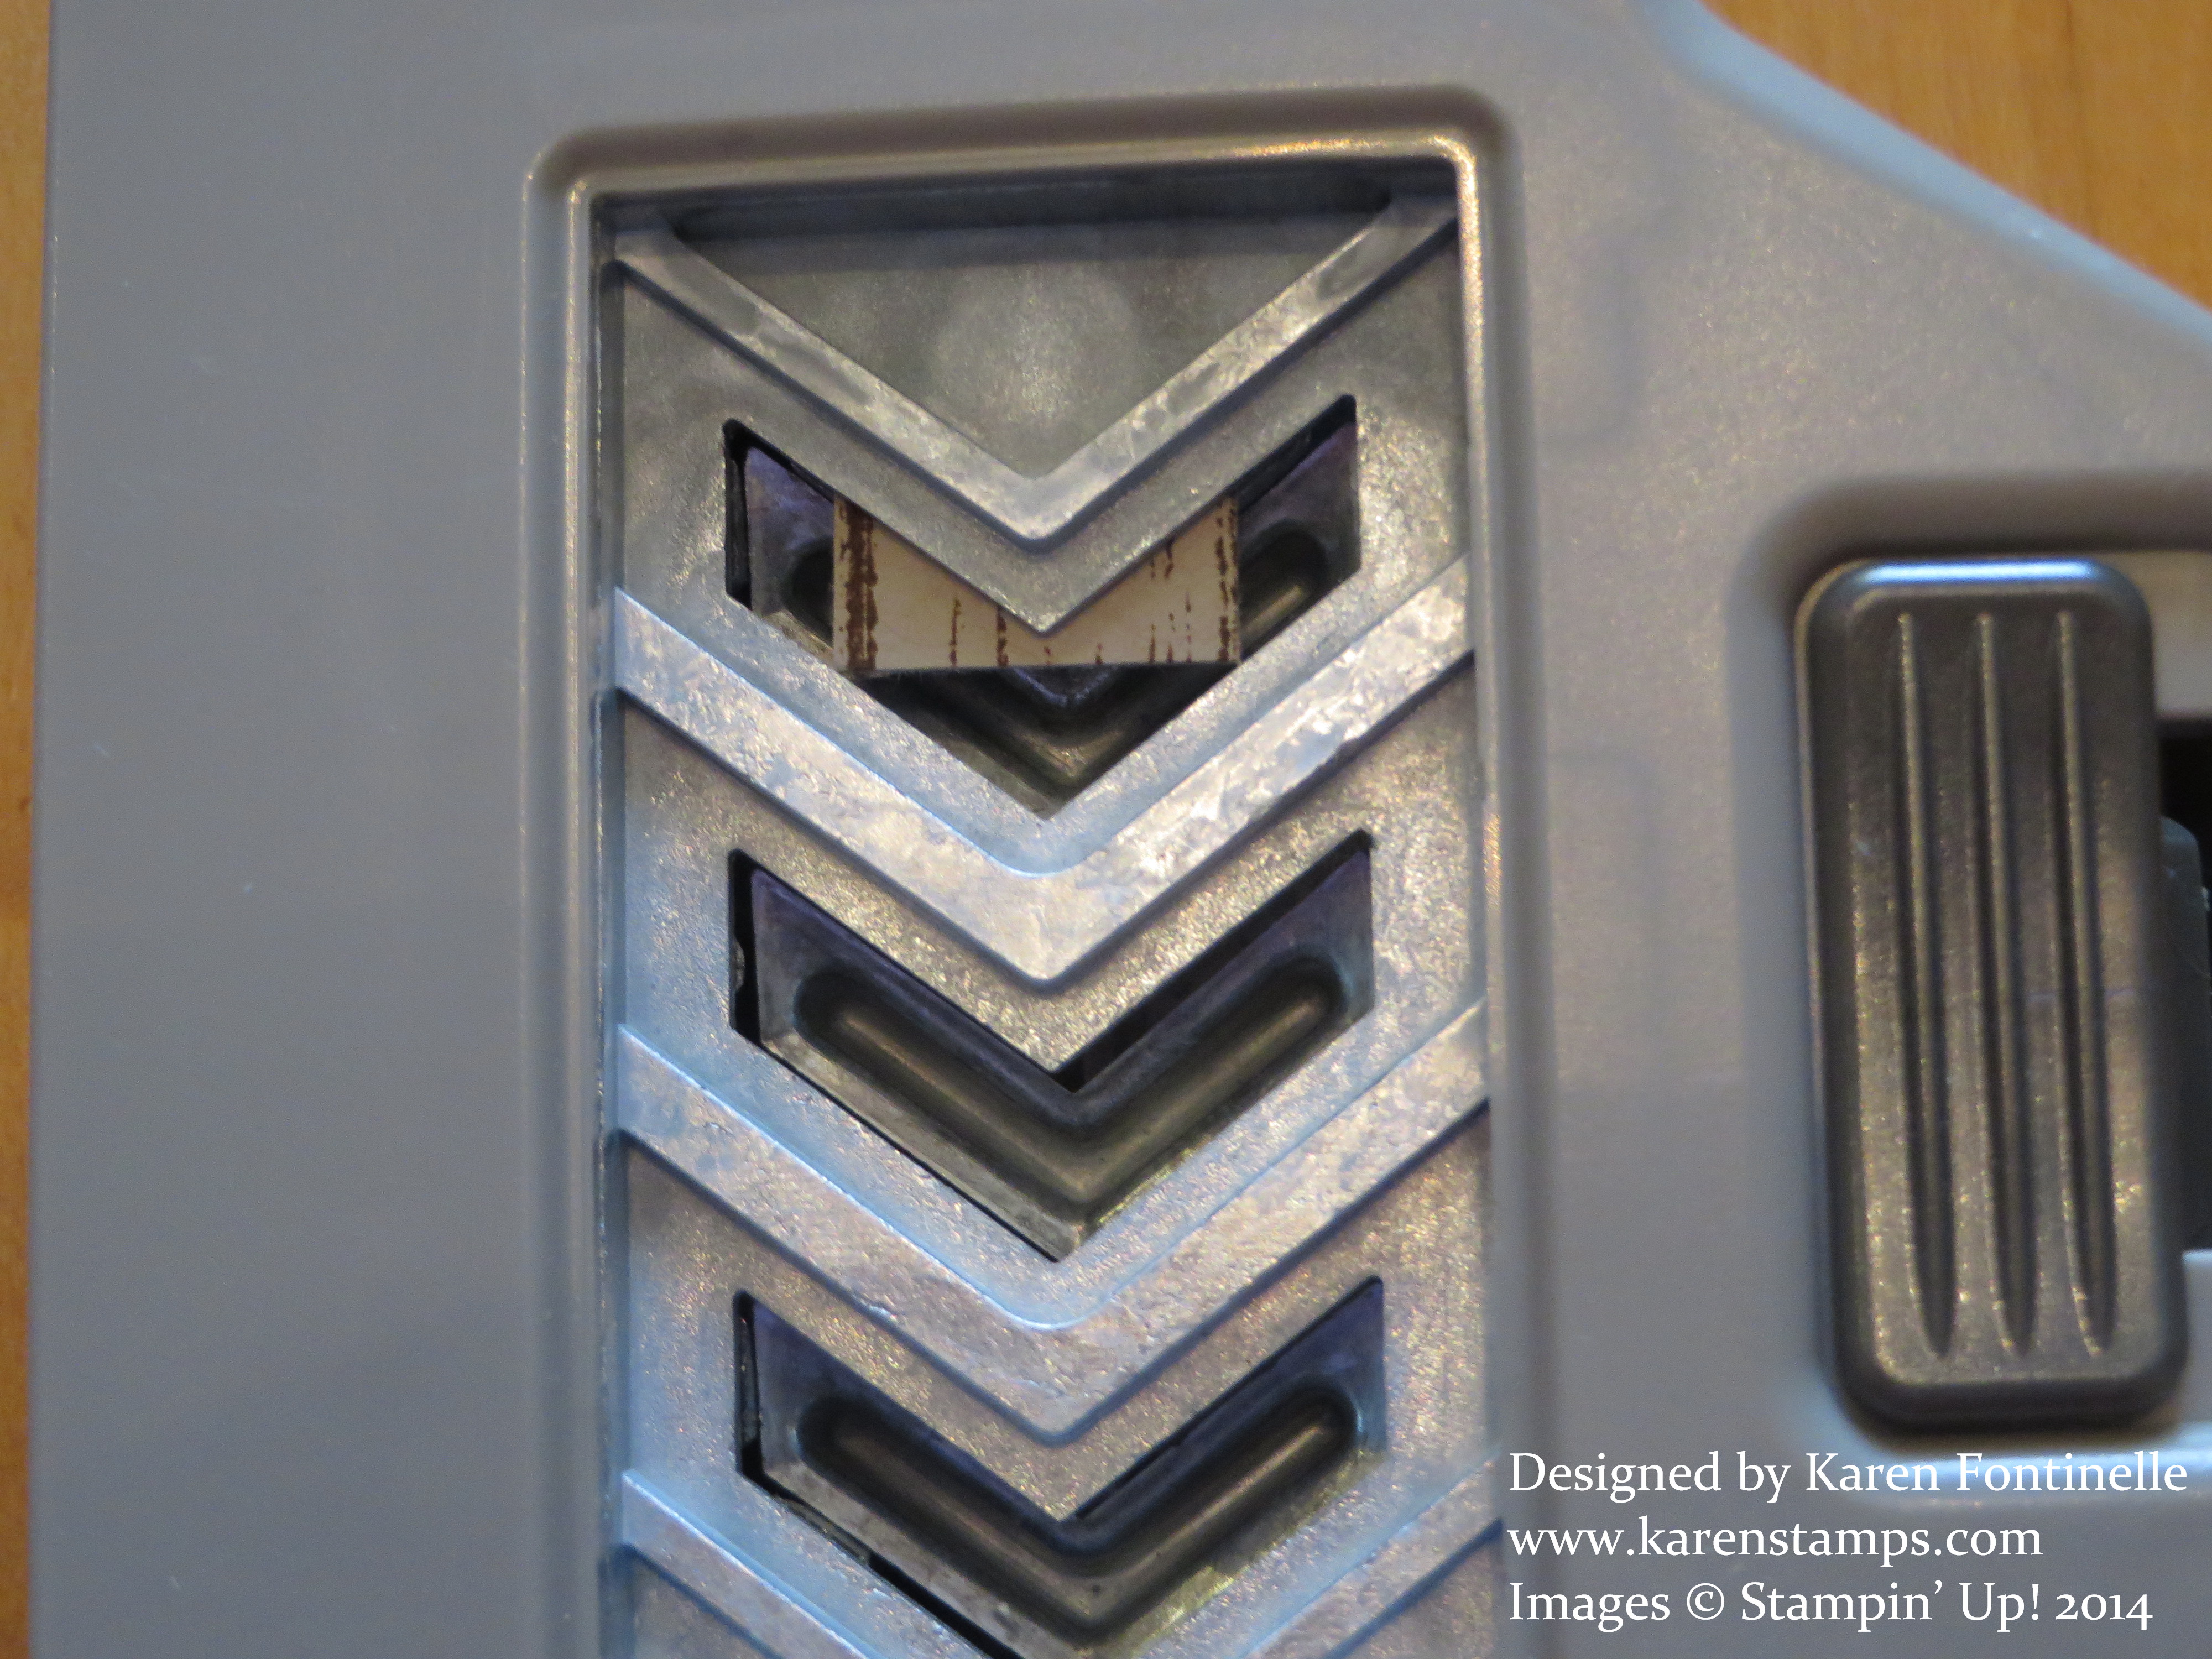
To get the pointy tops on the fence posts, Patty used the Border Chevron Punch. Just stick the strip into the punch as you see in the photo and punch. To match our own fence, I snipped off the pointy tip to make it flat!

Chevron Punch Making Fence Post Tops

And to make a few clouds on the Pool Party card base, I punched a Scallop Circle out of a scrap and sponged around parts of it with White Craft Ink to look like clouds! It’s very easy to do,  Just move the punched shape around on your paper.

Clouds Sponging close-upTo make the flowers, I just punched various shapes. I’m sure the scale isn’t correct, but it looks ok and it is, after all, a handmade card! I used the new Itty Bitty Accents Punch Pack flower for the rose bush, circles from the Owl Punch for the pink flowers, and the good old reliable Boho Blossoms Punch for the yellow “iris” flowers. I used the new Fringe Scissors a lot for the grass and the long flower stems. For the stems and leaves on the rose bush I used the stem from the Bird Punch. I had to add a little punched butterfly and for the center, I colored the Rhinestones with the new Blendabilities Markers (which hopefully will be available soon for everyone!).

The greeting on the front of the card is from one of my favorites Teeny Tiny Wishes.  The greeting inside the card is from a new set Fabulous Four. After I stamped it I just loved the look of it!

Fabulous Four Greeting Inside Card

I hope you got a new idea for using the Hardwood Wood Stamp today and maybe how to personalize a card for someone.

For tips on stamping with a background stamp, such as this Hardwood Wood Stamp, check out one of the recent posts on my Stamping With Karen Facebook Page.  Click the Like button there so you will receive my posts.

Have a Happy Father’s Day!!

Be Patriotic! Fly the Flag on Flag Day 2014!

Flag Day 2014

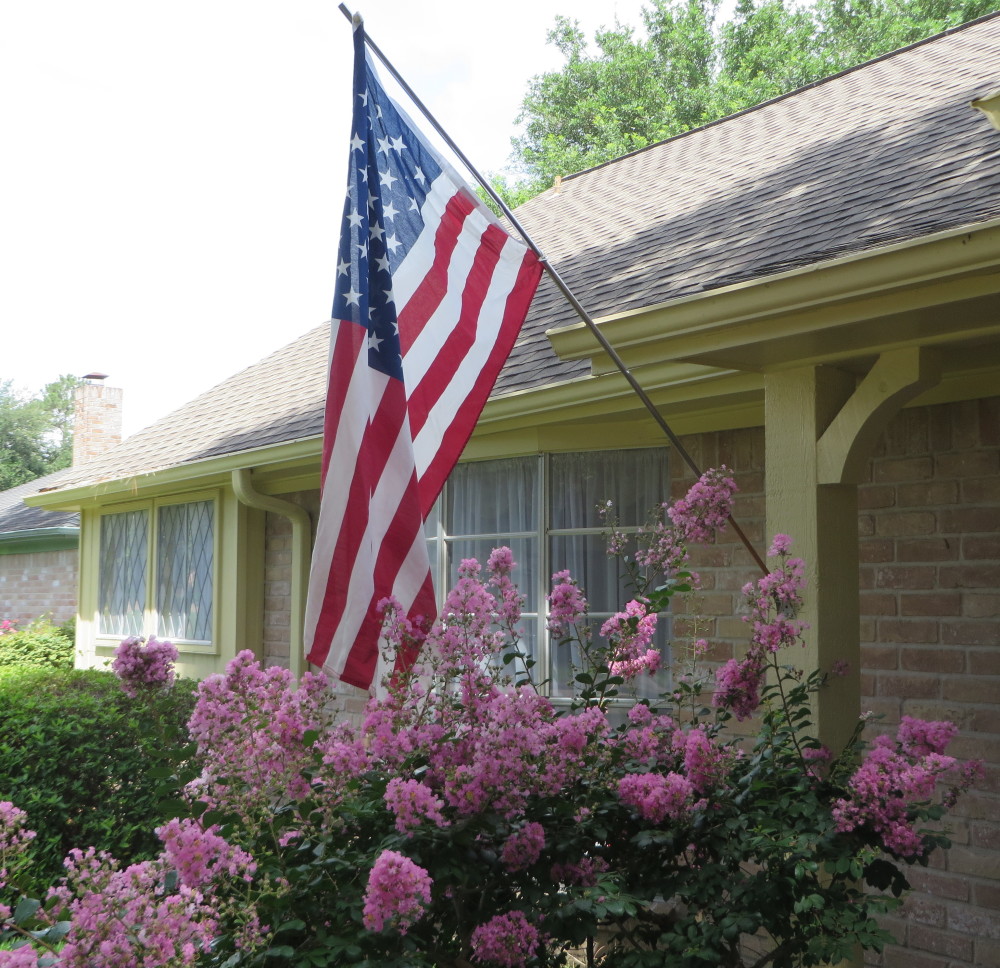
Be patriotic! Fly a flag on Flag Day today!  I love to put out my flag, although it often blows and catches on the roof or gets all wrapped up in itself. But today it looks really nice along with the blooming crepe myrtle.

Flag Day is when the flag was first issued by the Continental Congress in 1777. This day also marks the 200th anniversary of the Star-Spangled Banner, the national anthem of the USA, which Francis Scott Key was inspired to write upon seeing the flag flying over Ft. McHenry after a battle with the British.

It wasn’t long ago, but you can view my post HERE from D-Day when I made a flag card with the new Work of Art stamp set in the new Stampin’ Up! Catalog.

Work of Art Flag for Flag Day 2014


 Happy Flag Day! Celebrate by flying your flag!

Tap Into Your Modern Artist With Work of Art

Work of Art Modern Art Card

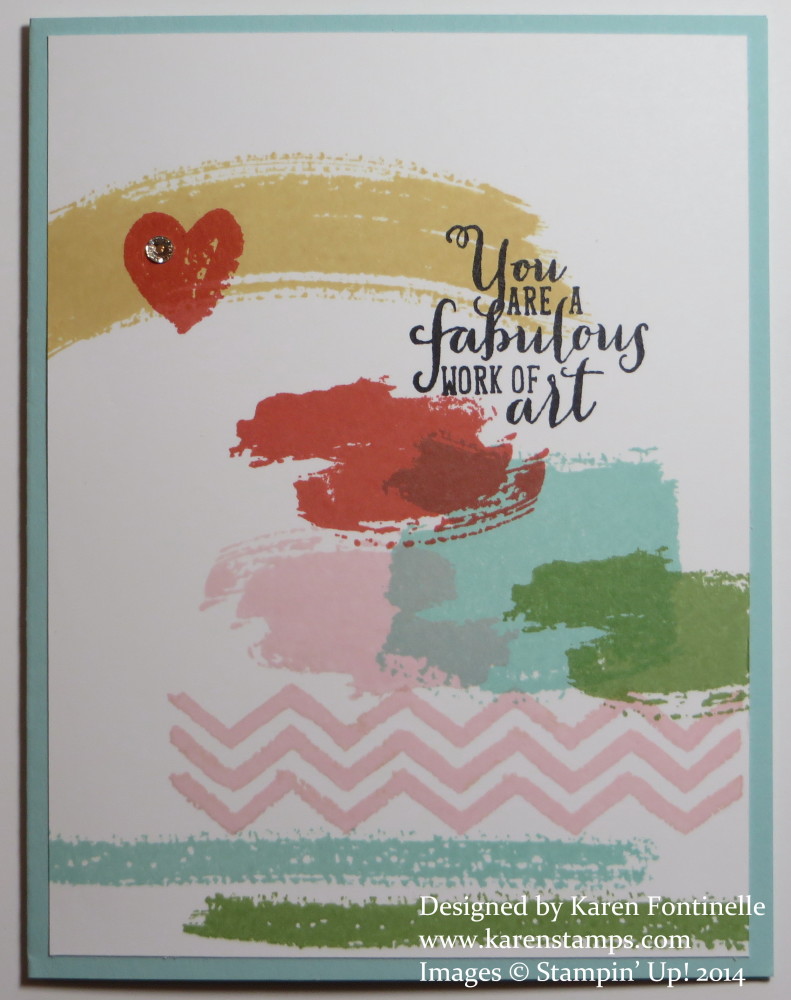
Tap into your modern artist with the Work of Art stamp set, a new one in the new Stampin’ Up! Annual Catalog! Since there’s no rhyme or reason to stamping with this set, you can just get out your paper, ink and stamps and play! Pick a few colors and go for it! I chose several ink colors from the Subtles family. The colors I used were Pink Pirouette, Wild Wasabi, Pool Party, Calypso CoraI, and So Saffron. I had no particular plan, just stamped. Very quick and very relaxing! The greeting comes in the set and I really love it! I think this stamp set is going to get a lot of use!
The heart also comes in the stamp set, and I added a little bling with a single Rhinestone Jewel on the heart.

To place your order, just go to my Stampin’ Up! Online Store.

Be sure to check the Weekly Deals, the New Arrivals, and the Clearance Rack!

For World Cup Soccer Fans!

World Cup Soccer Ball Card

Today is the beginning of the 2014 FIFA World Cup Soccer Tournament in Brazil. In spite of having sat through hundreds of little boys’ soccer games (and big boys!) through the years, I can’t say I ever learned the rules or understood the positions or anything.  I was just there to cheer on our team and my son, visit with the other parents, and bring the half-time snack and drinks for the end of the game! Sometimes I took one son to one game and my husband took the other one to the other game. Usually he was the coach of one team so that made soccer life even more interesting. All you soccer parents know what I am talking about! Sitting outside in Houston in the hot sun, sometimes no shade, was beyond miserable at times.  I still don’t know how those kids could all run around on that huge field in that heat! On some occasions it was miserably cold. I remember taking a thermos of hot chocolate and sitting in the car to watch the game until half time, then getting out to give my son a drink of hot chocolate and I was absolutely freezing just in those few minutes – but these kids were running and playing through the cold weather.

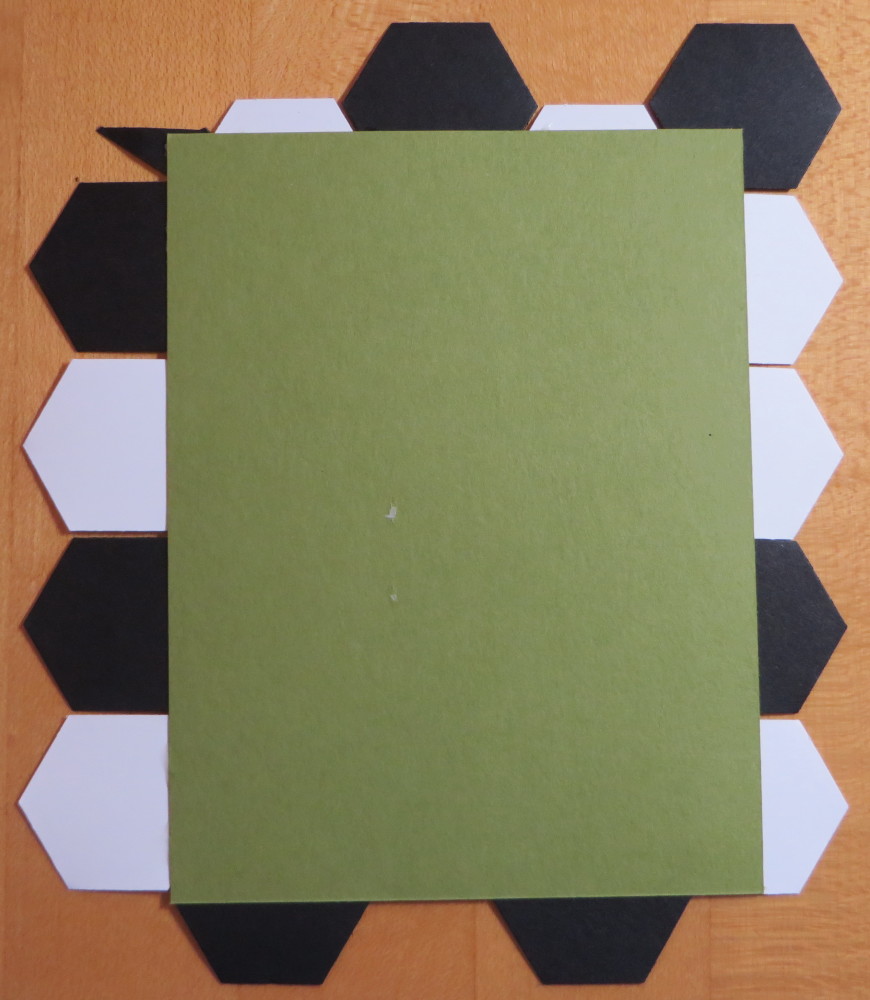
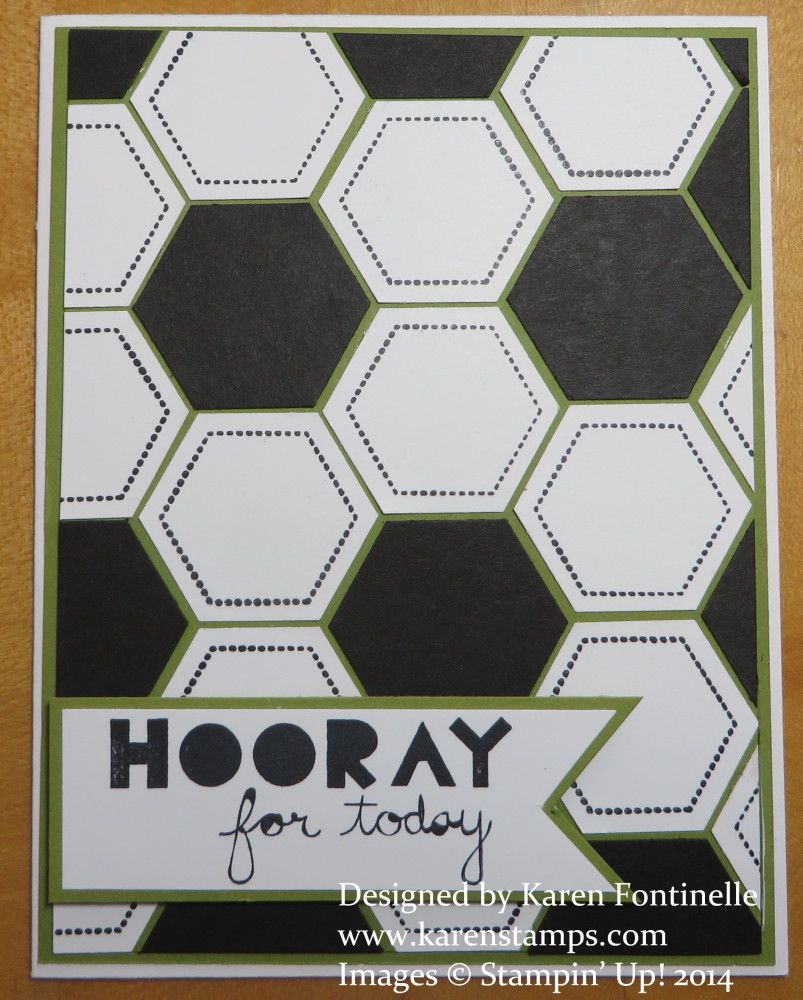
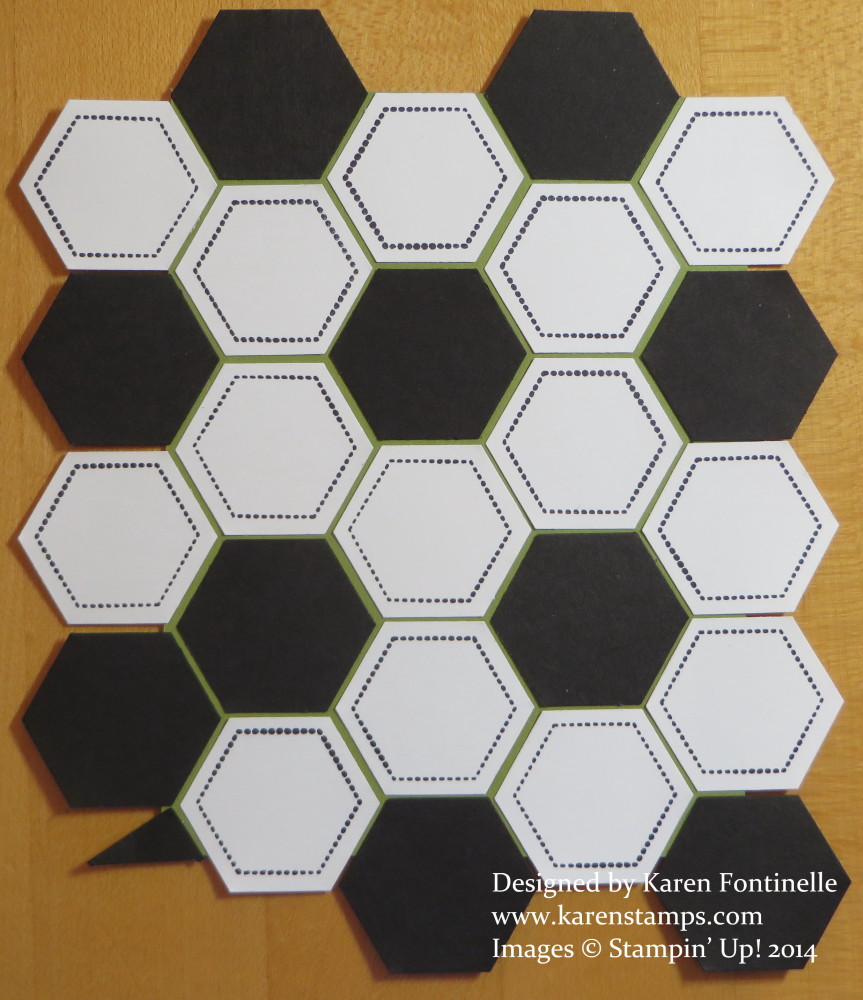
So in honor of the World Cup Soccer Tournament and my boys’ soccer games, here is a card I made to celebrate soccer! All you need is the Hexagon Punch for the black and white shapes. To add some interest, I stamped with the Six-Sided Sampler Stamp Set on Whisper White to give that little stitched look and then punched with the Hexagon Punch. Just for some color and contrast, I layered the hexagon pieces on a piece of Old Olive. Adhere the hexagons all the way to the edges of the card, letting them overhang the edge.

Making a Soccer Ball Card

This is what it looks like from the back:

Soccer Card layout back

Then just trim the excess!  Maybe you can use the scrap pieces on another card.

The greeting is from the Geometrical Stamp Set. You could also make this a Father’s Day card!

I think it is fun that you can do just about anything with stamping, even make something that looks like a soccer ball if you don’t have a stamp.

But if you want a sports stamp set, Stampin’ Up! has a new one!  It is called Simply Sports and comes in wood- or clear-mount. There are also My Digital Studio downloads you can purchase  and print out, then use on your traditional card or project – or make the whole card in My Digital Studio!

Enjoy the soccer if you are into the 2014 FIFA World Cup! Make a card or make a scrapbook page of soccer or you favorite sport!  You can shop anytime in my Stampin’ Up! Online Store!

Calling All Heroes Stamp Set! For All Super-Hero Fans!

Calling All Heroes Stamp Set

Images copyright Stampin’ Up! 2014

Calling all super-hero fans!  The new arrival today in the Stampin’ Up! Store is this photopolymer stamp set Calling All Heroes! You might think this set is mainly for little boys, but since the artist, Dave B., has a daughter who is just as interested in capes and masks, he says, as her older brother, he made sure this set could be for a girl, too!  And I contend it is also for the super-hero ADULT fans as well!  I know this will be a set to use to make cards or projects for my son-in-law who loves to go to shows such as Comic-Con and others, collects comic books, and has quite the collection of action figures. Not to mention I think my own grown up “little boys” will like cards made with this set as well! This set just solved some of your masculine card-making problems! The artist mentions (and shows) how well the Just Sayin’ phrases and Word Bubble Framelits work together.

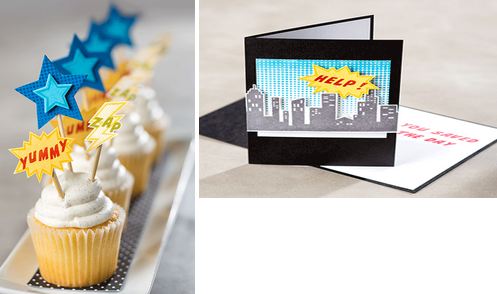
Calling All Heroes Cupcakes and Card

Images copyright Stampin’ Up! 2014

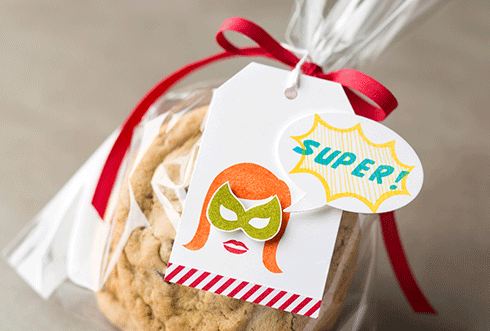
Calling All Heroes Treat Bag

Images copyright Stampin’ Up! 2014

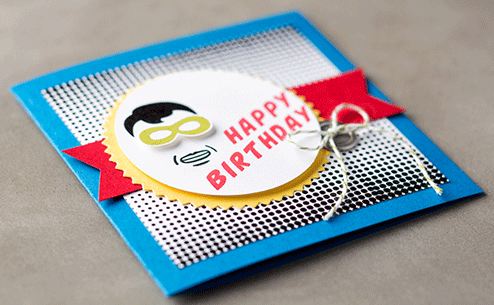
Calling All Heroes Card

Images copyright Stampin’ Up! 2014

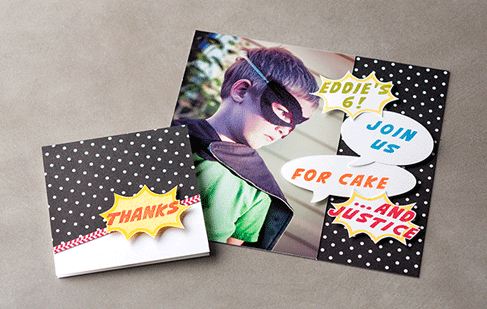
Calling All Heroes Photo Card

Images copyright Stampin’ Up! 2014

You can find these brand-new stamps, Calling All Heroes, in the Stampin’ Up! Online Store HERE under New Arrivals.

And while you are in the Stampin’ Up! store, be sure to check out the new Weekly Deals for this week, June 10 – 16.

Weekly Deal June 10 2014

It sure is an exciting morning in the Stampin’ Up! Online Store! Not only is there all the new catalog merchandise, and the Tuesday Weekly Deals, but the brand-new super heroes stamp set, Calling All Heroes!  Be sure to check it all out and then place your order. Email me if you have any questions.


Lost Lagoon Work of Art Thank You Tag Card

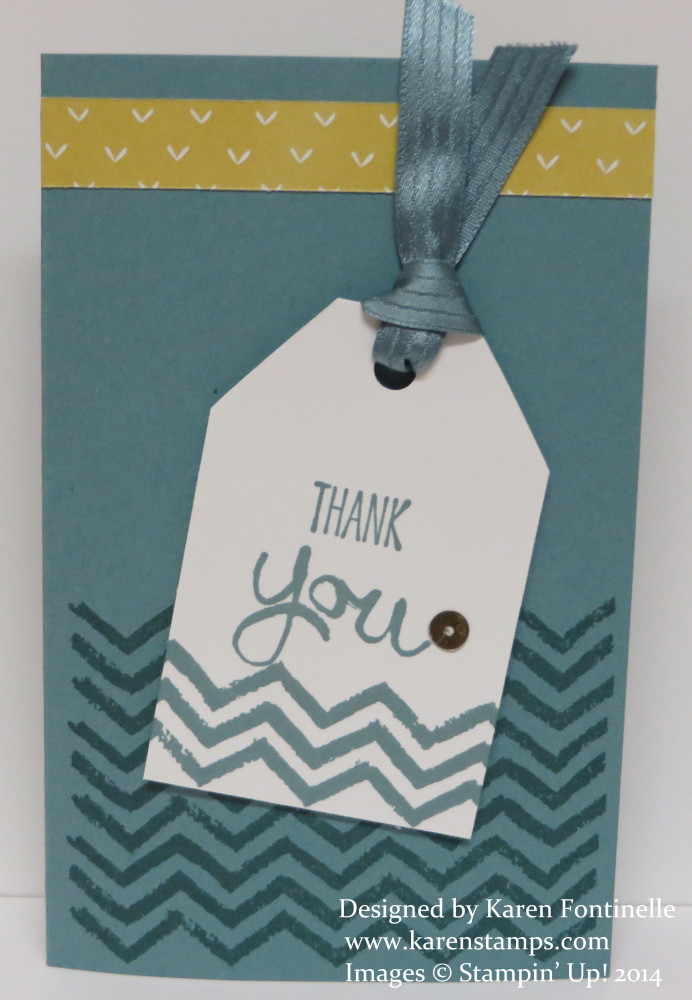
Lost Lagoon Work of Art Thank You Tag Card

I had fun making this smaller size card using Lost Lagoon card stock, one of the new In Colors, and stamping it with the Work of Art stamp set, a set that is already very popular. Being a Stampin’ Up! Demonstrator comes with many perks, one of them being receiving a special magazine every other month called Stampin’ Success. That magazine is one of everyone’s favorite things about being a Demonstrator!  I made this card copying one of the samples in that magazine, although the sample was a little gift bag! But it could also look like a card so that is what I made.

The Stamp-a-Ma-Jig came in handy to get those chevron lines at the bottom just right. The stamp in Work of Art has three lines on it so I stamped it three times. The Stamp-a-Ma-Jig is really easy to use and certainly comes in handy now and then when you don’t want to just “eyeball” something. The greeting is also included in the Work of Art stamp set. The card actually measures 3 1/2″ across and 5 1/2″ tall, so cut the paper 7″ wide.

I cut my own tag, but a better idea would be to use the new Tag Topper Angled PunchNo measuring, getting the corners even, just punch! The ribbon is the new Lost Lagoon 3/8″ Satin Stitched RibbonThe strip of designer paper at the top is different than the sample in the magazine but I used the Lullaby Designer Series Paper rather than a strip of Lost Lagoon as in the sample.  And I added a tiny bit of bling, a sequin from the Gold Sequin Trim.

You might as well put that Work of Art stamp set on your order!  You’re going to be seeing a lot of it from me and from other stampers! It’s just a fun set! And if you don’t already have the Stamp-A-Ma-Jig, I would go ahead and order that, too! You’ll be real happy you did every now and then!

Don’t forget, today is the last day for the current Weekly Deals! Shop at my Online Store!

Stampin' Up! Weekly Deals June 3 2014

Work of Art Flag for D-Day 70th Anniversary

Work of Art Flag for D-Day 70th Anniversary

Today is the 70th anniversary of D-Day, the day that Allied troops stormed the beaches of Normandy, invading Nazi-occupied France, and proved to be the turning point of World War II. I thought a patriotic card was in order.

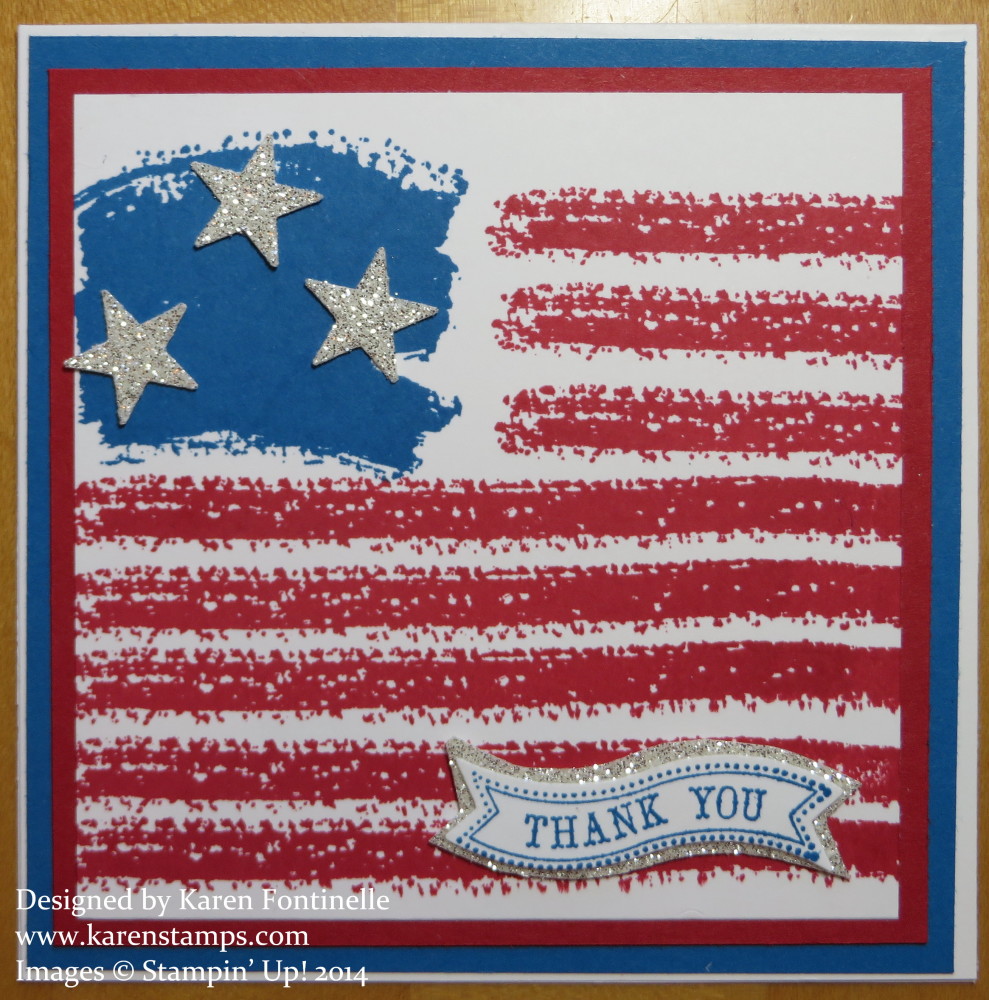
This isn’t an idea I would have thought of on my own, but I copied ideas others came up with using the new stamp set Work of Art to make a US flag of sorts. The “thank you” is from Itty Bitty Banners and die cut with the Bitty Banners FramelitsI just hand cut the Silver Glimmer Paper as a layer underneath the words. The little stars are punched with the star in the Itty Bitty Accents Punch Pack. There are times during the year when we want to make a patriotic card or decor item or favor and now we have another useful stamp set for this in our arsenal.

So Very Happy Flower Card

So Very Happy Flower Card

The flower on this card is stamped with the So Very Happy stamp set that we demonstrators received free at the Stampin’ Up! Leadership Conference held here in Houston last January. Now that the new catalog is out, we can use it and show it! The stamp set kind of reminds me of one we had years ago, the little bit whimsical line art drawings. I love it! The paper in the background is the new Lullaby Designer Series Paper, which, as I’ve said before, is absolutely not just for babies despite the name! The greeting is one of several in the stamp set.

I originally intended to use the other side of the designer paper which was Brown Sugar diagonal stripes. But when the piece I cut happened to be turned over to this side, I loved the look and used it instead. I also intended to cut out the flower, but laziness overtook me and I just left it on the Whisper White square layer. I would have been a little upset had I cut it out, because what I didn’t realize is that the Blossom Punch fits this flower!

Check my Stamping With Karen Facebook Page to see another version of this card using the Blossom Punch!

Shop for anything you want in the BRAND NEW Stampin’ Up! 2014-15 Annual Catalog at my Stampin’ Up! Online Store HERE!

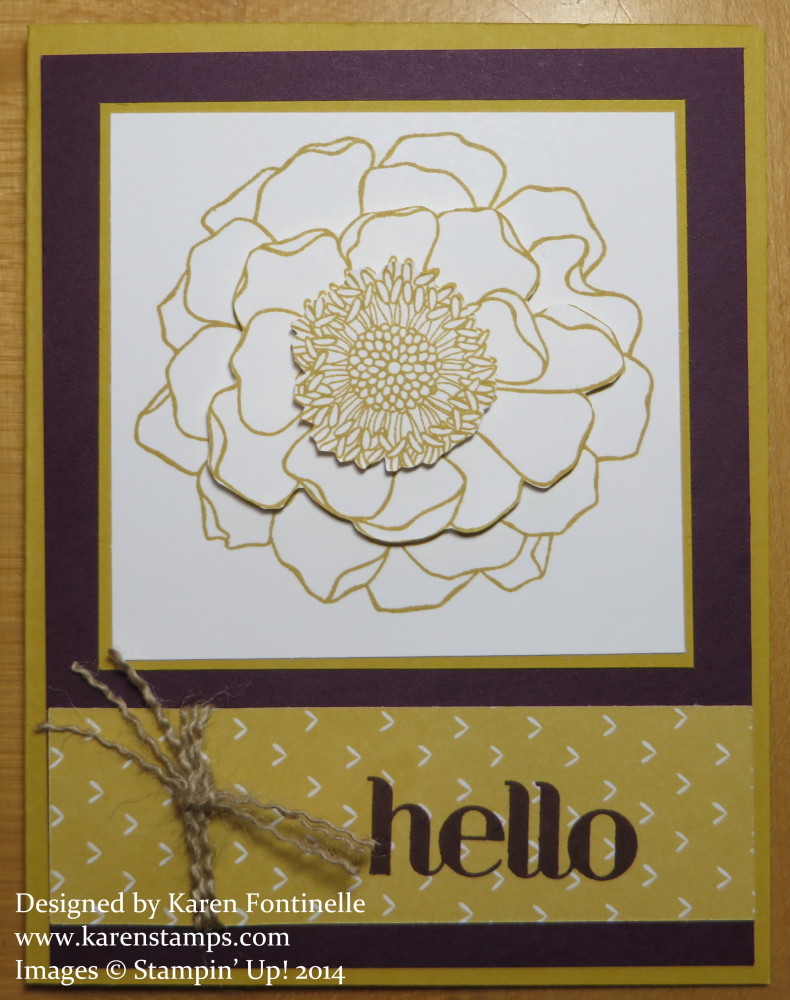
Blended Bloom In Colors Hello Card

Blended Bloom In Colors Hello Card

The Blended Bloom single stamp is a new one in the new Stampin’ Up! Catalog and has mostly been used to color in with the new upcoming Blendabilities alcohol markers (hopefully they will be available around the end of June or early July). But I thought I would just stamp the flower in one color and not color it in at all. And as usually happens, I changed it up a little more, stamping two more blooms and cutting out a couple of layers to make the flower more dimensional. I added a strip of the Lullaby Designer Series Paper. Don’t be fooled by the “Lullaby” paper, because there is not one image on it that will make you think it is “baby paper”. I was going to tie a piece of white Organza ribbon around the designer paper, but then I changed my mind and pulled off three threads from the Burlap Ribbon and tied that around the strip of designer paper.  The greeting is stamped in Blackberry Bliss ink with a stamp from the Four You stamp set. The card stock I used is Blackberry Bliss and Hello Honey, two of the new 2014-16 In Colors.

Check out the beautiful new In Colors in the new Stampin’ Up! Catalog! Blackberry Bliss is one of the favorites, so far, but we’ll all get acquainted more and more with these new colors!

Find what you need in my Stampin’ Up! Online Store HERE!  Remember, today, June 4th, is the last day to order any retired products that are still available.