Category Archives: Cards

Take Advantage of the Sales Tax Holiday This Weekend!

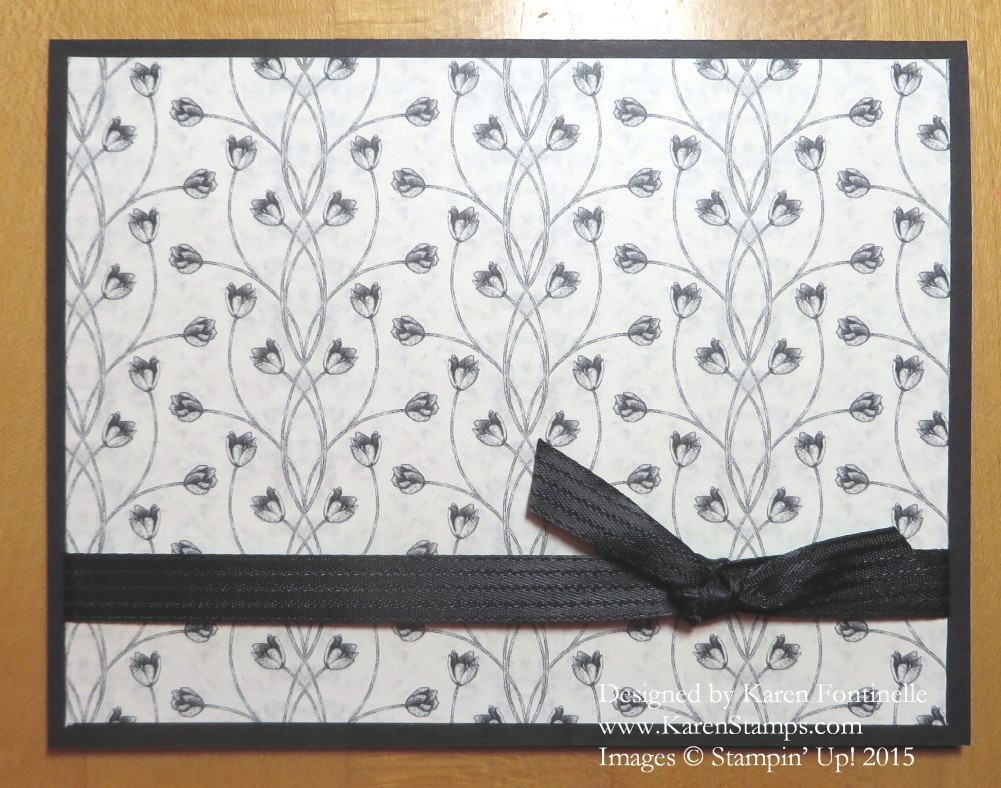
Timeless Elegance Small Flowers Card

The other day in this post, I used the Timeless Elegance Designer Series Paper to make some cards and was inspired to color the designs on some of the cards. On this card I am showing you, I just used the paper as is. I didn’t even add a greeting, because at the time I liked it as is, maybe just a note card that doesn’t need a greeting on the front. I think this paper can stand on it’s own for most of the designs.  And if you don’t care for the bolder designs, there are smaller and more subtle papers as well.

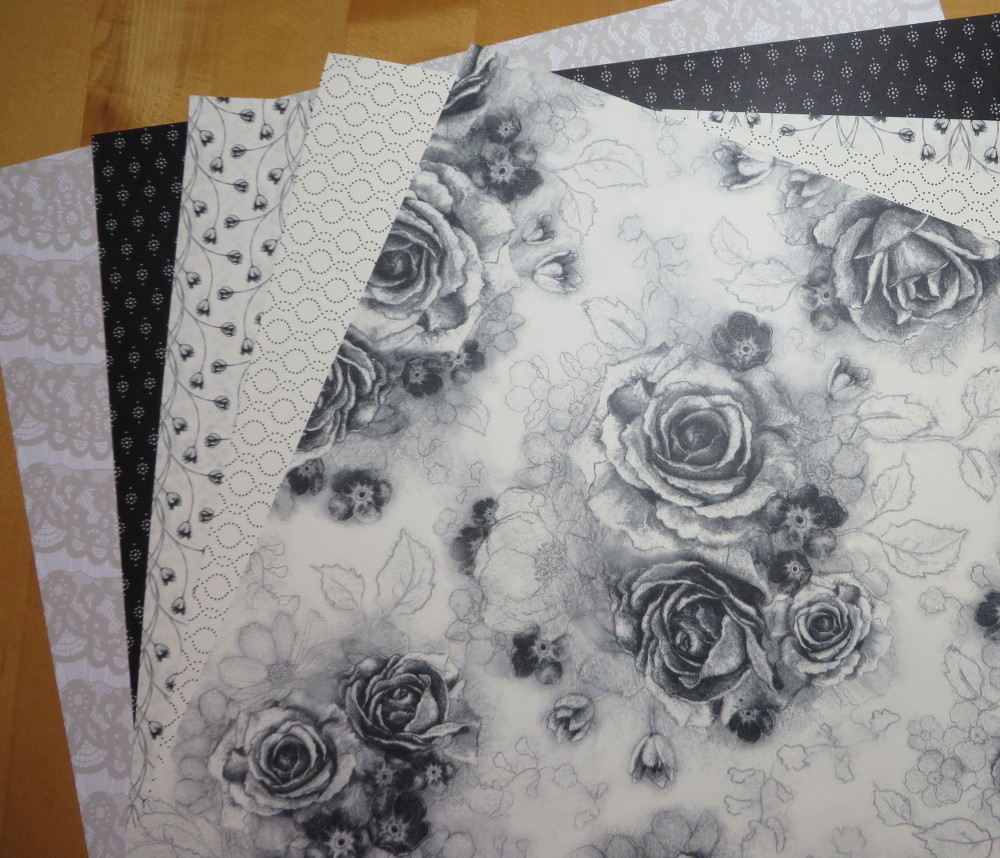
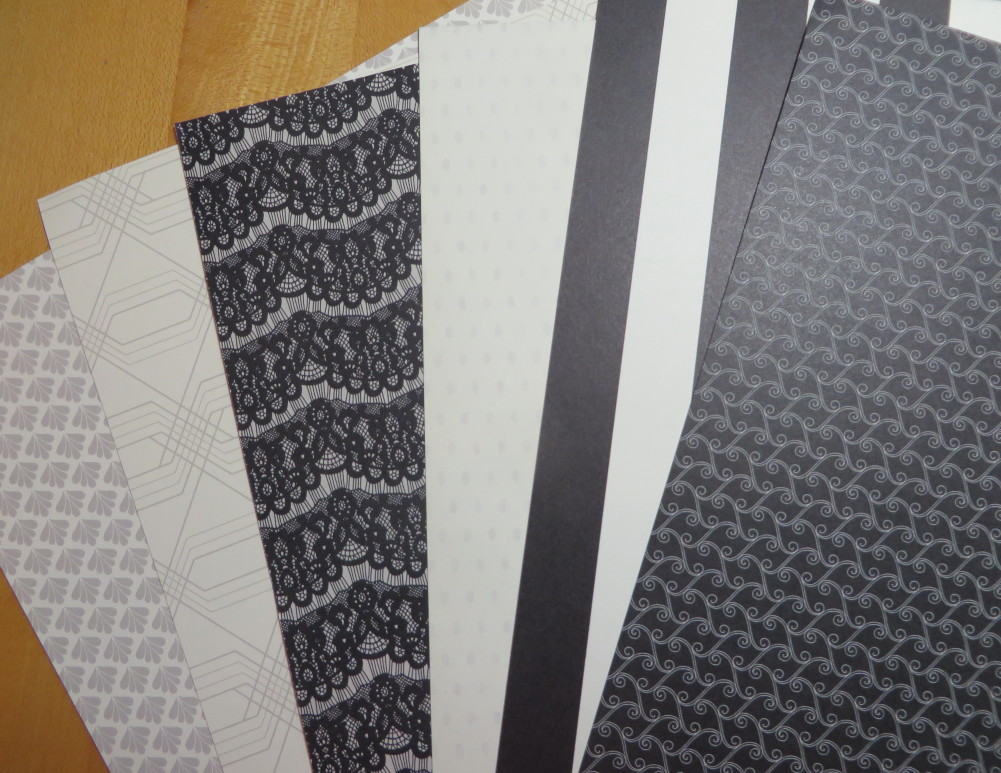
You can get an idea of the designs in this photo. Visit my Stampin’ Up! Store page and click on the photo slideshow to see all the patterns in larger views.

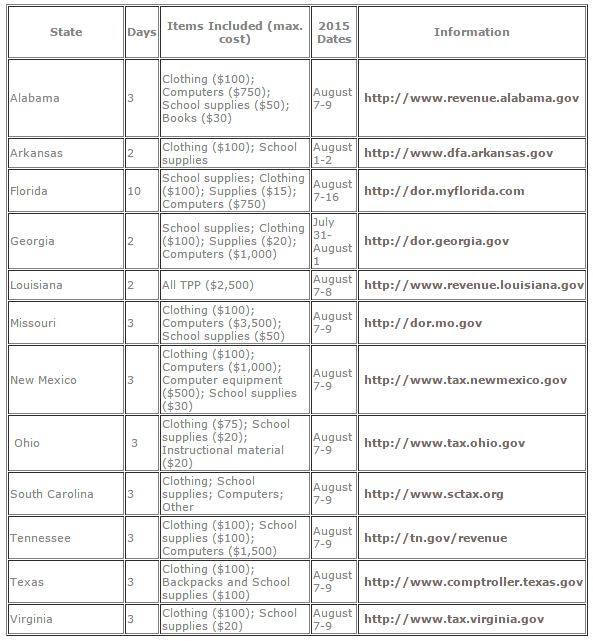
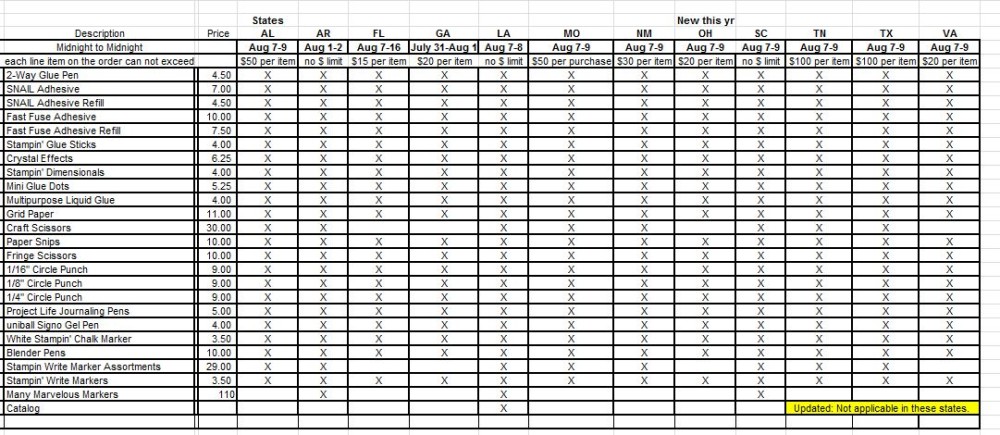
If you need some Stampin’ Up! products and if you live in one of the states and communities with a Sales Tax Holiday this weekend, place your order for these specific products and save the sales tax! It’s not a huge savings, depending on your tax, but it’s a little bit! Check the information below.

Note:  Stampin’ Up! did make a correction on those states that they initially stated the entire catalog was on the tax holiday list, but now it looks like only Louisiana is.  Be sure to pay attention to the dates given! These products can and will be used as school supplies by your children if you have them on hand, so you might as well have some extras!

Sales Tax Holiday 2015

Sales Tax Holiday Chart 2015

Click to View!

Shop Stampin’ Up! Online for Crafting Products and School Supplies!

Timeless Elegance Designer Paper Makes a Beautiful Card

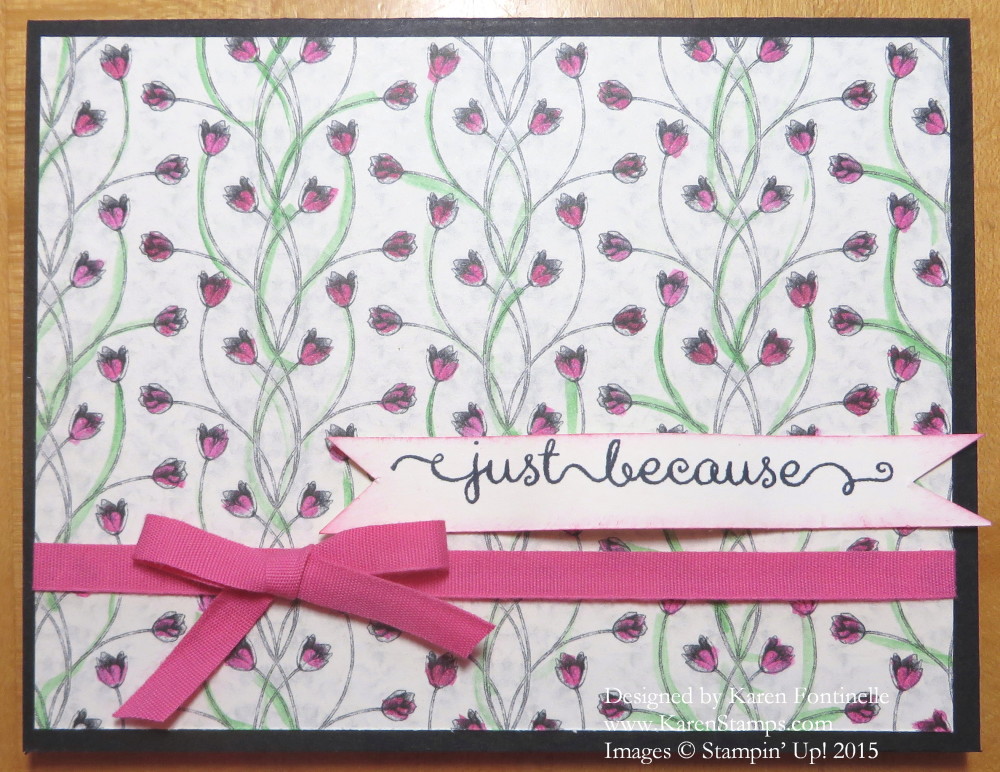
Timeless Elegance Painted Small Flowers Just Because Card

This beautiful Timeless Elegance Designer Series Paper can be used to make all kinds of different kinds of cards. This paper was so popular it was on backorder for awhile and I only got mine recently. The coordinating colors are Basic Black, Very Vanilla, and Sahara Sand so you can tell how neutral the colors are, but very dramatic. Of course the papers are double-sided so while one side has a bold pattern, the other side is very subdued.

On this card, I loved the tiny flower pattern and decided to try coloring in the little flowers with my Aqua Painter and some Melon Mambo ink. I didn’t try to carefully color in each little flower, I didn’t even have my reading glasses on! Watercoloring does not have to be exact so I just put down some color inside each little flower. Then I added a few Cucumber Crush green stems here and there, you can see I didn’t do every little line and I didn’t worry if they were exact either. I just had fun!

The greeting is from A Dozen Thoughts and the ribbon is Melon Mambo Cotton Ribbon.

Here are the patterns of the Timeless Elegance Paper:

Timeless Elegance Designer Series Paper

Timeless Elegance Designer Series Paper Patterns

I love the beautiful lace patterns printed right onto the paper!

If you would like your package of Timeless Elegance Designer Series Paper for making beautiful and elegant cards and projects, then visit my Stampin’ Up! Online Store and place your order! I’m also happy to do it for you, if you prefer!  Be sure to check the Weekly Deals and the Clearance Rack with newly added items today!

Sprinkles of Life Cherry on Top Birthday Card

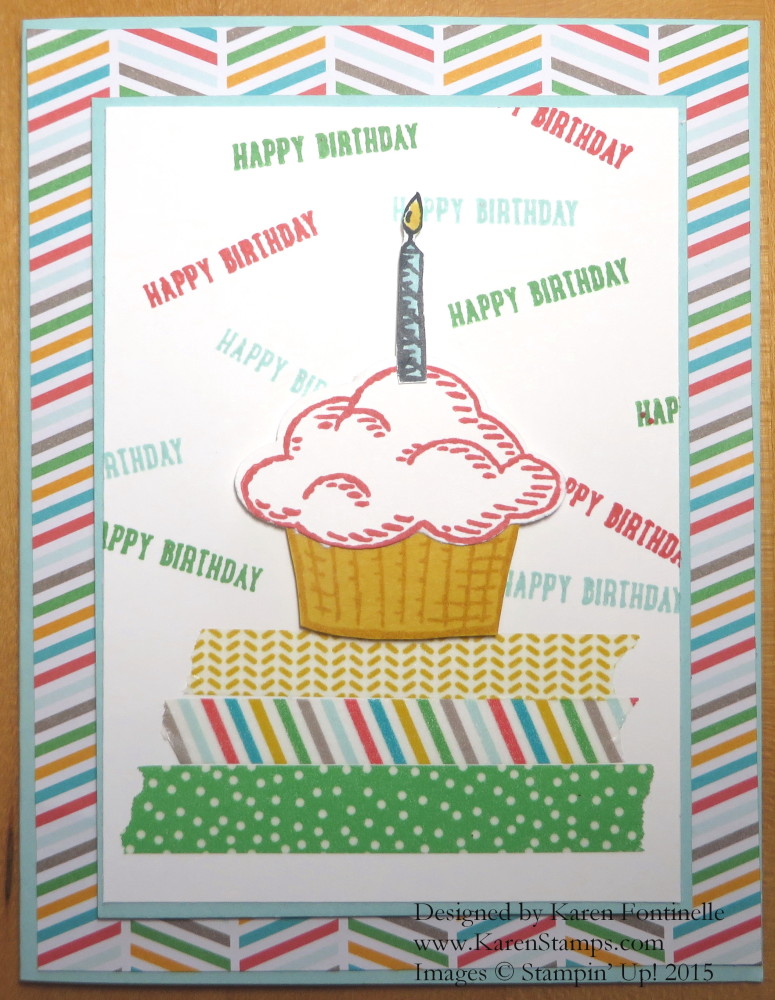
Sprinkles of Life Cherry on Top Birthday Card

Do you like this birthday card made with the Sprinkles of Life Stamp Set, Cherry on Top Designer Series Paper Stack, and the Cherry on Top Designer Series Washi Tape?  I really wanted to use all three products, and I love all three products, but I think the card turned out a little busy.  I think I could have done something better.  But, on the other hand, maybe somebody out there will like it and it will be just the card design they are looking for!  You never know!  We are all different!

I also used the Tree Builder Punch to punch out the pieces for the cupcake. But if you don’t have the punch, the pieces are not that hard to cut out yourself, at least if you have the Stampin’ Up! Paper Snips.

Washi Tape is always fun to use.  Just tear off a few strips and stick them on your card or project. Washi Tape is repositionable and can be used in oh so many ways.  The Cherry on Top Washi Tape has such cute designs and matches the Cherry on Top Paper Stack. I used a pattern from the Paper Stack for a layer on the Pool Party card base.

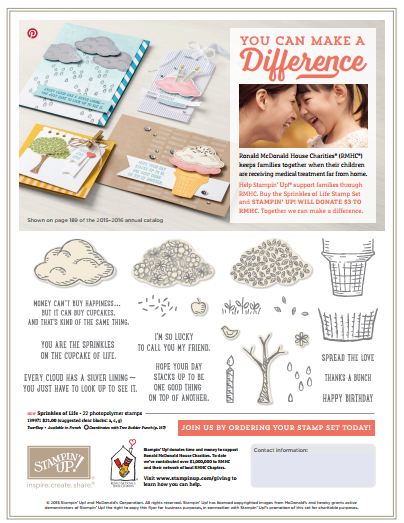
The Sprinkles of Life Stamp Set comes with a special bonus!  While you are stamping beautiful cards and projects with it, you will know that you are contributing to the Ronald McDonald House Charities® by purchasing this stamp set.  With every set sold, Stampin’ Up! donates $3 to this worthy charity, plus makes an annual contribution.

Sprinkles of Life Stamp Set RMHC

You can find this Sprinkles of Life Stamp set and all the products I used to make this card in my Stampin’ Up! Online Store.

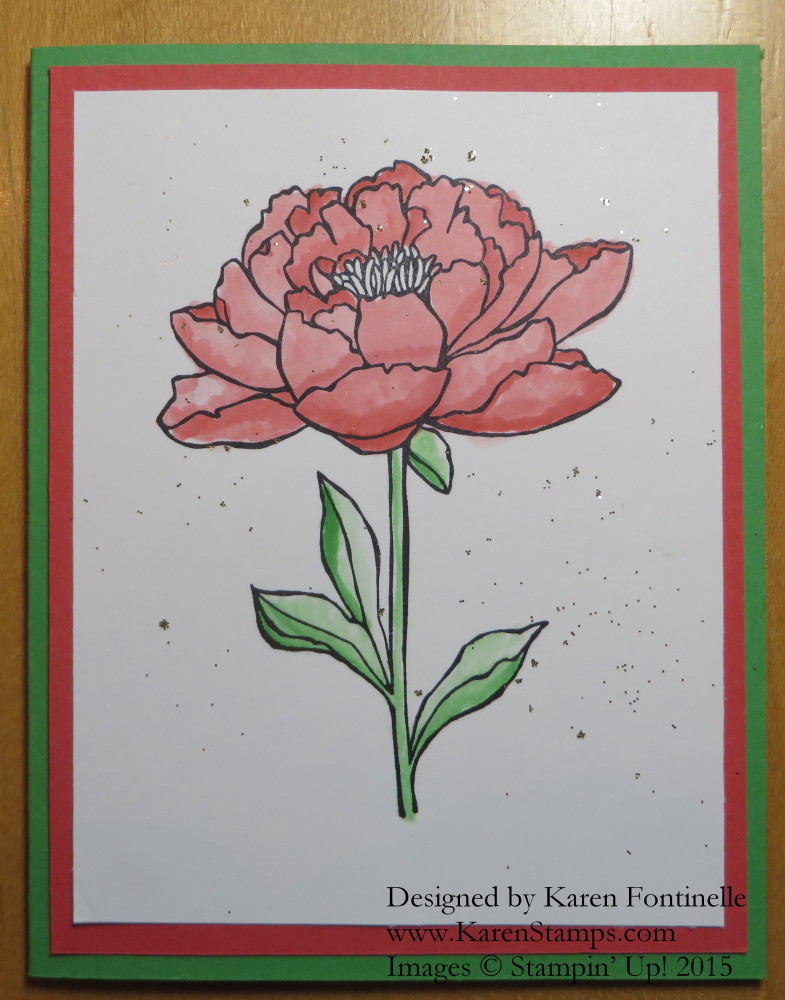
You’ve Got This Flower Card with Glitter Splatter

You've Got This Flower Card with Glitter

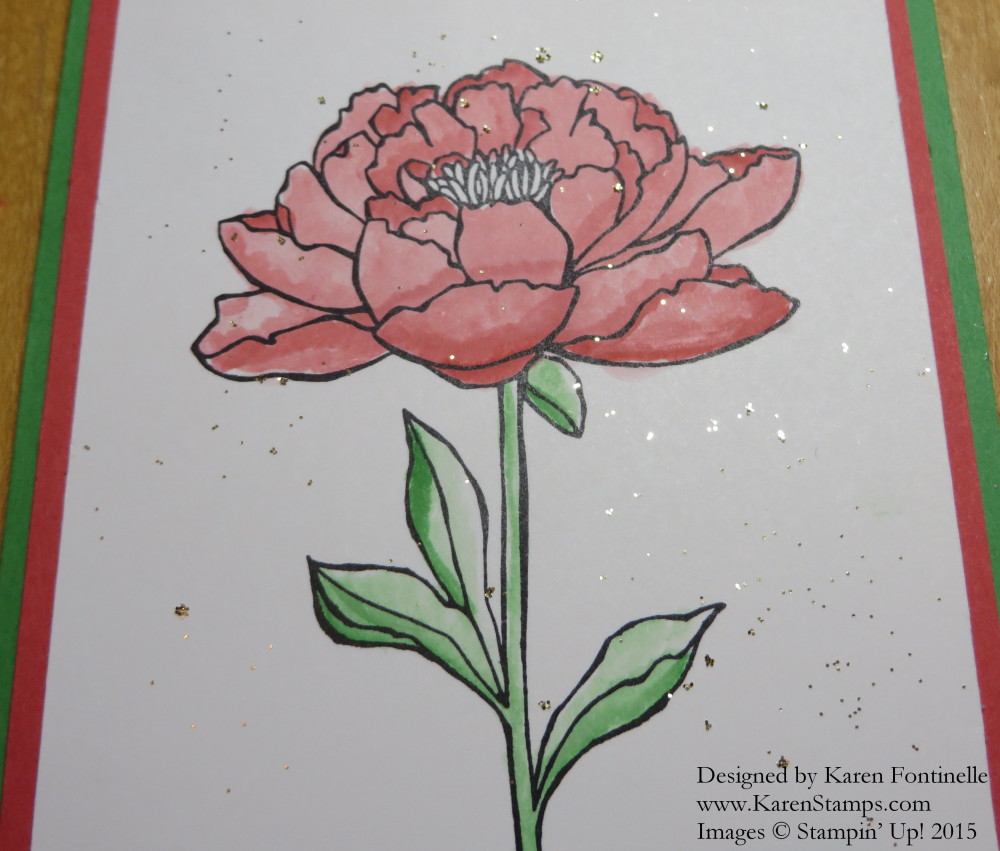
I’m still trying to catch up after vacation, but I watched some of the livestreaming recordings from the Stampin’ Up! Convention and saw this neat technique, splattering with Multipurpose Liquid Glue and adhering Gold Glitter. I used the You’ve Got This Stamp Set to stamp and watercolor the beautiful flower and add a little pizzazz with splatters of gold glitter! I can still add a greeting to this card and I forgot to color the center flower parts, so maybe it is not completely finished!

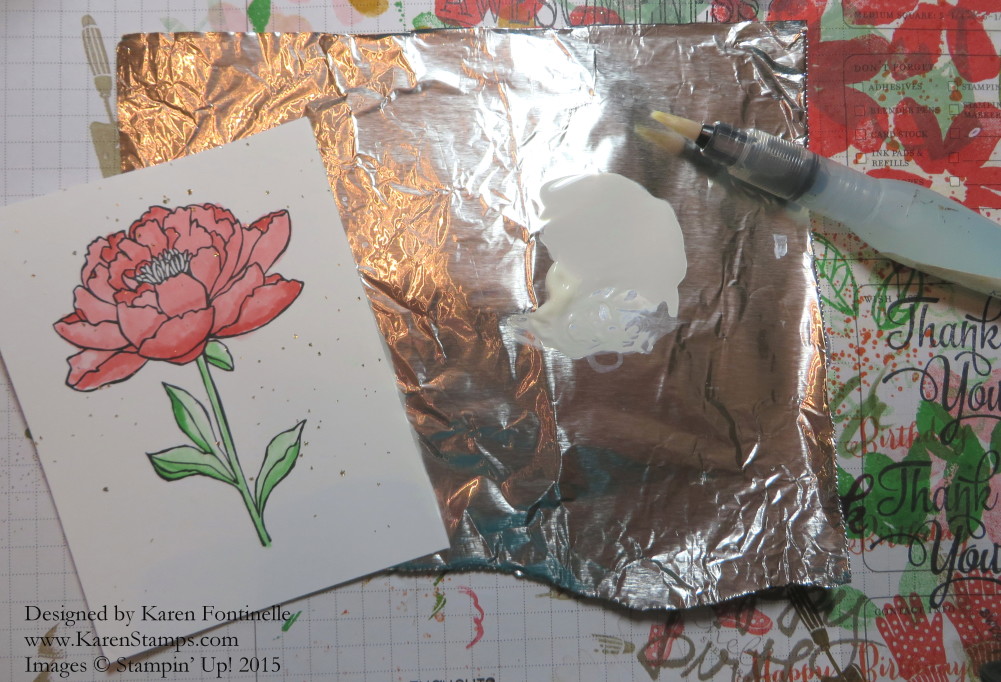
Someone from the Stampin’ Up! Home Office at Convention demonstrated this glittering technique. You need an Aqua Painter (or a small paintbrush) (but you really should own an Aqua Painter!  I love mine!) and some Multipurpose LIquid Glue. Squeeze out a little glue, you don’t need much.  Then dilute it with some water from your Aqua Painter. You don’t want it too thin and not too thick, but different consistencies will give you different size splatters.  Then with the diluted glue on the Aqua Painter, splatter it on the card, however little or much you want.  Sprinkle the card with Gold Stampin’ Glitter and dump off the excess.  The glitter, of course, will stick to the glue splatters!

You've Got This Flower Card Gold Glitter Splatter Technique

In my painting days, I learned to splatter by tapping the splattering brush onto another brush handle or pencil or Aqua Painter held in your other hand over the project.  It gives you a little more control.

You could also splatter some color on to your card with a matching ink if you wanted.

I love watercoloring with my Aqua Painter!  To color in this flower, stamped with Stazon Ink, I just put a dab of reinker in the lid of the ink pad and picked some of that up, diluted with a little water with my Aqua Painter. If you want a darker shade, either pick up a bit of reinker that hasn’t been diluted OR touch your Aqua Painter to the corner of the ink pad itself to pick up ink.

Experiment with this splattering technique using Multipurpose Liquid Glue, the Aqua Painter, and some glitter!

You've Got This Flower Card Glitter Splatter

If you need any supplies for your cardmaking and other papercrafting or scrapbooking projects, please visit my Stampin’ Up! Online Store!

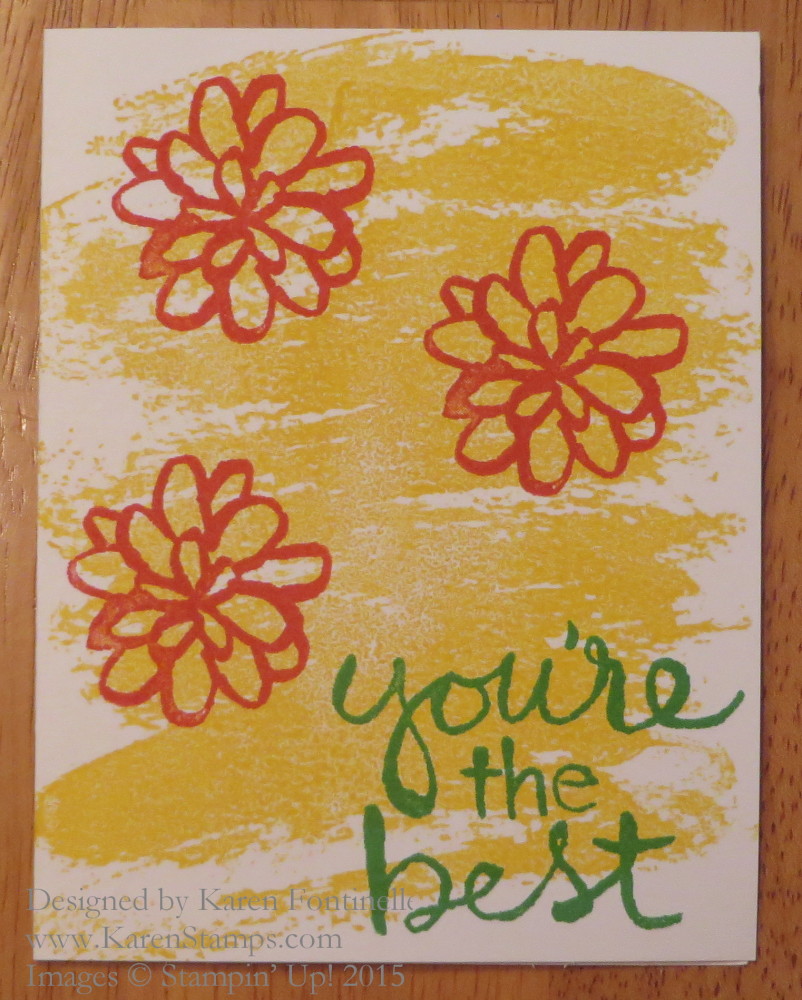
Watercolor Words Watercolor Wash Card

Watercolor Words Watercolor Wash Card

On this super simple card, it’s all about the watercolor! Watercolor Wash for the background and Watercolor Words for the stamping and greeting! Use the new Whisper White Thick Cardstock and you don’t even need any layers of cardstock.  The new thick Whisper White is great just by itself for the card base!

The Watercolor Wash is a background stamp. Lay the stamp face up on the table and ink up with the ink pad. Then place the card you are going to stamp on top of the Watercolor Wash (certainly doesn’t have to be exact with this design). Best to place a scrap piece of computer paper over the card and then rub to make sure you are getting the impression of the stamp on the card. Putting the scrap paper over it will keep your fingers clean!

Then choose some colors that will stand out from the background to stamp some flowers, hearts, or stars from the Watercolor Words Stamp Set and a greeting. Couldn’t be easier! It’s fun to just do some basic stamping and turn out a masterpiece!

To embellish the card more if you wanted, you could tie a ribbon around, or twine, to match. Add some Dazzling Diamonds GlitterStamp the flowers on Whisper White scrap, cut out and adhere with Stampin’ Dimensionals.  But if you want to keep it simple, it will be a nice card to send as is!

Don’t forget to check the Weekly Deals that end tonight!

Watercolor is in right now, so choose some watercolor stamps and you’ll look like an artist in minutes!  Try the Watercolor Wash background and the Watercolor Words Stamp Set for a simple handmade card!

Shop Stampin’ Up! Online HERE!

Crystal Effects Water Drops

Crystal Effects Water Drops

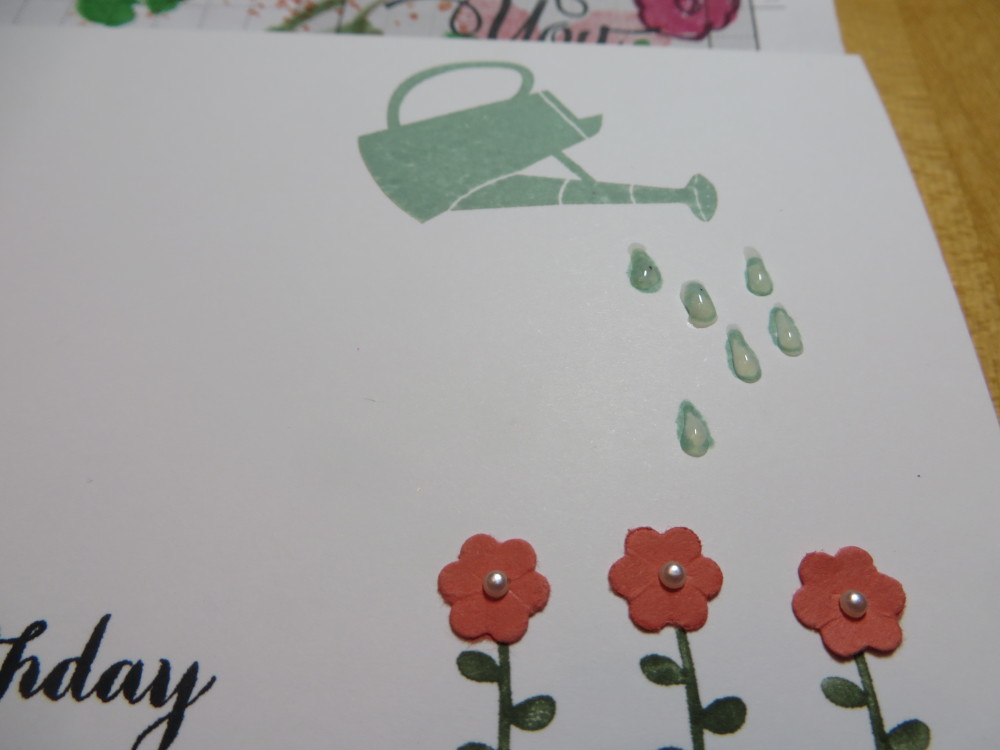
This is a portion of a card I made with the Gift From the Garden Stamp SetThe sprinkling can and the flower stems come from this stamp set but the water drops are a stamp from the Sprinkles of Life Stamp Set. In order to make the water drops look real, I put dabs of Crystal Effects on the water drops. They are wet in this photo and I tried to draw them out a little bit to look more like a drop of water.  Then dry, the Crystal Effects will be clear.

Crystal Effects can be used as an adhesive or as a glossy, lacquer finish to objects. It gives a raised, embossed look to stamped images. There are actually many techniques you can use with Crystal Effects.

Don’t forget to check the Weekly Deals!  These are good through Monday night, July 20.

Weekly Deal July 14

For fun papercrafting shopping, just visit the Stampin’ Up! Online Store this weekend!

Pink Marker Colored Dahlia Card

Pink Marker Colored Dahlia Card

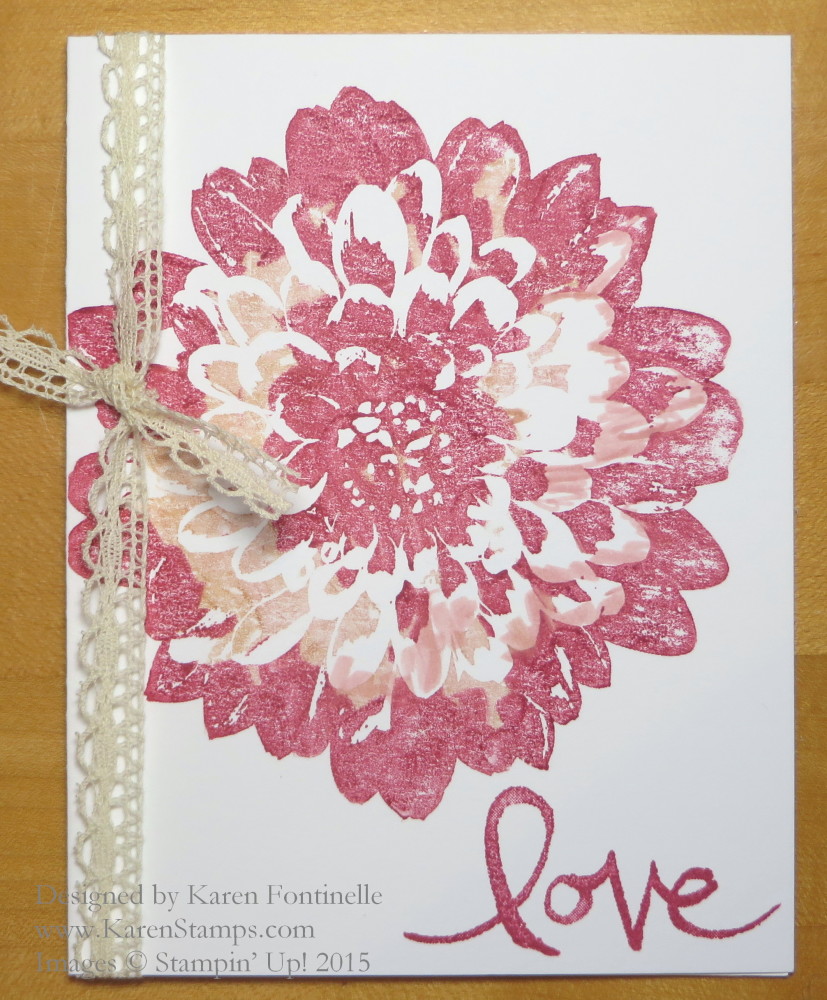
The Definitely Dahlia Stamp is almost as big as the card front, which makes for very simple cardmaking!  Just stamp it and add a greeting or embellishment and you’re done. I tried this before on another dahlia card but this time I made the colors really different, like Pink Pirouette and Rose Red. Instead of stamping on an ink pad, I colored rather randomly with Stampin’ Write Markers to try to get a shaded look with this stamp. I actually missed some spots on the flower and then tried to color in (not a good idea), but overall I think it still looks pretty good. The greeting is from the new stamp set Watercolor Words. For a little embellishment I added some Venetian Crochet Trim tied around the front of the card.

If you want to  try the Definitely Dahlia Stamp, available in wood- or clear-mount, please visit my Stampin’ Up! Online Store.

June Paper Pumpkin Card From a Friend

June Paper Pumpkin Card

Today we got a pile of mail, maybe they have been hoarding it at the post office! You may recognize this as a Stampin’ Up! Paper Pumpkin card from the June 2015 kit.  Can you imagine how pleased I was to find a personal card in the stack and not just bills and credit card applications and solicitations of all sorts?! This card was from my college friend Sally, who lived across the hall in my dorm. By our fourth year we were roommates in an apartment and have remained in touch all these years. Sally has always been good about sending cards in the mail, but I think she has stepped up her game recently to help keep the post office going! We all need to be doing that because there is nothing like a note from a friend, especially these days when we mostly communicate by email and text messages.

This was her first Paper Pumpkin kit and she said she enjoyed it. Unlike some of us (me!) she said she has already sent out half her cards. I’m sure those recipients enjoyed finding a real card in the mailbox as much as I did!

With Paper Pumpkin you can make the card exactly as suggested by Stampin’ Up! in the directions or you can branch out and do whatever you want with the supplies. Each kit includes a stamp set and Stampin’ Spot for ink.

If you join Paper Pumpkin now through August 10th you will be signed up in time to receive the August kit in the mail. It is always a surprise what papercrafting project we will receive!

Just click HERE to sign up for Paper Pumpkin and see how much fun it is to get that red box in your mail! You can pause or cancel your subscription at any time. Hopefully you will enjoy some crafting time when your kit arrives and feel like you have given yourself a gift!

Stampin’ Up! Weekly Deal July 14 2015

Stampin' Up! Weekly Deal July 14 2015
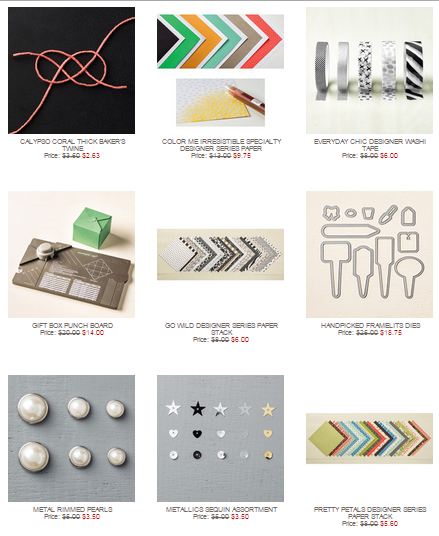
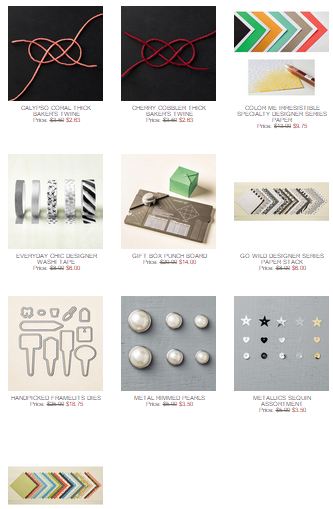
Here are the Stampin’ Up! Weekly Deals for July 14 – Monday July 20. Click the link or photo above to view in the Store.  If you see something you really want, better grab it because once a quantity sells out, that deal is gone. Also check the Clearance Rack for any new things they might add. Honestly, I can’t remember what was on there before each time I look at it, so just remember to check when you are ordering to see if there are any bargains on there that you want!

The Color Me Irresistible Designer Paper is on the Weekly Deals.  This is similar to the embossed paper that was free during Sale-A-Bration but BETTER because you also get paper that is already colored. Use the white paper plain or color it with sponging or spritzing or whatever method you like!  You also might really like the other designer papers available on the “deals” as well as the new pearls, washi tape and sequins, plus twine for embellishing.  And if you like an easy way to make gift boxes, then the discounted Gift Box Punch Board is for you!

The Watercolor Wishes Card Kit was not available until this month, and now it is so popular that it is nearly on backorder. If you are thinking about ordering this kit, I would do it today! More kits are on the way but there might be a backorder situation for a little while,   unfortunately. It really is a cute kit and easy to make some beautiful cards! AND a very nice stamp set comes with it! What a deal! You can see it displayed on page 80 of the Stampin’ Up! Catalog. Order several kits (if they are available) and get your friends together for a cardmaking day or evening! And the stamp set is one you will be able to use a lot!

Have fun choosing or get it all!! Check my Stampin’ Up! Online Store for the Weekly Deals, the Clearance Rack, the Watercolor Wishes Card Kit, and all the other Stampin’ Up! goodies!

Cottage Greetings Card Kit


One of the new Stampin’ Up! Card Kits is called Cottage Greetings. You can make 15 cards, 5 each of 3 designs, with the kit. You’ll want to add the stamp set Cottage Greetings available in wood- or clear-mount. It’s a lovely stamp set, whether or not you buy the kit.  You can use it easily without the kit so don’t worry you won’t get your money’s worth out of it! I love the font and the sayings.

Check out the video and find out all about the Cottage Greetings Card Kit. If you want to order it and the stamp set, just go to my Stampin’ Up! Online Store. It’s a fun and easy way to get a stack of cards made!

Gift From the Garden Card

Gift From the Garden Card

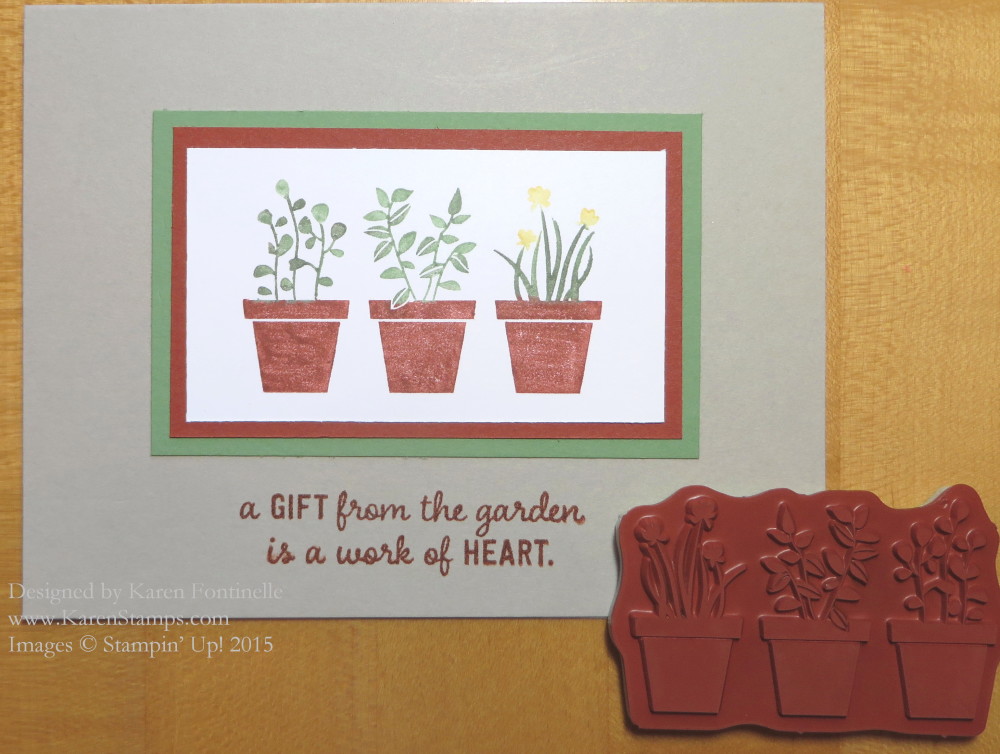
This is the first card I’ve made with the new stamp set Gift From the Garden. I saw a gift set of cards and things that Stampin’ Up! posted one day by a UK demonstrator and decided to get the stamp set. So cute! I haven’t started on the gift set yet but here’s my first card.  Very easy! Use the marker technique to color the flower pots and the plants separately, breathe on the stamp to remoisten and then stamp. I layered with matching colors, Cajun Craze and Wild Wasabi and adhered to the Sahara Sand card base. The greeting is stamped in Cajun Craze ink and comes in the set, of course.  I think the flower pot stamp is cute in itself so I placed it in the photo!
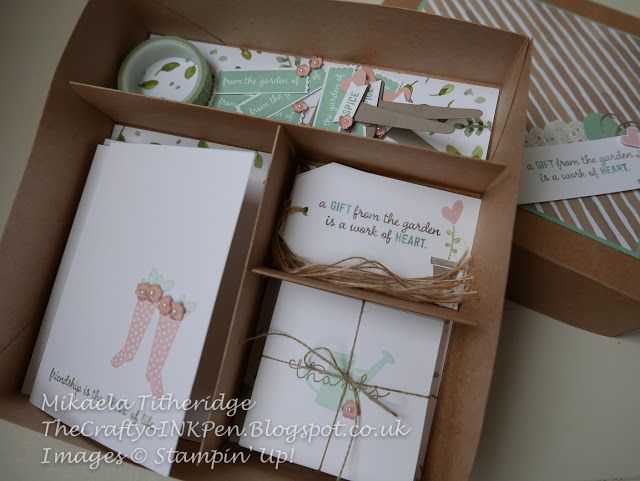
SU Gift From the Garden Gift Box

I love this cute gift set!  Maybe it is the colors! If you have a gardener in your life, maybe you need this Gift From the Garden stamp set!  Place your order today!

Shop Stampin’ Up! Online HERE!

Definitely Dahlia Thank You Card

Definitely Dahlia Thank You Card

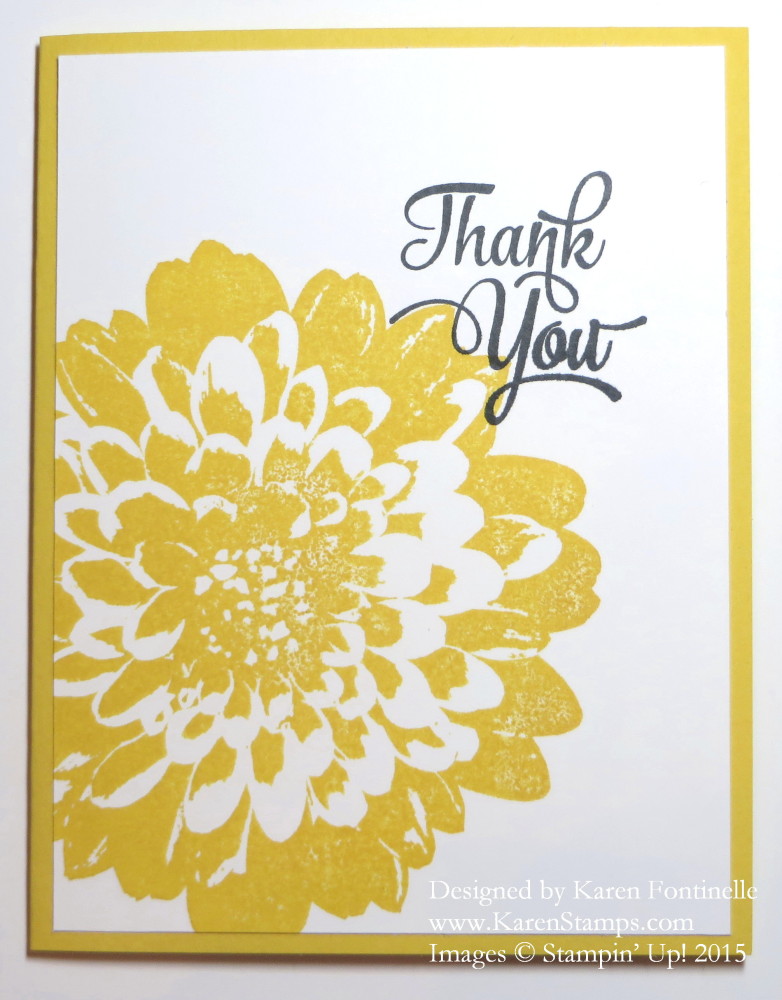
If you want to make a simple, easy handmade card, then try this Definitely Dahlia Thank You Card. Stamp the card, stamp the greeting, done and beautiful!  The beautiful Definitely Dahlia single stamp will do all the work for you! It is one big stamp, as you can see, and I am sure there are lots of possibilities for colors and creativity. Apparently dahlias come in lots of colors so there is lots of leeway in stamping your flower!

The Definitely Dahlia stamp comes in clear-mount or wood-mount.  My personal preference is wood-mount for large stamps like these and also background stamps. I like having that large stamp already mounted on the wood and I think it is sturdier for stamping a large area like that. Plus the stamp itself, this one, is decorative just as a stamp to set on your shelf!

The card base is Daffodil Delight card stock and the dahlia is stamped on Whisper White with Daffodil Delight ink.  The greeting is from the new stamp set One Big Meaning.  This stamp set contains all kinds of “Thank You’s” and we can all make use of those! The greeting is stamped with Memento Ink.

If you wanted to jazz up this simple card, you could certainly do that with ribbon, with a little bit of glitter and maybe the greeting on a banner or other die-cut shape. Stamp the dahlia on another paper and cut it out and make it a pop up on the card front with Stampin’ Dimensionals.  Lots of possibilities!

Shop Online at my Stampin’ Up! Online Store!

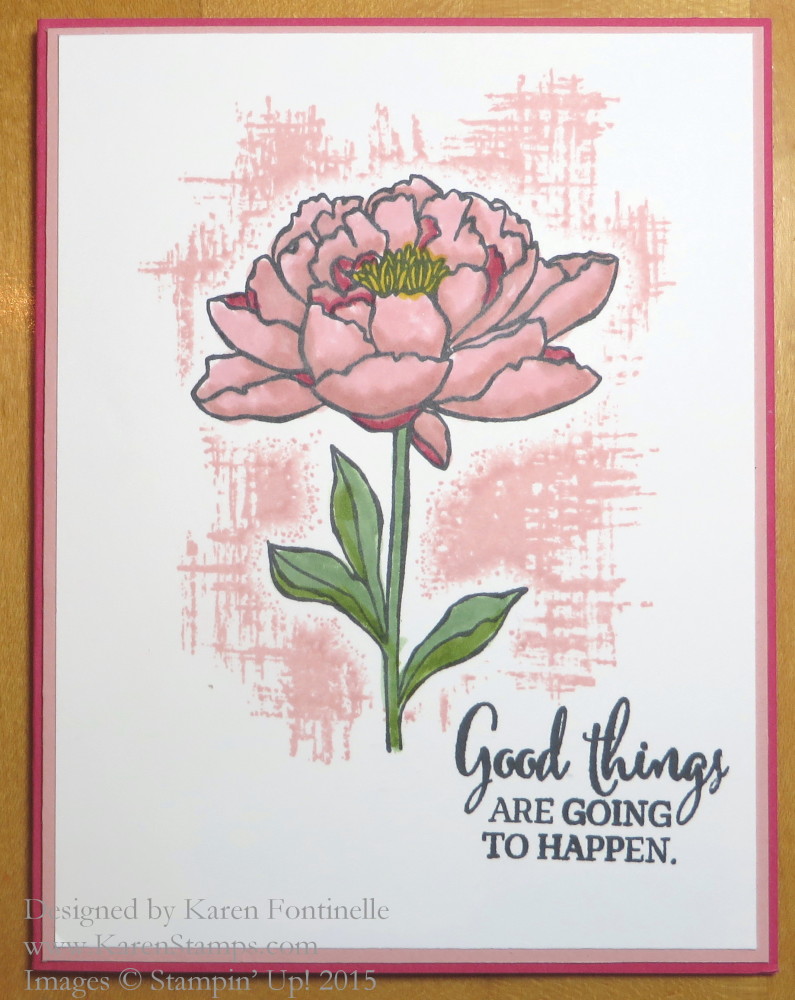
Coloring For Adults – “You’ve Got This” Flower Card

You've Got This Flower Card

In the Sunday paper, I read an article about how coloring for adults is really a craze right now. Apparently there are all kinds of coloring books for grown-ups out there. The author described coloring as “transporting” because she was just concentrating on the page and what she was doing, not her worries and problems. While that is nice, we stampers have known that for a long time! When we sit down and stamp a card or project or get together in a class with other stampers, life tends to take a backseat and we can relax and just enjoy the creative experience. We often call it stamping therapy or say that all our stamping supplies are “cheaper than therapy”! We don’t even need to spend money on coloring books for grown-ups because we can just stamp an outline image, such as this flower from the You’ve Got This Stamp Set, and be “transported” while we color away!

The only trick to this card is masking.  Stamp the flower on the Whisper White card stock with black Stazon or Memento Ink (I didn’t have any trouble with the Memento ink even though it is not waterproof like Stazon). Then stamp it again on computer paper and cut out with Paper Snips (believe me, they make “fussy cutting” so much easier than other scissors). This cut out flower becomes the “mask”.  Lay it over the stamped image (good to apply dots of 2-Way Glue and let dry so it will be like a post-it note to hold it in place) and then stamp that background right over the mask and the flower! The mask will protect the flower image from the background ink. Remove the mask and then color in! If you are still using your Blendabilities, this flower is perfect for them.  Otherwise, use the Stampin’ Write Markers, in different shades if you like. Use Watercolor Paper and you can really work the coloring without making the paper pill.
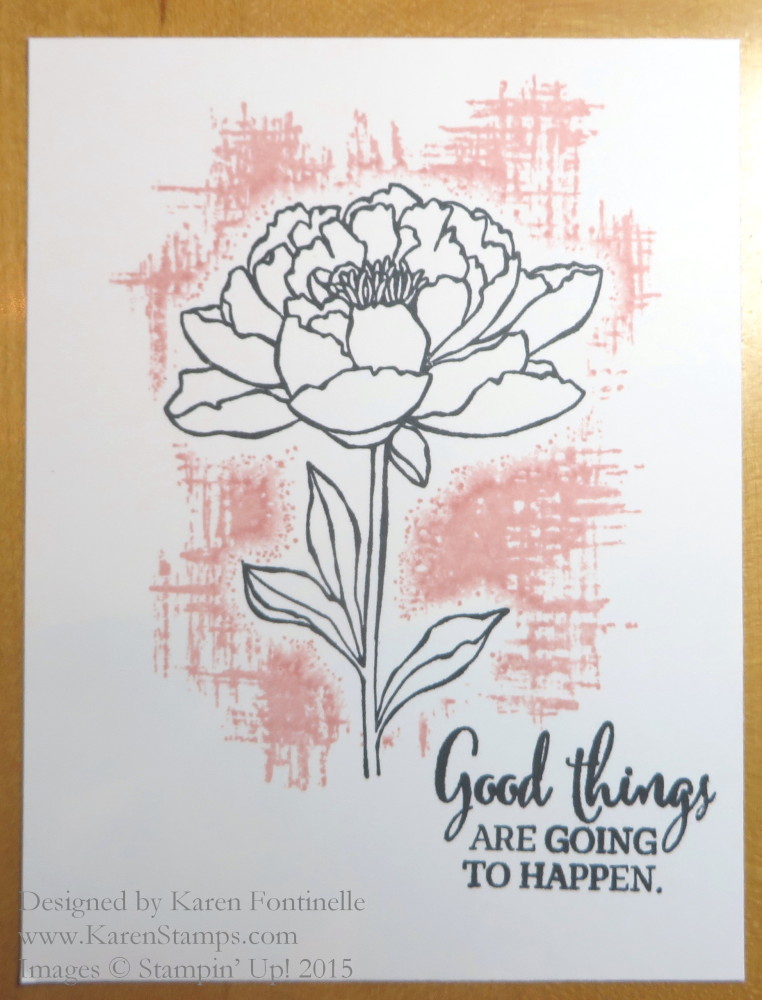
You've Got This Flower Card Unmasked

The card base on this sample is Melon Mambo, the layer Blushing Bride. To color in the flower I used Pink PIrouette as the lightest color, Blushing Bride and thought I was using Melon Mambo for a few dark accents but it turned out to be Rose Red!  All Stampin’ Write Markers. The flower stem colors are a couple of greens, Wild Wasabi and Old Olive. The background ink color is Blushing Bride.

If you prefer not to color in, stamp the flower image, then stamp right over it without a mask, with the background image and your flower will automatically be colored in! Looks great that way also!

So if you would like to join the adult coloring craze, just stamp the “You’ve Got This” flower and color! Use Stampin’ Write Markers or use Blender Pens or the Aqua Painter. You have all kinds of choices. Just relax and enjoy the process! In the end you’ll have a lovely work of art!

To get your stamp set and coloring mediums, just shop online at Stampin’ Up! Don’t forget to check the Weekly Deals, too!

 

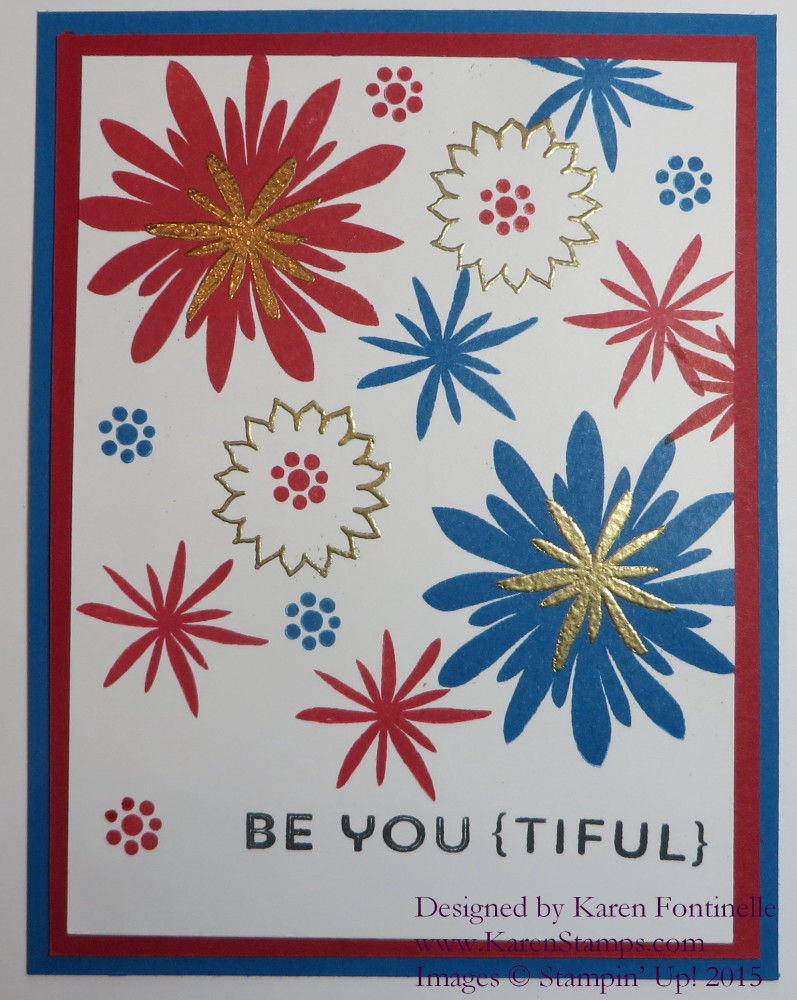
Flower Patch 4th of July Fireworks Card

Flower Patch 4th of July Fireworks Card

Would you believe this Flower Patch 4th of July Fireworks card is made from flower images? If you look at the Flower Patch Photopolymer Stamp Set, you will find some flower images that can be made to look like bursts of fireworks! All of these stamped images on this card are made from the Flower Patch Stamp Set and then embellished with some heat embossing.  You could also use glitter or rhinestones! If you purchase the Flower Patch Photopolymer Bundle, you will also get the Flower Fair Framelits Dies at a 15% savings on the Bundle!

To make these flowers look more like fireworks, I stamped the flower centers with Versamark Ink and used the Heat Tool and  Gold Stampin’ Emboss Powder.  Embossing is so much fun! You could also use the 2-Way Glue Pen and Dazzling Diamonds Glitter or stick on some Rhinestone Jewels for some bling!

Look through your stamp sets and see what you could use to make a card, decoration, or treat for the 4th of July holiday! If you would like some of the supplies I used to make my Flower Patch 4th of July Fireworks card, you can order at my Stampin’ Up! Online Store HERE.