Author Archives: Karen Fontinelle

Candlelight Christmas Flocked Clear Strip Christmas Ornament

Candlelight Christmas Strip Ornament

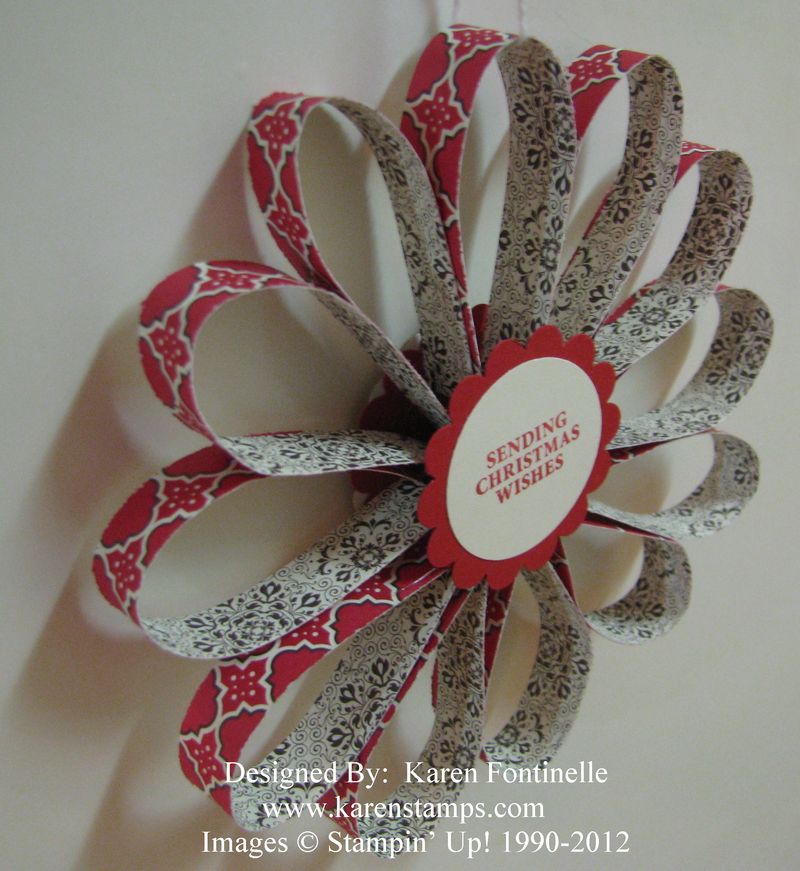
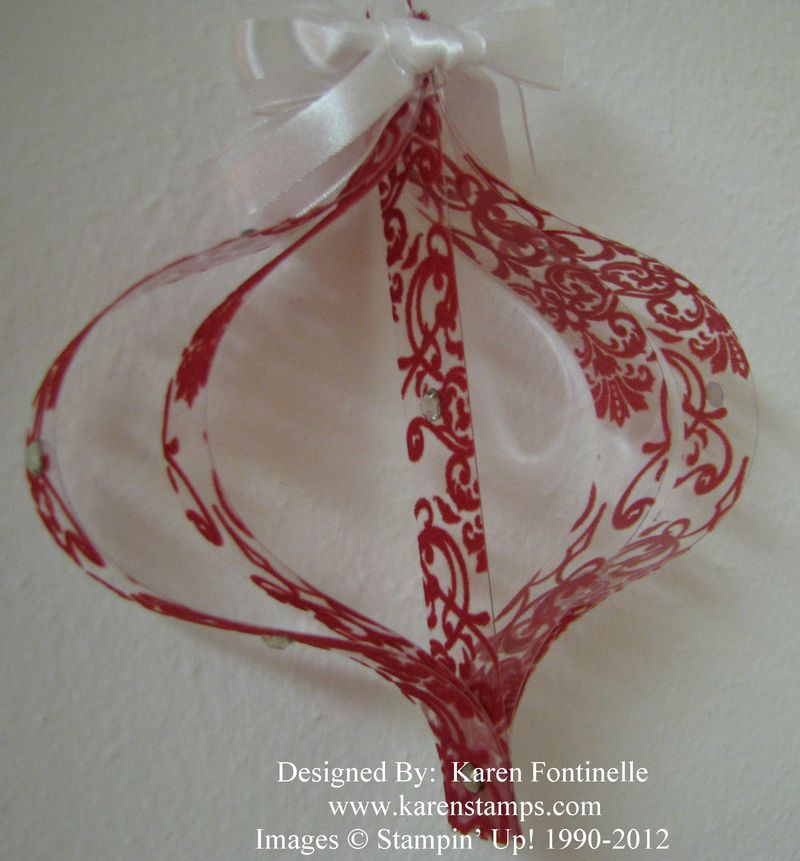
I had to play again with the design of the ornaments on the cover of our Stampin' Up! Demonstrator magazine called Stampin' Success. You can make these Christmas ornaments with just strips of paper! This time I decided I wanted a fancier one…I only intended to add some ribbon and maybe some rhinestones.  But once I pulled out the Candlelight Christmas Specialty Designer Series Paper, I noticed the beautiful flocked clear window sheet "paper"! I thought that would make something pretty! So here it is!

Once I made the ornament, I attached a bow at the top with some mini glue dots and added just a few Rhinestone Jewels here and there.
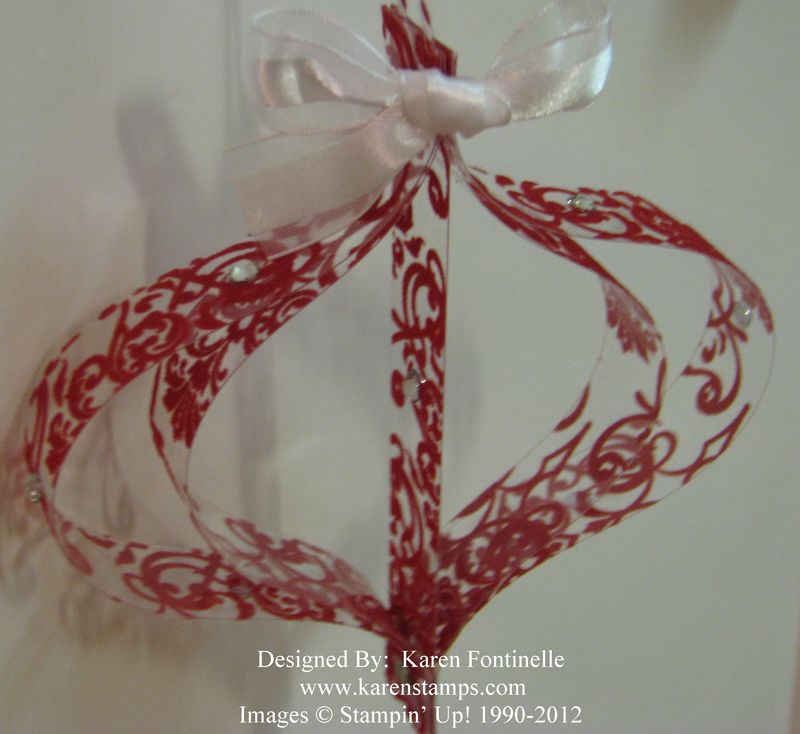
Candlelight Christmas Paper Strip Ornament

My strips this time were 4 3/4" for the center one, two strips 6" each and 2 strips 7 1/4".  I think you just need to play with the lengths of the strips to get the size of ornament that you want. These strips are only 1/2" wide. You can read my directions for how I put the ornament together on my post the other day here. I think you can see in this photo above that I put rhinestones near the top, middle and bottom of the outside strips and one on each side of the center strip. I used Baker's Twine for the hanging thread.  Just feed it in through the center of the ornament and pull tightly for it to come up to the top in between the strips.

I might not be done yet!  I think the next one I will try will have another set or two of strips!

If you want a pack of the Candlelight Christmas Specialty Designer Series Paper, you know where to go!  While you are there, check out the Merry Christmas special which includes the Candlelight Christmas paper, and also the Clearance Rack! New items were just added on Friday!  Although some products sold out the first day, there still are great bargains to be had, so don't miss out!
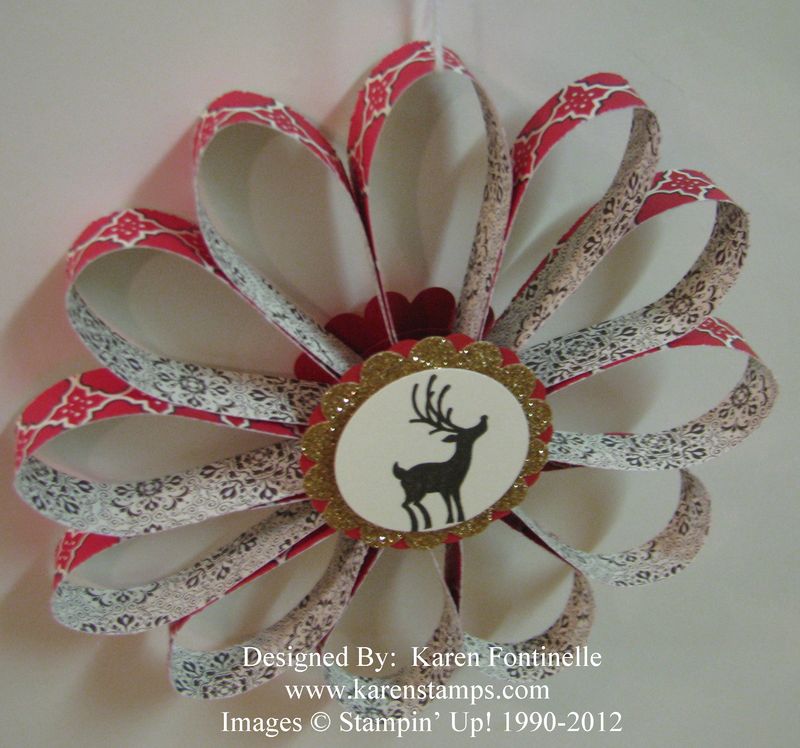
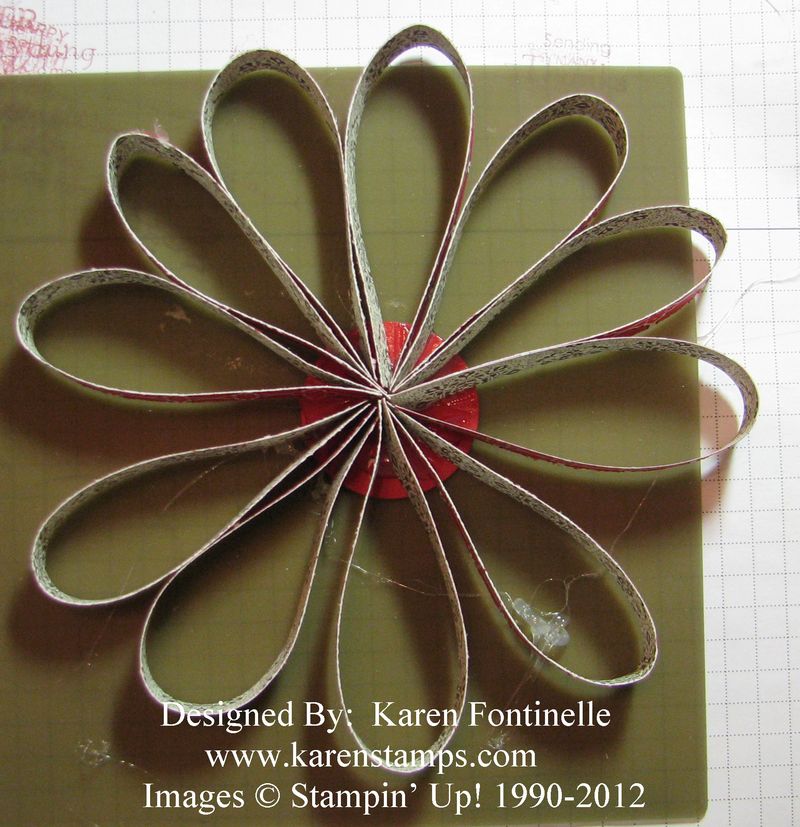
Candlelight Christmas Paper Strip Christmas Ornament

Paper Strip Christmas Ornament
I'm playing with some more paper strips to make a Christmas ornament again, this time using the Candlelight Christmas Specialty Designer Series Paper. I cut twelve strips, each 1/2" wide and 6" long. I punched a  circle with the 1 3/8" Circle Punch on which to glue the strips.
Paper Strip Christmas Ornament inside
Yes, I have hot glue all over the place!  Thank goodness for the Silicone Craft Sheet! There should be twelve strips glued in there but one got lost….when I found it I was able to stick it in the slightly empty space with some Tombow Multi Glue. I used more hot glue to add scallops and circle punches to decorate the outside.
Paper Strip Christmas Ornament Back
The little reindeer and the greeting are from the Joyous Celebrations stamp set. I love the Champagne Glimmer Paper scallop behind the reindeer on the front of the ornament.
Time is getting closer and closer to start thinking about making some things for Christmas! If you need any supplies for crafting, you will find what you need at my Stampin' Up! Online Store!  Be sure to check the Stampin' Up! Clearance Rack for some great bargains!  New items just added yesterday!

Make Your Own Halloween Ornament with Paper Strips

Paper Strip Halloween Ornament

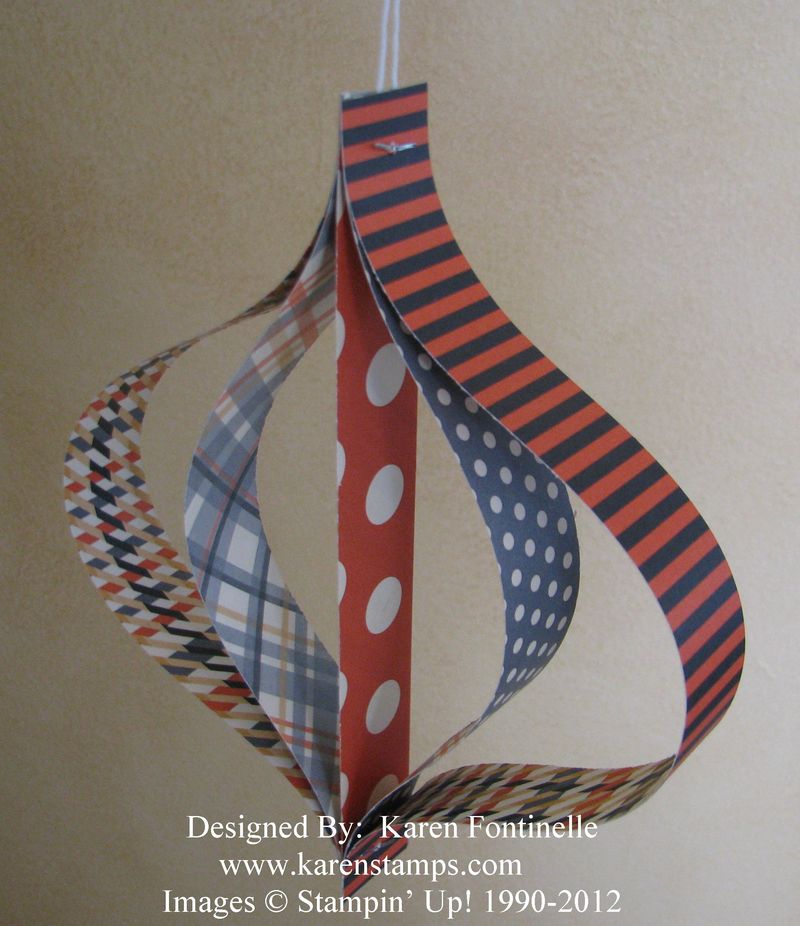
As Stampin' Up! Demonstrators, we receive a magazine that we all love filled with creative ideas, business tips, and the latest Stampin' Up! news.  On the cover of the latest issue are pictures of ornaments like these, except for winter or Christmas. I decided to try making a paper ornament for Halloween with the Howlstooth & Scaringbone Designer Series Paper. These would be so fun to make for Halloween decorations for a party!

Stampin' Up! didn't provide any specific instructions that I found, but I found some examples online! This particular one is made with five strips of paper.  Basically you need two "long" strips, two "shorter" strips, and one "even shorter"!

This is what I used:

Strips are cut 1" wide.

2 strips 10" long, 2 strips 8" long, and 1 strip 6 3/4" long.

Arrange the strips in a "sandwich", paying attention to how you want the sides of your paper to show:  shortest strip in the middle, next longest on each side of the shortest strip, and the longest strips on the outside. So for my ornament, I have the strips stacked 10" – 8" – 6 3/4" – 8" – 10" and make them all flush at one end (they'll be uneven at the opposite end of the pile). Using my paper-piercing tool I poked a hole and inserted a brad. Then I lined up the bottom of the strips, which shapes the ornament and inserted a brad to hold it.  That's it!  Tie a string or ribbon through the top and you've got it!  Experiment with sizes and you can have ornaments of all sizes! I think I would make the next one a little narrower and shorter strips.

Try one with your paper scraps!  Bet you can't make just one!!

When you want to order MORE paper, just go to my Stampin' Up! Online Store….but be sure to check the Clearance Rack because Stampin' Up! added over 70 new products today…some might be gone, so check as soon as you can!  Clearance Rack orders must be made online only because of the availability of the items.

Ornament Keepsakes Paper Christmas Ornament

Stampin' Up! Holiday Catalog Cover Ornament

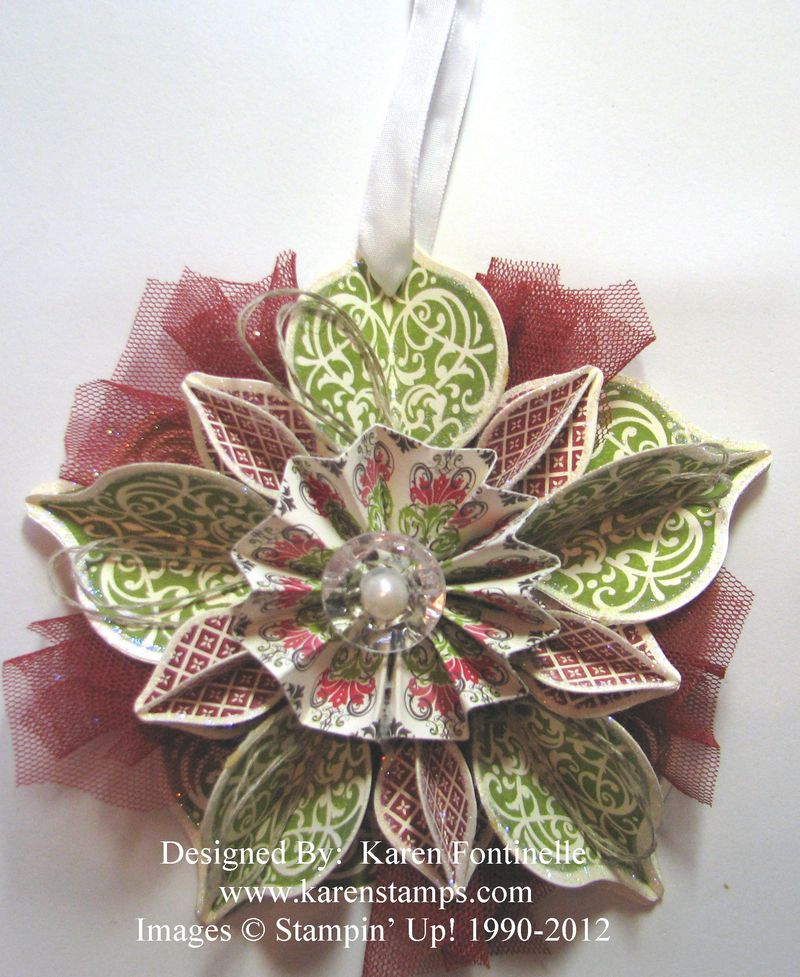
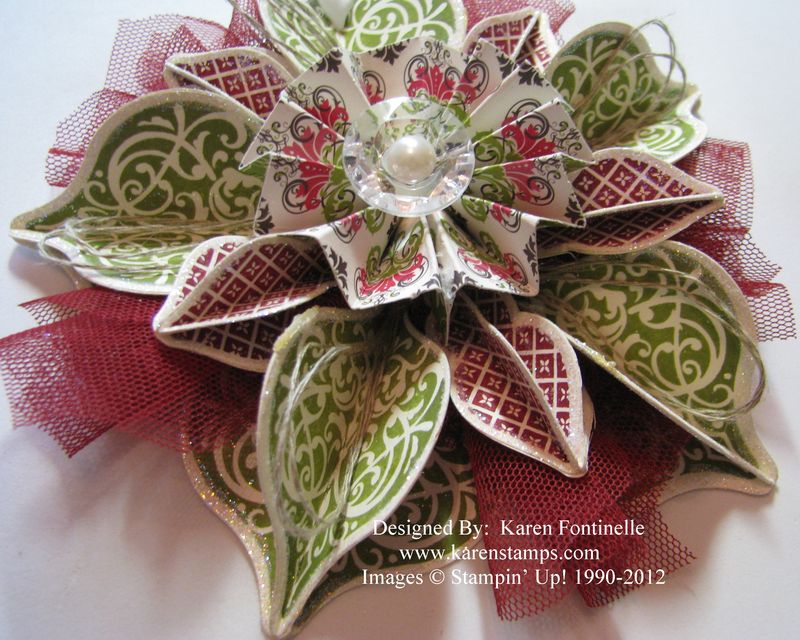
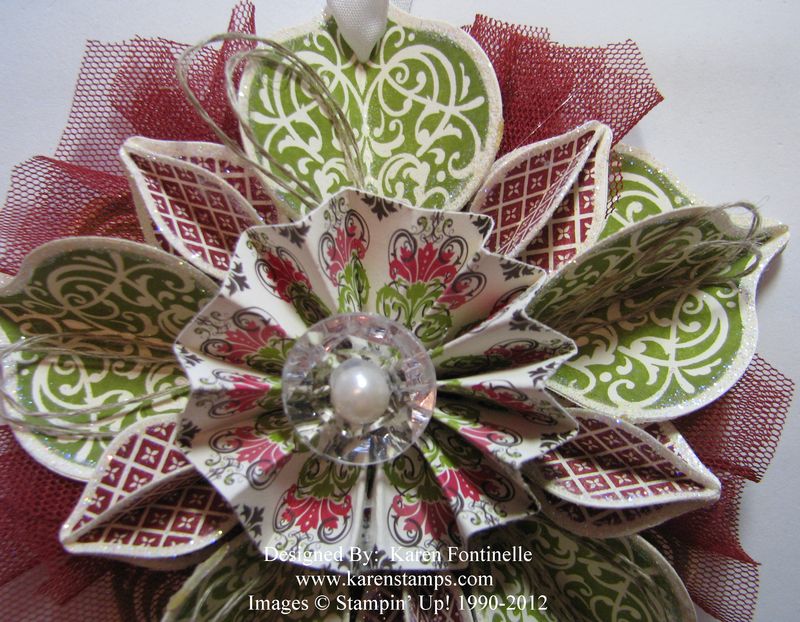
I know you have seen this ornament before…it's on the cover of the Stampin' Up! Holiday Catalog and a lot of people have been making them! I finally stopped the world and made the hanging ornament myself! It really is beautiful in person and the Dazzling Diamonds Glitter around the edges of each little ornament really makes it look fantastic.  This is made with the Ornament Keepsakes stamp set and the Holiday Ornaments Framelits Dies. The only difficult part is cutting out your stamped images of the ornaments with the Framelits as it just takes awhile to do twenty of each!  But once you have that part done (you can also just cut out designer paper, not stamped images) the rest is fairly easy to assemble and glue. Mine has Linen Thread loops in each of the large ornaments, but I think something more sparkly would be better. The Scalloped Tulle Ribbon was fun to work with and insert and twist between some of the ornaments. The rosette in the center is made with the Candlelight Christmas Specialty Designer Series Paper.  Then a Vintage Faceted Designer Button is hot-glued into the center of the rosette with a Large Pearl Basic Jewel adhered to the center of the button.

I hope you will take some time to make something special for Christmas, just because! Just to relax and enjoy the creative side of yourself! Sometimes we all have to do that!

If you need any stamping or scrapbooking supplies, please visit my Stampin' Up! Online Store or email with your order. Don't forget to check the Merry Christmas October Promotion by Stampin' Up! which is only good until the end of October….which is sure sneaking up on all of us!

Ornament Keepsakes Christmas Ornament

Ornament Keepsakes Christmas Ornament Front

Have fun making your ornament!  You'll be glad you did!

Ornament Keepsakes Paper-Pierced Christmas Card

Ornament Keepsakes Paper Piercing Card
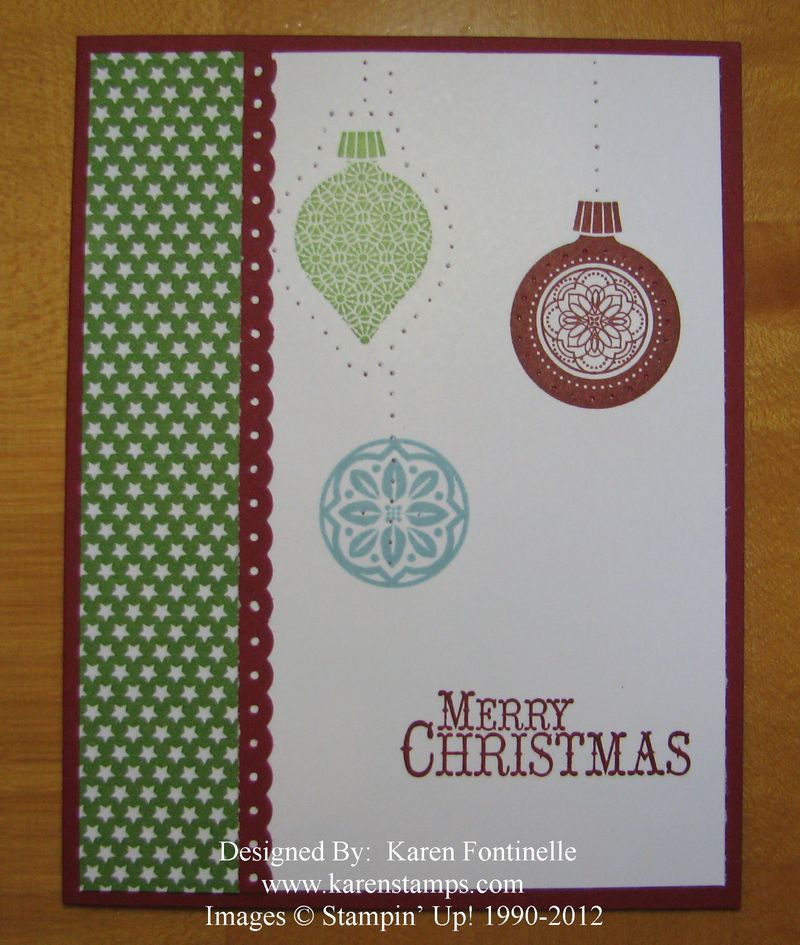
Stampin’ Up! gives us so many options for designing our handmade Christmas cards and other projects. One of the big trends right now is paper-piercing. If you look closely at my card, stamped with the Ornament Keepsakes stamp set, you can see three different styles of paper-piercing.  On the Gumball Green ornament, I went around the outside. On the Cherry Cobbler ornament I made a circle inside the ornament, and on the Baja Breeze ornament the piercing is on the center design. Then I free-handed piercing for the ornament strings up to the top of the card.
The Paper Piercing Tool is very handy to have!
Feel free to email me with any questions at Karen@KarenStamps.com.

Christmas Porcelain Ornaments….A Blast from the Past!

Christmas Porcelain Ornaments

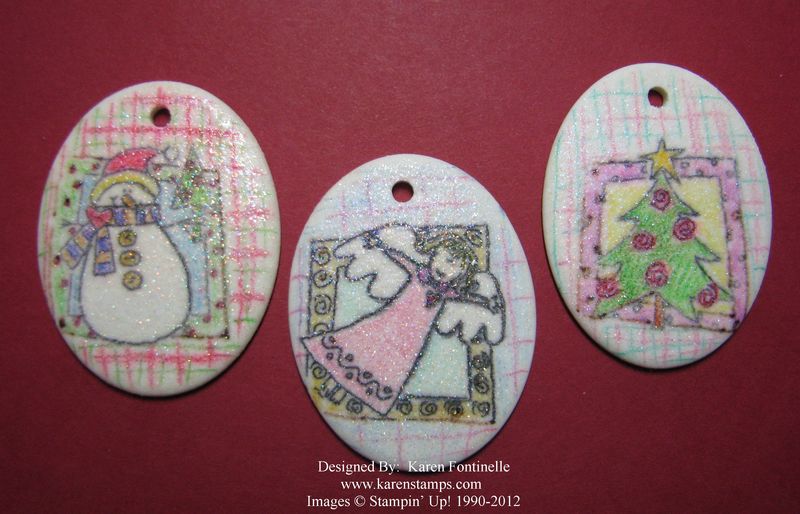
Anybody remember these Christmas porcelain ornaments Stampin' Up! used to sell? I'm thinking it was back in the beginning days of my association with Stampin' Up! And that's now been over ten years ago if you count from the time I first heard about Stampin' Up! from my friend I was visiting. If you've been around Stampin' Up! that long, I'm sure you will recognize the stamp set, too!

As I was cleaning out my craft closet recently, I knew I was going to find a bag of plain porcelain ornaments….but I didn't remember that I had already stamped them! What a nice surprise to find something stashed that was actually used, so now I am happy to bring them out of the darkness and hang them on the tree this year! They would also make a cute Christmas tag on a package! Just remember that a handmade Christmas ornament can be very special.

I believe these were stamped with Stazon and then colored in with markers. For the sparkly finish they probably were stamped with VersaMark ink and embossed with Iridescent Ice Embossing Powder #101930.

Find something in your stash that you've been putting off or forgot you even had and make something with it today! You might find some Christmas gift ideas that you didn't know you had!

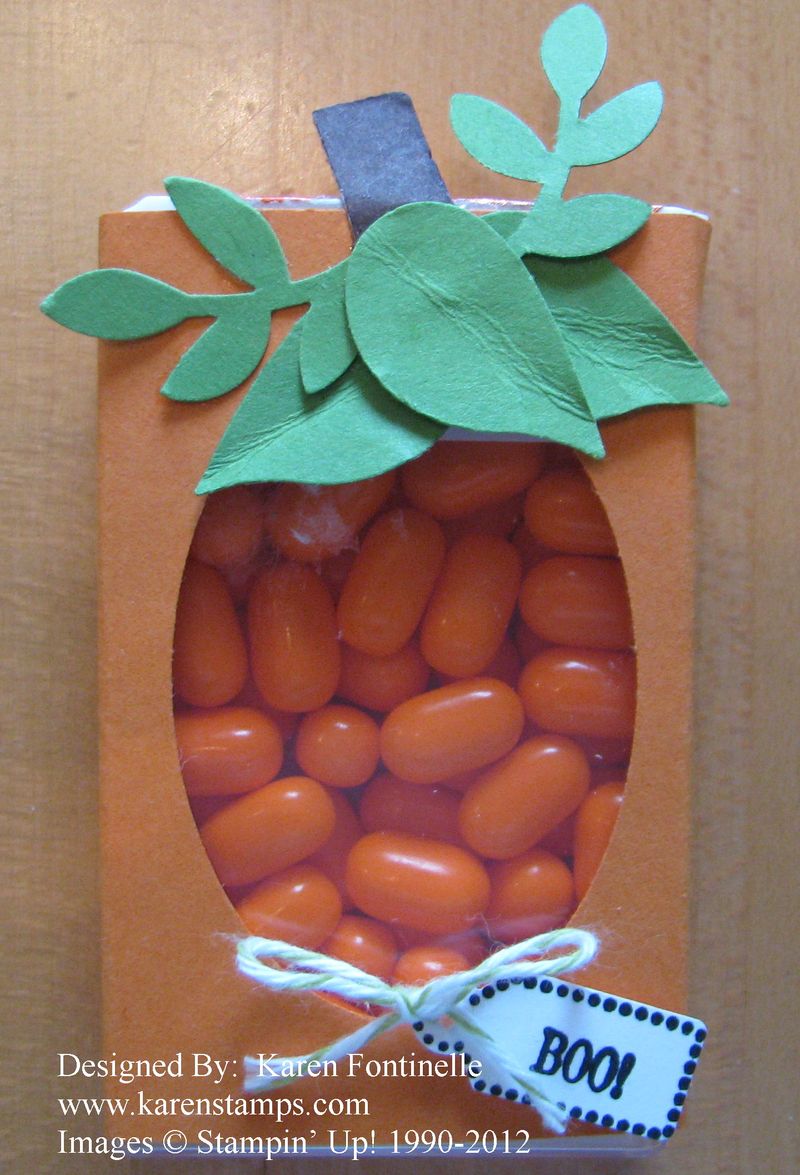
A Tic Tac Pumpkin for Halloween

Tic Tac Pumpkin Folds

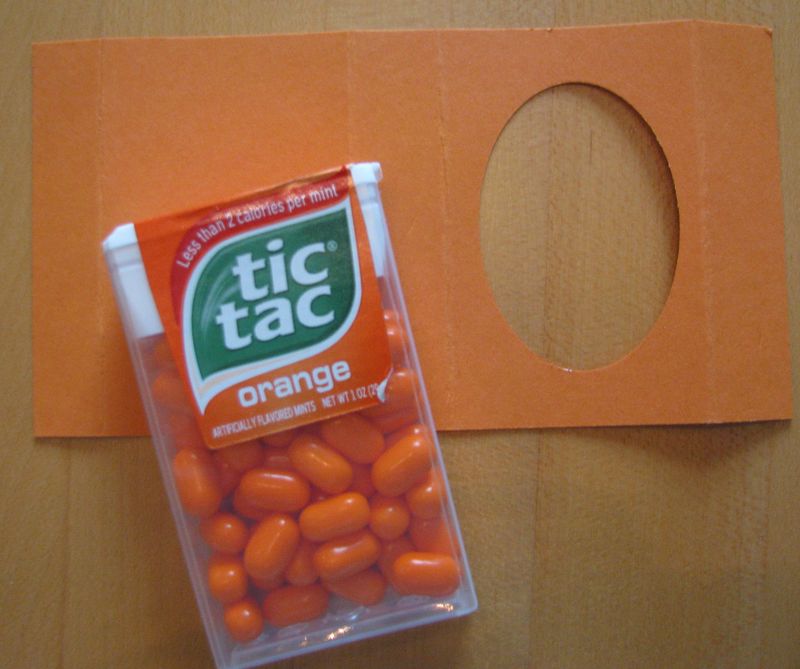
I've seen a lot of different characters online made by various stampers using Tic Tac boxes. When you wrap some paper around the Tic Tacs and punch a hold in order to see through to the Tic Tacs, you can make a cute Santa, snowman, jack-o-lantern, elf, etc. Some have used the Two Tags Die and tied it with ribbon on the side, some have used the Top Note Die, and some have just wrapped a piece of card stock around the Tic Tac box.

In this project, I used a piece of Pumpkin Pie card stock cut at 5 1/4 x 2 3/4" (I assume all Tic Tac boxes are the same size, but I'm not sure). Either you can just wrap the strip around the Tic Tac box tightly, sort of scoring the edges with your fingers as you fold, or you can score at 5/8", 2 3/8", 3" and 4 3/4". The fun part is punching out a shape on the front so you can see through to the Tic Tacs inside.  You will need to tear off the label or it might show in your punched hole. For this pumpkin, I used the Extra-Large Oval Punch #119859 but you could use a small circle punch. Figure out which panel is going to be the front, and center the punch as best you can.  You could also punch a Post-it Note, stick it where you want your shape to be punched on your project, and then punch.

Tic Tac Pumpkin for Halloween

Then to make my box look like a pumpkin, I punched some leaves and branches with the Bird Builder Punch #117191 and cut a little scrap of brown for the pumpkin stem. You could also add scraps of black to make a jack-o-lantern face if you wanted to. You could also add a piece of window sheet inside the card stock and glue a face on that…or just stick on the Tic Tac box.  Then for some embellishment, I added a "Boo" from the Tiny Tags stamp set and punched out with the Jewelry Tag punch #117190. Finally, I tied on a little piece of Lucky Limeade Baker's Twine to the little tag.

This is an easy project and fun to do!  Use your imagination and come up with something to coordinate with the color of Tic Tacs you have!

For any card stock and punches, just shop at my Online Store! Don't forget the Merry Christmas promotion if you are interested in the Ornament Keepsakes Bundle.

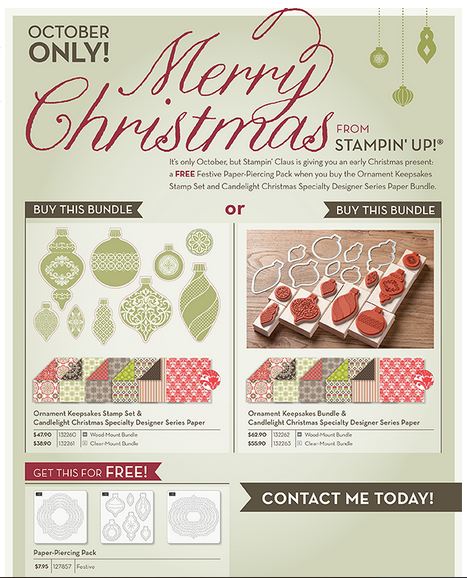
Stampin’ Up! October Promotion–Free Festive Paper-Piercing Pack

Festive Paper-Piercing Pack October Promotion

Don't forget about the Stampin' Up! October Promotion! Purchase a combination of Christmas products and get a FREE Festive Paper-Piercing Pack. Paper-piercing will enhance your stamping projects and is a trendy technique to use these days!

You have a couple of choices for receiving your free Festive Paper-Piercing Pack:

  • Purchase the Ornament Keepsakes Stamp Set (in wood- or clear-mount) AND the Candlelight Christmas Specialty Designer Series Paper and get the Festive Paper-Piercing Pack FREE.
  • Purchase the Ornament Keepsakes BUNDLE and Candlelight Christmas Specialty Designer Series Paper and receive the Festive Paper-Piercing Pack FREE. The Bundle includes the stamp set,the designer paper AND the Holiday Ornaments Framelits Dies. Check out the Bundles in the Holiday Catalog just inside the front cover and throughout the catalog.

Be sure to use the special order numbers in the flyer above (click on it to enlarge) to receive the special offer.  You can order online at my Stampin' Up! Online Store here or just email me and I will put your order in for you.

This is a beautiful stamp set and beautiful designer series paper (one design is like a clear window sheet with flocking!) so it is well worth taking advantage of this special offer. The Bundle that includes the framelits dies makes cutting out those stamped ornaments, or just the ornament shape from designer paper, so easy…and the bundle is a savings in itself! Please check it out and get your order in before Halloween night!!

This early Christmas Gift with Purchase to you from Stampin' Up! is only good during October!


Tips for Taking Great Halloween Photos!

Today I read an interesting blog article written by Suzanne Kantra about taking great Halloween photos . I admit most of these tips are over and above my point-and-shoot photography skills, but you might be more capable when it comes to cameras! And they're not all advanced tips, so I think we can all benefit.

This article talks about how to get those after dark shots on Halloween night, including how to capture a few ghosts in your photo! She has tips for eliminating blurry shots in the dark and how to get some good shots right at dusk. Maybe you will even want to capture some ghost writing!

To read the full article, you will find it here. I hope this gives you good ideas for Halloween photos!

Plan ahead for your Halloween photos and create some scrapbook pages, traditional or digital, so you can just place those photos right in their places the day after Halloween! If you need some Halloween ideas for scrapbooking, please contact me.

Full-Moon-With-Tree

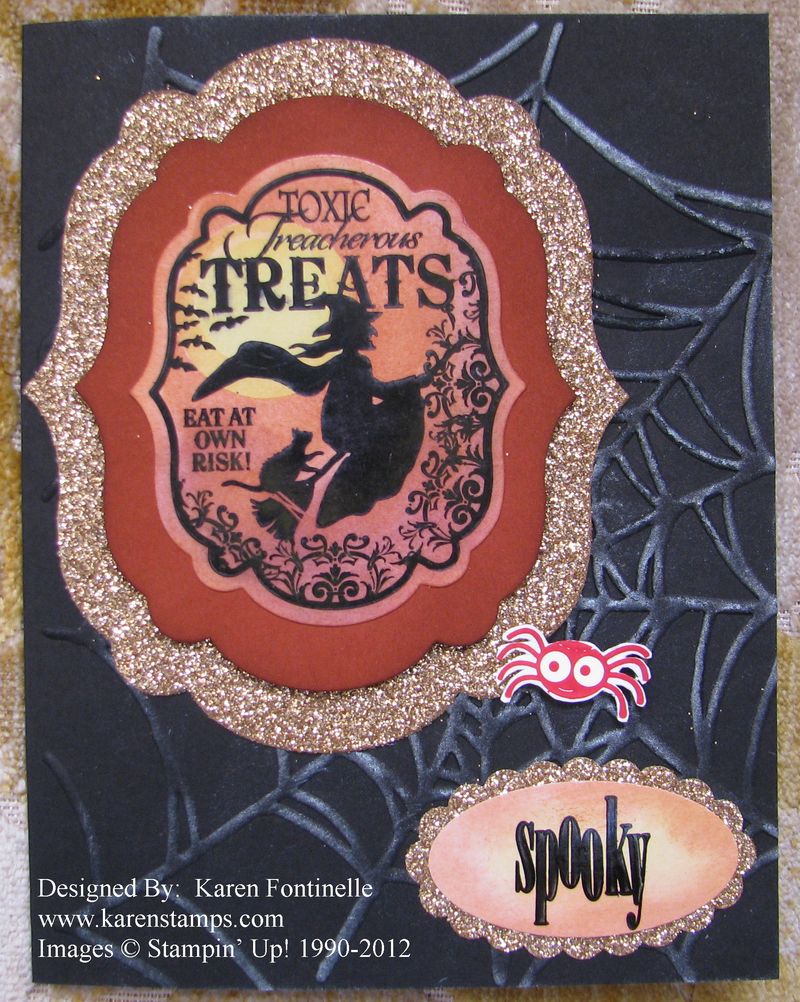
Toxic Treats Halloween Card with Champagne Glimmer Paper

 Toxic Treat Halloween Card with Champagne Glimmer Paper

It was fun to play around with the Toxic Treats stamp set and the Champagne Glimmer Paper….and all the other elements on this card!  First I used the Spider Web Embossing Folder for the front of the card and then lightly rubbed the new Illuminate Glimmer Watermark Stampin' Pad over the web to give it some shimmer.

I stamped the witch image on Glossy White Card Stock and then sponged the Daffodil Delight moon in the background using a Post-it Note for a stencil.  Then I covered the moon with the punched out circle from the Post-it Note to mask it while I sponged some More Mustard ink around the moon…and then around the rest of it I sponged Cajun Craze. I also used the Labels Collection Framelits to cut out the Toxic Treats image, the Cajun Craze layer and the Champagne Glimmer Paper.  LOVE the glimmer paper!!!  I HAD to put a little spider in the web, although I'm not sure he matches…but oh well, it's Halloween!

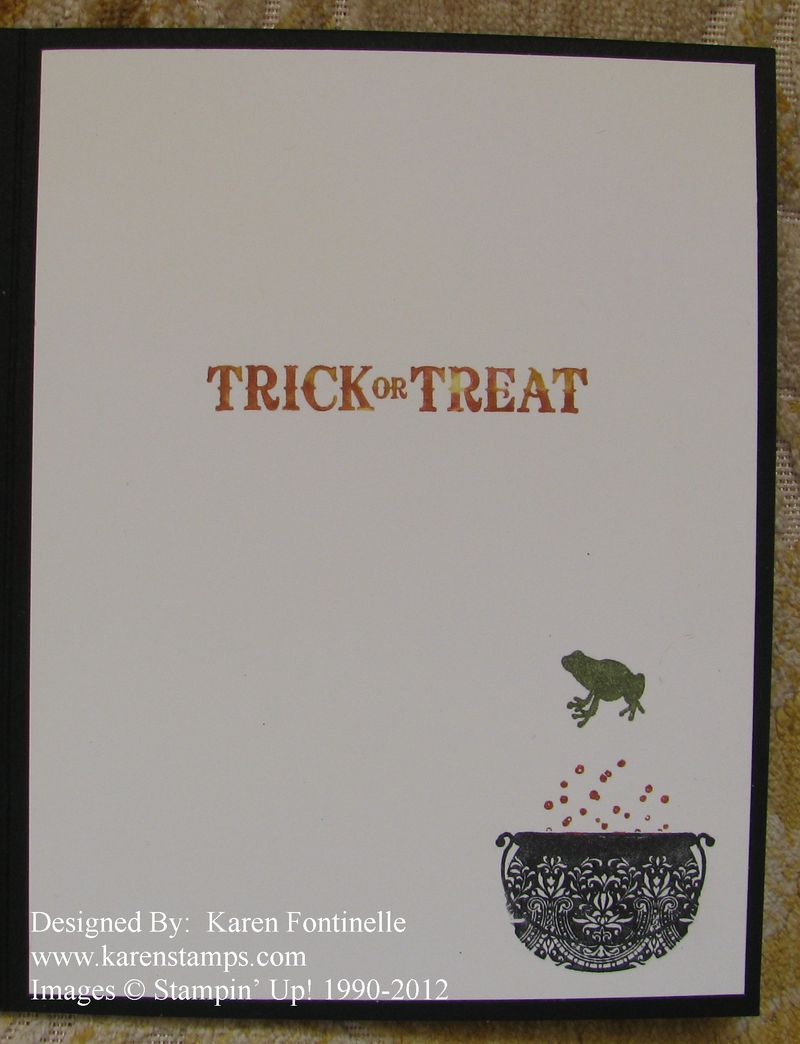
Oops, almost forgot to show you the inside of the card, since the card base is black. I just added a layer of Whisper White card stock that I stamped with some images from Toxic Treats stamp set.

  Toxic Treat Halloween Card with Champagne Glimmer Paper _Inside

I hope you will make some fun Halloween cards or projects for your family and friends or maybe neighbors.  It is 90 degrees here today in Houston so anything I can do to make me think it is actually fall here makes me happy!

If you need any Halloween stamping supplies you can find plenty in the Stampin' Up! Holiday Catalog AND the Stampin' Up! Annual Catalog!  Find everything you need in my Stampin' Up! Online Store!

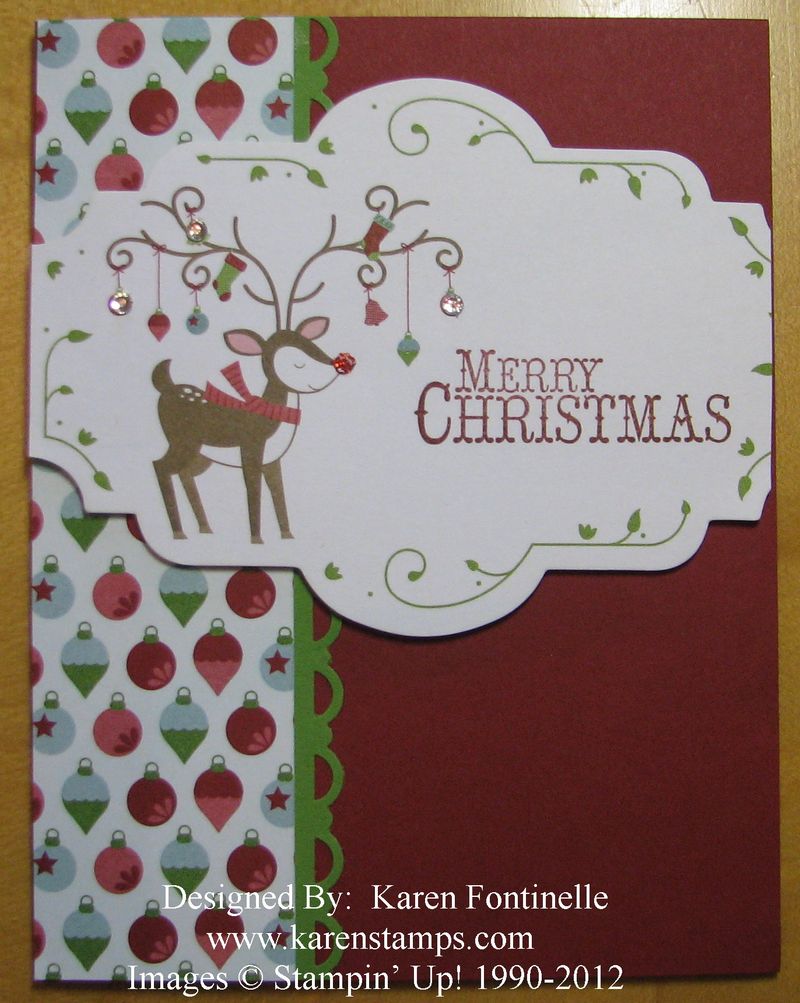
Snow Festival Designer Tag Reindeer Christmas Card

Snow Festival Designer Tag Reindeer Christmas Card
These Snow Festival Designer Printed Tags are so cute and easy to add to Christmas cards!  This card took just minutes to make. I used Cherry Cobbler for the card base, punched a strip of Gumball Green card stock with the Scallop Trim Border Punch, and used a strip of the Snow Festival Designer Series Paper.  And for a little extra razzle-dazzle, I added some Rhinestone Jewels to the ornaments on the reindeer antlers, plus a little dot of Dazzling Details on his red nose!
Order yourself a pack or two of these Snow Festival Designer Printed Tags! You'll be glad you did!
Shop at my Stampin' Up! Online Store or email me!

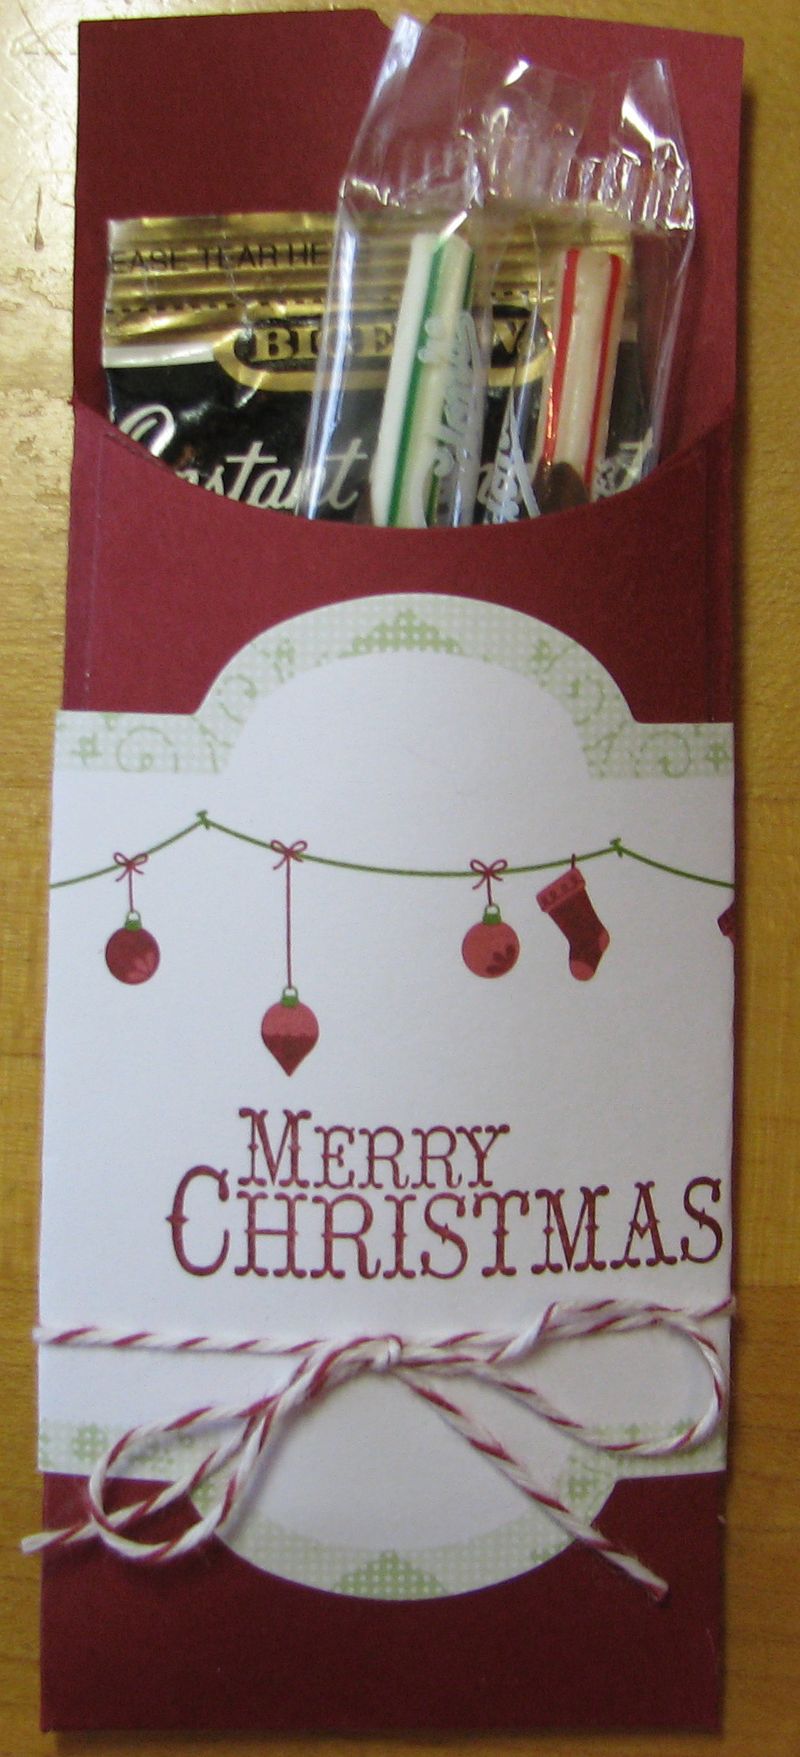
Petite Pocket Die Pouch with Snow Festival Designer Printed Tag

Pocket Die with Snow Festival Tag

You will find the Snow Festival Designer Printed Tags in the Stampin' Up! Holiday Catalog on page 17, and look how you can pair one with the Petite Pocket Die and make a cute little gift! Honestly, I passed these up when I saw them in the Holiday Catalog because I didn't know why I would want to buy tags for packages from Stampin' Up! Well, of course they were cute, but when I wanted so many other things, why would I spend money on these? But since then, I have seen so many cute ideas for using these for more than tags, that I ordered two packages of them!

The Snow Festival Designer Printed Tags come in a little pad so you just tear off the one you want to use. Each of the 25 tags is double-sided with five different holiday designs on each side, so that makes ten different designs to use in your projects!

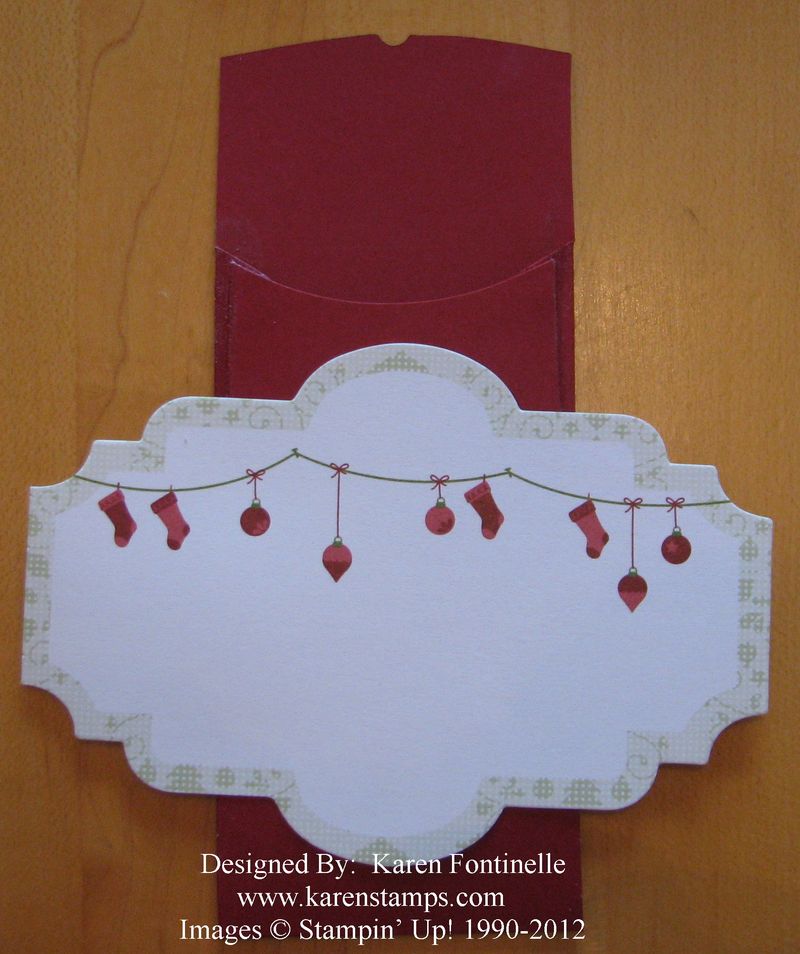
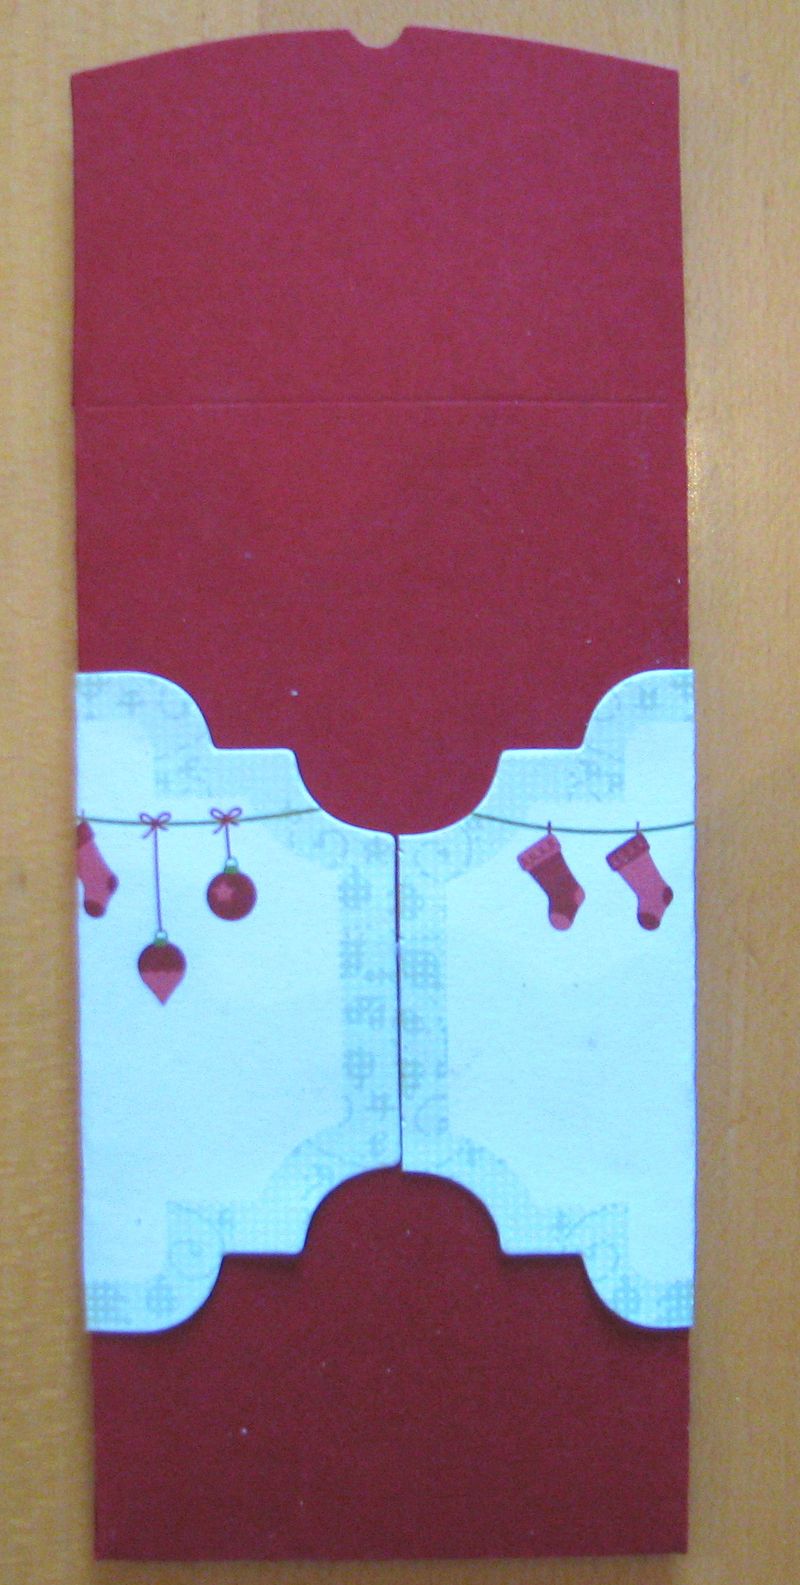
Here is one cute project…..it was in the magazine that Stampin' Up! Demonstrators receive with craft ideas, business tips and news. Just use the Petite Pocket Die cut out with the Big Shot and adhere the sides to make the pouch. Then take a tag of your choice and adhere just the center on the front of the pouch.

Pocket Die Snow Festival Tag

Wrap the sides around to the back and adhere. Stamp a greeting or embellish with some ribbon.  I used Baker's Twine and stamped the greeting from Chock-Full of Cheer (best to stamp the greeting before you attach the tag!)

Pocket Die Snow Festival Tag Back

If you want to add on these Snow Festival Designer Printed Tags to your order, just go to my Stampin' Up! Online Store and shop!  It's not too early to get started on your Christmas projects!

And if you want to see a creative Christmas idea every week, be sure you are on my newsletter mailing list!  My next "12 Weeks of Christmas" newsletter comes out tomorrow!!  Don't miss another one! Sign up at the top of my blog today!


Columbus Day on My Digital Studio

My Digital Studio Columbus Day

Images © Stampin’ Up! 2012

Happy Columbus Day!  Here’s my crude little version of one of Columbus’s ships, the Santa Maria, in honor of Columbus Day!  I made it all in My Digital Studio, with no plan, no copying, just playing!! I just used punches to make the ship and the waves, even tried the new crop feature in MDS 2! I love all the new features in Version 2 of My Digital Studio! If you either own My Digital Studio or want to learn a little bit about it, you can visit www.mydigitalstudio.net.  It’s is a Stampin’ Up! site for My Digital Studio for customers and demonstrators. It’s actually a Ning site that you can join, but you might be able to just look it over without joining. There are places to ask questions and tons of videos from Stampin’ Up! as well as other demonstrators on how to use all the features in this digital papercrafting software.

Once you check it out, go get the My Digital Studio Free 30-Day Trial and play with it! If you’ve never done digital, yes, it will take a bit to get used to (i went crazy at first not having paper and stamps in my hands to move around and try out!) but it is not hard to learn! I learned it from no experience!  The more you use it, the faster you will become proficient….you only need practice, not great computer or digital designing skills!

Give it a try today! Just go to my Stampin’ Up! store  and you’ll be able to download the free trial in minutes!

World Card Making Day! Make a Card! How About Spooky Bingo Bits Halloween Card?

Spooky Bingo Bits Halloween Card
Images copyright Stampin' Up! 2012
Today is World Card Making Day, so get in on the fun!  Join cardmakers and papercrafters and stampers all over the world and make a card! Here is one I made in My Digital Studio, the design software from Stampin' Up! for digital papercrafting of all kinds! If you don't own My Digital Studio, you can easily make this same card with some paper, some punches and the stamp set Spooky Bingo Bits! You can get Spooky Bingo Bits in clear-mount or wood-mount. Or you can purchase Spooky Bingo Bits as a digital download to use in My Digital Studio or another design program.
You can purchase My Digital Studio two ways….just get MDS 2 (the new version 2) for $39.95 which is software you can download immediately with a little bit of content and add to it as you like.  Or, purchase MDS 2+ which is the software plus over $500 in digital content for $79.95.  Honestly, this is the best deal….you get SO much content to use for that extra $40.
If you don't even know what I am talking about….digital papercrafting?  digital downloads?  My Digital Studio?? ….. (because I didn't in the beginning!!!), then do the trial version!  Yes, you can try My Digital Studio, the full software plus enough content to play with, for free for 30 days! You can download the free 30-day trial of My Digital Studio.  While you are using the trial version, you can make your projects, print them yourself or send them off to the Stampin' Up! printer.
Whether you make a traditional card, a digital card, or even a hybrid card (digital plus traditional paper additions), stop and make a card today with all the cardmakers around the world on World Card Making Day!

World Card Making Day Tomorrow, October 6, 2012

Gently Falling Birthday Card

Tomorrow, October 6, 2012 is World Card Making Day! Plan now to stop everything and sit down and make a card (or two or three!) tomorrow.  If you make two, you can keep your masterpiece and still have one to send to someone! Just think how thrilled someone would be to actually receive a REAL card in the mail from you! Or take advantage of the day to start on your Christmas cards!  Plan a design today and then you'll be ready to go tomorrow for World Card Making Day!

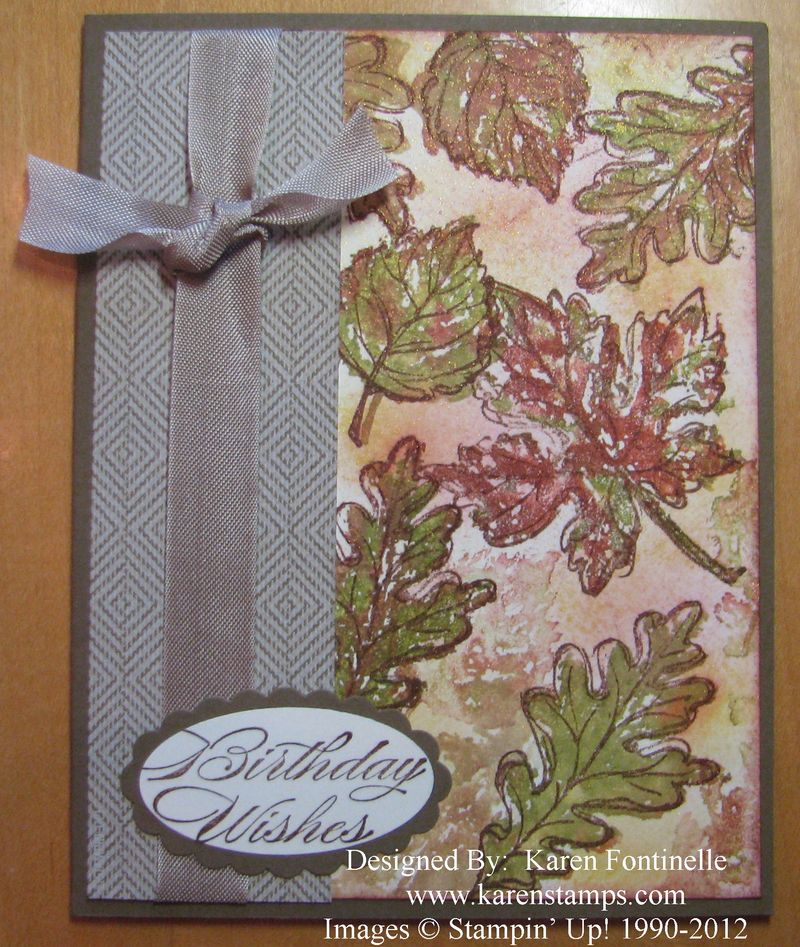
This card looks beautiful in person.  I'm not sure the photograph does it justice. I used the Gently Falling stamp set of leaves.  It's two-step stamping:  stamp the leaf, then stamp over it with the outline stamp.  If you want it perfect, you can use the Stamp-A-Ma-Jig….but usually I just eyeball it and come close enough, as I did on this card. To make the multi-colored fall leaves, I used Stampin' Write Markers of various colors and then spritzed with some water very lightly to blend the colors. Then I over-stamped with the outline stamp of each leaf with Soft Suede. And I even sponged a little bit of color in between the leaves.

You could use this card for a masculine birthday card, Thanksgiving, or fall.

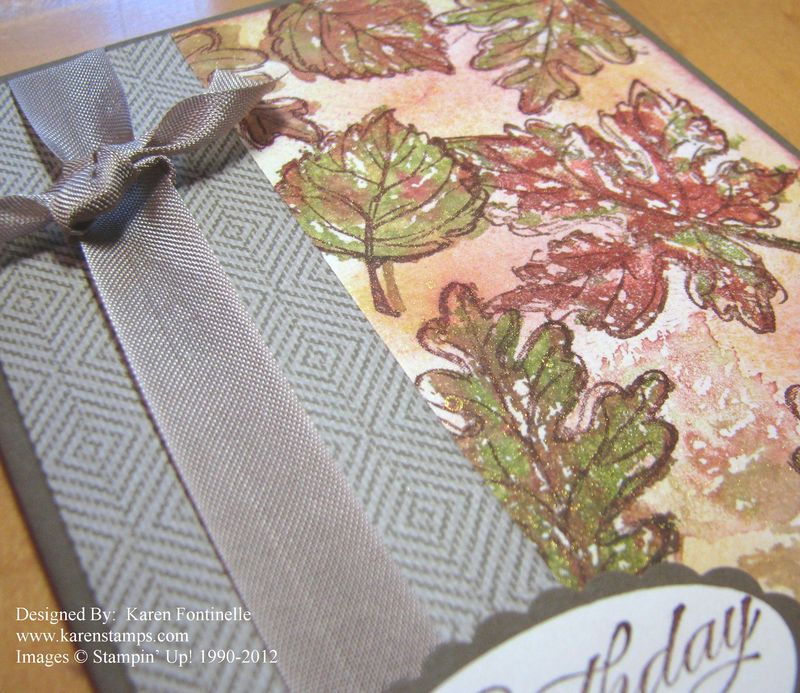
For some extra jazz, I spritzed the leaf part of the card with the Gold Glow Smooch Spritz.  You'll be able to see that gold spritz in the photo below.  The key to using the Smooch Spritz is to confidently push the spray button!  Don't try to do it lightly or half-heartedly or you will get big blobs of gold.  Just spray boldly and a fine mist will come out!  Use a box of some kind to catch the overspray, just in case.

Gently Falling Birthday Card Gold Shimmer Smooch Spritz

Depending on your browser, you might be able to click the photo above and enlarge it. Then you'll be able to see the gold shimmer.

Happy World Card Making Day Tomorrow!