Author Archives: Karen Fontinelle

New Stampin’ Up! Weekly Deals, Clearance Rack, & Holiday Catalog

Here are the new Stampin’ Up! Weekly Deals, available while supplies last, until Monday September 7, 2015. Don’t miss out! Great embellishments for your cards and projects in the Candy Dots and Rhinestones, of course! Both are adhesive-backed so all you do is stick them on!  Any Washi Tape is fun to use, and the White Seam Binding Ribbon is always useful!


Clearance Rack Banner 2015

Be sure to check the Clearance Rack before you finalize any orders. You never know what you will find. Stampin’ Up! plans to add new items next week! But if you think ahead to the holidays, right now you can stock up on the pretty Cherry Cobbler Sheer Linen Ribbon (more than half off!), the Real Red Satin Ribbon, the Mossy Meadow Satin Stitched Ribbon for some green,  and the Extra Large Gift Boxes are handy to have on hand for gifts! And there are many more things, but those items jumped out at me as something you can use soon – and all the time, really!

Stampin' Up! Holiday Catalog 2015

And of course, in case you missed it, the Stampin’ Up! Holiday Catalog went live yesterday!!  If you need a catalog (USA) please email your contact information to Karen@KarenStamps.com.

Check out all the fantastic Holiday Catalog products in my Stampin’ Up! Online Store! .

Make a Witch Hat Decoration With the Witching Decor Project Kit by Stampin’ Up!

Witching Decor Project Kit Witch Hat

Today is the day that the Stampin’ Up! Holiday Catalog begins! And the Witching Decor Project Kit Witch’s Hat is the item that caught my eye as soon as I saw it! It was the first thing I wanted to get my hands on because I love Halloween and all the fun decorations! This is a kit with everything you need for the hat except for the stamp set, ink pads and adhesive. It doesn’t take very long to make (really!) and it is a good size for a table decoration or Halloween decor! I love how mine turned out! You’ll find the Witching Decor Project Kit (140969) on page 7 along with the coordinating stamp set, Witches’ Night, to make that Halloween label and to stamp the leaves.

Everyone can begin ordering from the Holiday Catalog today and right through January 4, 2016. (Okay, let’s not get ahead of ourselves!) Everyone can view the catalog and the products online today. I hope my regular customers received their catalog in the mail already. If you would like to be one of my customers, please contact  me and I can send you a catalog (in the USA).

This Holiday Catalog is the best, even if I did say that last year – and the year before!  But this one really is fantastic with lots of new products, lots of Bundles to save you 15%, and lots of Kits that take the worry out of designing something. Get together with some friends and have everyone order a kit, then get together to make the project for a fun girls’ night out, or afternoon.

Stampin' Up! Holiday Catalog 2015
Go right now and check out all the great Holiday Products from Stampin’ Up!  I think you will be dazzled! Order the Witching Decor Project Kit by Stampin’ Up! and make your own witch hat decoration!

Sprinkles of Life Blue Bell Ice Cream Cone Card

Sprinkles of Life Blue Bell Ice Cream Cone Card

Today is a red-letter day in Houston and some other places in Texas! Blue Bell Ice Cream is coming back, hence my Sprinkles of Life Blue Bell Ice Cream Cone Card to celebrate! Blue Bell had to close up shop after a listeria outbreak, but they haven’t lost the support of their customers, certainly not this one! We tried various other brands of ice cream, even some very expensive ones, but nothing compared.

When we lived in Oklahoma, my favorite ice cream flavor was Braum’s Chocolate Almond, but when we moved to Houston years and years ago and heard about Blue Bell, there’s barely been a time when we haven’t had a couple of cartons of Blue Bell Ice Cream in our freezer. One time my husband opened the freezer and and said, “I can’t believe some alarm is not going off! We are out of Blue Bell!” I’m always stocked up if out-of-town company is coming because they MUST taste my favorite flavors of Blue Bell. Only limited flavors are coming back for now, as everything must be tested first before it goes out to stores, but one of my favorites is in there – Homemade Vanilla! My other favorite is Chocolate Chip, but guess I will have to wait for that.

The Sprinkles of Life Stamp Set by Stampin’ Up! is perfect for today because you can make an ice cream cone with however many scoops you want on it with the images. The ice cream scoops could also be clouds. There are lots of images in the stamp set and even a coordinating punch, the Tree Builder Punch, so there are TONS of creative things you can do with these stamps. And while you are having fun stamping and creating, you are helping out the Ronald McDonald House Charities because for every stamp set sold, Stampin’ Up! donates three dollars to the charity.

The greeting on my card is from the Bravo Stamp Set. I easily could have used one of the greetings in the Sprinkles of Life Stamp Set, but I decided on something more celebratory! And how can you have a celebration without some Gold Glimmer Paper stars punched with the star punch in the Itty Bitty Accents Punch Pack?! The card base is made with Tip Top Taupe, one of the new In Colors, and the layer is another In Color, Delightful Dijon.

Hard to believe today is the last day of August! And you know what that means! Tomorrow, September 1st is the beginning of the Stampin’ Up! Holiday Catalog! So if you live where they start selling Blue Bell Ice Cream, maybe you can eat a bowl of Blue Bell while you decide on your Holiday Catalog order! So many delicious flavors of Blue Bell to come, so many delicious Stampin’ Up! holiday products to choose from in the cataog! Choose from kits if you want it simple or don’t want to do the designing. There’s fall, Halloween, Thanksgiving, and the Christmas holidays! Get an early start on your holiday cards or Thanksgiving table decorations. Tomorrow I will show you my favorite kit in the catalog! And I couldn’t be more thrilled with how it turned out in just an hour or two.

If you don’t have a Stampin’ Up! Demonstrator helping you, I’d be happy to send you a Holiday Catalog of your own. Just email me your contact information.

And if you are feeling charitable and would like to make a donation to the Ronald McDonald House Charities while you are having a good time stamping, try the Sprinkles of Life stamp set. Then you, too, can make a Sprinkles of Life Blue Bell Ice Cream Cone Card with your favorite ice cream flavors or many other card designs.

Use Your Washi Tape for Gift Wrap!

Gift Wrap Using Washi Tape

Here’s a great way to use up some of your washi tape! Use your washi tape for gift wrap! Use plain white wrapping paper, as my friend did for my birthday present, and then decorate with washi tape. You could get real creative and colorful using washi tape this way.

Some other suggestions might be:

  • Tape down a little bauble or favor on top of the package with washi tape.
  • Write out the person’s name or initials in washi tape on the package.
  • Use it instead of tape to hold the wrapping together or to adhere the gift card to the package.
  • Use washi tape to decorate a plain white or kraft gift bag.
  • Make a washi tape banner to string across the package.

Stampin’ Up! carries an assortment of washi tape to coordinate with your other Stampin’ Up! products to use for your cards and other creations and scrapbook pages. Shop HERE!

Stampin' Up! Washi Tape

And there will be more washi tape coming in the Stampin’ Up! Holiday Catalog, coming September 1, 2015!  That’s Tuesday!! Use your washi tape for gift wrap and have fun with it!

How to Label Stampin’ Up! Ink Pads

How to label Stampin' Up! Ink pads

If you are new to stamping, this is how to label Stampin’ Up! ink pads! You might not have noticed (or forgot, like me!) that there are ink color labels on the bottom of each ink pad. They come in different languages, as do most things these days, but you can use more than your country’s name! It’s very handy and useful!

Peel off the whole color label piece.  Underneath you will find the directions for opening and closing your ink pad so you want that uncovered anyway, especially if you are new to stamping. Choose the label with the ink color in your language and stick that on the front of the ink pad as shown. It fits perfectly along that top edge. (One time I thought I had to fit the label on the shorter space underneath, I don’t know why!)

Then use the extra labels in the other languages to trim off the color ends and adhere those inside the ink pad in the little well in the front. Sometimes you can’t tell one ink pad color from another when you have several open, so this way, you can look inside and see the color from the labels. Very handy at times!

Then since you still have some labels left, use another one, to adhere to the bottom of the ink pad. Maybe not likely you will be looking under there, but just in case your ink pad gets turned over, you can see at a glance what color it is! And maybe you will also learn a foreign language while you are placing all the labels on your ink pads!

Here are the features of Stampin’ Up! ink pads!

Classic Stampin’ Pads come in exclusive Stampin’ Up! colors, grouped in collections to take the guesswork out of product coordination. The innovative ink pad design has a patented flip-top lid and a firm foam pad to give you a superior stamping experience.

* Fast drying, dye-based ink
* Always Artichoke
* Acid free
* Flip top for upside-down storage: pads stay inked during storage
* Firm foam pad lasts longer than felt pads and provides exceptional ink coverage, especially with solid-image stamps
* Can be re-inked with matching Classic Stampin’ Ink Refills
* Coordinates with Stampin’ Up! cardstock, markers, and embellishments
* 3-1/2″ x 4-1/2″

Be sure to order an ink refill when you purchase an ink pad so you have one on hand. You can also use the ink refills for various techniques so they’re not just for reinking!

Now that you know how to label Stampin’ Up!  ink pads, I hope you will take the time and put the extra labels to good use!

Shop Stampin’ Up! Online 24/7


Back to School Bravo Star Card

Back to School Bravo Star Card

Here in Houston it is almost the end of the first week of school, so I thought maybe people would want to make a Back to School Bravo Star Card either for the student that has completely their first week of school or perhaps for the teacher who has completed a week (and probably more) of back to school! Use the Bravo Stamp Set and some stars cut with the Stars Framelits and Big Shot to choose an appropriate greeting. Change the greeting and make the card for someone getting ready to start school next week or after Labor Day!

For the card base I just used the new Whisper White Thick Cardstock. You will love the weight of this card stock if you would like to make a card with less layers. Then just die cut a bunch of assorted stars with the Stars Framelits and play around with the arrangement until you are happy with the placement of the stars and greeting.  Use a lot or use a few!  Place one framelit inside the other to make the stars with the center cut out.

I’ve always said everyone should have some star punches, star stamps, or in this case Star Framelits because stars can be used for just about anything. They are so good for congratulations, birthday, promotions, achievements, baby, thank you, anything special that you are making!

I loved making this simple Back to School Bravo Star Card using multiple stars and the Bravo Stamp Set! If you need any supplies, please visit my Stampin’ Up! Online Store!

Love a Dog With a Card For National Dog Day

National Dog Day 2015 CardLove a dog with a card for National Dog Day 2015! Today, August 26, is National Dog Day, a day to celebrate dogs! It’s a day to recognize our pets, dogs that need to be rescued, dogs that serve others, dogs that give comfort, dogs that are fun to play with. Whatever your reason for caring about dogs, today is the day to celebrate!  So why not make a handmade card for a friend or loved one with a dog theme!

There are lots of “punch art” designs out there to make dogs out of punches and paper so there are no shortage of ideas. All it really takes, though, is to get out some paper and punches and play. Pick your dog color, maybe a couple of colors, choose their features, whatever you like. Just play. I decided to make a dog house using the Hardwood Background Stamp.  I had no directions, I just stamped the whole stamp and then cut it down to the size that would fit nicely on my card. Then from the scraps I made the roof, as if it were nailed up there. The doghouse door is cut from part of an Oval Framelit but you could also use the  2 1/2″ Circle Punch.  The card base is Marina Mist sponged with some Whisper White Craft Ink to look like clouds. Here are the punch art pieces (I just hand cut the tail) I used to make my dog:

Punch Art Dog Pieces

I used the Extra Large Oval Punch for the dog body and also another Extra Large Oval piece to punch out a small piece for the dog face with the 1 3/8″ Circle PunchThe dog head is punched with the 1 3/8″ Circle Punch. The ears are punched with the Large Oval Punch, you might need to trim them a little bit. The black nose is from the 1/2″ Circle Punch and trimmed to look like a dog nose.  The eyes and mouth are drawn on. To make the red collar, punch into a piece of card stock with the 1 3/8″ Circle Punch, then reach in a little farther in order to cut out a piece to look like a collar. Make it wider than you want so you have space to put adhesive.

Stampin’ Up! also carries several stamp sets with dog images in them!  Check them out!

New Stampin’ Up! Weekly Deal

Stampin' Up! Weekly Deal Aug 25 2015

It’s Tuesday and that means new Stampin’ Up! Weekly Deals!  Check out two great punches, the Sweetheart Punch and the Pansy Punch, plus one of my favorite products, the Gold Glimmer Paper. Then for jazzing up your project, we have the Eclectic Paper-Piercing Pack, the Silver Stampin’ Glitter, and the pretty Very Vanilla Satin Ribbon.

These specials good through Monday, August 31 or while supplies last!

Be sure to check out the Clearance Rack as well when you order!  You might find some bargain you can use!

Shop Stampin’ Up! Here For the Weekly Deals and More!

Paper Pumpkin Kits to the Rescue!

Paper Pumpkin August 2015 Kit Projects
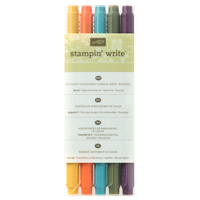
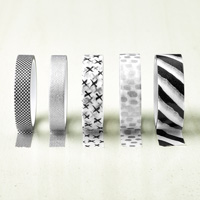
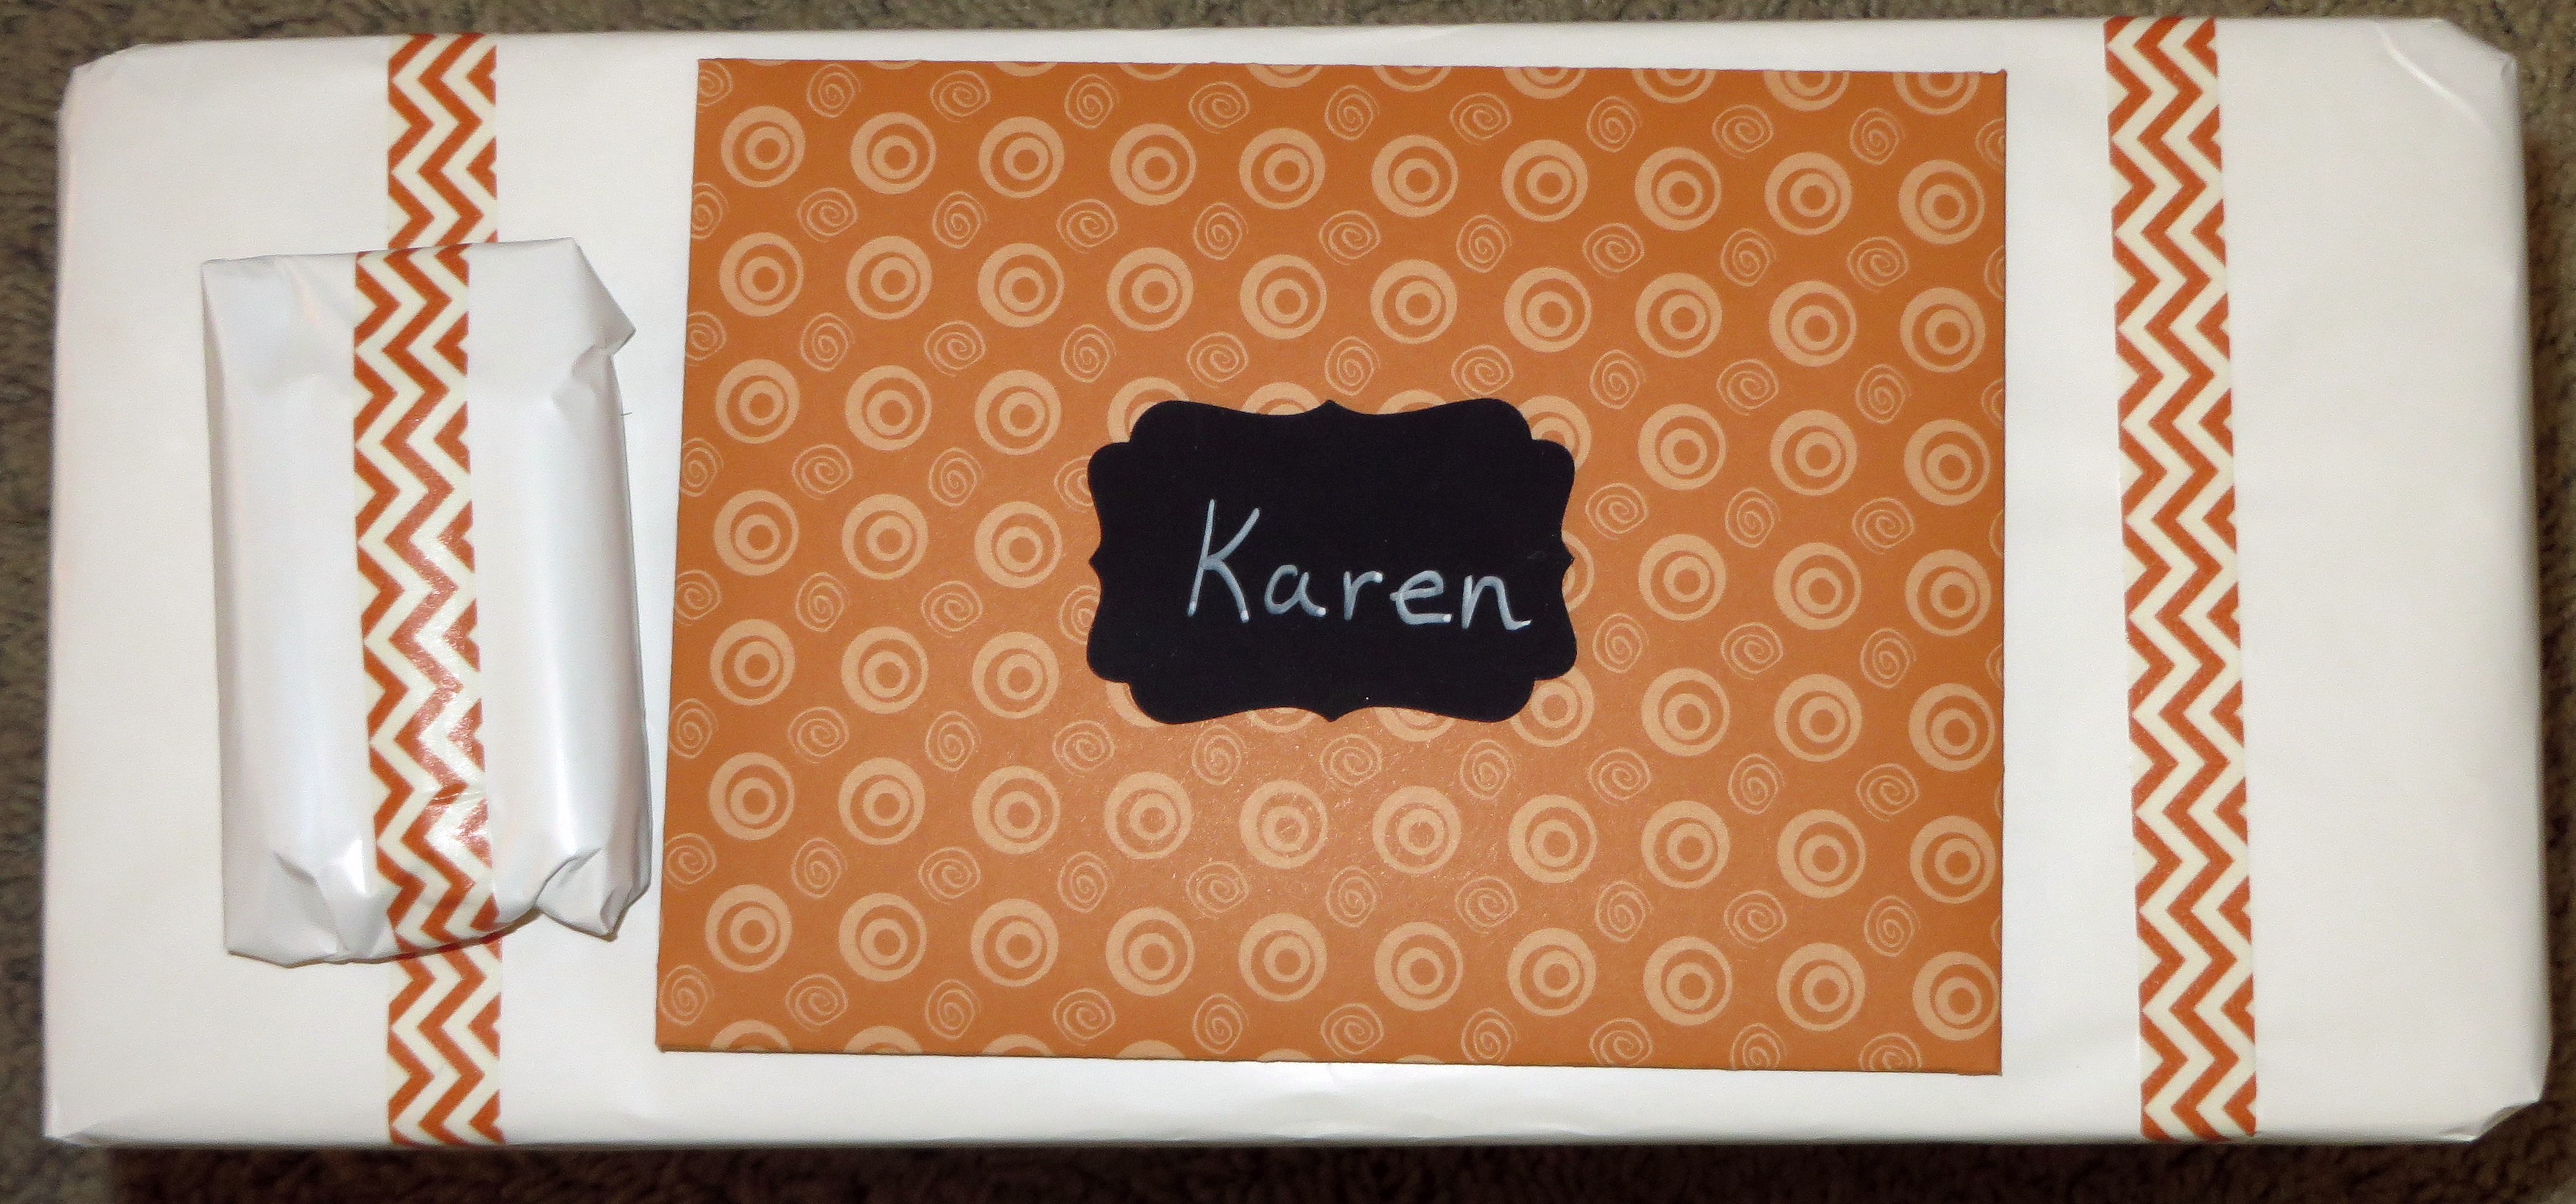
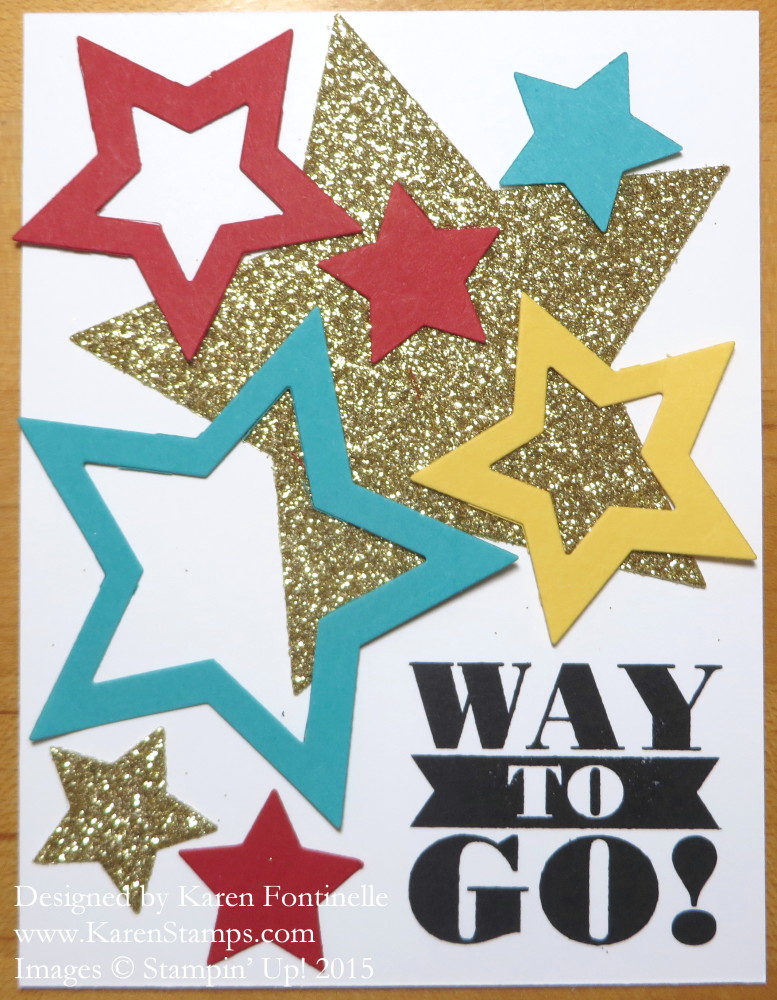
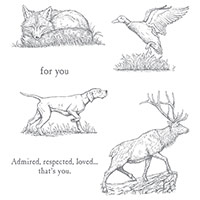
I have to say my Paper Pumpkin kits saved my sanity yesterday! Pictured above are just some of the projects in the August Paper Pumpkin Kit. I stopped with those in case I wanted to make anything different with the remaining materials. I would vote the August Paper Pumpkin Kit probably the easiest and prettiest kit to date. There were lots of other kits I also loved, but this one was really so easy and turned out so nicely. And that’s what I needed yesterday!

Our power went off yesterday at 8:30 am, not due to any storm or anything wrong that I could see.  I even thought we had a new transformer or something for our part of the neighborhood put in recently due to the frequent outages we were having. In the many, many years we have lived here in Houston, we have never had the power go off as much as it did there for awhile a couple months ago.  Even after hurricanes and tropical storms, OUR power came back on in a few hours, even if others’ didn’t for a couple weeks.  Maybe this is payback!

Thank goodness now for email notifications from the electric company telling us what was going on (or not going on!). As we passed the first estimated time of repair and another couple hours was estimated, I suddenly realized the air-conditioner was not running and would not be and it was going to get HOT in here! For lunch I went to Subway and picked up sandwiches and a cold, icy Coke since we couldn’t open the refrigerator with the power off. As the next email said “repairs were taking longer than estimated”, but, by golly, they were trying really hard to fix it, the temperature climbed to 93 degrees outside, according to my phone. Now that’s cool compared to what we had not long ago, 100+, so I should be grateful. We closed all the blinds to keep the heat out, didn’t talk or move much.

Finally I decided I needed something to do to take my mind off how hot it was getting inside, so I got out my new August Paper Pumpkin Kit that just arrived the other day! What a blessing that kit was, this one in particular! I really liked it from seeing the kit and it was oh so easy to make! It was too hot to think about designing something or even copying something, too hot to be hopping up and down for supplies. The Paper Pumpkin kit made it easy. I didn’t have to think about what to make, I liked what I was making, and everything I needed was right there in the box except for scissors to cut the ribbon. The cards and gift boxes went together quickly. When I was finished with that kit, I moved on another kit I hadn’t worked on yet. Again, it was cute, easy to make, and everything was right there.  No need to get sweaty making a card!

Paper Pumpkin Kits Power Off

To wind up my power outage story, we went out for dinner to cool off and went somewhere where I could sit by an electric plug to recharge my laptop. That was all great and while we were gone it rained at home so maybe it cooled off a bit. As we sat here in the dark in the evening, and the latest repair estimate of 9 pm came and went, we decided maybe it was time to head to a hotel for the night.  Good news!  As we began throwing a few things into a suitcase, in the dark with flashlights, the power came back on!!! Perfect timing, and saved us at least $100 to stay cool for the night. The power was off for 13 hours, but we survived.

My Stampin’ Up! Paper Pumpkin Kits really came in handy yesterday to keep me occupied during a stressful time (and who doesn’t have stressful times even with the power on?!) and gave me a sense of accomplishment knowing I got something done even without electricity! Stamping is something we can do even without power. And maybe it’s a good idea to keep at least one Paper Pumpkin kit on the shelf for just such an occasion when you need it!

You’re in luck right now because a monthly Paper Pumpkin subscription is 50% off for the first two months if you sign up by September 10th!

If you’re a mom and you just sent your kids back to school or will soon, go ahead and get Paper Pumpkin for yourself!  You deserve it! No risk, no obligation.  Pause your subscription any month or cancel if you must. Order extra kits for a gift any month! Have some fun with your friends!

Just click HERE for more information and to join. Enter Promo Code HALFOFF.

Back to School Big News Awesomeness Gift

Back to School Big News Awesomeness Gift

Tomorrow is Back to School time in Houston and probably lots of other places. If not tomorrow, probably very soon! Maybe you are looking for a little card or something for your child’s first day of school to encourage them, surprise them in their lunchbox or backpack. Rather than make this a card, I chose to tie some ribbon across the top to make it a hanger. Now the child can hang it up in their room or school locker and be inspired everyday and know you were thinking of them!

We have yet another power outage at our house as I am writing this so I’m not even sure how the colors are showing up. The base is Basic Black with a Real Red layer embossed with the Big Shot and Lucky Stars Embossing Folder.  The sentiment from Big News is stamped with Versamark Ink and heat embossed with White Stampin’ Emboss Powder and the Heat Tool. Be sure you have the Embossing Buddy to wipe across the card stock before stamping and applying the embossing powder because it helps eliminate the static that makes specks of embossing powder cling to the paper where you don’t want them! This embossed piece is cut out with the largest of the Deco Labels Framelits DiesYou could also just trim it whatever size you wanted to fit the card base. The smallest stars are punched out with the star in the Itty Bitty Punch Pack and the smallest star in the Stars Framelits DiesOf course the Gold Glimmer Paper is perfect for this as would be the Gold Foil Sheets. And I had to use a couple of Brights Candy Dots because they are so cute!

While you could easily copy this and make it a card in the usual fashion, I inserted some Gold 1/8″ Ribbon for a hanger. Any little thing you can make for your child for back to school I’m sure will be appreciated, even a note in their lunchbox!

Be sure to check the Stampin’ Up! Weekly Deals that end Monday night, August 24 as well as the Clearance Rack.

And if you are in the USA and do not have a Stampin’ Up! Demonstrator that you work with and don’t have access to the gorgeous new Holiday Catalog coming September 1st, please contact me at Karen@KarenStamps.com and  I will send a catalog out to you! I’m always happy to assist people in discovering and enjoying the fun and creativity of stamping and the products of Stampin’ Up!

Visit my Stampin’ Up! Online Store HERE!

Vivid Vases for a Dark and Stormy Morning!

Vivid Vases NotecardIt was a dark and stormy morning, lots of lightning and thunder here in Houston, so I decided to make an easy, bright card with the Vivid Vases stamp in contrast to the rainy weather! With our recent history of power going off pretty easily, I wanted to stamp something very quick with all the lightning and thunder before the electricity could possibly go off.  (So far it has stayed on!) I also wanted something happy and bright.  The Vivid Vases Wood-Mount Stamp jumped out at me from my shelf!

Coming in the new Holiday Catalog is a new Basic Black Archival Ink Pad so I tried it out on this card.  It stamped beautifully! Then I colored in the vases and flowers with my Stampin’ Write Markers and Blender Pen. Using a Blender Pen to pick up the colors rather than coloring directly with the markers gives a lighter look.  I just scribbled some marker on the stamp case itself and picked up the ink from there.  You could also touch the corner of your ink pad or use ink refills for the color.  So many ways to do things in stamping!

You might notice I drew in some stems since I made the vases look like they were clear with water inside.  If you colored the vases as solid containers, then you wouldn’t need to do that.

To make this card even simpler, I just grabbed a  Whisper White Note Card.  No cutting, no fuss, just stamp!  Just the right size.

I hope your day is bright and sunny, but if it is dark and rainy stamp something to brighten up your life!

Using Clear-Mount Stamps and Stickers

Clear-Mount Stamps and Stickers

Sometimes we have trouble with the clear-mount stamps staying stuck on the acrylic block when we are stamping. The clear-mount stamps come with stickers to label them, but that covers up the foam meant to stick to the block. Some people remedy this by not applying the stickers at all to the stamp.  I have tried this but found I like having the sticker on there so I can remember what stamp I am using! It’s just what I am used to!

Here is one way to make your clear-mount stamps stick on the block better. If you want to use the stickers, kind of take a trip down memory lane years ago before the stamps were all die-cut and we had to cut out the rubber stamps ourselves with the appropriate scissors. Instead of cutting the rubber, trim the sticker down closer to the image so that when applied to the stamp, a little border of foam will not be covered and will stick to the block better.

Owl Stamp and Sticker

Is that extra work?? Yes!  Can we all use a little mindless trimming with our Paper Snips while watching TV or just relaxing?  Yes!  You don’t have to be exact so that makes it pretty easy.  Just go around the image in order to leave a little bit of a border.  Some stamps might have more than others.  Peel off the white paper covering the foam on the stamp. Then remove the split paper on the sticker itself and apply the sticker to the foam.  Then remove the backing from the sticker so that you can see it.

Here’s an ornament stamp with the sticker trimmed and applied, before the backing is removed. You can see the foam around the edge that will now be able to adhere to the block.

Ornament Sticker

After the sticker is applied to the stamp, peel off that white covering.

Owl Clear-Mount Stamp and Sticker

Look closely and you can see the trimmed sticker on the stamp.

Sticker on Stamp

Of course if you still have trouble, or don’t want to trim your stickers, there are other solutions to clear-mount stamps that don’t stick.  Sometimes the acrylic blocks get dirty or greasy, so just cleaning off those oils will help stamps stick better.  Use the Clear Block Cleaning Cloth  or wash with some grease-cutting dishwashing soap.  The Multipurpose Liquid Glue can be applied lightly to the stamp and allowed to dry for a temporary adhesive. And if I am just in a hurry with a stubborn stamp, sometimes I just apply a little SNAIL! Also when you apply the sticker, make sure the stamp is flat and doesn’t get a bend in it from sticking the sticker on too tightly.

Clear-mount stamps are less expensive than wood-mount and take up less storage space, but the disadvantage is that they have to be placed on an acrylic block and taken off and sometimes they do not stick too well. If this is a real problem for you, I would recommend you purchase wood-mount stamps that are always ready to go, and that wood block just feels good in your hand!

The place to buy the best stamps is always Stampin’ Up!

Stampin’ Up! Weekly Deals August 18 2015

Stampin' Up! Weekly Deal Aug 18 2015

Here are the new Stampin’ Up! Weekly Deals for August 18 – 24, 2015.  Be sure to check them out in case you want to add some to your order. Offer available while supplies last at these prices. Make custom envelopes with the Envelope Punch Board! Make cute little paper bows with the Bow Builder Punch! Always good to have embellishments, like ribbons and buttons! And why not have another embossing folder?!

Shop for these Weekly Deals and more at my Stampin’ Up! Online Store HERE!

Home For Christmas Christmas Wishes Card

Home For Christmas Christmas Wishes Card

With my big box of new goodies from the Stampin’ Up! Holiday Catalog, I’ve copied some samples in the catalog itself. Here is one on page 8, a Christmas card using the stamp set Cozy Christmas for the greeting and the stamped bells on the card. There is a strip of the fabulous Home For Christmas Designer Series Paper going across the card, accented with a strip of the new Red Foil. And you will love the cute Home For Christmas Designer Buttons, 10 each of 3 designs!

The Holiday Catalog goes live September 1st! If you are interested in Stampin’ Up! products, especially for the upcoming holidays, and would like a catalog, just contact me.

If you are real anxious to get your hands on the new Holiday Catalog products, you can join Stampin’ Up! and either choose some of the products to go in your Starter Kit, or join and get your Demo number, then go ahead and place a Pre-order since you will be a demo! Start your own stamping business and take advantage of the perks of being a Stampin’ Up! Demonstrator! Let me know if I can answer any questions or provide you with more information.

All the details are here, if you are interested in being a Stampin’ Up! Demonstrator:

JOIN STAMPIN’ UP! HERE

Save Your Sanity On a Plane

Relaxation Travel Kit

As the end of August approaches and people try to fit in a vacation or one more trip before school starts, I thought I would suggest a way to save your sanity on the plane ride! As we all know, flights these days are super-crowded and we’re packed into our seats like sardines.

I read yet another article this morning about coloring books for adults as a way to relax while traveling. The article says it can be like art therapy, a way to relax and to express feelings. You might choose bright or dark colors depending on your mood or maybe the more subtle pastel colors. Just doing the coloring can enhance our creativity. If nothing else, it’s something to do while you are crammed into your seat on a plane, nervous about flying, or trying to ignore the crying babies or the person edging in to your seat space. It can take your mind off whatever is troubling you or at least distract you a little bit! And that might be enough to get your through the plane ride!

Instead of going out and buying adult coloring books, some of which are quite expensive, I’ve noticed, just use your stamps! Before the trip, stamp some images on Whisper White with Stazon Ink. Then take along your choice of coloring – Stampin’ Write Markers, a Blender Pen, Aqua Painter, ink spots (if you have some from way back or are getting them in Paper Pumpkin KIts) – whatever you like. The Stazon ink will not run (and stay tuned for the new Basic Black Archival Ink coming in the Holiday Catalog!!)

Use an empty stamp case to keep your supplies in.  You could even use the case for a tabletop if you needed to! You can purchase these cases in the Stampin’ Up! Online Store, 4 cases for only $4.00.  They are very handy for more than just storing stamps.

When you get home or to your destination, maybe you can cut out or punch those images you colored and use them on cards or projects.  But the real purpose is relaxing by coloring while you are traveling!

So before you pack your clothes in your suitcase, stamp some outline images first, gather your coloring supplies, and stick all those things in an empty stamp case.  Now you are ready to travel and save your sanity on the plane!